Brief: This article shows you essential things to do after installing Ubuntu 17.04 to give you a better and smooth experience with the freshly installed Ubuntu 17.04.
Ubuntu 17.04 is knocking on the door. By now, you must have seen the new features in Ubuntu 17.04 and if you are giving it a try with a fresh install, here are a few things to do after installing Ubuntu 17.04 that will make your life better.
Things to do after installing Ubuntu 17.04
I have maintained it before and I say it again. What to do after installing Ubuntu differs from person to person. If you are into graphics, you’ll like to install plenty of Linux graphics tools. If you are into Linux gaming, you might look for installing more Linux games and configuring your graphics card for that.
What I try to do in this mostly generic list is to put down things that might be useful for almost everyone. These steps mentioned here are surely helpful to most Ubuntu users.
1. Update your system
Make it a rule of thumb. You do a fresh install of Ubuntu, you update the system. While it may sound weird because you just installed the OS but trust me on this, you must look for updates.
I have experienced that if you don’t update the system, you might face issues while trying to install a new program.
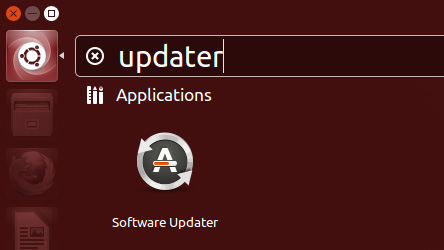
Press Super Key (Windows Key) to go to Unity Dash and look for Software Updater. Run this program. It will look for available updates. Install them.
Alternatively, you can use the following command in the terminal (Ctrl+Alt+T):
sudo apt update && sudo apt upgrade
2. Enable Canonical Partner repositories
Another rule of thumb, at least for me is to enable Canonical Partner repositories. Ubuntu has a number of software available from its repositories. You can see then when you open Ubuntu Software Center.
But you get even more software if you enable the Canonical Partner repositories. This additional repository consists of third party software, often proprietary software such as Skype.
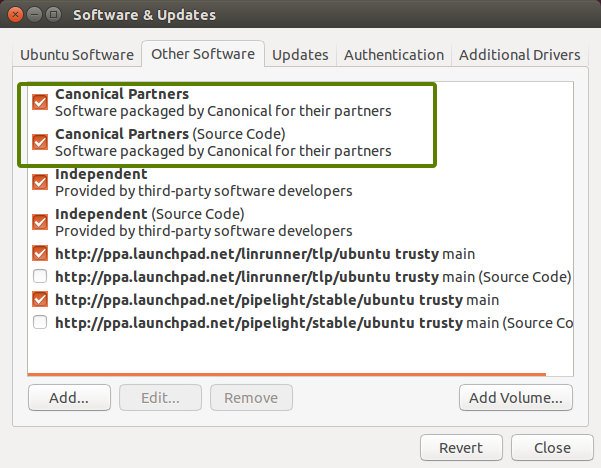
Go to Unity Dash, and look for Software & Updates:
Open it and under the Other Software tab, check the option of Canonical Partners.
It will ask for your password and update the software sources. Now if you look in Software Center, you’ll find more applications to install.
3. Install media codecs
By default, Ubuntu doesn’t provide a number of codecs because of copyright issues. However, it does provide an easy way to install these media codecs so that you could play MP3, MPEG4 and a number of other media formats.
You can install those media codecs thanks to Ubuntu Restricted Extra package. Click on the link below to install it from the Software Center.
Or alternatively, use the command below to install it:
sudo apt-get install ubuntu-restricted-extras
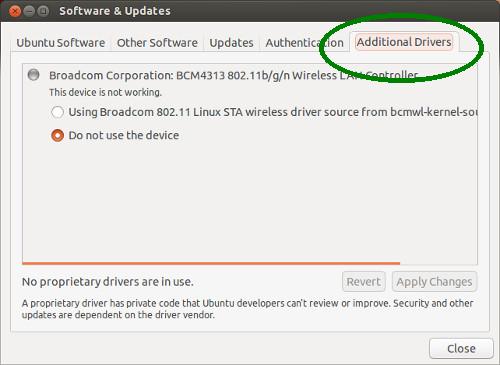
4. Install additional drivers
By default, Ubuntu supports most modern graphics and wireless hardware. It comes with free and open source drivers.
However, at times, the proprietary drivers give you better performance. Don’t worry, you are not left guessing if you have to install additional drivers or where to find them. Ubuntu provides an easier way for that.
Open the ‘Software & Updates’ tool from the Unity Dash. Click the ‘Additional Drivers’ tab and see if you have any additional drivers available for your system. If yes, click on it to install it.
5. Install software from Ubuntu Software Center
Once you have upgraded the system and installed the codecs, you should go on software installing spree. If you have ever used Ubuntu, you might already know. But if you are rather new to it, I suggest reading this detailed beginner’s guide to installing software in Ubuntu.
You can open the Software Center to look for software to install in this graphical tool.
Alternatively, if you know what you are going to install just type the sudo apt install <program_name> command to install it.
It is up to you but I can surely suggest a few applications that are on my list of things to do after installing Ubuntu 17.04.
VLC media player for videos
GIMP – Photoshop alternative for Linux
Shutter – Screenshot application
Calibre – eBook management tool
Chromium – Open Source web browser
6. Install Gdebi package installer
Chances are that you’ll be installing some software from the web by downloading .deb executable files (similar to .exe files in Windows). Gdebi is an application that is used for installing DEB packages. It is lightweight and handles dependencies way better than the default Software Center.
Though it is optional, I recommend to install Gdebi and make it default for installing .deb files in your system. It will save you lots of headache in long run, trust me on this.
You can install Gdebi via Software Center by clicking on the link below:
Or, if you are like me, you’ll go for the command line way of installing software:
sudo apt-get install gdebi
[irp posts=”15088″ name=”Lightweight Alternative Applications for Ubuntu”]
7. Install software from the web
We saw about installing applications from Software Center. But you’ll find that many software vendors provide their applications in DEB packages. These DEB packages can be downloaded from their official website and can be installed by double-clicking on it.
Some of the main software that I download and install from the web are:
One of the best ways to prevent overheating in Linux laptops is to use TLP. This install and forget works wonder in controlling CPU temperature and thus prolonging your system’s battery life in long run.
You can install it using the command below in a terminal:
sudo apt install tlp tlp-rdw
Once installed, run the command below to start it:
sudo tlp start
No need for any configuration changes. It will be automatically started with each boot and tweak your system’s power consumption.
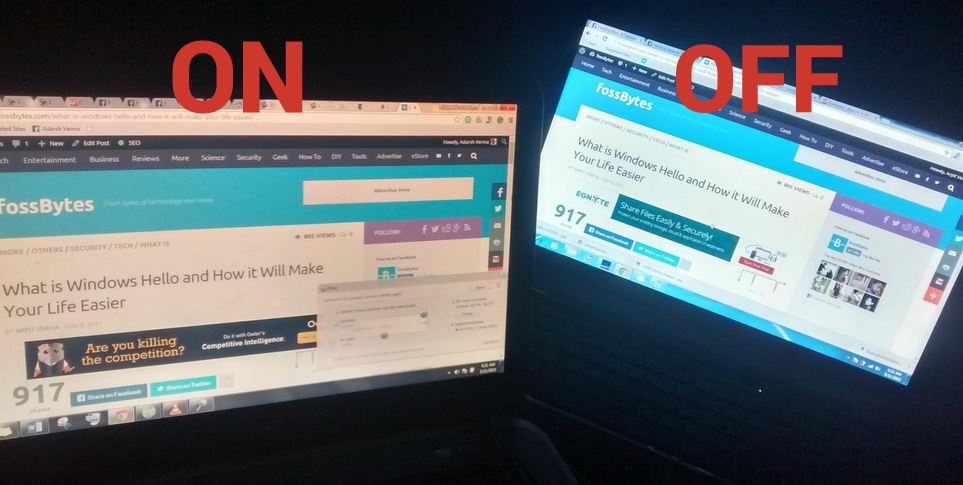
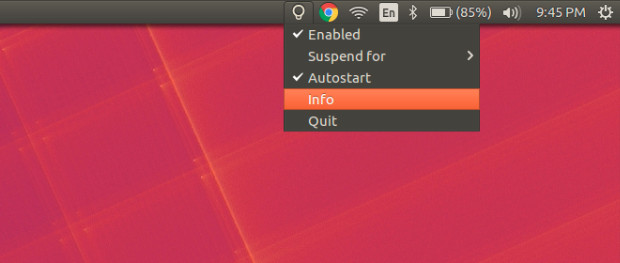
11. Save your eyes with Redshift
Another one of my go-to tool. Keeping your eyes safe at night from the computer screen is very important. Reducing blue light actually reduces eye strain.
To use this nightshift like feature, I prefer Redshift. You can install it by clicking on the link below:
Keeping your Ubuntu clean is good for your system’s health. I have discussed CCleaner alternatives for Ubuntu in the past but lately, Stacer has become my favorite tool for cleaning and optimizing Ubuntu system.
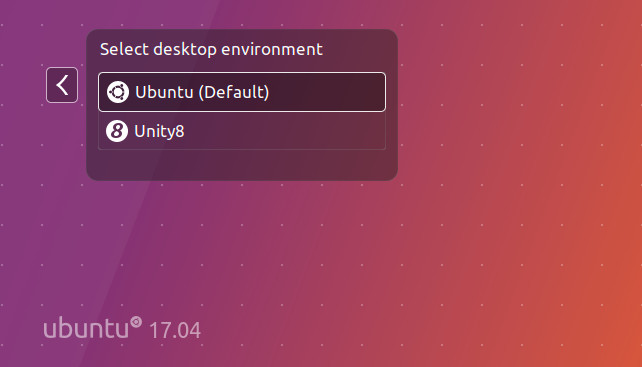
Ubuntu is going to ditch Unity and will switch to GNOME with Ubuntu 18.04. This means that we will not see an Ubuntu release with Unity 8 as the default desktop environment.
However, Unity8 together with Mir display server is available in Ubuntu 17.04. You can give it a try by choosing for Unity8 at the login screen. I must warn you that Unity8 is not stable at all and you’ll encounter a number of issues immediately.
You can choose between Unity 7 and Unity 8 in Ubuntu 17.04
Your say?
This is pretty much my list of things to do after installing Ubuntu 17.04. What is yours? Do you do some specific stuff after a fresh Ubuntu install? Share with rest of us in the comment section below.
Created It's FOSS 13 years ago to share my Linux adventures. Have a Master's degree in Engineering and years of IT industry experience. Huge fan of Agatha Christie detective mysteries 🕵️♂️
With the FOSS Weekly Newsletter, you learn useful Linux tips, discover applications, explore new distros and stay updated with the latest from Linux world

 Ubuntu is going to ditch Unity and will switch to GNOME with Ubuntu 18.04. This means that we will not see an Ubuntu release with Unity 8 as the default desktop environment.