


Whether you live in a large house or just struggle with weak Wi-Fi signals in certain rooms, you may have thought — “How can I extend my Wi-Fi range without breaking the bank?”
Well, that was certainly the case with me when I visited my parents’ house during a recent vacation. They have only one router set up on the ground floor, and my room is up on the first floor.
Faced with spotty coverage, I had an idea: why not put my old Raspberry Pi 3B+ to good use as a Wi-Fi extender?
Yes, it is possible to do that 🤯
Let me show you how to use Raspberry Pi as a Wi-Fi extender in this tutorial.
Here's what you require
- Raspberry Pi – I used my Pi 3B+, but you can use any model with built-in Wi-Fi.
- USB Wi-Fi dongle – While the built-in Wi-Fi module will work for newer models, you will still need an additional USB Wi-Fi adapter to set up as a hotspot. It needs to have support for Access Point mode as well.
- Raspberry Pi OS – I recommend installing the latest version, as it has Network Manager, which simplifies the setup.
I SSH'd into my Pi, but you can definitely use a monitor & keyboard.
Setting up the Raspberry Pi
It is essential that Pi connects to your main Wi-Fi network and then broadcasts that connection to extend coverage.
Preparing the Raspberry Pi
- Make sure that your Raspberry Pi is up-to-date. Connect it to your main network and update it using the following commands:
sudo apt update
sudo apt upgrade- These commands will fetch the latest package lists and upgrade any out-of-date packages, ensuring your Pi is ready for the task.
- After updating, check if you’re connected to the Wi-Fi you wish to extend. If not, go to the Raspberry Pi’s Wi-Fi settings and connect to it.
Getting the Wi-Fi interface name
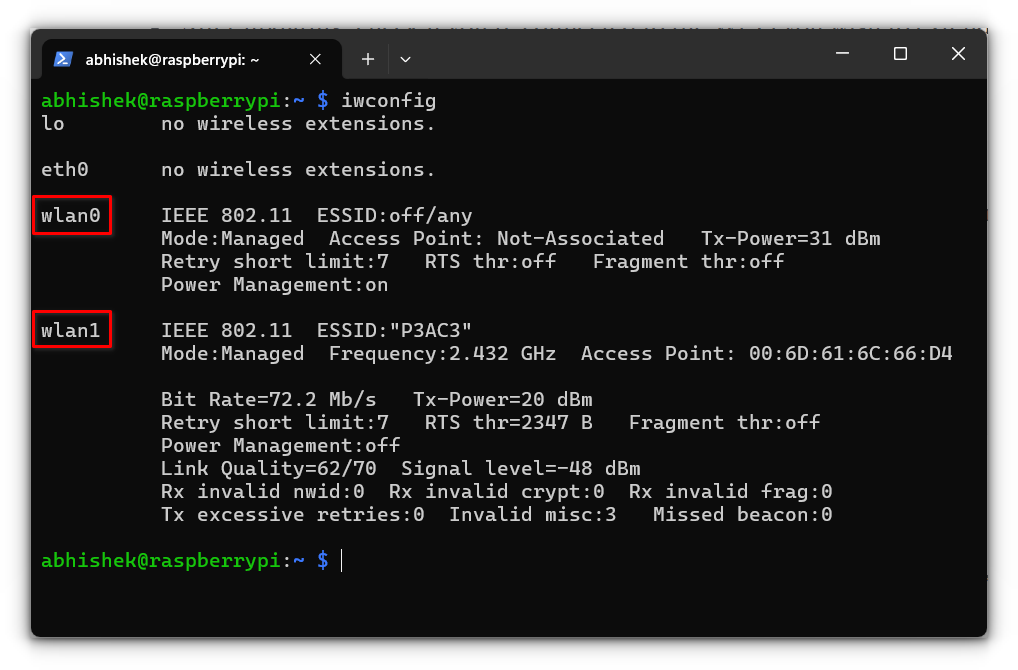
Now, you’ll need to identify the names of your Wi-Fi interfaces so we can configure them correctly.
- Run the command below to see a list of network devices:
iwconfigLook for two Wi-Fi devices, typically labeled wlan0 and wlan1.
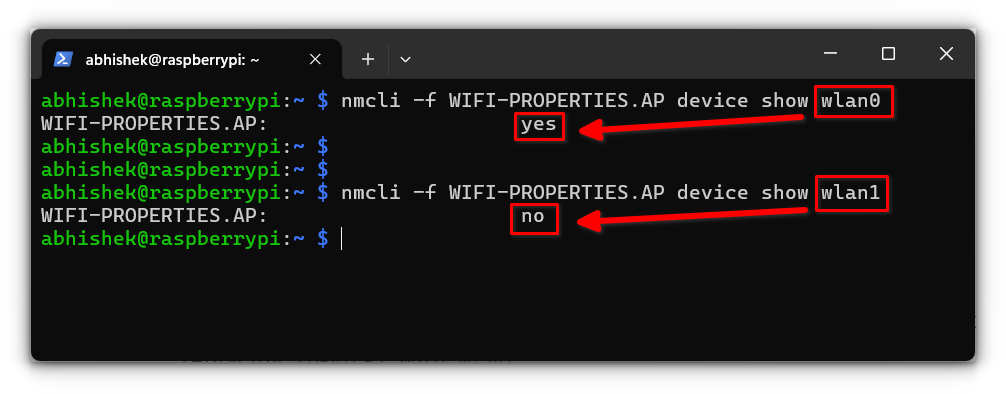
- To check if the WiFi card/ dongle can act as an access point, use the following command, replacing
<DEVICE>with the respective interface likewlan1:
nmcli -f WIFI-PROPERTIES.AP device show <DEVICE>If you see WIFI-PROPERTIES.AP: yes, you’re all set. Otherwise, you may need a different Wi-Fi dongle that supports AP mode.
Configuring the Raspberry Pi as a Wi-Fi Extender
Using Network Manager, it is surprisingly straightforward to set up the Pi as an extender.
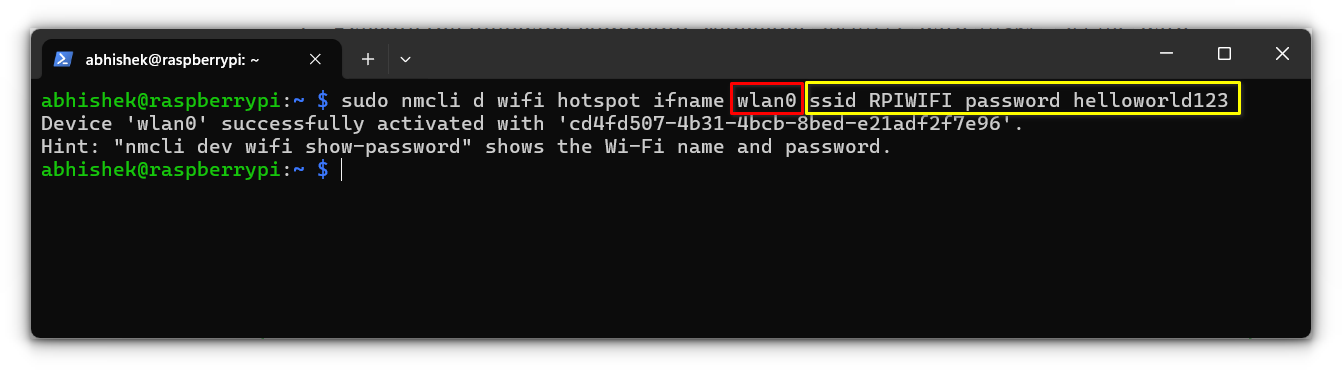
Execute the following command:
sudo nmcli d wifi hotspot ifname <DEVICE> ssid <SSID> password <PASSWORD>Replace the following:
-
<DEVICE>with the interface that supports AP mode in my casewlan0 -
<SSID>with the network name you want for your extended Wi-Fi, and -
<PASSWORD>with your chosen password.
This command places the Pi’s first Wi-Fi adapter into hotspot mode, which effectively extends your Wi-Fi network.
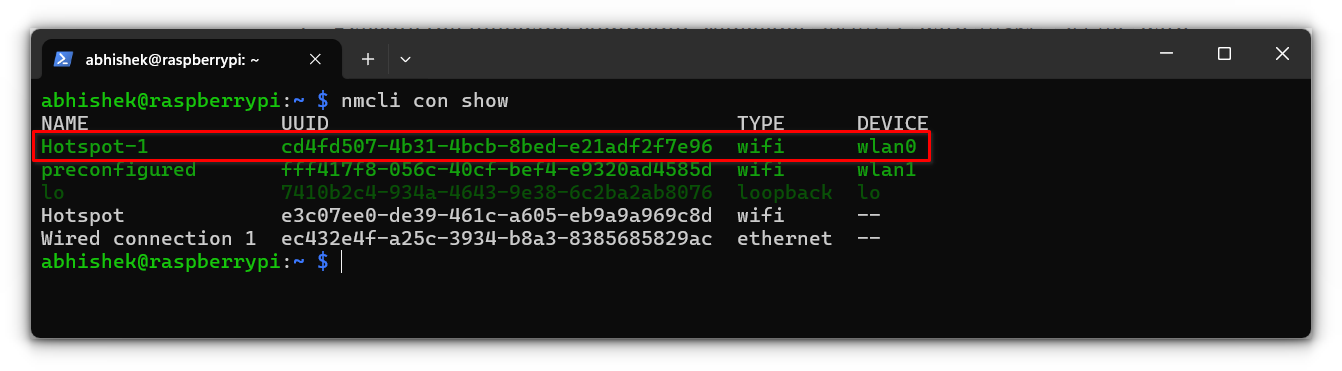
To verify that the hotspot is up and running, run:
nmcli con showLook for a connection labeled “Hotspot” associated with your second Wi-Fi adapter (wlan0).
You should now see your Raspberry Pi broadcasting a new Wi-Fi network!
Testing your Wi-Fi Extender
After setting everything up, it’s time to test. Connect a device to the extended Wi-Fi network you just created (phone, laptop, etc.) .
Check if it provides consistent internet access and if the range now reaches the previously weak areas. This will help verify that your extender is working correctly.
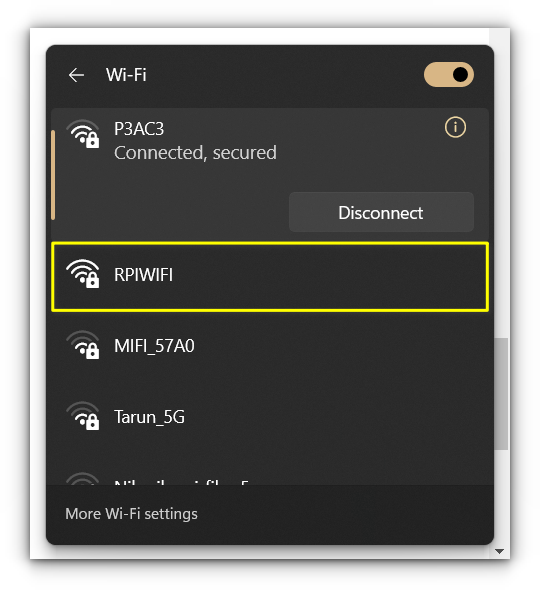
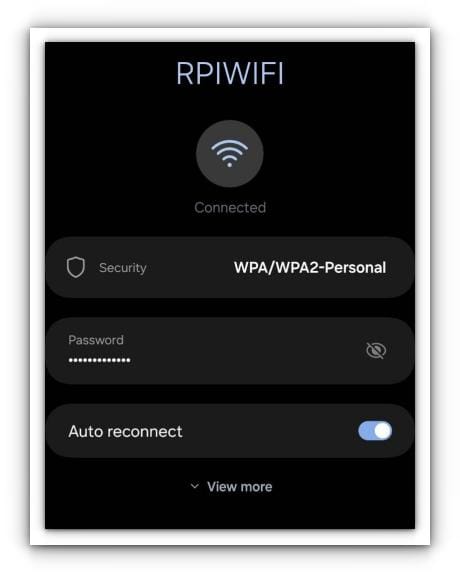
I have also connected my phone with it:
Troubleshooting Common Issues
- Cannot Connect to the Extended Network: If you’re unable to connect to the new network, the issue may lie with Protected Management Frames (PMF), a security feature some adapters don’t fully support. Disable it with the following command:
sudo nmcli con modify Hotspot wifi-sec.pmf disable- Slow Internet Speeds: Remember, you may notice some drop in speed. This is because data travels to your Pi over Wi-Fi, and then gets retransmitted, effectively halving the available bandwidth.
Conclusion
Transforming my old Raspberry Pi into a Wi-Fi extender was a rewarding project. After moving into my parents’ home temporarily (don't judge me, it's common in my country), it quickly solved the issue of spotty Wi-Fi upstairs.
The best part? This project gives a new purpose to older tech. Not only does it expand your Wi-Fi range without costly hardware, but it is also a fun DIY task that deepens your understanding of networking basics.
Although I did notice some speed reduction, I found it worth it for reliable coverage in a previously unreachable area.
Speaking of putting older tech to some good use, let me share another fun project I did to transform my old Wi-Fi dongle into a wireless traffic capture device.
 Abhishek Kumar
💭 Share your thoughts about my experiment in the comments below!
If this helped you, consider supporting It's FOSS
It's FOSS has been helping people use Linux for the past 14 years. Help us stay independent from big tech. Become a Plus member, enjoy ad-free reading and get 5 eBooks.