

Out of all the things you can do with Raspberry Pi, using it as a server in a home network is very popular. The tiny footprint and low power consumption makes it a perfect device to run light weight servers.
One of the things you should be able to do in such a case is run commands on your Raspberry Pi without needing to plug in a display, keyboard, mouse and having to move yourself to the location of your Raspberry Pi each time.
You achieve this by logging into your Raspberry Pi via SSH (Secure Shell) from any other computer, your laptop, desktop or even your phone. Let me show you how.
How to SSH into Raspberry Pi
I assume that you are running Raspbian on your Pi and have successfully connected to a network via Ethernet or WiFi. It’s important that your Raspberry Pi is connected to a network otherwise you won’t be able to connect to it via SSH (sorry for stating the obvious).
Step 1: Enable SSH on Raspberry Pi
SSH is disabled by default in Raspberry Pi, hence you’ll have to enable it when you turn on the Pi after a fresh installation of Raspbian.
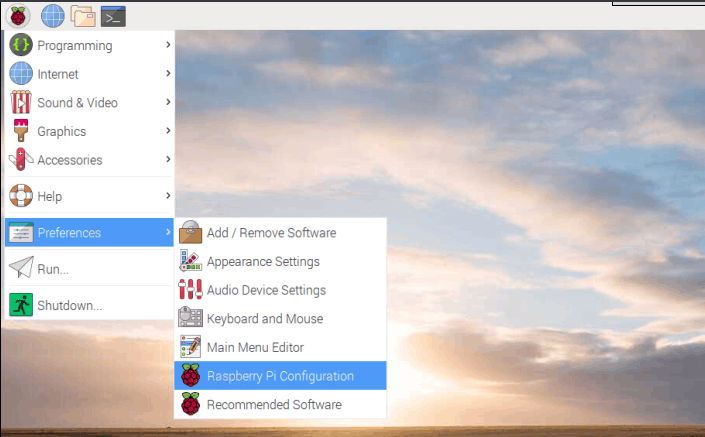
First go to the Raspberry Pi configuration window by navigating through the menu.
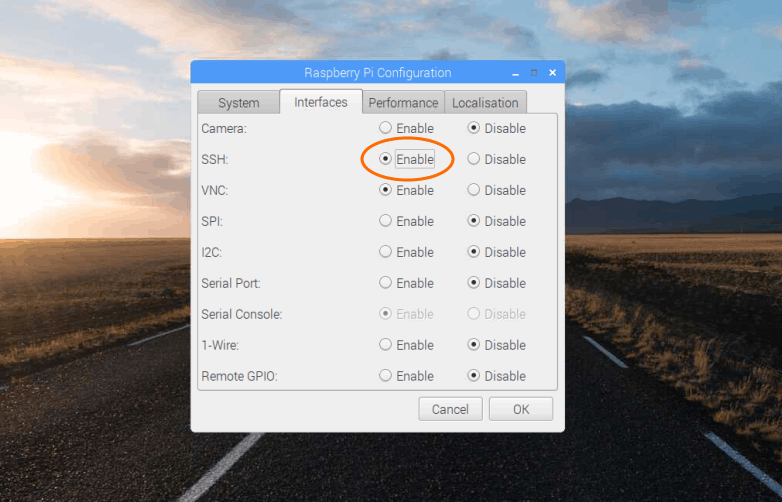
Now, go to the interfaces tab, enable SSH and restart your Pi.
You can also enable SSH without via the terminal. Just enter the command sudo raspi-config and then go to Advanced Options to enable SSH.

Pironman 5 Case With Tower Cooler and Fan
This dope Raspberry Pi 5 case has a tower cooler and dual RGB fans to keep the device cool. It also extends your Pi 5 with M.2 SSD slot and 2 standard HDMI ports.
Step 2. Find the IP Address of Raspberry Pi
In most cases your Raspberry Pi will be assigned a local IP address which looks like 192.168.x.x or 10.x.x.x. You can use various Linux commands to find the IP address.
I am using the good old ifconfig command here but you can also use ip address.
ifconfig
This command shows all the list of active network adapters and their configuration. The first entry(eth0) shows IP address as 192.168.2.105 which is valid.I have used Ethernet to connect my Raspberry Pi to the network, hence it is under eth0. If you use WiFi check under the entry named ‘wlan0‘ .
You can also find out the IP address by other means like checking the network devices list on your router/modem.
Step 3. SSH into your Raspberry Pi
Now that you have enabled SSH and found out your IP address you can go ahead and SSH into your Raspberry Pi from any other computer. You’ll also need the username and the password for the Raspberry Pi.
The default username and password is:
- username: pi
- password: raspberry
If you have changed the default password then use the new password instead of the above. Ideally you must change the default password. In the past, a malware infected thousands of Raspberry Pi devices that were using the default username and password.
Open a terminal (on Mac and Linux) on the computer from which you want to SSH into your Pi and type the command below. On Windows, you can use a SSH client like Putty.
Here, use the IP address you found out in the previous step.
ssh pi@192.168.x.x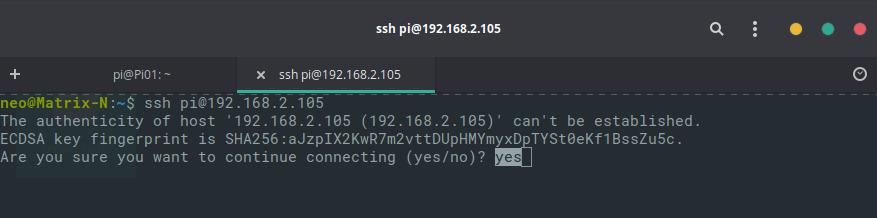
You’ll see a warning the first time, type yes and press enter.
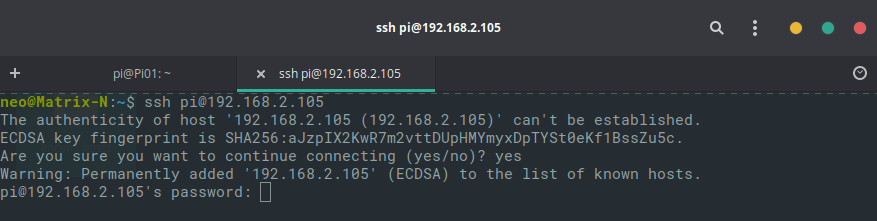
Now, type in the password and press enter.

On a successful login you’ll be presented with the terminal of your Raspberry Pi. Now you can any commands on your Raspberry Pi through this terminal remotely(within the current network) without having to access your Raspberry Pi physically.
Furthermore, you can also set up SSH-Keys so that you don’t have to type in the password every time you log in via SSH, but that’s a different topic altogether.
I hope you were able to SSH into your Raspberry Pi after following this tutorial. Let me know how you plan to use your Raspberry Pi in the comments below!
If this helped you, consider supporting It's FOSS
It's FOSS has been helping people use Linux for the past 14 years. Help us stay independent from big tech. Become a Plus member, enjoy ad-free reading and get 5 eBooks.
