


If your Raspberry Pi can no longer connect to Wi-Fi because the SSID or password changed, you can update the Wi-Fi configuration directly from its SD card. This helps when you cannot connect the device to a monitor and keyboard.
That's what I did. I had switched to a different internet provider, and that changed the router, its SSID and the password. I was using a Raspberry Pi Pico W in my Pi Dog. Connecting it to a screen and keyboard would have been a pain.
The easier option was to just take out the SD card and edit the WiFi details directly there. The entire process is composed of the following step:
- Insert the SD card with Raspberry Pi OS on it on your (Linux) computer
- Go to the mounted rootfs partition and go to /etc/NetworkManager/system-connections/ location
- Here, either create or edit
.nmconnectionfile and enter the wifi name (SSID) and password
Let me show that in detail for you.
wpa_supplicant.conf instead of NetworkManager. In that case, this method may not entirely be applicable. I have tested it on Raspberry Pi 5 running Raspberry Pi OS based on Debian Trixie.Step 1: Connect the SD card to your computer
Shut down the Raspberry Pi, remove the microSD card, and insert it into your Linux laptop or desktop using an SD card reader.
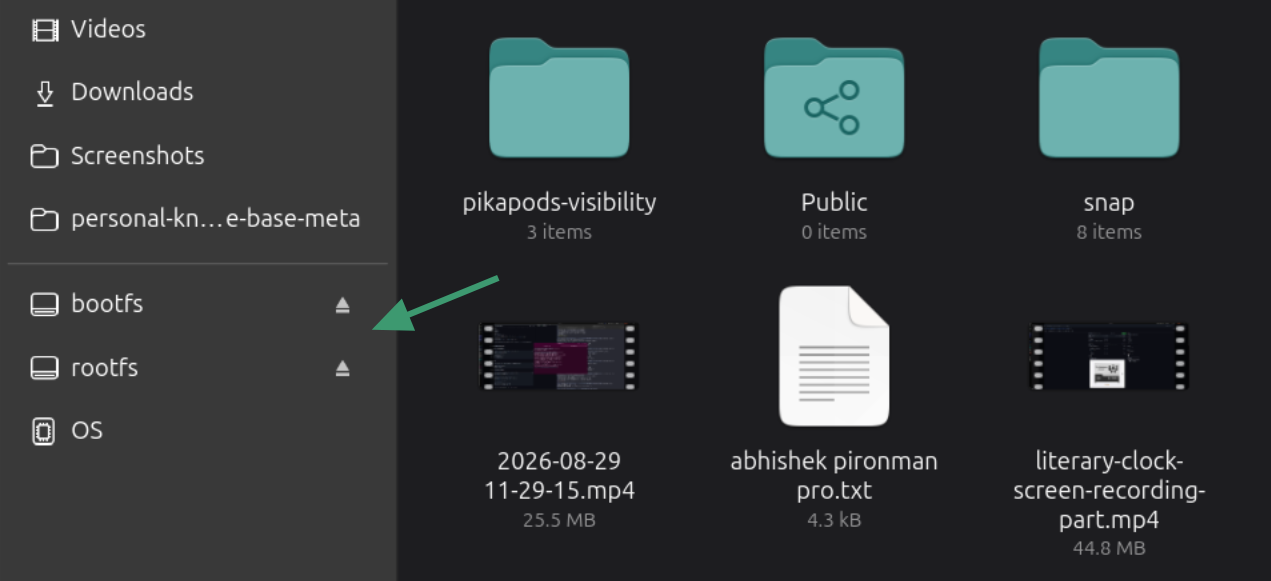
Raspberry Pi OS usually has two partitions:
bootfs
rootfs
The Wi-Fi configuration is stored inside the rootfs partition.
Step 2. Find the SD card mount points
Open a terminal and run:
lsblk -f
You should see something similar to:
sda
├─sda1   vfat     FAT32 bootfs B2F0-82D2                             438.1M    13% /run/media/abhishek/bootfs
└─sda2   ext4     1.0   rootfs 15f4c6be-1102-4331-9904-f78e78afd1fd   21.9G    18% /run/media/abhishek/rootfs
If you only see bootfs, mounted, you can mount rootfs from the file explorer.
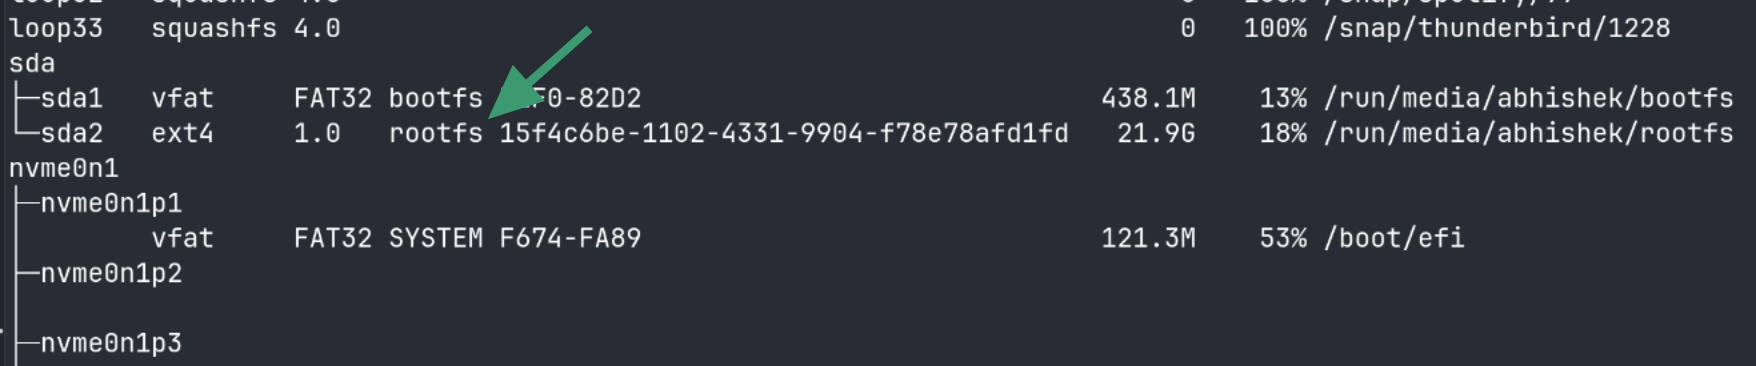
As you can see, for me, the Raspberry Pi root filesystem is available at:
/run/media/abhishek/rootfsYou can also confirm it with:
mount | grep rootfs
/dev/sda2 on /run/media/abhishek/rootfs type ext4 (rw,nosuid,nodev,relatime,errors=remount-ro,uhelper=udisks2
Step 3. Check the existing Wi-Fi configuration
Recent Raspberry Pi OS releases store NetworkManager connection profiles here:
/etc/NetworkManager/system-connections/
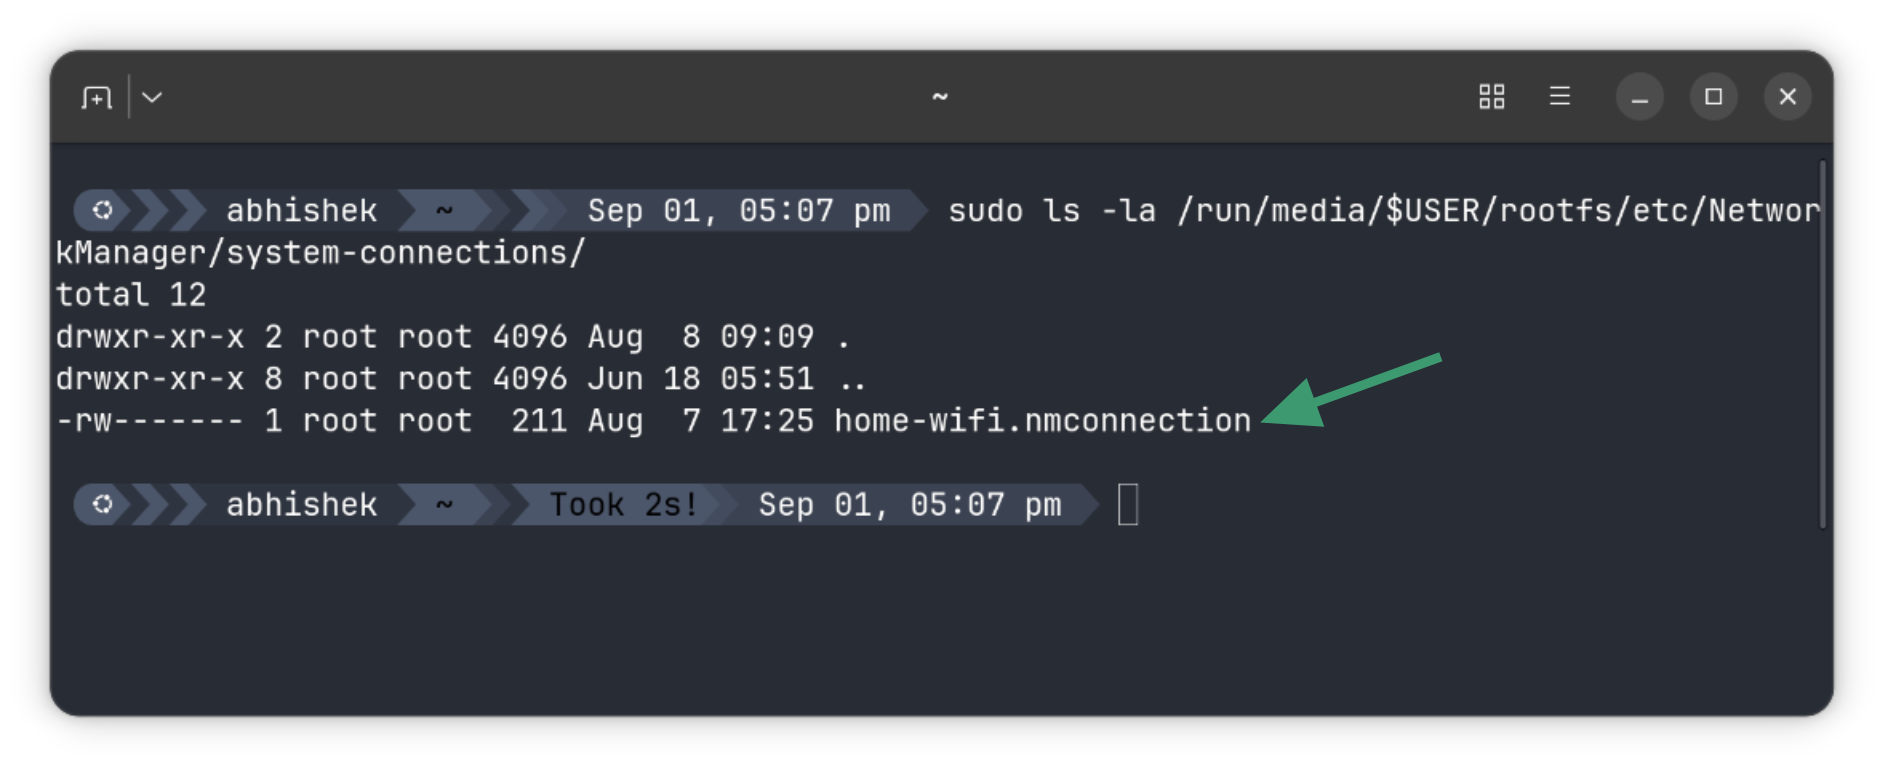
Since we are accessing Raspberry Pi OS through its SD card, run:
sudo ls -la /run/media/$USER/rootfs/etc/NetworkManager/system-connections/
If you already see a .nmconnection file, you can edit that file.
No nmconnection file? Create one
If the directory is empty, create a new Wi-Fi profile.
touch /run/media/$USER/rootfs/etc/NetworkManager/system-connections/home-wifi.nmconnectionAnd then use a terminal-based text editor like Nano or even Micro and add the following details:
ssid and psk with your wifi access point name and its password.[connection]
id=home-wifi
type=wifi
interface-name=wlan0
autoconnect=true
[wifi]
mode=infrastructure
ssid=YOUR-WIFI-SSID
[wifi-security]
key-mgmt=wpa-psk
psk=YOUR-WIFI-PASSWORD
[ipv4]
method=auto
[ipv6]
method=auto
EOFStep 4. Set the correct file permissions
Your work is almost done. You just need to set the correct file permissions. That's because NetworkManager expects connection files to be readable only by root.
To give it the correct file permissions, use the following command:
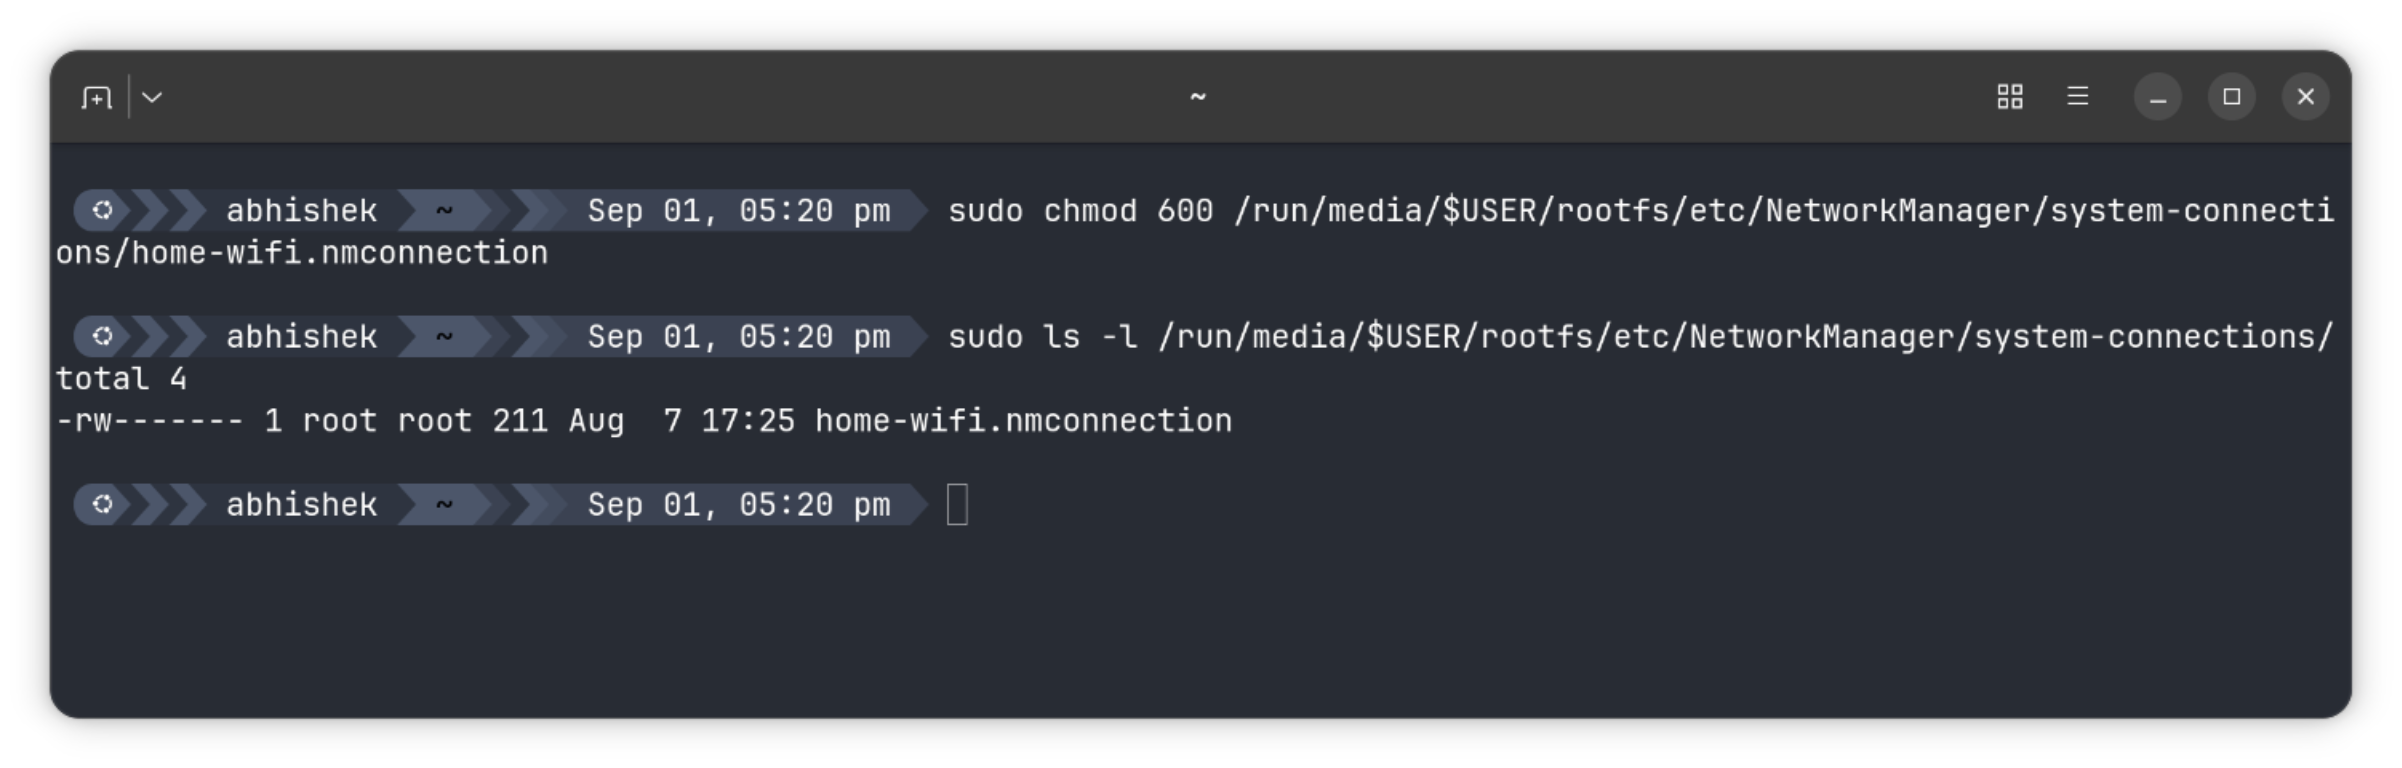
sudo chmod 600 /run/media/$USER/rootfs/etc/NetworkManager/system-connections/home-wifi.nmconnection
Verify the permissions:
sudo ls -l /run/media/$USER/rootfs/etc/NetworkManager/system-connections/
The file should look something like:
-rw------- 1 root root ... home-wifi.nmconnection
Step 5. Flush the changes to the SD card before removing
This is an important step. After making all the changes, run this command:
sync
The sync command makes sure any pending writes cached in memory are actually written to the SD card.
And then you can either unmount from the file explorer or use the umount command for both partitions:
sudo umount /run/media/$USER/rootfs
sudo umount /run/media/$USER/bootfs
You can now safely remove the SD card.
Step 6. Verifying the connection
Insert the card back into the Raspberry Pi and power it on. After it boots, check the devices connected on your network to find the Raspberry Pi's IP address.
The simplest way would be to log in to your router and see the connected devices.
Otherwise, Angry IP Scanner is a good graphical tool for scanning your network. Command line tool nmap also does the job:
sudo nmap -sn 192.168.0.0/24
Normally, it should show your Raspberry Pi's hostname. You can also try to run scan before turning on Pi and a few minutes after turning it on. This should show the new devices that turn up between the two scans.
Finally, check the connectivity with:
ping RASPBERRY_PI_IP
Or, if SSH is enabled on your Raspberry Pi, connect to it:
ssh username@RASPBERRY_PI_IP
By the way, if you have forgotten the user password of your Raspberry Pi, that can be easily reset too.
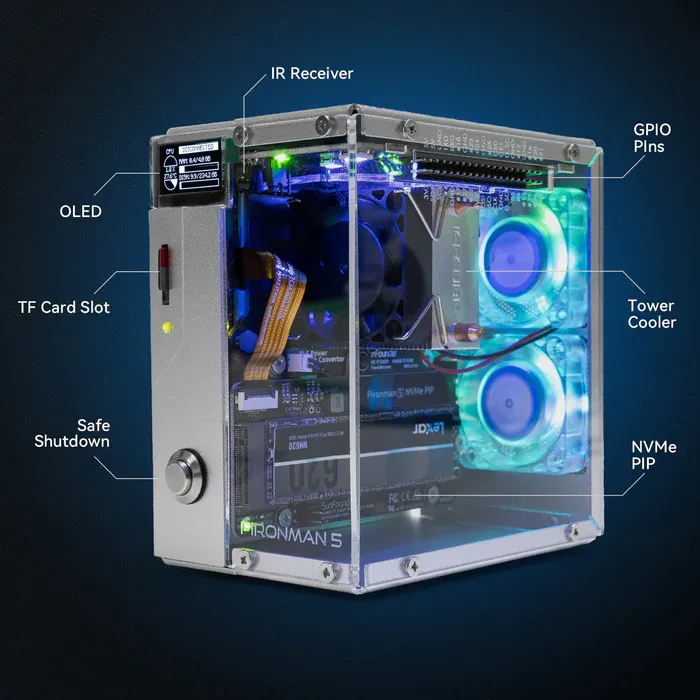
Pironman 5 Case With Tower Cooler and Fan
This dope Raspberry Pi 5 case has a tower cooler and dual RGB fans to keep the device cool. It also extends your Pi 5 with M.2 SSD slot and 2 standard HDMI ports.
Enjoy your Raspberry Pi 😄
If this helped you, consider supporting It's FOSS
It's FOSS has been helping people use Linux for the past 14 years. Help us stay independent from big tech. Become a Plus member, enjoy ad-free reading and get 5 eBooks.