

So you have decided to switch to Linux. Good decision! And if you chose to use Linux Mint, that’s even a better decision.
Linux Mint is one of the best Linux distributions for beginners. Using Linux Mint is fairly easy and installing Linux Mint is no rocket science either. In this tutorial, we’ll see how to install Linux Mint along side Windows.
Before that, let me recap you a few things about installing Linux Mint. There are a few ways you can start using any Linux based operating system.
- Use Linux inside Windows in a virtual machine: This runs a Linux OS like any other application within Windows. This is also one of the safest ways to get a feel of Linux. However, this will utilize your system resources and if you have less than 4Gb of RAM, I won’t advise using it extensively.
- Use a live version of Linux: In this method, you put Linux on a USB or DVD and you boot from it. This is usually slow and your changes done to the Linux system are (normally) not saved. This is particularly useful if you just want to see what Linux feels like.
- Remove Windows and Linux: If you have backed up your data and have a recovery or installation disk of Windows ready with you or if you are determined that you are not going back to Windows, you can remove Windows completely and use only Linux.
- Install Linux alongside Windows: This method is called dual booting Linux with Windows. Here, you install Linux on a system that already has Windows. And when your system powers up, you can choose if you want to use Windows or Linux. This involves touching the disk partition and sometimes boot order. Absolute beginners often find it complicated but this is the best way to use Linux and Windows together in one system. And in this article, we’ll see how to dual boot Linux Mint with Windows 10.
Will dual booting Linux with Windows slow down your system?
I was asked this question several times in the Linux Users Group. So, the short answer is no. Dual booting Linux and Windows won’t slow your system in any way.
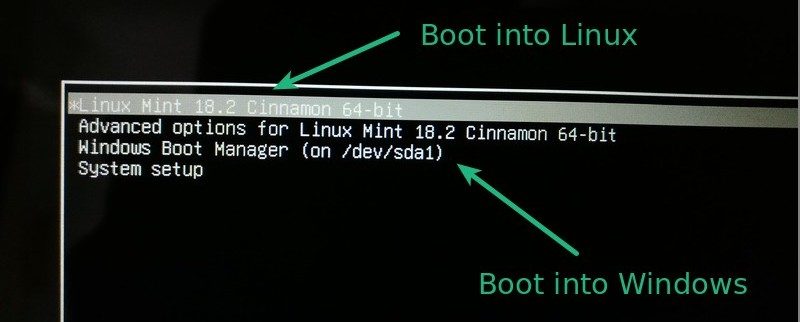
The only delay is in boot time because you get 10 seconds of buffer time to select between Linux and Windows. Once you have booted into either Linux or Windows, it will work the same as if it is the only OS in the system. No impact on the usability of your system.
In other words, dual boot won’t slow down your system.
Install Linux Mint in dual boot with Windows
Before we proceed to see the procedure to dual boot Linux Mint with Windows, let me give you some optional yet recommended safety instructions:
- Back up your data: You are going to touch disk partitions. Normally, it’s not a big issue but just in case if you touched wrong partition etc, you may lose data. So my advice is to back up your important files, documents, music, movies etc to an external disk or cloud, whichever suits you.
- Have a boot repair disk (optional): If your boot gets messed up, you can try to repair it with boot repair disk. If you have an extra USB or CD, you can use that to create boot repair disk.
- Have a live or recovery disk of Windows ready (optional): If your boot gets messed up and despite all efforts, you ended with an unbootable system, you can use the Windows disk to reinstall Windows.
I am not discouraging you. I am asking you to be prepared for the worst case scenario.
Remember that this article applies to computers that have Windows 10 already installed on the system. You are installing Linux Mint on an already installed Windows system, not the other way around.
I have created a detailed video tutorial on installing Linux Mint alongside Windows 10. You can refer to it if you want to see all the steps in even more detail. I also advise you to subscribe to our YouTube channel for more Linux tutorials.
Follow the steps below to install Linux Mint in dual boot with Windows:
Step 1: Create a live USB or disk
Go to Linux Mint website and download ISO file. This ISO file is the disk image that you can burn to a USB or DVD.
There are several versions of Linux Mint available. The default is Cinnamon. If your computer supports 64 bit, go with 64 bit Linux Mint Cinnamon. If you know about other desktop environments, you can make your mind and choose whichever Mint version you want.
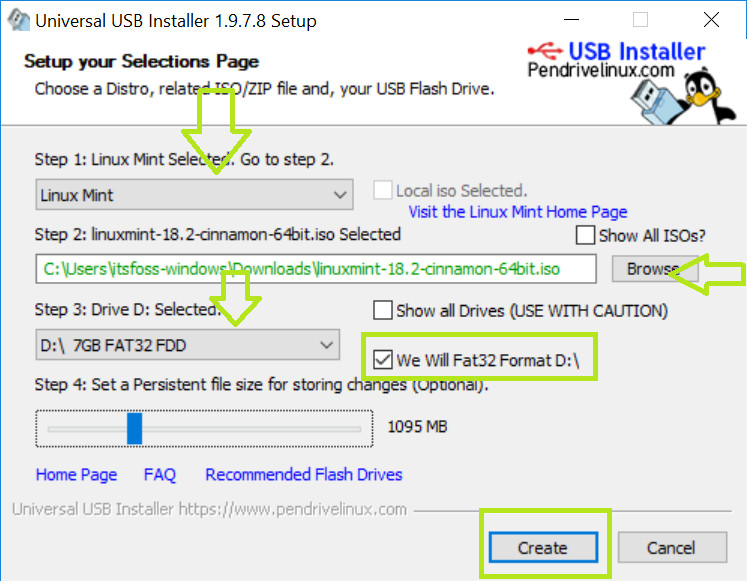
Once you have downloaded the Linux Mint ISO, you need a tool to write the image to a disk. I recommend using a free tool called Universal USB Installer in Windows:
Download Universal USB Installer
It’s an executable exe file. Just double click on it to run the software and browse it to the ISO. Make sure that you have your USB key plugged in:
If you need more hints, here is a screenshot tutorial on how to create a live USB for Linux.
Step 2: Make a new partition for Linux Mint
This is where you have to be cautious. If you have multiple partitions (not the recovery ones), you can either use one of them or create a new partition from an existing partition.
Your existing data will be safe if you have enough free space. Typically, you install Linux in under 15 GB, however, if disk space is not a concern, I advise using 40-60 GB at least. This way you can have more space at your disposal for downloading and keeping various files.
In Windows, go to start menu and type ‘partition’. This will bring up Disk Management utility. Now carefully select the disk in which you’ll make some free space by shrinking the volume:
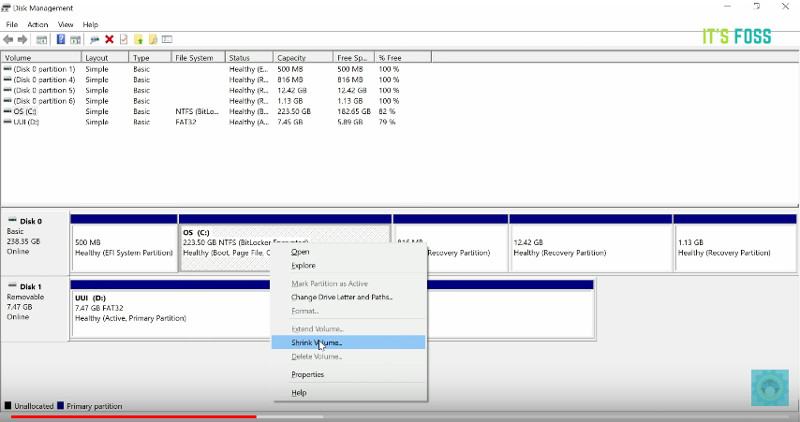
In my case, I only had the C Drive with 223 GB of space on it. So I shrunk it to make 110 GB of free partition on it. I recommend watching the video to see the exact steps you need more hint.
Step 3: Boot in to live USB
Plug the live USB or disk into the computer and restart the computer. While booting the computer press F10 or F12 function key (defers from computer to computer) to go to the boot menu. Now, choose the option to boot from USB or Removable Media.
Step 4: Start the installation
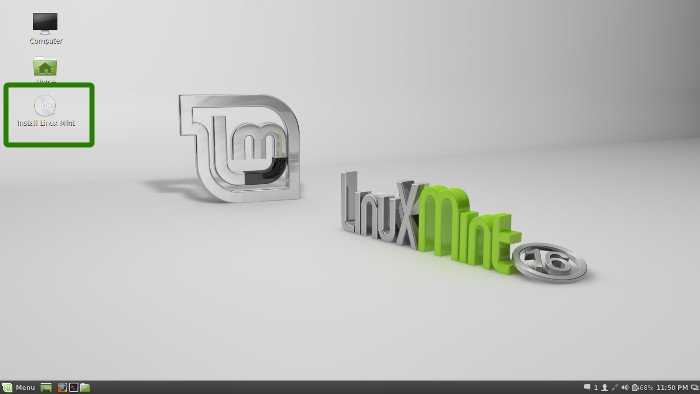
It takes some time to boot from the live USB or disk. Have some patience. Once it boots in to the live disk, you’ll be provided to Try Linux Mint or Install Linux Mint. Even if you choose to try it, you can find the install option on the desktop:
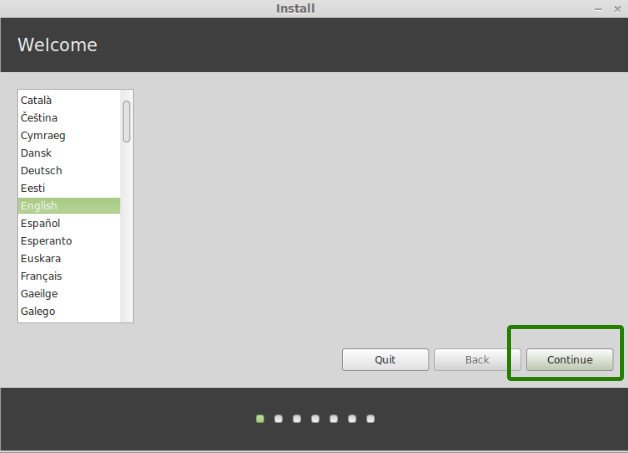
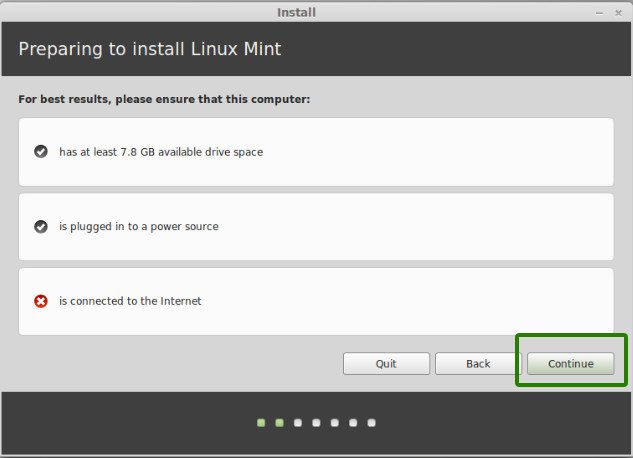
In next few screens, you’ll be asked to choose the language of the operating system. It will then do some checks on available space, battery and Internet connection.
Step 5: Prepare the partition
This is the most important part of the whole installation. Where to install Linux Mint?
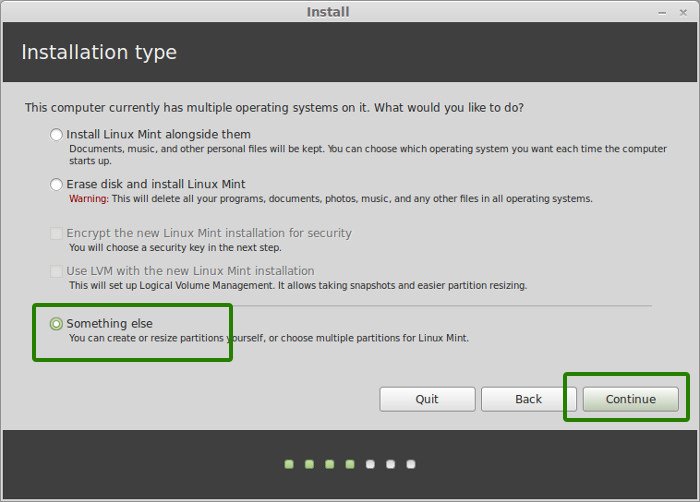
But as mentioned before, I prefer separate partitions for Windows and Linux. Windows is already installed here, we’ll prepare a new partition for Linux Mint. In the Installation Type window, choose Something Else:
Step 6: Create root, swap and home
Since you already created a new partition in Windows, it’s time to install Linux Mint on it. Now, there are several ways to do it.
If you want to keep things simple, just go with a single root partition and it will contain everything (swap, home, boot) under it.
But here, I’ll show you my favorite way and that is to have a root, a Swap and a Home.
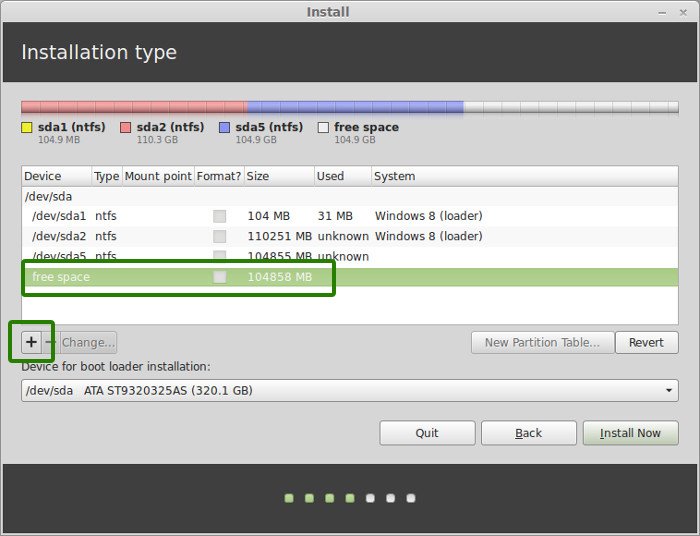
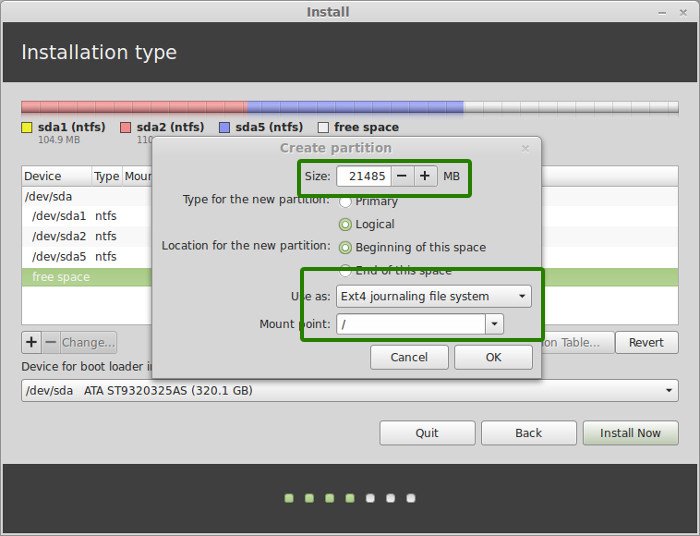
Create a root partition first. Choose the free space available and click on +.
Here, choose the size of the root. Root is like your C drive in Windows. Installed software, updates and other system files are under this root partition. Home partition is for your personal documents, music, downloads etc.
If you have total 100 GB at disposal, give 30 GB to root. In any case, don’t give it less than 15 GB because if root runs out of space, your system will slow down and you’ll run into issues.
I opted to have 20 GB, choose ext4 file system, and mount point as / (i.e. root):
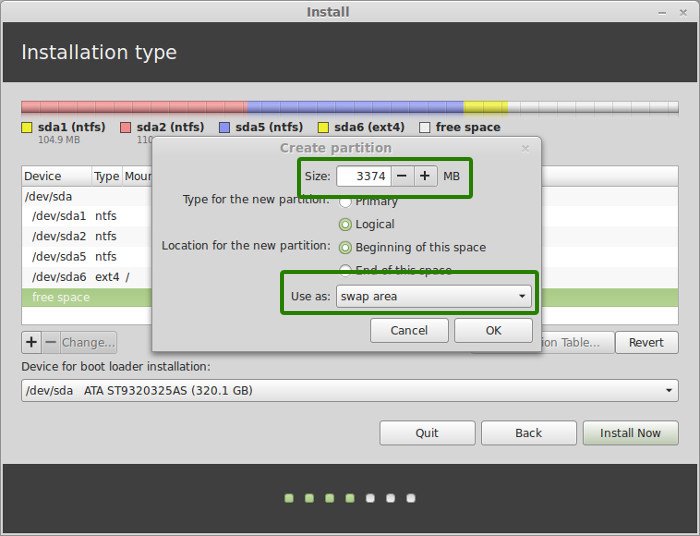
Now, next is to create the swap partition. Now the question is what should be the swap size for Linux Mint installation?
The answer depends upon your RAM size, your needs, available disk space and whether you would use hibernation or not. You can use the below suggestion:
- RAM less than 2 GB: Swap should be double the size of RAM
- RAM between 2 to 4 GB: Swap should be RAM size + 2 GB
- RAM between 6 GB to 8 GB: Swap should be size of RAM
- RAM more than 8 GB: Swap should be half the size of RAM or less
Don’t spend too much time thinking about swap. It is helpful for systems with less memory. For system with more than 8 GB of RAM and SSD, the less the swap, the better it is.
Newer version of Linux Mint utilize Swap file. It creates a special file under root and utilizes it as swap area. You can have both swap partition and swap file in a system.
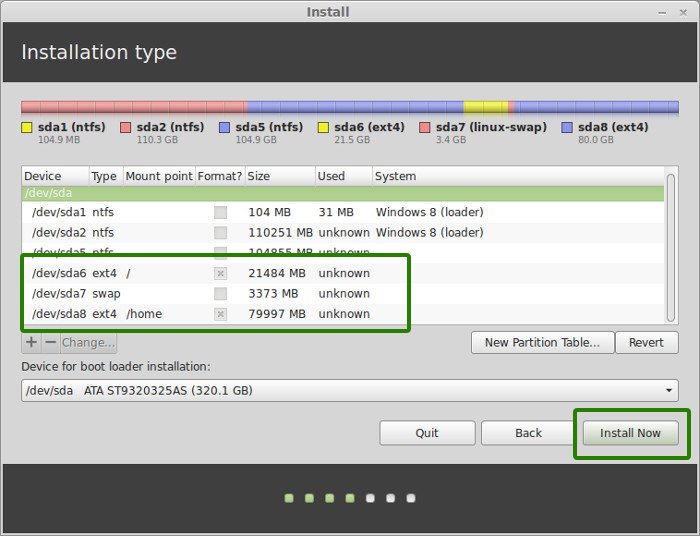
The next step is to create Home. Try to allocate the maximum size to Home because this is where you’ll be downloading and keeping the files.

Once you have created Root, Swap and Home partitions, click on Install Now button.
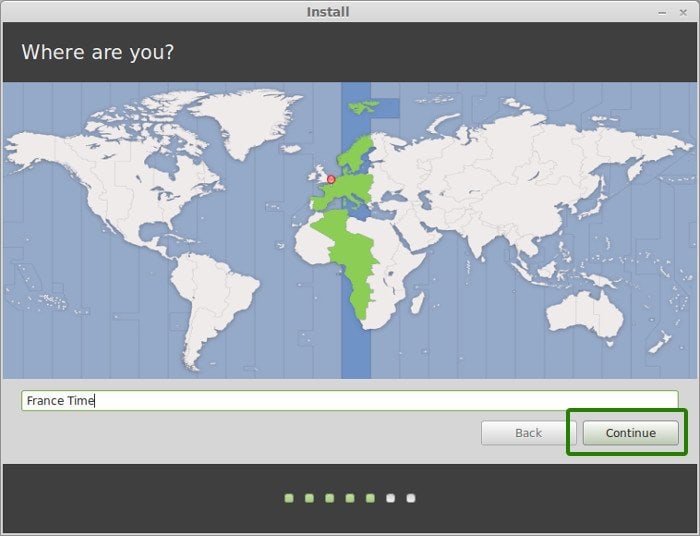
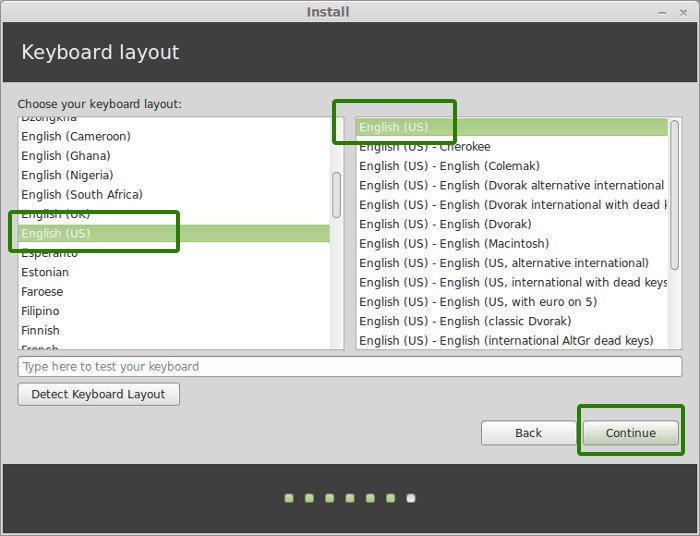
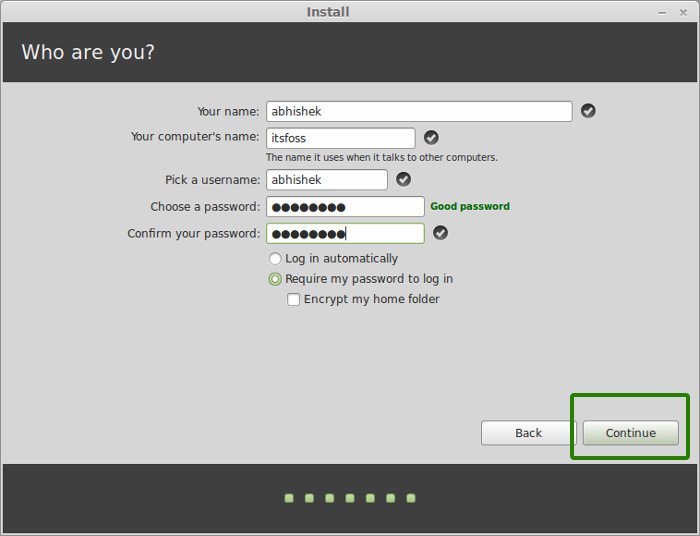
Step 7: Follow the trivial instructions
Technically, you have crossed the main hurdle if you reached this point successfully. Now, you will be taken through a number of screens to select options like keyboard layout, login credentials etc. You don’t need to be a genius to figure out what to do here afterward. I have attached screenshots for reference purposes here.
Once the installation is over, you will be presented with the option to keep trying live version or to restart the system.
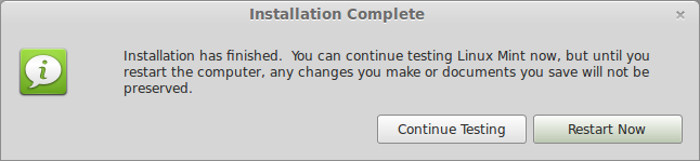
And that would be it. On next boot, you will see the option of Linux Mint on the grub screen. And thus you can enjoy the beautiful and beginner-friendly Linux distribution. I hope you found this guide to Linux Mint dual boot with Windows helpful.
Here are a few common troubleshooting you might have to do after dual booting Linux Mint:
- Fix Grub Not Showing For Windows 10 Linux Dual Boot
- Fix No Bootable Device Found Error After Installing Ubuntu
- error: no such partition grub rescue in Ubuntu Linux
- Fix Minimal BASH like line editing is supported GRUB Error In Linux
I strongly advise you to read things to do after installing Linux Mint so that you can have a good start.
If you want to remove, you can follow this guide to uninstall Linux Mint from Windows 8 dual boot.
If you have questions, suggestions or a word of thanks, feel free to drop a comment. Stay tuned for more Linux Mint tutorials. Ciao :)
