
When you switch to Linux, the experience could be overwhelming at the start. Even basic things like installing applications on Ubuntu may seem confusing.
Don’t worry. Linux provides so many ways to do the same task that it’s only natural to feel lost, at least at the beginning. You are not alone. We’ve all been at that stage.
In this beginner’s guide, I’ll show you the most popular ways to install the software in Ubuntu. I’ll also show you how to uninstall the software.
I’ll also provide recommendations about methods to install software on Ubuntu. Sit tight and pay attention. This long and detailed article will give you lots of helpful information.

Method 1: Install software using Ubuntu Software Center [Recommended]
The easiest and most convenient way to find and install the software in Ubuntu is by using the Ubuntu Software Center or the Snap Store. On Ubuntu, you can search for Ubuntu Software in Activities Overview and click on it to open it:
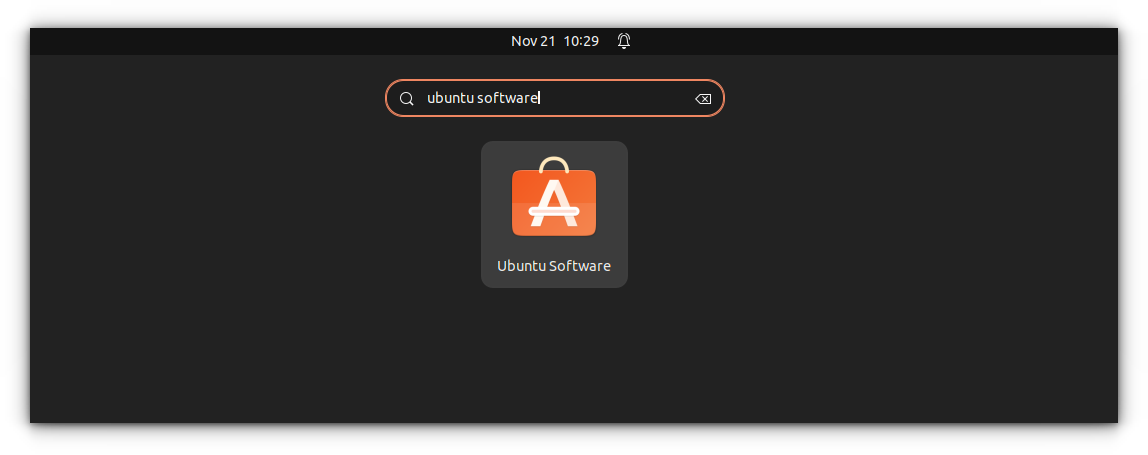
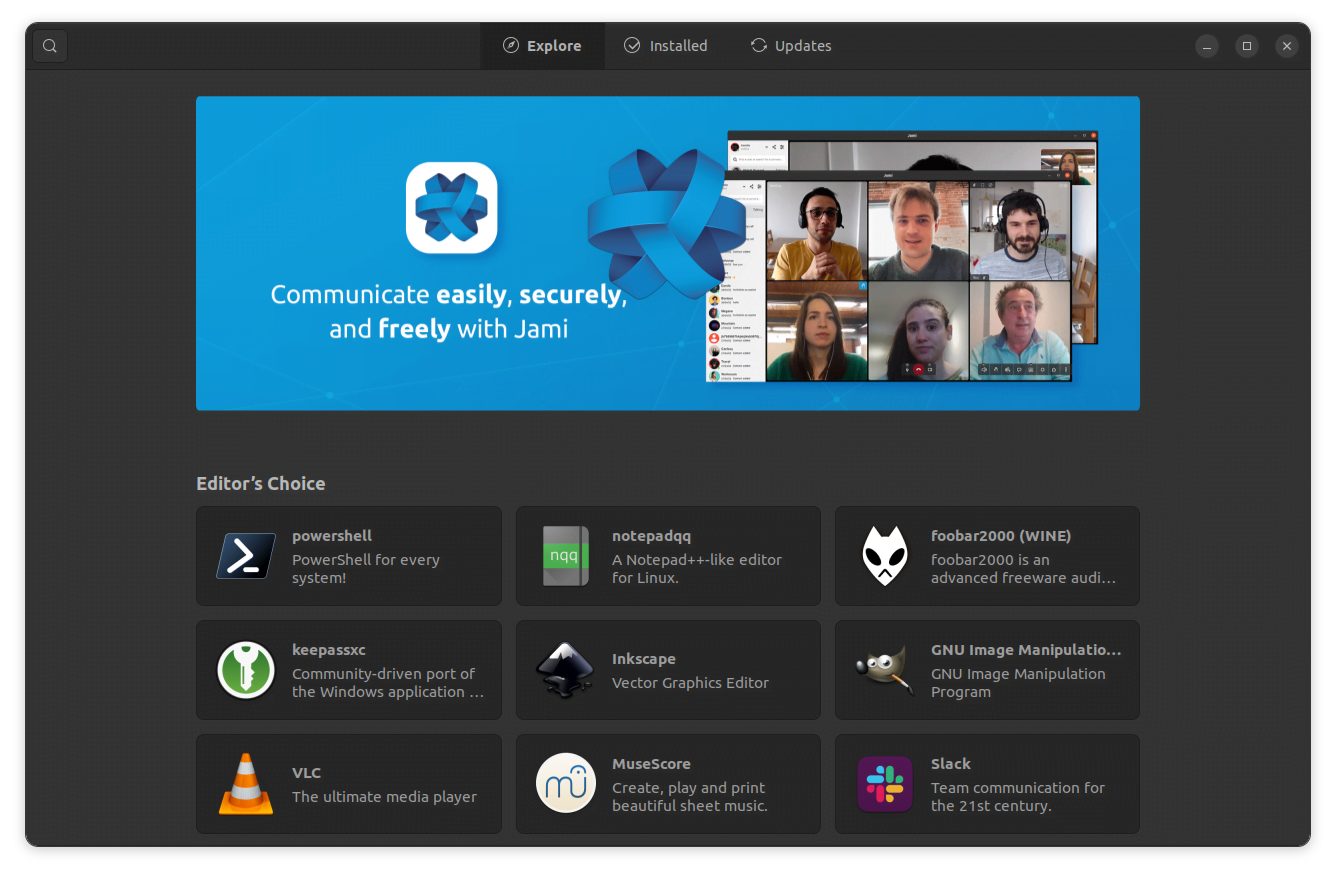
You can think of the Ubuntu Software Center as Google’s Play Store or Apple’s App Store. It showcases all the software available for your Ubuntu system. You can search for an application by its name or browse through various software categories.
In some Ubuntu flavors, you might find it listed as “Software Boutique” or “Software Manager.”
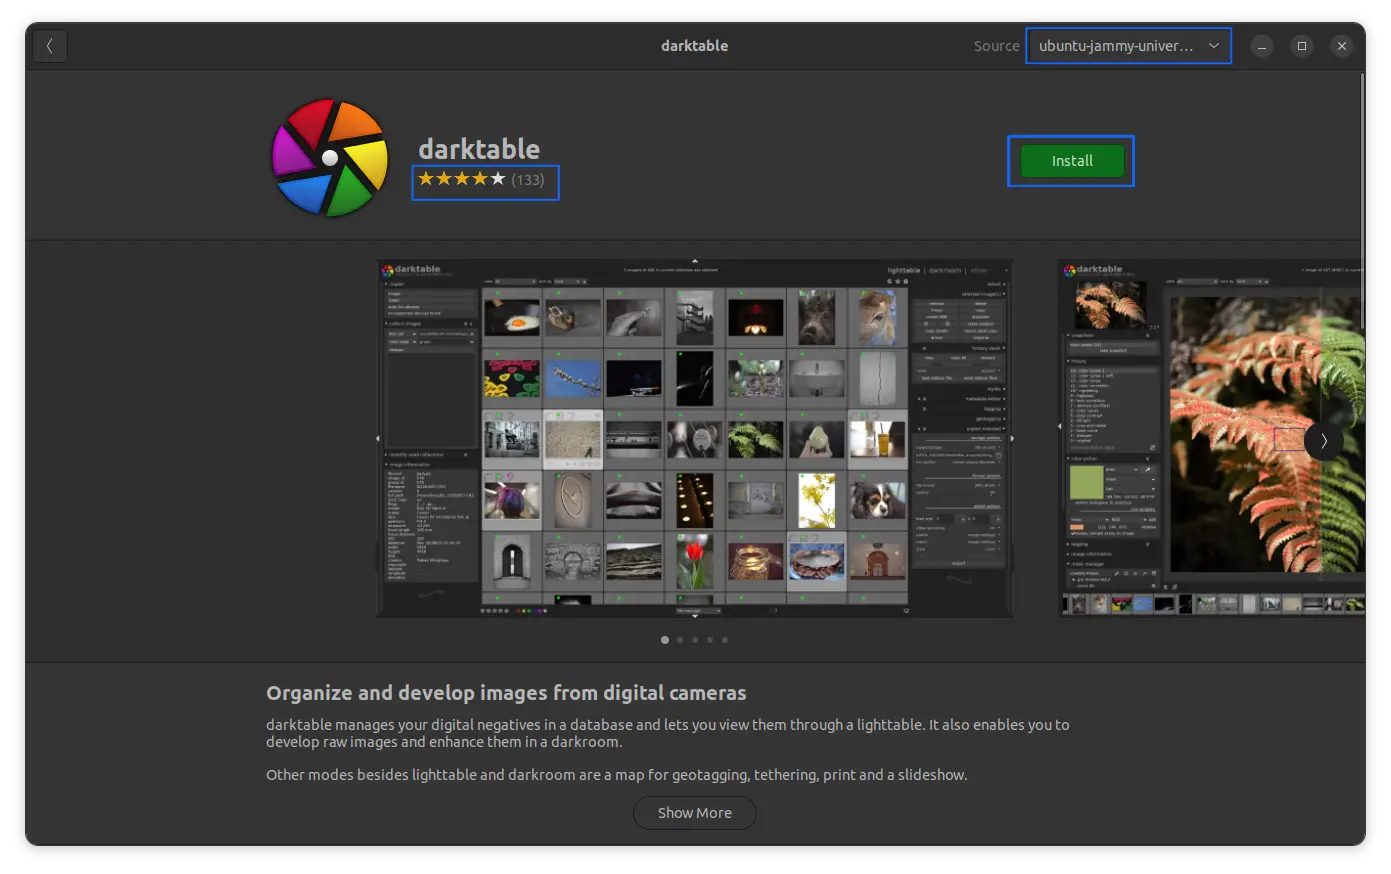
Once you’ve found the application you’re looking for, click on it. This will open a page inside the Software Center with a description of the application. You can read the description, see its rating and also read reviews. You can also write your review after you get to use it.
You can also select the source to change the type of package you want, such as a snap, deb, etc. Ubuntu does not have Flatpak integration, but you can find it on other Linux distributions. Once selected, you can click on the install button to install it.
You’ll have to enter your password to proceed to install the application.
Could it be any easier? I doubt it.
In Activities Overview, look for Software & Updates
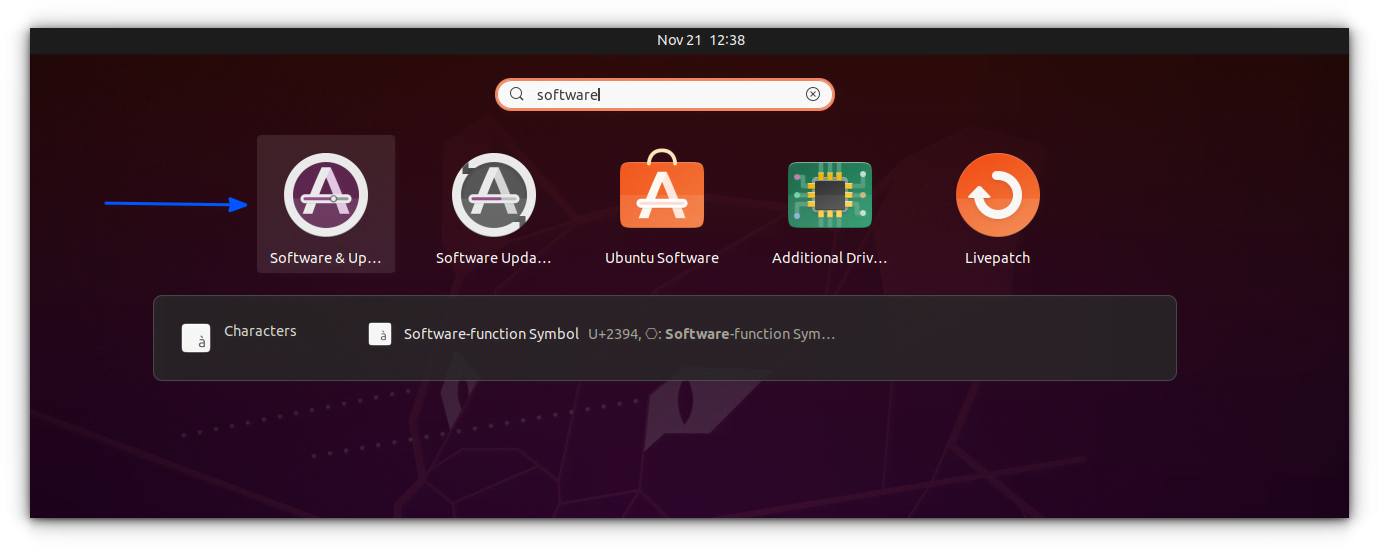
And here, under the Other Software tab, check the options for Canonical Partners.
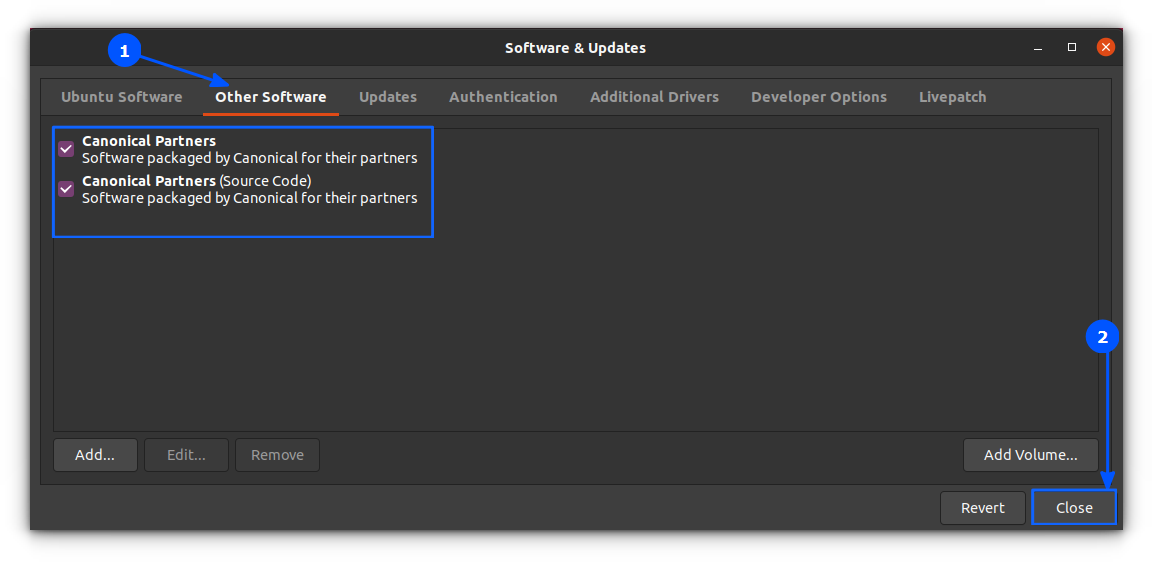
Once you press Close, you will be prompted to reload the software information.
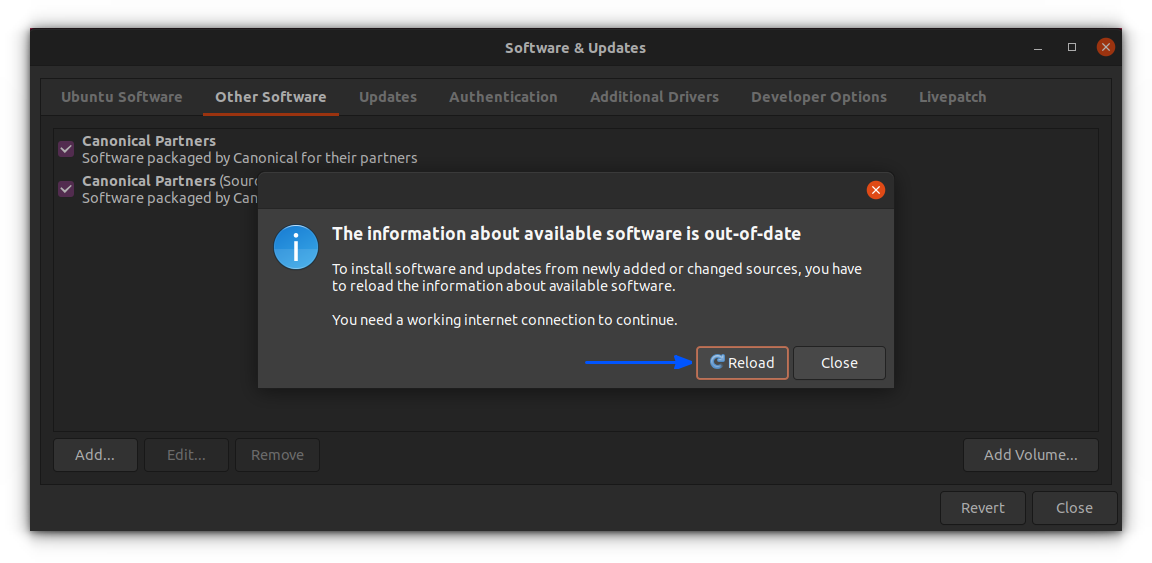
You need to click on reload, which will reload the information about the software installed on the system.
Remove software using Ubuntu Software Center [Recommended]
We just saw how to install software using the Ubuntu Software Center. How about removing the software that you installed using this method?
Uninstalling software with the Ubuntu Software Center is as easy as installing.
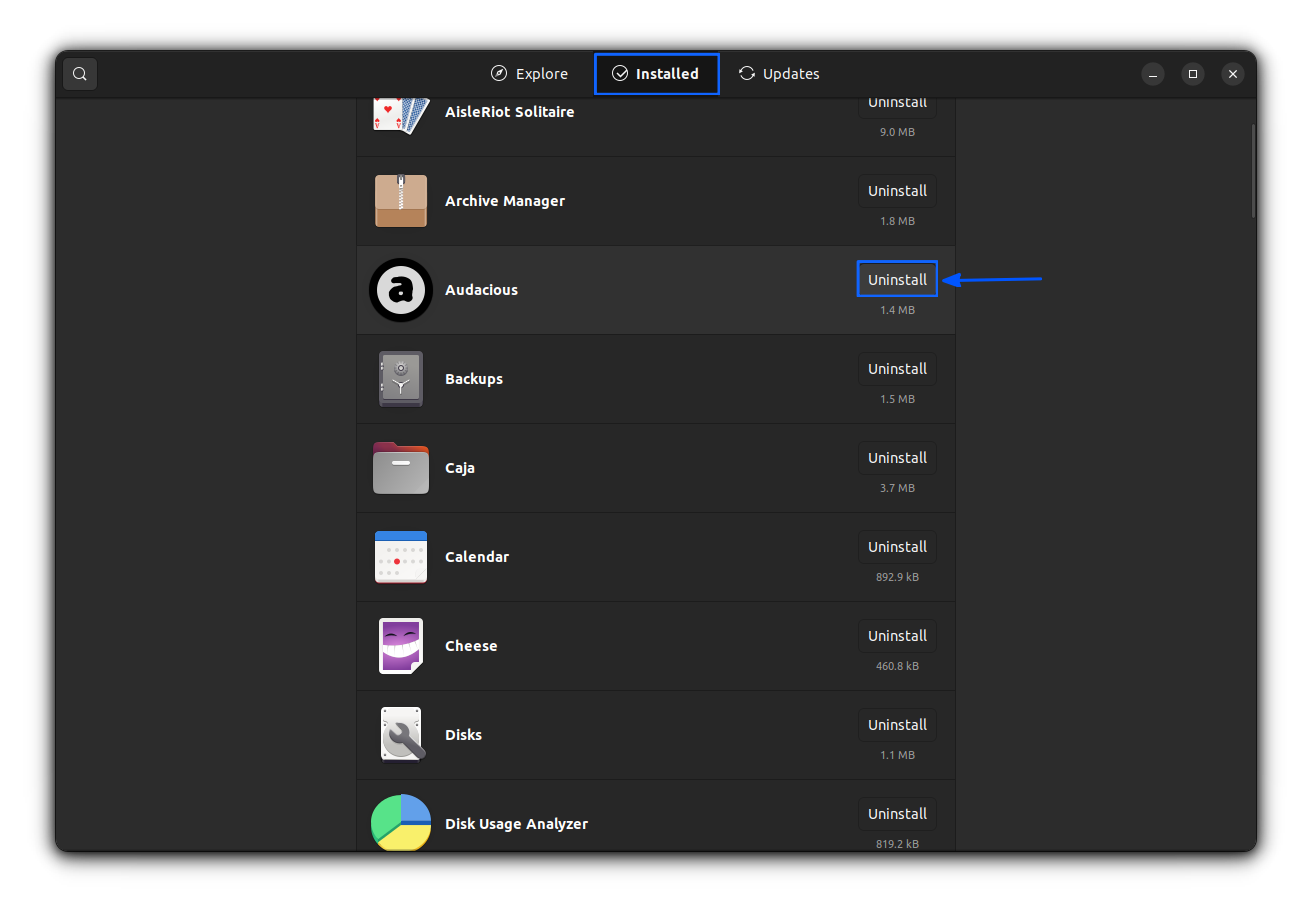
Open the Software Center and click on the Installed tab. It will show you all the installed software. Alternatively, you can search for the application by name.
To remove the application from Ubuntu, click on the Uninstall button. Again, you’ll have to provide your password here.
Method 2: Install the software on Ubuntu using .deb file
.deb packages are similar to .exe files on Windows. They’re an easy way to allow software installation.
Many vendors provide their software in .deb format: Google Chrome is an example.
You can download the .deb file from the official website.
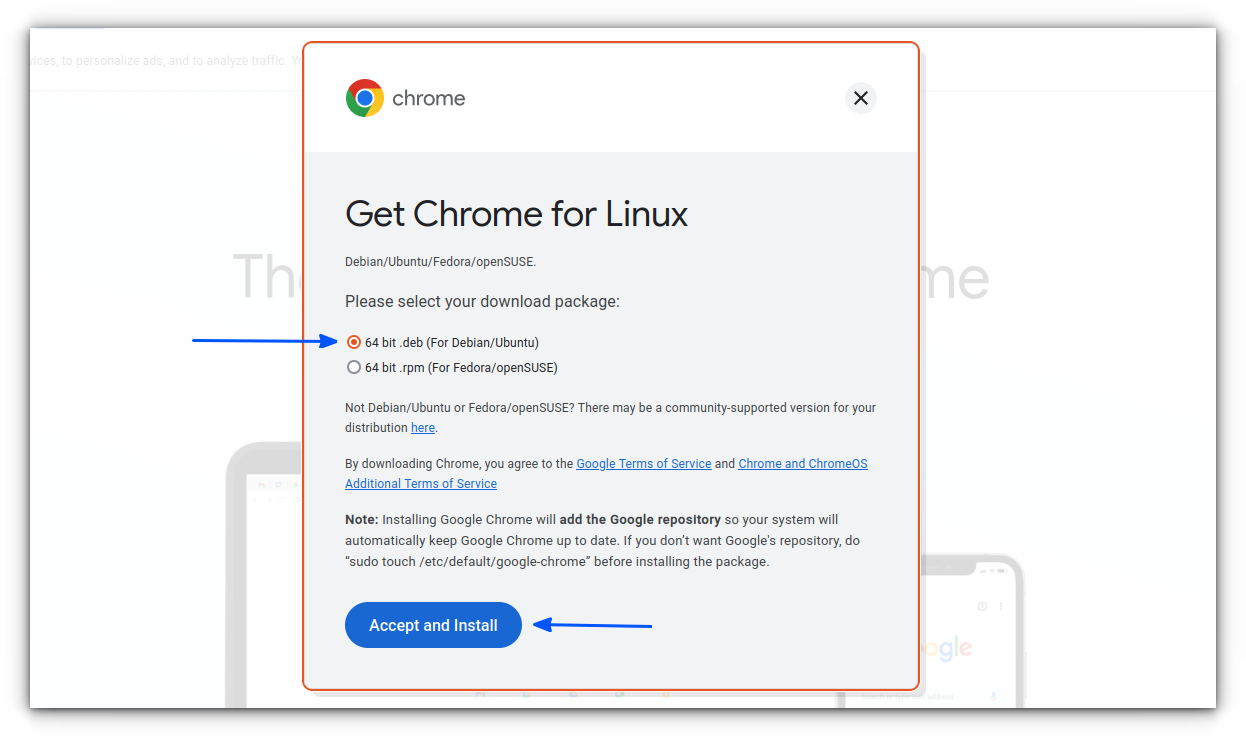
Once you’ve downloaded the .deb file, double-click on it to run it. It will open in the Ubuntu Software Center, and you can install it the same way as you did through the software center.
Alternatively, you can use the lightweight program Gdebi to install .deb files in Ubuntu.
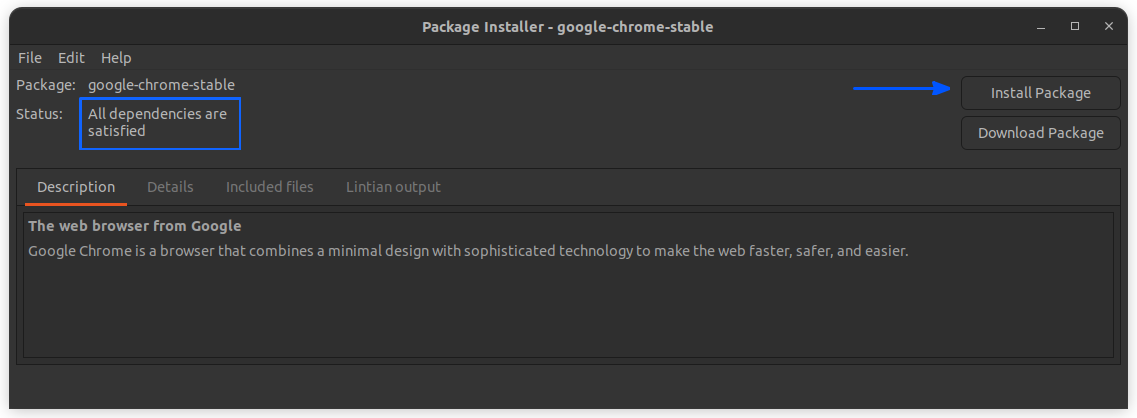
Once you’ve installed the software, you can delete the downloaded .deb file.
Tip: A few things to keep in mind while dealing with .deb files:
- Make sure that you’re downloading the .deb file from the official source. Only use the official website or GitHub pages.
- Ensure you download the .deb file for the correct system type (32-bit or 64-bit). Read our quick guide if you need to know if your Ubuntu system is 32-bit or 64-bit.
- If your version of Ubuntu opens deb files in the archive manager instead of the software center, refer to our article for the solution.
Remove software that was installed using .deb
Removing software that was installed from a .deb file is the same as removing any app from the software center.
Just go to the Ubuntu Software Center, search for the application name and click on Uninstall to uninstall it.
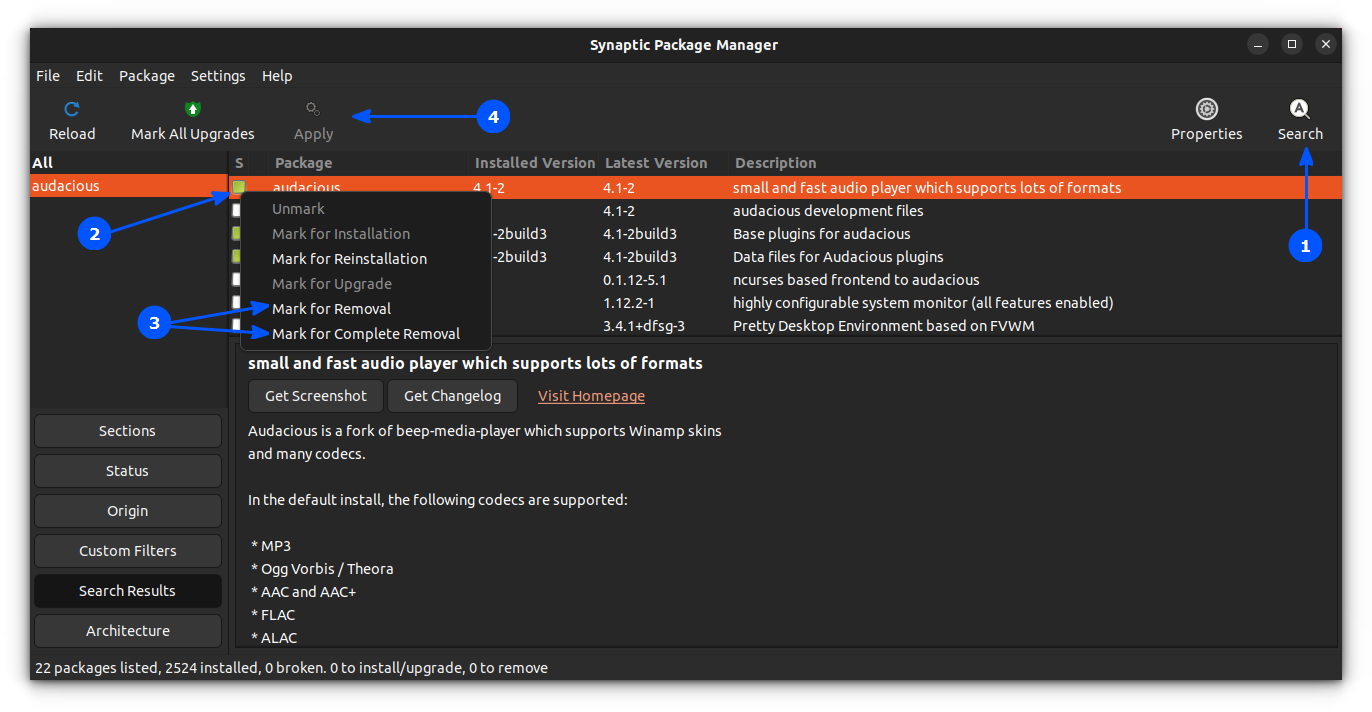
Alternatively, you can use Synaptic Package Manager. It’s not usually the case, but it may happen that the installed application is not visible in the Ubuntu Software Center.
Synaptic Package Manager lists all the software that is available for your system and all the software that’s already installed there. It’s a very powerful and very useful tool.
Open Synaptic Package Manager and then search for the software you want to uninstall. Installed software is marked with a green button. Click on it and select “mark for removal”. Once you do that, click on “apply” to remove the selected software.
Method 3: Install software on Ubuntu using apt commands
You might have noticed a number of websites giving you a command like sudo apt-get install to install software in Ubuntu.
This is actually the command-line equivalent of what we saw in section 1. Basically, instead of using the graphical interface of the Ubuntu Software Center, you’re using the terminal. Nothing else changes.
If you prefer using the terminal commands, follow this method.
Using the apt-get or apt command to install software is extremely easy. All you need to do is to use a command like:
sudo apt install package-nameHere sudo gives you “admin” or “root” (in Linux terminology) privileges. You can replace package-name with the name of the desired software.
Remove software on Ubuntu using apt commands
You can easily remove software that was installed using the Ubuntu Software Center, the apt command or a .deb file using the command line.
All you have to do is to use the following command – just replace package-name with the name of the software you want to delete.
sudo apt remove package-nameUsing apt-get commands is not rocket science. It’s actually very convenient. With these simple commands, you can get acquainted with the command-line part of Ubuntu Linux and it does help in the long run. I recommend reading my detailed guide on using apt-get commands to learn more about it.
Method4: Install applications on Ubuntu using a PPA
PPA stands for Personal Package Archive. It’s another method that developers use for providing their software to Ubuntu users.
In section 1, you came across the term “repository”. A repository basically contains a collection of software. Ubuntu’s official repository has programs that are approved by Ubuntu. The Canonical partner repository contains software from partnered vendors.
In the same way, a PPA enables a developer to create their own APT repository. When an end user (i.e., you) adds this repository to the system (sources.list is modified with this entry), software provided by the developer in his/her repository becomes available for the user.
Now you may ask what the need of PPAs is when we already have the official Ubuntu repository?
- Sometimes the latest version of the software is not available in the official repository to ensure stability.
- A quick way for developers to distrubute software even if it is not available on the official repository.
Note that you should not trust any PPA. Ensure that it is maintained by the original developer or recommended by the developers.
Typically, PPAs are used with three commands.
The first adds the PPA repository to the sources list. The second updates the cache of your software list to make your system aware of the new software available (On Ubuntu, add-apt-repository command automatically updates the package index). And the third installs the software from the PPA.
sudo add-apt-repository ppa:numix/ppa
sudo apt update
sudo apt-get install numix-gtk-theme numix-icon-theme-circle
In the above example, we added a PPA provided by the Numix project. And after updating the software information, we added two programs available in the Numix PPA.
If you want a GUI application, you can use the Y-PPA application (PPA currently valid only up to Ubuntu 21.10). It lets you search for PPAs and add and remove software in a better way.
Remove applications installed using a PPA
I’ve discussed removing PPAs from Ubuntu in detail before. You should refer to that article to get more insights into handling PPA removal.
To quickly explain it here, you can use the following two commands.
sudo apt remove numix-gtk-theme numix-icon-theme-circlesudo add-apt-repository --remove ppa:numix/ppaThe first command removes the software installed via the PPA. The second command removes the PPA from sources.list.

Method 5: Installing software as Snap in Ubuntu Linux
For several versions, Ubuntu is promoting software as snap application. Although, there exists varied opinions about snap packages, it’s a fact that several software provides only snap as their official version for Linux.
Snap applications can be installed easily using Ubuntu’s Software centre. Since it has built in support, you just need to search for the packages (as in the case of section 1.1) and press install.

Similarly, you can use the command-line to install snap apps by:
sudo snap install package-nameRemove applications installed using snap
Since snap apps are very well integrated with the snap store, you can uninstall those within Ubuntu’s Software Centre. Go to the installed packages an select Uninstall as in section 1.2.
Removing installed snap application is as simple as removing a regular app. You just open a terminal and enter the following command:
sudo snap remove package-nameThe command will disconnect the snap application from the system.
For further information, refer to our complete guide on using Snap packages on Ubuntu.

Method 6: Installing software using source code on Ubuntu Linux [Not recommended]
Installing software using the source code is not something I would recommend to you. It’s tedious, troublesome and not very convenient.
But building from the source code is still some people’s preferred method, even if they don’t develop software of their own. To tell the truth, the last time I used source code extensively was 5 years ago when I was an intern and I had to develop a program using Ubuntu. I’ve come to prefer other ways to install applications on Ubuntu since then. For normal desktop Linux users, installing from source code should be avoided.
I’ll be brief in this section and just list the steps for installing software from source code:
- Download the source code of the program you want to install.
- Extract the downloaded file.
- Go to the extracted directory and look for a README or INSTALL file. Well developed software may include such a file to provide installation and/or removal instructions.
- Look for a file called configure. If it’s present, run the file using the command
./configure– this will check if your system has all the required software (called ‘dependencies’ in software terminology) to install the program. Note that not all software includes a configure file, which is, in my opinion, bad development practice. - If configure notifies you of missing dependencies, install them.
- Once you have everything, use the command
maketo compile the program. - Once the program is compiled, run the command
sudo make installto install the software.
Do note that some software provides you with an install script and just running that file will install the software for you. But you won’t be that lucky most of the time.
Also note that programs you install using this method won’t be updated automatically like programs installed from Ubuntu’s repository or PPAs or .deb files.
I recommend reading this detailed article on using source code in Ubuntu if you insist on using source code.
Removing software installed using source code [Not recommended]
If you thought installing software from source code was difficult, think again. Removing the software installed using source code could be an even bigger pain.
- First, you have to keep the source code you used to install the program.
- Second, you should make sure at installation that there is a way to uninstall the program. A badly configured program might not provide a way to uninstall the program and then you’ll have to manually remove all the files installed by the software.
Normally, you should be able to uninstall the program by going to its extracted directory and using this command:
sudo make uninstallBut this is not a guarantee that you’ll have this method all the time.
You see, there are lots of ifs and buts attached to source code and not that many advantages. This is why I don’t recommend using source code to install software on Ubuntu.
Few Other Ways to Install Applications in Ubuntu
There are a few more (not so popular) ways you can install software on Ubuntu. Since this article is already way too long, I won’t cover them here. I’ll just list them below:
dpkg commands: Head on to the directory where you downloaded the deb file and execute sudo dpkg -i deb-file-name
Using software as Flatpak apps is also an option.
You may find some applications in AppImage format so learn about them too.
Some Python software can be installed using the pipx command line tool.
If you already use Ubuntu, what’s your favorite way to install software on Ubuntu Linux? Did you find this guide useful? Do share your views, suggestions and questions.


