
As you’re here, I’m going to assume that you’re a Linux user. And every once in a while, you find yourself asking: can I run windows applications on Linux?
The answer to that question is yes. Yes, you can run Windows applications in Linux. Here are some of the ways for running Windows programs with Linux:
Both of them work just fine. But they are somewhat resource hungry.
If you only need to use a small Windows application, installing Windows on a separate HDD partition or as a Virtual Machine is not efficient. Moreover, Virtual Machine can’t utilize the total power of your machine. So, what is the solution?
No worries, there is another way to use Windows software on Linux. It’s called Wine. If you aren’t yet familiar with it or you are a beginner in the world of Linux, this article is for you.
In this beginner’s guide, I’ll show you what Wine is and how to use it to run Windows software on Linux. I have used Ubuntu here as Ubuntu is one of the best Linux distros for beginners, but any other Linux distribution will have more or less the same steps (except for the commands in Arch or Fedora-based distros).
Using Wine to run Windows programs in Linux
Wine stands for Wine Is Not an Emulator. And WINE is actually an acronym for that. And as previously stated, it’s not even a virtual machine.
Rather it is a compatibility layer for running Windows applications on UNIX-like, POSIX-compliant operating systems (e.g. Linux, Mac, BSD). While a virtual machine or emulator simulates internal Windows logic, Wine translates those Windows logic to native UNIX/POSIX-complaint logic.
In simple and non-technical words, Wine converts internal Windows commands to commands your Linux system can natively understand.
Installing Wine
There are various ways to install Wine on your system. Almost all the Linux distros come with Wine in their package repository. Most of the time the latest stable version of Wine is available via the package repository.
If you are using a 64-bit installation of Ubuntu, you will need to add 32-bit architecture support on your distro which will benefit you in installing specific software. If you don’t know whether you have a 32-bit installation or 64-bit, check this article on how to check if you have a 32-Bit or 64-Bit Computer.
Once confirmed, do this by executing the following command:
sudo dpkg --add-architecture i386In Ubuntu, you can install Wine by:
sudo apt update
sudo apt install wine
Get the latest WINE version (optional)
But in the case of Ubuntu 22.04 LTS, the available package in the repo is Wine v6.0.3, while the latest stable release is v7.0.1. In the case of software like Wine, which receives significant updates frequently, always try to remain in the latest stable release. To do this in Ubuntu, first, you need to add the 32-bit architecture with the above step. Then download and add the repository key:
sudo mkdir -pm755 /etc/apt/keyrings
sudo wget -O /etc/apt/keyrings/winehq-archive.key https://dl.winehq.org/wine-builds/winehq.key
In the next step, you need to download the Wine source file. For that, you need wget installed.
sudo apt install wgetAlso, you should know which version of Ubuntu is running on your system. In my case, I was running Ubuntu 22.04 Jammy Jellyfish.
To know your version, run this command in a terminal window:
lsb_release -csOnce you get your version name, replace this in place of jammy and execute the command below:
sudo wget -NP /etc/apt/sources.list.d/ https://dl.winehq.org/wine-builds/ubuntu/dists/jammy/winehq-jammy.sourcesNow update the package information.
sudo apt updateFinally, install the latest stable version of Wine with:
sudo apt install --install-recommends winehq-stableYou can use winehq-devel or winehq-staging for Development and Staging branch respectively.
Getting Started with Wine
Before we go on installing and running applications in Wine, we should have a clear idea about a few things and about how to configure Wine for usage:
WinePrefix
Windows applications need a C: drive. Wine uses a virtual C: drive for this purpose. The directory of this virtual C: drive is called wineprefix. First of all, you need to create a wineprefix. To do that, fire up a terminal and enter this command:
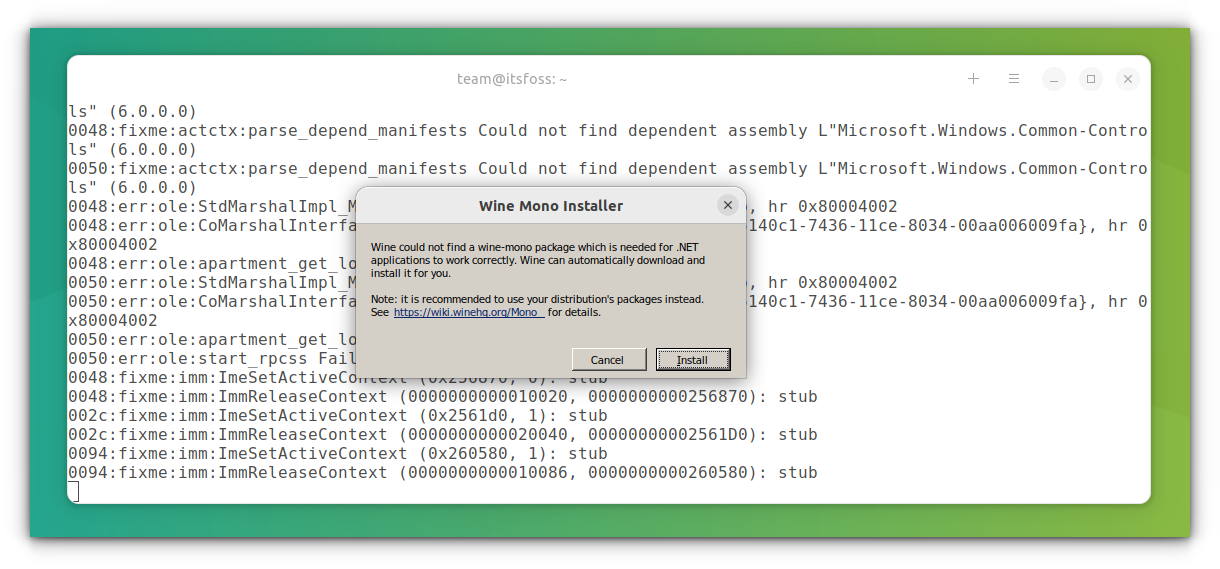
winecfgHere it prompts you to install the Wine Mono package needed for the .NET application to work properly. You can press the Install button to do this job.
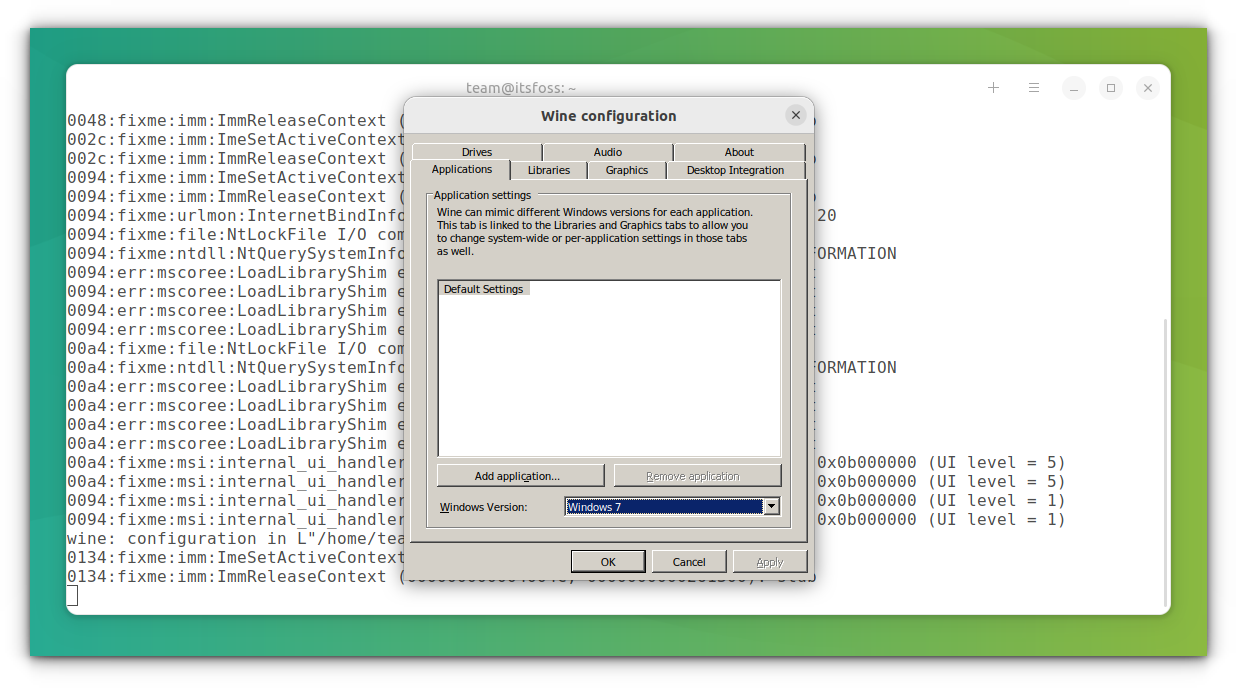
This will create a wineprefix and open the configuration window for Wine. You can change the configuration options or let it be as it is and close it.
Now, you can locate the virtual C: drive at
$HOME/.wine/c_drive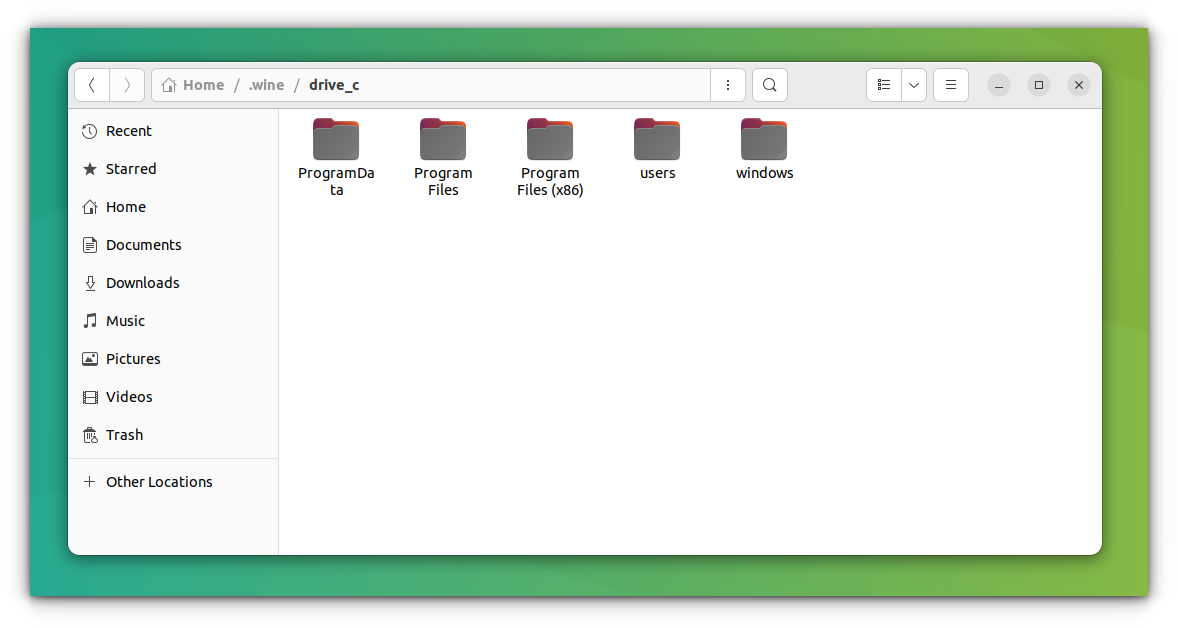
The general rule is to install each new application into a fresh wineprefix. You can create and maintain multiple wineprefix manually. But that task would seem rather tedious for beginners. So, we will skip that part for now. But, later I will show how to do that part with ease.
Which Windows applications are supported by Wine?
A large number of Windows applications are currently fully supported by Wine. They will run without any hassle.
However, new Windows applications are being developed every day. Many of them wouldn’t function as we want on Wine. But the development pace of Wine is also rapid, and support for new applications is being added all the time.
And there is a dedicated database for keeping track of just that.
Wine Application Database has almost 28,000+ applications rated with different statuses depending upon how well those applications run in Wine. If you want to quickly check the rating of the application you want to use in Wine, you can take a look there. Here is the meaning of those ratings:
- Platinum: These applications install and run flawlessly in out-of-the-box Wine.
- Gold: These applications work flawlessly with some special configurations.
- Silver: Applications with minor issues are tagged as Silver.
- Bronze: The Bronze ones have major issues that seriously affect usage.
- Garbage: These simply won’t run on Wine.
Reviews, Installation Procedure, which Wine version it was tested against and various useful data are also available for each application here.
Of course, Wine Application Database is mostly user-generated data, so you are always welcome to try running an application with a different version of Wine and share your result with the rest of the community.
Finding an Application in Wine Application Database
Let’s see how we can find an application in Wine Application Database.
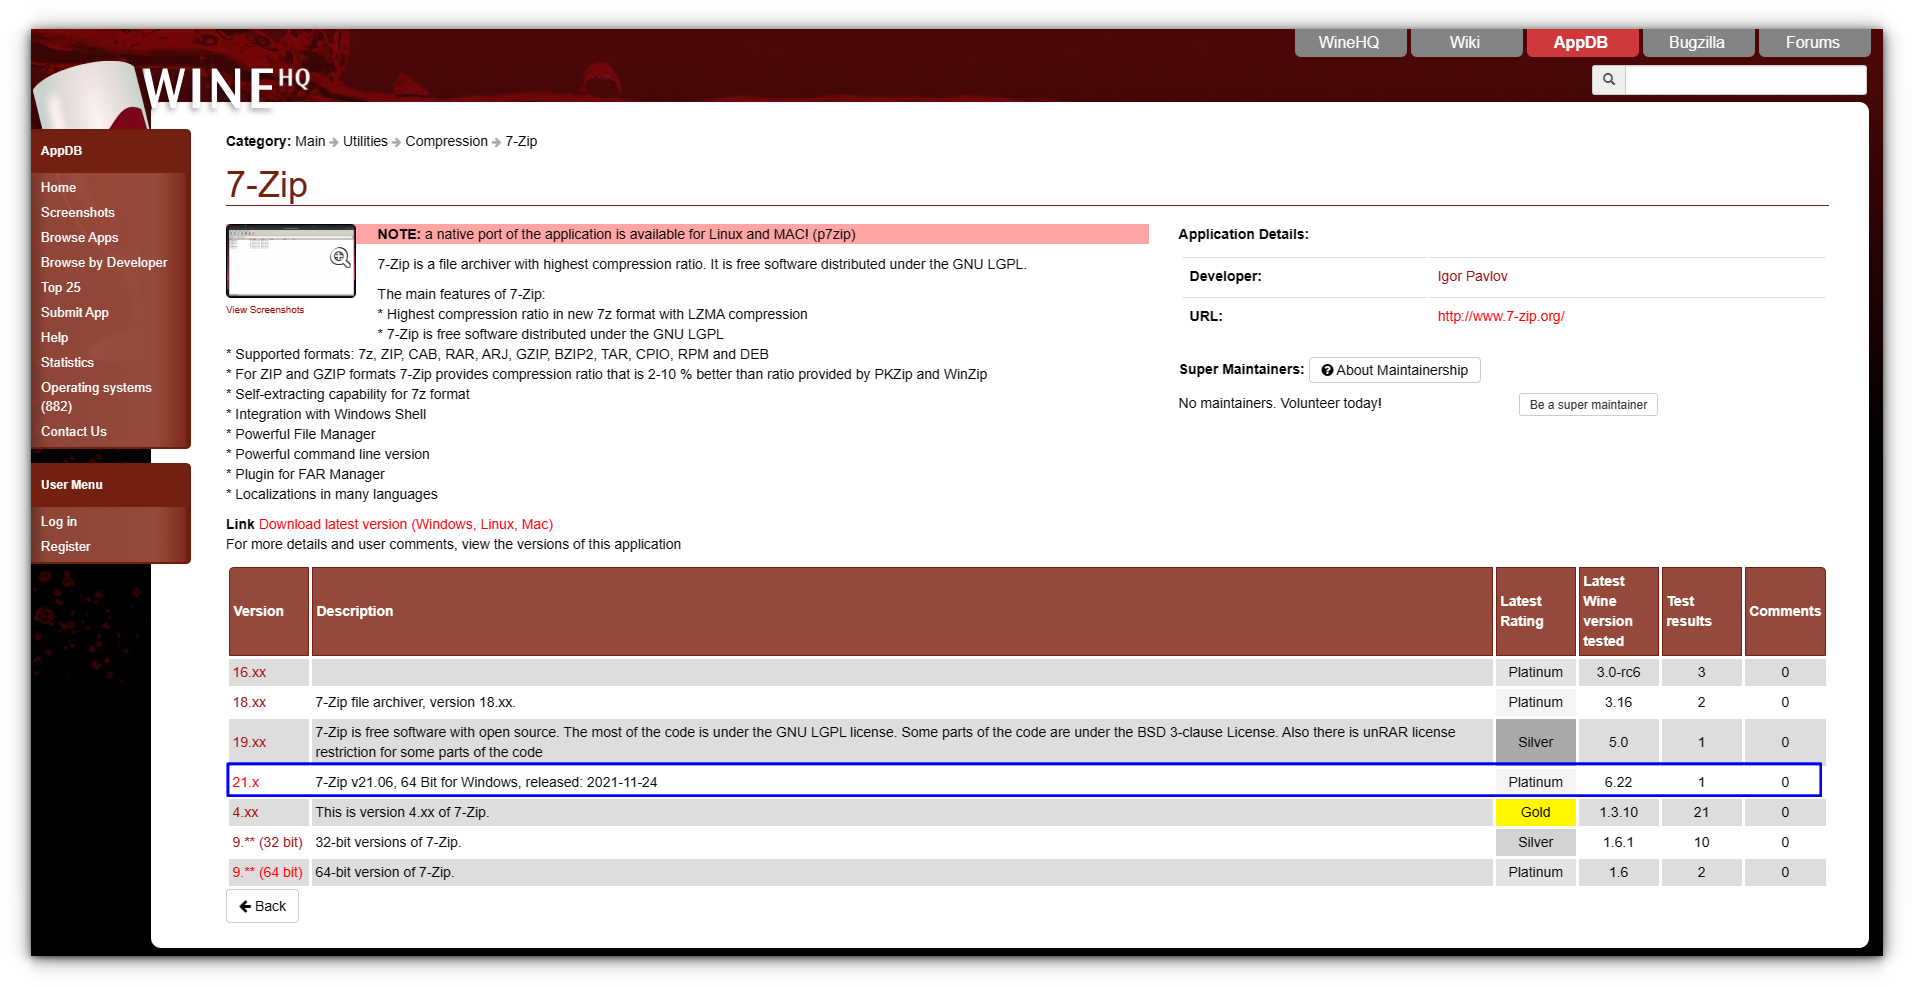
Go to Wine Application Database. Click Browse Apps from the left sidebar.
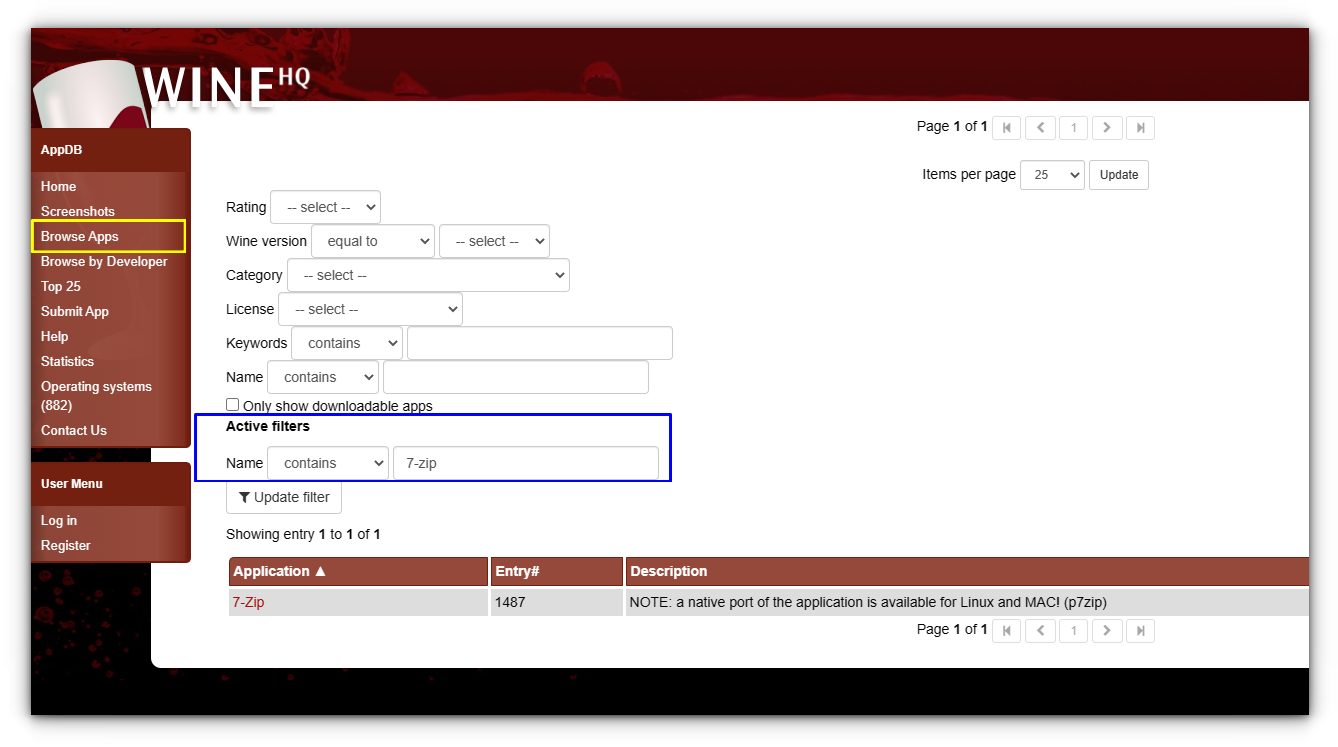
Click on the link to the application from the search result. You’ll see a description of the application. There will be a list of various versions with their compatibility rating with a specific Wine version.
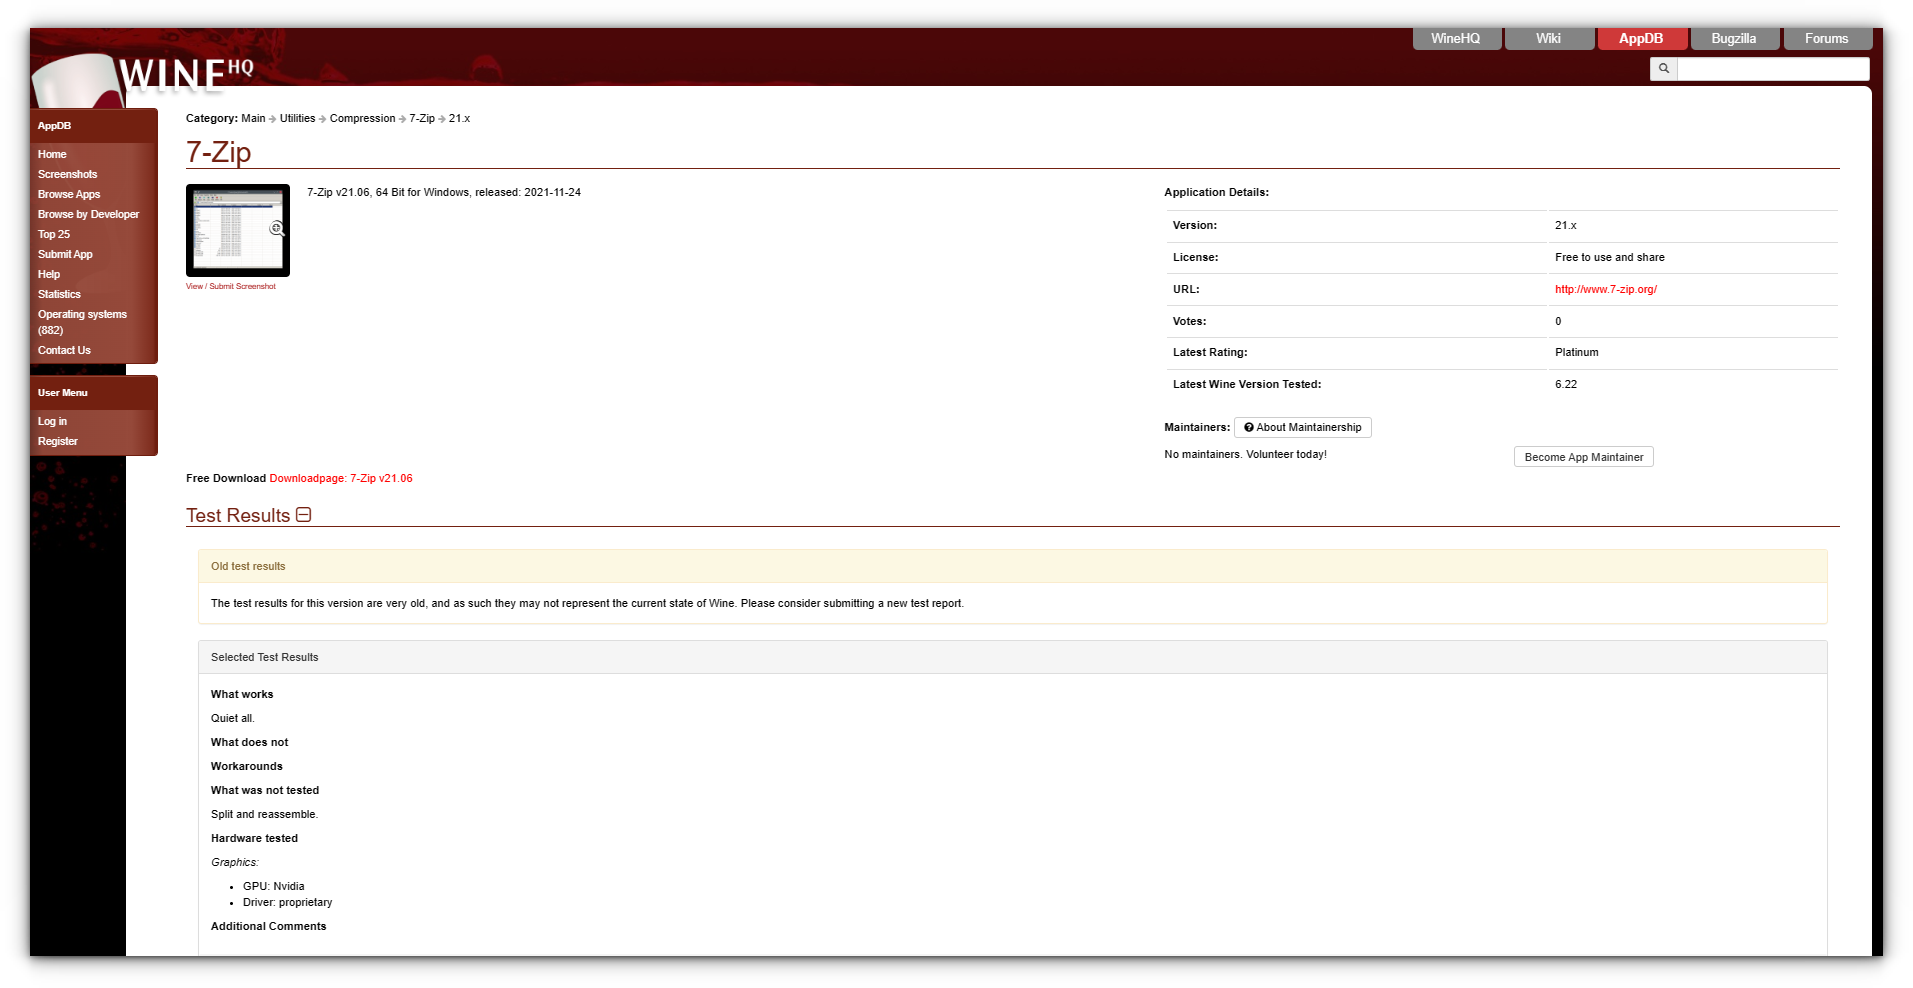
Let’s click on the latest version link. This is the main page you need to check. There will be detailed information about that specific version.
Installing an Application with Wine
Installing a supported application in Wine is generally as easy as double-clicking on the installation file. However, you will now see a step-by-step guide for installing 7-zip on Wine.
First of all, check for 7-zip rating on Wine Application Database. It has a Platinum rating, so we are good to go. Open Wine configuration ( winecfg ) and set the Windows Version to Windows 7 (Shown in the above screenshot).
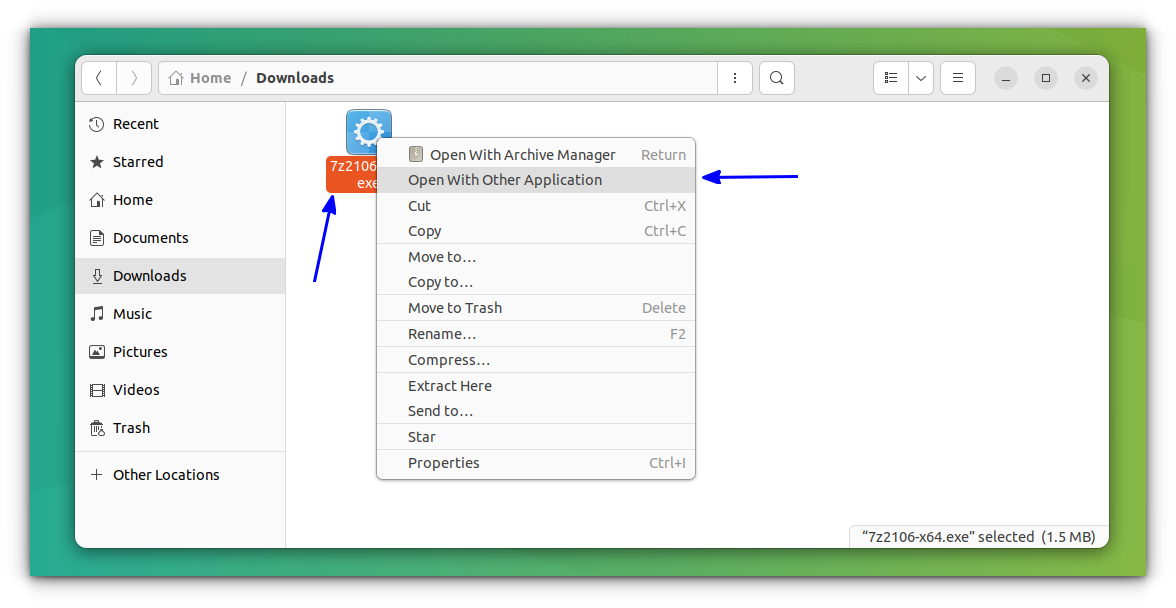
Right-click on the 7-zip installation file and select the Open With Other Application option.
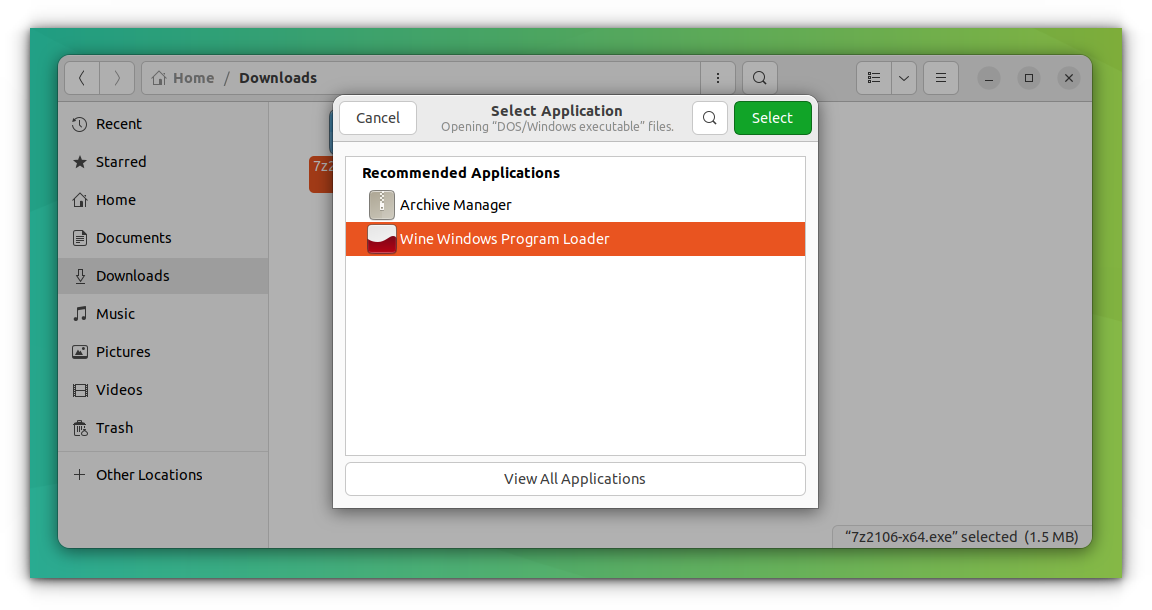
After that, select Wine Windows Program Loader.
See that destination folder path? The 7-zip installation has recognized the virtual C: drive from wineprefix.
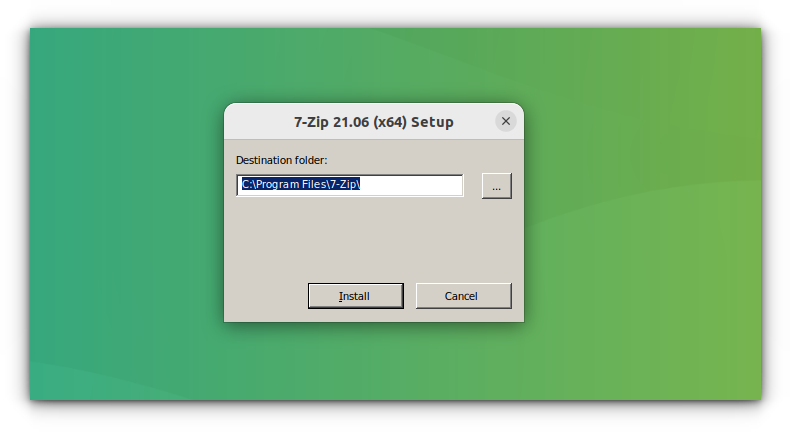
Finish the installation and you can now open the 7-zip application from the Ubuntu Activities overview.
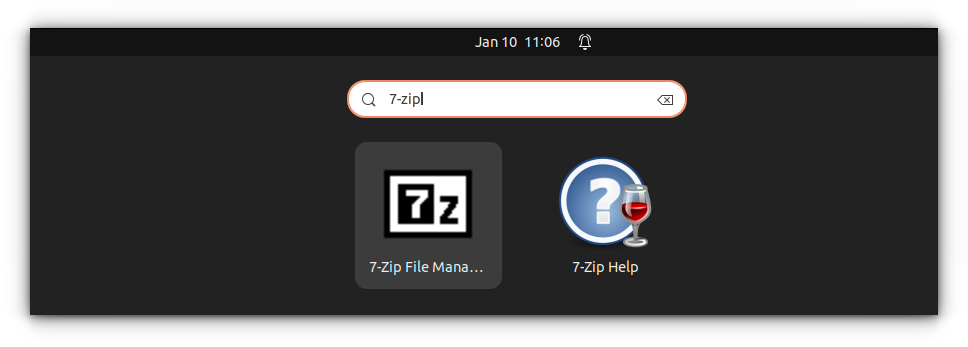
All you have to do is click on the icon. If you want to access your files on Linux, they are generally located in Z: Drive.
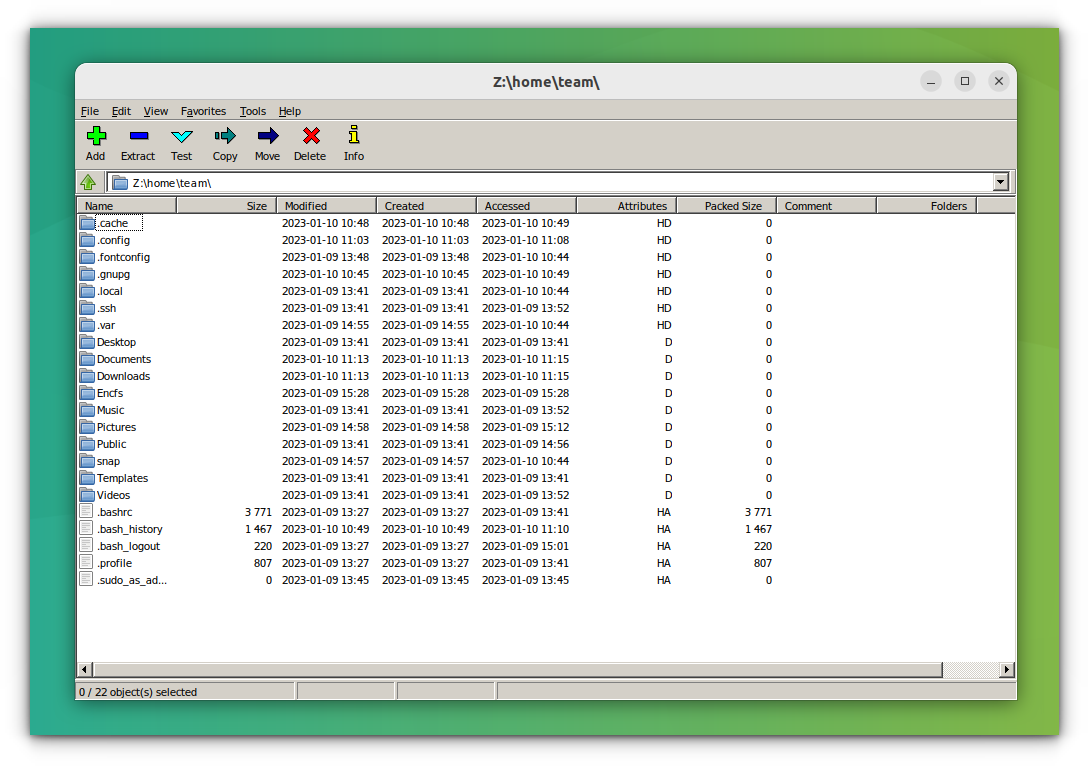
You can use the 7-zip just as you would use it on Windows – for extracting and creating archives and such.
Uninstalling an Application with Wine
As said above, installing an application is easier with Wine. To uninstall an application, you have a Wine Uninstaller tool. You can access this tool by entering the terminal:
wine uninstallerThis will open the uninstaller window. Here, the list of installed applications will be present. You need to select the application, 7-zip in this case, and press Modify/Remove button as shown below:
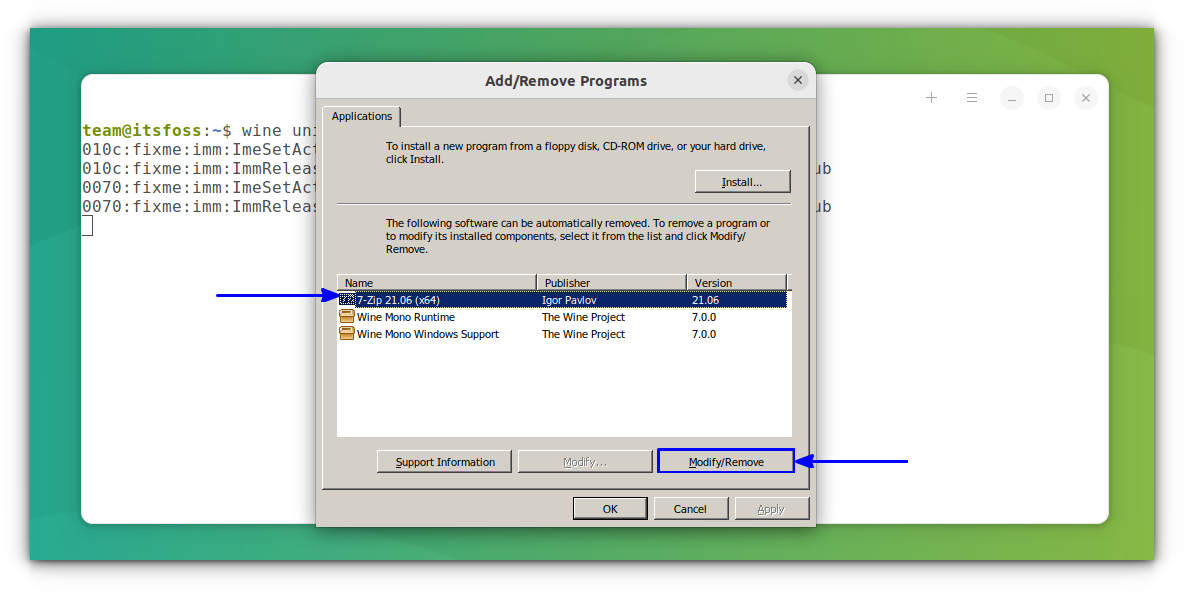
This will initiate the uninstall process and can be completed easily on an application basis.
Let’s make things (a lot) Easier
You might have noticed that, in Wine Application Database, a specific Wine version is mentioned with every version of the application reviews.
It is because of the rapid development rate of Wine. Though an application runs with the current version of Wine, it might not run with a future version, because of the changes made.
Also, I’ve mentioned installing each application in its own fresh wineprefix. So, an application has no chance of interfering with another. And doing all these manually, usually from the terminal, is time-consuming, tiresome, and sometimes confusing.
PlayOnLinux is here to rescue you. It provides a nice interface for doing all these things easily. For installing PlayOnLinux on Ubuntu, simply run this command:
sudo apt install playonlinux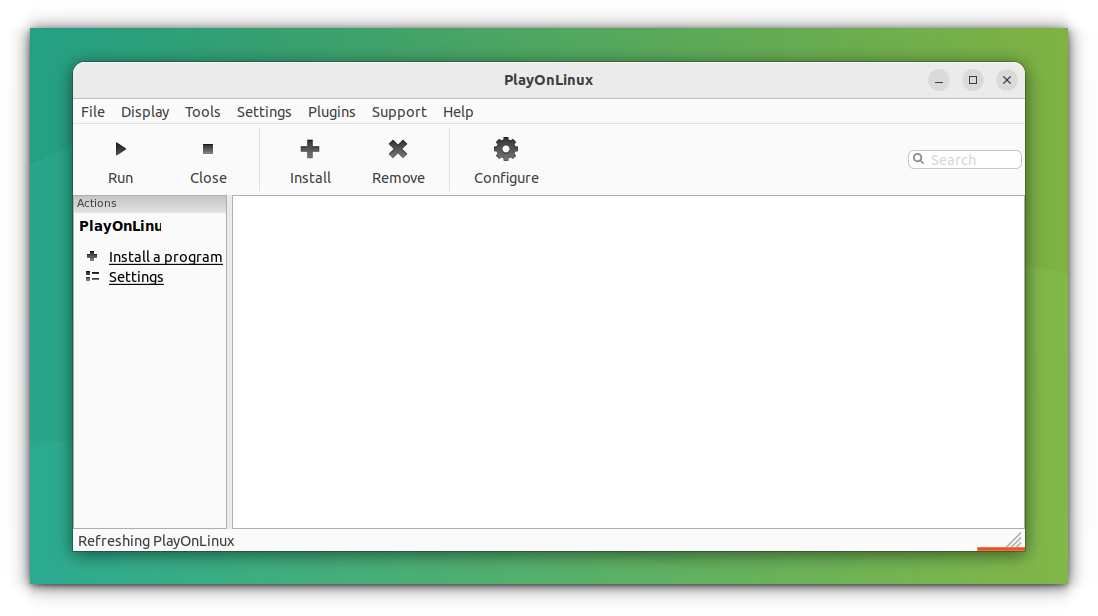
You can easily perform every task related to Wine with PlayOnLinux from a beautiful and intuitive graphical interface:
- Installing & Uninstalling applications.
- Creating, Updating & Removing wineprefixes.
- Maintain Wine of different architecture and versions.
- Run & Create shortcuts for installed applications.
- And so on…
But still, you will need to check Wine Application Database for reviews, installation procedures, and such.
Advantages of using Wine
When it comes to running Windows applications on Linux systems, Wine provides many advantages over using emulators or virtual machines.
- Performance: Wine is immune to the performance loss that otherwise occurs while emulating.
- Native Experience: There is no need to open Wine before running a Windows application. Exactly how Wine works will be clear from this quote from the official site,
Wine can be thought of as a Windows emulator in much the same way that Windows Vista can be thought of as a Windows XP emulator: both allow you to run the same applications by translating system calls in much the same way. Setting Wine to mimic Windows XP is not much different from setting Vista to launch an application in XP compatibility mode.
Wine Derivatives
There are quite a number of projects for running Windows applications on other platforms, based on Wine:
- CrossOver: CrossOver is developed by the company named CodeWeavers. It is directly based on Wine with a few tweaks and proprietary add-ons. In fact, CodeWeavers employs a large portion of Wine developers. Unlike the rapid releases of Wine, CrossOver releases are more stable. The one major downside is that Crossover is not free.
- PlayOnLinux: PlayOnLinux is completely based on Wine. And provides an easier route for installing and managing applications with Wine. PlayOnLinux is free. It is also available for Mac as PlayOnMac.
- Bottles: Bottles app got huge popularity recently, because of its ease of use and various other life-saving features. It is available as a flatpak to install on all Linux distributions. You can run Applications and Games inside bottles.
- ReactOS: ReactOS is an entirely different open-source operating system for running Windows applications. It reuses a considerable amount of codes from Wine. However, this is a project under development for more than a decade and I won’t recommend it.

Additional Tips on using Wine
Winetricks
This is another important part of using Wine. Winetricks is a helper script to download and install various redistributable runtime libraries needed to run some applications in Wine. These may include replacements for components of Wine using closed-source libraries. Winetricks comes with Wine installation on Ubuntu through the package manager.
For starting winetricks, run this command:
winetricksIf you have installed Wine from Wine official repository, you may need to install winetricks separately.
To do this, open a terminal and enter the following commands:
cd "${HOME}/Downloads"
wget  https://raw.githubusercontent.com/Winetricks/winetricks/master/src/winetricks
chmod +x winetricks
Now open Winetricks with:
./winetricks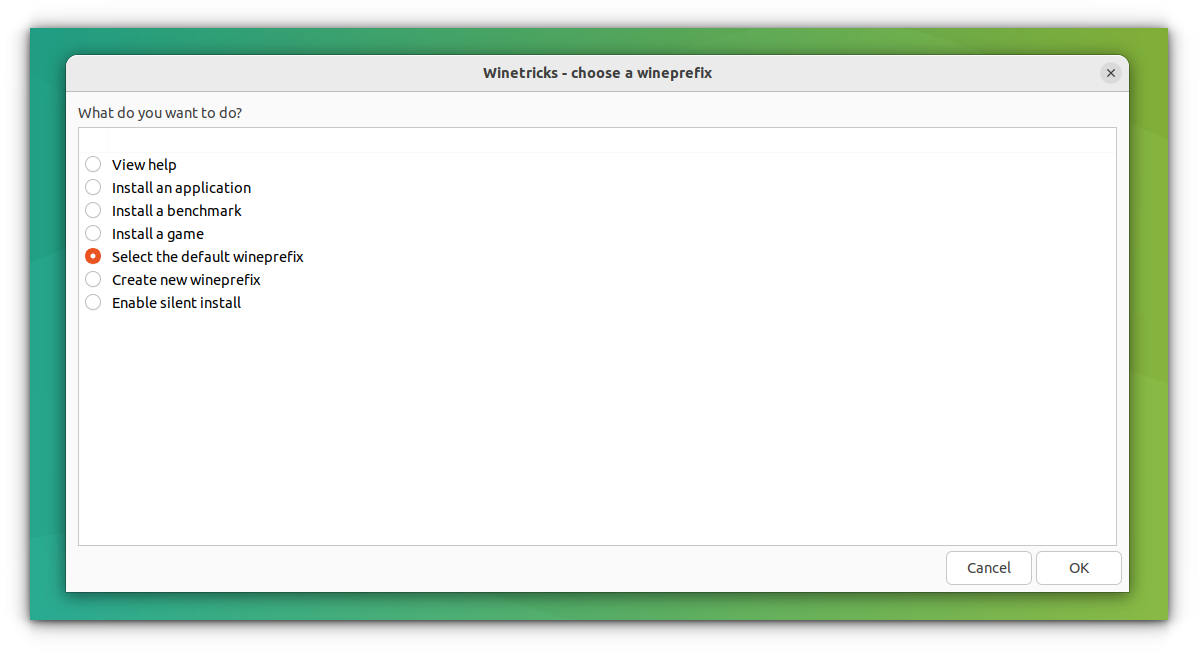
There are many options for helping you with various tasks.
Installing an Application with Winetricks
If you Install an app from winetricks, it will be installed in a separate wineprefix. Let’s install VLC:
So, select install an app from the options and click OK:
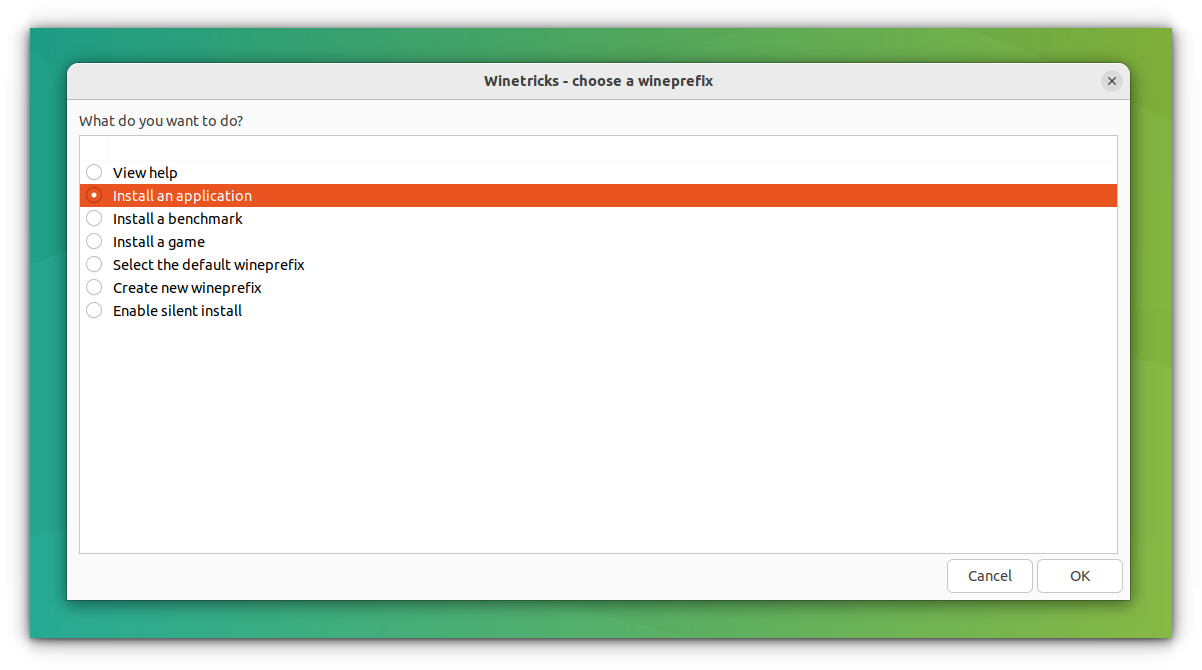
Now select VLC from this list:
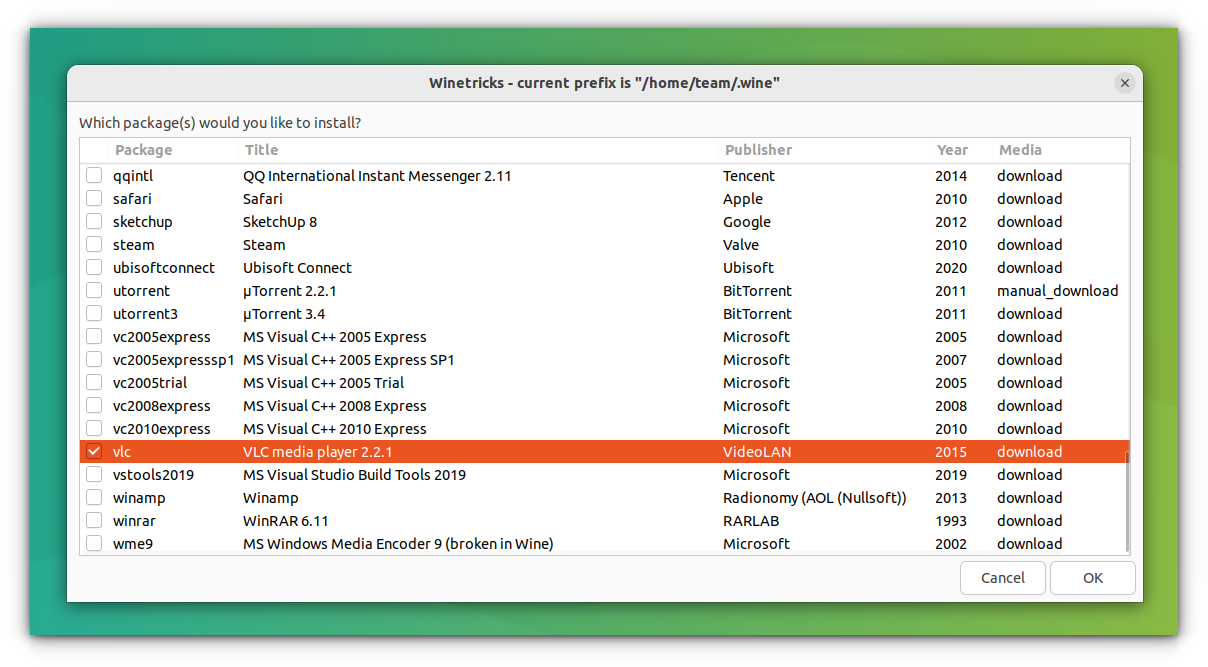
It will then begin to download the VLC installation files. And then guide you through the rest of the process. It’s pretty simple.
Install Windows DLL or components and others
You can select a wineprefix from winetricks and install various libraries and components required by the application you want to run and also perform other operations.
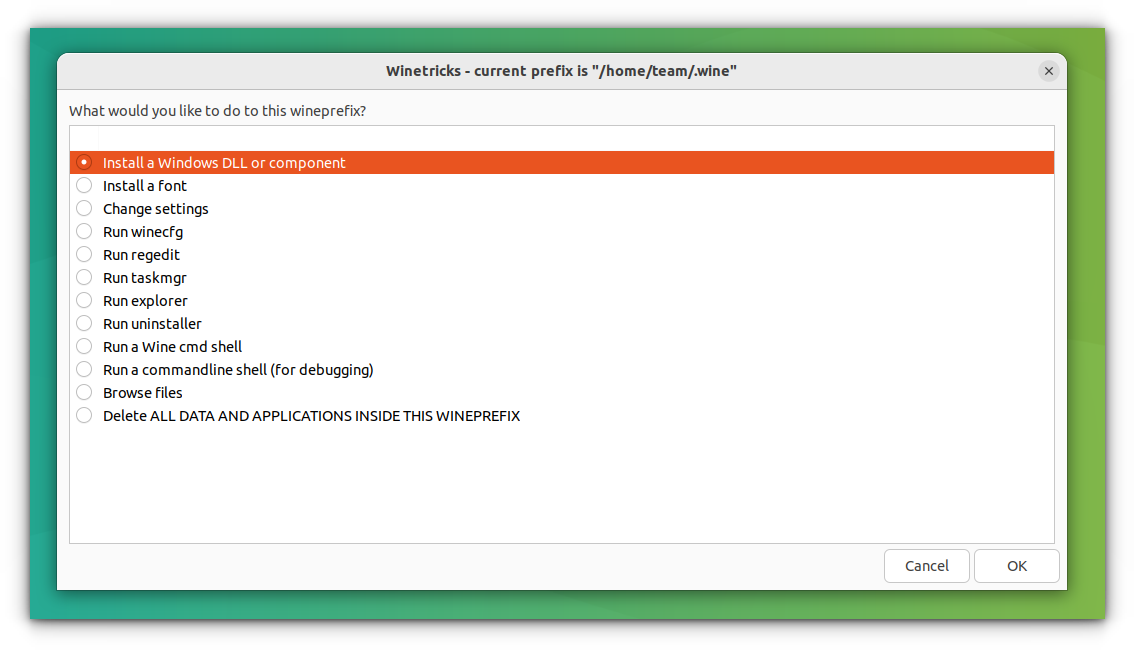
And then select the required DLL or component to install:
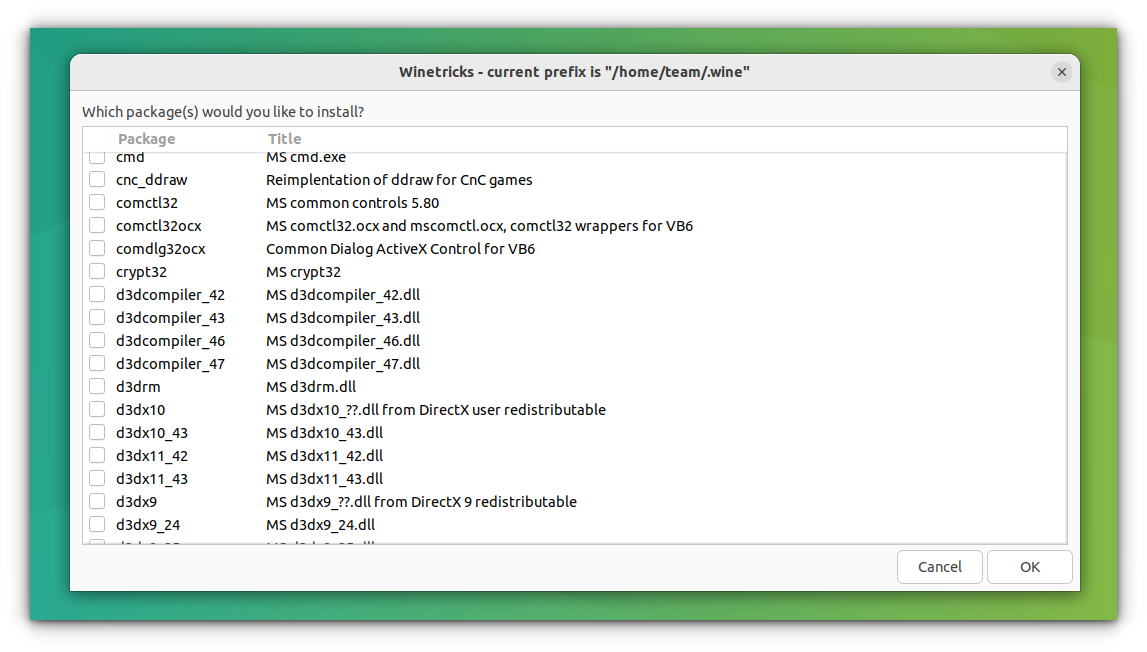
For more information, you can check Wine FAQ and Documentation.
I hope you find this complete beginner’s guide to using Wine in Linux helpful. Now you can run Windows programs in Linux without installing a virtual machine or dual booting.
Let us know if you have any questions or opinions in the comment section below.


