

Dual booting Linux with Windows is one of the most convenient ways of enjoying the two operating systems on the same computer.
You have both OS installed on the disk, on real hardware and when you power on your system, you can choose which operating system to use.
In an earlier tutorial, I showed the steps to dual boot Ubuntu with Windows 7 which comes with an MBR partition. The steps are almost the same for the newer systems that come preinstalled with Windows 10.
In this tutorial, I’ll show you how to install Ubuntu with Windows 10 already installed on the system.
The steps mentioned here apply to other Ubuntu versions such as Lubuntu, Kubuntu, Xubuntu and Ubuntu-based Linux distributions such as Linux Mint, elementary OS, etc.
Dual boot Ubuntu Linux with Windows 10
Compatibility checks
This tutorial is suitable for systems that come with Windows 10 pre-installed with UEFI secure boot and GPT partitioning system. Please check whether your system uses GPT or MBR.
Make sure your system uses UEFI: This tutorial is only applicable for systems with UEFI boot. If you have bought your system in the last 5-6 years, chances are that you should already have a UEFI system on GPT partition. However, there is no harm in verifying that your system uses UEFI. If your system uses legacy BIOS with MBR partitioning system, please follow this dual boot tutorial.
Bitlocker encryption process is different: Newer systems with Windows 10 Pro have their disk encrypted with Bitlocker. If you have such a system, please follow this tutorial to dual boot with Bitclocker encryption.
 Abhishek Prakash
System with both SSD and HDD: If you have a system with both SSD and HDD, i.e. dual disk system, the process is pretty much the same. However, you’ll be a lot better following this dedicated tutorial on dual booting dual disk system.
Abhishek Prakash
Prerequisites: What do you need?
You’ll need the following things to easily and safely install Linux alongside Windows:
- A computer that comes preinstalled with Windows 10.
- A USB key (pen drive or USB drive) of at least 4 GB in size and no data on it.
- Internet connection (for downloading Ubuntu ISO image and live USB creating tool). You can do this on any system, not necessarily on the system you are dual booting.
- Optional: External USB disk for making back up of your existing data.
- Optional: Windows recovery or bootable disk (if you encounter any major boot issues, it could be fixed).
Let’s see the steps of installing Ubuntu alongside Windows 10. I have made a video of the entire process. You may watch that as well.
Step 1: Make a backup of your Windows system [optional]
It is always nice to have a backup of your data, just in case you mess up with the system while dealing with disk partitions.
I advise copying all the essential data you cannot afford to lose on an external USB disk. You can use an external HDD (slower but cheaper) or SSD (faster but expensive) and copy the important files and folders.
Step 2: Download Ubuntu (or whichever Linux distribution you are using)
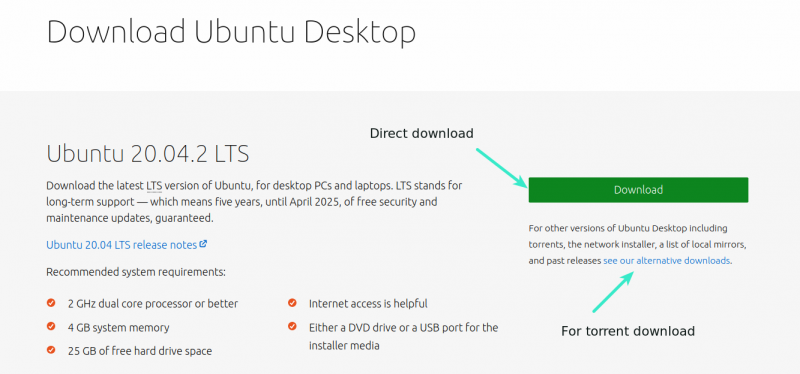
Head over to Ubuntu’s website and download the ISO file. The file should be around 2.5 GB in size. If you need to download Ubuntu via torrents, you can click the ‘alternative downloads.’
Step 3: Create a live USB/disk of Ubuntu
I presume that you are using Windows to create the live USB. Several free applications allow you to create a live Ubuntu USB. You can use any of these tools. Since I cannot show all of them, I’ll go with Rufus.
Download Rufus for free from its website. It will download a .exe file.
Plug in your USB. This device will be formatted so make sure you don’t have any important data on this USB disk.
Run the Rufus tool you just downloaded. It automatically identifies the plugged-in USB but double-check it anyway. Now, browse to the location of the downloaded ISO image and ensure that it uses GPT partitioning scheme and UEFI target system.
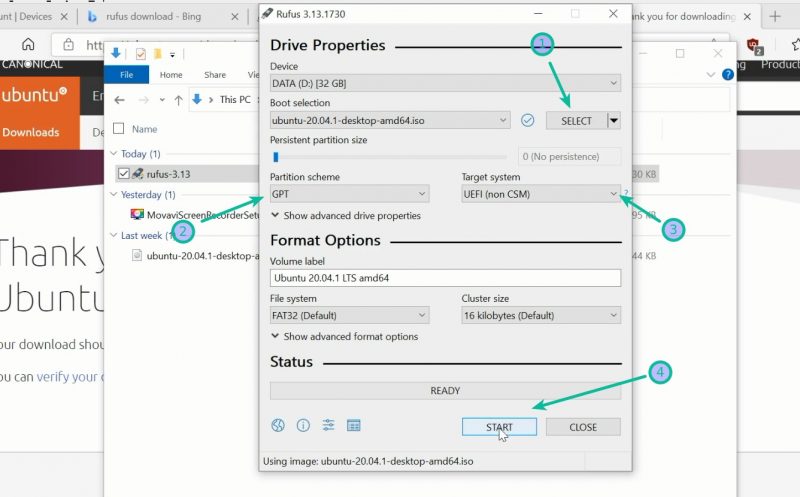
Hit the start button and wait for the process to complete. Your live Linux USB is ready.
Step 4: Make some free space on your disk for Ubuntu installation
In many systems, while installing Ubuntu, it gives the option to make a disk partition for Ubuntu. However, that is not a surety. This is why making the required free space on the disk would be better before starting the installation procedure.
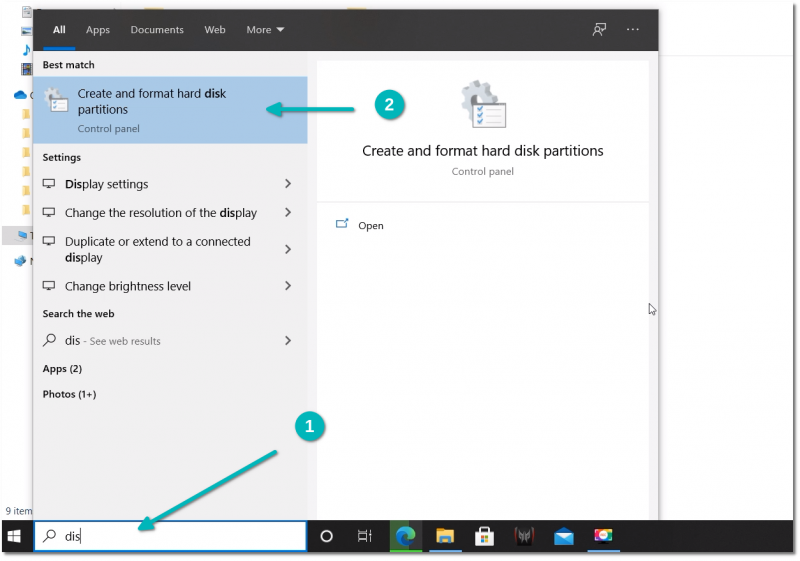
In the Windows menu, search for ‘disk partitions’ and go to ‘Create and format hard disk partitions.’
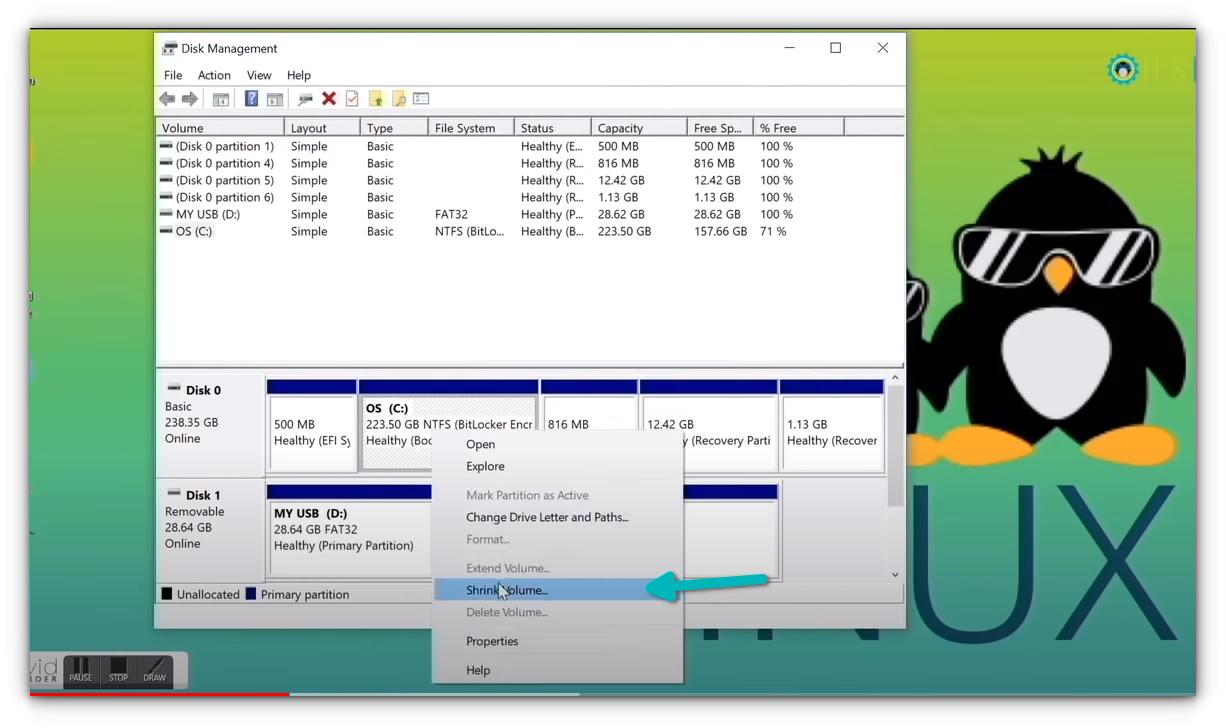
In the Disk Management tool, right-click on the drive which you want to partition and select shrink volume.
If you have just one partition like this, you need to make some free space out of it for Linux. Use any of them except C drive if you have several partitions of considerable size because it may erase the data.
The 256 GB in my system already had several partitions from the manufacturer but mainly for backup and other purposes. The primary partition was the C drive, around 220 GB, where Windows 10 is installed. In my case, I shrank the C drive to make some free space for Linux installation.
How much space do you need for Linux in dual boot?
This depends on how much total disk space you have. You may install Ubuntu on 15 or 20 GB but you’ll soon start running out of disk space. These days, you should have at least 120 GB of disk. In that case, go for 30-40 GB of disk for Linux. If you have 250 GB disk, allocate 60-80 GB or even more. If you have more disk space, allocate even more free space, if you want.
What if you have D, E or F drives?
This is a common confusion for many people as they think Ubuntu can only be installed on the C drive. That’s not true. I had only one C drive, so I shrank it. If you have D, E or F drive, you may shrink one of those drives. You may also choose to delete the D, E or F drive. NEVER DELETE C DRIVE.
Step 5: Boot from live Ubuntu USB
You created a live Ubuntu USB in step 3. Plug it into the system. Before you go and boot from the live USB, let’s have a quick word about the infamous secure boot.
Do I need to disable the secure boot for installing Linux?
6-8 years back, the UEFI secure boot was not well-supported by Linux; hence, you had to disable secure boot before installing Linux. Thankfully, Ubuntu and many other Linux distributions currently support secure boot very well. Usually, you should not need to do anything about it. However, if your system doesn’t allow booting from live USB or if you see any other related issue, you may disable the secure boot on Windows.
Alright! Let’s see how to boot from the USB. You can go to the boot settings by pressing F2/F10 or F12 at the system start time and selecting to boot from the USB. However, some people find it difficult.
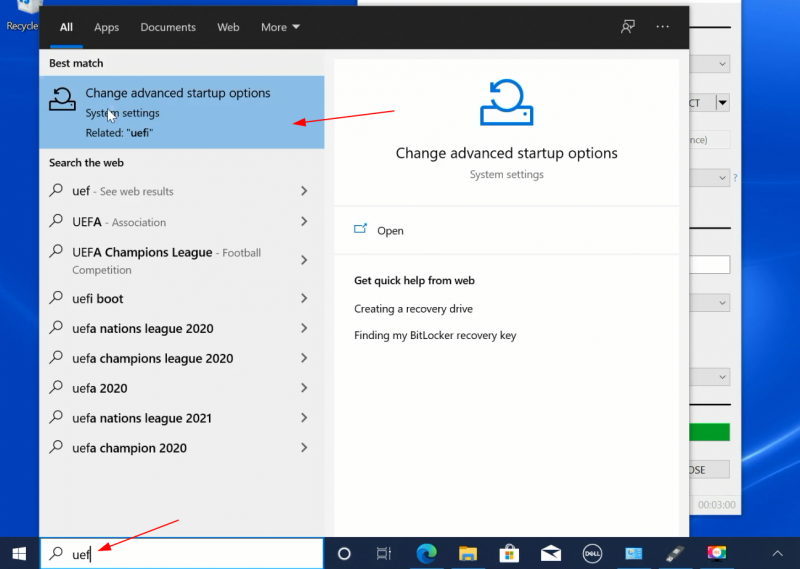
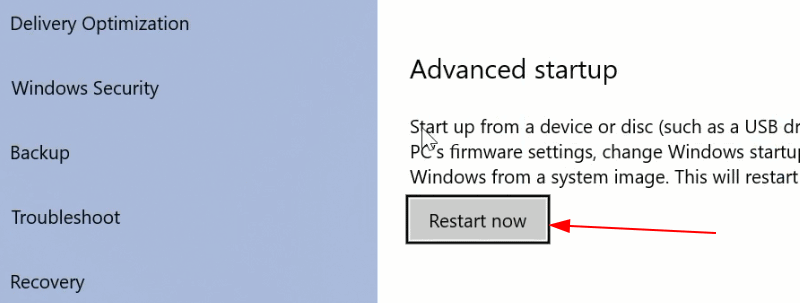
The longer but an easier step is to access the UEFI boot settings from within Windows. In the Windows menu, search for UEFI and then click on ‘Change advanced startup options’:
Go to the Advanced startup option and click on Restart now button.
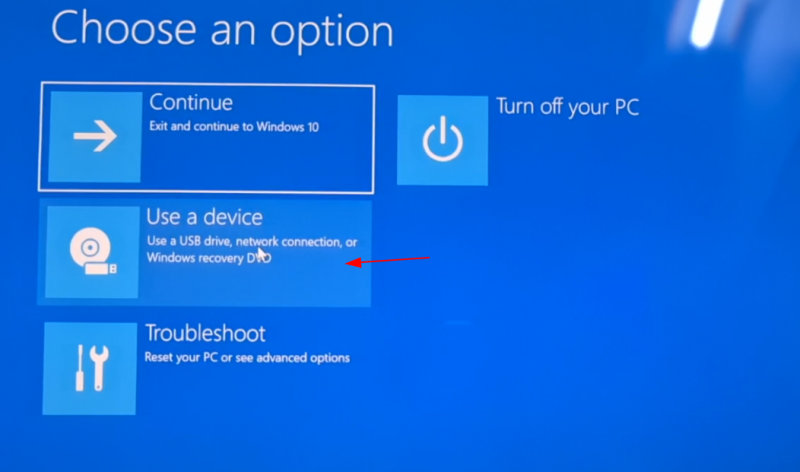
On the next screen, click on ‘Use a device’:
Recognize the USB disk with its name and size. It may also be displayed as EFI USB Device.
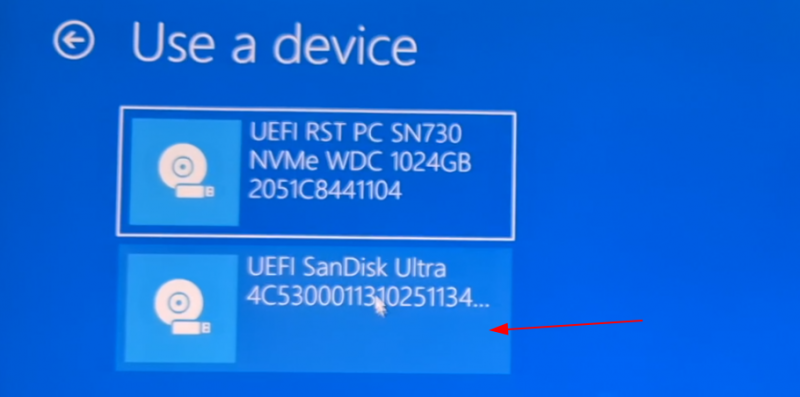
Now it will power off your system and reboot into the disk you chose which should be the live USB disk. You should see a screen like this after a few seconds:
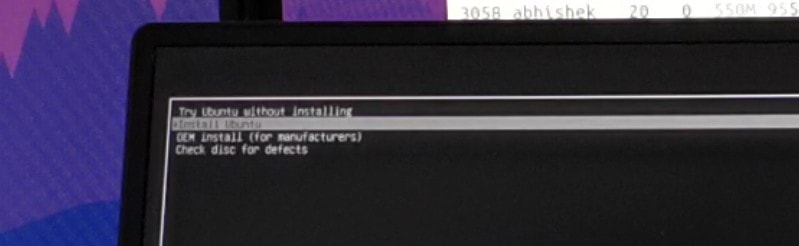
The ‘Try Ubuntu without installing’ option allows you to experience Ubuntu from the live disk. The option to install Ubuntu can be found on the desktop.
The “Install Ubuntu” option will start the Ubuntu installation immediately.
You can opt for either option based on your preference.
Step 6: Installing Ubuntu along with Windows 10
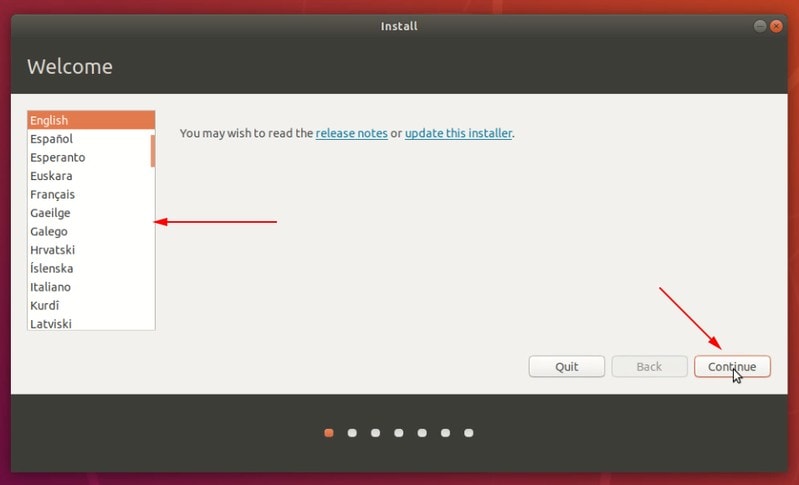
Start the installation procedure. The first few steps are simple. You choose the language and keyboard layout.
On the next screen, choose Normal installation. No need to download updates or install third-party software just yet. You may do it after the installation completes.
Hit continue. It may take some time to go to the next step.
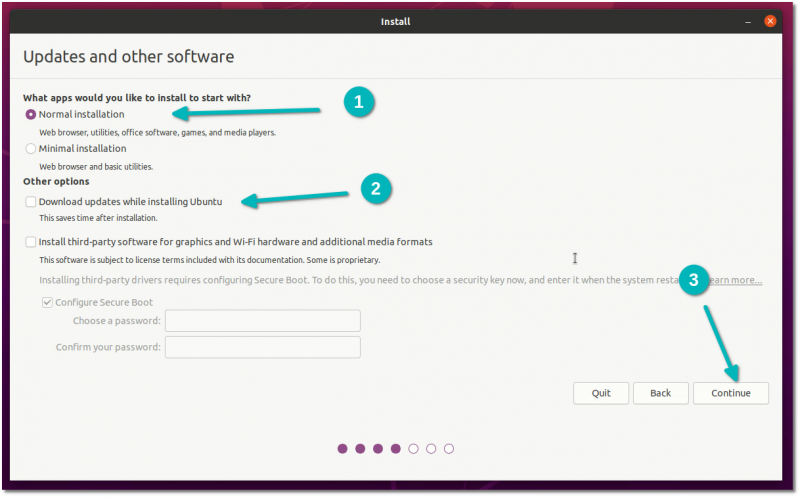
Note: Some people try to download updates and install media codes while installing. In my experience, it sometimes creates issues during installation and may also cause the installation to fail. For this reason, I advise against them.
Important: Installation takes two approaches based on what you see on the next screen
Since this is a detailed tutorial, I’ll cover both aspects.
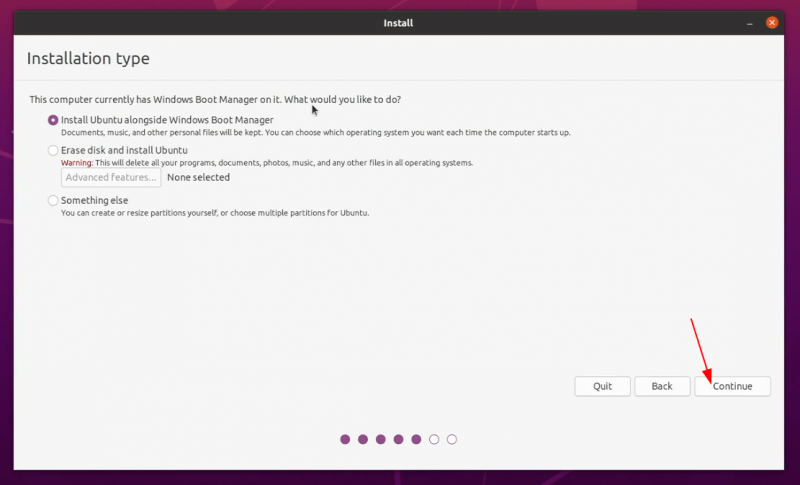
Approach 1: You see the “Install Ubuntu alongside Windows Boot Manager”
If you see the “Install Ubuntu alongside Windows Boot Manager” on the Installation type screen, you are in luck. You can select this method and hit continue.
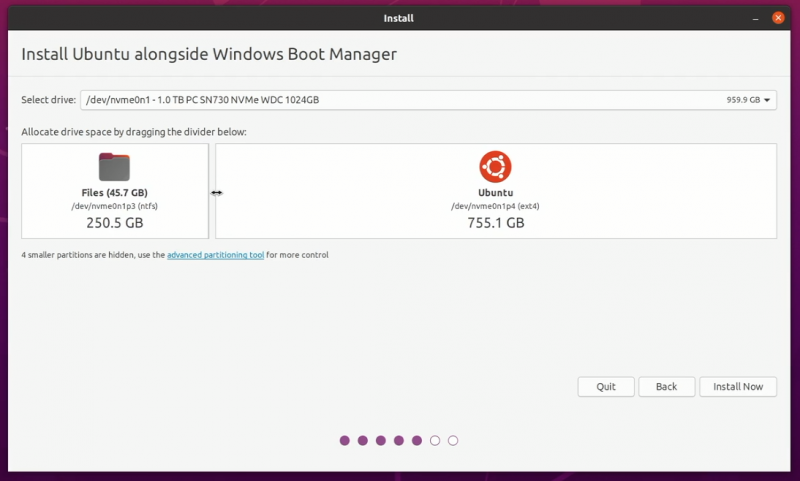
The next screen will give you the option to create a partition for Ubuntu by dragging the divider. You can allocate appropriate disk space to Linux here. Ubuntu will create one partition of the allocated disk space and it will have root with home and a swapfile of 2 GB in size under root itself.
Approach 2: You don’t see ‘Install Ubuntu alongside Windows Boot Manager’ option or it is greyed out
But if you are one of the unlucky ones who don’t see this option, no need to worry. Things are not that bad for you. You can still install Ubuntu with Windows.
On the Installation type screen, go with Something Else.
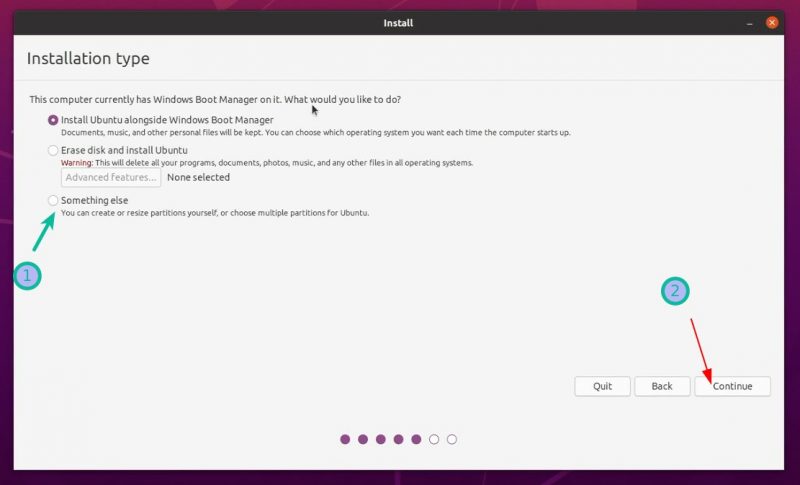
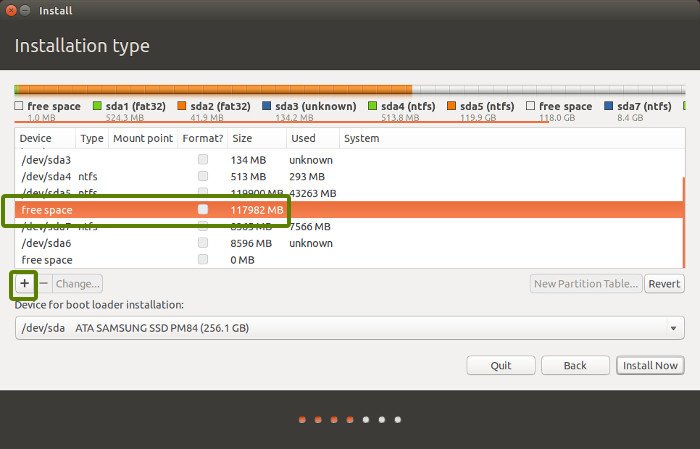
It will take you to the partitioning screen. Remember you had created some free space beforehand?
You may allocate the entire free space to root (swapfile and home will be created automatically under root) or separate root, swap and home partitioning. Both methods are acceptable.
I show the steps for creating root, swap and home partitions separately. But feel free to use a single partition for all of them.
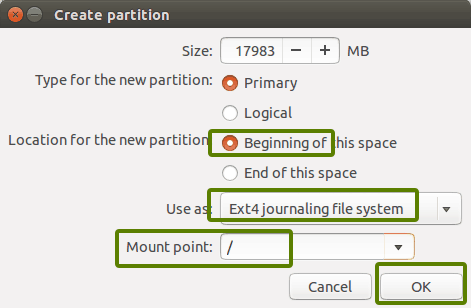
Select the free space and click on the + sign.
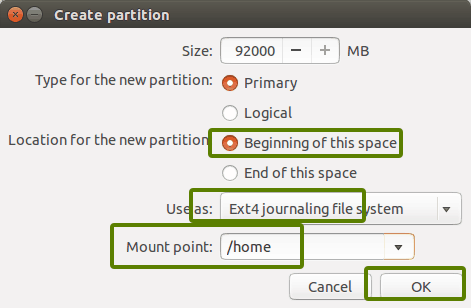
It will provide you with the option to create a Linux partition. You are creating the Root partition. Anything above 25 GB is more than sufficient for it. Choose the size, select Ext 4 as the file type and / (means root) as the mount point.
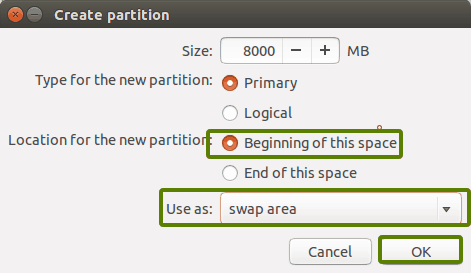
Clicking on OK in the previous step will bring you to the partition screen. Next, create a swap. Like previously, click on the + sign again. This time, use the file type as the Swap area.
Ideal swap size in Linux is debatable. If you have 2 GB or less RAM, use swap double the size of RAM. If you have 3-6 GB of RAM, use a swap of the same size as RAM. If you have 8 GB or more RAM, you may use swap half the size of RAM (unless you have plenty of disk space, and you want to use hibernation and in that case, use a swap of at least the same size as RAM).
If you feel like you have less swap on your system, don’t worry. You can easily create swapfile and add more swap space to your systems.
Similarly, create a Home partition. Allocate it maximum space (in fact allocate it the rest of the free space) because this is where you’ll save music, pictures and downloaded files.
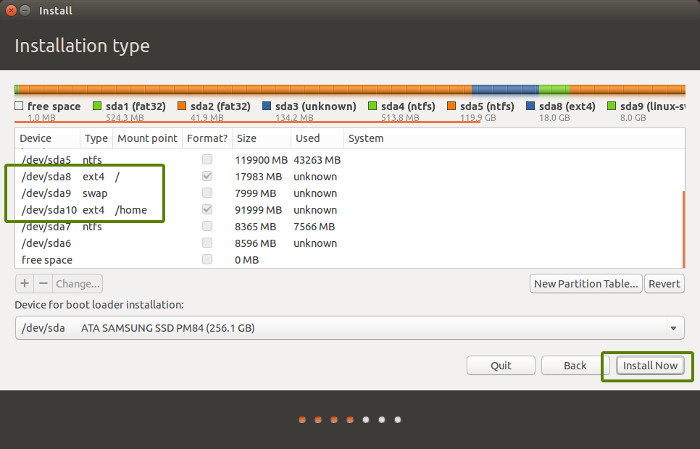
Once you are ready with Root, Swap and Home, click on Install Now:
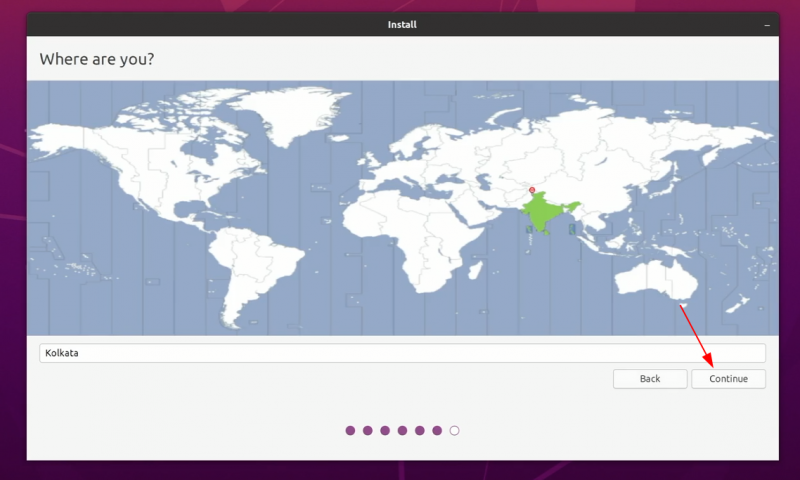
Well, you have almost won the battle. You can smell victory now. Select a timezone when asked.
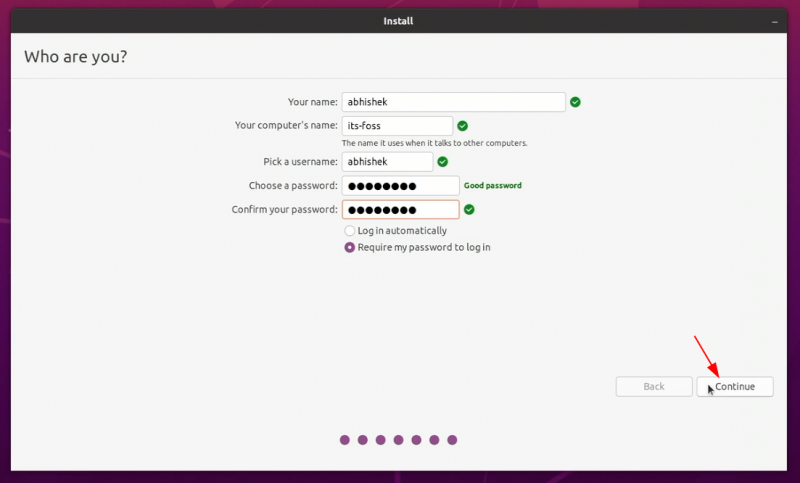
Next, you’ll be asked to enter a username, hostname (computer’s name) and password.
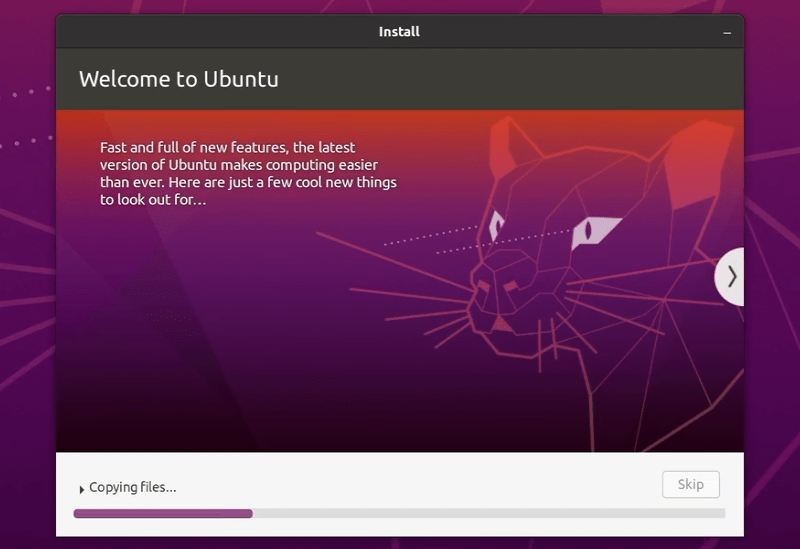
Now it’s just a matter of waiting. It should take 8-10 minutes to complete the installation.
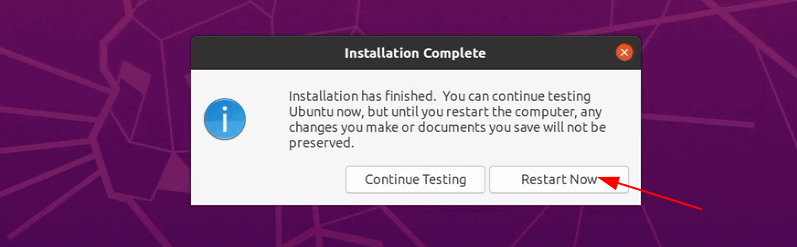
Once the installation finishes, restart the system.
You’ll be asked to remove the USB disk. You can remove the disk at this stage without worrying. The system reboots after this.

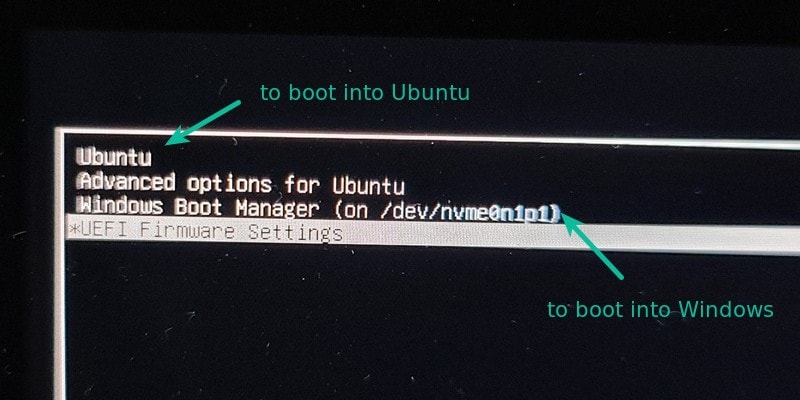
If everything goes smoothly, you should see the grub screen once the system powers on. Here, you can choose Ubuntu to boot into Ubuntu and Windows boot manager to boot into Windows. Pretty cool, right?
Dual boot did not succeed? Here are some troubleshooting tips
Life is not even for everyone. For some, the dual boot might not succeed just yet. However, instead of giving up, you may follow a couple of tips and retry the installation procedure.
Try changing the USB port
This may sound ridiculous but sometimes some USB ports cause issue with booting the USB or installing Linux. Changing the USB port could be a trick.
Try not using internet while installing Linux
I have experienced that sometimes Linux installation throws error if it is connected to the internet. If you encountered a “‘grub-efi-amd64-signed’ package failed to install into /target” error, please try installing Ubuntu without internet.
Disable secure boot and/or fast boot
In some rare cases, secure boot would not allow you to boot from live USB or install Linux. Disable secure boot. You may also disable fast boot in some cases.
Dual boot finished but you don’t see the grub screen to boot into Ubuntu
Please check your boot order in the UEFI settings. Do you see Ubuntu/UEFI below Windows Boot Manager? If yes, move it up the order. If you don’t see grub at all, you may carefully try this or this tutorial.
Grub rescue error or no bootable device found after dual booting
Use this tutorial for no bootable device found error. And this one is for grub rescue error.
Additional Tips: You’ll notice that there is a time difference between Windows and Ubuntu You can fix the time gap issue in dual boot easily. Also, in the grub screen, Ubuntu is up the priority. You can also change the boot order to make Windows default if you are going to use Windows more often than Linux. If you want to reverse the process, follow this guide to remove Ubuntu from dual boot with Windows.

I hope this guide helped you to dual boot Ubuntu with Windows 10 UEFI. I went into too much detail here, but I wanted to answer all the typical confusion and show all the required steps.
If you still have doubts or face strange errors, please comment, and I’ll try to help you out.
If this helped you, consider supporting It's FOSS
It's FOSS has been helping people use Linux for the past 14 years. Help us stay independent from big tech. Become a Plus member, enjoy ad-free reading and get 5 eBooks.
