Brief: Step-by-step beginner’s guide to installing TeamViewer on Linux. It also explains how to use TeamViewer on Linux.
TeamViewer is a remote desktop application primarily used to connect to a different system quickly and securely. It lets you remotely connect to someone’s desktop, transfer files, share screens, and video conferencing.
It is extremely popular for its simplicity and ease of use. It is mainly used to provide technical support to remote computers.
It’s a cross-platform software available for Windows, Mac OS X, Linux, iOS, and Android, and there is web browser support too. Though TeamViewer is proprietary software, it is free of charge for non-commercial use and offers almost everything the paid version has to offer.
And, yes, it has a native Linux client for 64-bit systems.
TeamViewer features
- Allows you to take remote control of a system.
- Supports video conferencing, group calls, and desktop sharing.
- There is a 256-bit AES session encoding and 2048-bit RSA key exchange for a secure connection.
- Wake-on-LAN feature allows switching on your computer remotely.
- Supports rebooting your system or servers while on the go.
- Switching between multiple screens is easy.
- It offers many more features, which you can refer to on its official page.
Installing TeamViewer 15 in Ubuntu
TeamViewer provides .deb binaries for Debian and Ubuntu-based Linux distributions. It also has .rpm packages for Fedora and SUSE. There is also a tarball for other Linux distributions.
You can grab a copy of TeamViewer from the official download page:
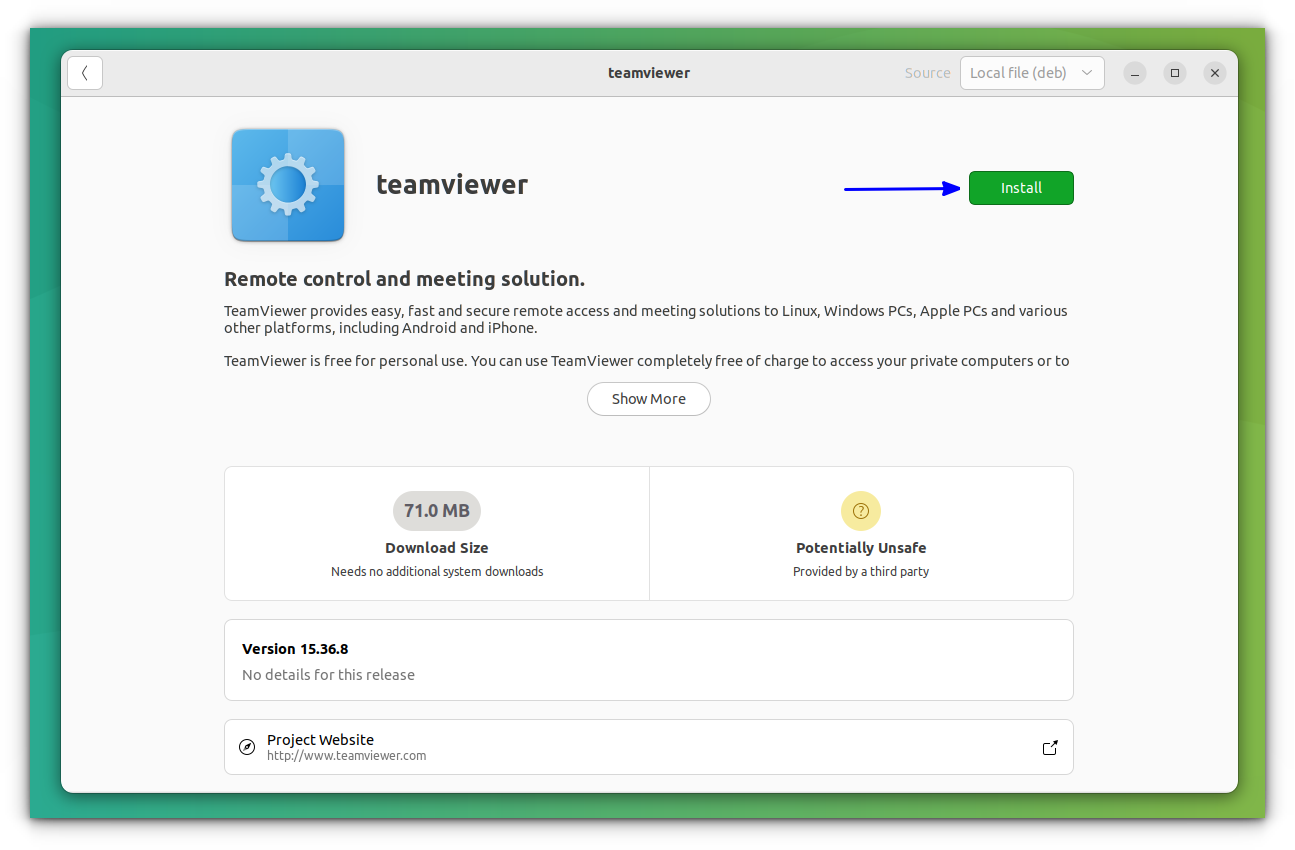
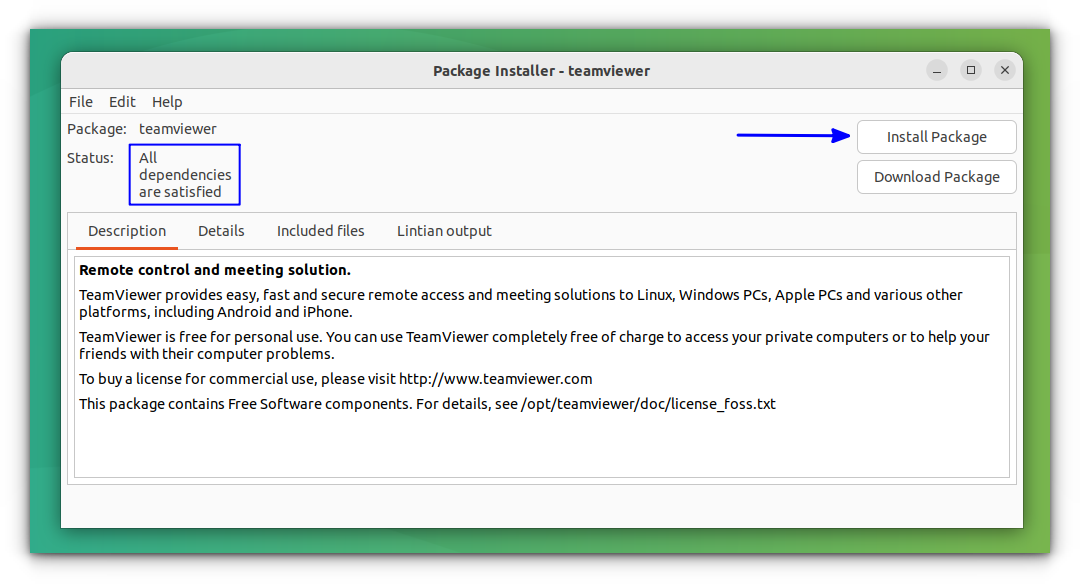
I will install TeamViewer on Ubuntu, so I downloaded the .deb file. You can use the graphical installer by double-clicking the downloaded package to install via the software center.
Installing deb packages is easy, but if you face dependency issues, I suggest installing it with the GDebi package installer.
Alternative command line way
Alternatively, if you prefer the terminal way, navigate to the download folder and run the below command:
sudo dpkg -i teamviewer*If you are notified of installation failure due to missing dependencies, type the below command to complete the installation.
sudo apt-get install -fOnce installed, you can open TeamViewer from the application menu.
Or run it from the console using the command:
teamviewerUsing TeamViewer without installing it on Linux
TeamViewer provides an additional option to run without installing it on your system. This may be helpful for many people who only wanted the service for some specific one-time purpose.
Before using this, you need to be clear about some points:
- Always run TeamViewer inside of your desktop environment like GNOME/KDE etc. Otherwise, it will not find a display to show the TeamViewer window.
- Always run it with the current user. Do not run it as sudo or root user.
- Running without installation is not available for TeamViewer Host, as it is meant to provide unattended access and therefore needs to run in the background at all times.
Related Read: How to Use Raspberry Pi via VNC
Now let’s see how to use this:
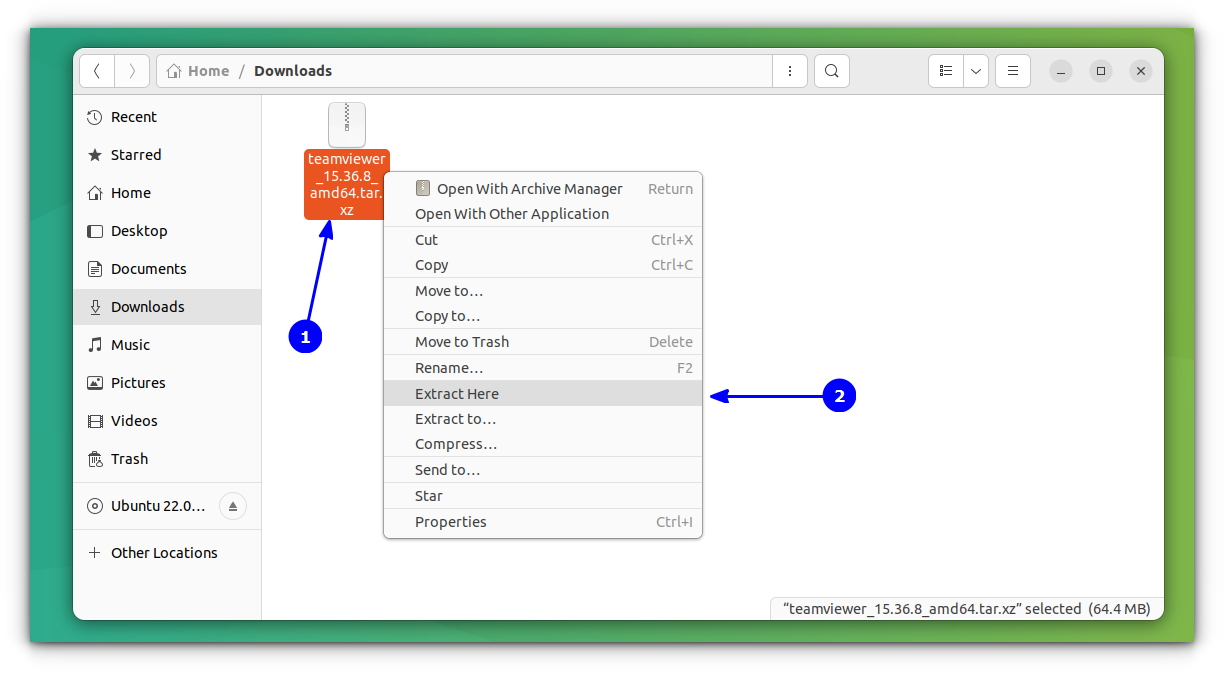
Download the tarball file from the official download page. Once downloaded, extract the file.
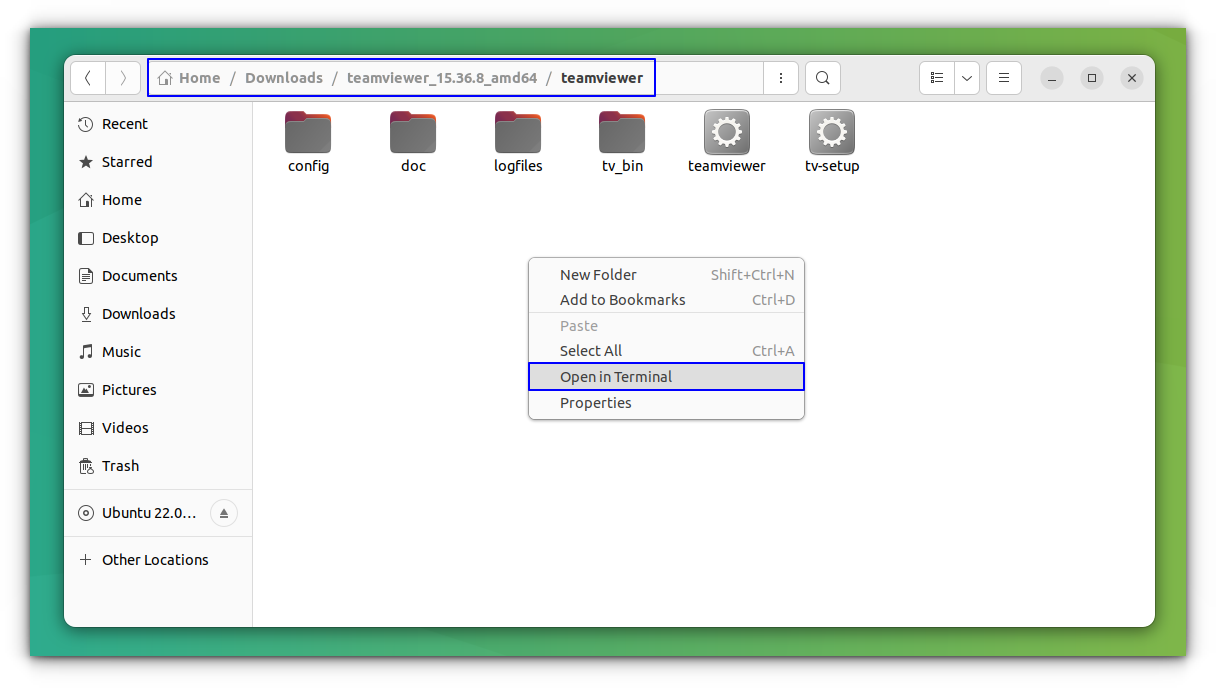
Now, open a terminal inside the extracted folder.
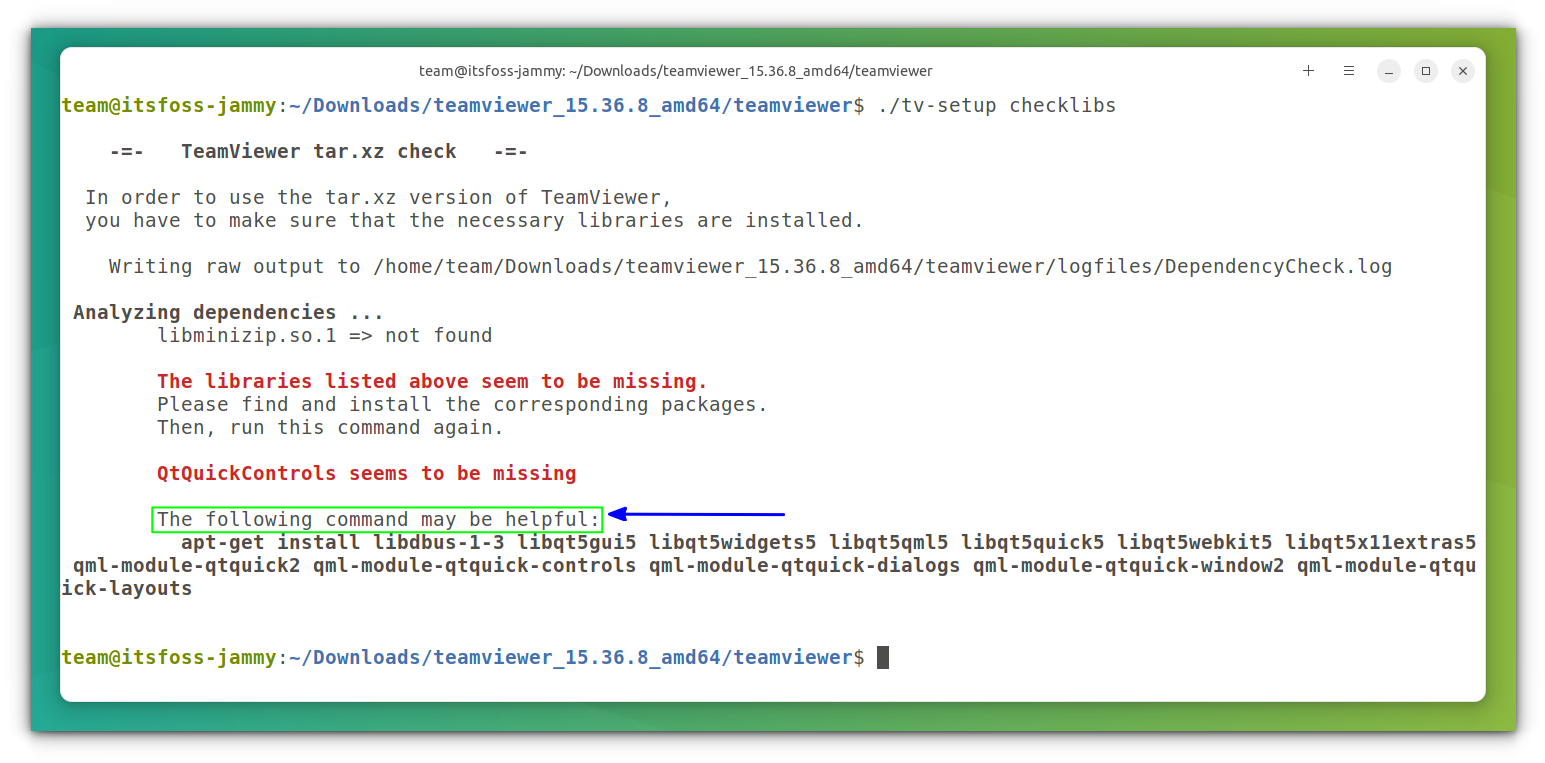
Now, run the following command to check if any dependencies are needed to run TeamViewer.
./tv-setup checklibsThis will list the necessary dependencies and also provides a command to download all the needed dependencies.
Run the install command, highlighted in the above screenshot, with sudo privileges.
It will install the dependencies. Also, double-check that everything is installed. In my system, I needed to install a dependency manually after executing the code. Luckily, that was also mentioned in the dependency check (libminizip, as shown in the above screenshot).
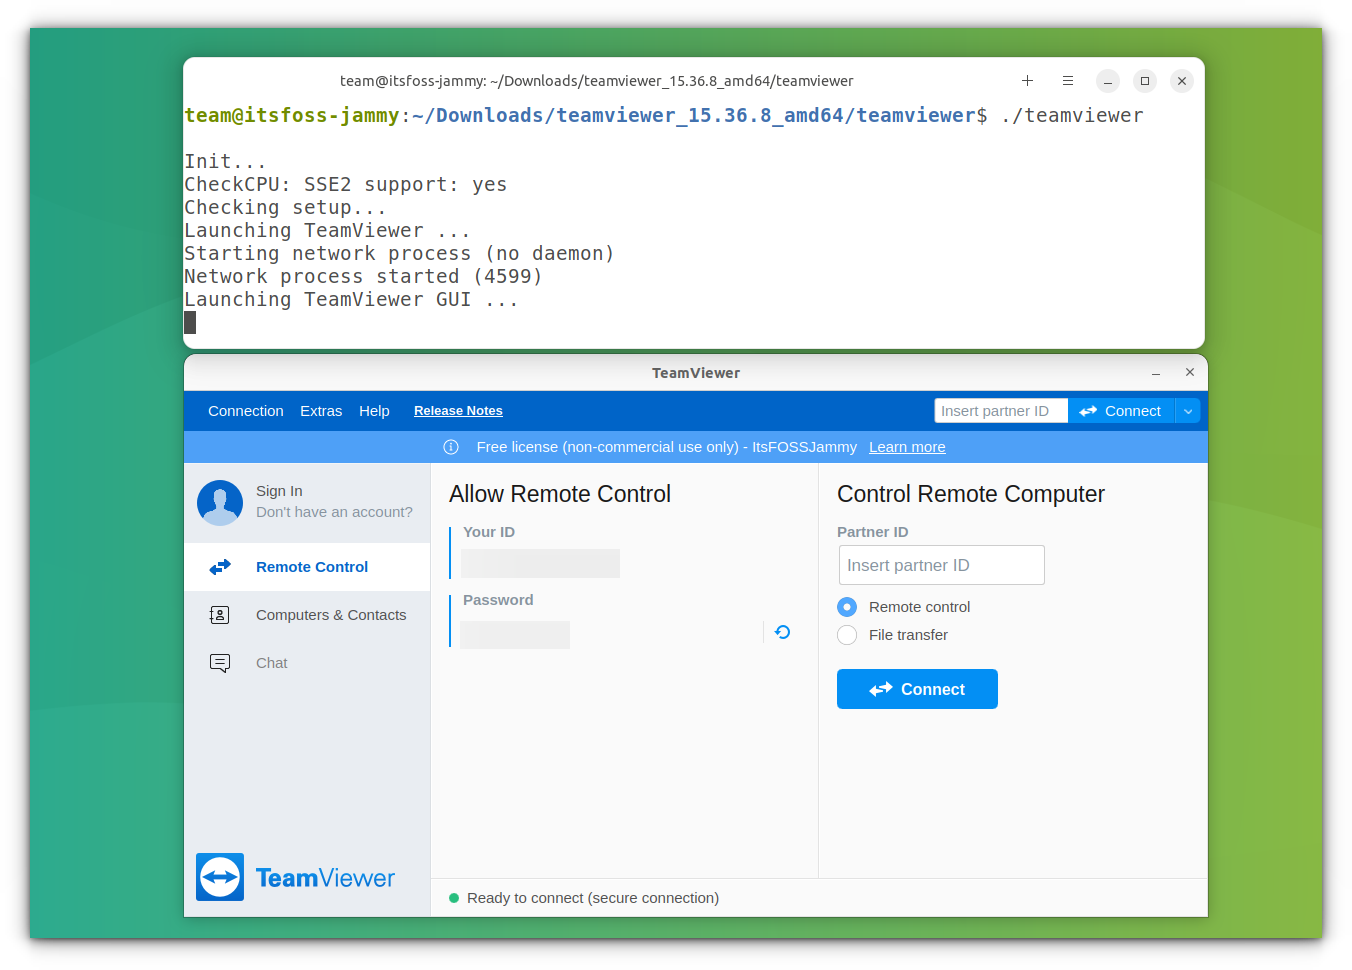
Once installed, run the following command in the same folder to start TeamViewer:
./teamviewerYou can see in the above screenshot that TeamViewer is running without installing anything on your system.
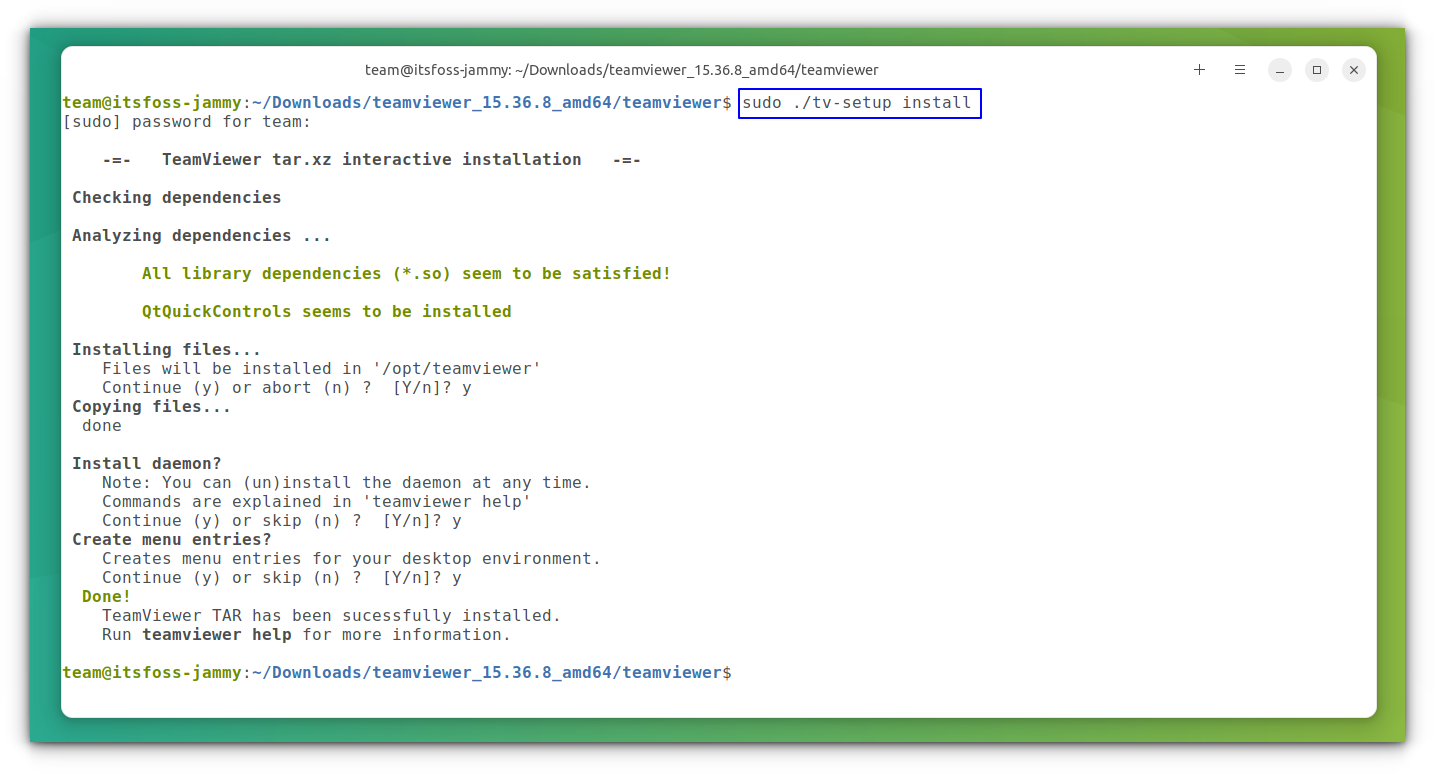
If you want to permanently install the TeamViewer, run the following command in the same directory.
sudo ./tv-setup installThis will check for dependencies and then install TeamViewer to your system.
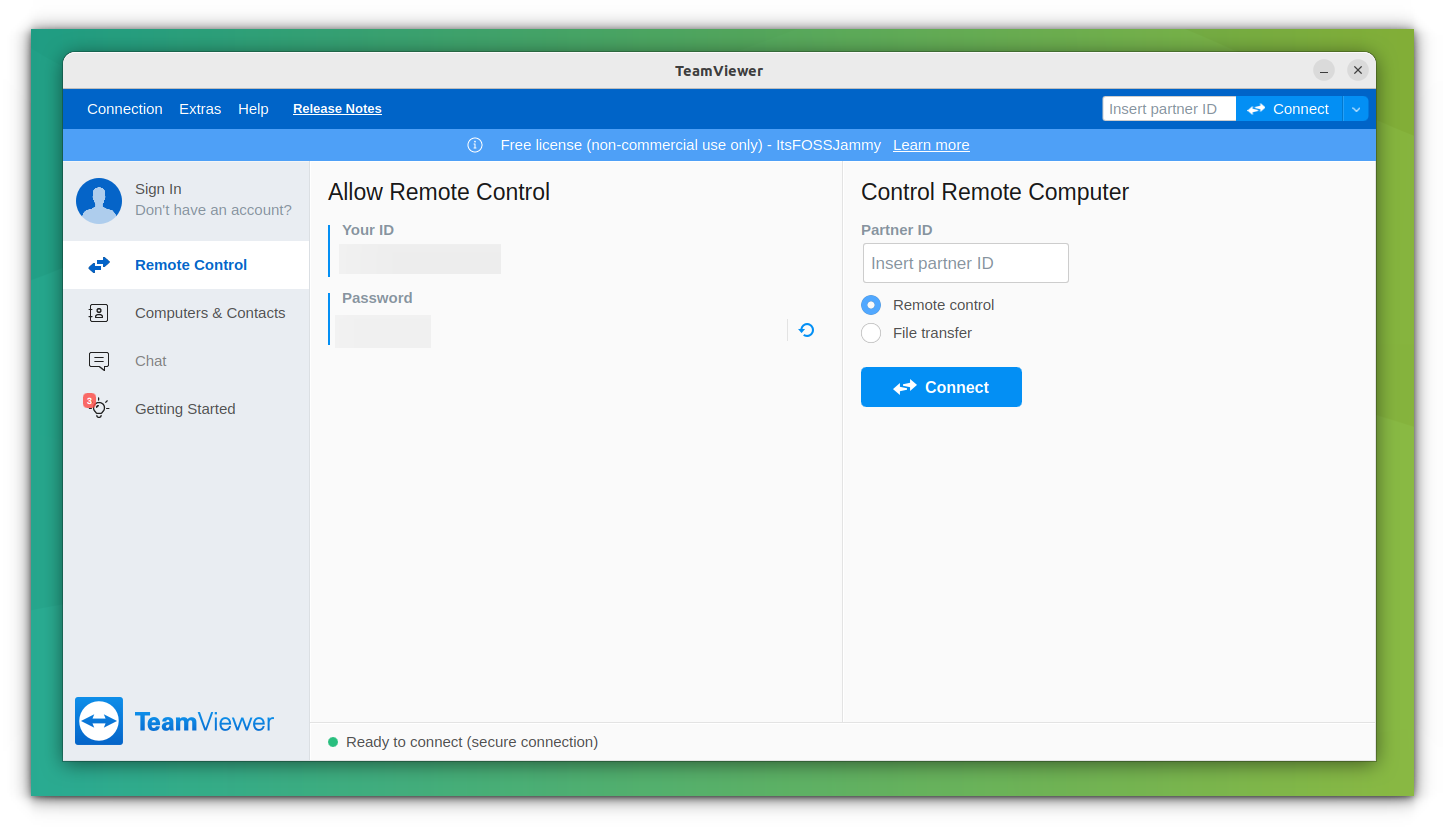
After installation, the background daemon should be running. You can check that by running:
teamviewer daemon statusIt will report an active status if running fine.
For any installation-related doubts, you can refer to the official documentation.
That’s it. You can now use TeamViewer for your uses.
How to use TeamViewer on Linux to connect to other systems
Here are a few things you should know about using TeamViewer for remotely connecting to other systems:
- Both host and target systems should have TeamViewer installed. Preferably, they should have the same TeamViewer version.
- Host and target can be any supported operating system. For example, you can connect to a Windows system from your Linux system.
- By default, each system is given an ID and a password generated randomly at the start of the application.
- If you are trying to connect to a remote system, you’ll need to know the ID and password of the target system.
- Similarly, if you are giving someone access to your system, you need to provide them the password and ID of your system to the remote system.
- Both systems must be connected to the internet.
- You are not required to create an account on TeamViewer to use it.
Now that you know a few things, let’s see how to do it:
Step 1
Start TeamViewer on both host and target systems. You’ll see the ID and password of your TeamViewer application on your screen. Similar info will be displayed on the remote system.
This is important information as it will be required to make the remote desktop connection.
An ID and Password are displayed on the screen. For the screenshot, I have it blurred out. Otherwise, you might try connecting to my system!
Step 2
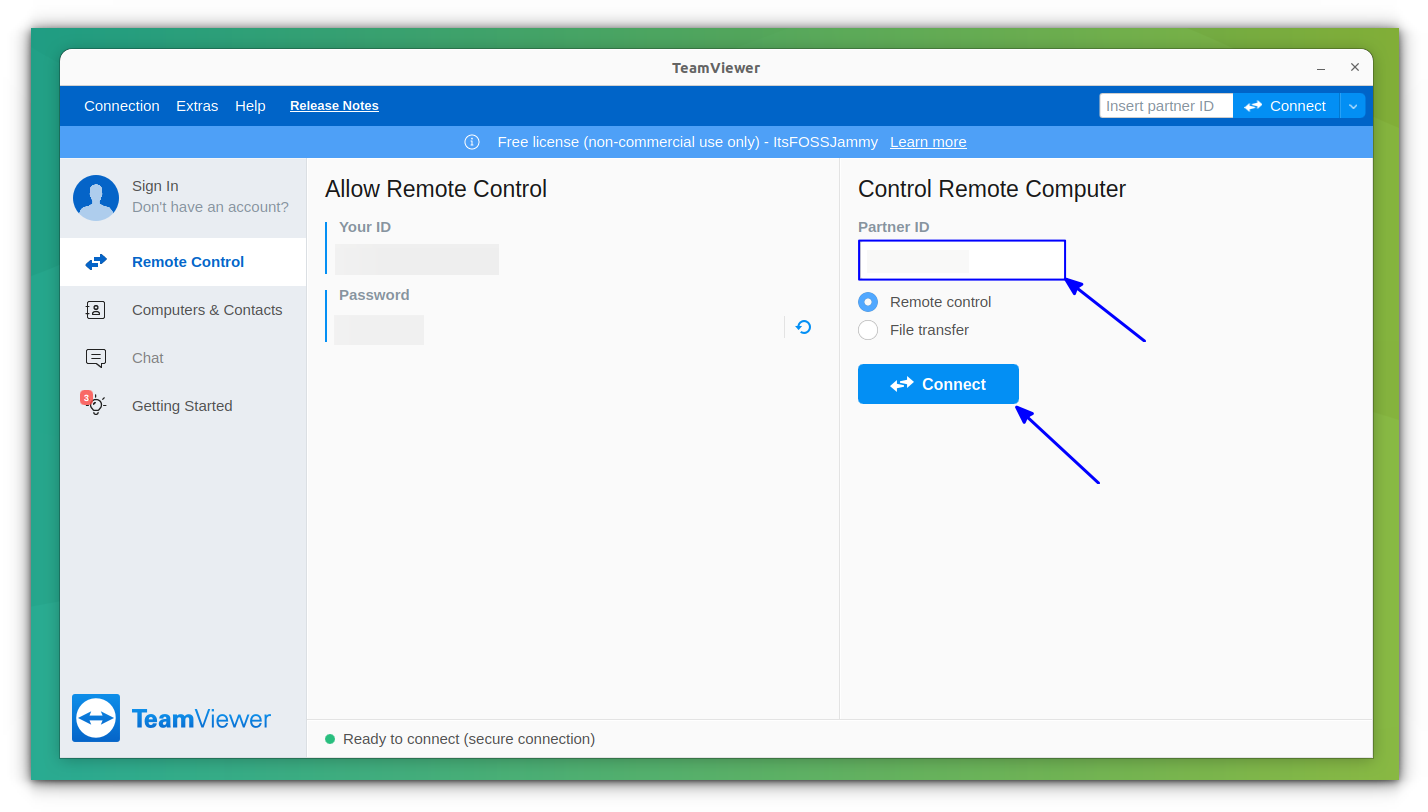
Both the host and target machines should have TeamViewer installed. You will need the unique ID and password of the system you want to connect to. Open TeamViewer and under the “Control Remote Computer,” type in the ID in the Partner ID box, and click on “Connect”:
Enter the ID of the target device
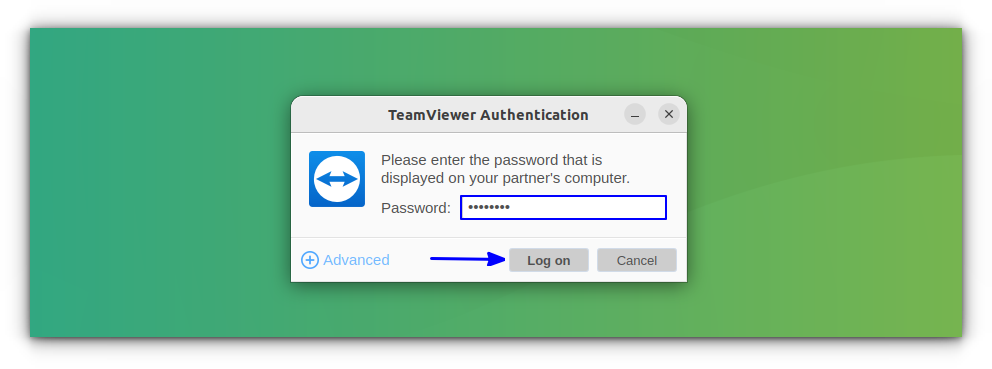
Obviously, it will ask you to enter the target system’s password.
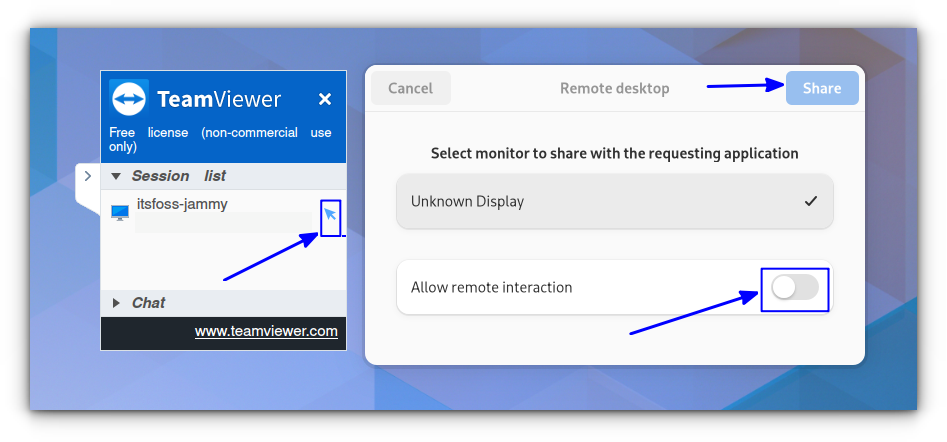
Once you enter the correct password and hit Log On, you will be asked permission to share the screen with the remote user.
You should toggle on “Allow Remote Interaction” to gain interaction permission for the remote user. Also, if you don’t toggle it initially, you can always give interaction permission to the remote user by pressing the “Arrow” icon on the original system. Once done, press “Share,” and it should immediately connect to the target system.
You can refuse the interaction permission to the remote user at any point by toggling off the “Arrow icon” on the original system.
Step 3
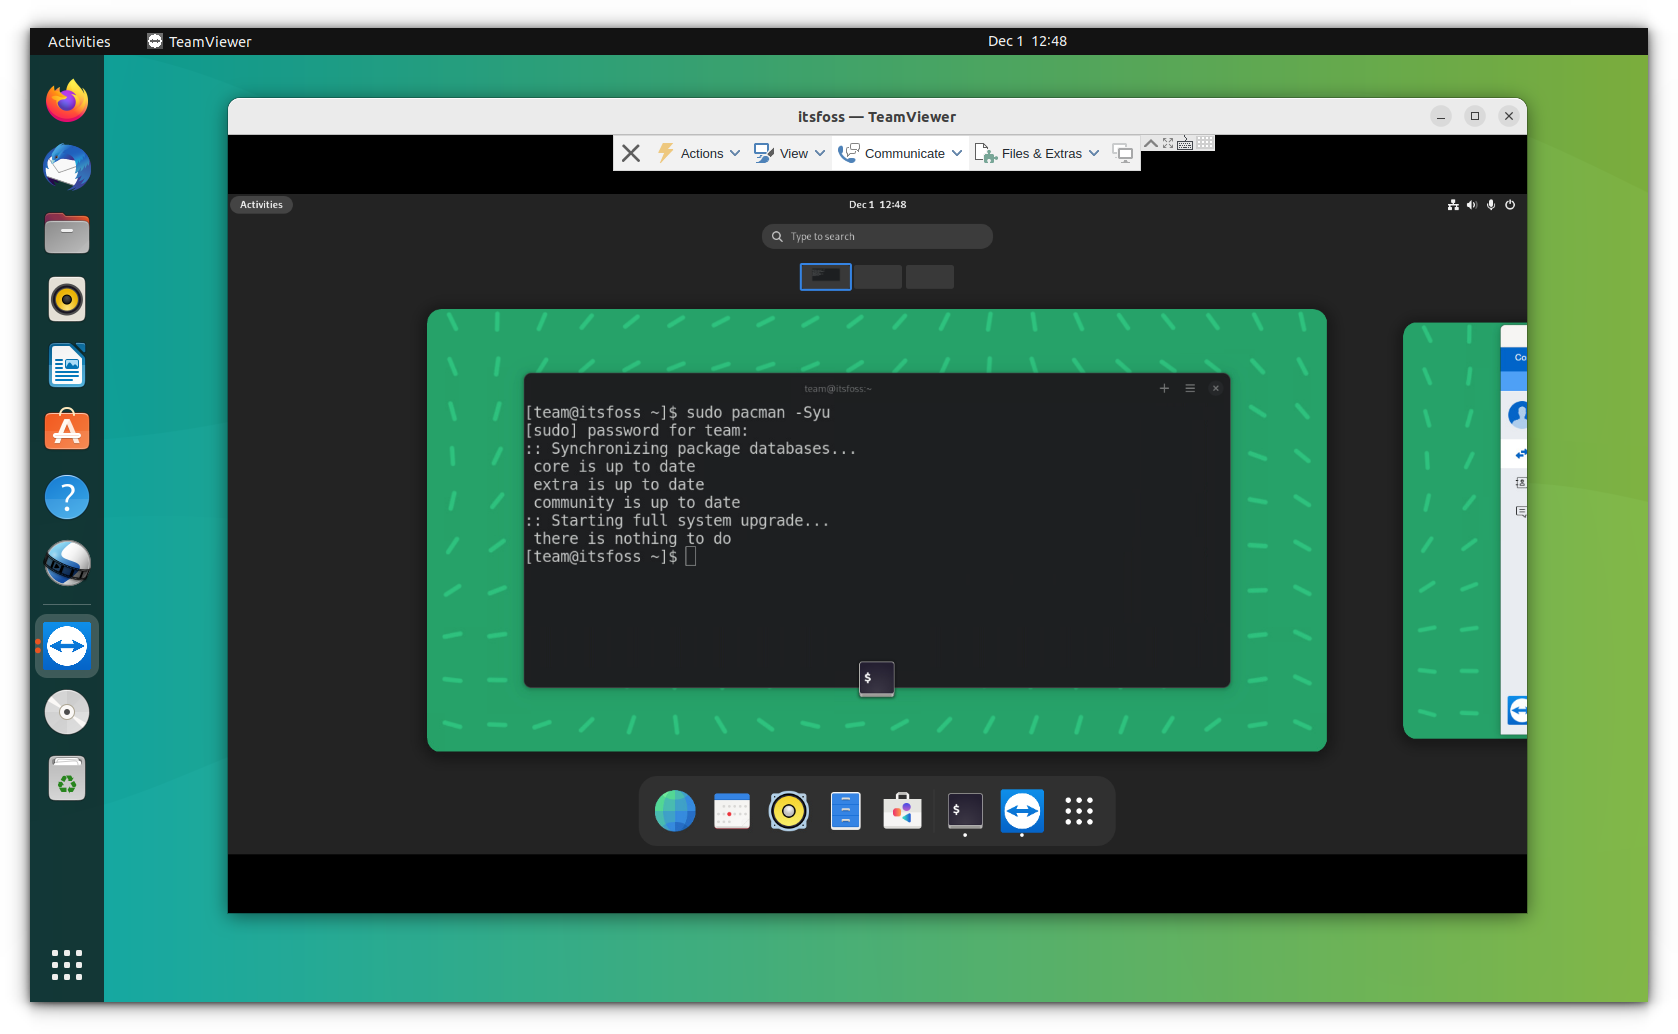
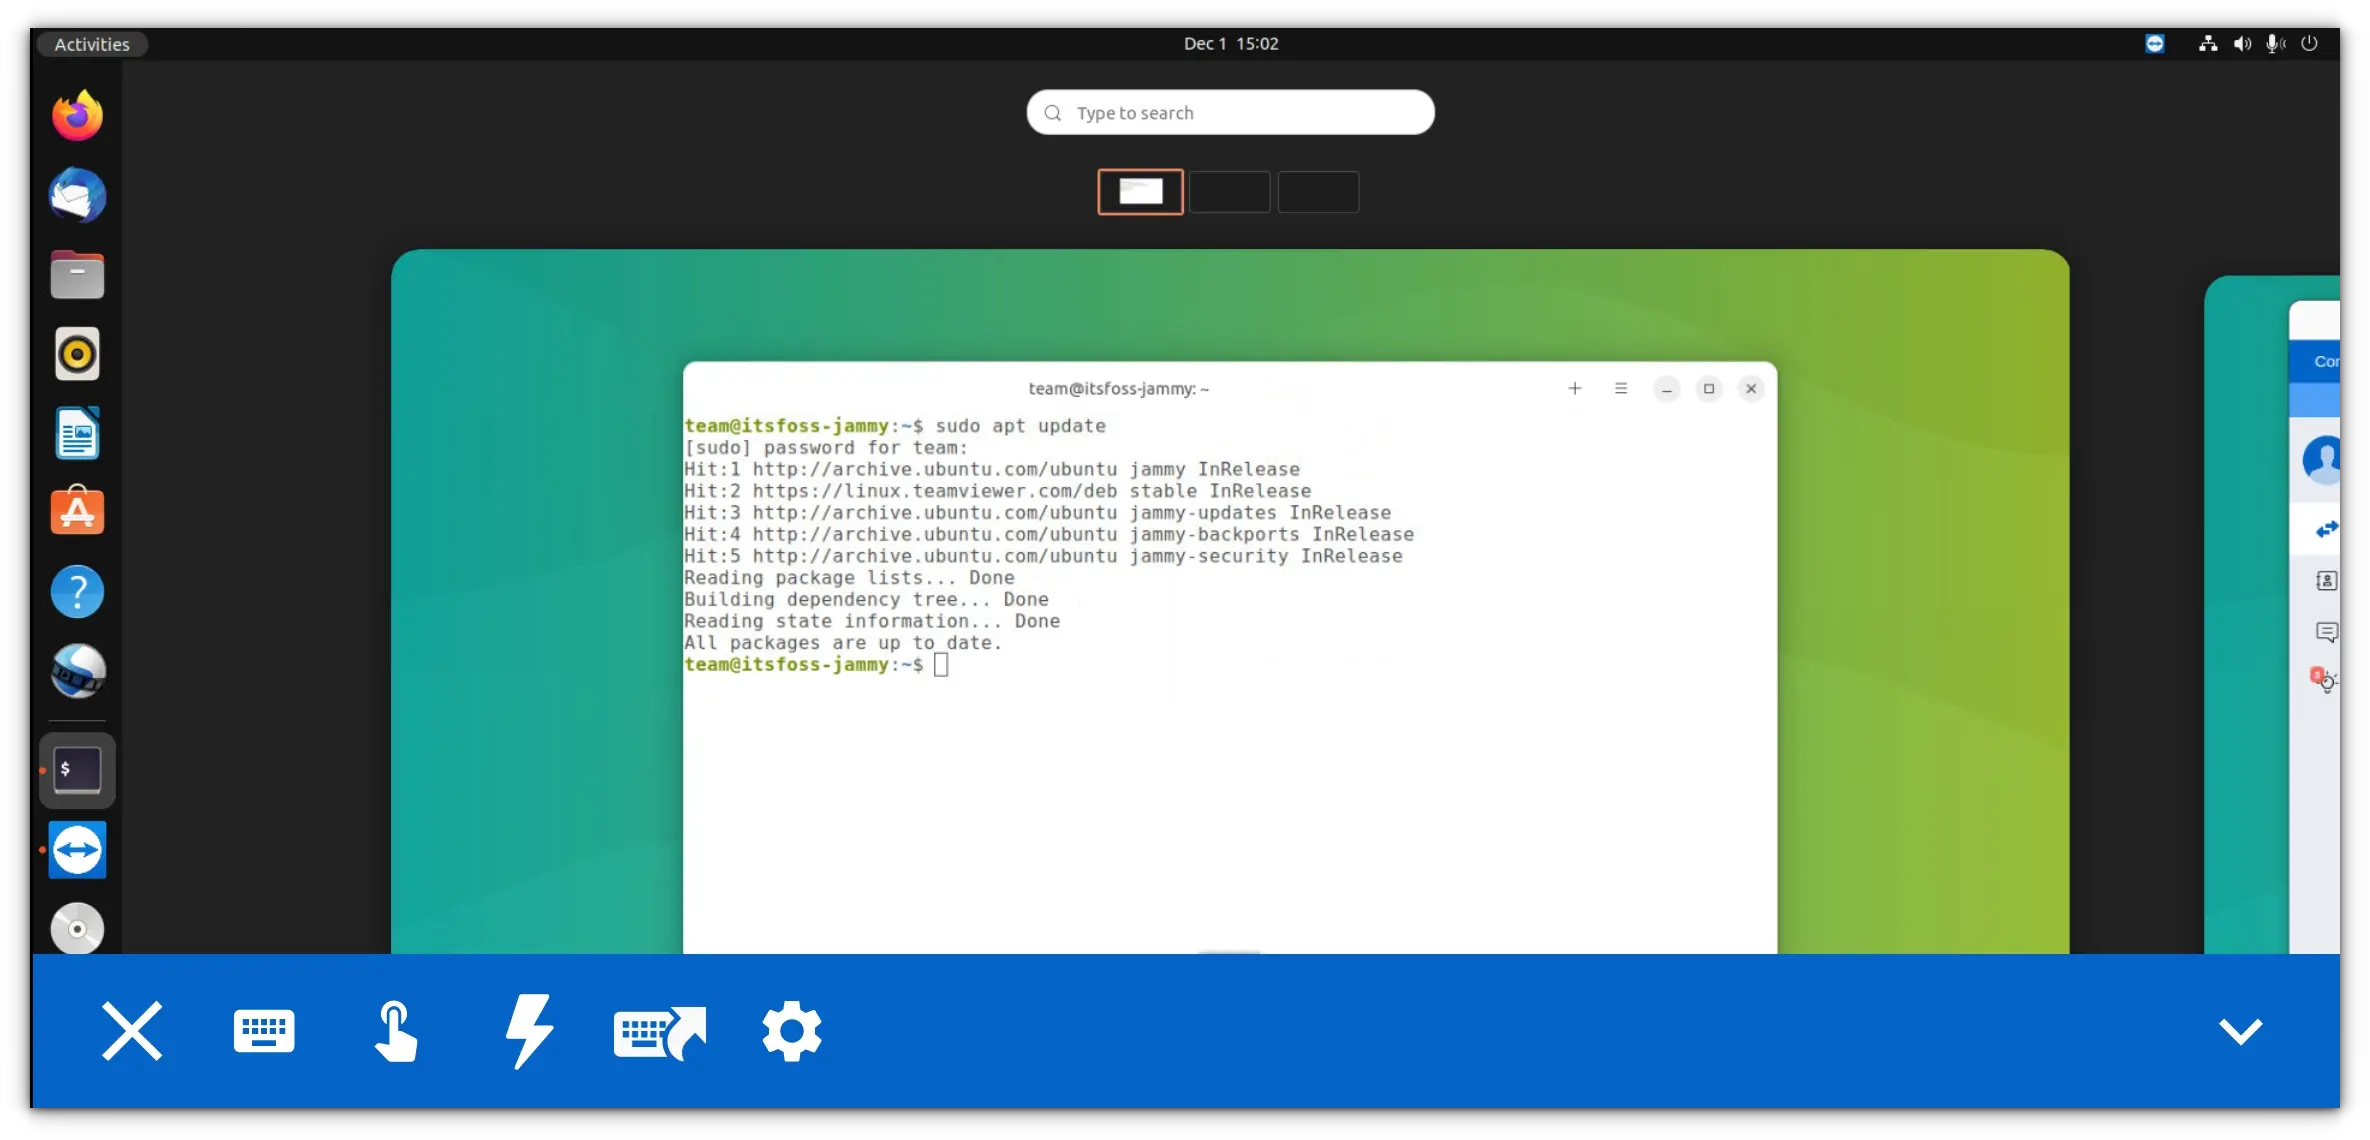
Once connected, you have complete control of the target system. I have a system running Ubuntu from which I established a remote desktop connection to another system running Arch Linux, and then I ran an update command there!
Connected to Arch Linux from the Ubuntu system
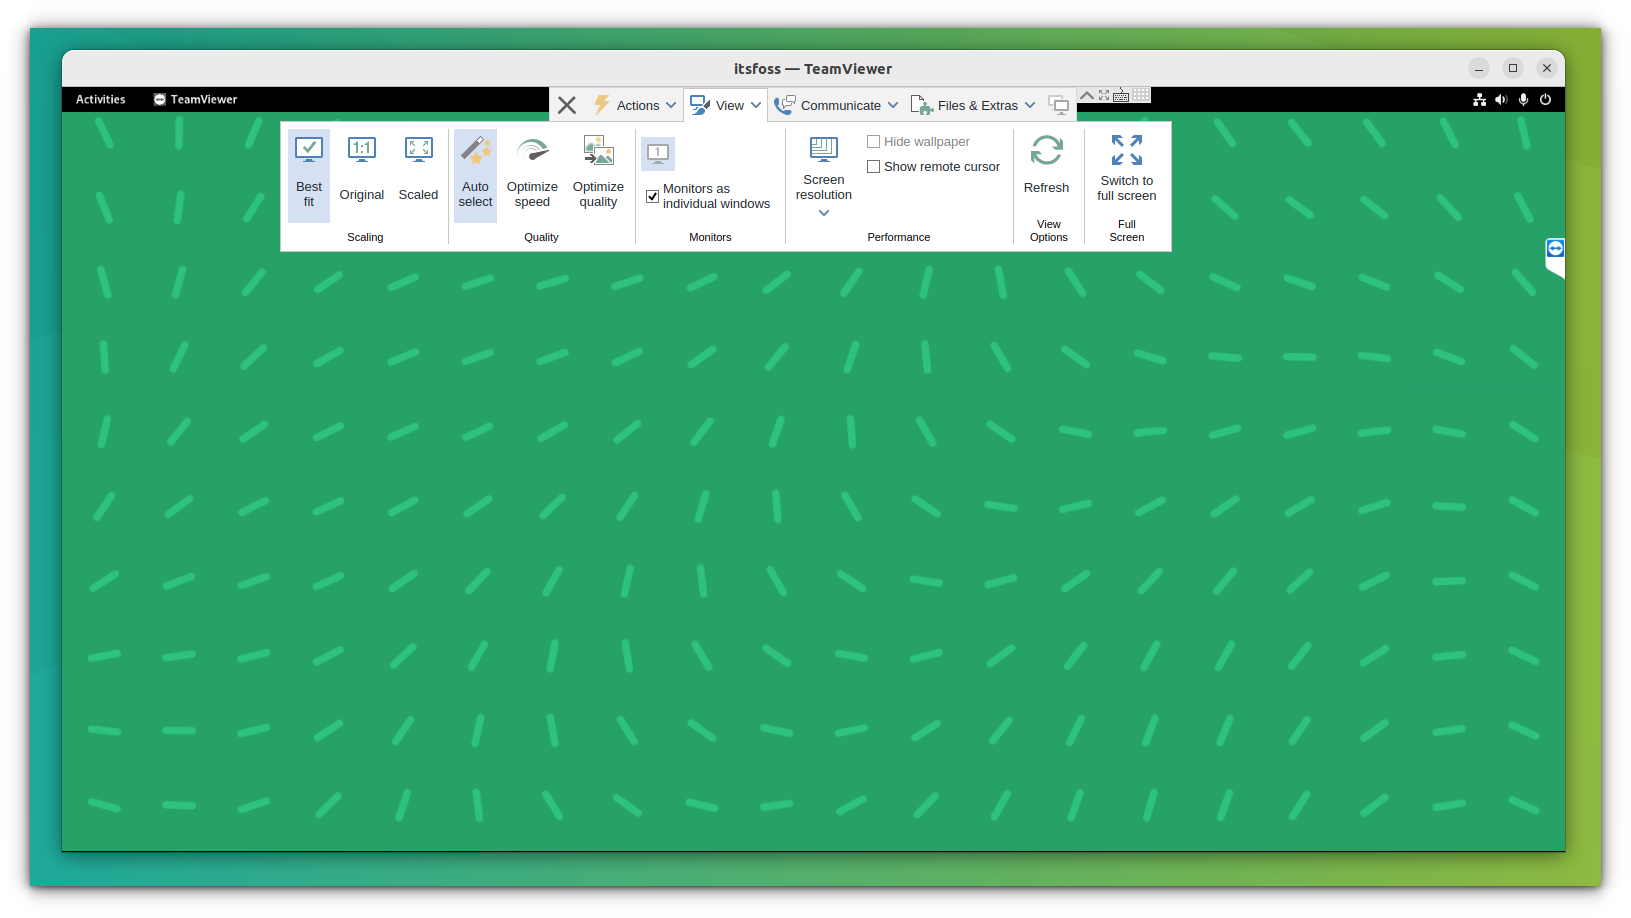
The top bar provides different options for TeamViewer. Under the Actions tab, you can find options to end the session, reboot your device or even invite additional participants.
The view tab contains the most valuable options. You can select the screen fit, optimize speed and quality and select the screen resolution for the target system.
Files & Extras allows you to take a screenshot or record a session. You can share a file between the two systems via drag and drop or using the file manager.
Tips for using TeamViewer more effectively
There are ways to optimize your TeamViewer experience. Let’s see some of them.
1. Using a TeamViewer account for easy access
TeamViewer provides an ID and password which can be used to take control of your system. However, signing up as a free user lets you store these credentials and quickly connect to a system without the hassle of typing it every time.
2. Recording a session
You can always record a TeamViewer session for later access or the records. Once connected to TeamViewer, navigate to Extras in the Toolbar, and you will find the option to start, pause and stop recording.
You will be prompted to save it as well.
3. Multiple Sessions support
TeamViewer supports multiple sessions simultaneously; you can take control of a second system without being disconnected from the first one. For IT support people, this can be very useful.
4. Easy file transfer
You can share a file by selecting File Transfer from the TeamViewer toolbar. You can either select the file which you want to share or drag and drop a file using the option File box. This is important since you can push an application to the target machine and install it without having physical access.
5. Manage Visual Settings
Visual Settings options lets you optimize your connection to the target machine by giving you options to choose the Quality, Scaling, and Screen resolution.
It can be accessed via the View option. If there is a lag, you could select Optimize speed under Quality options or disable GUI animations.
6. Connect with a smartphone
TeamViewer app is available for iOS, and Android, which can help you take a look at your system remotely. This lets me access my system and check if some downloads are completed or even change the music track without reaching out to my system.
I tried controlling my system with my phone, which worked like a charm.
Final Words on TeamViewer
TeamViewer is a great tool for controlling someone’s system for troubleshooting or monitoring your system with your mobile handset. And since it is available for almost every platform, there’s always a way around to help someone by connecting to their system.
Are you a TeamViewer user? What other tools do you use for remote desktop connection in Linux? Let us know in the comments how it helps you!
*This article was initially contributed by Ambarish Kumar. We have edited and improved the article with more information.


