

Removing the background is one of the most used graphic design procedures. There could be many reasons why you would want to do that.
For example, you don’t like the background, you want to add the image to another background, or you simply want to make the image transparent.
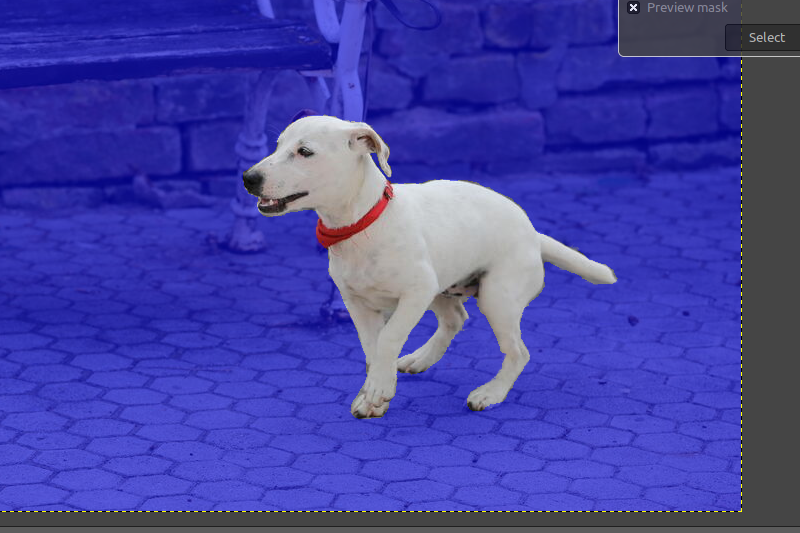
When you make the image background transparent, you can use the colour according to the background of the new image. If you put a transparent image on top of a blue image, the image will now have a blue background. This is quite handy in graphic designing.
While using an online tool like Canva is easier for this purpose, not everyone can opt for the premium plan.
And this is where you can use the free and open source tool GIMP to remove the background from an image. I am going to show you how to do that step-by-step in this GIMP tutorial.
In a later section, I'll share a CLI tool that could help you remove the background automatically.
How to Make a Transparent Background in GIMP

Step 1: Open up the image as a layer
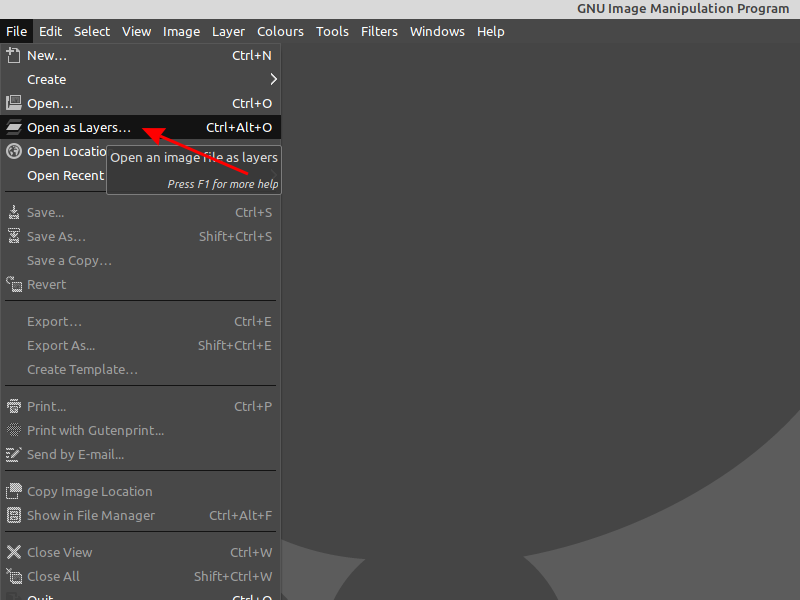
As I have mentioned before, you need to get used to isolate different images and actions as layers. This tutorial is so simple that if you just open your image, it will still be fine. Although I want to maintain a good habit and open my image as following.
File -> Open as Layers
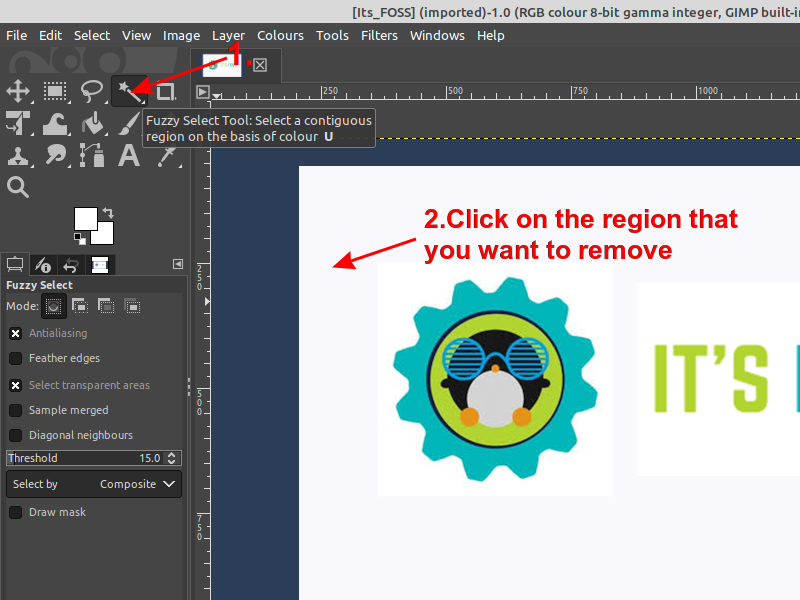
Step 2: Use the Fuzzy select tool
The Fuzzy Select tool is designed to select areas of the current layer or image based on colour similarity. This tool will help us to select the unwanted background with one click.
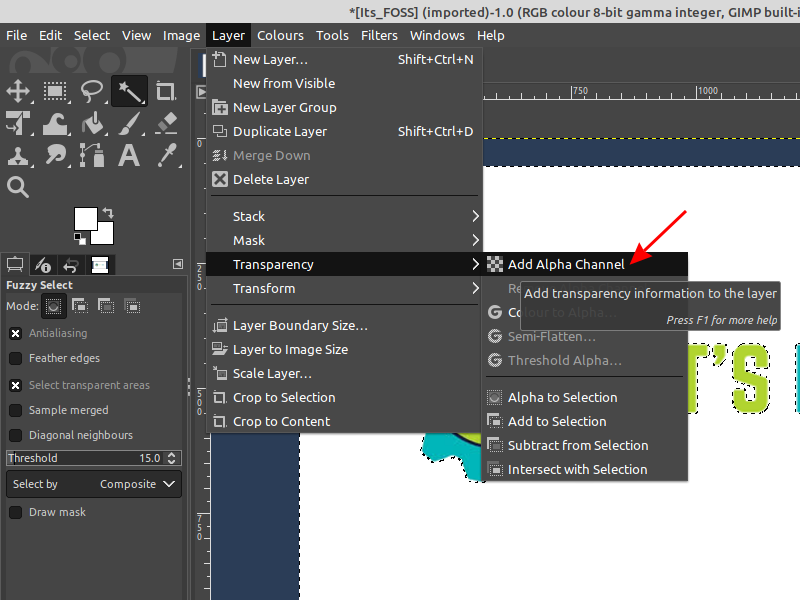
Step 3: Add Transparency
An alpha channel is automatically added into the Channel Dialog as soon as you add a second layer to your image. It represents the transparency of the image.
If your image has only one layer (like our example), this background layer has no Alpha channel. In this case, to Add an Alpha channel.
Layer -> Transparency -> Add Alpha Channel
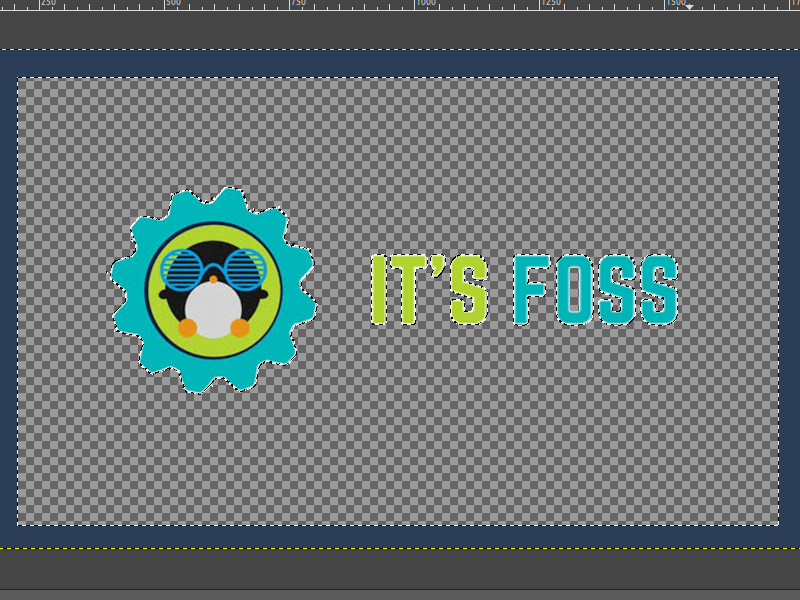
Step 4: Delete the background
Press the Delete keyboard button to remove the background.
If you have other different coloured regions that you need to remove, click on them and delete them.
You might have to repeat the steps 2 to step 4 if necessary. I have to remove the blue background in this example.
Step 5: Export the image
To export the image go to File -> Export As, choose PNG file format and click on Export. All done!

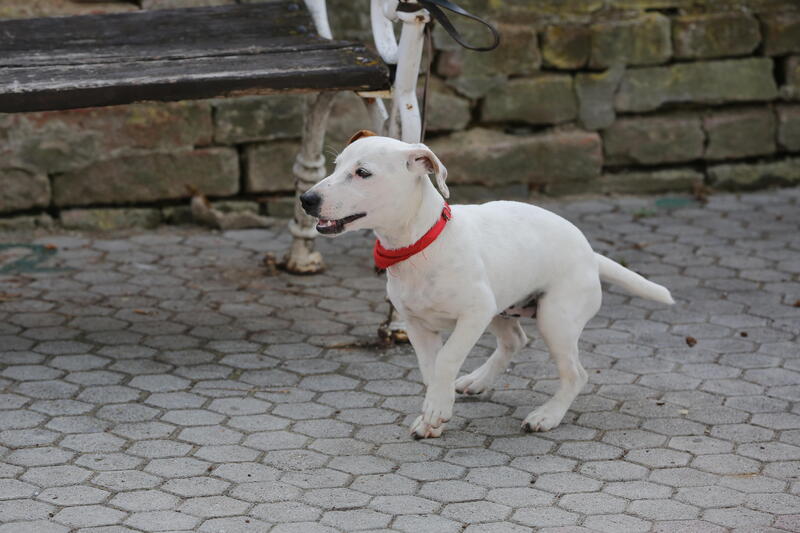
Advanced tutorial: Removing the complex background of an image in GIMP
If you have a complex background to remove, you need to take a different approach to do your job.
For the second part of this tutorial, I will demonstrate how to remove the background by adding a transparent layer and how to add a layer of your preference.
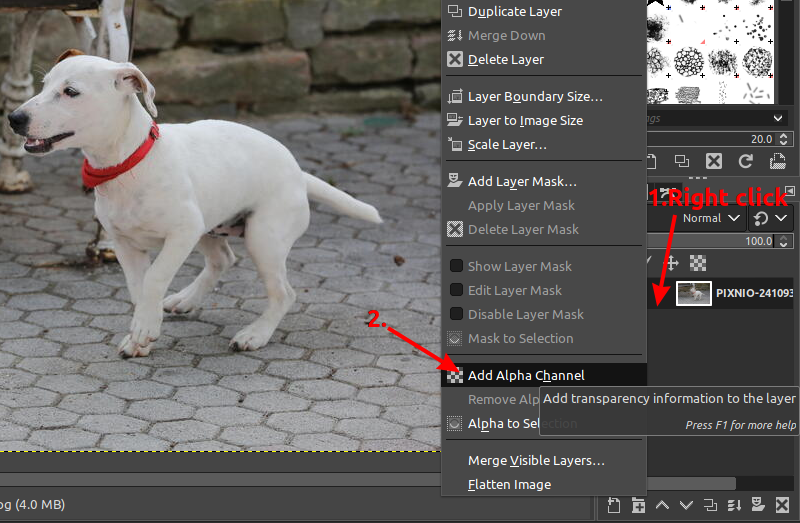
Step 1: Add a transparency layer
Once you open your image, right click on the image layer and click “Add Alpha Channel“. This needs to be done, to ensure that there is transparency at this layer.
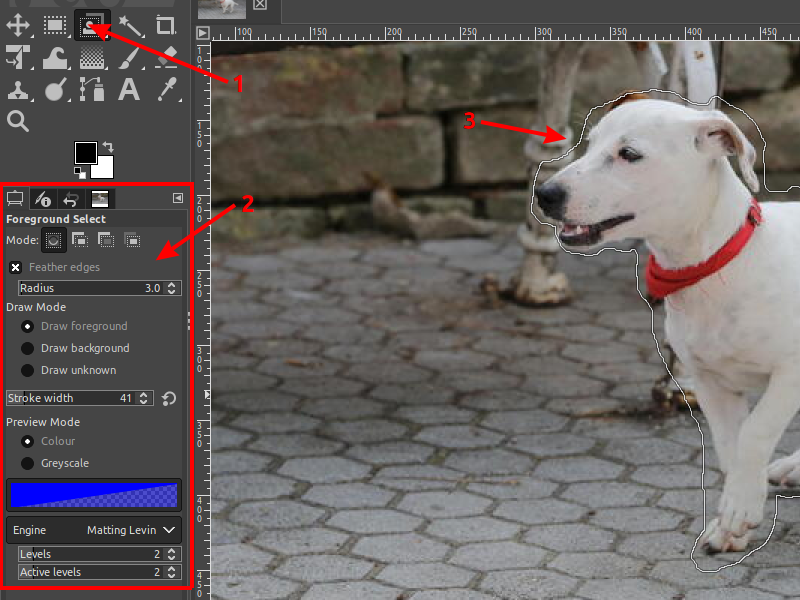
Step 2: Select the foreground
Next you need to select the foreground by using the foreground select tool. You may wish to copy my settings as shown at the example below and before you start outlining your object make sure that the draw foreground option is selected at the settings.
Once you have adjusted your settings, draw a rough outline of your object and hit the enter key when done. Precision is not important at this step.
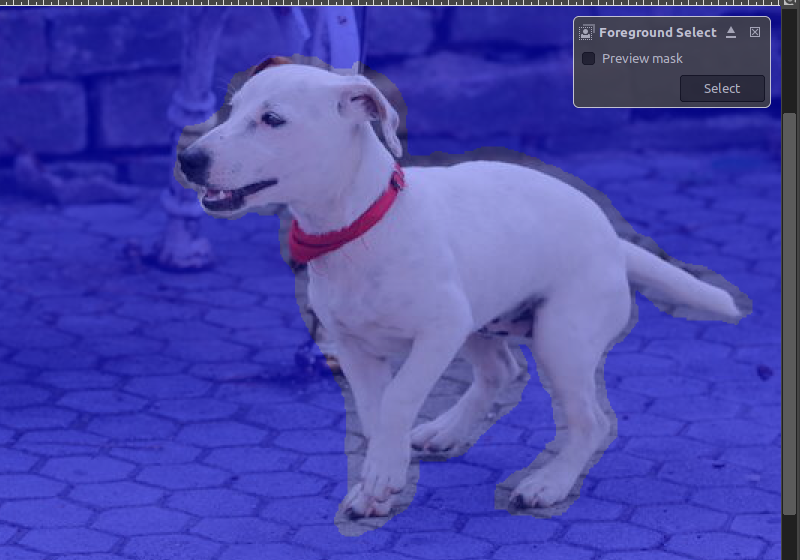
Adjust the stroke width at the settings panel and draw your object by clicking and dragging your mouse, like you paint it with a brush. You can adjust the stroke width near the outline of your object to get a more accurate result.
You can also change the foreground colour prior to selecting the foreground, to be more obvious whilst go through the process. My personal choice is a red colour.
When you release your mouse it should show up like the example.
Step 3: Fine tune your selection
You can fine tune the process by selecting the draw background option, to adjust the initial rough outline. Again, you don’t need to as far as you can with the precision.
You may need to go a bit back and forth between the draw foreground and draw background adjustment to minimize the work for the next step. A result as per below will be fine.
Hit the enter key when satisfied.
Step 4: Final adjustment
To get a more accurate result, you can refine even further the outline by working with the path nodes. This is what you can also use to outline text in GIMP.
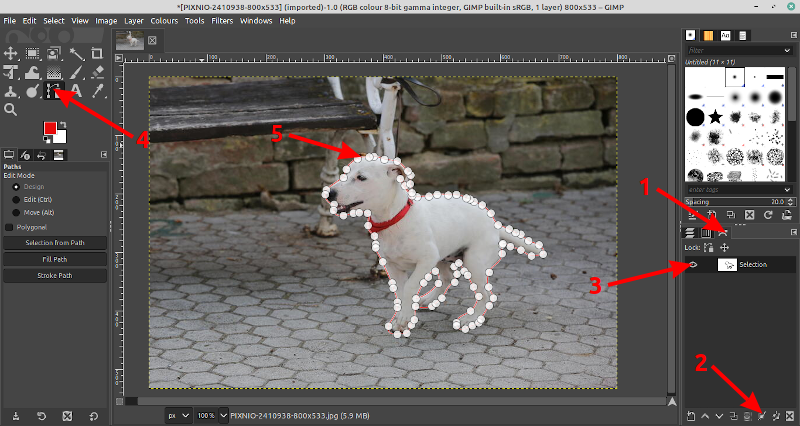
To see the path nodes follow the steps as shown.
- Make sure that you are at the paths dialog
- Click the selection to path option
- Unhide the path > Click Ctrl+Shift+A to deselect the path
- Choose the paths tool
- Click on the path
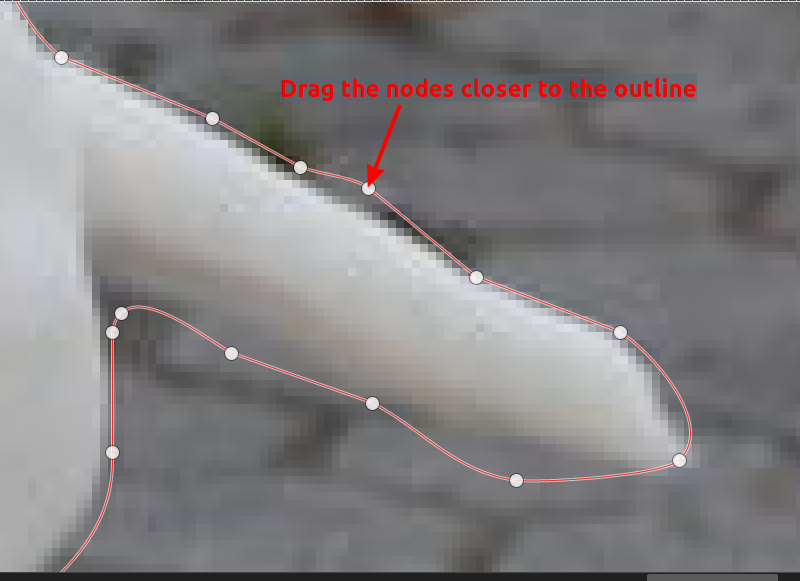
Focus on the outline precision
Adjust the outline to be nearly tangent to your desired foreground shape.
To add a node: To add a node point to a segment, and click where the node you want to be.
To adjust the outline curvature: Click the Ctrl key and drag the node. The node handles will be revealed to increase the precision to maximum.
To delete a node: Click the ctrl+shift key and click on a node to remove it.
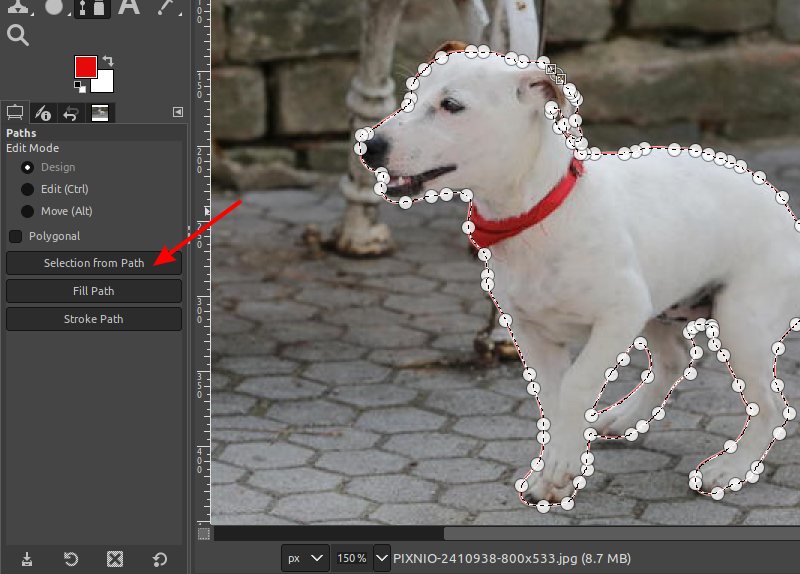
When the path is refined to a final shape, click the “Select from Path” option.
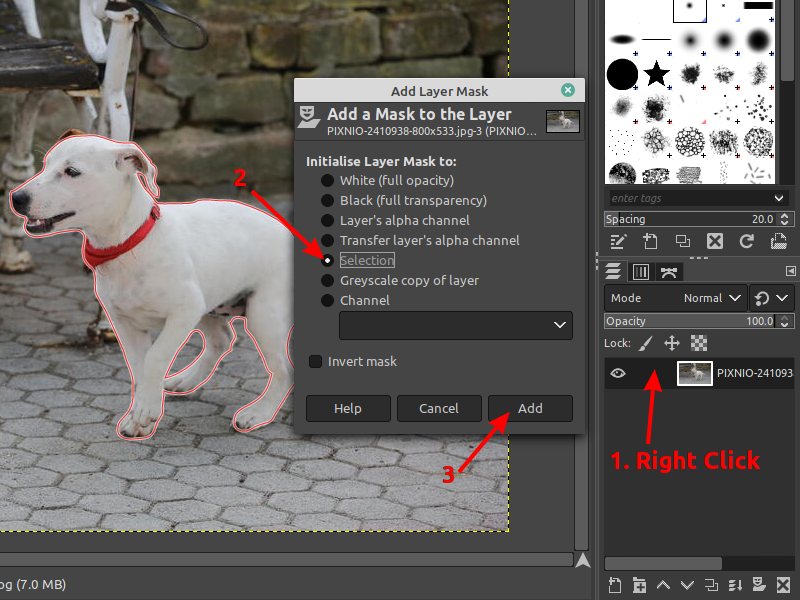
Step 5: Add a layer mask
Finally, you need to add a layer mask to “reveal” the transparency, that you created in the initial step.
To add a layer mask, right click on the current layer > Add Layer Mask > Selection and click Add.
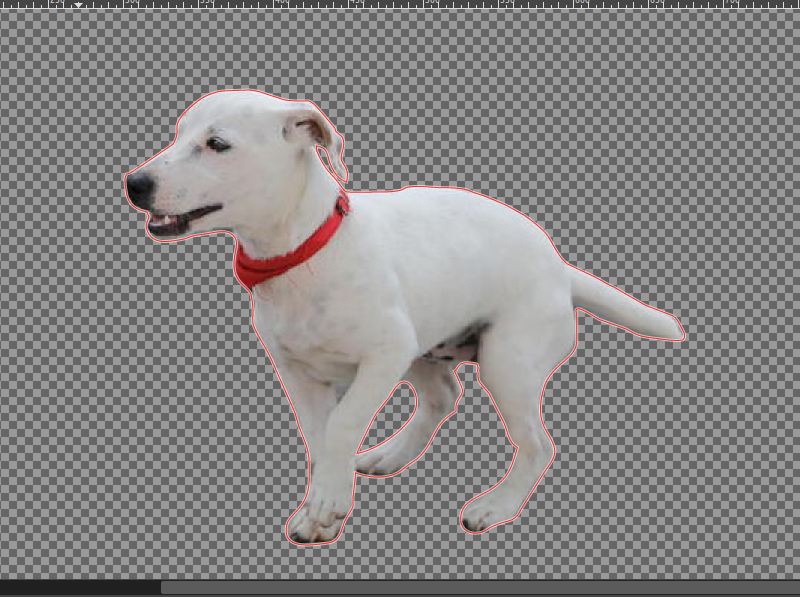
If you have followed all the steps correctly, the background will now be masked and you can import or create the background that you like.
Step 6: Add a new background
To create a new background, you have to create a new layer. If you are a regular reader of It’s FOSS, you already know how to create a new layer as it is shown in several GIMP tutorials.
As the difficult part is done, I will let you explore different ways to add a new background. If you already have an image that you want to add as a background, you need to open it as layers from the file drop menu, so you don’t have to create the layer manually.
Either way, you may need to re-order your layers to achieve the final result.
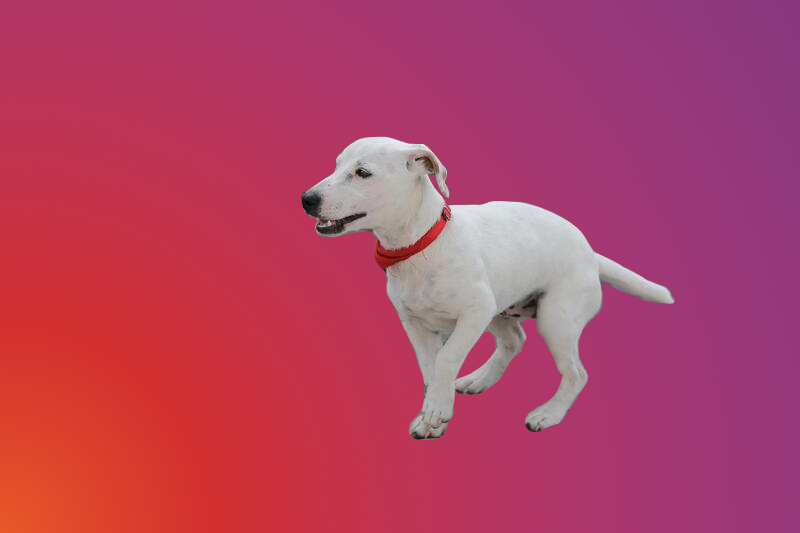
My preference for this example is to use the gradient tool, and yes I picked the colours from Ubuntu!
Final result with complex background removed and replaced by another
Bonus: CLI tool for automatic background removal
Talking about removing background of images, rembg is an awesome utility. It doesn’t offer a GUI front end but have some decent features.
With rembg, you can
- Remove the background of images from your local system.
- Remove the background of all images in a folder and save output to a new folder.
- Remove background of a remote image can be removed and saved
- Remove the background of images in a folder can be changed in real-time.
Install Rembg
Rembg is not available on default repository. You need to install it using pip. To set up pip on your system, read our dedicated guide on how to install python and pip on Ubuntu.
Once pip is installed, use the below command to install rembg.
pip install rembgThis installs CPU support version of rembg. There is a GPU support version too. To install that, first you need to check if your system supports the onnxruntime-gpu. Go to onnxruntime.ai and check the installation matrix.
Once sure, use the command below:
pip install rembg[gpu]Using rembg to remove background
As said above, there are several ways you can use rembg. Some of the most simple and useful ones are described below.
Remove the background of a local image
To do this, open a terminal and run:
rembg i <path/to/input/file> <path/to/output/file>
Remove the background of images in a folder
You may have various images in a folder. Here, rembg can be used to remove the background of all the images in that directory and save it to a new folder.
rembg p <path/to/input/folder> <path/to/output/folder>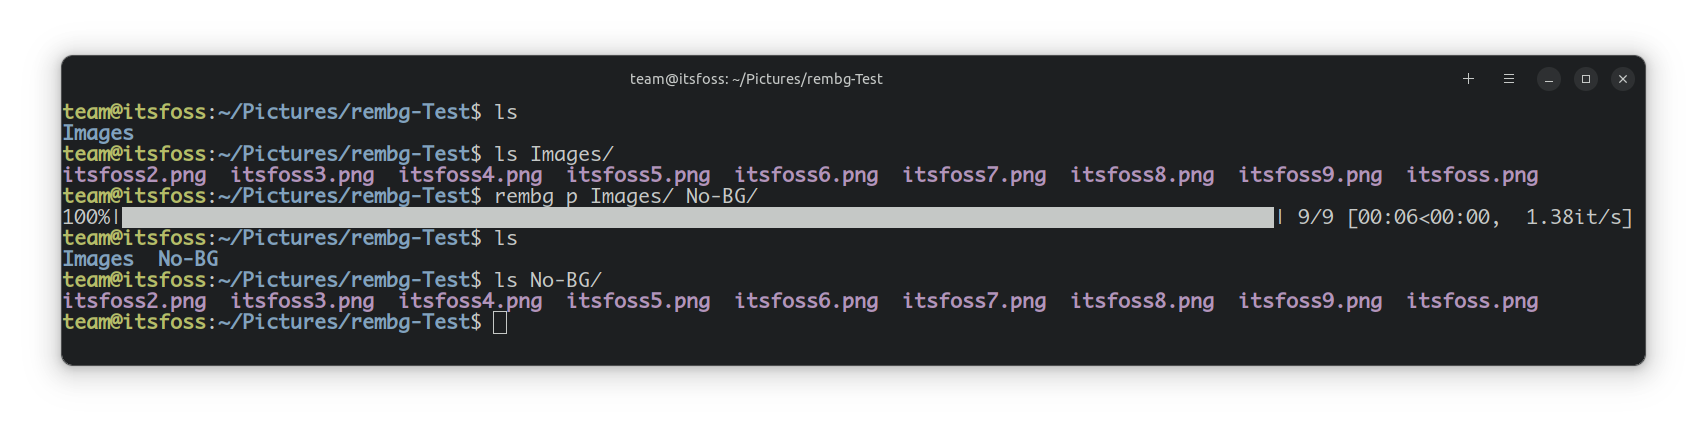
Remove the background of images in a folder in real-time
It means as you paste an image to the provided input folder, its background is removed and saved to the output folder.
rembg p -w <path/to/input/folder> <path/to/output/folder>
Remove the background of a remote image
If you have an image in a remote location, remove its background and save it to local system using:
curl -s <URL of Image> | rembg i > output.png
There are more ways you can use this tool. Refer to their official guide for more information.
Conclusion
There are many different ways to add transparency to an image, depending on the complexity of the background. There is not an absolute path to follow for every occasion and the more hours you spend with GIMP the more efficient user you become.
Don’t forget to subscribe to the newsletter and let me know what you created following this tutorial at the comments below.
If this helped you, consider supporting It's FOSS
It's FOSS has been helping people use Linux for the past 14 years. Help us stay independent from big tech. Become a Plus member, enjoy ad-free reading and get 5 eBooks.
