
Brief: This detailed guide shows you how to dual boot Ubuntu with Windows legacy BIOS systems. If you are not sure, read this to know if you have BIOS or UEFI system.
Continuing my experimentation with different Linux distribution, I installed Xubuntu last week. Xubuntu is a variant of Ubuntu with Xfce desktop environment instead of the default Unity. Light on resources, Xubuntu can be a good Linux alternative of Windows XP.
I prefer to install Linux in dual boot with Windows. I hardly use Windows but it gives me sort of back up if I mess up with things. Dual booting Linux with Windows is always suggestible for the beginners. In this tutorial, we shall see how to install Ubuntu in dual boot mode with Windows.
This guide covers system with BIOS. You can read this article for dual booting Windows 10 and Ubuntu with UEFI.
Ubuntu, Xubuntu, which one is it? Don’t be confused. The steps given here are equally applicable to Ubuntu, Xubuntu or even Linux Mint.
Before we see how to dual boot Ubuntu with Windows, let me give you some important details.
First, I had Windows 7 installed with 3 partitions on it. Later I installed Linux on it in dual boot mode. I changed the partition and kept around 100 GB of total 320 GB for Linux installation. In the course of time, I upgraded to Windows 8 and subsequently to Windows 8.1. I never had to face the problem of Windows 8′s secure boot thingy. It is just to clarify that this process does not show you how to deal with UEFI.
Install Ubuntu in dual boot with Windows 10 & Windows 8
Follow the steps below to install Ubuntu in dual boot with Windows:
Step 1: Create a live USB or disk
Download and create a live USB or DVD. In Windows, my favorite tool to create a live USB is Universal USB Installer.
Step 2: Boot in to live USB
Plug the live USB or disk in to the computer and restart the computer. While booting the computer press F10 or F12 function key (defers from computer to computer) to go to the boot menu. Now, choose the option to boot from USB or Removable Media.
Step 3: Start the installation
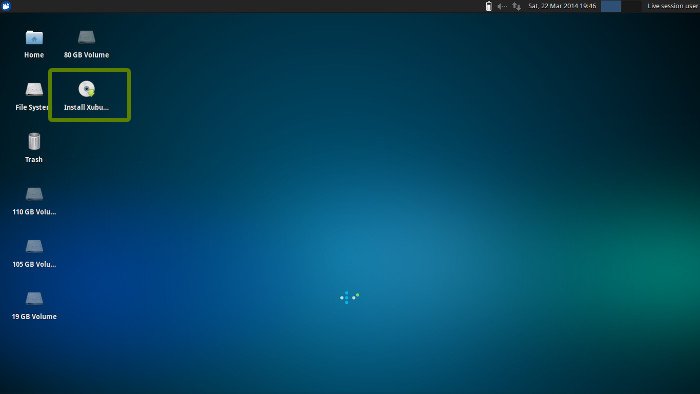
It will take some time to boot in to the live USB or disk. Once booted, you will be immediately provided with option to either try Ubuntu or install Ubuntu. Even if you choose to try, you can find the option to install on the desktop:
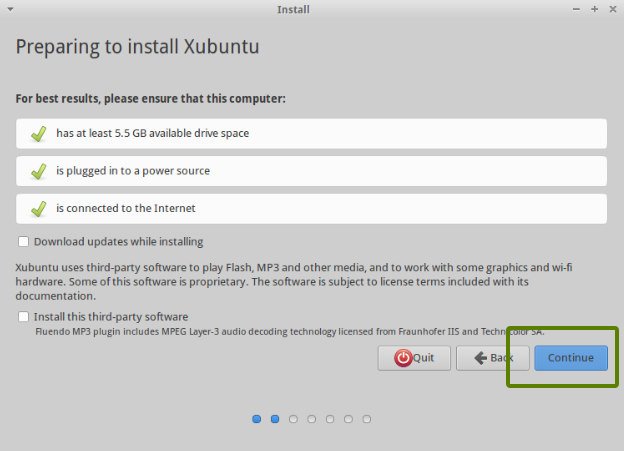
First few screens are pretty straight forward. Just choose press continue:
Step 4: Prepare the partition
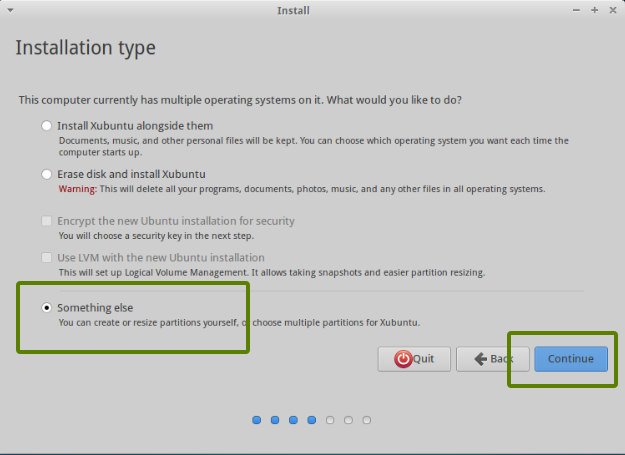
This is the most important part of the whole dual boot installation. Where to install Ubuntu? Windows is already installed here, so, we’ll prepare a new partition for Ubuntu. In the Installation Type window, choose Something Else:
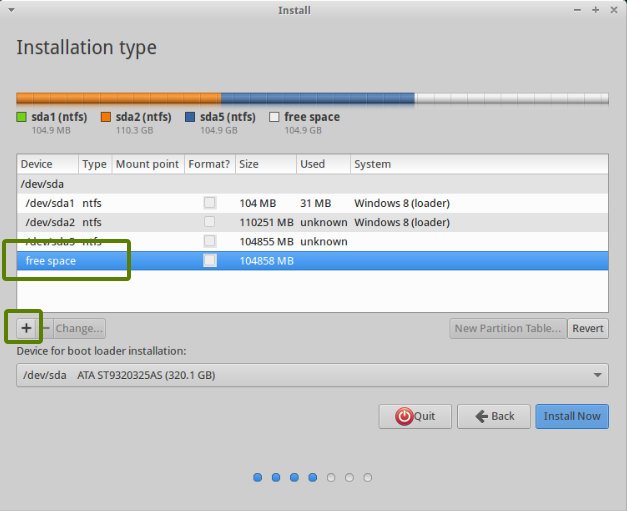
As you can see, I have 3 NTFS and some ext4 partitions. If you don’t have ext4 partition, don’t worry, we don’t need that. As you can see in the picture below, one of the NTFS partition consists of Windows installation. This should be untouched if you want to keep your Windows installation safe.
I presume that you have more than one NTFS (or FAT 32) partitions (i.e. Drives in Windows term) on your hard disk, with one of them consisting of Windows installation (usually C drive). What you need to do here is to delete a NTFS or existing ext4 partition and create some free space. This will delete all the data in that partition and this is why I asked you to verify if you have Windows installed in a different partition.
Click on the desired partition and press the – to delete the partition.

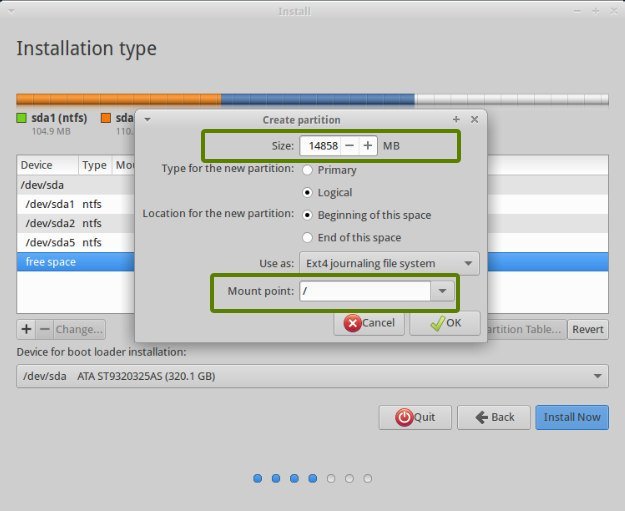
Step 5: Create root, swap and home
Once you have some free space on your hard drive, its time to install Ubuntu on it. Now, there are several ways to do it. But I prefer to have a Root, a Swap and a Home.
The root should be at least 15 GB for a comfortable use. If you have more disk space, increase the root size. Suppose you have 100 GB of disk space. You can easily devote 30 GB of space to root.
Create a root partition first. Choose the free space available and click on +.
Here, choose the size of root directory (keep it 20 GB or more), choose ext4file system, and mount point as / (i.e. root):
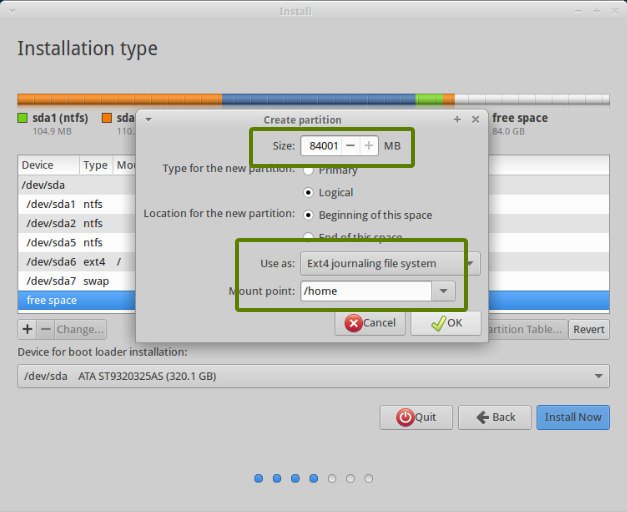
Next step is to create swap partition. It is advised by many that Swap should be double of your system’s RAM size. You can choose the swap size accordingly.

The next step is to create Home. Try to allocate the maximum size to Home because this is where you’ll be downloading and keeping the files.
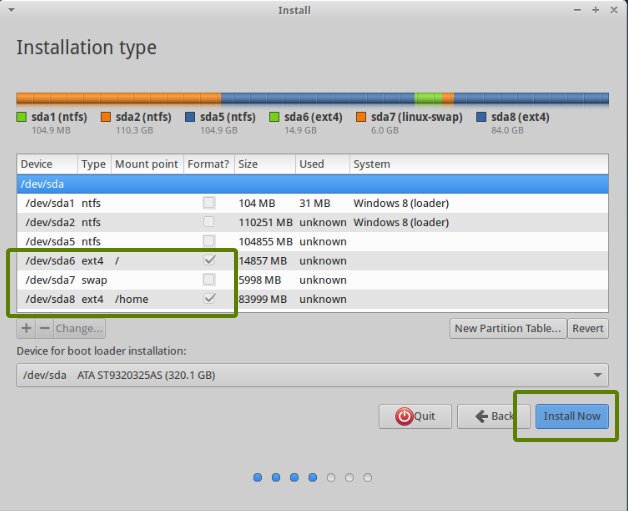
Once you have created Root, Swap and Home partitions, click on Install Now button.
Step 6: Follow the trivial instructions
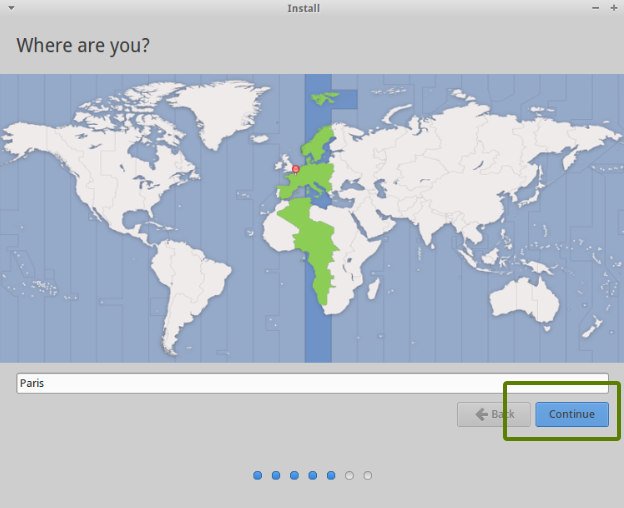
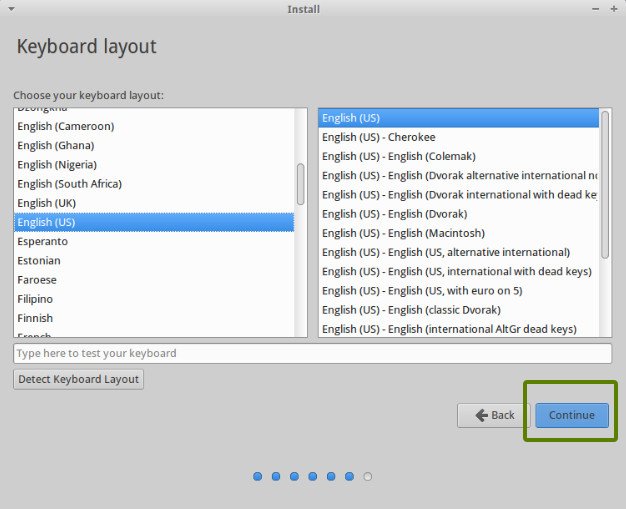
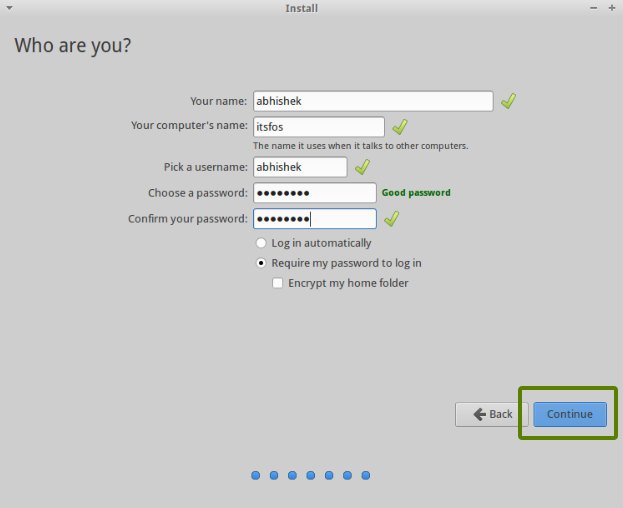
If you successfully created the partitions as mentioned above, you have almost won the battle. Rest is just some trivial steps to follow. You will be taken through a number of screens to select options like keyboard layout, login credentials etc. You don’t have to be a genius to figure out what to do here afterwards. I have attached screenshots for reference purpose here.

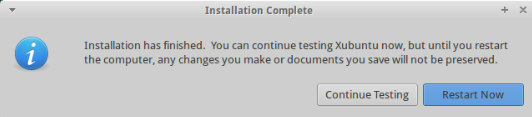
Once the installation is over, you will be presented with the option to keep trying live version or to restart the system.
And that’s it. On next boot, you will see the option of Ubuntu in the grub screen. And thus you can enjoy the beautiful, beginner friendly and world’s most popular Linux distribution. I hope you found this guide to dual boot Ubuntu with Windows helpful. If you need, you can change the boot order easily to make Windows your default OS. Since you have just installed Ubuntu 14.04, you can check out things to do after installing Ubuntu.
If you have questions, suggestions or a word of thanks, feel free to drop a comment.
