

Pop!_OS is the Linux distribution created by System76 and is based on Ubuntu. Since System76 sells Linux-first laptops and desktops, their Linux distribution, even though is based on Ubuntu, provides support for bleeding edge hardware (only if the newer Linux kernel does not create a conflict for currently supported hardware).
Out of all the new Linux distributions out there, the user-base of Pop!_OS just “popped” out of nowhere. Considering it is a relatively new distro among a plethora of other “well established distros” like Ubuntu, Manjaro, Mint etc; this is a big achievement!
This isn’t an opinion article on why you should use Pop OS over Ubuntu, but a guide, for you to get started with Linux on your PC by installing Pop!_OS on it.
Choosing the installation method for Pop OS
There are multiple ways to install Pop!_OS (and all other Linux distros) on your computer.
- Install Pop!_OS as a Virtual Machine using VirtualBox on your PC without affecting your current Windows install.
- Install Pop!_OS alongside Windows; AKA dual boot (even though the linked guide is for Ubuntu, it should work for Pop!_OS; make sure to turn off “Secure Boot”).
- Replace Windows 10/11 with Pop!_OS.
I highly recommend that you try out Pop!_OS in VirtualBox before installing it on your computer, specially if you are new to Linux.
This tutorial covers installation of Pop!_OS replacing Windows, and below are the hardware requirements for Pop!_OS.
- A 4 GB USB drive to create a Live USB drive
- Any 64-bit x86 CPU (any 64-bit Intel or AMD CPU)
- At least 4 GB of RAM is recommended
- A minimum of 20 GB of storage (to store the OS)
Choose the version of Pop!_OS to install
Just like Ubuntu, Pop!_OS comes in two variants. All LTS releases are supported for 5 years from release date. Canonical releases a LTS version of Ubuntu in April of every even numbered year.
A new Non-LTS version is released every 6 months (in April and September, every year) and that particular version is supported only for 9 months from release date.
As of writing this article, Pop!_OS is available in two (technically four, but we will get to that later) versions. Current LTS release is “Pop!_OS 20.04 LTS” and “Pop!_OS 21.04”. And soon enough, version 21.10 will be released.
Because Nvidia does not have open source drivers, installing Nvidia GPU Drivers ends up causing problems to your Linux installation if not done correctly. Therefore, System76 offers two variants for each version of Pop!_OS.
Pop!_OS 20.04 LTS is available in two variants (more details in next section).
- For users with a Nvidia GPU in their computer
- For users with an AMD (and/or an Intel for iGPU and for the upcoming dGPU) users.
If you are not sure, check the graphics card on your system and choose the appropriate version while downloading.
Installing Pop!_OS
In this guide, I’ll be using the non-Nvidia version of Pop!_OS 20.04 LTS (but the installer steps will be the same for every variant of the same version).
Step 1: Create a live USB
Visit System76’s website to download a copy of Pop!_OS.
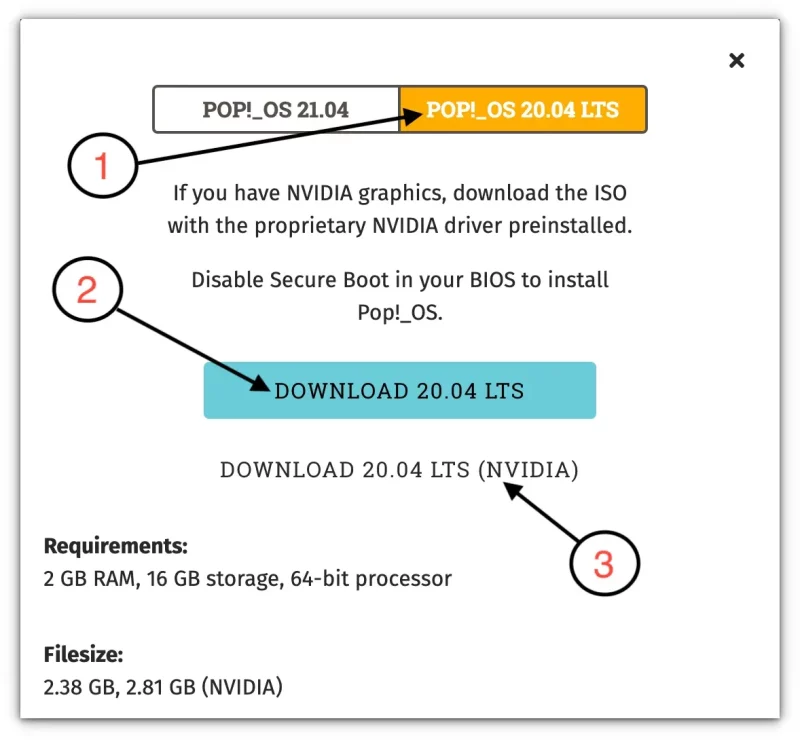
Select “Pop!_OS 20.04 LTS” (#1) and then click on either the normal ISO (#2) or the Nvidia-specific ISO (#3) to start downloading it.
After you have downloaded a copy of ISO that is suitable for your use case and machine, your next step will be to create a live installer for Pop!_OS. A live installer is a full copy of the OS for you to tinker with, before you feel that the OS is of your liking and also compatible with your hardware.
Sometimes the distribution of your choice might not have good support for the proprietary components like WiFi, GPU etc included in your laptop/desktop. Now is the time to test your hardware compatibility.
NOTE: Any data stored on your USB stick will be erased at this step, make sure you do not have anything important on the flash drive.
You have access to numerous tools to create a live USB stick. Some of them are:
- balenaEtcher (available on Mac, Windows and Linux)
- UNetbootin (available on Mac, Windows and Linux)
- Rufus (available only on Windows)
- Ventoy (available on Windows and Linux)
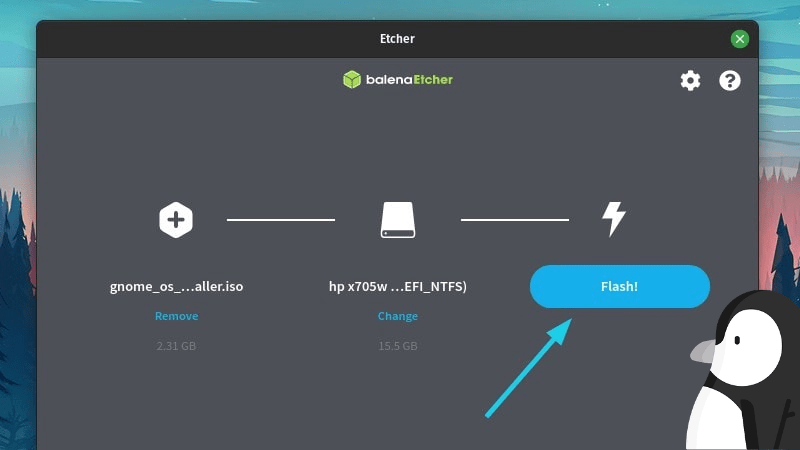
On Windows, you can use Rufus to create a live USB from Windows. You may also use Etcher for Windows, Linux and macOS. It is really simple. Just start the application, browse the downloaded ISO and hit the flash button.
Step 2: Booting from the live Pop OS USB
Once you have created the live USB, you need to tell our computer to boot from the USB stick instead of the disk on which Windows is installed.
To do that, restart your computer. And once you see your computer vendor’s logo (HP, Dell, Asus, Gigabyte, ASRock etc) press either the F2 or F10 or F12 or Delete key to enter your computer’s BIOS/UEFI. This key will differ based on your computer vendor, for most desktops it is usually the Delete key, and for most laptops it is the F2 key. If still in doubt, a quick web search should tell you which key to press for your system.

On modern computers with UEFI, you don’t even need to go in UEFI. You can directly hit a specific key like F12 (my computer vendor has F12) and you’ll see a boot menu. From there directly select your USB stick.

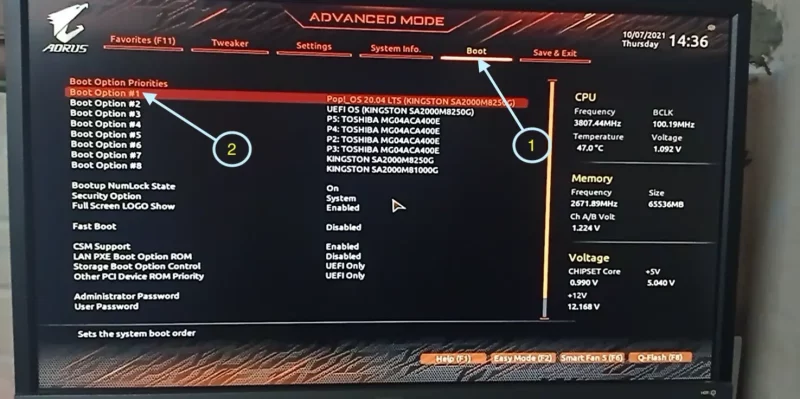
For people who have an older BIOS/UEFI, go under the section where it says Boot (do note, the steps will vary from vendor to vendor) and select your USB drive instead of your SSD/HDD. And reboot.
Your computer should now boot from the live USB you just created.
Step 4: Start installing Pop!_OS
You should be in the Pop!_OS live environment now. On your computer screen, you will see an installer asking you for setup details like your preferred Language, Country and Keyboard Layout.
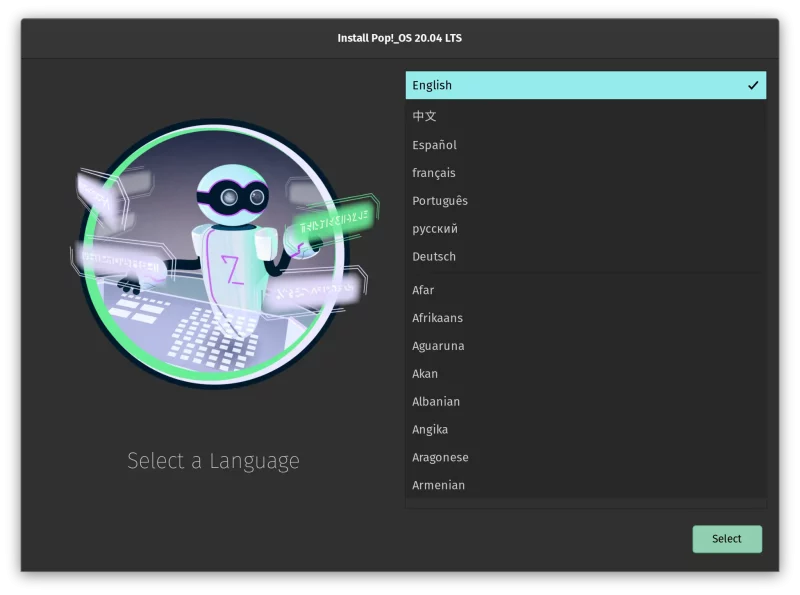
Once you have selected your Language, Country and Keyboard Layout, you will see this screen. You technically have 3 options.
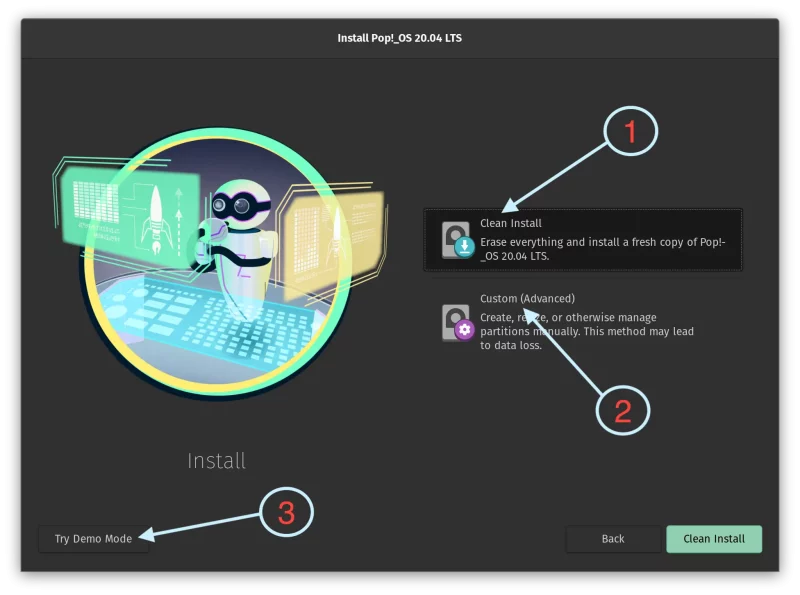
- Clean Install (#1): This option will erase your entire disk and install Pop!_OS on it.
- Custom (Advanced) (#2): This option will allow you to specify things like root partition, if you want a different home partition, use another file system for your root partition, resize partitions, use a different sized swap partition etc.
- Try Demo Mode (#3): An option in the bottom left of the installer that allows you to test drive Pop!_OS as if it was actually installed on your computer without actually touching your drive contents.
For the scope of this tutorial, proceed by selecting Clean Install.
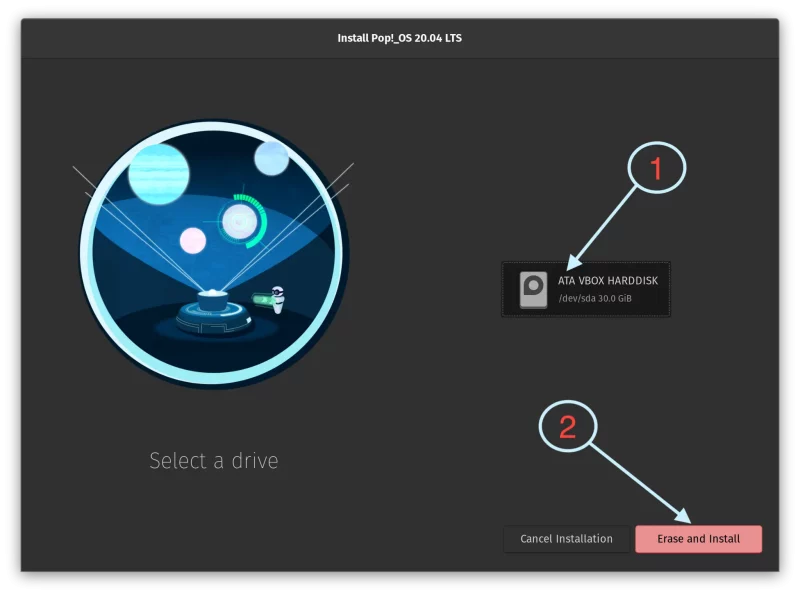
Next up, specify a drive where you want to install Pop!_OS on. In case your computer has multiple drives, you will see each drive labelled along with it’s size so you can be assured if the drive you have selected is the one you have decided to install Pop!_OS on.
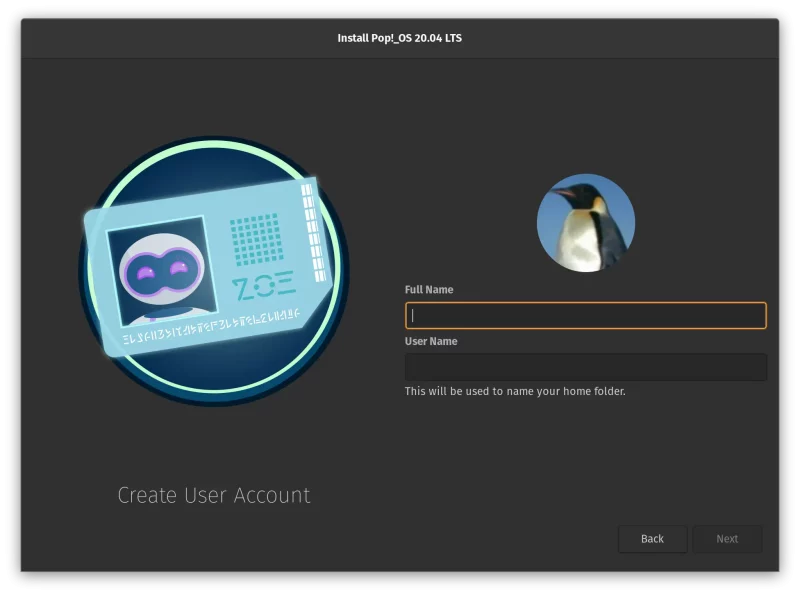
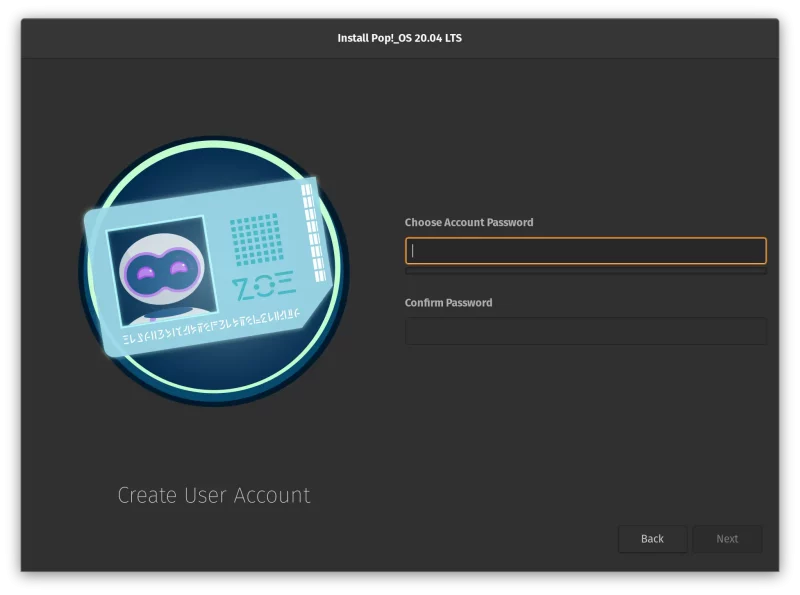
You will be prompted to provide your name and a username for your user. Your username will be the name of your home folder.
Up next, set a password for your user.
The final step includes setting up Drive Encryption. If someone has physical access to your computer, your data on the disk can be accessed using a live operating system (like the live USB you created).
The disk encryption prevents that. However, you must never forget the password or you’ll never be able to use the disk again.
It is up to you if you want to encrypt the disk.
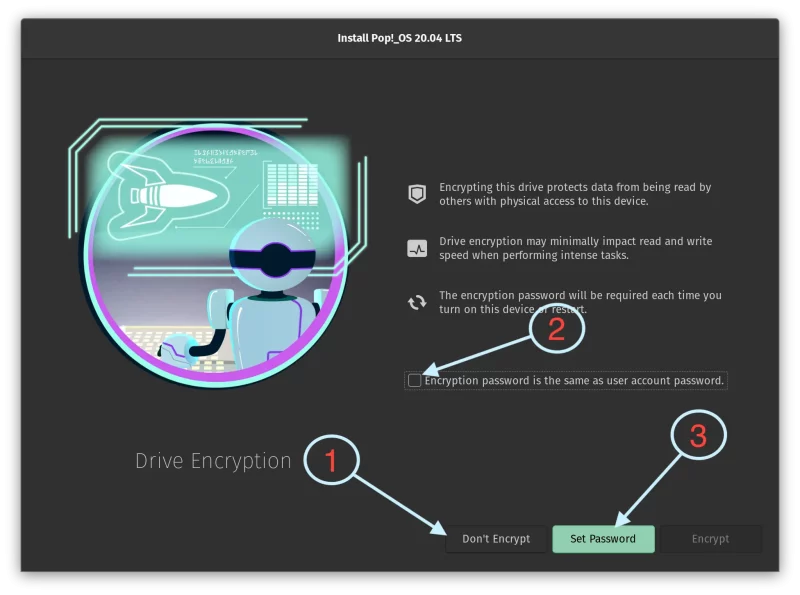
The installer will give you three options for encryption.
- Don’t Encrypt (#1): Does not encrypt your drive. Not recommended for security conscious users
- Use user password for drive encryption (#2): This will tell the installer to use the same password for your user and for drive encryption. If you use this option, make sure your user has a strong password.
- Set Password (#3): Use a different password for encrypting drive.
Whichever you choose, the installation should start now. Below is a screenshot showing the installer screen.
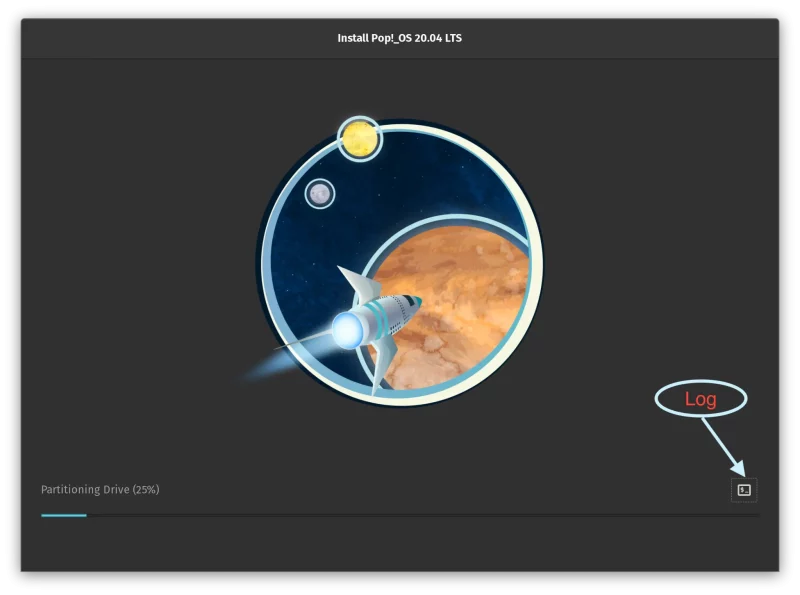
Just in case you encounter any error(s) during this step, click on the button placed at the bottom right edge of installer with “$_” (annotated as “Log” in the screenshot above) in it. It is the installer log. Posting a few lines from the bottom of this log should help others from our community forum or any other forums help you diagnose the issue causing installation errors.
Please wait for a few minutes for the installer to finish installing and it will provide you with two options, Reboot or Shut Down. Power off your computer and remove the USB drive.
Congratulations! You just installed Pop!_OS on your computer! Let me know if you face any issues.
If this helped you, consider supporting It's FOSS
It's FOSS has been helping people use Linux for the past 14 years. Help us stay independent from big tech. Become a Plus member, enjoy ad-free reading and get 5 eBooks.
