

If you have been following It’s FOSS regularly, you might have come across my coverage on the different tools to take a screenshot in Linux.
I did recommend using Flameshot as well because it happens to be my personal favorite to take screenshots. In case you didn’t know, Flameshot is an open-source screenshot tool available for Linux.
However, in this article, I shall be focusing on ‘Flameshot’ to help you install it, configure it, and highlight the features it has to offer.
Suggested Read 📖
 Ankush Das
Flameshot Features
Flameshot offers almost all the essential features that you would ever require on a screenshot tool on Linux. Here are some of the key features in video format:
Upload screenshot to Imgur
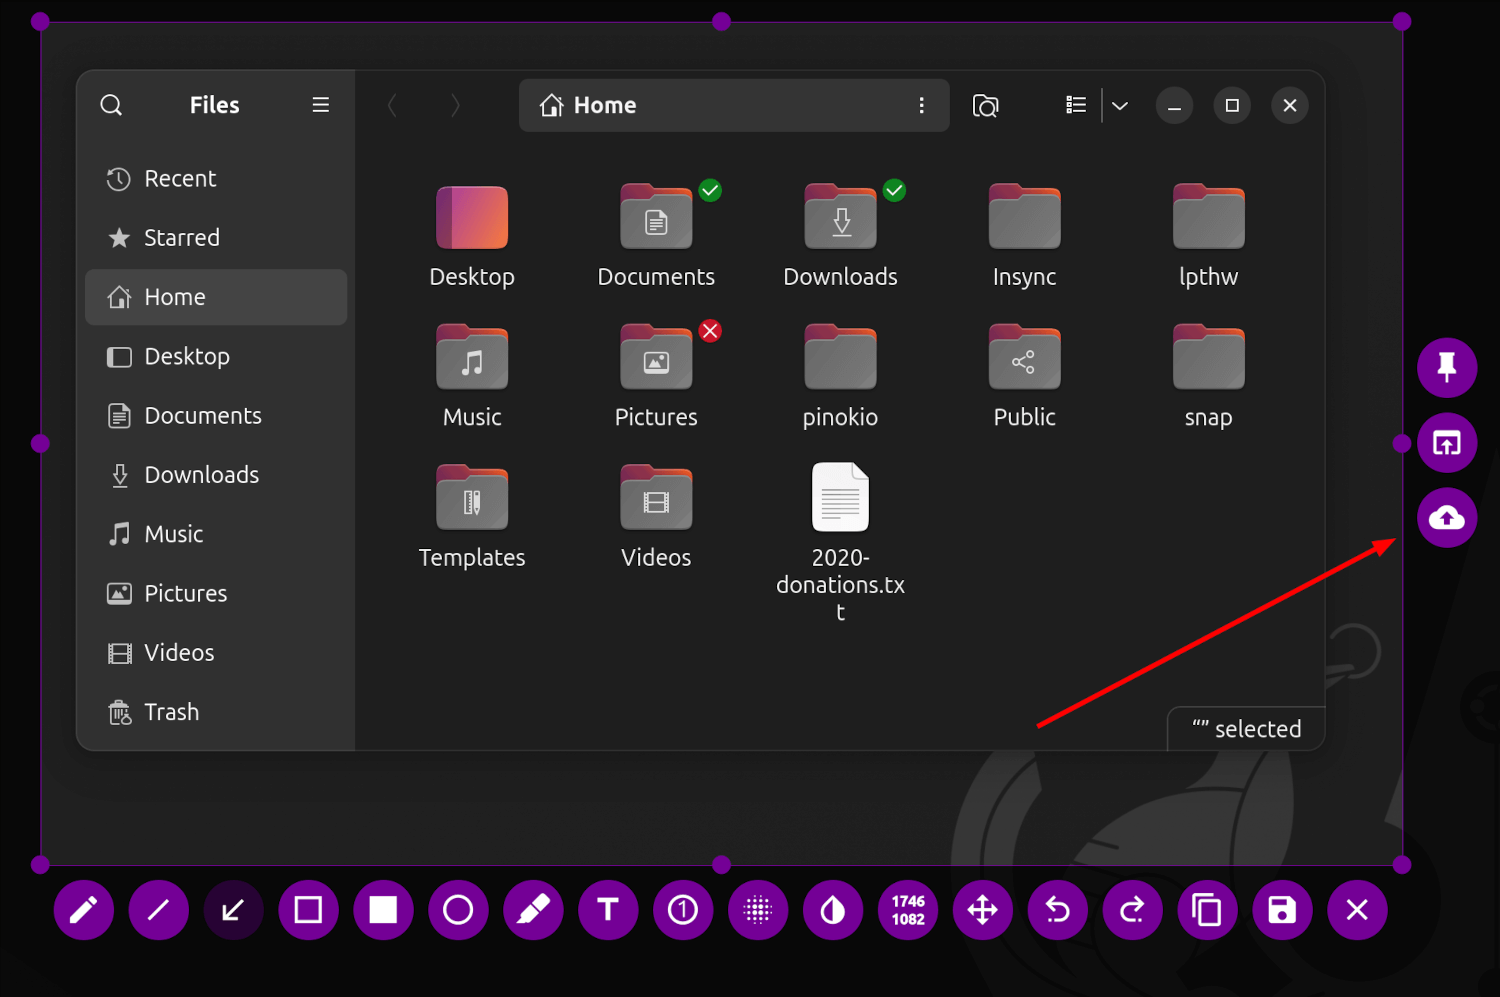
A lot of users want to simply upload their screenshots directly to the cloud in order to easily share it with others.
You can do that by syncing your saved files to a cloud storage solution like MEGA and share them later. But, that’s quite a few steps to follow in order to share your screenshot, right?
So, here, Flameshot lets you upload your image directly to Imgur with a single click. All you have to do is share the URL.
Annotation Options
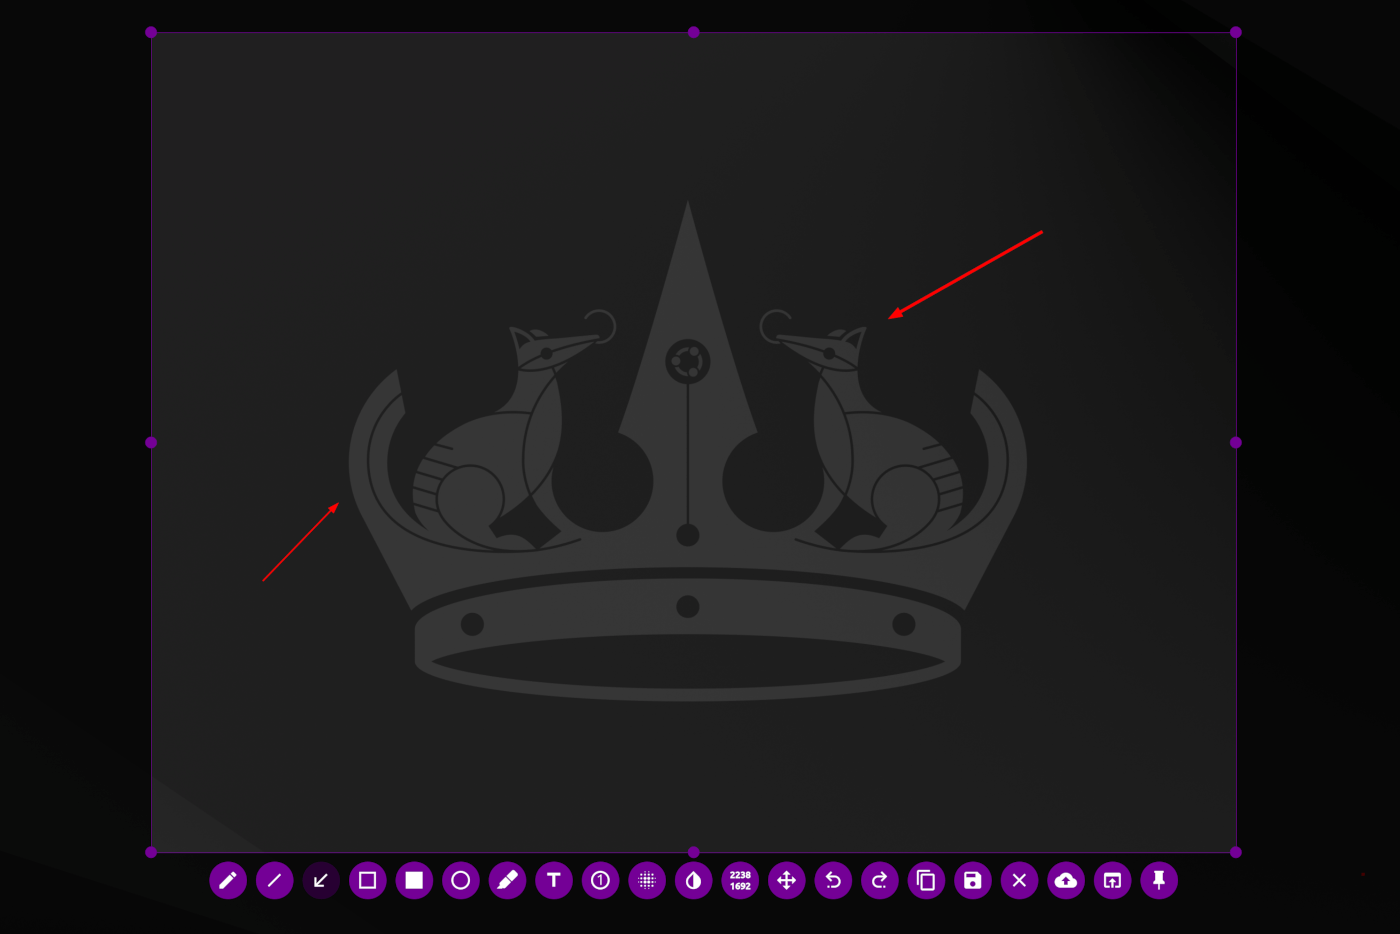
The whole point of having a 3rd party screenshot utility is the ability to annotate the pictures.
You can choose to add an arrow mark, highlight a text, blur a section (pixelate the area), add a text, draw something, add a rectangular/circular shaped border, add a counter number, and add a solid color box.
You can take a closer look at the options in the short clip above (or explore more on their official GitHub page).
You will also observe that the blur tool now blurs and pixelates the areas depending on the thickness of the area, and you will also find a new annotation option to add incremental counter numbers.
Customization Options

In addition to all the useful features, it also gives you the ability to customize the UI, filename (when you save a screenshot), and some general options as well.
You just head to the tool configuration when Flameshot is active (or from the app indicator).
Installing Flameshot on Linux
Before configuring Flameshot, you need to get it installed on your Linux system.
You might find it in your Software Center/App Center/Package Manager, simply search for “Flameshot” and get it installed. Or, get it using Flathub or Snap store.
You can also head on to its GitHub releases page and download the setup file suitable for your Linux distro. It is available in DEB (for Ubuntu), RPM (for Fedora) and AppImage (for all Linux distributions).
How To Setup Flameshot?
Now that you are aware of the features (and probably have it installed), how do you use it?
Of course, you would rather not launch a screenshot tool by searching for it in the list of applications installed.
So, the best way to access it would be to press the PRT SC key, right?
But, by default, when you press the Print Screen button, it will launch the default screenshot tool (or directly take a full-screen screenshot).
Fret not, you can easily change it. Here’s how you can set flameshot to launch upon pressing the ‘Prt Sc‘ button:
1. Head to the system settings and navigate your way to the “Device” options.
2. Next, head inside the “Keyboard Shortcuts” option.
3. Now, you need to change the keyboard shortcut for “Saving a screenshot to Pictures” from Prt Sc to anything else (a button you don’t use frequently).
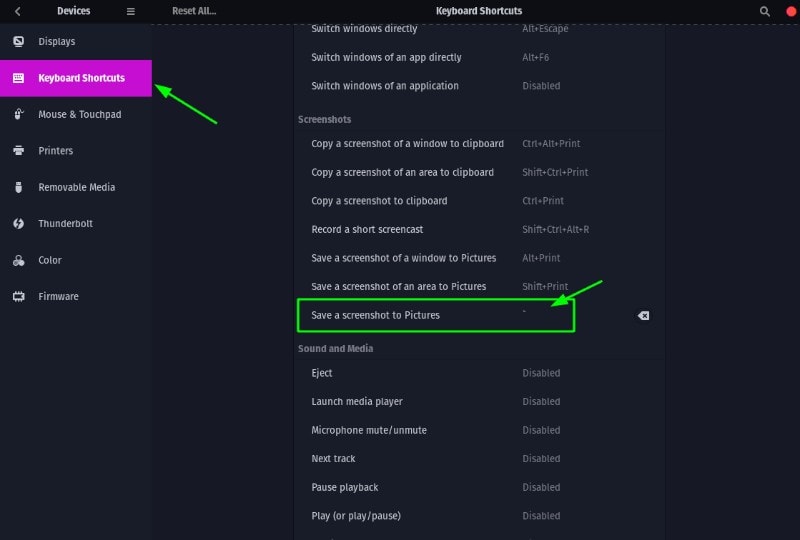
Refer to the image above to understand it better.
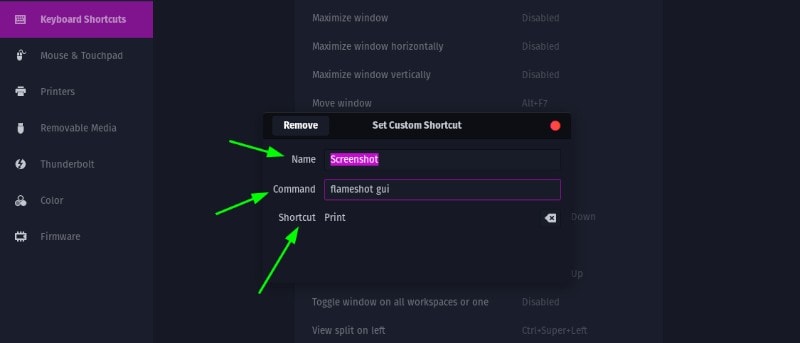
4. Once you have done this, scroll down to the bottom and add a new keyboard shortcut by clicking on the “+” button.
5. Here, you will get the option to name the shortcut (it can be anything) and in place of the command, you will have to enter:
flameshot guiAnd, hit the Prt Sc button when you set the shortcut. That’s it!
Here’s how it should look after configuration:
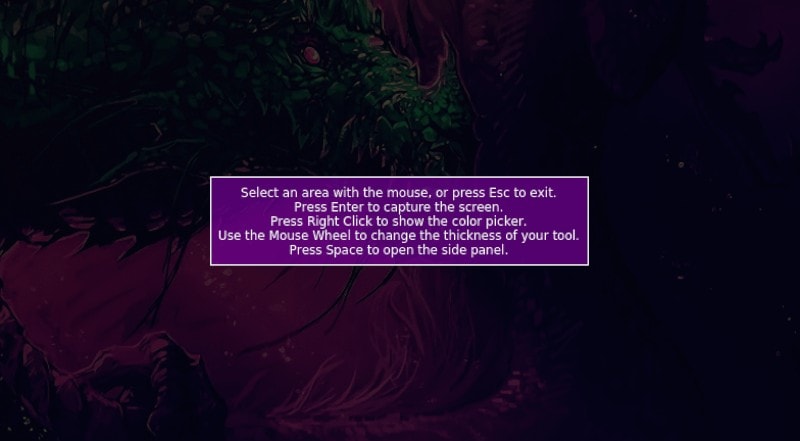
Now, you should be able to launch Flameshot by pressing the Prt Sc button.
Few Tips To Note
- By default, Flameshot saves the pictures in PNG format. So, if you need a JPEG file, you can simply rename the file extension.
- You can change the color of the text/arrow mark by performing right-click before adding it. Once you change it, the color remains the same even when you use it the next time. You can change the color again, the same way.
- If you want the option to choose a custom color (instead of the pre-defined color selection), head to the tool settings that you find on the left side of the screen.
- If you cannot access the Flameshot configuration option via the app drawer, simply type in “flameshot config” in the terminal.
Wrapping Up
Taking screenshot with GNOME Screenshot tool is not too bad. In addition to that, there are alternatives to Flameshot available, I find it to be a decent screenshot tool for my usage.
In either case, if you already use a screenshot tool, which one is it? Do you know of something that happens to be better than Flameshot? Let me know your thoughts in the comments below.
If this helped you, consider supporting It's FOSS
It's FOSS has been helping people use Linux for the past 14 years. Help us stay independent from big tech. Become a Plus member, enjoy ad-free reading and get 5 eBooks.
