

GNOME is a popular desktop environment that provides a modern experience.
While it works for the most part, some of their decisions have left the user fuming and questioning.
You cannot have icons and files on the desktop, new document option has been removed from the right click context menu. In addition to that, GNOME has also removed the applet indicator functionality in the top panel.
You know what indicator applets are, don’t you? Those little icons that let you access additional features of the given application. I have plenty of them in my Ubuntu system.
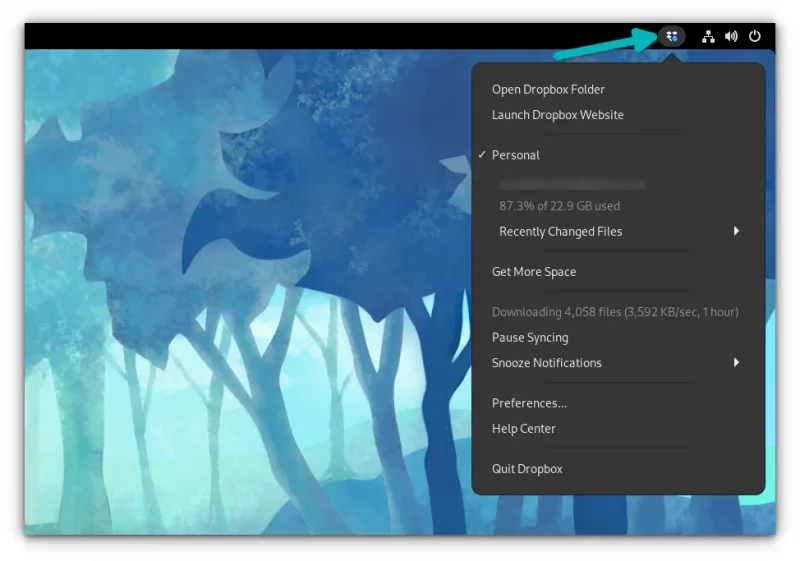
And this creates a problem, for applications that rely completely on these applet indicators to function. Take Dropbox, for example. The only way to access Dropbox settings is through the app indicator.
Unfortunately, GNOME at its core does not support app indicators, unless you are using a GNOME-powered distro that supports it by default.
That’s an issue, but thankfully, there are several workarounds, with varying level of customizations for that. Here, I discuss some possible options.
First: Setup Third-Party GNOME Extension Support
If you are using GNOME, you probably already know what GNOME Extensions are. They give you extra functionalities on top of your desktop experience.
You can enable the GNOME extensions by following this tutorial:
 Abhishek Prakash
It is easy. Go to any GNOME extension’s page using Firefox or Chrome, and it will suggest downloading a browser extension. Install it and you are good to go!
You may also need to install a package called chrome-gnome-shell, which can be installed in Ubuntu and Fedora by:
sudo apt install chrome-gnome-shell
OR
sudo dnf install chrome-gnome-shell
If you are using Arch Linux, install it using:
sudo pacman -Syu gnome-browser-connectorOnce you are ready to use extensions, we can start customizing the top panel using them. Let's go!
Enable App Indicators for GNOME Panel
App indicators are essential for the top panel experience. With them, you can interact with the apps running in the background, launch them, configure them, and stop them easily.
So, first we enable the app indicators, then we proceed customizing the panel.
1. Using AppIndicator and KStatusNotifierItem Extension
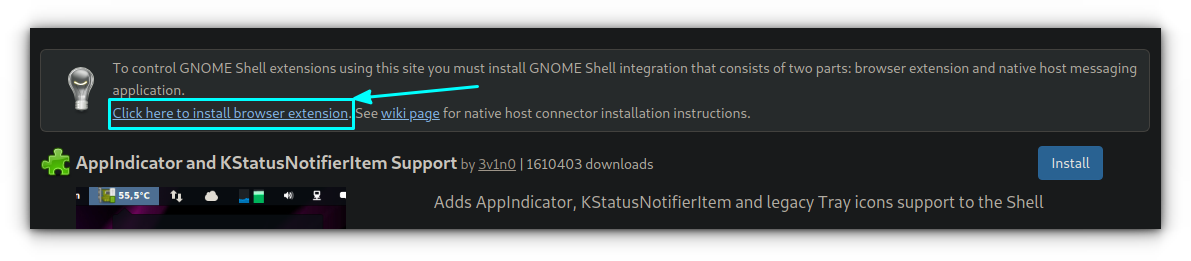
There are various GNOME extensions available that allow adding applet indicators in the top panel. At the time of writing this tutorial, AppIndicator and KStatusNotifierItem Support is a well-developed extension that is supported for recent GNOME versions.
Head to its extension page using the button below:
On the page, you should see a toggle button. Click it to install it.

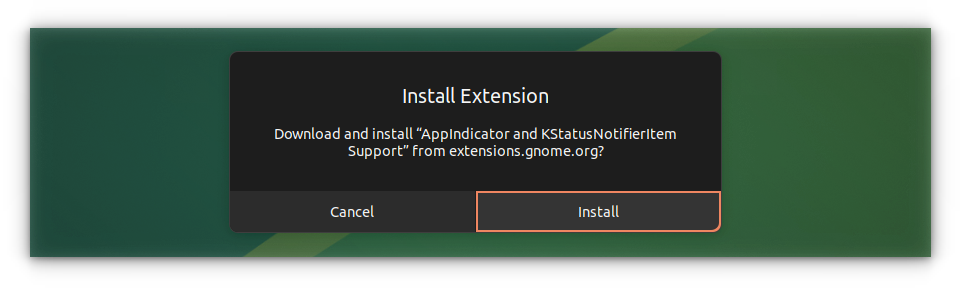
There will be a pop-up. Hit install when you see it.
The results may be seen immediately. If you have any applications installed that provides an indicator applet, you should see it on the top panel.
If that's not the case, you’ll have to restart GNOME. On Xorg, you could just use Alt+F2 and enter “r” but that does not work in Wayland.
Log out of the system and log back in. The Applet indicator should be activated now.
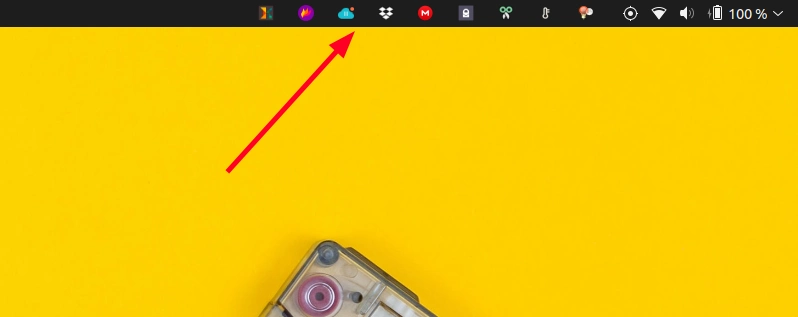
In my case, I had Dropbox already installed; hence it started showing the icon in the top panel.
This extension does not provide a lot of customization options, but the basics.
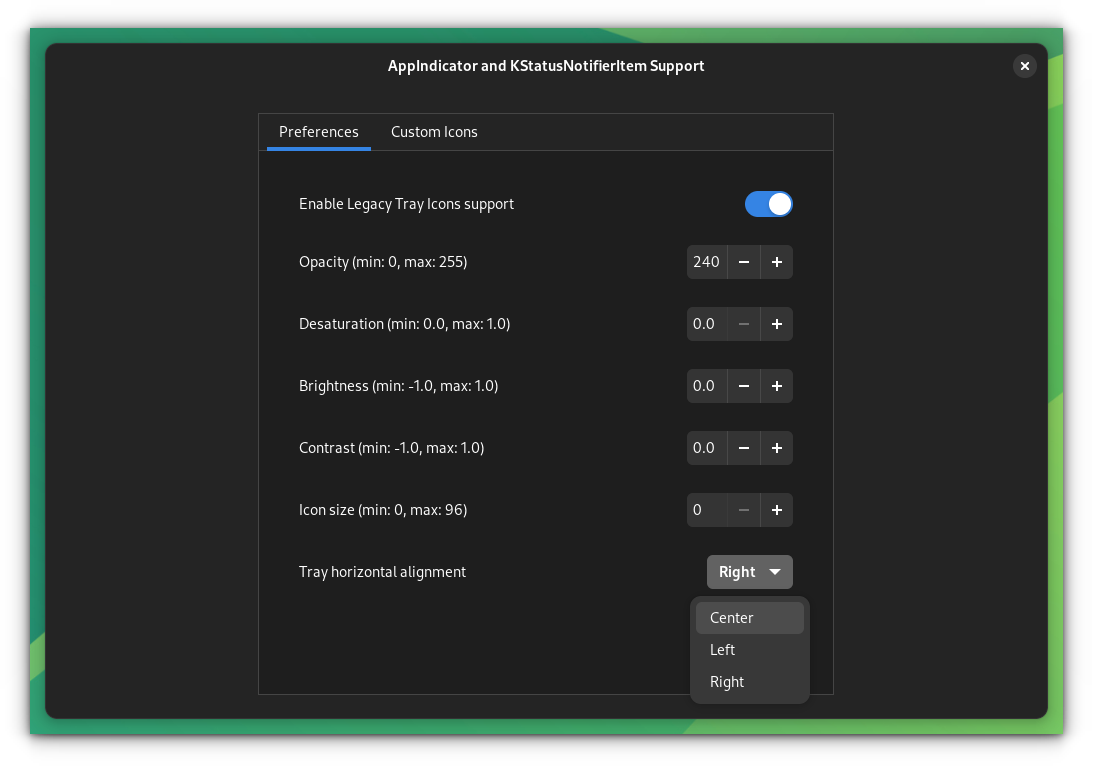
Things you can do include:
- Bring the Tray icon to center, left or right (default).
- Change the appearance of the icons, including size and opacity.
2. Using Tray Icons: Reloaded
Tray Icons: Reloaded is another tray icon support extension for GNOME. By default, it works well in Xorg and XWayland. You can go to the extensions page and install it.
Once installed, you can do several tweaks with this cool extension.
Overflow Mode
Usually, in this extension, if there are more than 3/4 applet indicators active in the top panel, it will show you an overflow mode. Here, the indicators are placed neatly on an overflow menu.
It is possible to set the Tray icon limit to your liking so that, the excess icons are moved to overflow, resulting in a very neat top panel.
Other Features
- Wine App Support (Left and middle click affect all wine apps)
- Invoke app to current workspace, from where it is opened at the moment.
- You can use Shift + Middle Click to kill an app.
- Hide selected apps in your tray
- Other visual tweaks
Now that you know how to enable app indicators for the top panel. Here's how you can customize the experience:
Customizing the GNOME Panel Using Unite
Unite is an extension, that applies some pre-configured settings to your top panel. You can introduce changes to them using the extension’s settings page. According to the documentation, by default, when you install this extension, it will help you:
- Add window buttons to the top panel for maximized windows.
- Show current window title in the app menu for maximized windows.
- Remove title bars on maximized windows.
- Hide window controls on maximized windows with header bars.
- Move the date to the right, fixes icons spacing and removes dropdown arrows.
- Move legacy tray icons to the top panel.
- Move notifications to the right.
- Hide activities button.
- Add the desktop name to the top panel.
When you open the extension settings, you will get several options with toggle buttons and drop-down menu. Make changes as you require.
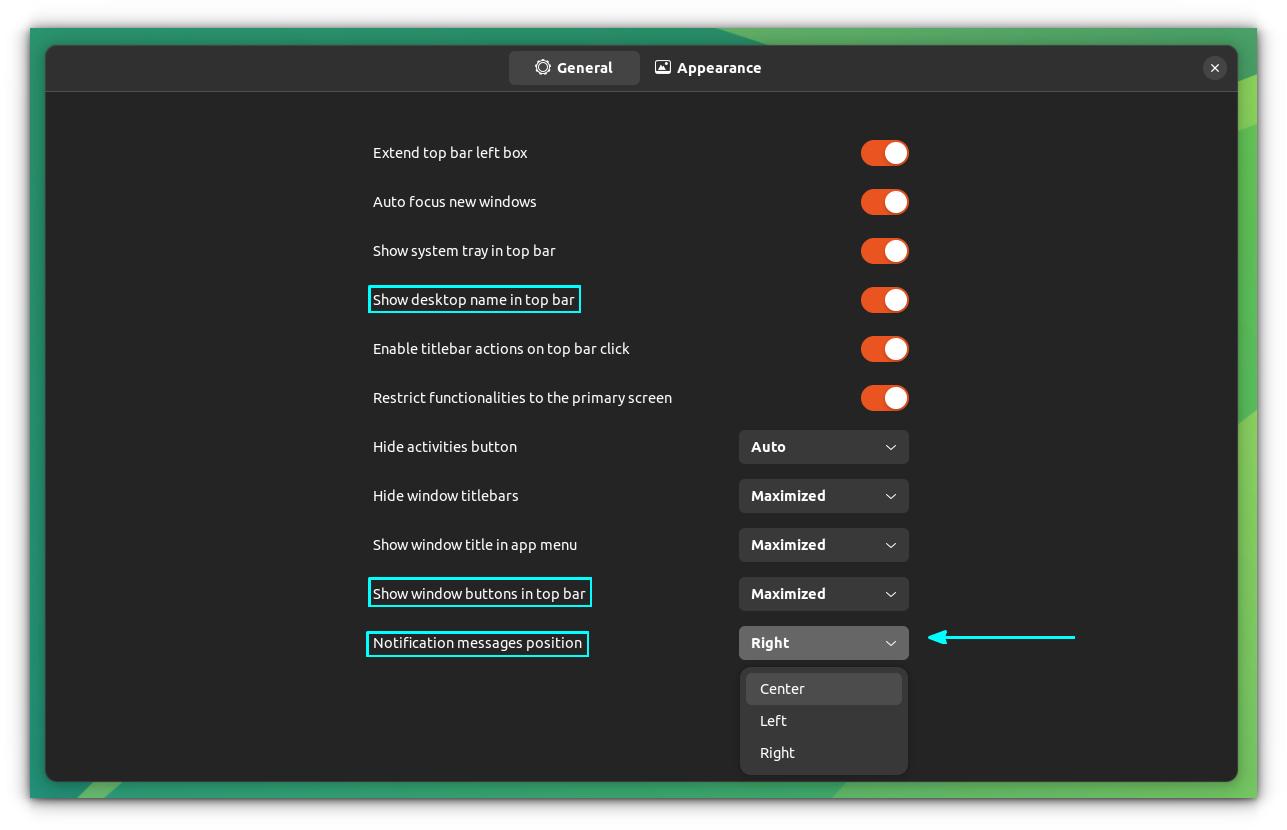
Here, I have marked some settings that can make your desktop experience a bit different.
- Setting the notification area position to a location convenient to you is one handy trick
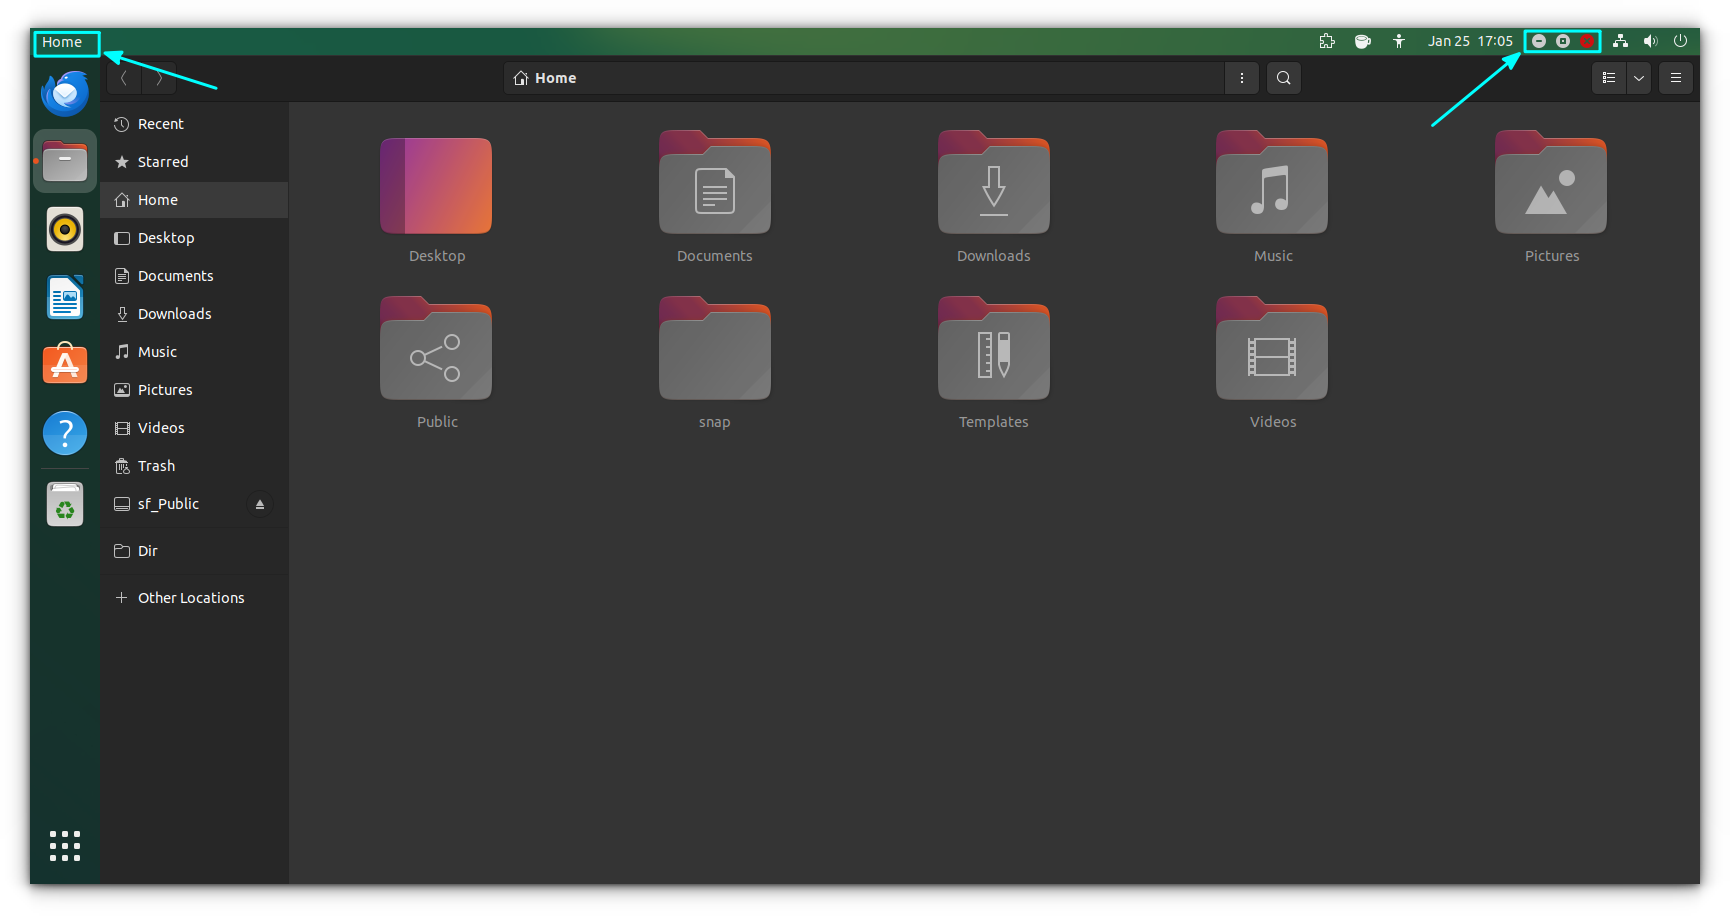
Similarly, you can show a desktop name in the top bar. By default, it will display “GNOME Desktop” on the top left of the panel. The text can be changed in the Appearance menu.
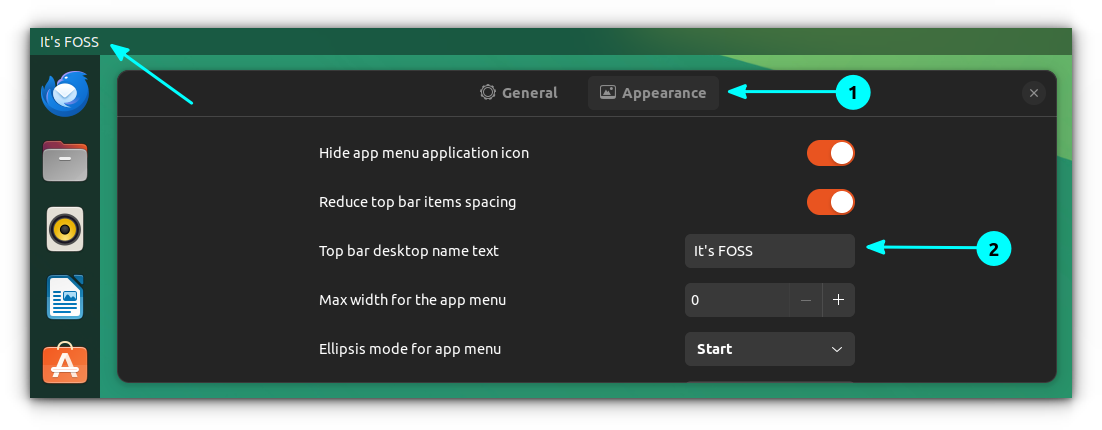
Now, when you are on the desktop, it will display the name of your choice on the top left of the panel.
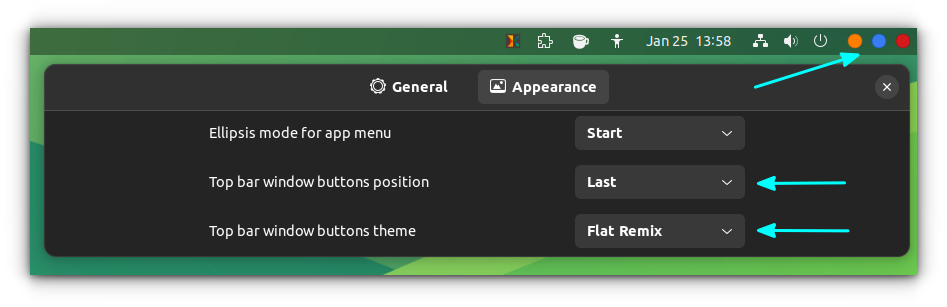
Likewise, it is possible to change the position and theme of the windows buttons (close, minimize, and maximize) on the top panel. Here, you can set a different theme and position.
Customizing the GNOME Panel Using Quick Settings Tweaker
Quick Settings Tweaker or QSTweaker is another cool GNOME Extension that works on GNOME 43+. If you are running Ubuntu 23.10, Fedora 39, etc., you can take advantage of this.
When you install this extension, it will move the notification part to the right side of the panel. This will leave a very neat and small calendar in the center, with all other controls going to the right side.
Default Quick Settings Tweaker Appearance
Now, there are many useful customizations available in this extension. Let me highlight some two important ones.
1. Remove Selected Items from Quick Toggle
If you don’t want some item inside the quick toggle, you can hide it using this setting. You can also bring back what you disabled/removed.
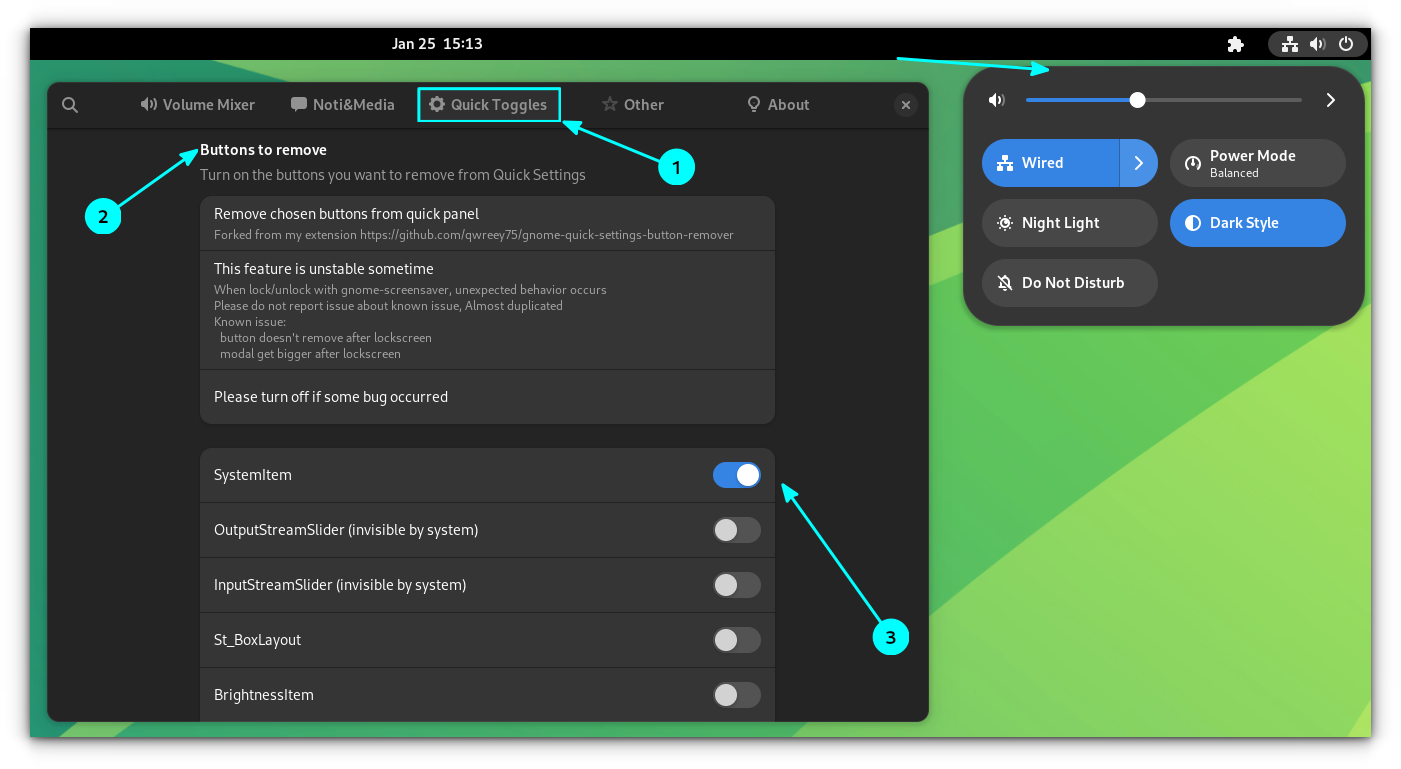
You can see it in the above screenshot, I have removed the icons for tools like settings, screenshot, etc. from the quick toggle. Scroll down the settings page to hide more options like Bluetooth, Dark Mode toggle, etc.
2. Control Volumes and Media Playing
By default, it places a volume mixer and also adds a media widget, that allows to manage various media sources.
The main attraction is, everything is now accessible from the right side of the panel.
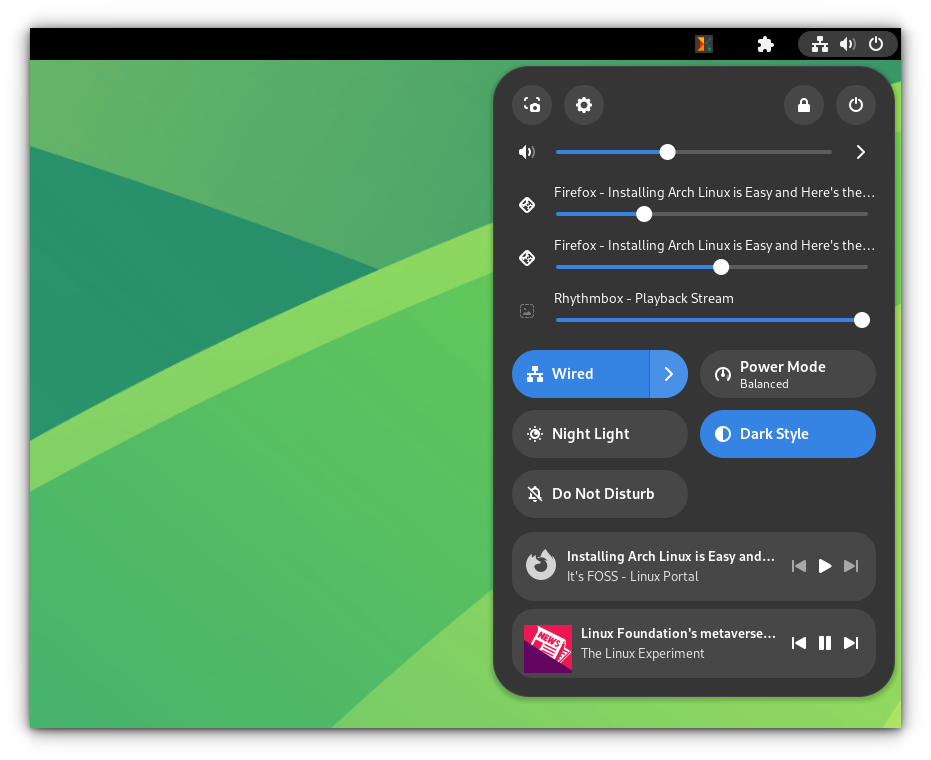
You can choose to disable the media widget, and the sliders, if you do not like it. Moreover, you can adjust the position, if you want the sliders to appear below the toggle buttons.
Bonus: Blur My Shell
You can use Blur my shell to make your panel look really cool. Here is a simple customizing tip for you!
First install the extension from its page or through the Extension manager application.
Now, access the settings and go to the panel tab. Here, toggle on the Panel blur and Customize Properties buttons.
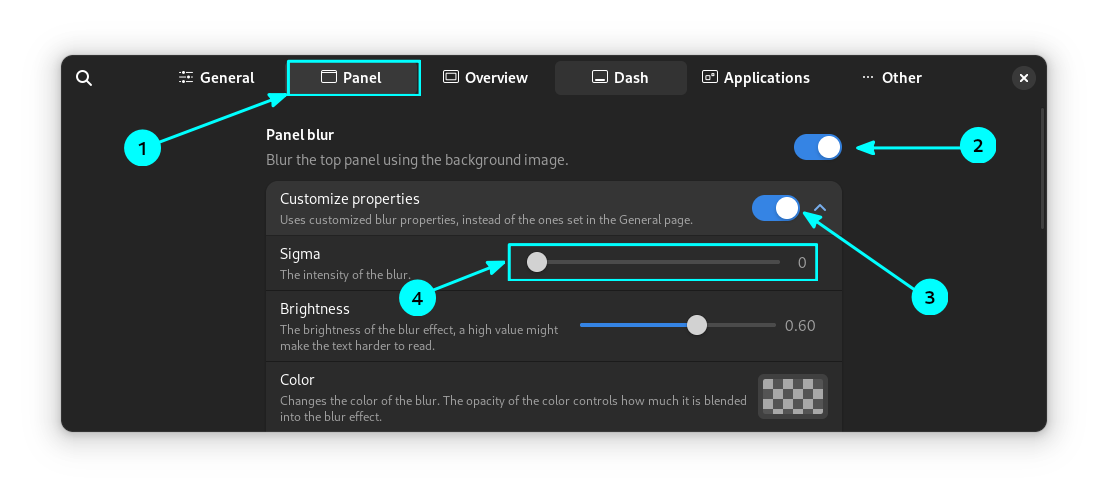
Under Customize properties, adjust the value of Sigma to Zero.
Then, scroll down a bit and toggle on the Override Background Button. Under this setting, change the Background Style to “Contrasted”. Furthermore, enable the “Disable when a window is near” option.
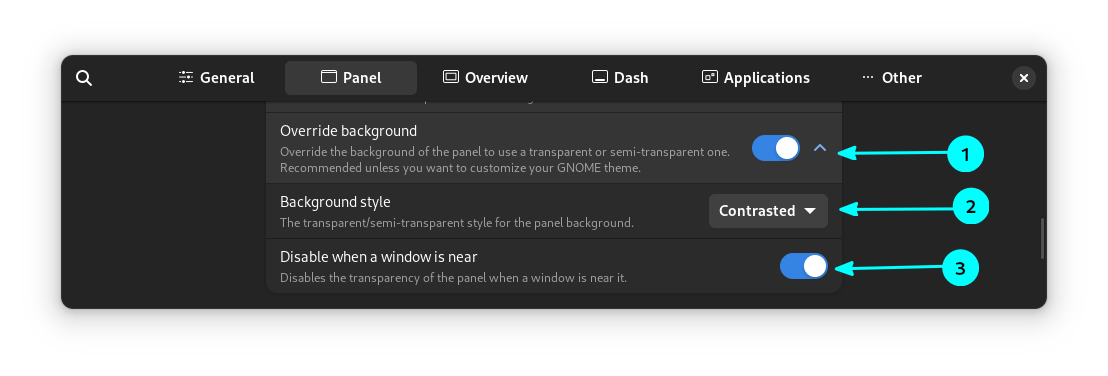
That’s it. You can see that the panel now becomes more attractive.
Panel with Blur My Shell Settings Applied
Wrapping Up
It is pretty easy to adjust the GNOME top panel, for a better look, or quick accessibility.
Of course, that's not all. If you want more GNOME customization, try this:
Sagar Sharma
If this helped you, consider supporting It's FOSS
It's FOSS has been helping people use Linux for the past 14 years. Help us stay independent from big tech. Become a Plus member, enjoy ad-free reading and get 5 eBooks.

