


From the dock to grub screen, GNOME can be customized to your liking.
Add the login screen to this list as a new tool called GDM Settings allows you to change the looks and tweak functionalities of the login screen in GNOME.
You can change the wallpaper, theme, icon, time format, top panel items etc. You can also enable tap to click on the login screen (I love this one) among other things.
In this tutorial, you'll see the steps for installing this tool and how you can use it to change various aspects of the GDM login screen.
Needless to say, you must be using GNOME desktop environment and GDM display manager in order to follow the instructions here.
Tweaks using GDM Settings tool
Let's first see the kind of changes you can make with this awesome utility.
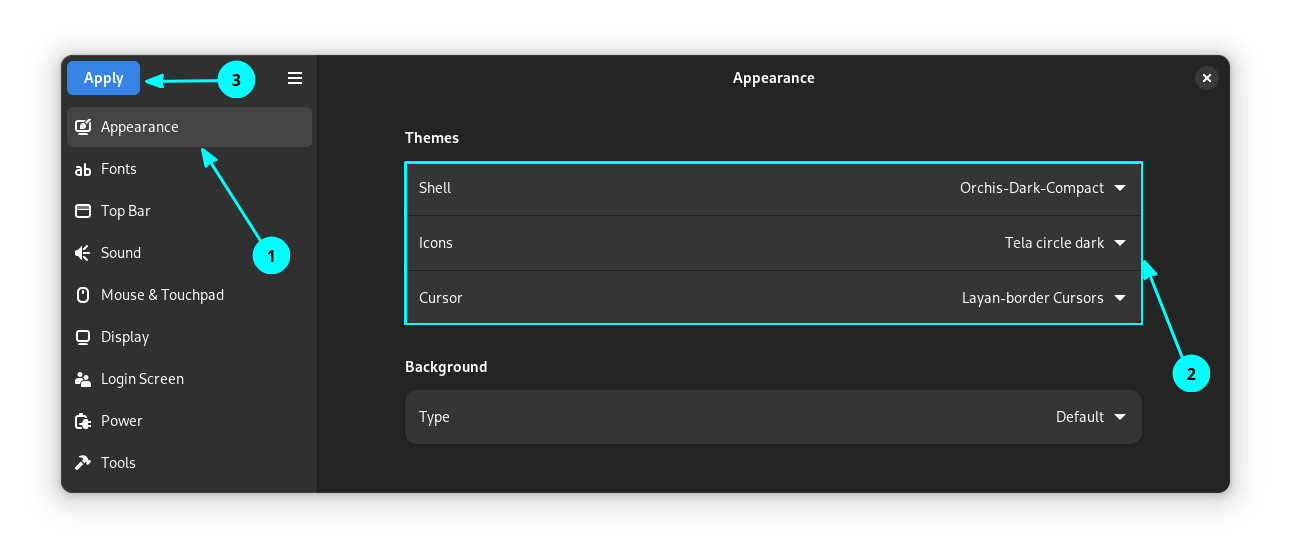
1. Change shell theme, icon, and wallpaper
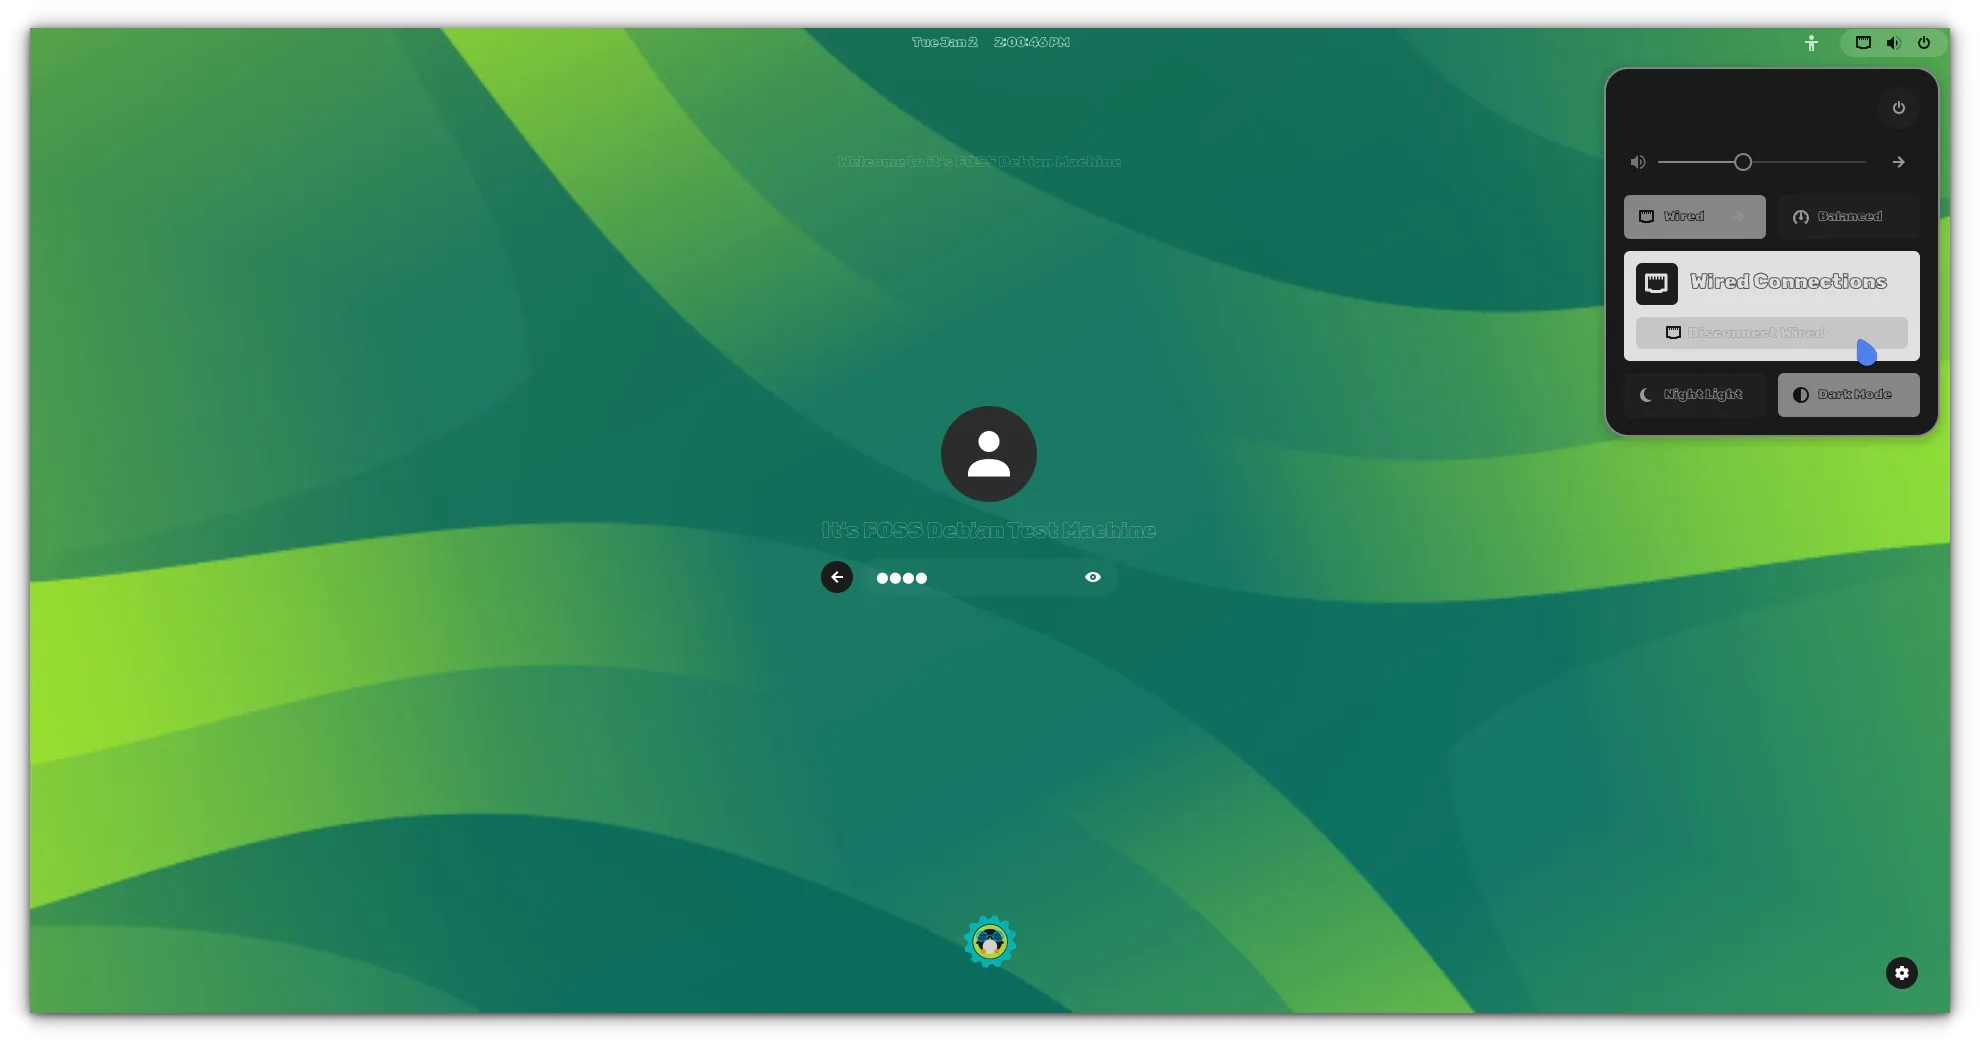
You can change the theme, icon and wallpaper of the login screen. Here's an example.
To change the theme, you should download it first. Get one from the GNOME Look website.
Next, ensure that the theme is in /usr/share/themes. Themes stored in ~/.themes are not visible to the GDM settings app.
In the GDM Settings tool, go to the Appearance tab and select the themes/icons/cursors.
If you want to set a wallpaper, change the Backgrounds to “Image” and then browse a picture from the file browser.
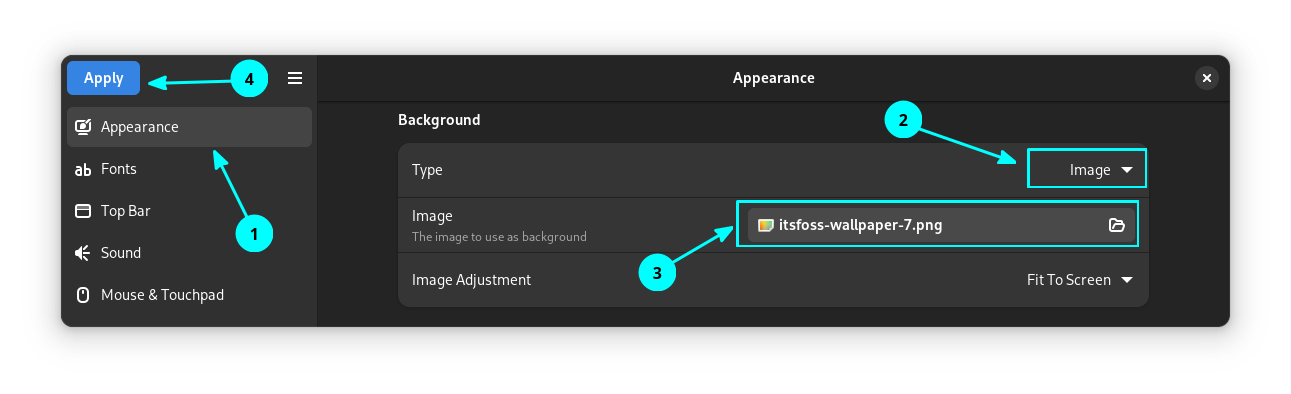
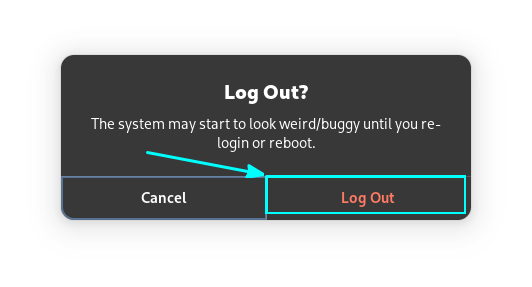
Once finished, click Apply. This will ask for the password. Give it when prompted.
You will be notified to log out to apply changes. When logged out, the changes will be visible.
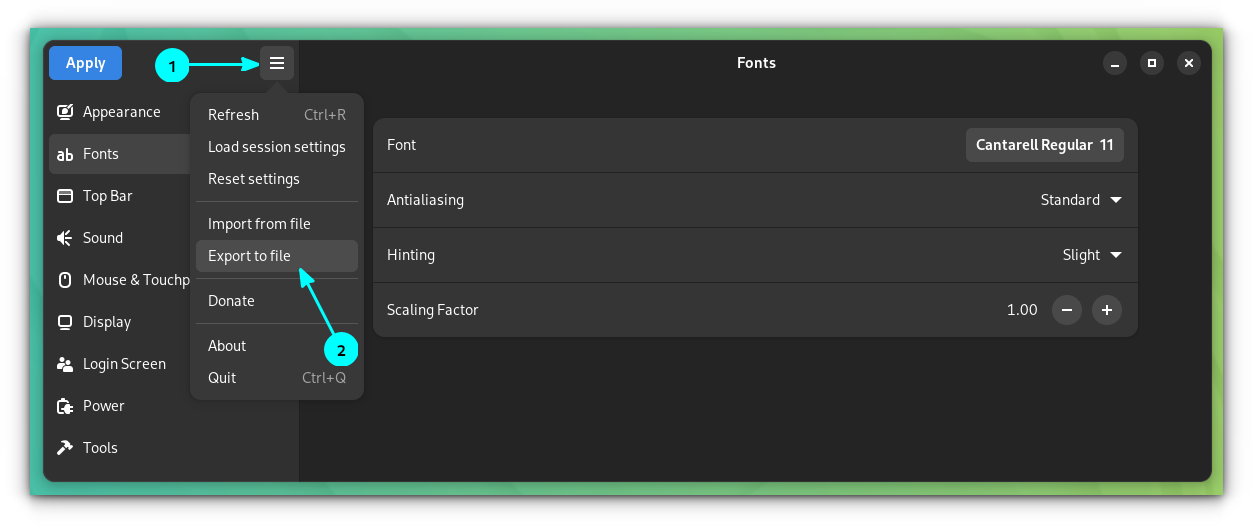
2. Change fonts
Before you change the font, you need to have that fonts installed on your system for all users.
To ensure that, paste the downloaded custom font file to /usr/local/share/fonts and then make a font cache using:
fc-cache -f -v
Now, open GDM Settings and go to the Fonts tab. There, you can set the fonts, anti-alias settings etc.
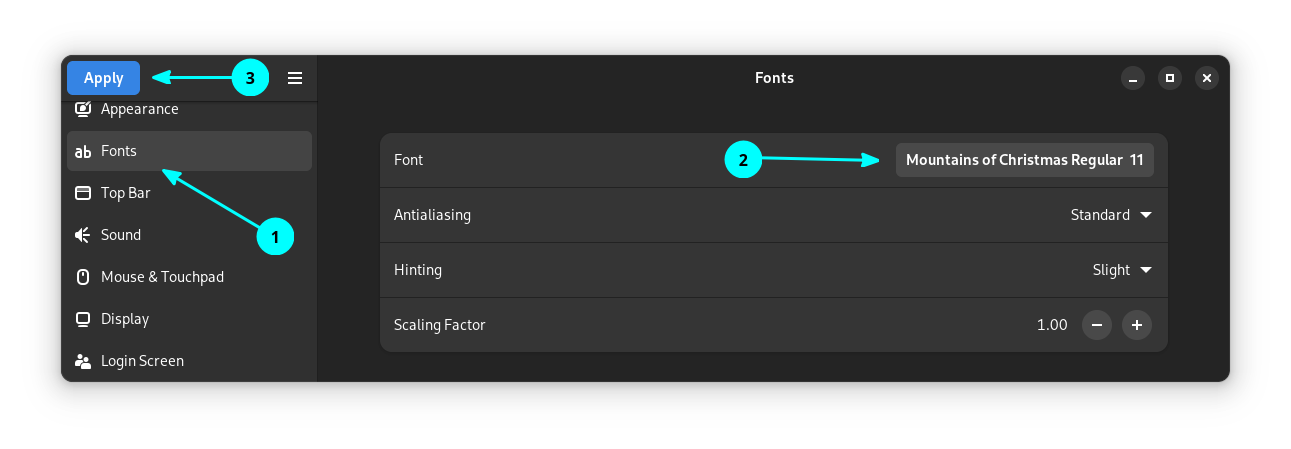
You can see that the new font is now set to your log in screen.
3. Change color of top panel
To change the top panel color, go to Top Bar option in the sidebar. Under Tweaks, enable the "Change Background Color" button and then set a color you want.
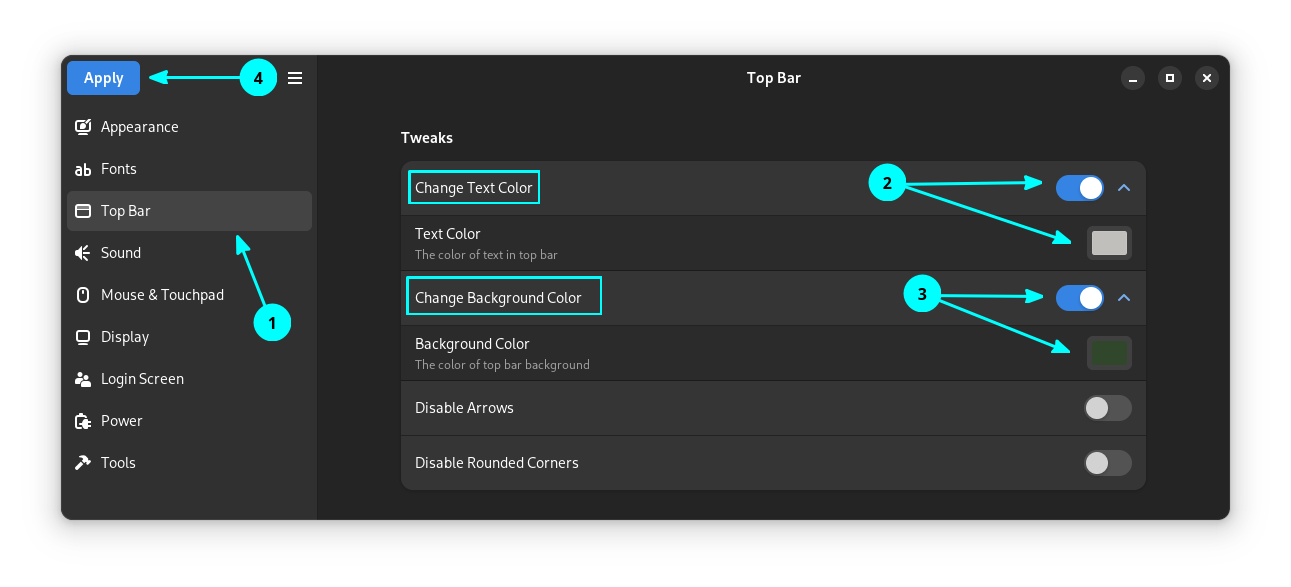
It is equally important to change the text color of the top bar to a convenient color to the background you have selected.

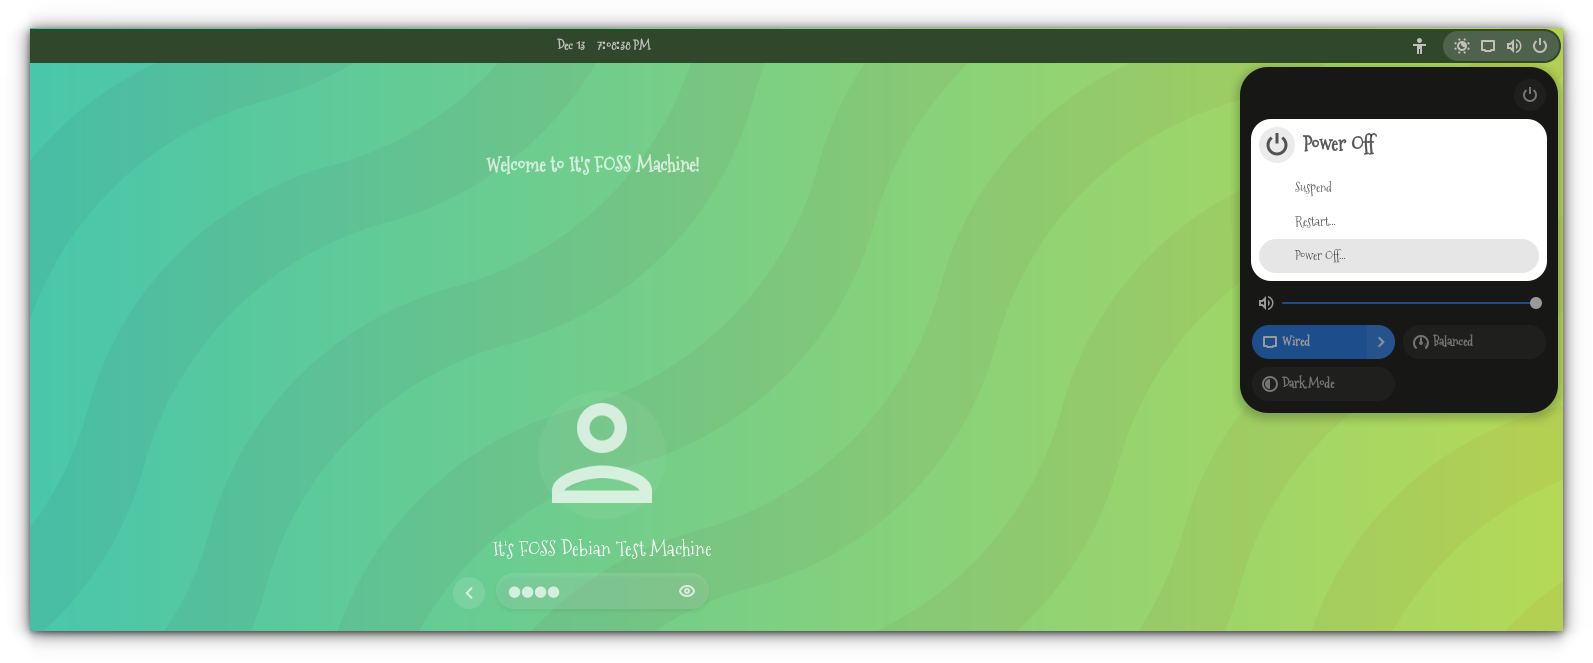
4. Change the time display format
Change the clock to 24 hr or 12hr format using the dropdown menu.
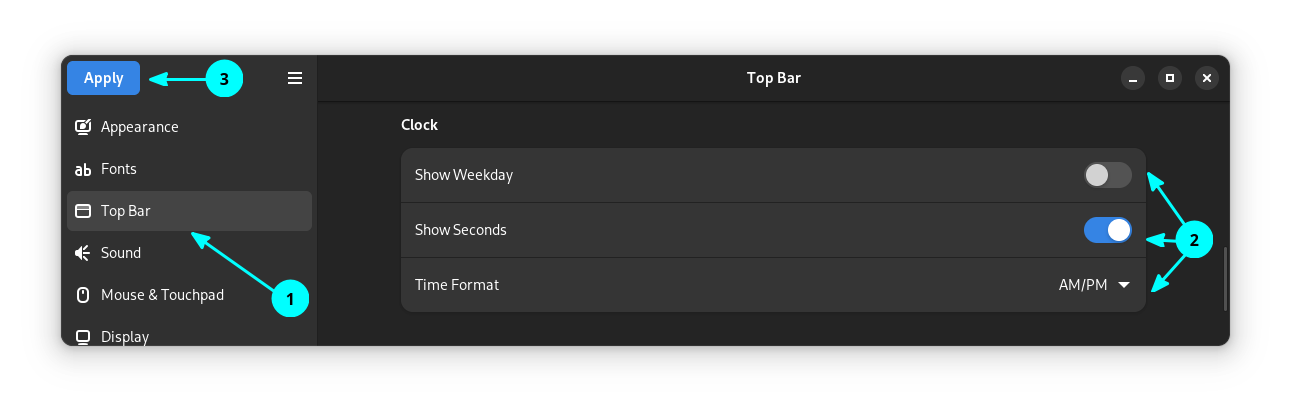
Furthermore, you can make seconds visible on the top bar, by toggling the corresponding button.

5. Enable tap to click on login screen
On most distros, this is the default behavior. Even if you have tap to click enabled in the system, the GNOME login screen need you to use left mouse click.
To change that, go to the Mouse and Touchpad section and enable the Tap to Click button.
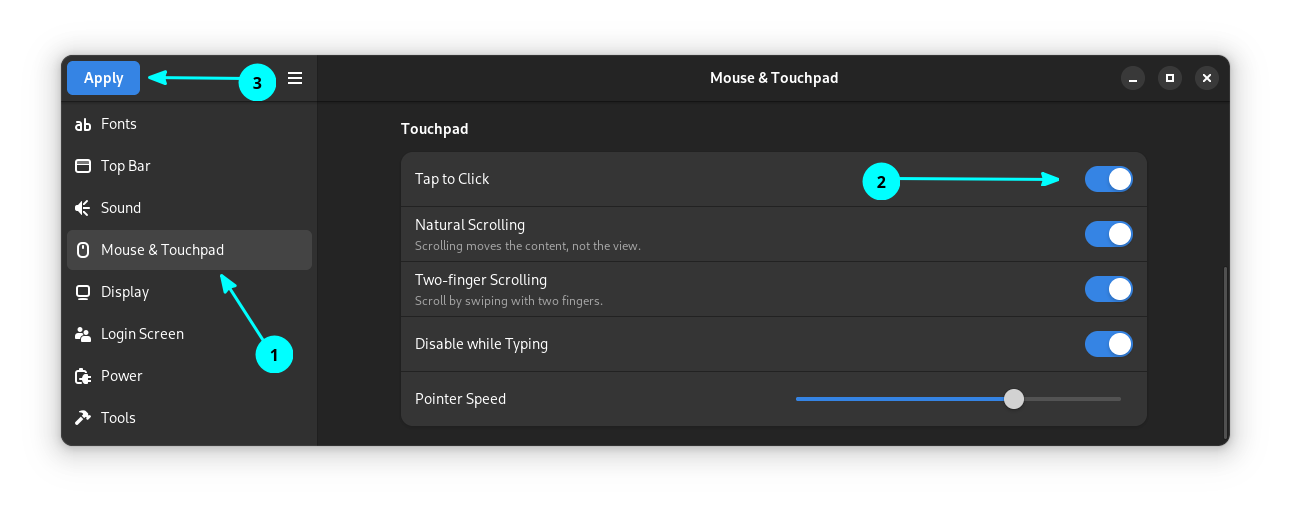
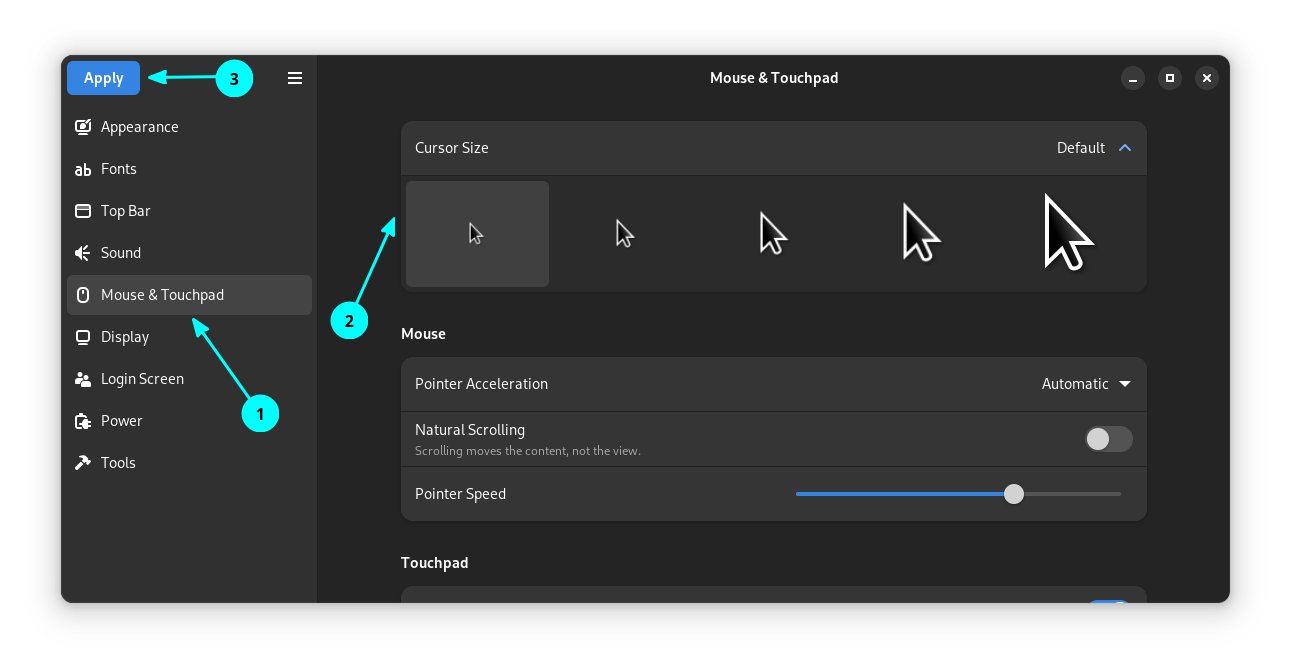
On the same menu, you have an option to tweak the mouse cursor size, if it looks small to you.
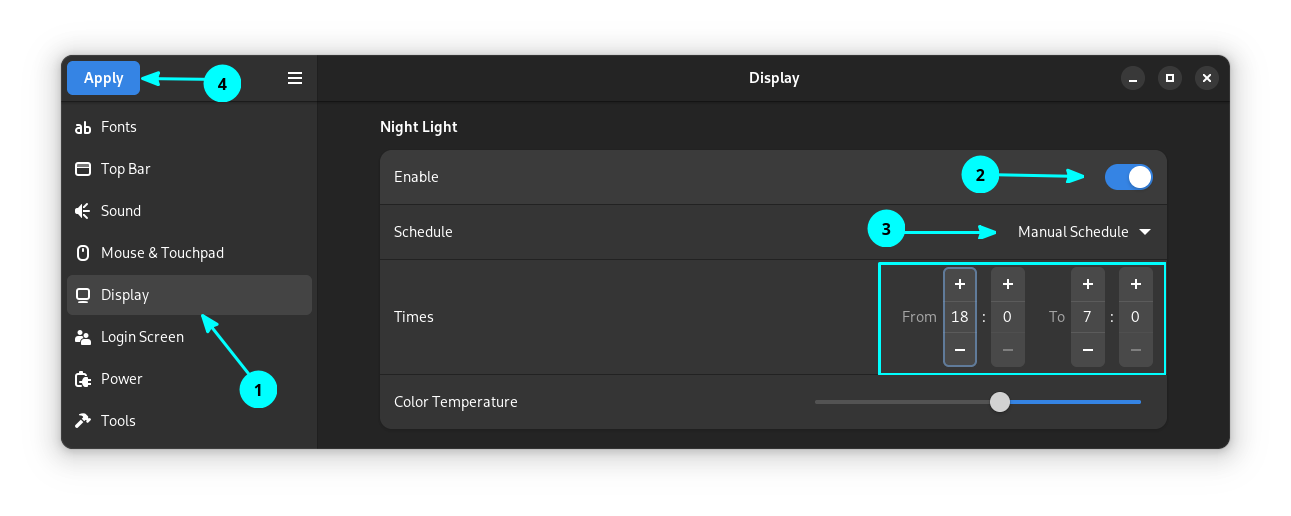
6. Enable night light
You can enable a scheduled night light to the GDM.
Go to Display, toggle the Night Light button on. Now, Schedule either sunset to sunrise or to a convenient time of your choice.
7. Add a logo and welcome Message
Go to the Login screen tab and then enable the "Enable Logo" button. This will give you a button to browse for the image.
Select the Image and press Apply.
After the image is applied, to set a welcome message, enable the Welcome Message button and then add the text you wanted to show.
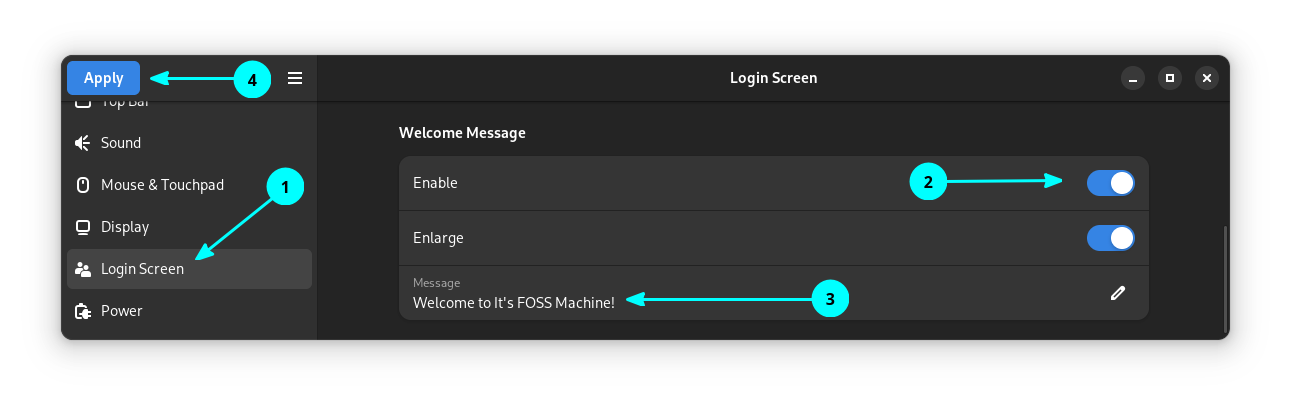
This will display the message, when you selected a user to enter the password.
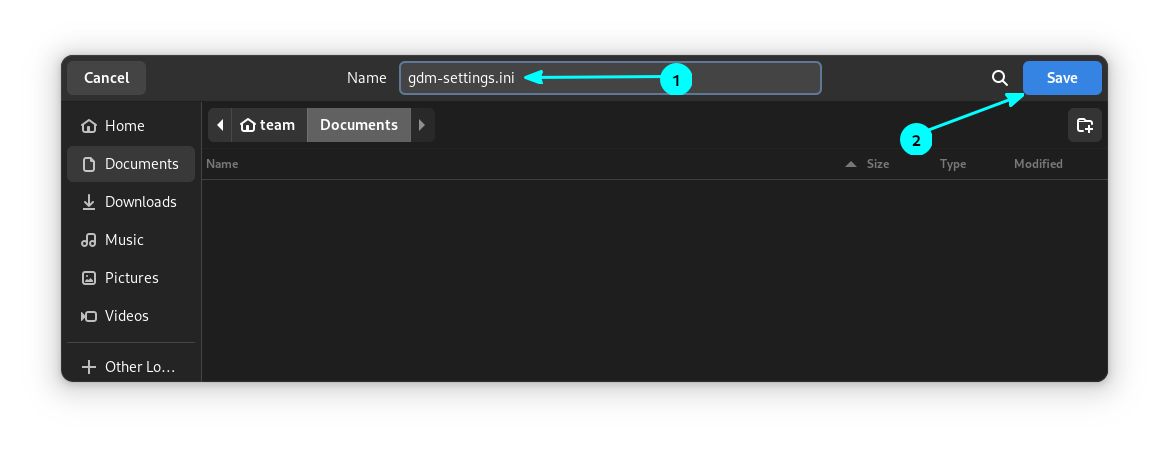
8. Export and import settings
If you want to apply the same settings on some other system, you can export the settings and import it on the other system running GDM Settings tool.
Click on the top-left hamburger menu, and select Export to file.
Name the .ini file and save it somewhere safe. You can import it later.
9. Reset all settings
Don't like the changes you made? There is an easy way to revert to default.
To reset the tweaks, click on the top-left hamburger menu and select Reset.
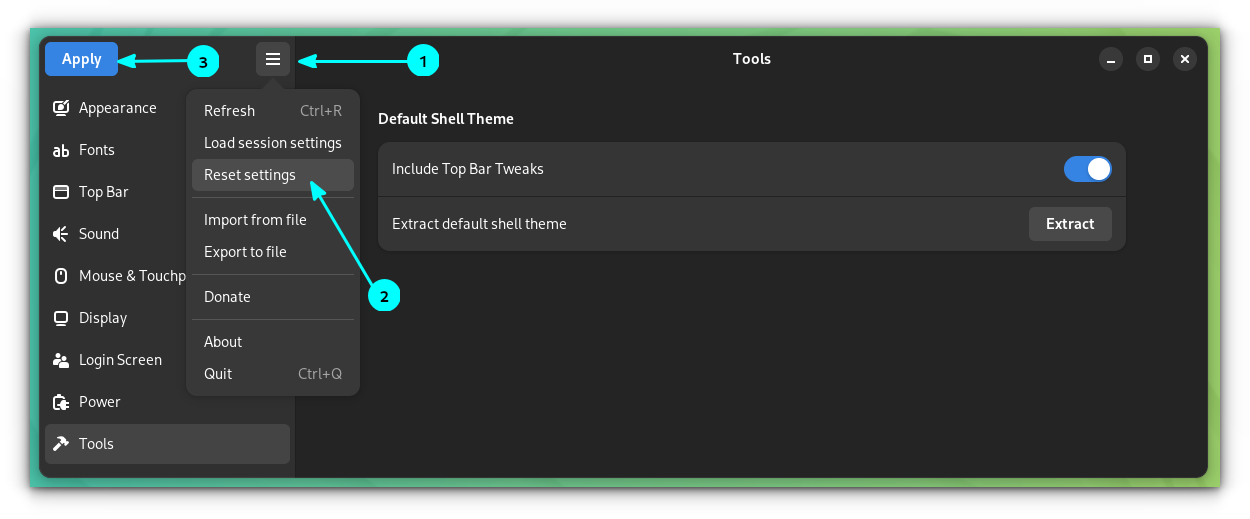
Now, press Apply. It will ask for your password. Once provided, you will be prompted to log out.
You can see that, all the changes have been reverted.
10. More settings
There are other tweaks available too, like:
- Show battery percentage on the top bar, through Top Bar ⇾ Power ⇾ Show Battery Percentage.
- Disable or enable the user list on the login screen through Login Screen ⇾ Disable User List.
- Change the screen off time, suspend time and other power settings through the Power tab.
Installing GDM Settings Tool
Now that you know what tweaks this tool can do, you may want to try it on your own. Let's see about installing it.
GDM Settings Tool can be installed as a Flatpak.
flatpak install flathub io.github.realmazharhussain.GdmSettingsOr, It is available as an AppImage.
For Arch Linux users, install using any AUR Helper from AUR.
yay -S gdm-settingsConclusion
Login screen is not something that everyone customizes. Other than the "tap to click" change, most other changes are just cosmetic changes.
Overall, it is good to have such options available for people who love to customize every nook and corner of their settings.
🗨️ Are you one of those Linux users who are obsessed with customization? Will you be trying GDM Settings?
If this helped you, consider supporting It's FOSS
It's FOSS has been helping people use Linux for the past 14 years. Help us stay independent from big tech. Become a Plus member, enjoy ad-free reading and get 5 eBooks.

