You might have already noticed that when you search for something in the GNOME menu/activities area, it also shows the files with names matching the searched term along with installed applications.
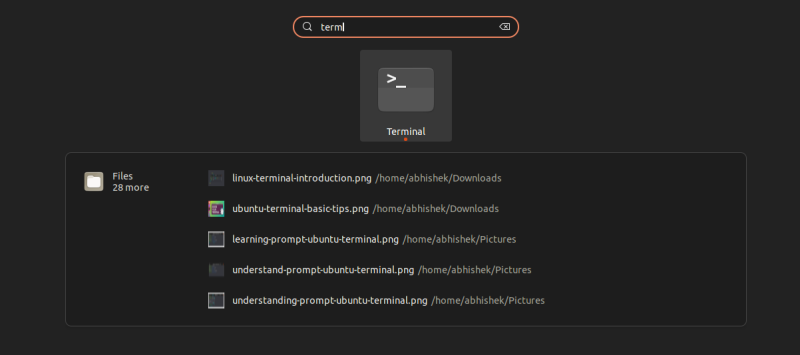
That’s a handy feature. If you remember the file name or even part of it, you can easily search for it and open it just by pressing the Super key (Windows key) and typing the name.
But there are a few nit bits around this search feature that you might not know about or never cared for.
In this article, I’ll share how you can control the GNOME search feature, add or hide folders from the search option and disable it completely.
Note: This is exclusively for distributions using GNOME. Please verify which desktop environment you are using and ensure it is GNOME.
Default locations for file search
The GNOME search feature utilizes a utility called Tracker Miner FS. Please do not get alarmed by the terms like tracker and miner. It’s not spying on you or mining crypto on your system. It basically functions as a search engine and a database to provide you instant search results.
By default, the file indexing takes place in the meta folders like Documents, Music, Pictures and Videos directories and their sub-directories. Files in the Home and Downloads folders are also indexed but not the ones in their sub-directories.
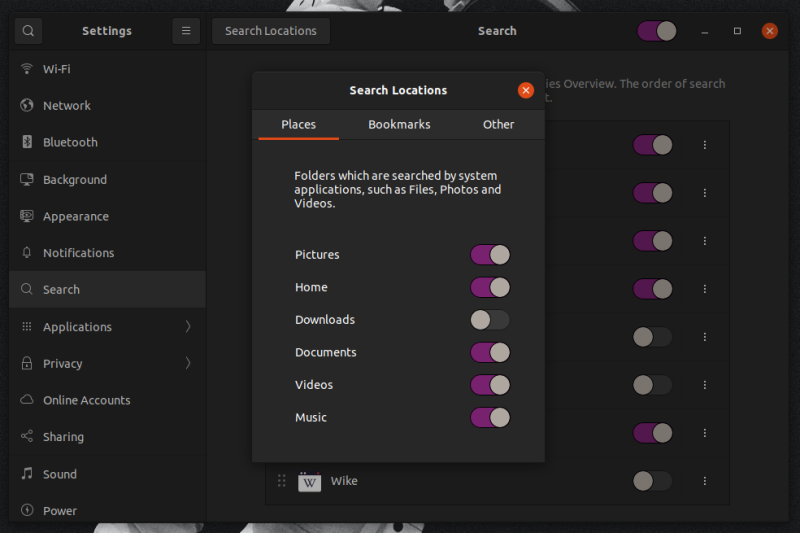
If you have created some new directories in your home folder, those files will not be indexed.
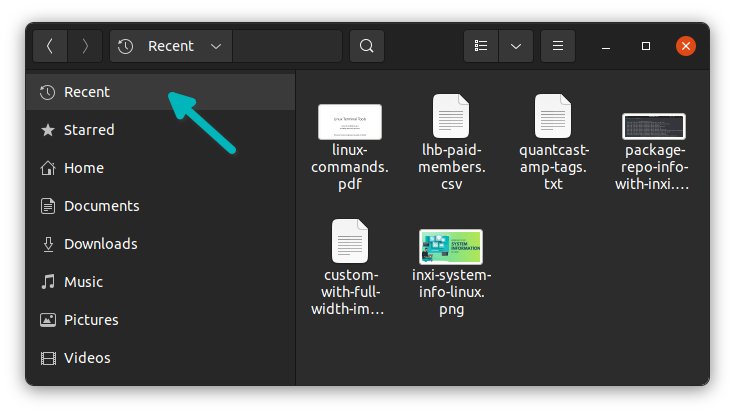
However, the recently accessed files are also indexed automatically. If you have opened a file recently, it is added to the ‘recent files’ and will appear in the search results irrespective of its location.
In case you didn’t know already, you can see your recently accessed files in the file manager:
Adding a folder content to search results
Suppose you have created a folder for coding projects in your home directory. These files won’t be indexed and won’t appear in search results (unless you have opened a file by double clicking and it is added to the recent files).
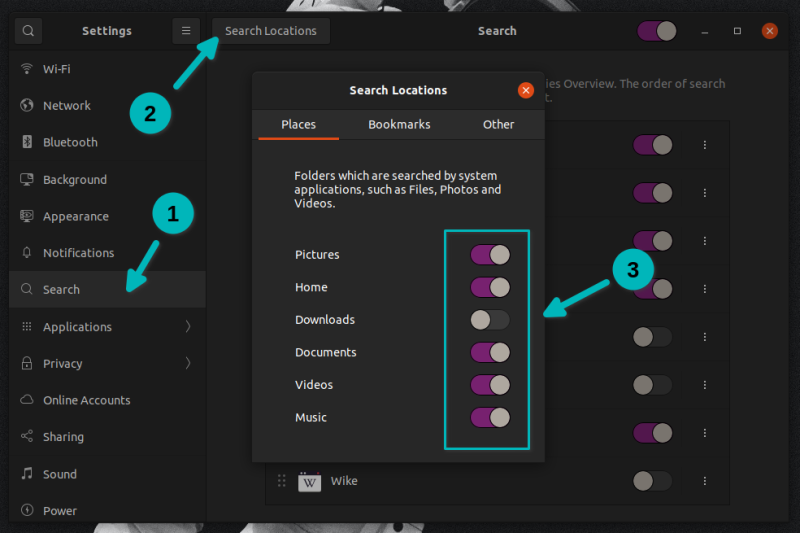
To add the files from a custom folder in the search result, you can add the folder to the search locations.
Open the Settings application by searching for it in the menu/activity area:

Go to the Search option from the left sidebar and click on the Search Locations option at the top. In the pop-up window, go to the Other tab and click on the + symbol. It will add the file browser and you can add your desired folder.
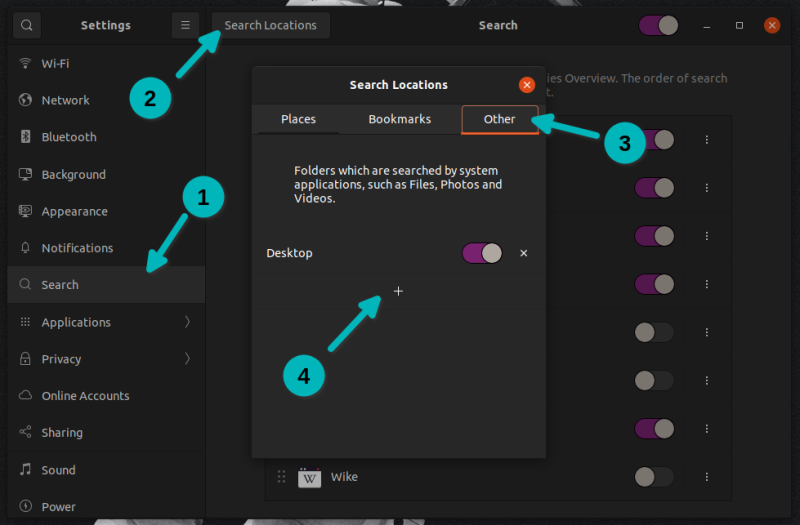
If you test by searching a filename in the just added folder, you should see it in the search results now. It should be instant but if it is not, try logging out or rebooting the system.
Hide a folder from search results
If you don’t want files from a specific folder to appear in the search result, you can hide it.
If you don’t want the content of the meta folders like Pictures, Documents, Videos in search, you disable it from the Search Location settings.
If you want the contents of only a certain folder under Documents to NOT appear in the search result, you just have to create a new file named .nomedia in that folder. You may also name the file .git, .trackerignore or .hg.
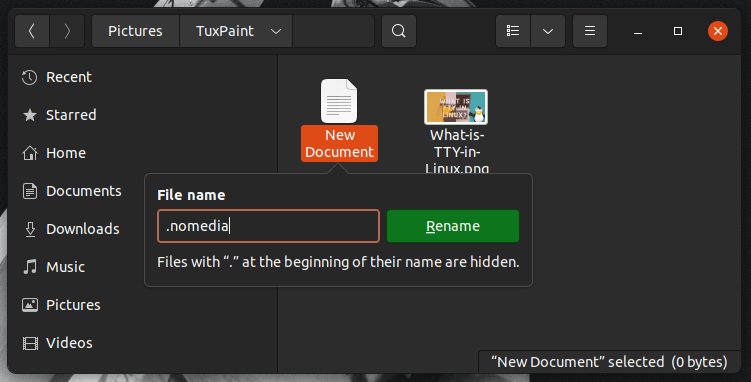
If you don’t see the option to create new file in right mouse lick, you’ll have to do some tweaking to add the create new document option in the right click context menu. Also note that any files starting with a . in its name is hidden from normal view. To toggle hidden files, press Ctrl+H keys.
This hiding might not work immediately because the file is probably already indexed. You may have to log out or reboot to see the effect.
If you access a file manually, it will be added to the recent files and will appear in the search result despite the ignore file in the folder.
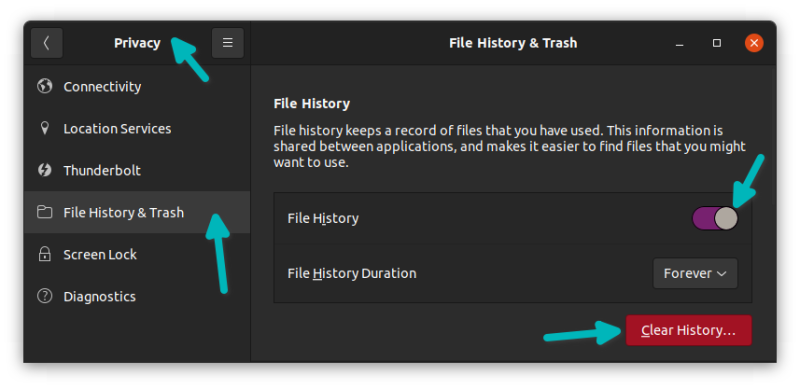
You can delete the recent files history or disable it altogether (if you want) from Settings-> Privacy-> File History & Trash. I don’t see the need of it, though, so make your own decision here.
Disable search results for all files
If you do not want any files to appear in the search results, you can disable search for Files altogether from the search settings.
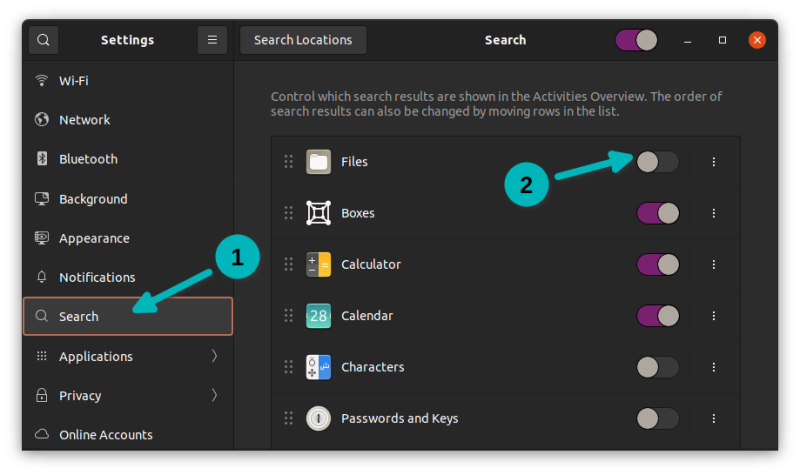
You should disable the search functionality altogether by clicking the Search toggle button at the top as it may interfere with the normal functionality of the GNOME desktop environment.
More details on it can be found on the project’s homepage.
Conclusion
The discussion here is about file search. GNOME desktop also searches in Calendar, Characters and some other utilities. You can disable or enable the available search options but let’s not focus on that.
I hope you find this quick tip helpful in customizing your GNOME experience. If you know some other neat trick that you want others to know, please share it with us in the comments.

