

You might have seen such a screenshot of a Linux desktop in various discussion forums.
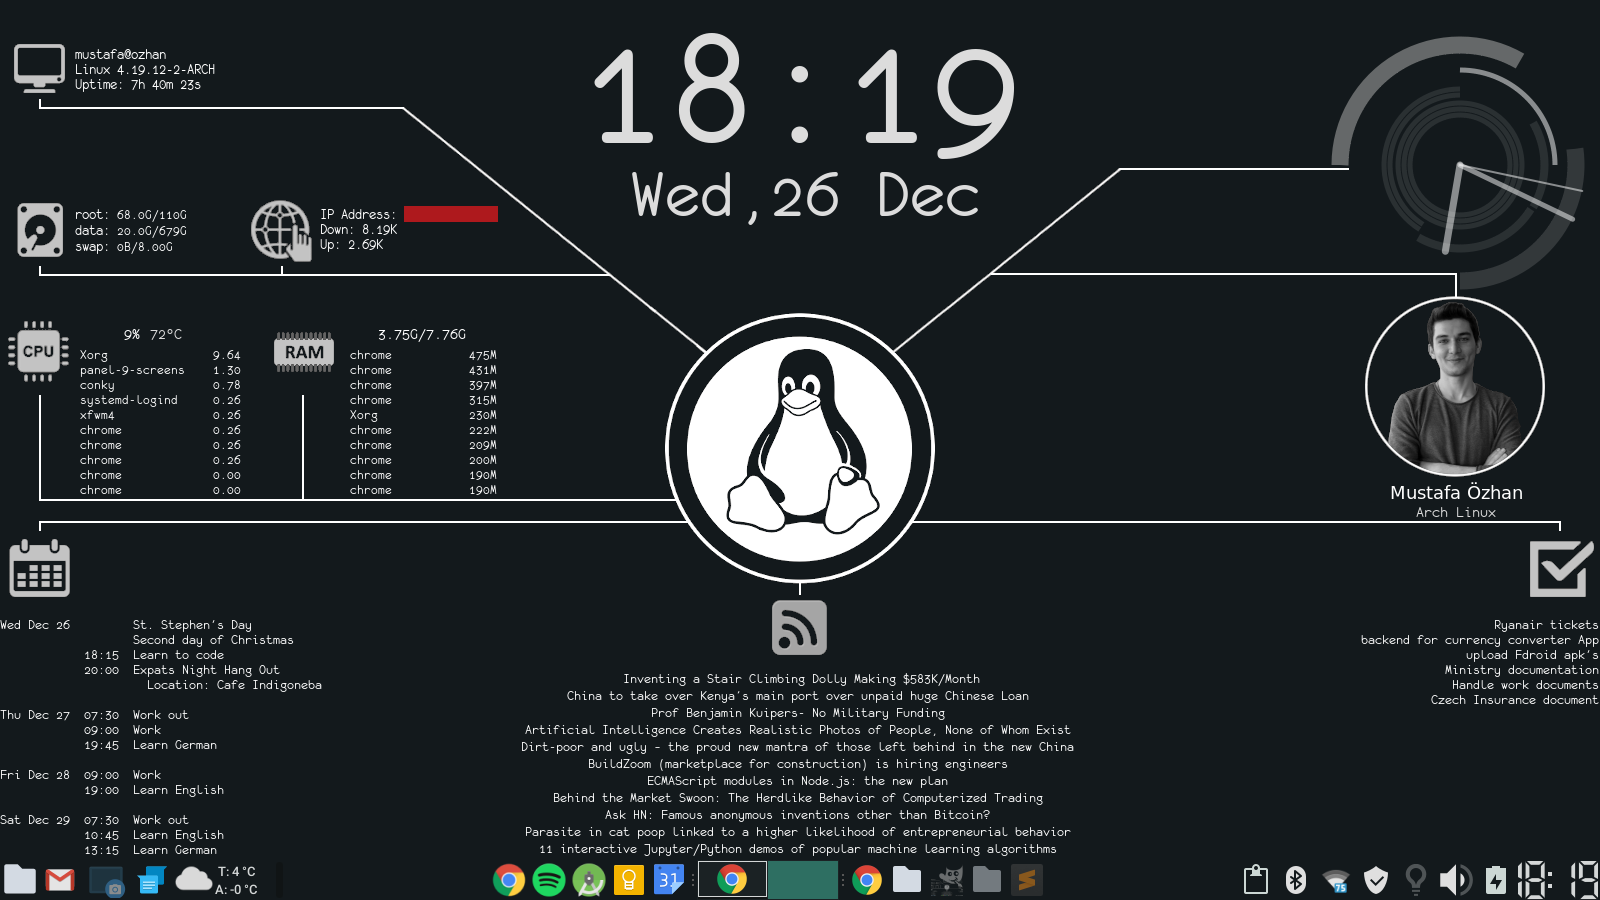
And you may wonder how did the other guy displayed CPU, memory and other information on the desktop. The answer lies in one word: Conky.
In this tutorial, I'll tell you about:
- What is Conky?
- Using Conky easily with Conky Manager
- Taking the difficult route of command line to use Conky on any Linux system
Excited? Let's begin.
What is Conky?
Conky is a lightweight system monitor available on Linux and BSD. It can display the system information and statistics such as CPU consumption, disk usage, RAM utilization, network speed, etc. in an elegant way. All the information is displayed on top of your wallpaper. It gives your desktop a live wallpaper feel.
The looks of the displayed information can be changed via Conky configuration file. For example, take a look at this 'hacker themed Conky':

The problem with Conky is that it is more of a text-based application. Which means you have to change its configuration file to tweak the display.
Conky is extremely configurable, and you can change every aspect of it by modifying its configuration file. But the complex way of installing and configuring Conky usually scares away the Linux beginners.
Don’t worry! You can still use Conky easily thanks to a GUI tool called Conky Manager. I’ll show you both GUI and command line way of installing Conky themes.
Easier Method: Use Conky with Conky Manager GUI tool
Conky Manager 2 is a GUI tool you can use to install, manage Conky themes on your system.
Install Conky Manager in Ubuntu and other Ubuntu-based distributions
You can install Conky Manager version 2.7 using PPA. Use the following commands in terminal:
sudo add-apt-repository ppa:teejee2008/foss
sudo apt update
sudo apt install conky-manager2 conky-all
I see that the older Conky Manager (version 2.3) is available in Arch and Fedora repositrories.
You can install Conky Manager in Arch Linux from Extra repository:
sudo pacman -S conky-managerAnd in Fedora with:
sudo dnf install conky-manager
Using Conky with Conky Manager:
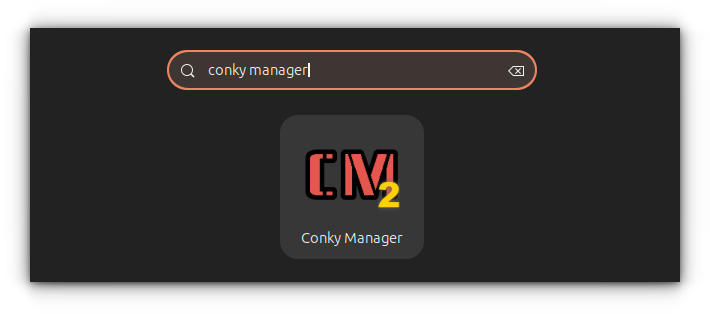
Once installed, you can start Conky Manager from the menu.
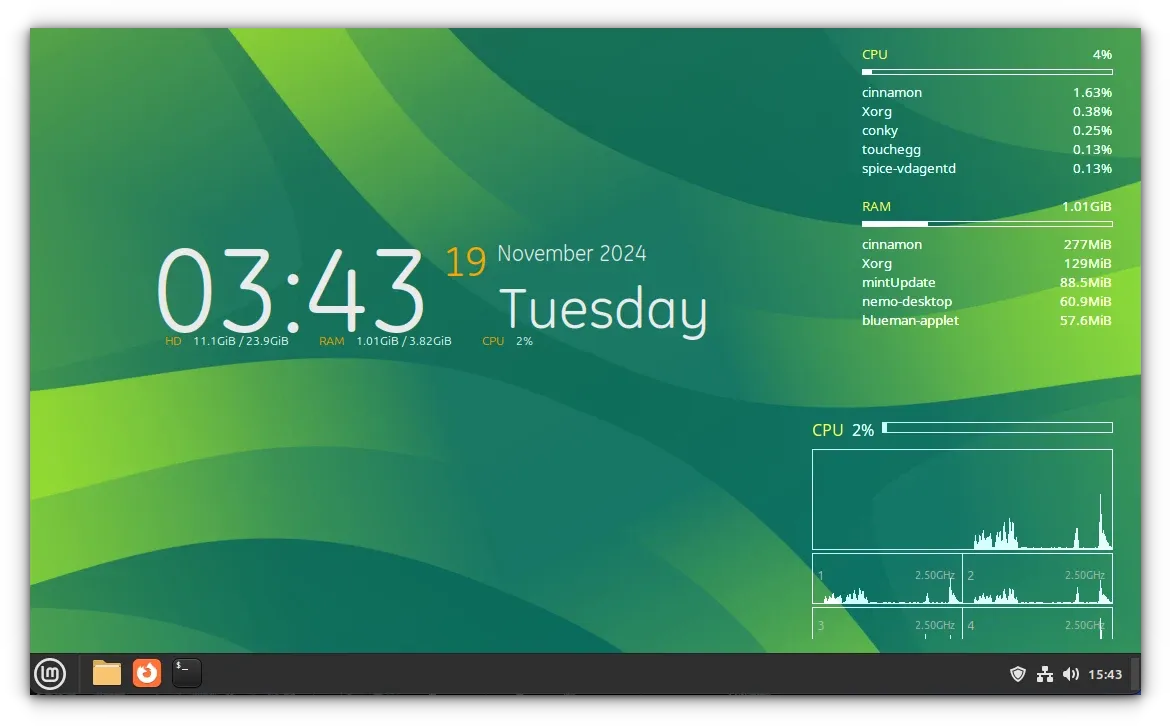
As I said before, using Conky Manager is like using a wallpaper application.
Change Conky theme
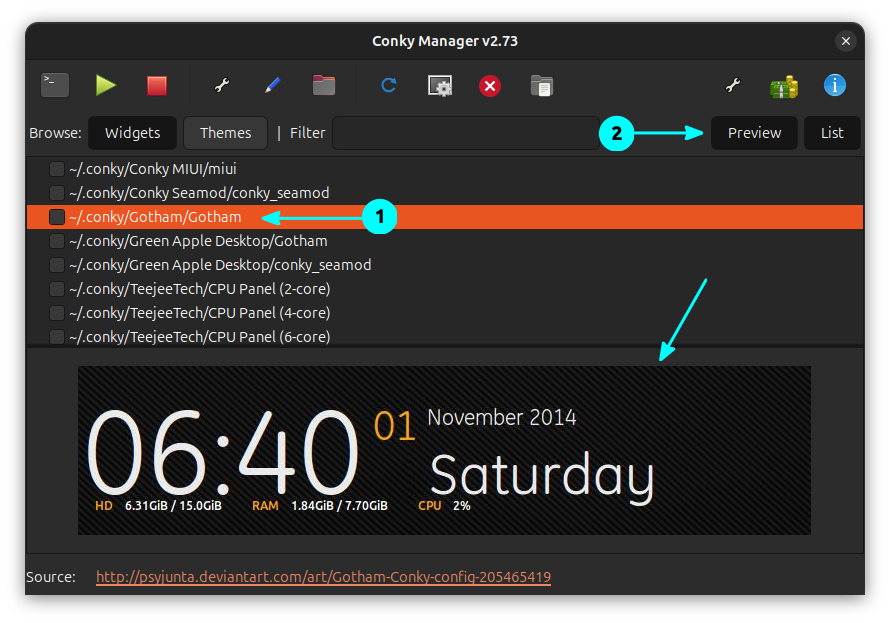
Conky Manager comes with several predefined sets of Conky themes.
Using them is easy. All you got to do is to select a theme and check the “enable” box in front of it, and it will be displayed on your desktop immediately.
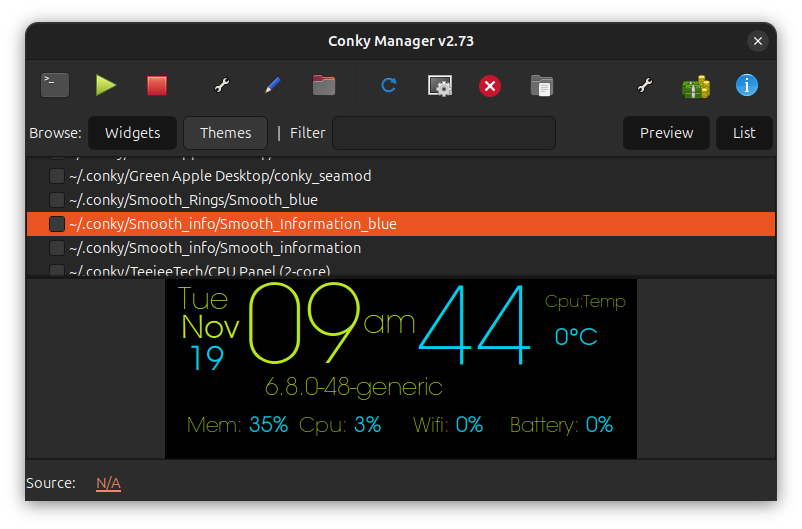
Alternatively, you can also preview a Conky which opens up in a bottom panel to show the look of the selected Conky.
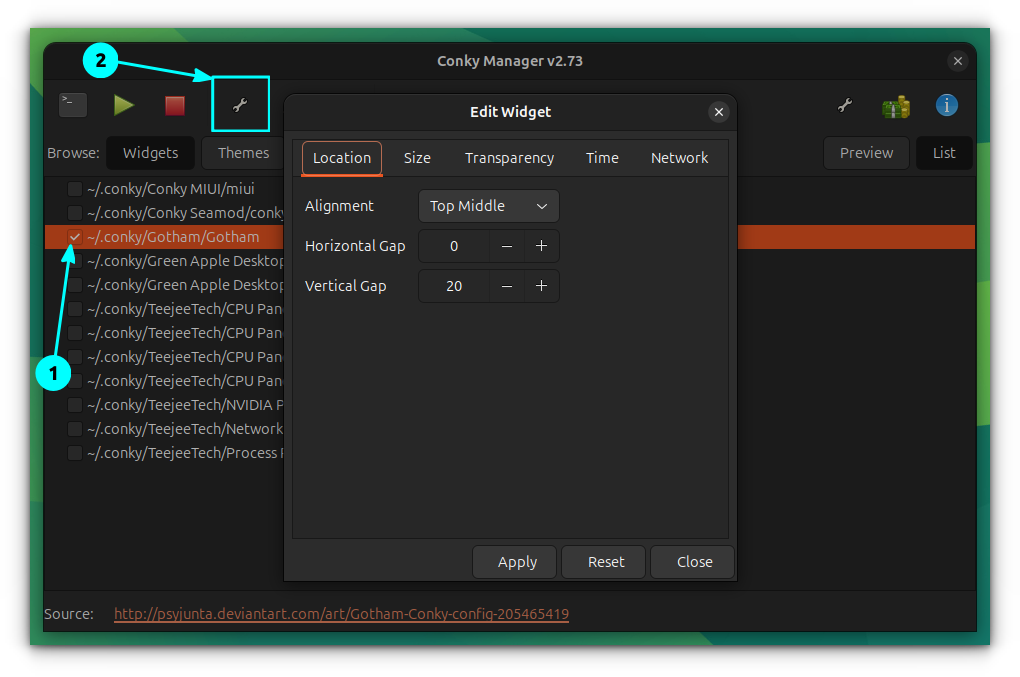
Edit a Conky in Conky Manager
You can change the alignment, transparency, size, time, etc. of the displayed Conky theme and/or its widget.
This is important as most of the themes have predefined settings which might not be suitable for all. So if you want the Conky to be displayed at the center rather than on the right side of the screen, you can do that here.
Click on a Conky theme you want to change. Now, click on the Widget settings button in the toolbar as shown in the screenshot below.
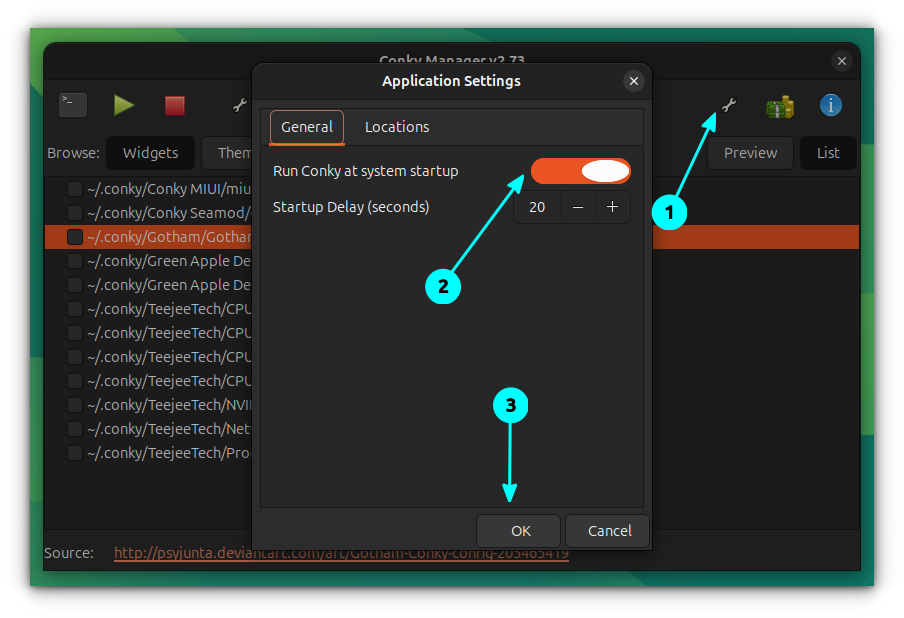
Using additional options to autostart Conky
You may want to start the Conky automatically at startup time so that you won't need to run Conky Manager manually each time.
To do this, click on the settings button on the right side of the toolbar. Here toggle the “Run Conky at system startup” box.
Importing new Conky files
Conky Manager comes with several default Conky themes. What if you want more Conkys? Conky Manager 2 gives you the option of importing other Conky themes in it. You can import themes in .7z, .cmtp, .zip, etc.
Popular art sites like DeviantArt provides Conky configurations. You can find Conky files, that can be imported using Conky Manager.
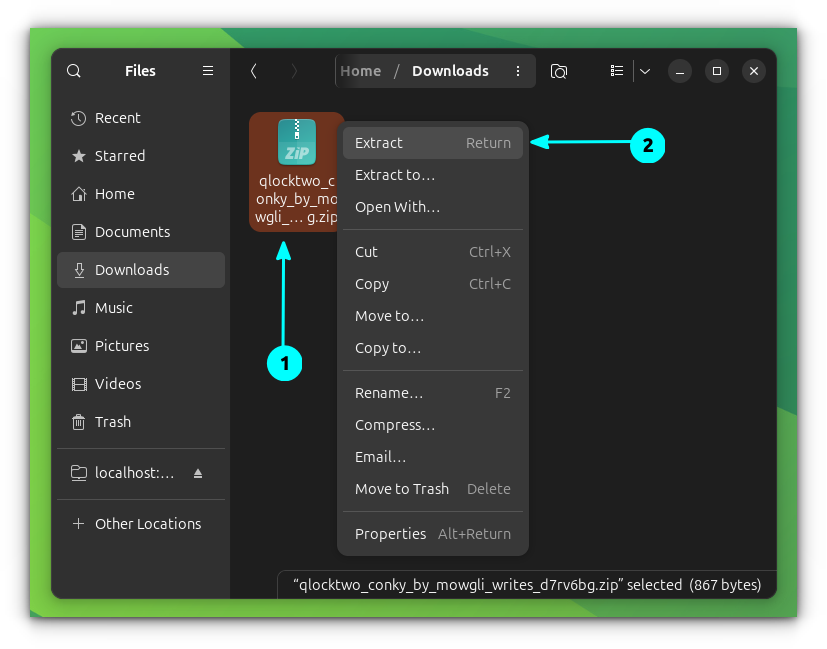
Download such a Conky theme archive file.
Now, in the Conky Manager, click on the “Import Conky Manager Theme Pack” button.
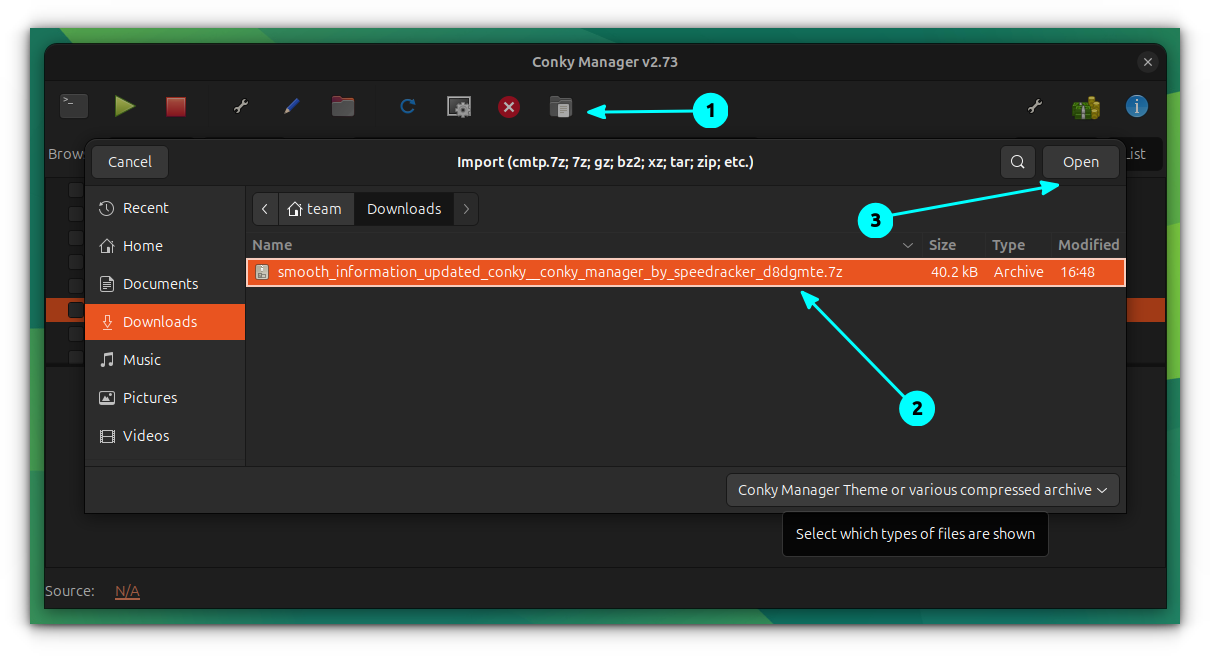
From the file chooser, select the downloaded archive file. Once completed, it will show you a success message.
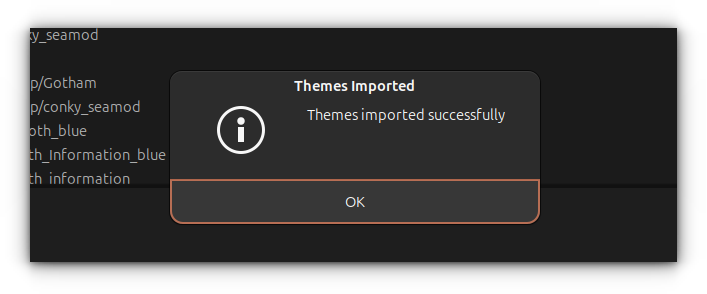
Now, the new theme will also appear in the Conky Manager home screen for you to enable.
Generate a preview of the custom theme
Conky Manager 2 provides a way to generate a preview image for the downloaded custom Conky theme. For this, click on the custom theme appearing in Conky Manager home page.
Now, click on the “Generate Preview” button on the toolbar.
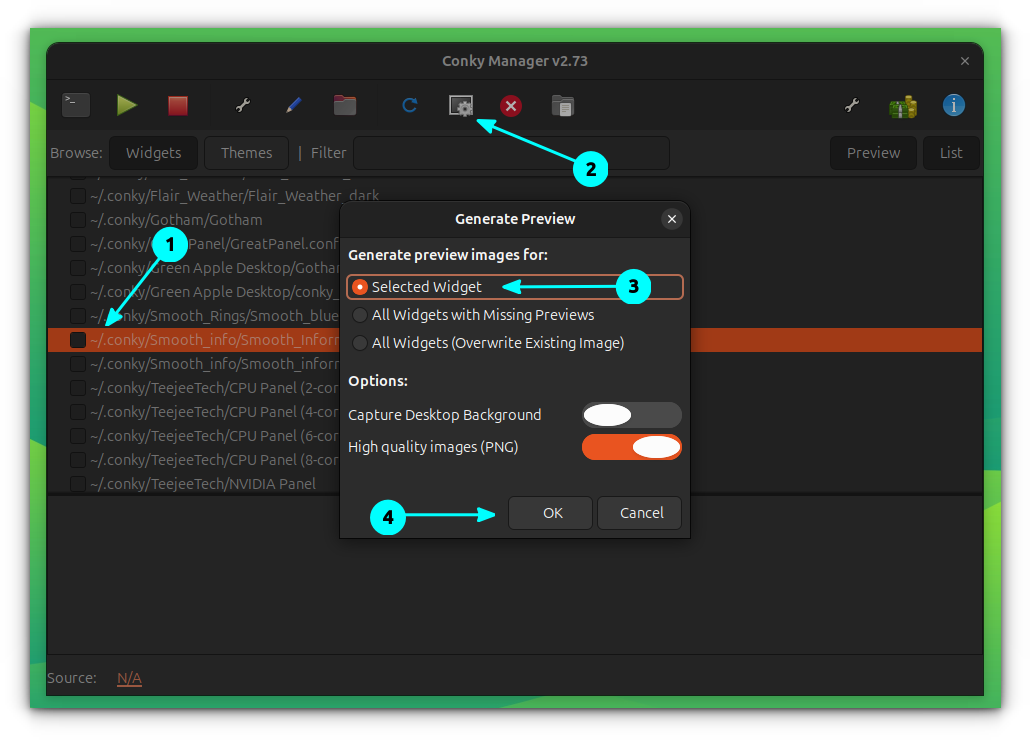
You can see a preview is generated in the bottom preview bar.
Advanced Method: Use Conky in command line
I am going to assume that you are familiar with basic Linux commands such as copying files and changing directories for this part of Conky tutorial.
Let’s first install Conky in your system. Most Linux distributions have the conky-all package. You can use this package to install Conky and other packages that many Conky scripts use.
In Debian and Ubuntu-based systems, use the command below:
sudo apt install conky-all
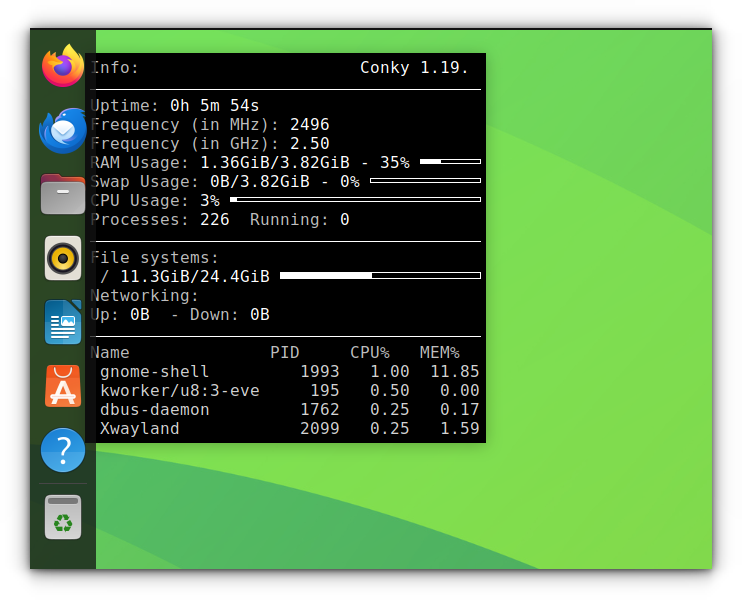
Once you have installed this package, you can run the Conky using the following command:
conky
It will display the default Conky installed with the above-mentioned package. The default config file is located in /etc/conky directory. Conky actually relies on the config file .conkyrc located in the home directory. If there is no such file in the system, it uses the /etc/conky/conky.config file.
And as you may see, it might not be the best-looking or well-integrated Conky for your system.
So, what’s the solution, then? Well, you have two options. Either you modify the Conky on your own, or you download a Conky theme from the internet and use it.
To modify the Conky on your own, you need to know a thing or two about the Conky settings.
Where can you find Conky themes? How do you use different types of Conky themes?
This is not something that can be easily answered. You can search for the term Conky on DeviantArt or OpenDesktop. You can also search on GitHub.
Using these Conky themes is similar to using source code installation. A good Conky theme will come with a README or other help file that tells you what to change in the Conky theme files and other important things about using the Conky theme. Most of the time you have to change the path to image files or Lua script.
Some Conky themes don’t have any instructions, and you have to manually explore what needs to be changed in the Lua script or Conky configuration files.
Most of the Conky themes will come in the following formats:
- Just a single file named
conkyrcorconky.confor something similar - Complete package for Conky Manager: Simply import it into Conky Manager.
- Conky package with Lua scripts, wallpapers, etc.
- Shell script or make install: should have a README file to help you out.
Let’s discuss the two of the common kinds with examples.
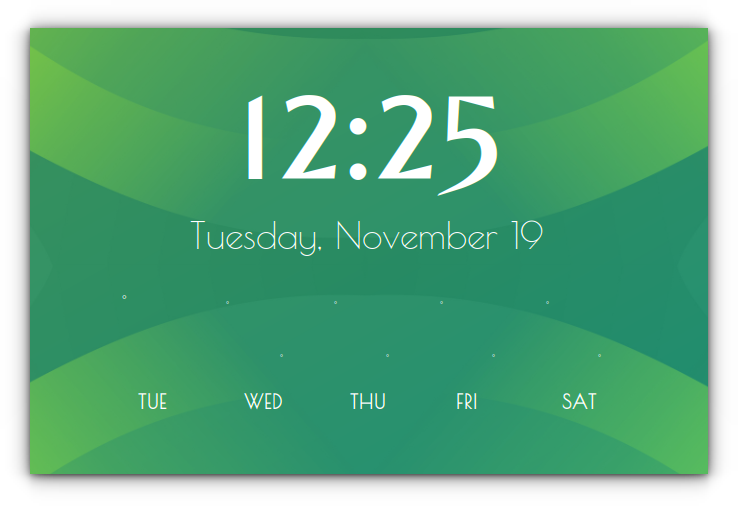
Example 1: Install qclocktwo Conky to display time in words
Go to DeviantArt and download the qclocktwo Conky. Extract the downloaded file and you’ll see a file named qclocktwo.
Now you have two options to run this Conky. Either you use a command like this:
conky -c ~/Downloads/qclocktwo
Or you rename the file qclocktwo to .conkyrc and move it to the home directory, i.e., ~/. This way, when you run the command conky, the qclocktwo Conky will be run.
The problem with the second approach is that if you ever use another Conky by renaming it to .conkyrc, you’ll lose the previous Conky.
In either case, you’ll see a beautiful Conky theme displaying time in the following fashion:

Example 2: Install Conky with Lua script
You’ll find many Conky themes that have their own wallpapers, images along with a Lua file and Conky configuration file.
Using Lua scripts, Conky themes can create some graphics (if I can call it that) such as rings, clocks etc. This further enhances the capability of Conky where you see the system information with more animated elements.
Let’s see it with an example. Download the Kit-Kat Conky. After extracting the downloaded files, you’ll see that there is a conkyrc file and a Lua file under the scripts folder.
The main thing to look for here is the path to the lua file in the Conky configuration file. So if you open the conkyrc_Kit-kat file, you’ll see that the path in lua_load expects the lua file to be in the location ~/.conky/Kit-Kat/scripts/lua.
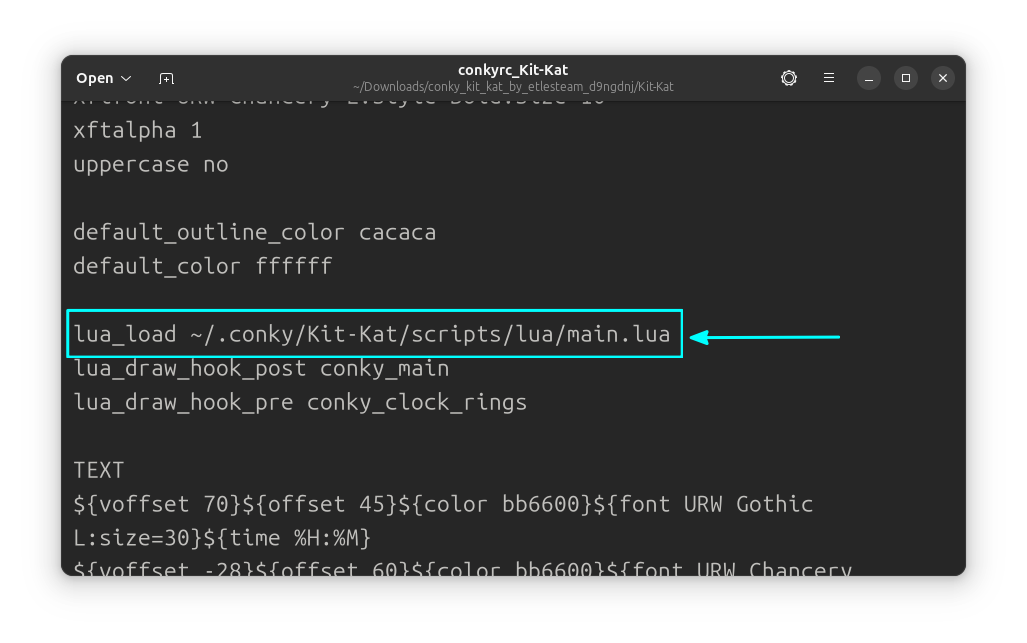
lua_load location in Config fileYou have two options here. Either you copy the entire Kit-Kat folder to the ~/.conky directory, or you change the Conky configuration file and set the path to the current location of the Lua script file. It is always better to put the files in ~/.conky to avoid unnecessary troubles.
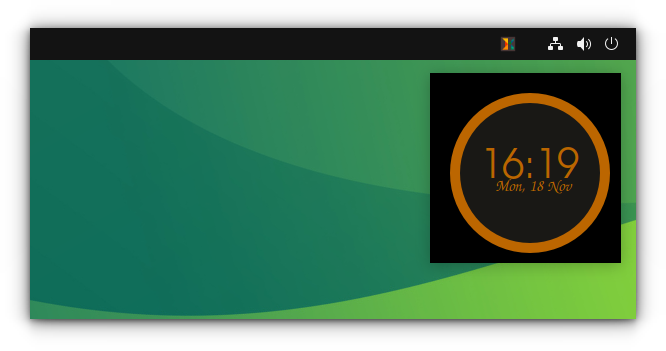
Once you have done one of the above two things, you need to use the conky command with the path to the config file of Kit-Kat Conky.
conky -c .conky/Kit-Kat/conkyrc_Kit-Kat
And then you’ll see an analog clock ticking in the top-right corner of your desktop.
Few things to keep in mind about Conky
Before you start experimenting with Conky, here are a few more things you should know:
- Most Conky themes on the internet are outdated. Be prepared to be disappointed when you see issues after issues in the Conky.
- You can have more than one Conky in use at the same time. Just use the Conky command in the following fashion:
conky -c path_to_conky_1 path_to_conky_2. - You can also set Conky commands to run them at startup.
Enjoy Conky
Here are a couple of Conky themes I liked.
Grey Minimalistic: Manual install possible. (Works in Ubuntu)
Smooth Information: Use it via Conky Manager. (Works in Ubuntu)

Overall, I found Conky Manager easy to use and quite useful. It has some nice Conkys to start with. It is a nice app for beginners to use Conky in GUI. What do you say? Do you like it? Let me know of your views.
