

Being a distro hopper, I can relate to the pain of having one ISO image on a flash drive. But not anymore!
If you constantly distro hop, or you just want to carry multiple ISO files in a single pen drive, there is a solution - Ventoy.
In this guide, I'll walk you through the following:
- Installing Ventoy on Linux
- Creating a live Linux USB
- Booting from Ventoy
- Using multiple Linux distros on a single USB
- Creating Windows bootable USB
- Using Linux and Window on a single USB
So let's start with the first one.
Install Ventoy on Linux
Ventoy is not available in the default repositories or 3rd party repos on Ubuntu. But, it is available on AUR for Arch users. This simply means you cannot use apt to install the package.
So in this case, we have to install Ventoy from source. Fret not, you just need to follow along the steps below, it is easy.
1. Visit the official download page of Ventoy and choose the file ending with linux.tar.gz:

2. Now, open your terminal and use the cd command to navigate to where the Ventoy file was downloaded. For most users, it will be the Downloads directory:
cd DownloadsThe Ventoy binaries are shipped in the form of the tarball and to untar (or extract) the package, you can use the tar command as shown:
tar -xzvf ventoy-*.tar.gz3. Once extracted, you will find a directory of Ventoy. Use the cd command to get into that directory.
In my case, it was ventoy-1.0.93, so I will be using the following:
cd ventoy-1.0.93If you list the directory contents, you will find that there are multiple scripts:
ls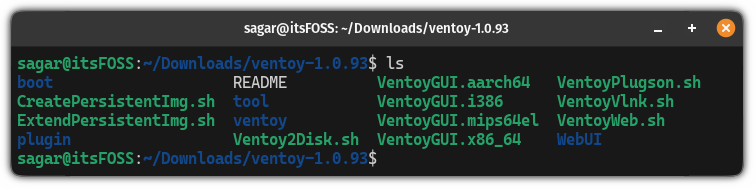
But what you need is VentoyWeb.sh which allows you to flash your drive using your browser without any commands.
4. To execute the script, use the following command:
sudo ./VentoyWeb.sh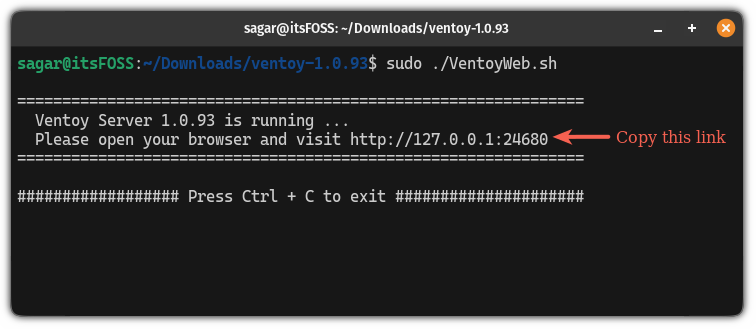
As you can see, it started the Ventoy server and to access it, copy the given URL and paste it to the address bar of your browser.
Once you do that, it will look like this:
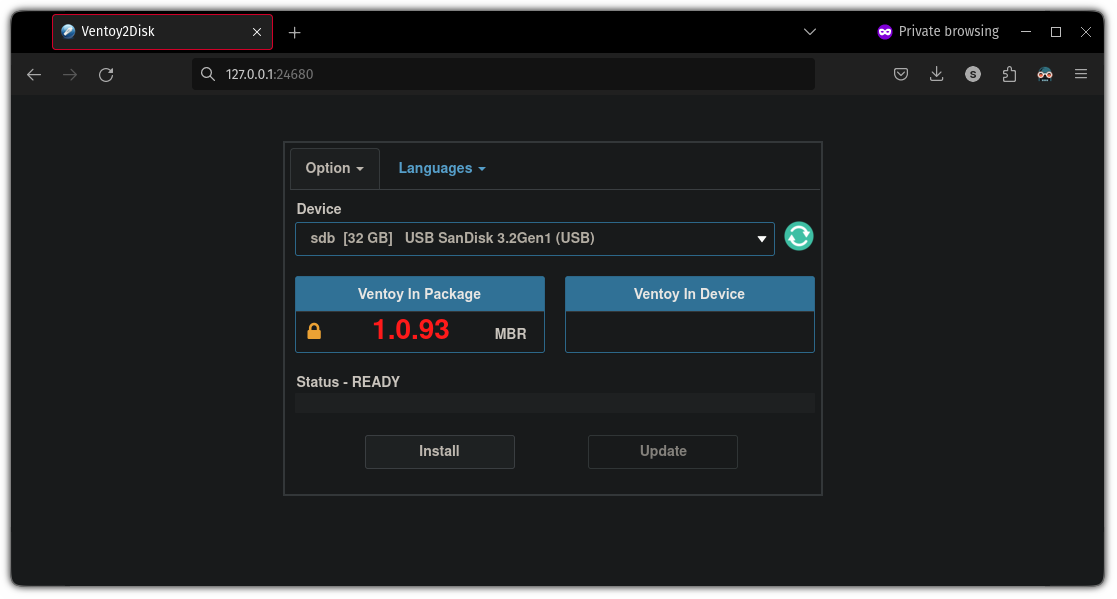
By default, it will be enabled to work with the secure boot option and this is the reason it shows the 🔒 (lock) symbol with the version name.
I do not recommend you change this setting, but if you would like to, you can disable this option from the Option→Secure boot Support:

Once done, select the storage path on which you want to install Ventoy and hit the Install button.
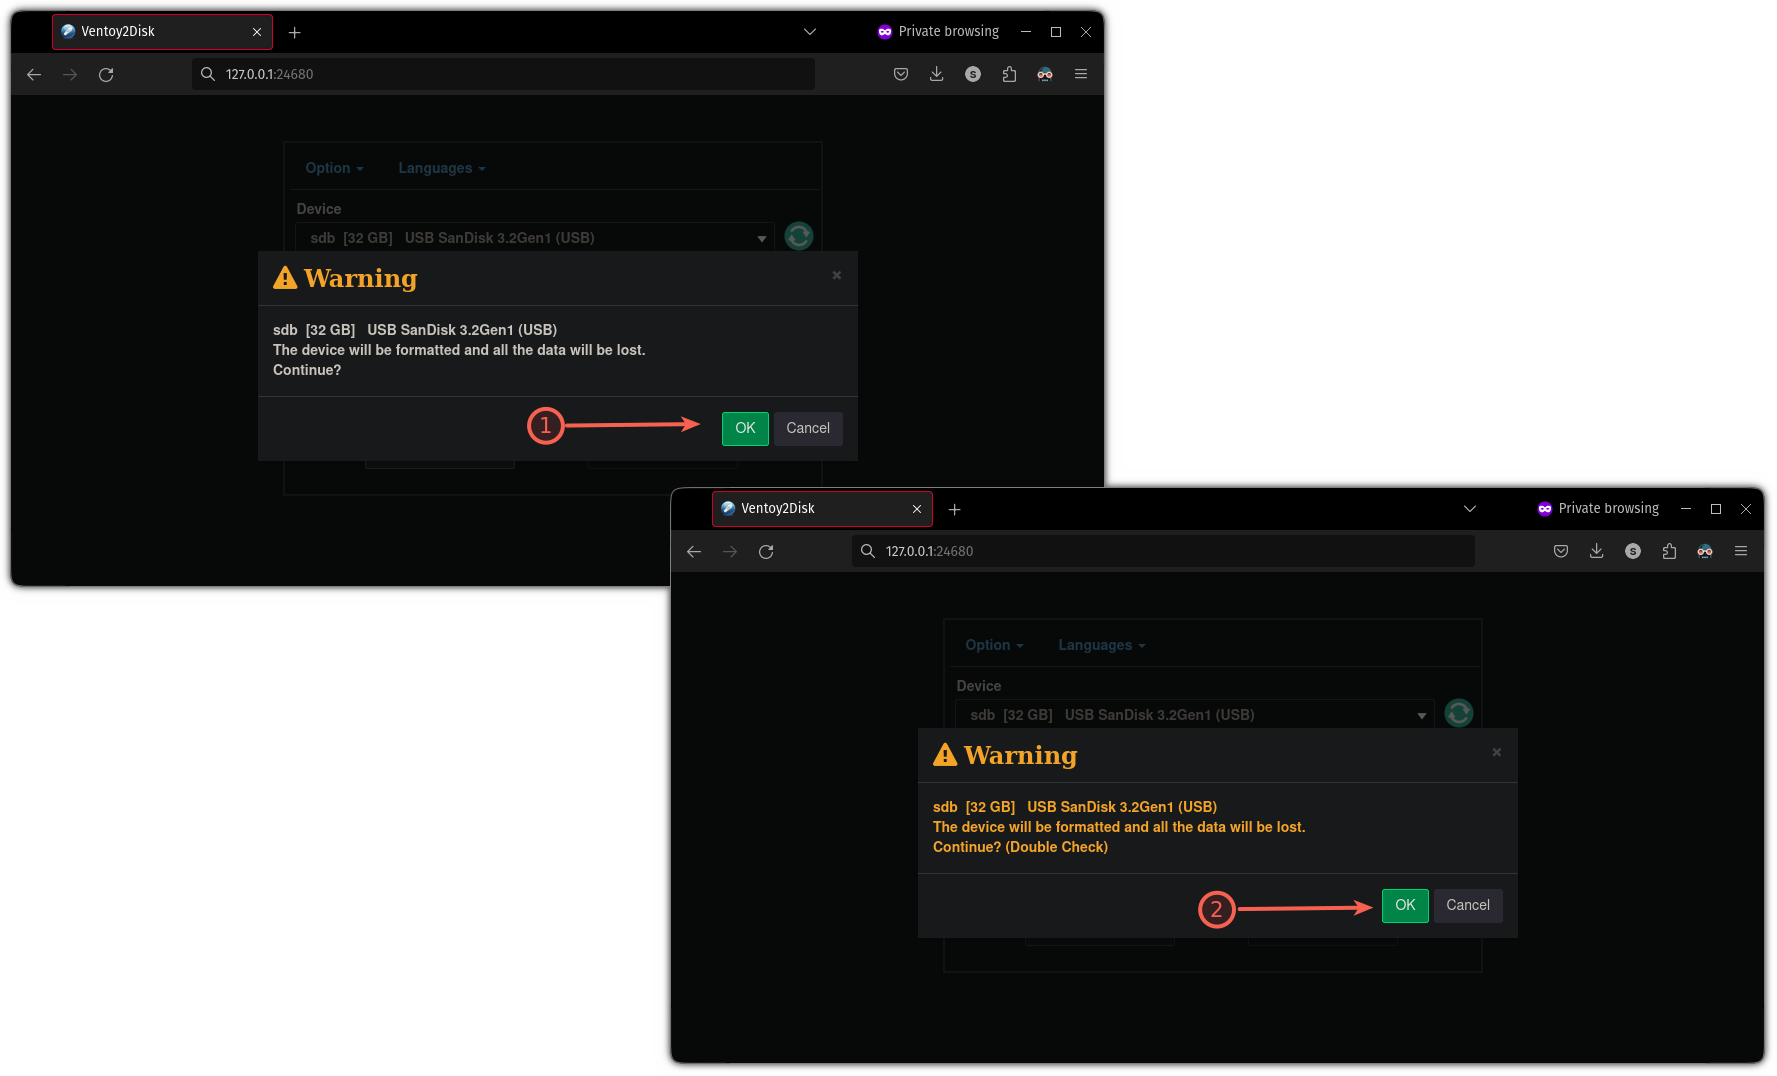
Before installing, it will ask you to check the drive two times as it will format the drive, so make sure to take a backup of critical data (if there's any):
Once done, you will see a message—"Ventoy has been successfully installed to the device":
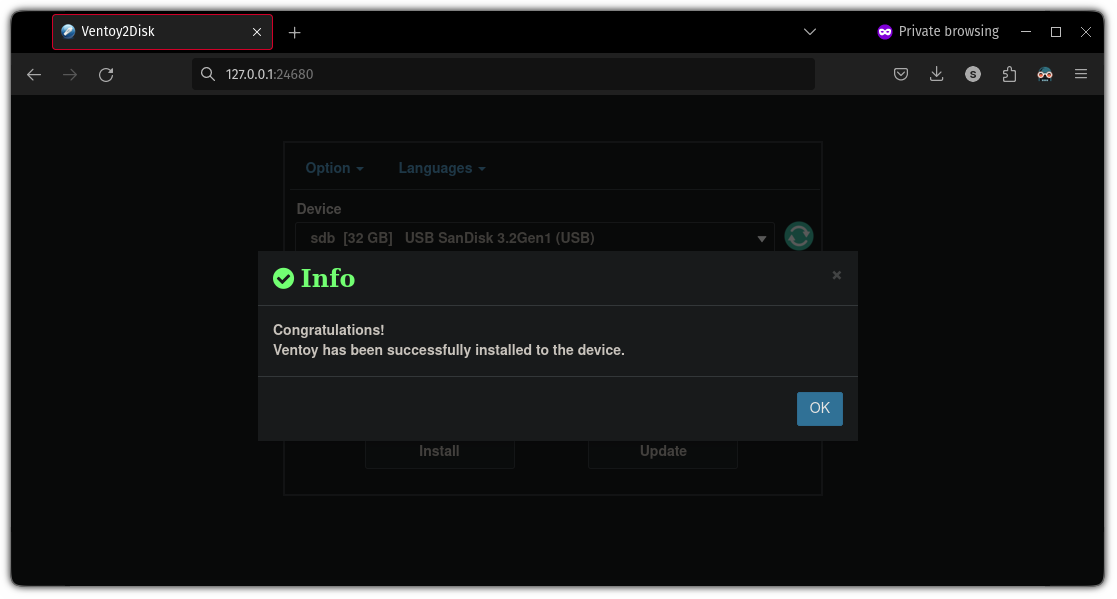
And the installation is done.
Create a Live USB with Ventoy
To create a Live USB with Ventoy, first, you need to download an ISO image of your preferred operating system.
While Ventoy should support almost everything, I would still recommend checking the compatibility from their official page.
To make the USB bootable with Ventoy, all you have to do is paste the ISO file to the Ventoy drive. Yes, it is as simple as that! 🤯

Using GtkHash to check the hash (optional)
While Ventoy does can check the hash, it can only be used when you boot with Ventoy and most users won't have another system to compare the hash.
So it is a good idea to check the hash sum on a working system.
To check the hash, I would recommend using GtkHash which is a simple GUI tool that lets you check the hash for the files.
It is available as a Flatpak so if you haven't enabled flatpak, then, you can refer to our detailed guide on using Flatpak on Linux. Your software center may include support for it, so you might want to check that too.
Once setup, you can use the following command to install it on your system:
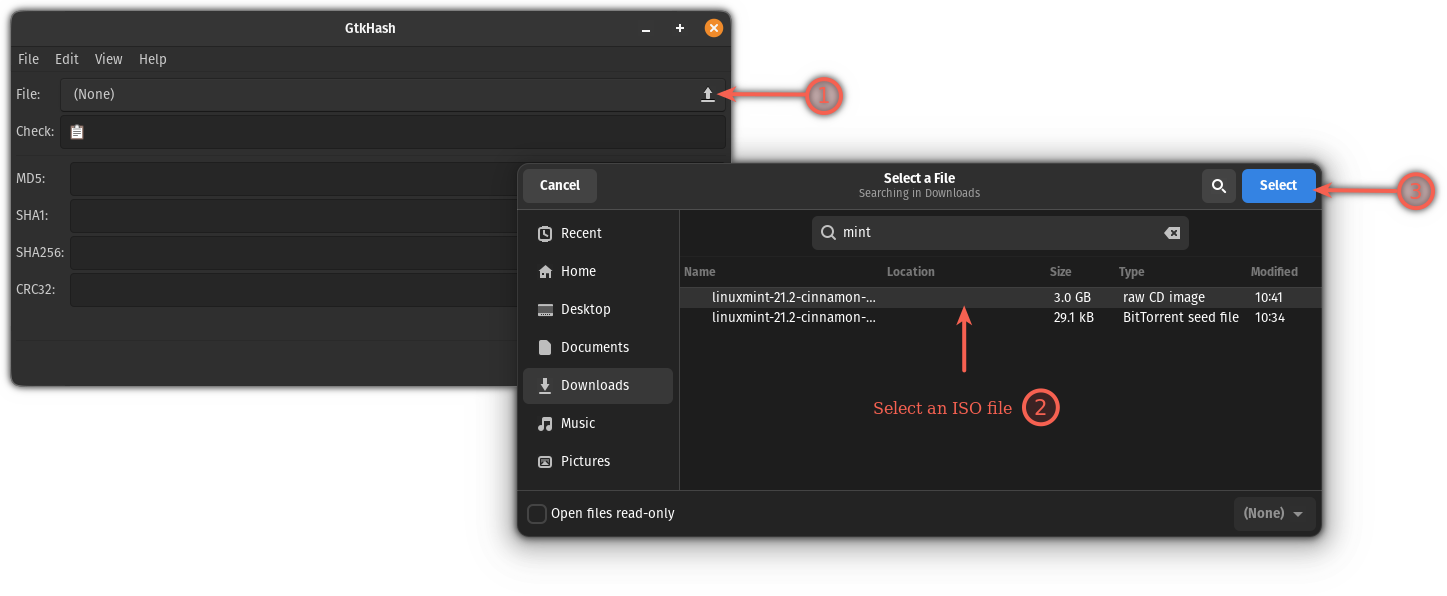
flatpak install flathub org.gtkhash.gtkhashAfter installation, start GtkHash from your system menu and follow two simple steps to check the hash value:
First, select the ISO file:
And paste the hash from the website you got the ISO file in the Check field, then press the Hash button:
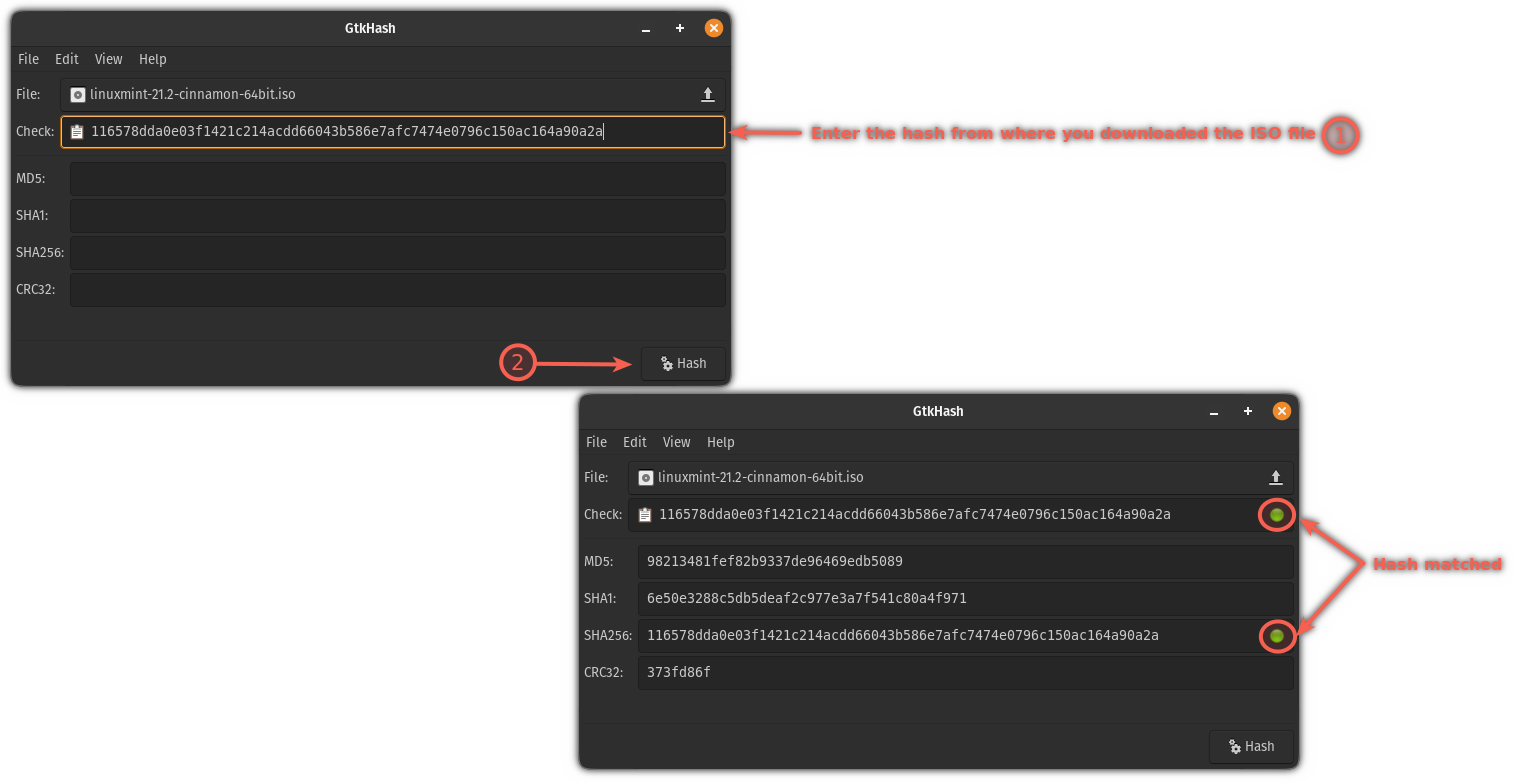
As you can see, it shows a green signal 🟢 meaning, the hash matched!
Boot Using Ventoy USB Drive
Before I walk you through the boot process, there are two modes that you should consider if the ISO doesn't boot.
GRUB2: If any of your Linux distros doesn't boot, you may enable theGRUB2mode by pressingCtrl + r. Remember, it will only work with distros having a grub2 config file.WIMBOOT: If you run into problems while booting Windows ISO, you can enable the wimboot mode by pressingCtrl + w.
While you can reboot your system and press F12, del, F2, or other respective keys to get into the BIOS, you can also choose to use the terminal if you like.
To get into the BIOS of your system while using Linux, all you have to do is use the following command in your terminal:
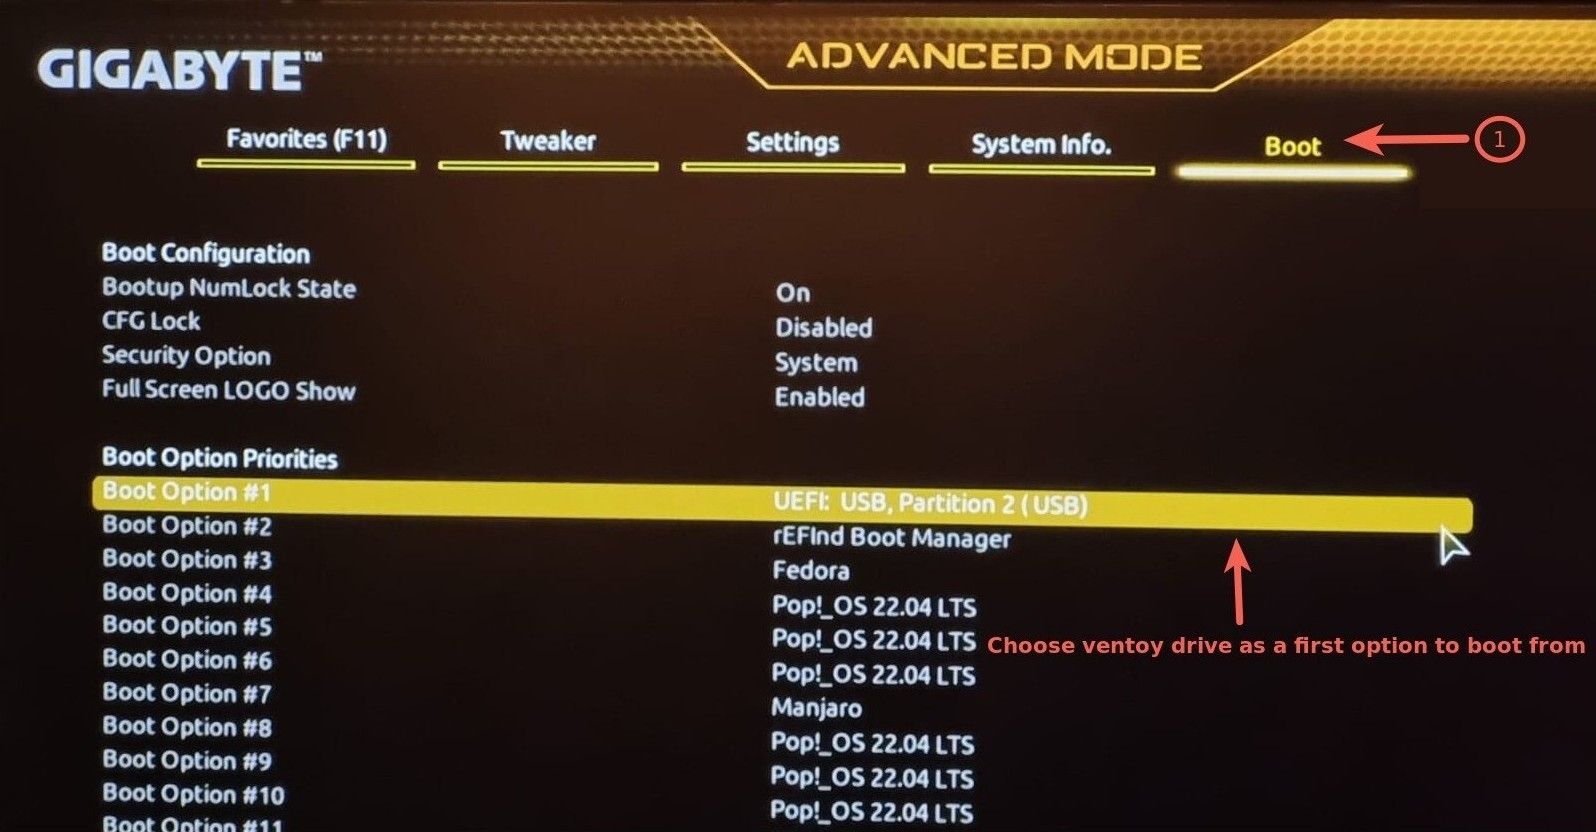
systemctl reboot --firmware-setupIf you want to boot from Ventoy every time you start your system with the flash drive, head to the boot menu and change the boot priorities with Ventoy's USB drive as the first.
If not, you can simply use the boot menu every time and select to boot from it Ventoy manually (overriding the defaults).
Now, save changes and exit from the BIOS (as per your preferences), and you will see a Ventoy screen with one or multiple distros:

Here's how it looks like with multiple distros onboard:
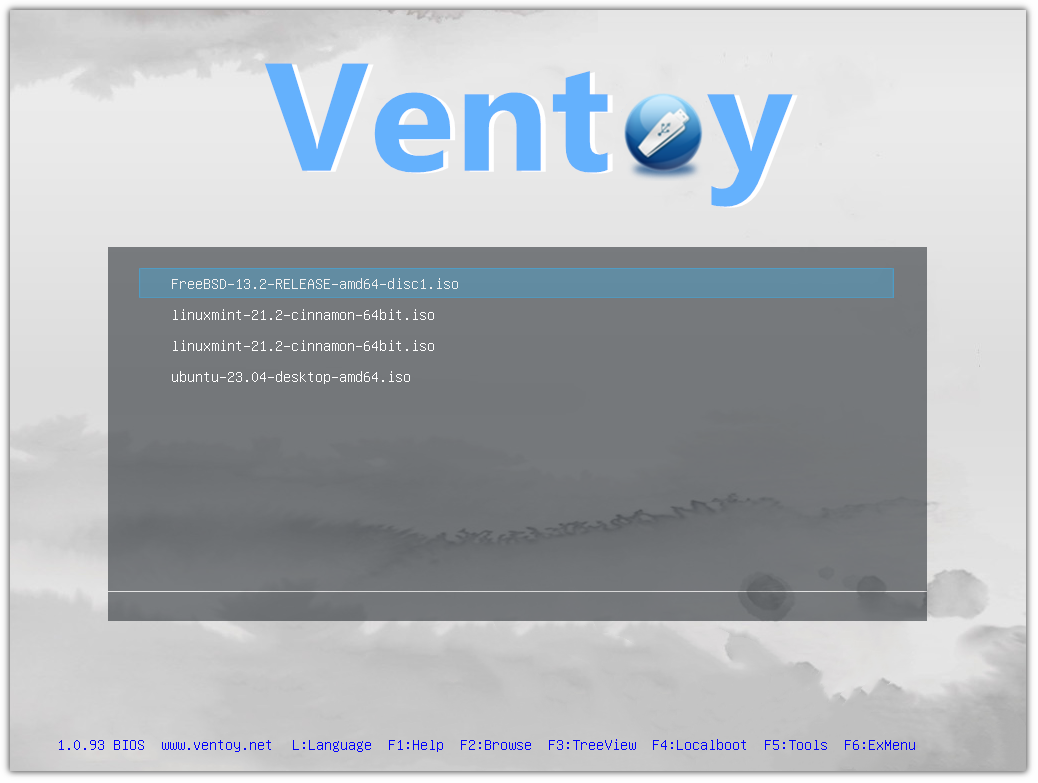
You can use the arrow keys to navigate through the multiple options.
And if you choose the Linux distro as I did, then by pressing the enter key on the distro option, you will see the following options:
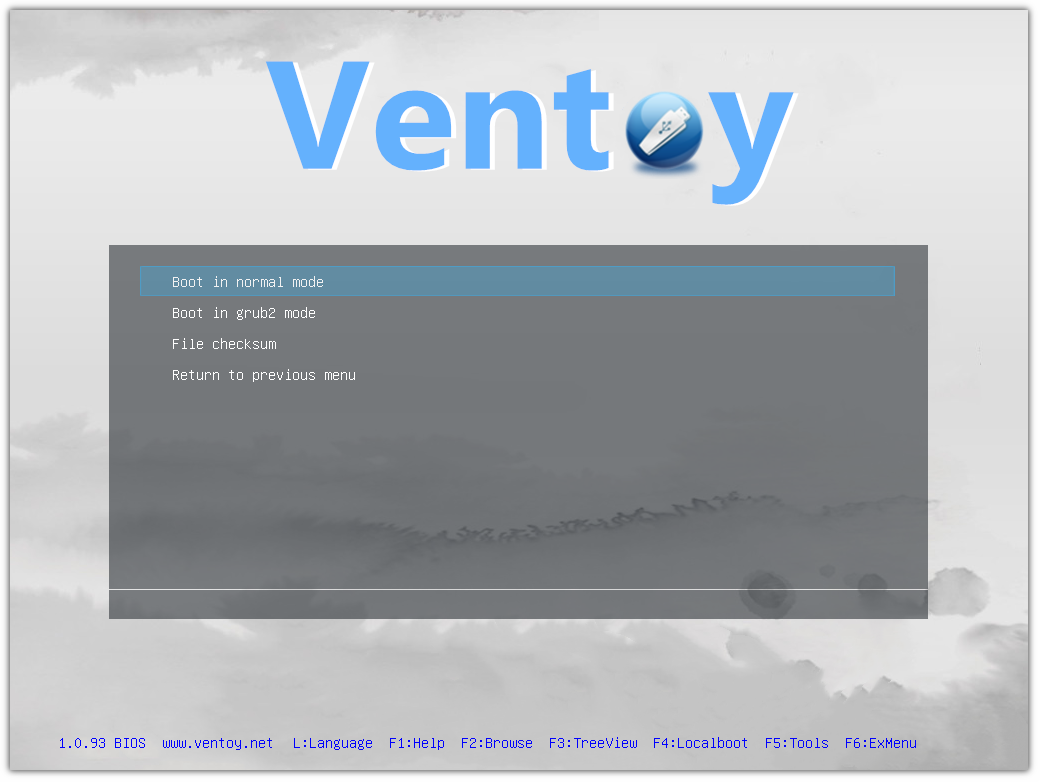
Boot from the normal mode (selected by default); if it doesn't work, you can boot from the grub2.
Create a Windows bootable USB
The process for creating a bootable Windows USB remains the same, but this time, you have to copy the Windows ISO file to the Ventoy drive. But let me walk you through it so that you can avoid any confusion.
So, now if you will boot from Ventoy, you will see a Windows ISO file. I went with Windows 10, so mine looks like this:

Once you press enter, you will see a little different boot menu compared to what it displayed with Linux distros on the flash drive:
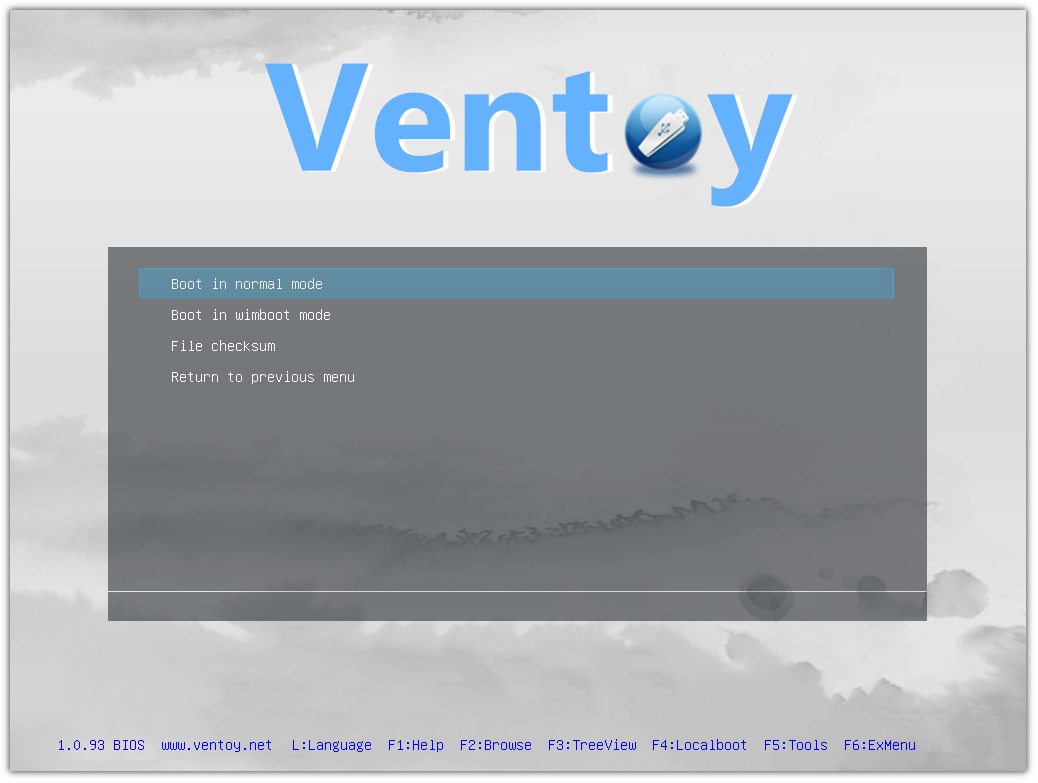
If you notice carefully, it added Boot in wimboot mode an option.
First, try with the normal mode and if it does not work, use the wimboot mode.
 Abhishek Prakash
Use multiple Linux distros in a single USB
To use the multiple distros on a single USB, all you have to do is copy multiple ISO files in the Ventoy disk drive:

Yes. It's that simple. Want more details? This detailed article will help you with that.
Abhishek Prakash
Use Linux and Windows ISOs in the same USB
By far this is the most realistic implementation where you can boot from Windows and your favorite Linux distros.
The method remains the same. All you have to do is copy the Windows ISO and Linux ISO to Ventoy.
Here, I have copied the ISO of LinuxMint and Windows, but you can do more as per the drive size:
Once done, you boot from Ventoy and you'd see ISO of Windows ISO and Linux:
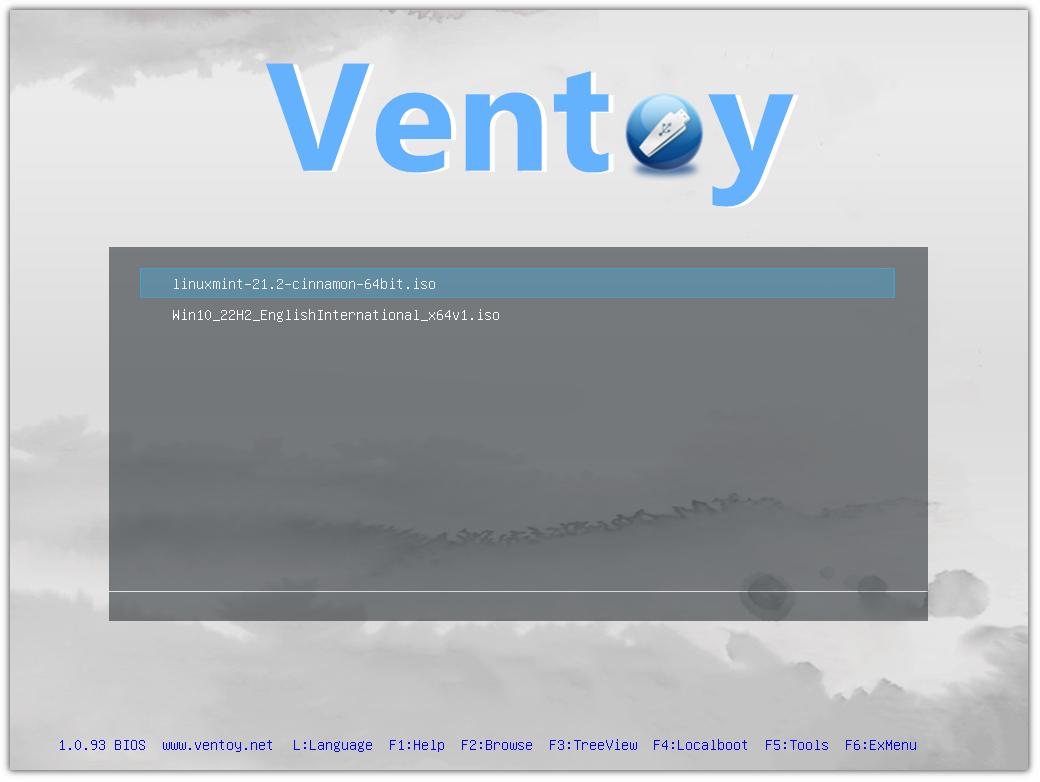
And there you have it!
Wrapping Up
I've been using Ventoy for the past two years and I can't recall any situation where it backfired! It works like a charm. Some people, like my colleague Ankush, prefer Etcher for creating live USBs. That too is a good tool but I prefer Ventoy.
Ankush Das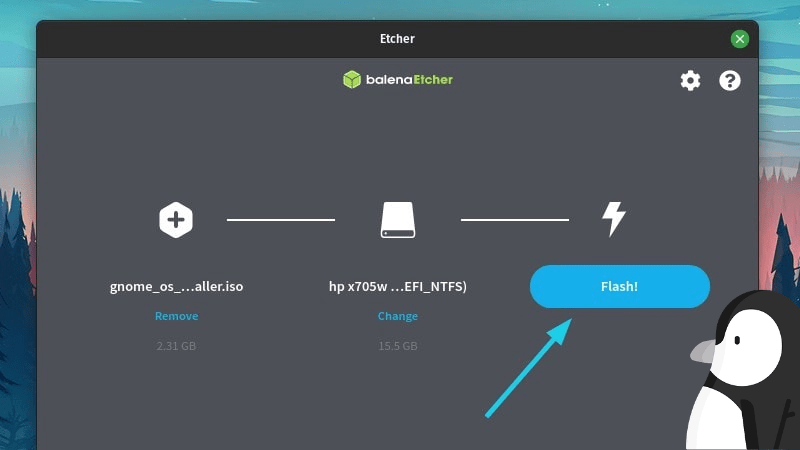
But I'm curious to know how you utilize Ventoy and your experiences 🤔
💬 Don't forget to share your thoughts in the comments box below.
If this helped you, consider supporting It's FOSS
It's FOSS has been helping people use Linux for the past 14 years. Help us stay independent from big tech. Become a Plus member, enjoy ad-free reading and get 5 eBooks.

