

There are plenty of new features in Ubuntu 24.04 LTS. As an ardent Ubuntu user, it is normal to get excited about this new version release.
Getting 24.04 LTS when you are already using Ubuntu
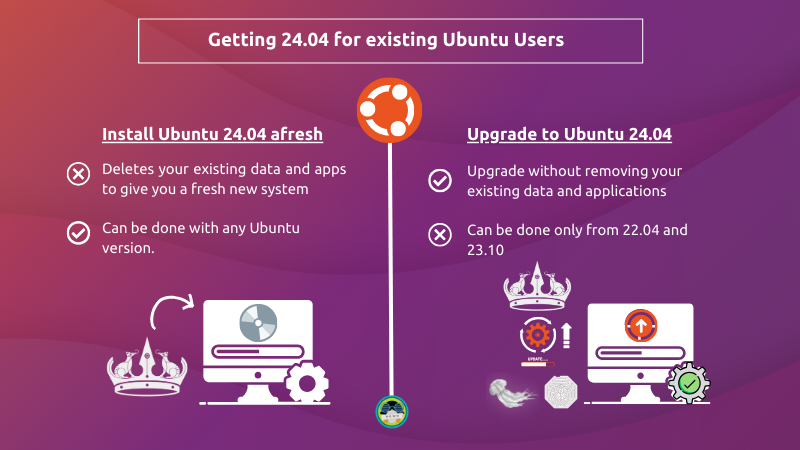
Wondering how to get your hands on 24.04 as an existing Ubuntu user? There are two ways to get the new version:
- Install Ubuntu 24.04 afresh: it deletes your existing data and applications to give you a fresh new system. You can do it with any Ubuntu version.
- Upgrade to Ubuntu 24.04 from 22.04 or 23.10: your existing data and most of the applications remain as it is, and you get the new Ubuntu version.
You probably already know how to do a fresh installation of Ubuntu, so I am not going that way in this tutorial. Here, I’ll show you the steps for upgrading to Ubuntu 24.04 Noble Numbat from 23.10 or 22.04.
The upgrade procedure consists of three main steps:
- Make sure that you get notified of the availability of a new version
- Update your system: sudo apt update && sudo apt dist-upgrade
Don’t worry. I’ll discuss the steps in detail. I’ll also provide suggestions on things to look for before and after the upgrades.
Things to know about upgrading the Ubuntu version to a new release

Upgrading to Ubuntu 24.04 from 23.10 and 22.04 means that you don’t need to create a live USB of Ubuntu and do a fresh installation.
All you need is a good internet connection that can download around 1.5 GB of data. The upgrade process takes a few clicks and 30 minutes to 2 hours, depending on your internet speed.
Here are a few things you should know and keep in mind.
- All your data and most of the application settings remain the same in the existing system. However, making a data backup on an external disk is always recommended.
- If you choose to upgrade your Ubuntu version, you cannot downgrade it. You cannot go back to Ubuntu 22.04 or 23.10 without reinstalling it. And if you do that, you’ll have to format the disk/partition.
- It is always a good idea to make a backup of your data before performing a major upgrade like this.
- Please note that some PPA and external repositories you have added may not work in the newer versions.
- All PPAs and external repositories will be disabled during the upgrade. You’ll have to re-enable them after the upgrade procedure finishes.
- You need to have around 3-4 GB of free space on your root partition. If not, clean your disk and make some free space on Ubuntu.
- You need a good internet connection for the upgrade procedure.
- You may need an hour or less depending on your internet speed for the entire upgrade procedure.
- Furthermore, you might not see the option to upgrade right after the release of a new version. Upgrades roll out in bunches, and it may take a few days before you get it. You may force an upgrade, though.
Precheck before you start the upgrade
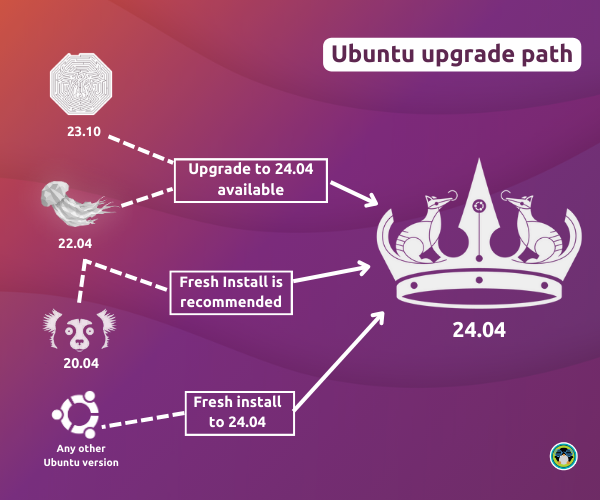
The upgrade to 24.04 is available from 22.04 and 23.10.
For any other version, you’ll have to go for a fresh installation.
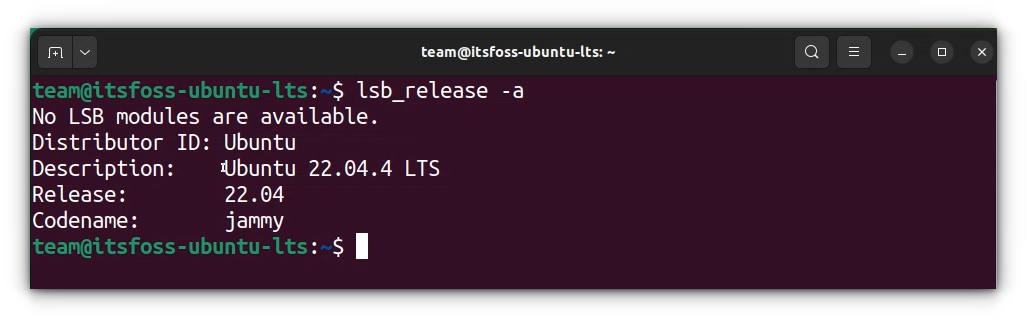
Check your Ubuntu version to ensure that you are using 22.04 or 23.10:
lsb_release -a
Next, you should make sure that all the crucial applications (you cannot function without) are available in the new Ubuntu version. For example, if you use a specific embroidery software for your business, and it is not available for the new release yet, you may want to hold on to the upgrade.
If you take every step carefully, please ensure that
- You have copied the contents of the home directory to an external USB. This is optional, but could help if anything goes wrong in some unlikely cases.
- You have a live Ubuntu USB or access to another computer so that you can do a fresh installation of Ubuntu in the unlikely event of a failed upgrade.
With that aside, let’s focus on the upgrade procedure. There are two ways to upgrade to a new version like Ubuntu 22.04, and I have shown both ways here:
- Upgrade to Ubuntu 24.04 graphically (suitable for desktop users)
- Upgrade to Ubuntu 24.04 via command line (suitable for servers and terminal dwellers)
I am using default Ubuntu with GNOME desktop, but the same steps should be applicable to other Ubuntu flavors such as Kubuntu, Xubuntu, etc.
Method 1: Upgrade to Ubuntu 24.04 graphically (for desktop users)
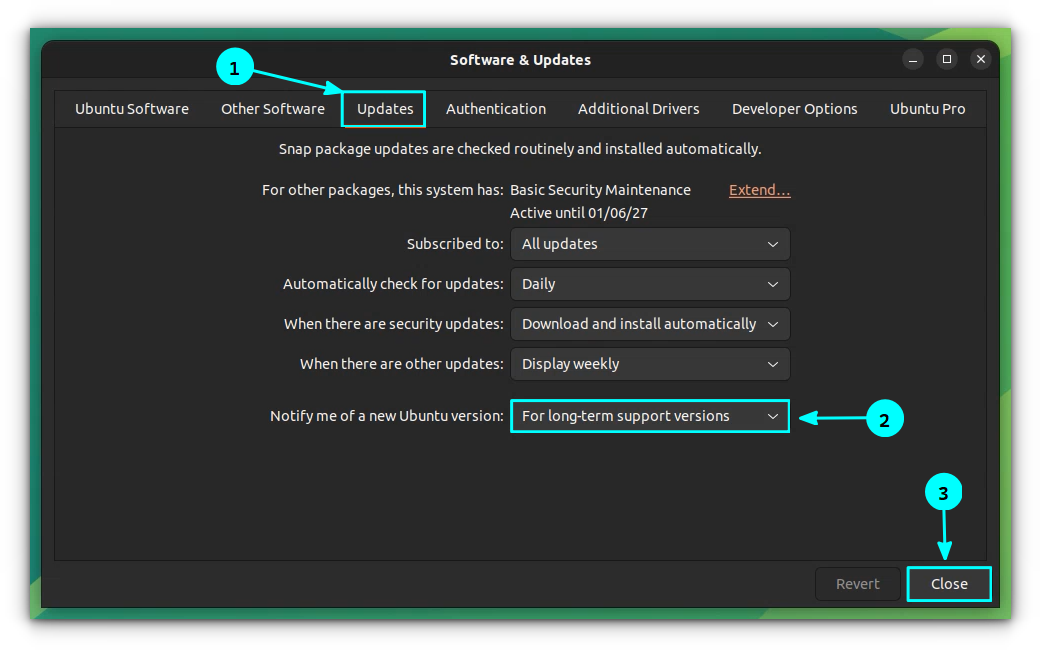
Go to Software & Updates:

And under the Updates tab, make sure that Notify me of a new Ubuntu version is set to:
- Any new version (if you want to upgrade to any new release).
- Long-term support release (if you wish to upgrade to only LTS release)
This will reload the Software repository cache.
Once the correct Software Sources settings are in place, open a terminal and use the command below to update the system. It may take some time, depending on your internet speed.
sudo apt update && sudo apt dist-upgrade
If you are asked to do a system restart, restart your system.
Run Update Manager so that it looks for distribution upgrades.
sudo update-manager
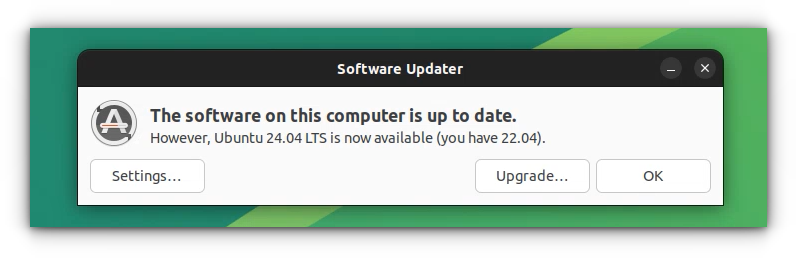
This will open the Software Updater, and it should notify you of the availability of Ubuntu 24.04.
If you don’t see the availability of a new version, try running the command:
sudo update-manager -d
Obviously, click on Upgrade. The rest of the process is fairly easy. All you have to do is to follow the on-screen instructions.
It will download the release upgrade tool.
If you have some third-party repositories like PPAs configured, then these will be disabled during the upgrade process.

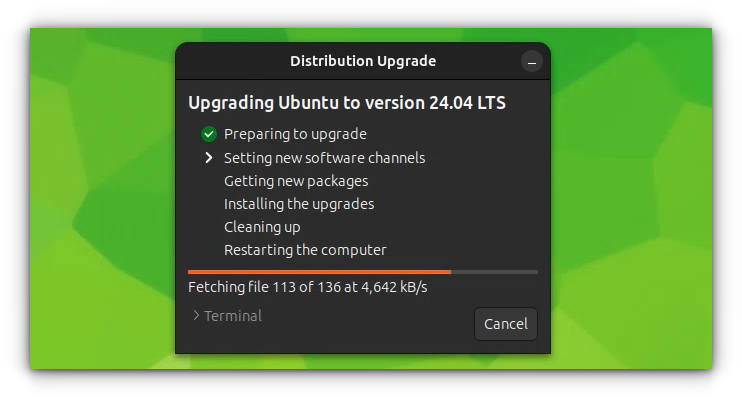
And then it will prepare your system for the upgrade by setting new software repositories.
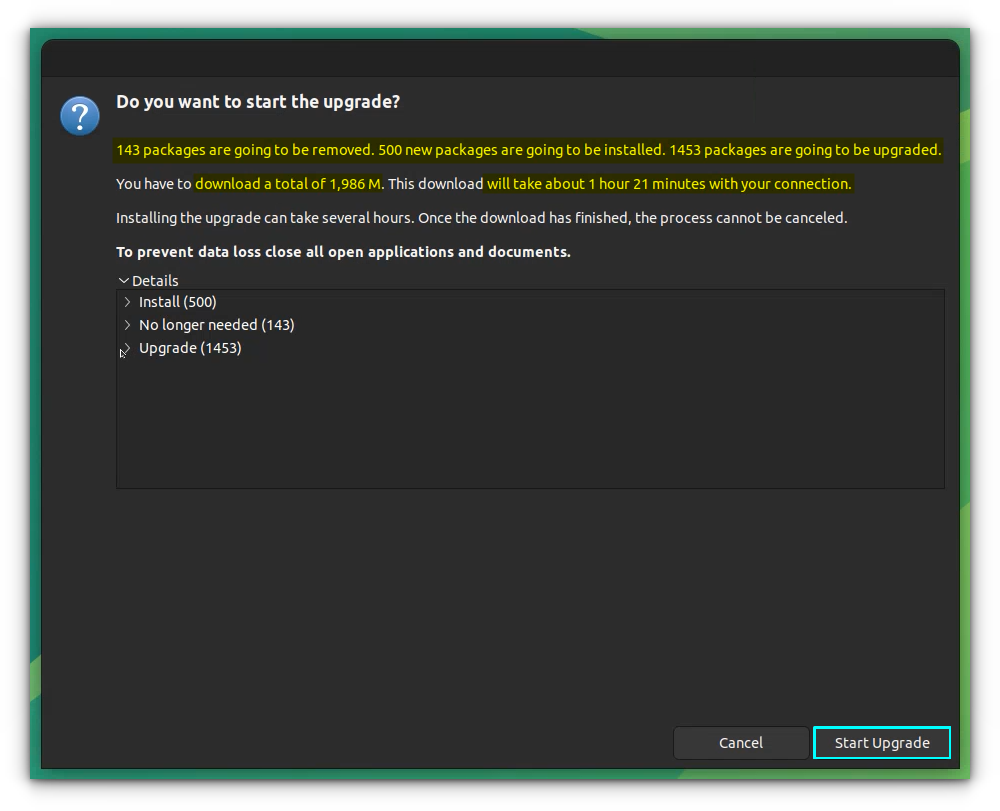
And at this stage, you’ll be asked to actually upgrade your system. This is the point of no return. You cannot go back from here, so make sure you have a reliable internet. The entire process may take anywhere from 20 minutes to 90 minutes, depending on your internet speed.
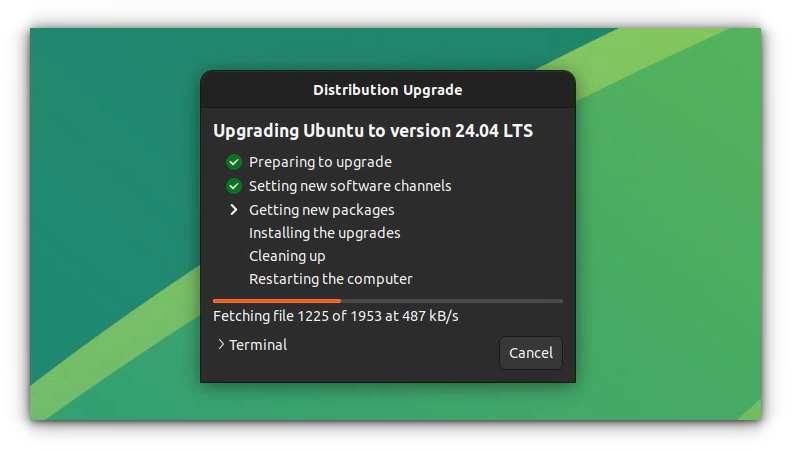
Now your system will be installing the new Ubuntu 24.04 packages.
Once the packages are downloaded and changes are calculated, the updater will warn you about the changes to the Thunderbird package. Thunderbird, from Ubuntu 24.04 onwards, will be installed as a Snap application. You don't have an alternative, so proceed with it.

 Sourav Rudra
If you have done any modification to systemd resolved conf file, then you will be asked to keep it or replace it with a newer one.
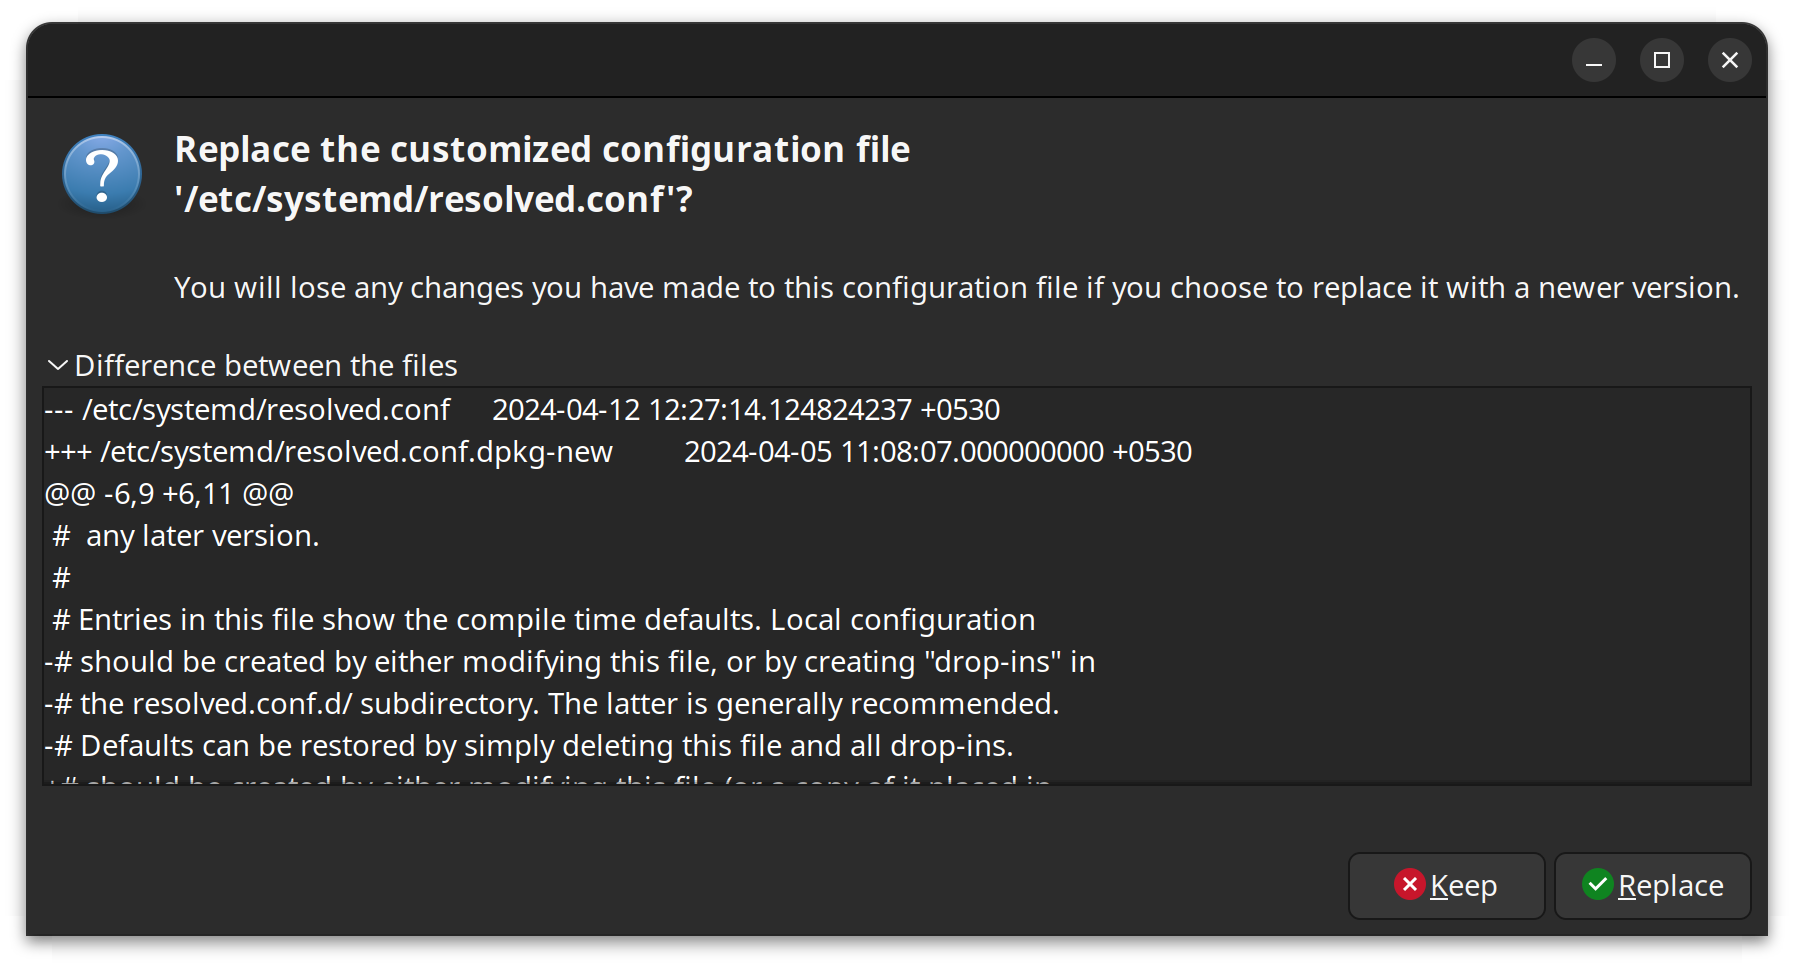
If you choose to replace, then the changes you have made will be lost. So keep an eye on this section.
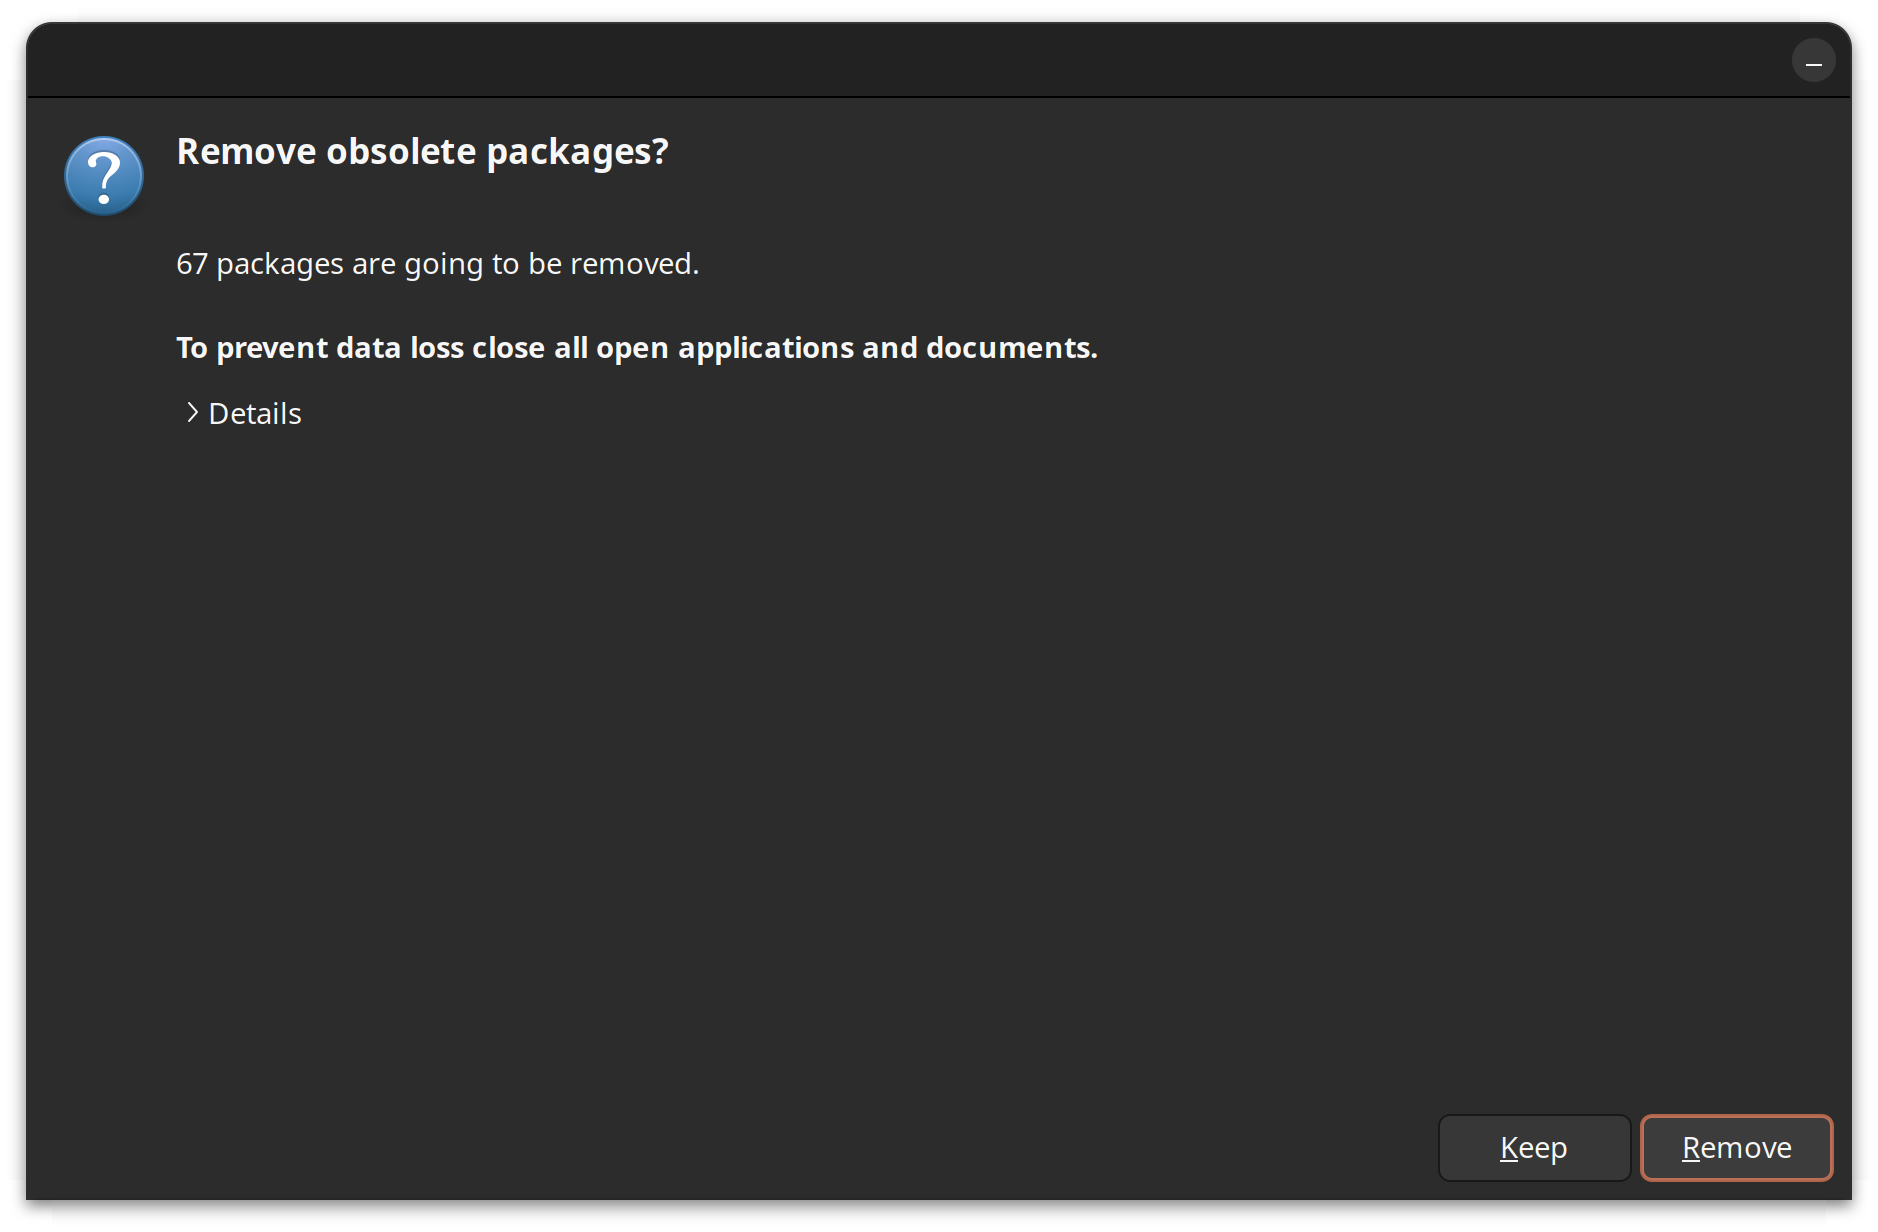
After some time, you’ll be asked whether you want to keep the obsolete packages from the previous Ubuntu install. I advise removing them.
At this point, you have already completed the Ubuntu 24.04 upgrade process. Your system will be restarted.
After the restart, you’ll see the Ubuntu 24.04 default wallpaper.
Sourav Rudra
That’s it. That’s all you needed to do to upgrade to Ubuntu 24.04 from Ubuntu 23.10 and 22.04. Enjoy Ubuntu 24.04.
Method 2: Upgrade to Ubuntu 24.04 using command line
You need to make sure that you have the update-manager-core package installed. Open a terminal and run the following command:
sudo apt install update-manager-core
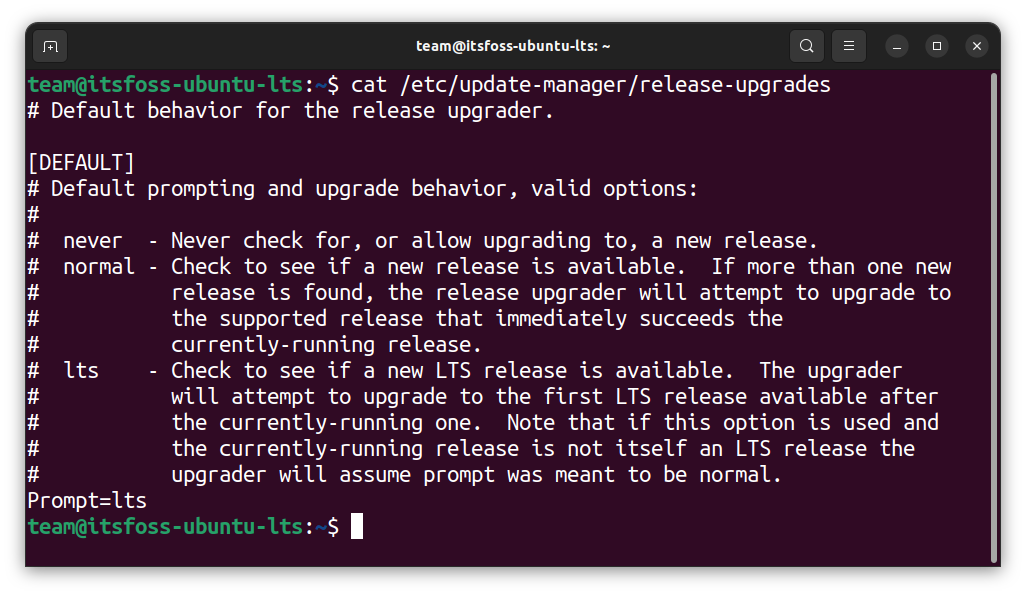
Make sure that you have “Prompt” set to LTS in the file /etc/update-manager/release-upgrades.
You should also install any pending software updates:
sudo apt update && sudo apt dist-upgrade
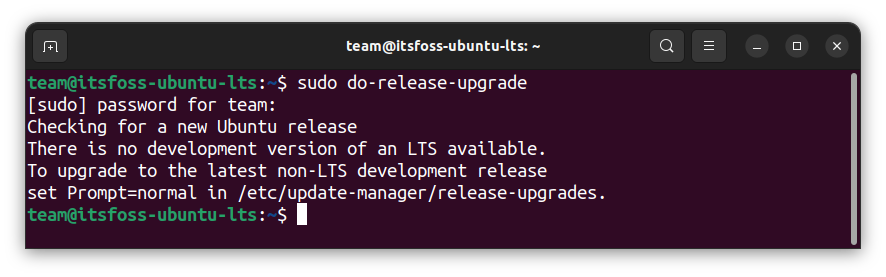
After this, run the following command to upgrade to Ubuntu 24.04:
sudo do-release-upgrade
This command will search for a newer Ubuntu version. If it finds a new version, it will download the files, around 1.5 GB in size, and then will ask you if you want to install those new packages. If you choose yes, your upgrade procedure starts.
As I said previously, you might not see the availability of the new version immediately. You may see “no new release found”.
Bonus Tip: Post upgrade check
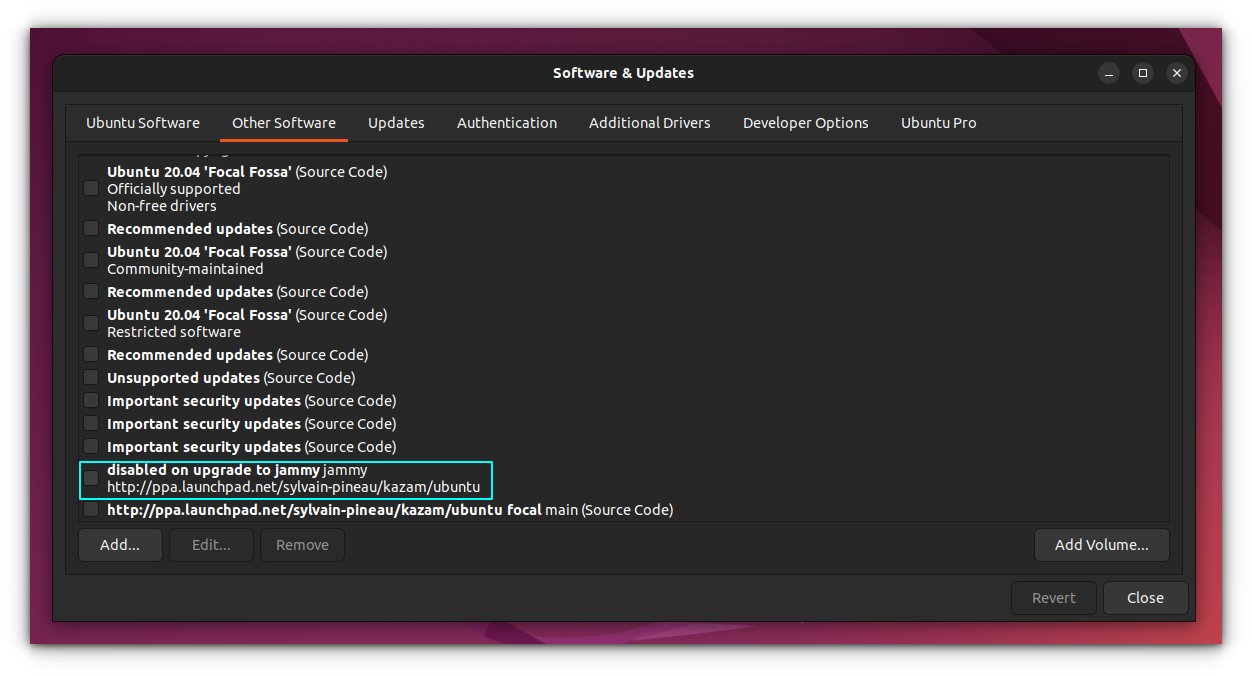
Once you have upgraded successfully, you can start enjoying the new version. But don’t forget the third-party repositories that had been disabled before the Ubuntu version upgrade.
Go to Software & Updates. You’ll find that PPAs are listed with comments like “disabled during upgrade”. Tick the checkboxes to enable the PPAs.
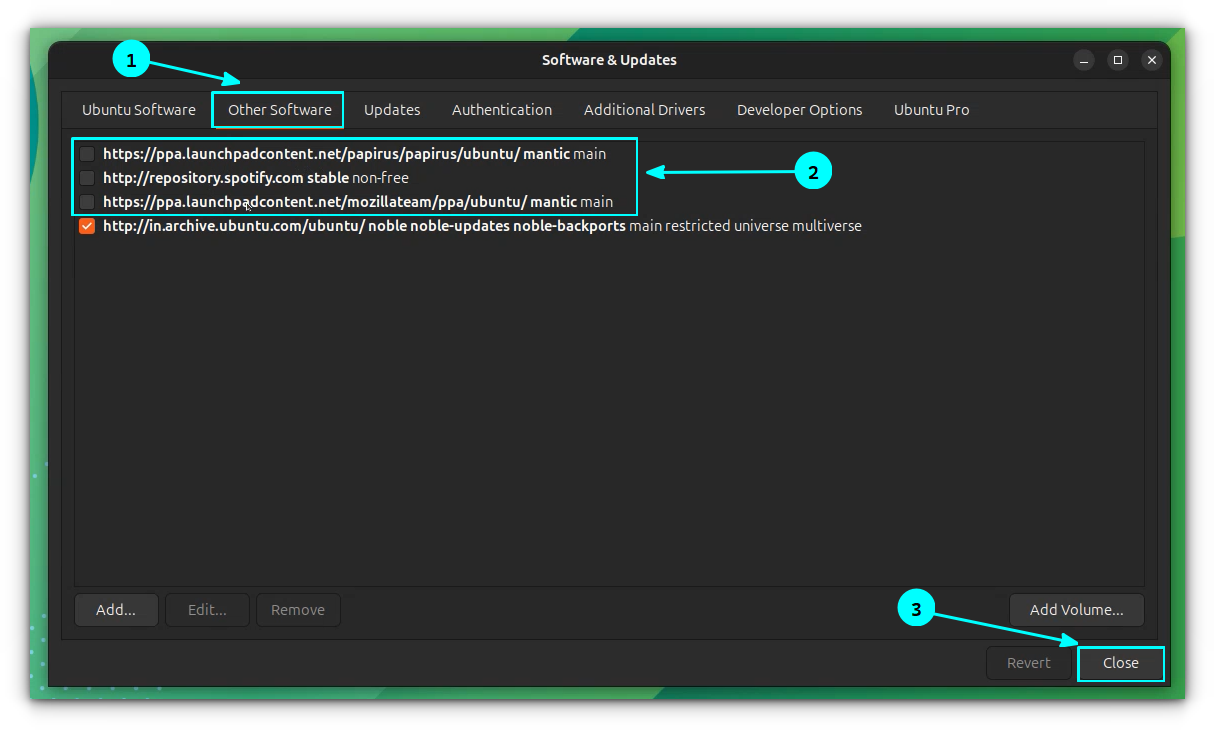
The job is not over yet. Some PPAs might not be available in the new Ubuntu version. How to know that? Just run this command in the terminal:
sudo apt update
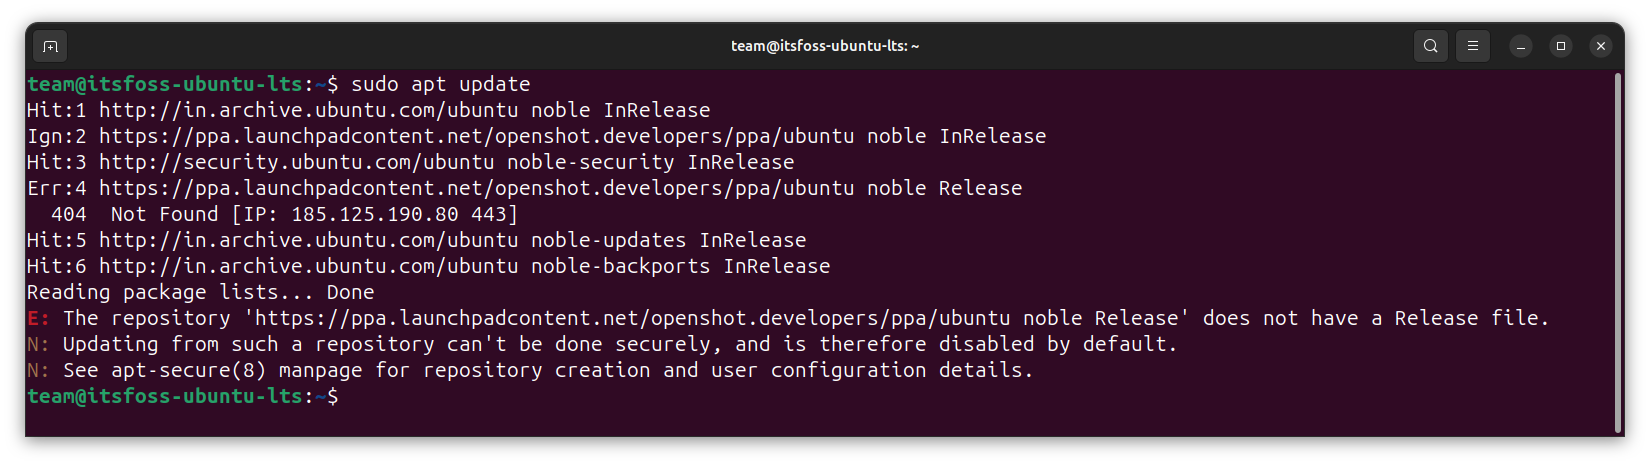
Do you see any error about repositories not being found for Noble, as shown in the screenshot above? If yes, you should disable the repositories it is complaining about again.
Troubleshooting: What to do if the upgrade fails for some reason
Check if you can still boot into the system and if the old system version is still available.
If not, see if you can access the recovery and boot into an older kernel.
If that too doesn’t work, it’s time to utilize the backup. Do a fresh installation of the new version and get the data back from the backup USB disk.
Upgrading is usually smooth, but no harm in being careful
For users who have Ubuntu 23.10 installed, you can follow our other tutorial here:
 Abhishek Prakash
In case you forgot your password, this tutorial should be helpful:
Abhishek Prakash
Do you want to get the latest mainline kernel in your Ubuntu? Use this detailed guide:
Abhishek Prakash
I don’t remember the last time the upgrade procedure failed me. However, having proper backup and contingency are signs of a mature and alert computer user.
I hope this tutorial helps you in upgrading to Ubuntu 24.04 LTS. If you face any issues or have any questions, please let me know in the comment section.
If this helped you, consider supporting It's FOSS
It's FOSS has been helping people use Linux for the past 14 years. Help us stay independent from big tech. Become a Plus member, enjoy ad-free reading and get 5 eBooks.
