

I am assuming that you already know what is a Linux kernel. This is the core software that drives any Linux distribution. Linus Torvalds created it around 30 years ago and still works on it.
A newer version of the Linux kernel is released every few months with new features (such as support for more hardware), bug fixes, etc.
But most Linux distribution do not provide the latest Linux kernel (with some exceptions like Pop!_OS) unless you use an Arch-based distribution or a rolling release distribution.
This does not mean you cannot use the latest Linux kernel in Ubuntu or other distributions you are using.
In this tutorial, I’ll discuss various ways to get a new Linux kernel on Ubuntu.
Suggested Read 📖
 Abhishek Prakash
Using the latest Linux kernel in Ubuntu: FAQ
Before we proceed installing the latest Linux kernel version in Ubuntu. Let me highlight some important information to avoid confusion.
Upgrading the Linux Kernel manually could break your system. So, you need to have a backup ready to restore things if it happens.
Why install a new Linux kernel version manually?
Suppose the new Linux kernel introduces support for your sound card or Wi-Fi card or some other hardware component.
Considering your current Linux Kernel version does not detect your hardware and giving you serious issues, you can choose to upgrade.
HWE kernel option is also available
You should also remember that Ubuntu has this hardware stack enablement (HWE) feature that lets you use a somewhat newer Linux kernel on an Ubuntu LTS release.
Older kernels remain available
Another thing to note is that installing a new kernel doesn’t mean the older kernel has been removed from the system. It remains at your disposal. By default, Ubuntu boots into the newest Linux Kernel installed on the system.
Two ways of installing a new kernel in Ubuntu: Command line and GUI
There are two ways to install a newer Linux kernel:
- Manually download the DEB file for the new Linux kernel and install it in terminal
- Use a GUI tool and install a newer Linux kernel
If you want to enable Secure Boot and enjoy the newer kernel, you will have to sign the Linux Kernel manually, which can be challenging for non-technical users.
Method 1: Manually install the new Linux kernel in Ubuntu using the command line
The latest Linux kernel is called the mainline Linux kernel. You’ll see this term used often.
Step 1: Check currently installed version
You may want to first check the currently installed version of kernel. You can do this by using the uname command in the terminal:
uname -rAs you can see in the output below, I have kernel version 5.4 installed.
abhishek@itsfoss:~$ uname -sr
Linux 5.4.0-40-generic
Step 2: Download the mainline Linux kernel of your choice
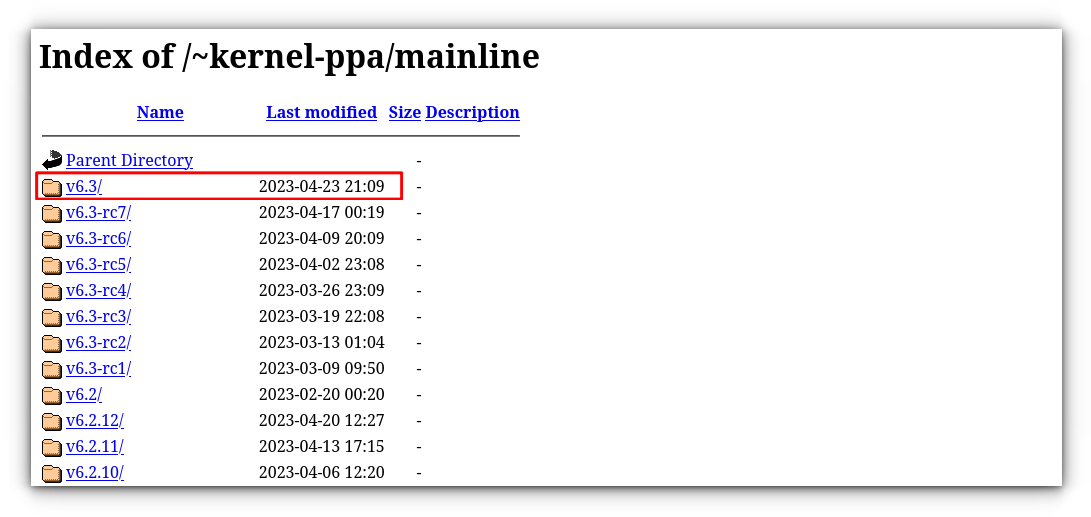
Now you have to download the desired kernel build provided by Ubuntu from here.
You can see the kernel list like this. I am going to download Linux Kernel 6.3. You also should remember to install the stable kernel instead of RC (release candidate).
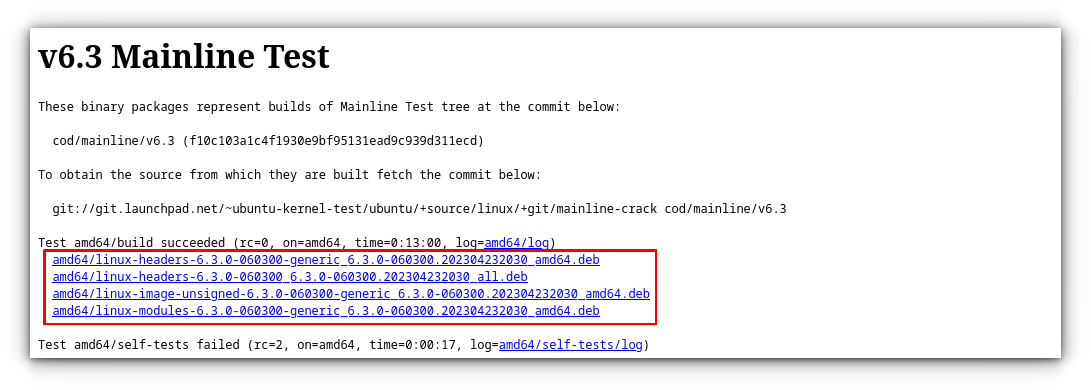
Now download the appropriate kernel files for your architecture. For 64-bit architecture, you should download these files:
- linux-headers-VERSION-NUMBER_all.deb
- linux-headers-VERSION-NUMBER_amd64.deb
- linux-image-VERSION-NUMBER_amd64.deb
- linux-modules-VERSION-NUMBER_amd64.deb
Here's what it looks like:
Step 4: Install the downloaded kernel
Now it’s time to install the downloaded kernel. First, go into the directory where you’ve downloaded the kernel and enter the following command:
sudo dpkg -i *.deb
It will take some time. After installation is finished, you can list the kernel files and look at them using the following command:
ls -l
Step 5: Reboot Ubuntu and enjoy the new Linux kernel.
Now that you’ve successfully installed the new kernel in Ubuntu; it’s time to reboot the machine. Ubuntu, by default, boots into the newer kernel version.
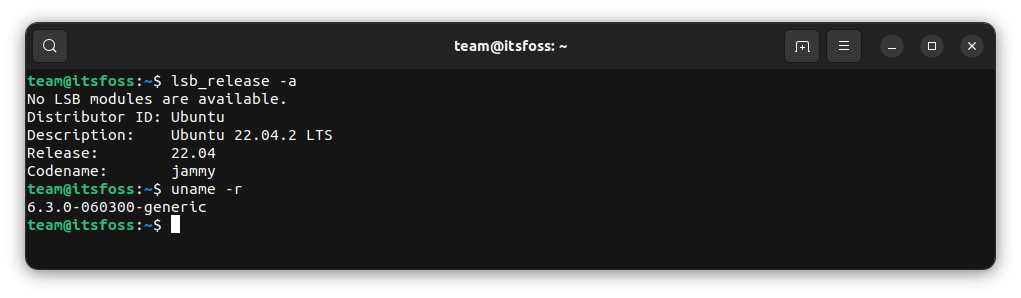
After rebooting, check the kernel version with the uname -r command you used earlier. As you can see, it’s updated to 6.3.0.
Rollback the changes and downgrade the Linux Kernel
If you do not like the new Linux Kernel or if you discovered issues with it. You can easily downgrade the Kernel. You have to:
- Boot into an older kernel
- Remove the newer Linux kernel you don’t want
Let’s see how to do that.
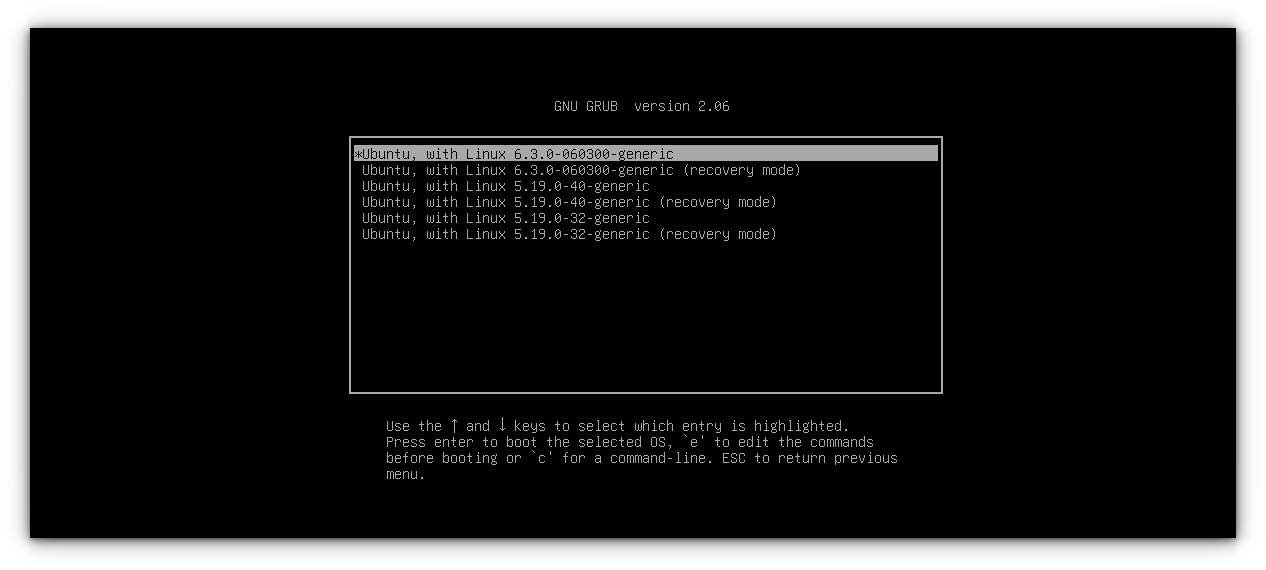
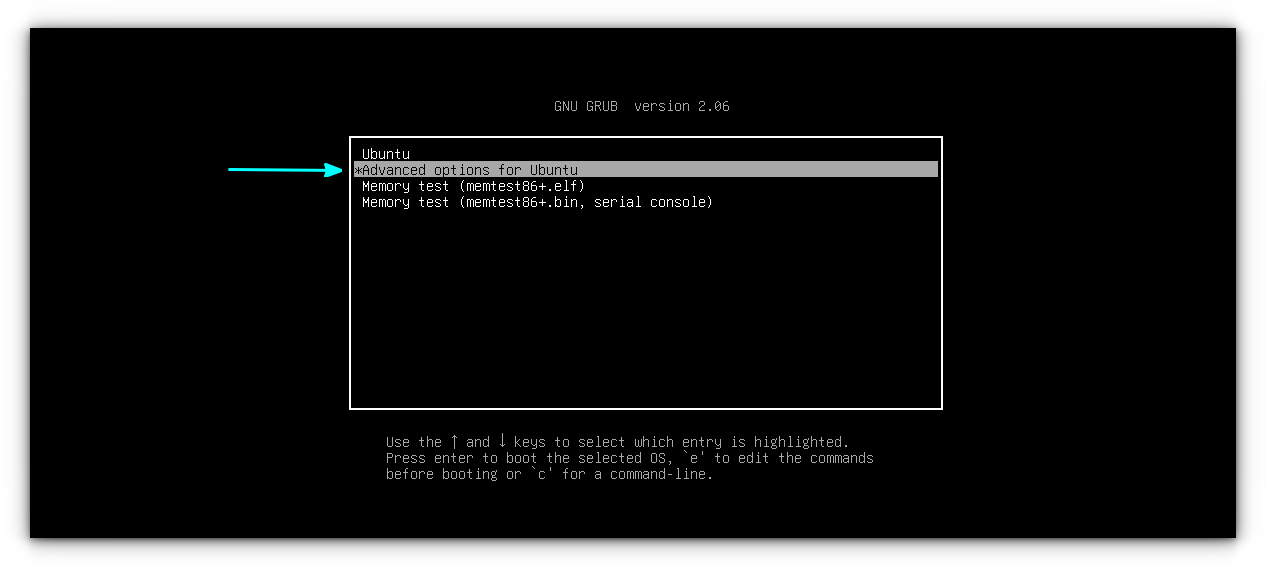
When booting into your system, select the Advanced options for Ubuntu on the grub menu.
If you do not see the grub menu, try holding the shift key or using the Esc key to bring the grub menu.
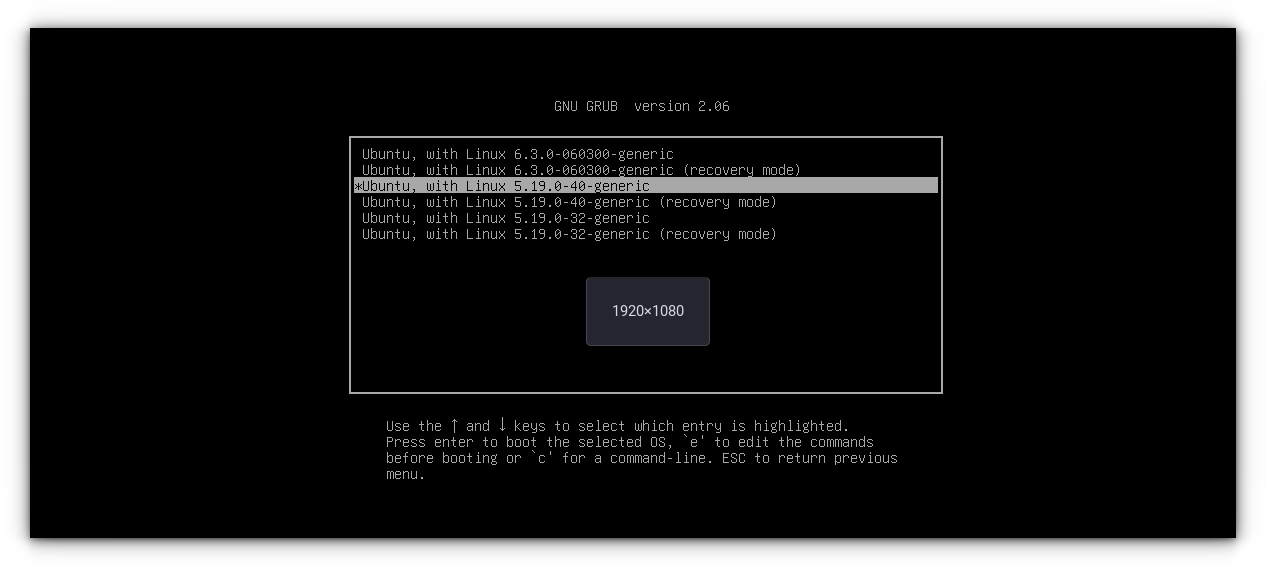
Here, you’ll see all the Linux kernels installed on your system. Select an older one. Don’t choose the recovery mode; go with the normal ones.
Now that you have booted into your good old kernel, we have to remove the new kernel.
You can use the apt or dpkg command to remove the installed kernel version.
Do you remember the version of the new kernel you installed manually? For me, it was kernel 6.3. So here’s what I use to delete it.
Change the commands with the version you want to install:
sudo apt remove linux-headers-6.3.0*
sudo apt remove linux-image-6.3.0*
sudo apt remove linux-modules-6.3.0*
Method 2: Upgrade Linux Kernel in Ubuntu Ukuu GUI tool
You can upgrade the Linux kernel in the Linux command line.
But the kernel upgrade procedure is much easier and more convenient with a GUI.
You can use the paid tool called Ukuu (Ubuntu Kernel Update Utility) or an open-source fork mainline.
Step 1: Install mainline in Ubuntu
You can download the deb files from its GitHub releases page.
Step 2: Install kernel with mainline
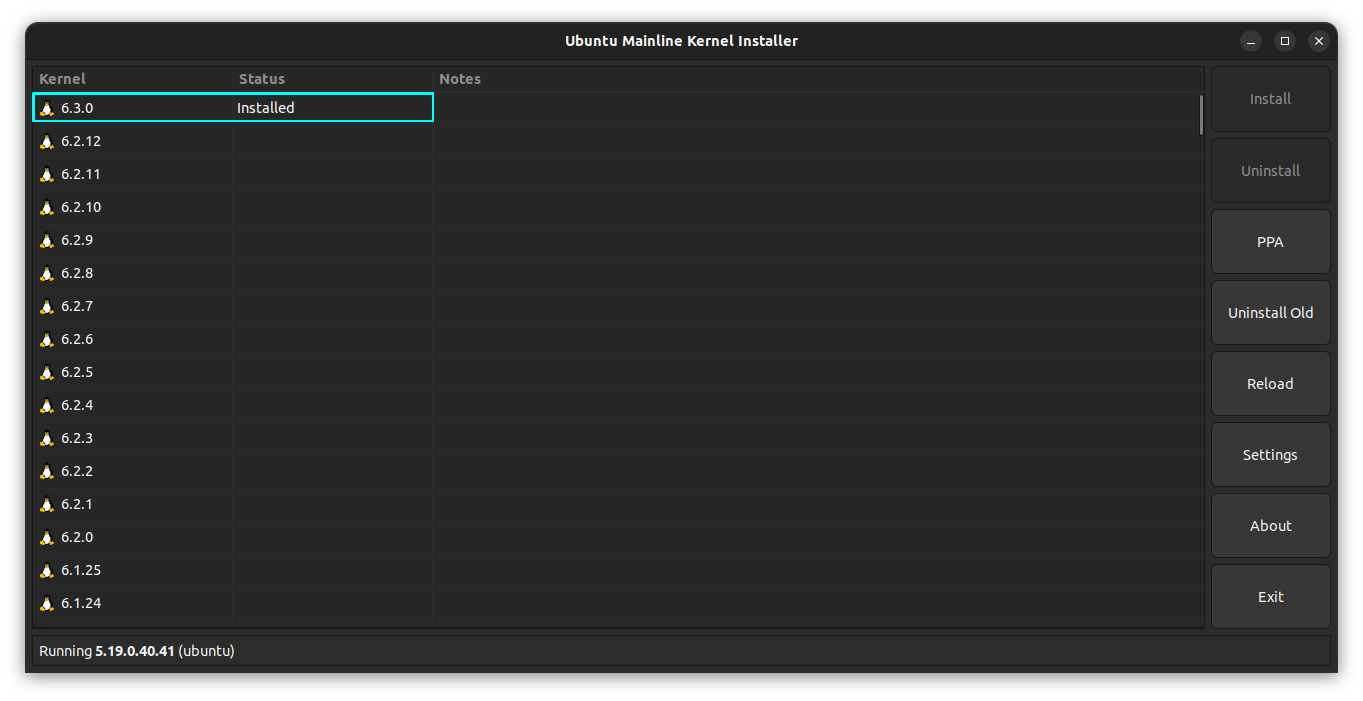
Once you have installed mainline, start it. It will refresh the list of available Linux kernels available for Ubuntu.
By default, it will show you all the available kernels, including the unstable release kernel (tagged with RC and with the red Tux icon).
Kernel versions from the distributions are labeled with the logo, and the other versions have just the good old Tux logo.
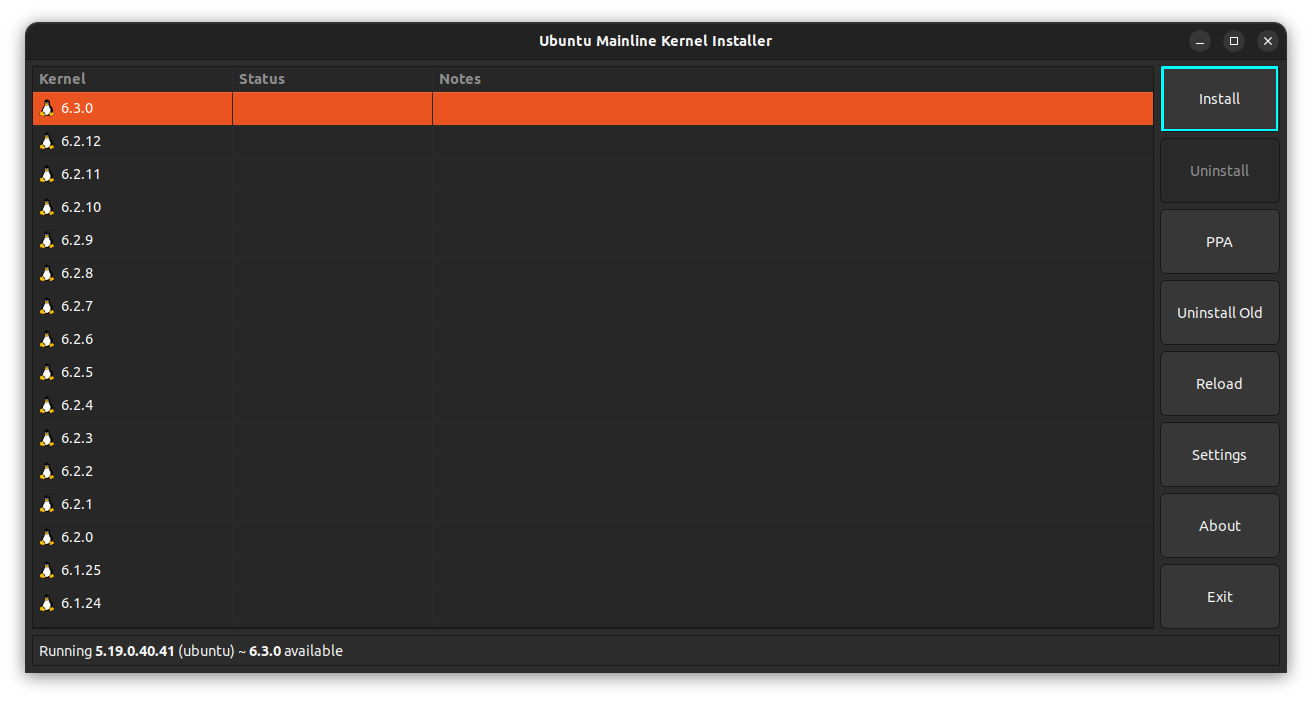
Again, you should avoid the release candidates. Select the desired Kernel version and click on Install. It will download the Linux Kernel that you want and also list what you have currently installed (which is Linux Kernel 5.19 for Ubuntu 22.04 LTS).
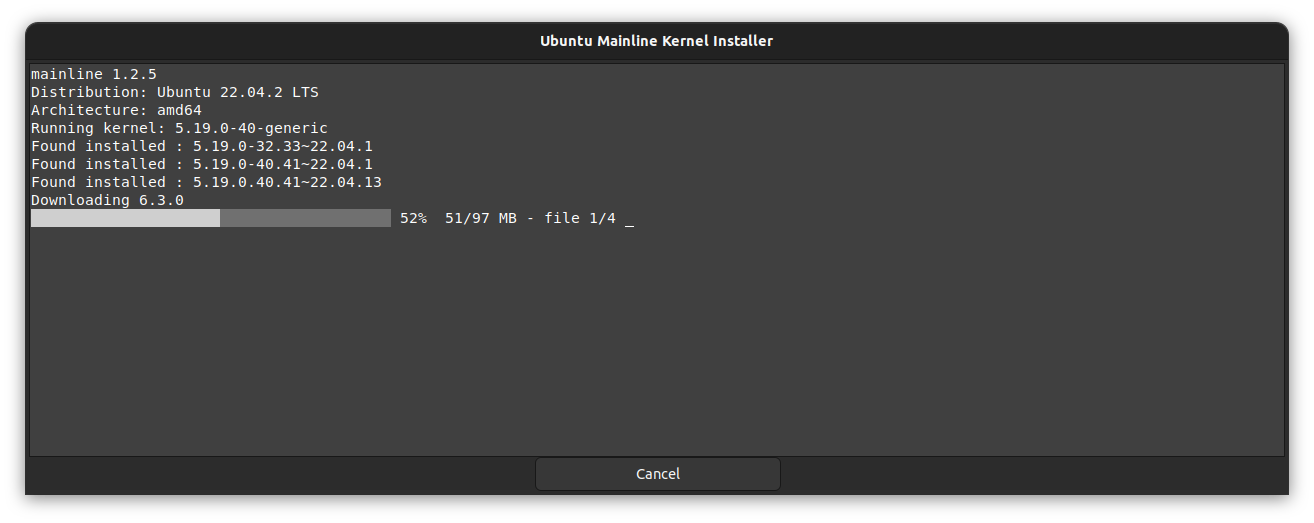
Of course, it will require an admin password for this action. Once you have entered your password, you can see the installation progress in the application itself.
You should see something like this when the installation is finished successfully.
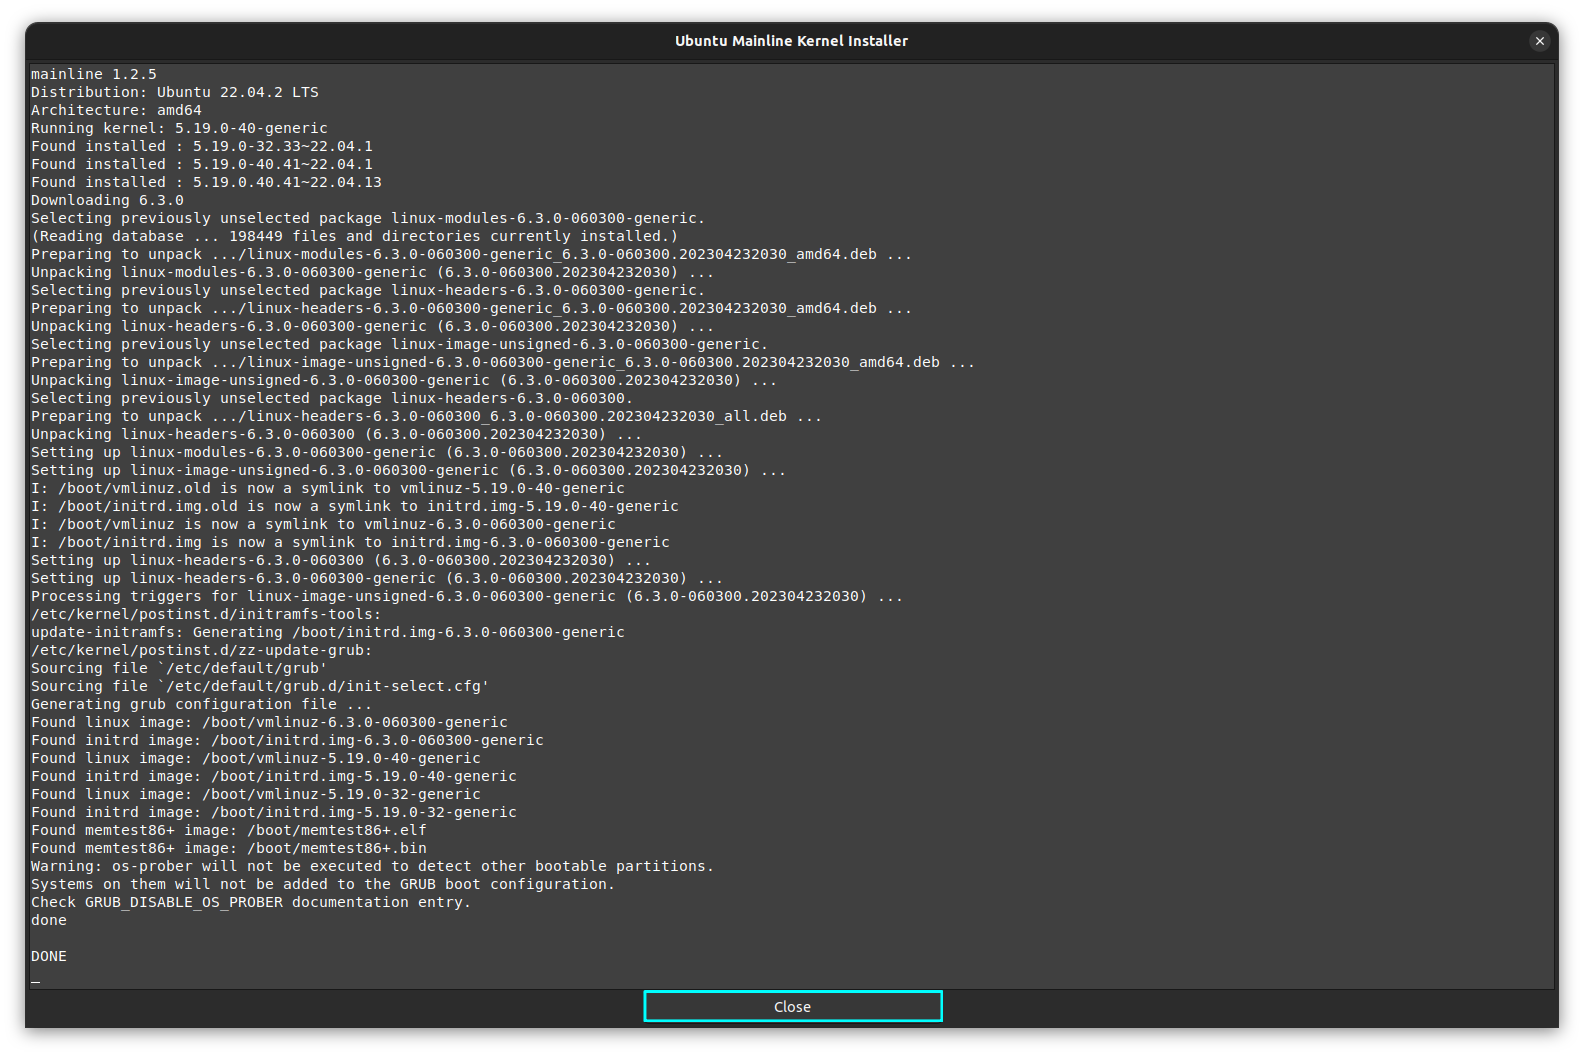
Once installation finishes, you’ll see a beneficial screen that tells you if anything goes wrong with the new Linux kernel, you can always choose to boot into the older kernel from the grub menu.
Now it shows that you have Linux Kernel 6.3 installed:
Rollback the changes/Downgrade Linux Kernel with mainline
Rollbacking is done in two steps:
- Boot into an older kernel
- Remove the newer Linux kernel you don’t want
Let’s see how to do that.
When booting into your system, select the Advanced options for Ubuntu on the grub menu.
Select your old kernel (Linux Kernel 5.19 in this case) to boot into it.
Once you boot into the system with the older Linux kernel, start mainline again.
Ensure that you are not deleting the kernel you are currently running.
Select the newer kernel version you don’t want anymore and click Uninstall.

That’s all you need to do here to downgrade the Linux kernel in Ubuntu.
How do you upgrade the Linux kernel?
I hope this tutorial helped you install the mainline Linux kernel in Ubuntu.
So, do you often upgrade the Linux kernel on your own, or do you wait for your distribution to provide the upgrade? How do you do it? 🤔
If this helped you, consider supporting It's FOSS
It's FOSS has been helping people use Linux for the past 14 years. Help us stay independent from big tech. Become a Plus member, enjoy ad-free reading and get 5 eBooks.
