

UFW (Uncomplicated Firewall) is a simple to use firewall utility with plenty of options for most users. It is an interface for the iptables, which is the classic (and harder to get comfortable with) way to set up rules for your network.
 Abhishek Prakash
What is GUFW?
GUFW is a graphical utility for managing Uncomplicated Firewall (UFW). In this guide, I’ll go over configuring a firewall using GUFW that suits your needs, going over the different modes and rules.
Do you really need a firewall for desktop?
A firewall is a way to regulate the incoming and outgoing traffic on your network. A well-configured firewall is crucial for the security of servers.
But what about normal, desktop users? Do you need a firewall on your Linux system? Most likely you are connected to internet via a router linked to your internet service provider (ISP). Some routers already have built-in firewall. On top of that, your actual system is hidden behind NAT. In other words, you probably have a security layer when you are on your home network.
Now that you know you should be using a firewall on your system, let’s see how you can easily install and configure a firewall on Ubuntu or any other Linux distribution.
But first, let’s see how to install GUFW.
Installing GUFW on Ubuntu and other Linux
GUFW is available in all major Linux distributions. I advise using your distribution’s package manager for installing GUFW.
If you are using Ubuntu, make sure you have the Universe Repository enabled. To do that, open up a terminal (default hotkey: CTRL+ALT+T) and enter:
sudo add-apt-repository universe
sudo apt update -y
Now you can install GUFW with this command:
sudo apt install gufw -yThat’s it! If you prefer not touching the terminal, you can install it from the Software Center as well.
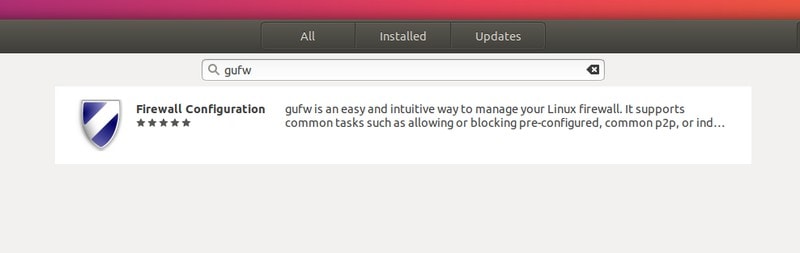
Open Software Center and search for gufw and click on the search result.
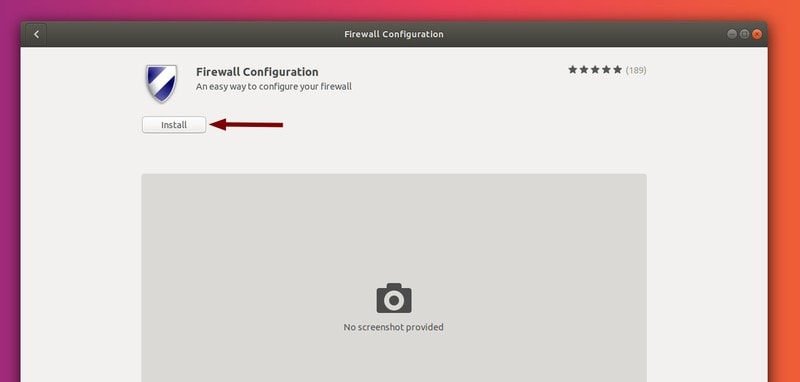
Go ahead and click Install.
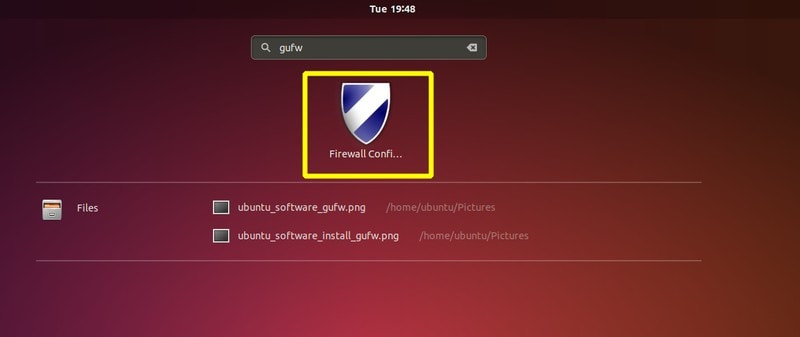
To open gufw, go to your menu and search for it.
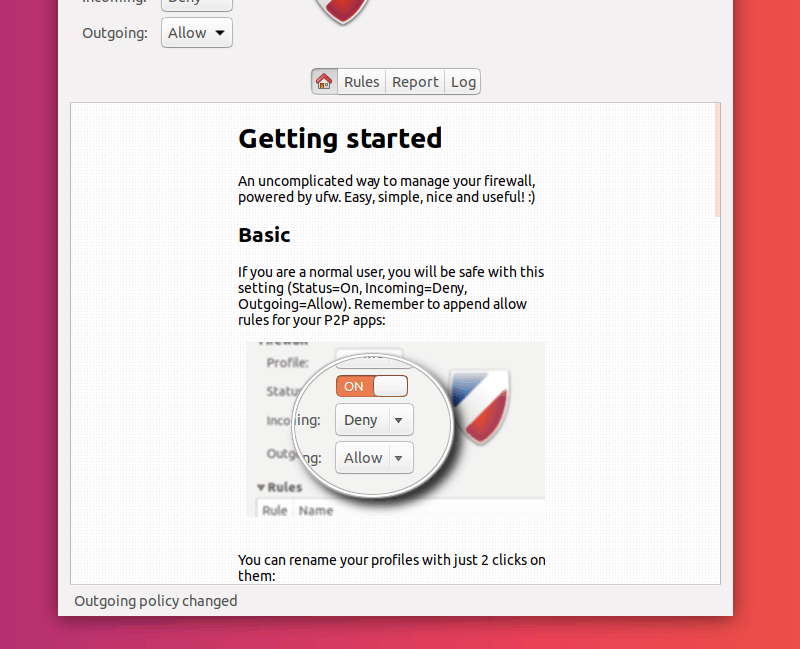
This will open the firewall application and you’ll be greeted by a “Getting Started” section.
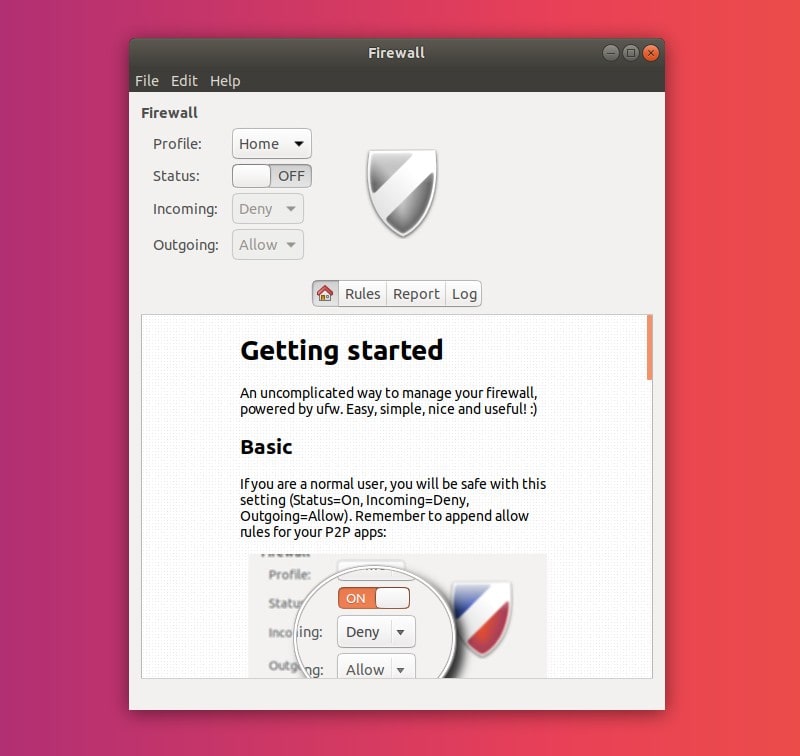
Turn on the firewall
The first thing to notice about this menu is the Status toggle. Pressing this button will turn on/off the firewall (default: off), applying your preferences (policies and rules).
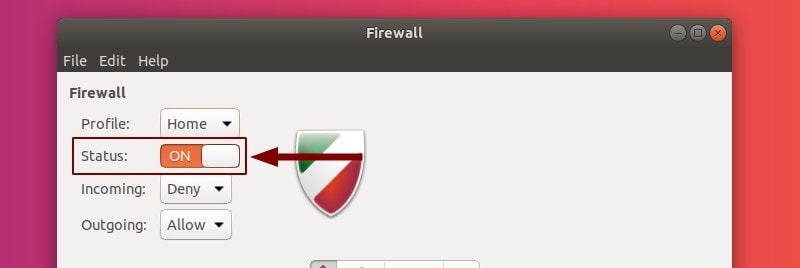
If turned on, the shield icon turn from grey to colored. The colors, as noted later in this article, reflect your policies. This will also make the firewall automatically start on system startup.
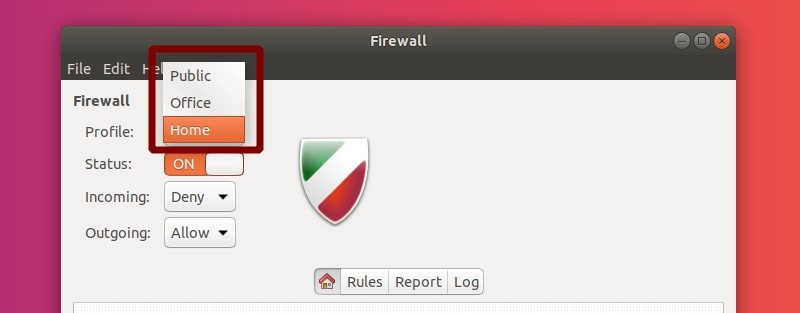
Understanding GUFW and its profiles
As you can see in the menu, you can select different profiles. Each profile comes with different default policies. What this means is that they offer different behaviors for incoming and outgoing traffic.
The default profiles are:
- Home
- Public
- Office
You can select another profile by clicking on the current one (default: Home).
Selecting one of them will modify the default behavior. Further down, you can change Incoming and Outgoing traffic preferences.
By default, both in Home and in Office, these policies are Deny Incoming and Allow Outgoing. This enables you to use services such as http/https without letting anything get in (e.g. ssh).
For Public, they are Reject Incoming and Allow Outgoing. Reject, similar to deny, doesn’t let services in, but also sends feedback to the user/service that tried accessing your machine (instead of simply dropping/hanging the connection).
Configuring firewall rules and policies [for advanced users]
All profiles use the same rules, only the policies the rules build upon will differ. Changing the behavior of a policy (Incoming/Outgoing) will apply the changes to the selected profile.
Note that the policies can only be changed while the firewall is active (Status: ON).
Profiles can easily be added, deleted and renamed from the Preferences menu.
Preferences
In the top bar, click on Edit. Select Preferences.
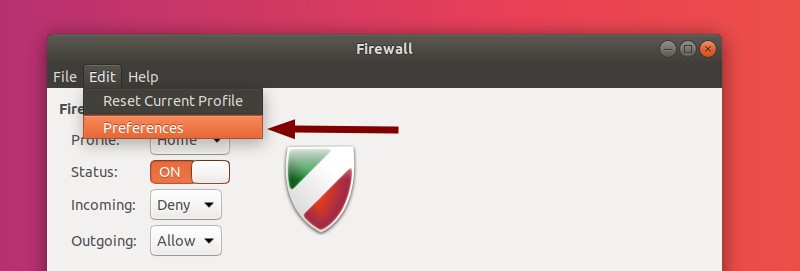
This will open up the Preferences menu.
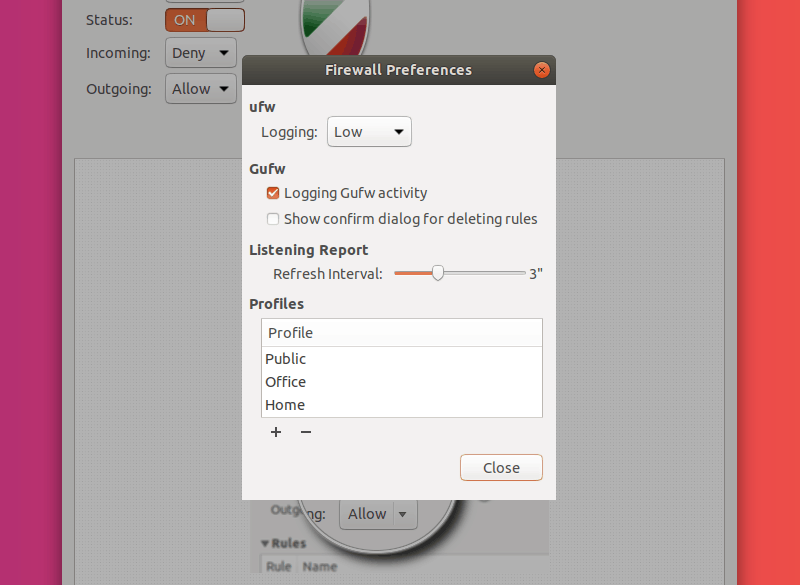
Let’s go over the options you have here!
Logging means exactly what you would think: how much information does the firewall write down in the log files.
The options under Gufw are quite self-explanatory.
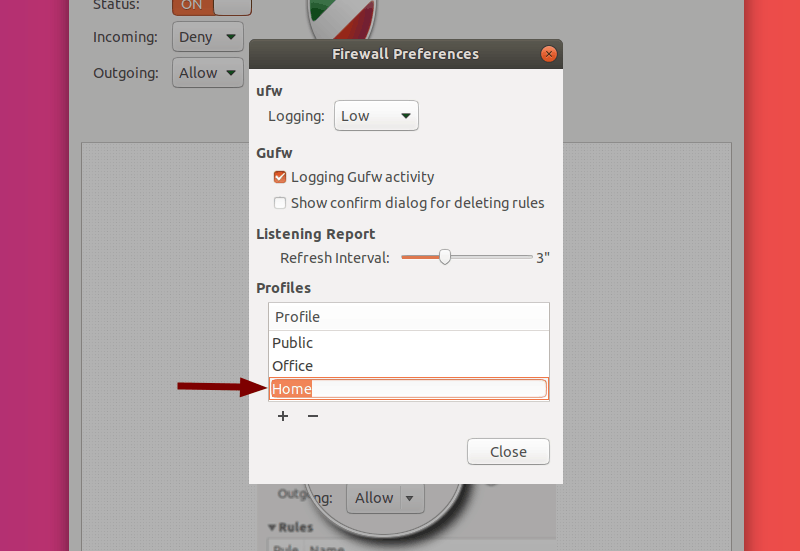
In the section under Profiles is where we can add, delete and rename profiles. Double-clicking on a profile will allow you to rename it. Pressing Enter will complete this process and pressing Esc will cancel the rename.
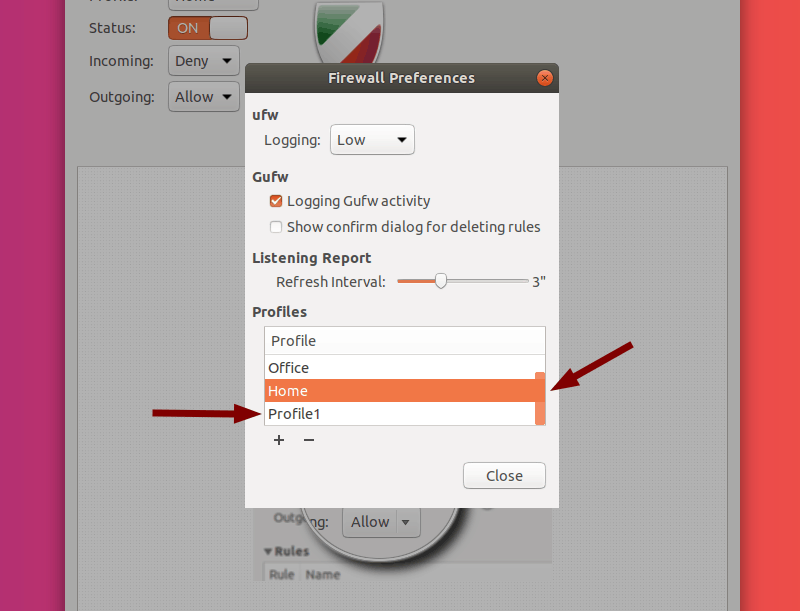
To add a new profile, click on the + under the list of profiles. This will add a new profile. However, it won’t notify you about it. You’ll also have to scroll down the list to see the profile you created (using the mouse wheel or the scroll bar on the right side of the list).
Note: The newly added profile will Deny Incoming and Allow Outgoing traffic.
Clicking a profile highlight that profile. Pressing the – button will delete the highlighted profile.
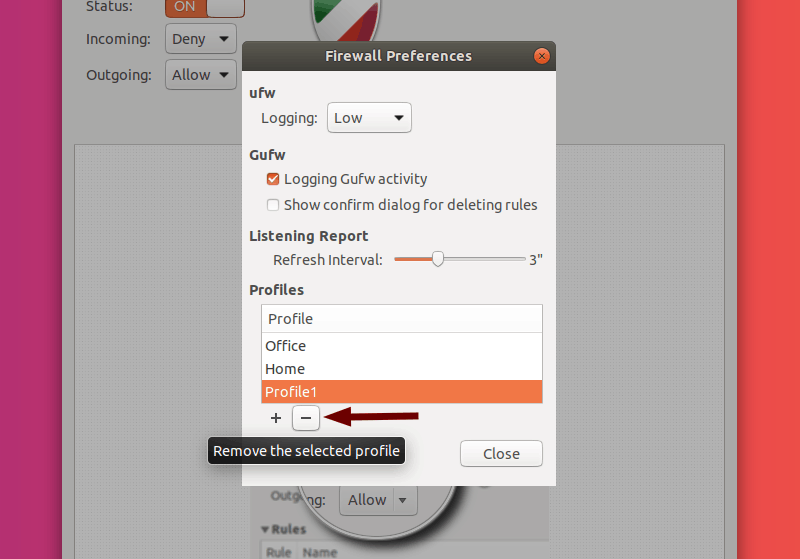
You can now click on Close. Next, I’ll go into setting up different rules.
Rules
Back to the main menu, somewhere in the middle of the screen you can select different tabs (Home, Rules, Report, Logs). We already covered the Home tab (that’s the quick guide you see when you start the app).
Go ahead and select Rules.
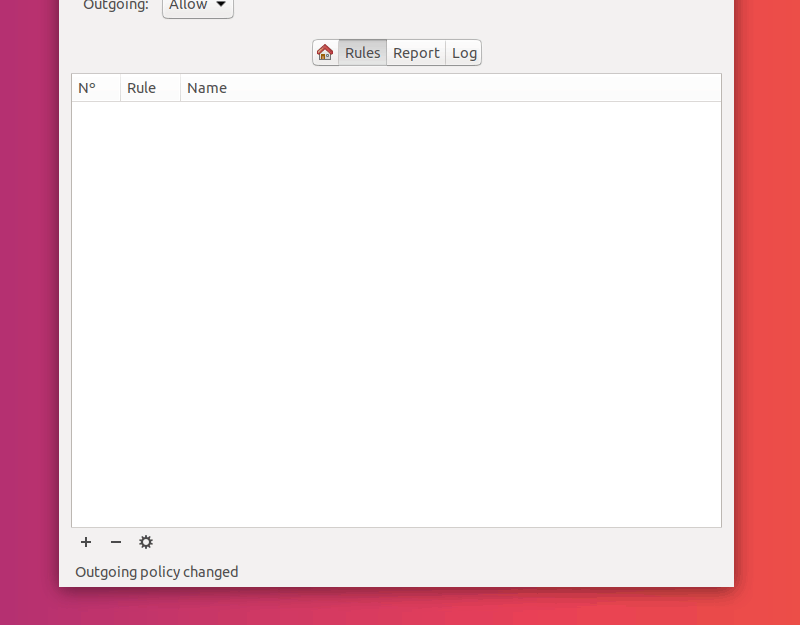
This will be the bulk of your firewall configuration: networking rules. You need to understand the concepts UFW is based on. That is allowing, denying, rejecting and limiting traffic.
Note: In UFW, the rules apply from top to bottom (the top rules take effect first and on top of them are added the following ones).
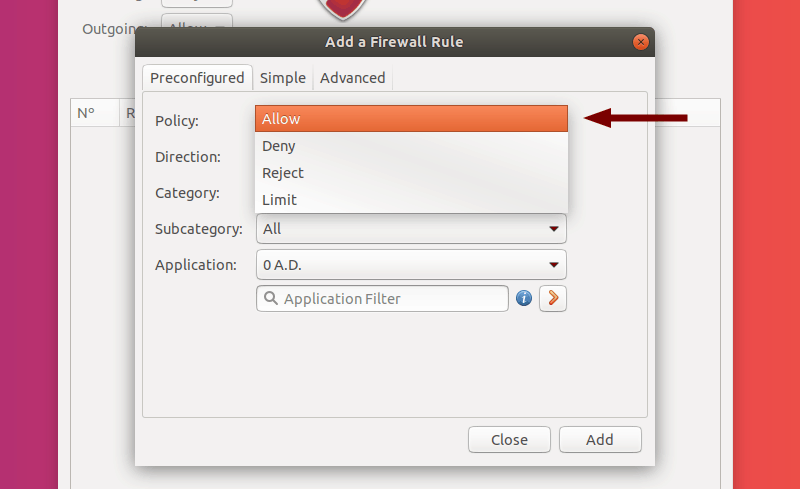
Allow, Deny, Reject, Limit:These are the available policies for the rules you’ll add to your firewall.
Let’s see exactly what each of them means:
- Allow: allows any entry traffic to a port
- Deny: denies any entry traffic to a port
- Reject: denies any entry traffic to a port and informs the requester about the rejection
- Limit: denies entry traffic if an IP address has attempted to initiate 6 or more connections in the last 30 seconds
Adding Rules
There are three ways to add rules in GUFW. I’ll present all three methods in the following section.
But first, click on the + at the bottom of the Rules tab.
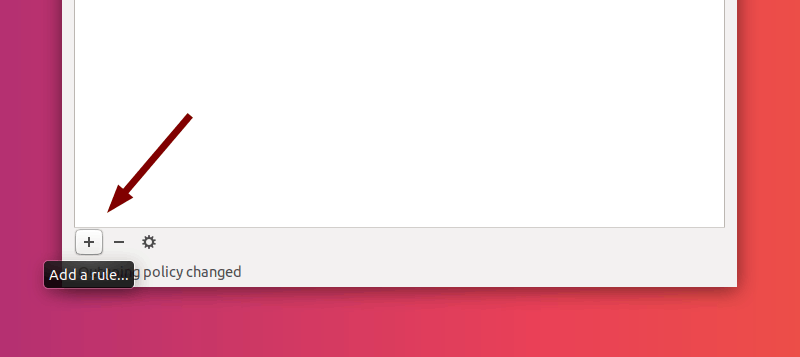
This should open a pop-up menu (Add a Firewall Rule).
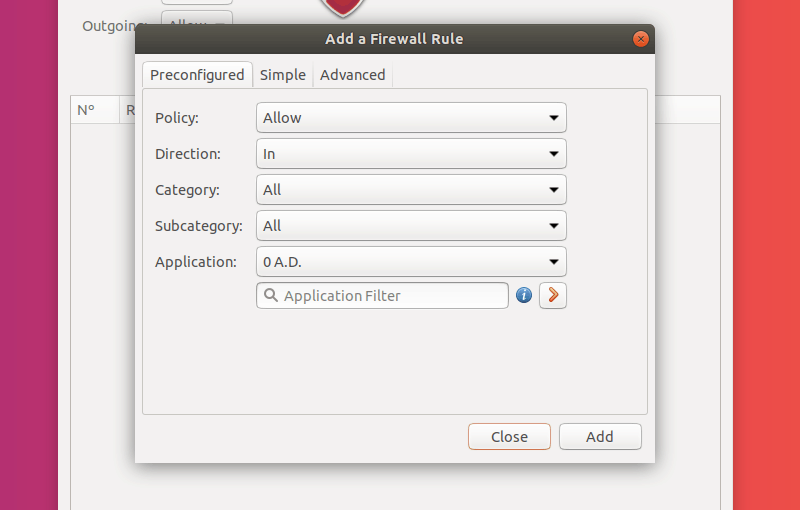
At the top of this menu, you can see the three ways you can add rules. I’ll guide you through each method i.e. Preconfigured, Simple, Advanced. Click to expand each section.
Preconfigured Rules
This is the most beginner-friendly way to add rules.
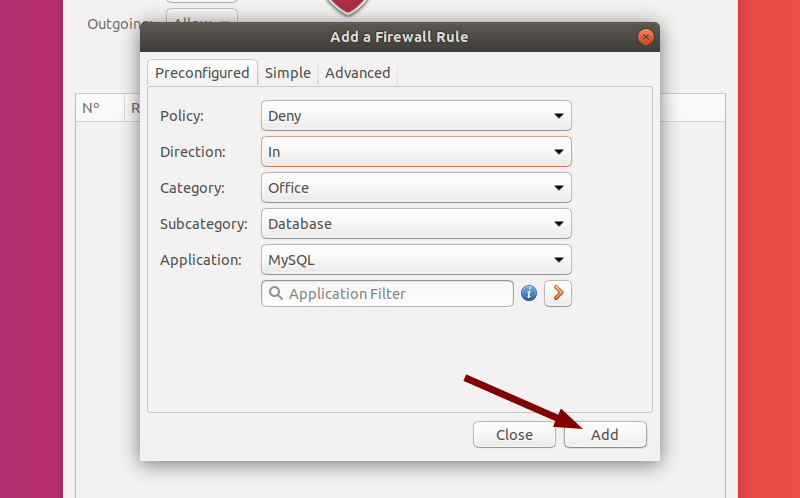
The first step is choosing a policy for the rule (from the ones detailed above).
The next step is to choose the direction the rule will affect (Incoming, Outgoing, Both).

The Category and Subcategory choices are plenty. These narrow down the Applications you can select
Choosing an Application will set up a set of ports based on what is needed for that particular application. This is especially useful for apps that might operate on multiple ports, or if you don’t want to bother with manually creating rules for handwritten port numbers.
If you wish to further customize the rule, you can click on the orange arrow icon. This will copy the current settings (Application with it’s ports etc.) and take you to the Advanced rule menu. I’ll cover that later in this article.
For this example, I picked an Office Database app: MySQL. I’ll deny all incoming traffic to the ports used by this app.
To create the rule, click on Add.
You can now Close the pop-up (if you don’t want to add any other rules). You can see that the rule has been successfully added.
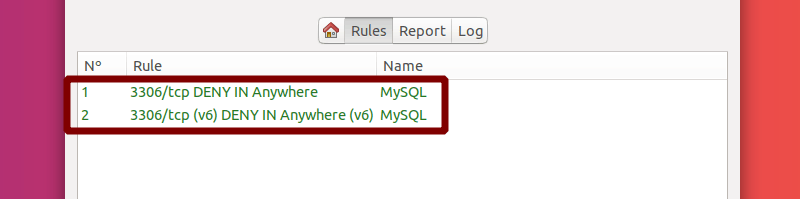
The ports have been added by GUFW, and the rules have been automatically numbered. You may wonder why are there two new rules instead of just one; the answer is that UFW automatically adds both a standard IP rule and an IPv6 rule.Simple RulesAdvanced Rules
Simple Rules
Although setting up preconfigured rules is nice, there is another easy way to add a rule. Click on the + icon again and go to the Simple tab.
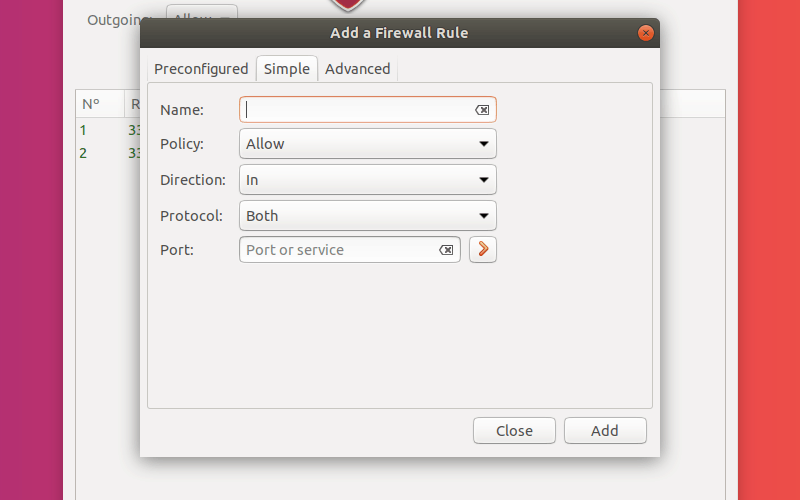
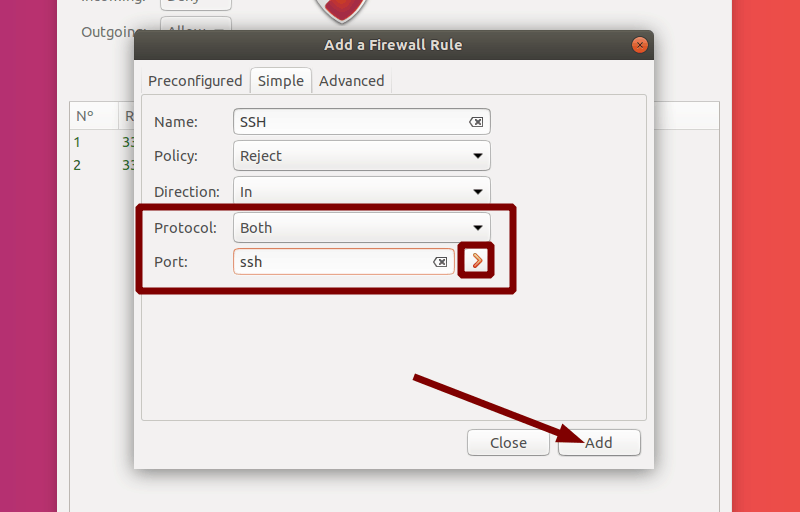
The options here are straight forward. Enter a name for your rule and select the policy and the direction. I’ll add a rule for rejecting incoming SSH attempts.
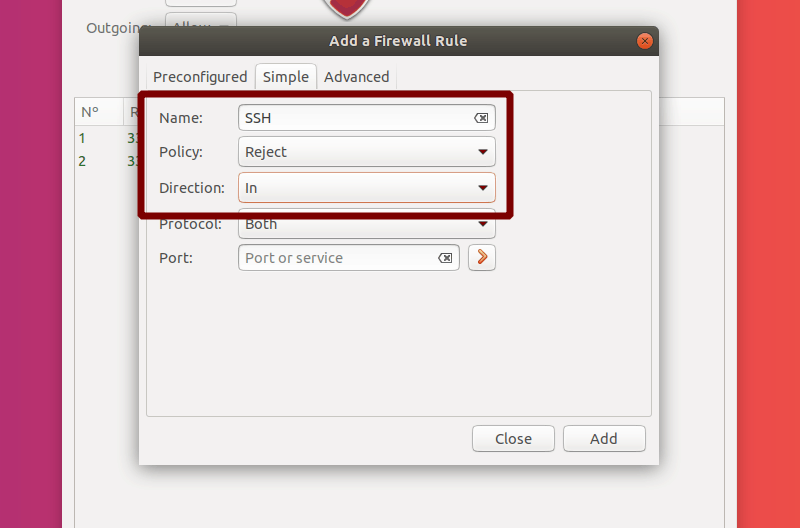
The Protocols you can choose are TCP, UDP or Both.
You must now enter the Port for which you want to manage the traffic. You can enter a port number (e.g. 22 for ssh), a port range with inclusive ends separated by a : (colon) (e.g. 81:89) or a service name (e.g. ssh). I’ll use ssh and select both TCP and UDP for this example. As before, click on Add to completing the creation of your rule. You can click the red arrow icon to copy the settings to the Advanced rule creation menu.
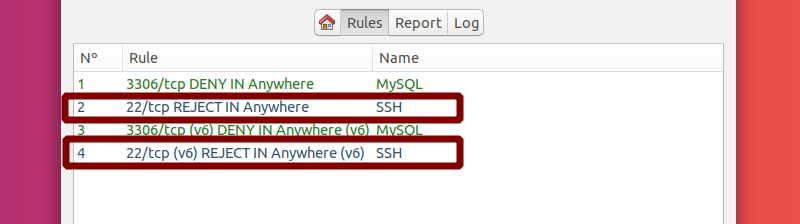
If you select Close, you can see that the new rule (along with the corresponding IPv6 rule) has been added.
Advanced Rules
I’ll now go into how to set up more advanced rules, to handle traffic from specific IP addresses and subnets and targeting different interfaces.
Let’s open up the Rules menu again. Select the Advanced tab.
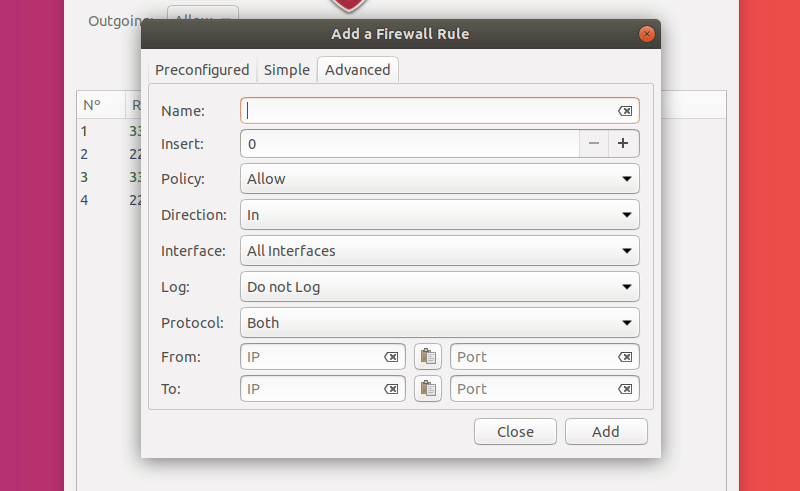
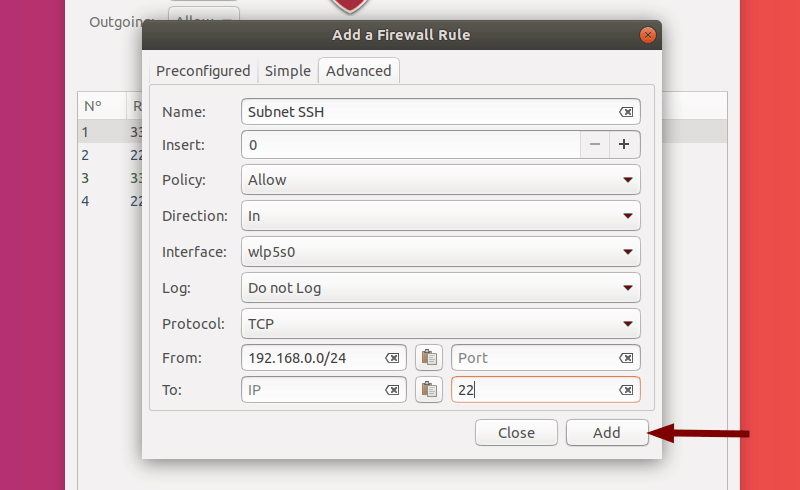
By now, you should already be familiar with the basic options: Name, Policy, Direction, Protocol, Port. These are the same as before.
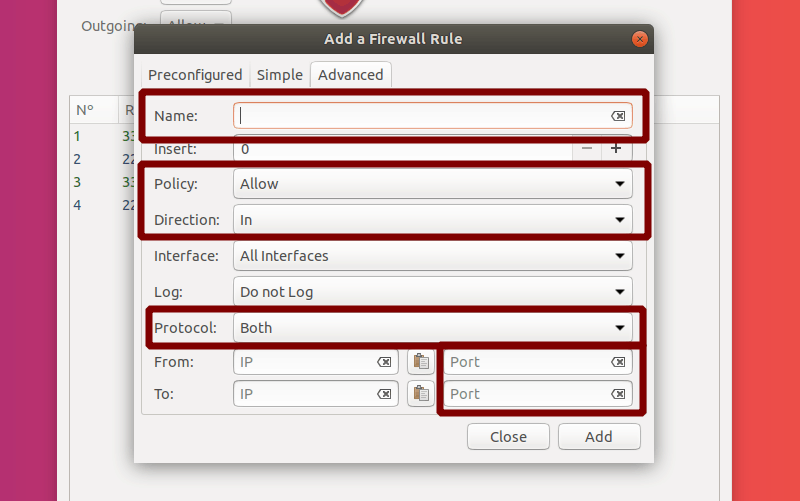
Note:You can choose both a receiving port and a requesting port.
What changes is that now you have additional options to further specialize our rules.
I mentioned before that rules are automatically numbered by GUFW. With Advanced rules you specify the position of your rule by entering a number in the Insert option.
Note: Inputting position 0 will add your rule after all existing rules.
Interface let’s you select any network interface available on your machine. By doing so, the rule will only have effect on traffic to and from that specific interface.
Log changes exactly that: what will and what won’t be logged.
You can also choose IPs for the requesting and for the receiving port/service (From, To).
All you have to do is specify an IP address (e.g. 192.168.0.102) or an entire subnet (e.g. 192.168.0.0/24 for IPv4 addresses ranging from 192.168.0.0 to 192.168.0.255).
In my example, I’ll set up a rule to allow all incoming TCP SSH requests from systems on my subnet to a specific network interface of the machine I’m currently running. I’ll add the rule after all my standard IP rules, so that it takes effect on top of the other rules I have set up.
Close the menu.
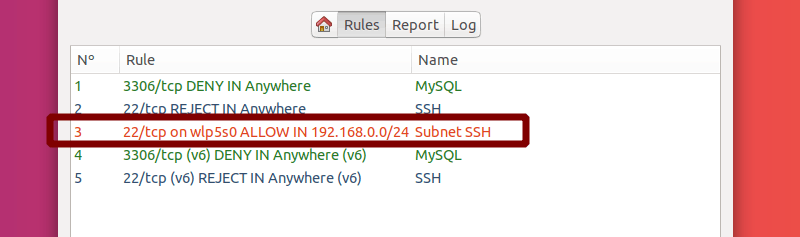
The rule has been successfully added after the other standard IP rules.
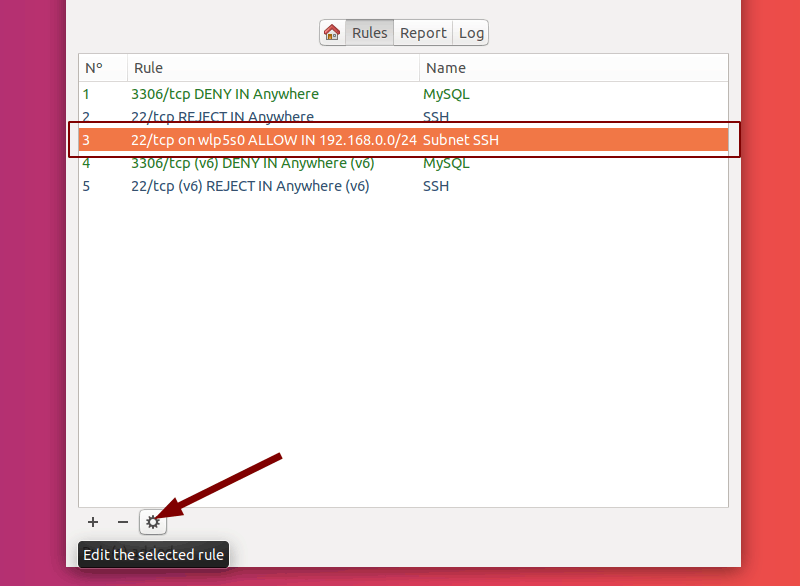
Edit Rules
Clicking a rule in the rules list will highlight it. Now, if you click on the little cog icon at the bottom, you can edit the highlighted rule.
This will open up a menu looking something like the Advanced menu I explained in the last section.
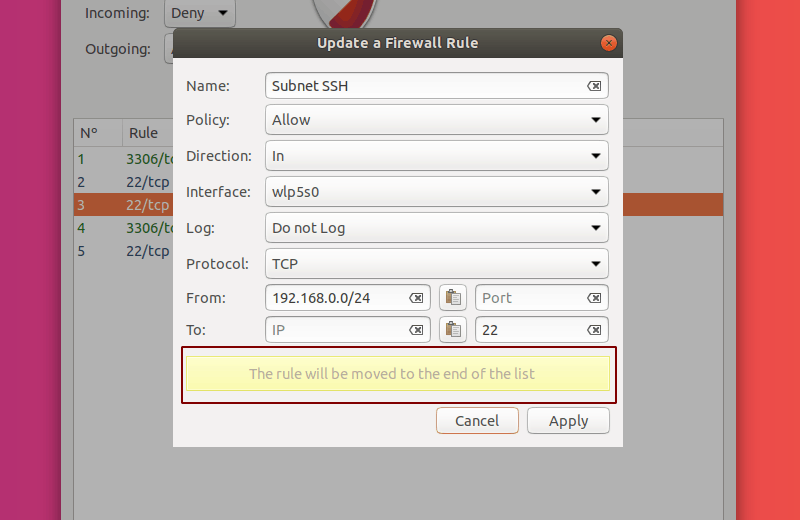
Note: Editing any options of a rule will move it to the end of your list.
You can now ether select on Apply to modify your rule and move it to the end of the list, or hit Cancel.
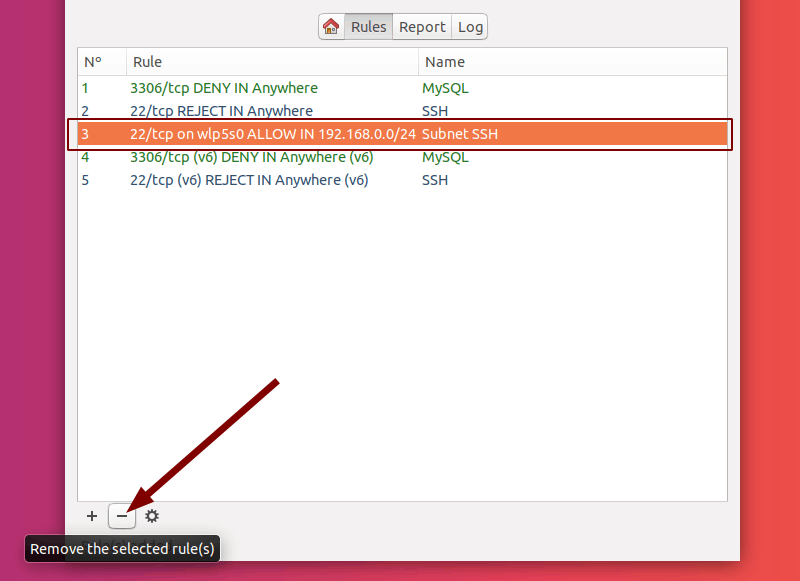
Delete Rules
After selecting (highlighting) a rule, you can also click on the – icon.
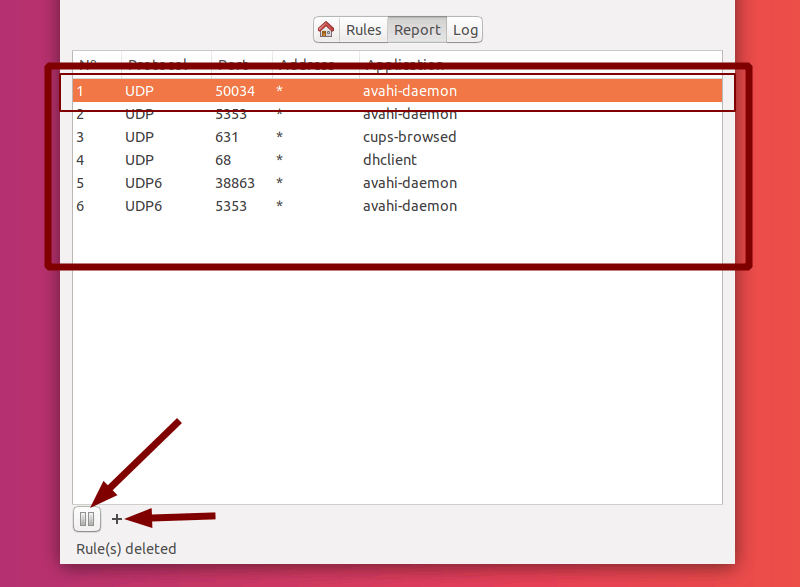
Reports
Select the Report tab. Here you can see services that are currently running (along with information about them, such as Protocol, Port, Address and Application name). From here, you can Pause Listening Report (Pause Icon) or Create a rule from a highlighted service from the listening report (+ Icon).
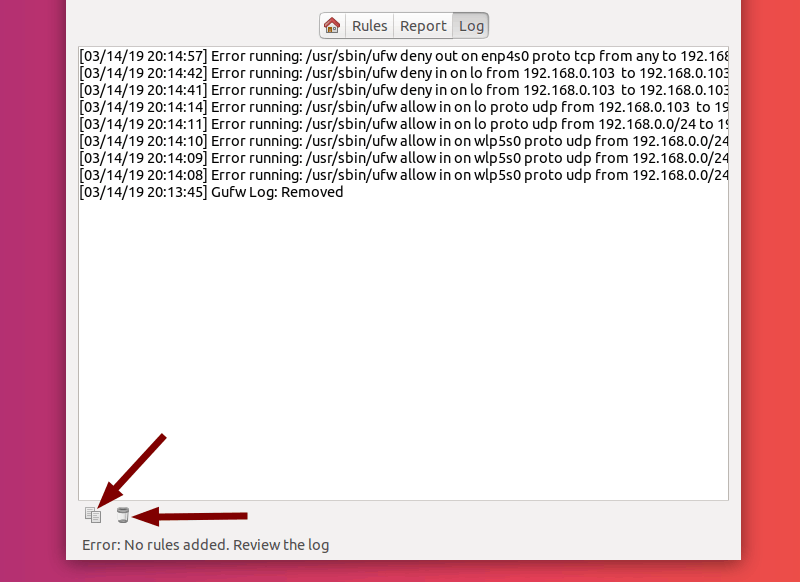
Logs
Select the Logs tab. Here is where you’ll have to check for any errors are suspicious rules. I’ve tried creating some invalid rules to show you what these might look like when you don’t know why you can’t add a certain rule. In the bottom section, there are two icons. Clicking the first icon copies the logs to your clipboard and clicking the second icon clears the log.
Wrapping Up
Having a properly configured firewall can greatly contribute to your Ubuntu experience, making your machine safer to use and allowing you full control over incoming and outgoing traffic.
I have covered the different uses and modes of GUFW, going into how to set up different rules and configure a firewall to your needs. I hope that this guide has been helpful to you.
Compared to setting up the firewall with UFW in command line, it is easier to do that with the comfort of GUI with GUFW.
If you are a beginner, this should prove to be a comprehensive guide; even if you are more versed in the Linux world and maybe getting your feet wet into servers and networking, I hope you learned something new.
Let us know in the comments if this article helped you and why you decided a firewall would improve your system!
If this helped you, consider supporting It's FOSS
It's FOSS has been helping people use Linux for the past 14 years. Help us stay independent from big tech. Become a Plus member, enjoy ad-free reading and get 5 eBooks.
