

Making a GIF can be fun and many users would like to know how to make one. You can create a GIF very easily with GIMP, the powerful open-source image editing software.
In this GIMP tutorial, I’ll show you how to create a simple GIF in GIMP.
Making a GIF in GIMP
Using GIMP as an animation tool requires you to think of every layer as of an animation frame. In this tutorial, I will create a simple web banner based on It’s FOSS logo. I will use 2 images as my layers but you are welcome to add more when you make your own.
The method that I use here is called “the combine method”, in which the new frame is added to the previous frame. My idea is to make a “flashing” web banner, to draw the attention to something important.
I presume that you have already installed GIMP in Ubuntu or whichever operating system you are using. Let’s start making the GIF.
Step 1
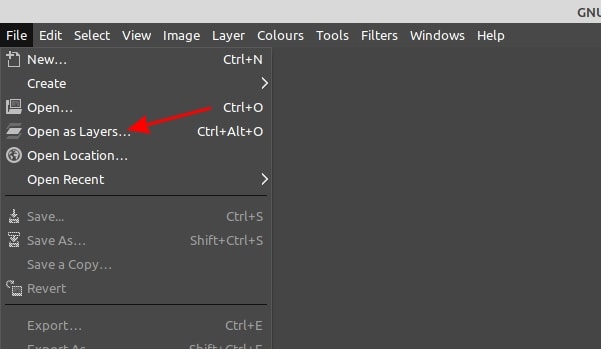
From the File menu, click on Open as Layers and select all the images you want to include in the GIF. Then click Open.
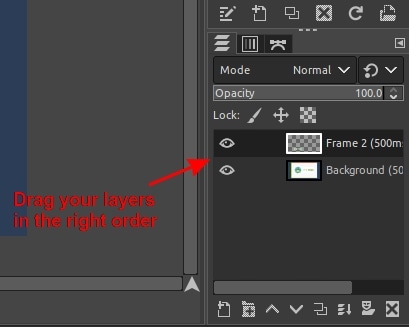
You can order your images in the layers tab. The GIF sequence will start with your bottom layer and run through each layer bottom to top.
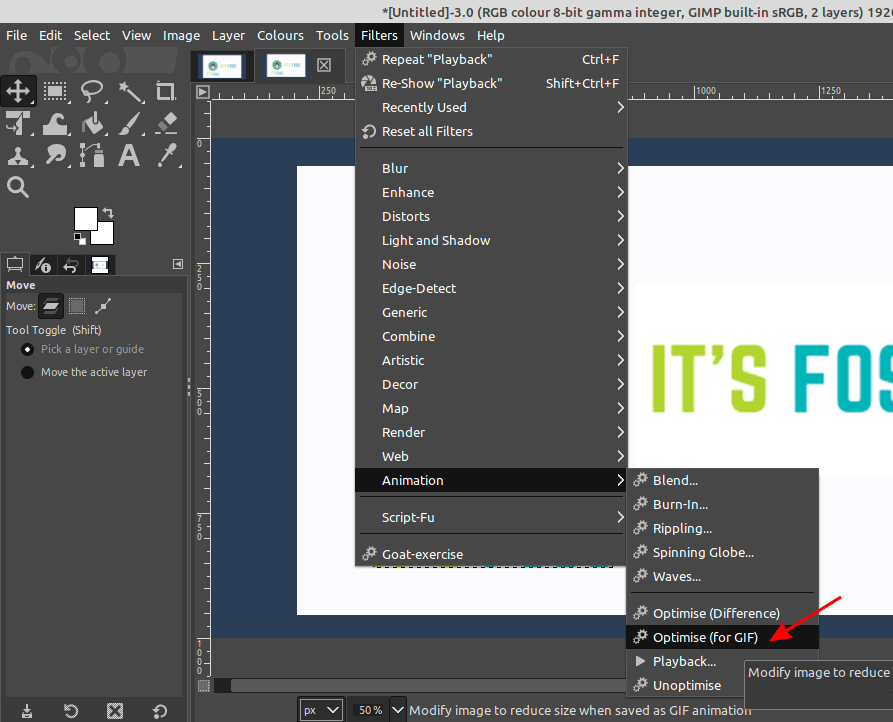
From the main menu select Filters, then Animation and finally click Optimise (for GIF).
What “Optimise” does?
Optimise examines each layer, and reuses information from previous frames if they haven’t changed at the following frame. It only stores new values for pixels that change, and purges any duplicate parts.
If a frame is exactly the same as the previous one, it removes that frame completely and the previous frame just stays on the screen for longer.
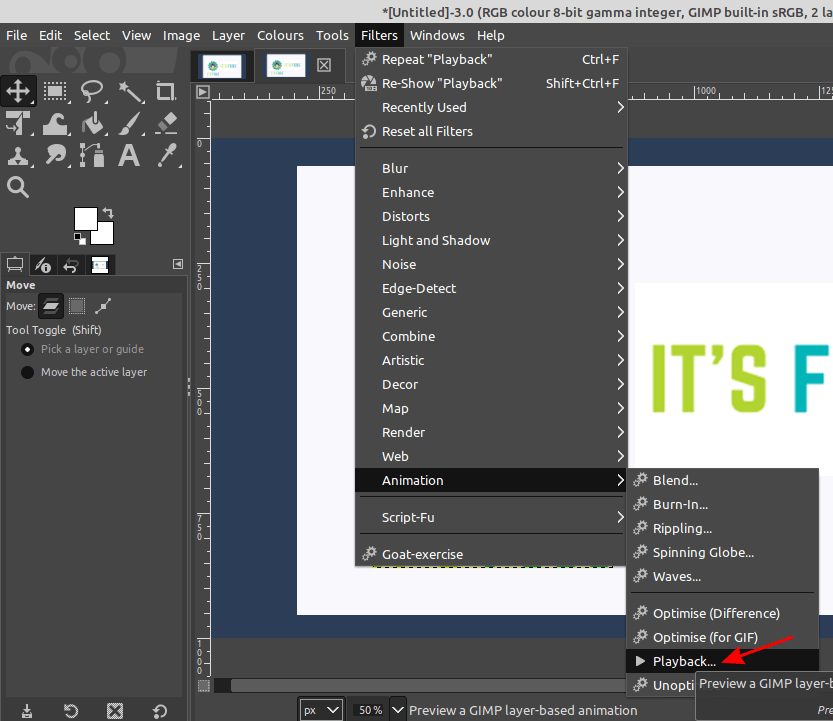
To view GIF, from the main menu click on Filter then Animation and Playback.
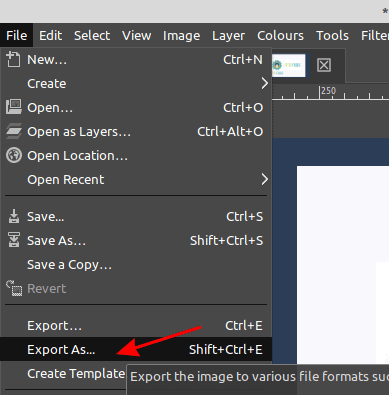
Press the Playback button to start GIF. To save GIF on the File Menu select File, click on Export as.
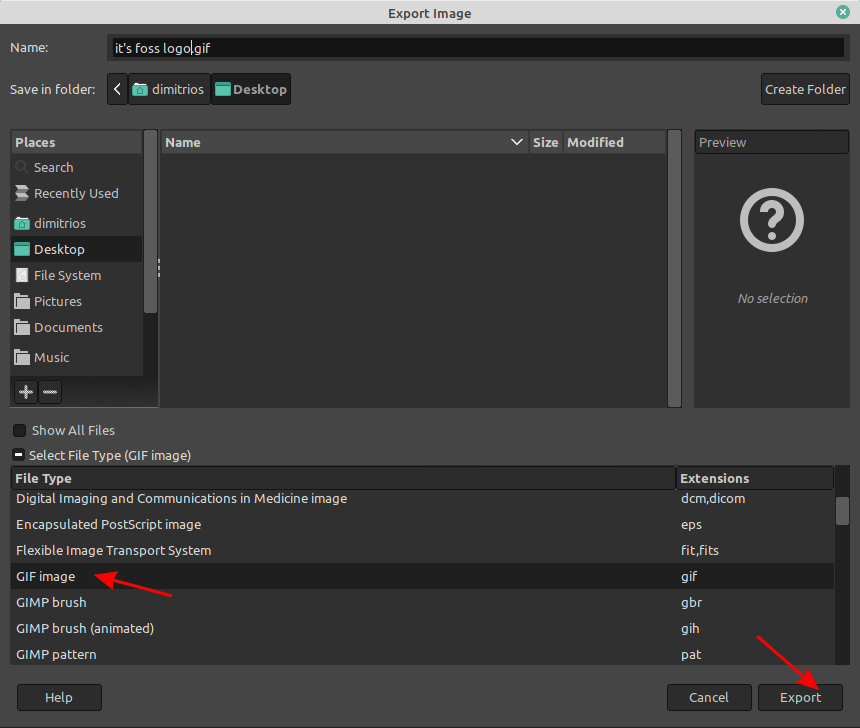
Name your GIF and choose the folder you want to save it in. On “Select File Type“, choose GIF Image.
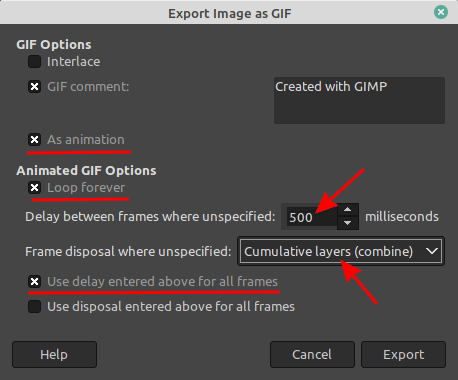
When prompted select ‘As Animation’, ‘Loop Forever’, set the desired delay value and to take effect click on “Use delay entered above for all frames”.
The most important option is to set the frame disposal action as “Cumulative layers (combine)” to get the “flashing” effect for our banner. Click Export as a final step.
Your GIF is ready!
This was an easy-to-follow, simple example, although GIMP has a much greater depth in animation creating and requires a good amount of study and practice to master it.
If you are interested in more GIMP tutorials, you may read how to outline text in GIMP. Stay tuned at It’s FOSS for more such useful tips in the future. Subscribing to the weekly newsletter is the best way to stay updated. Enjoy!
