

Halloween is around the corner. Boo!
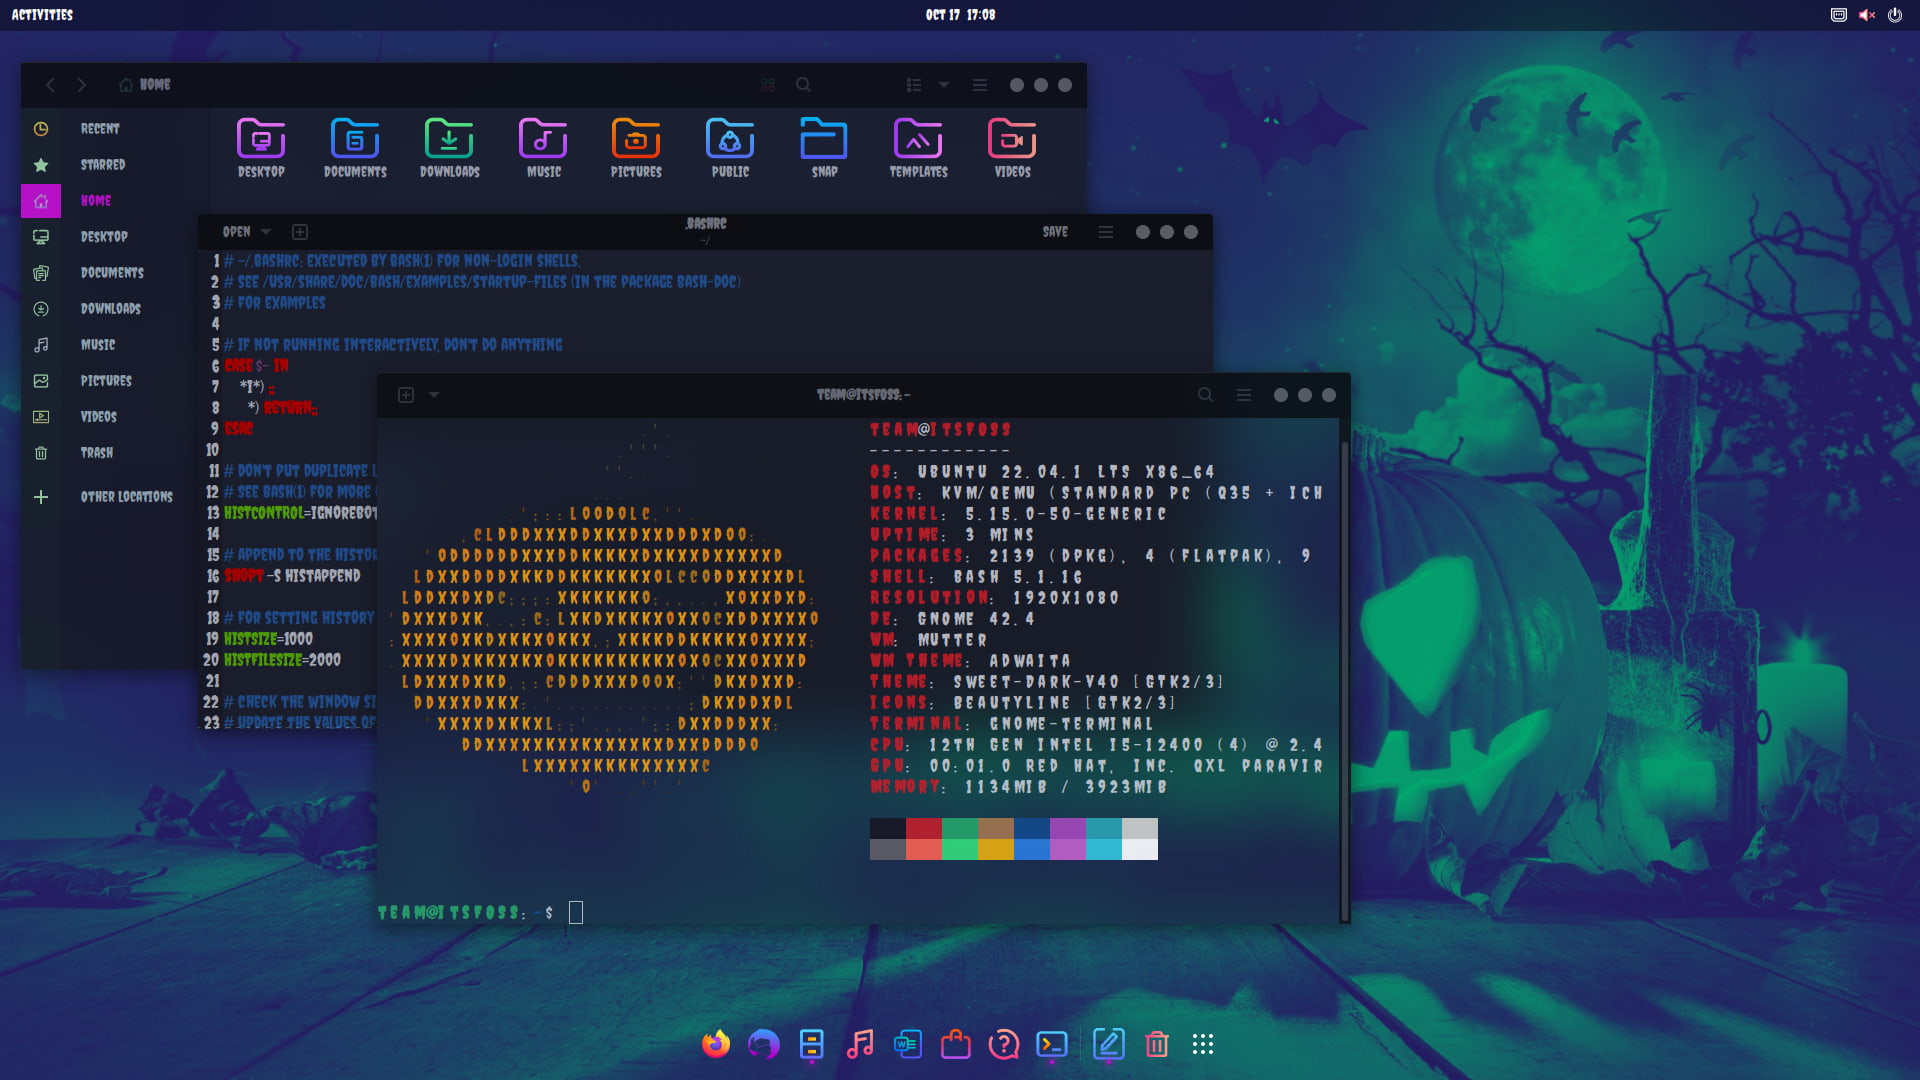
Of course, there are ways to celebrate Halloween, and I believe you might have a few ideas of your own. How about giving your Linux desktop a spooky, dark makeover? Something like the screenshot below?
Customization is a high point of Linux, and there is no end to it. Earlier, we showed you how to make your Linux look like macOS. Today, I’ll share a few tips to keep up with the Halloween ‘spirit’.
This is possible with a combination of themes, icons, extensions, fonts, conky, etc. While you can do these things on any distribution and desktop environment, it’s not feasible for me to show them all in a single tutorial.
Here, I have used Ubuntu with the GNOME desktop environment.
Getting all the tools
You need several packages and tools. Make sure you have them all (or most of them) before you start the customization.
It’s not mandatory to make all of the changes. But the more you do, the better look and feel you get.
GNOME Tweaks and GMOME Extensions manager
Get the Tweaks tool and the extension manager with this command:
sudo apt install gnome-tweaks gnome-extension-manager In KDE-based systems, you don’t any tweak tool to change the look. But surely, you will need the Kvantum-Manager app that I discussed in the KDE theming guide.
Conky
This is actually optional. Since the conky-manager project is not receiving any maintenance, it will be a bit tricky to use conky. But anyway, let’s use it for the additional look-and-feel.
sudo apt install conky-allNeofetch or shell color scripts
This step is also a personal choice. You can choose neofetch because it’s already available in the repository and can be used easily.
sudo apt install neofetchShell-color scripts are another excellent choice. The package is available in AUR and Arch Linux users can install it from there. In Ubuntu, you need to install it manually.
git clone https://gitlab.com/dwt1/shell-color-scripts.git
cd shell-color-scripts
sudo make install
Themes, icons, fonts, and wallpaper
I am using Sweet theme, Beautiline icon pack, simple1e cursors, and Grey-Minimalistic conky theme. Once downloaded, extract them. You should also get Creepster font.
Download a spooky wallpaper from the internet.
Alert! You’ll be doing a lot of customization and change. You can go back to the usual look by reverting all the changes you made. An easier way out would be to create a new user with admin access and make all these changes with this new user. This way, your original user account and appearance doesn’t get impacted. When Halloween is over, you can delete this additional user.
With all resources in hand, it’s time to utilize them.
Install and use the extensions
Open the gnome-extensions app. In Ubuntu 22.04, you can install extensions from within the app, by using the browse section.
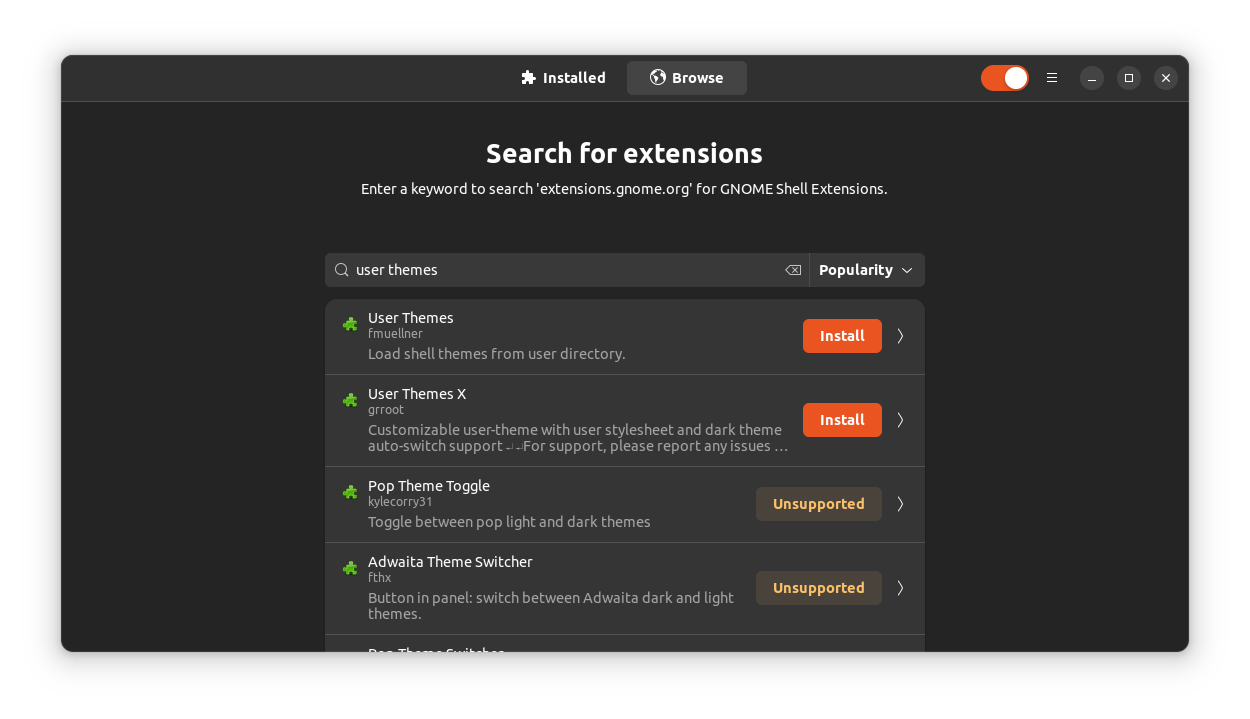
In other versions of Ubuntu and other GNOME distributions, you can install shell extensions through the browser. For our purpose, install the following extensions :
Also, make sure that all the extensions are enabled.
Apply theme, icon, and font
You need to copy and paste the extracted theme folder to ~/.themes directory and icon and cursor folder to the ~/.icons directory.
Now open GNOME tweaks and apply the settings as shown in the screenshot below.

To use a custom font in Ubuntu, right-click on the font file that you have downloaded and extracted and select open with Font manager. I am using Creepster font.
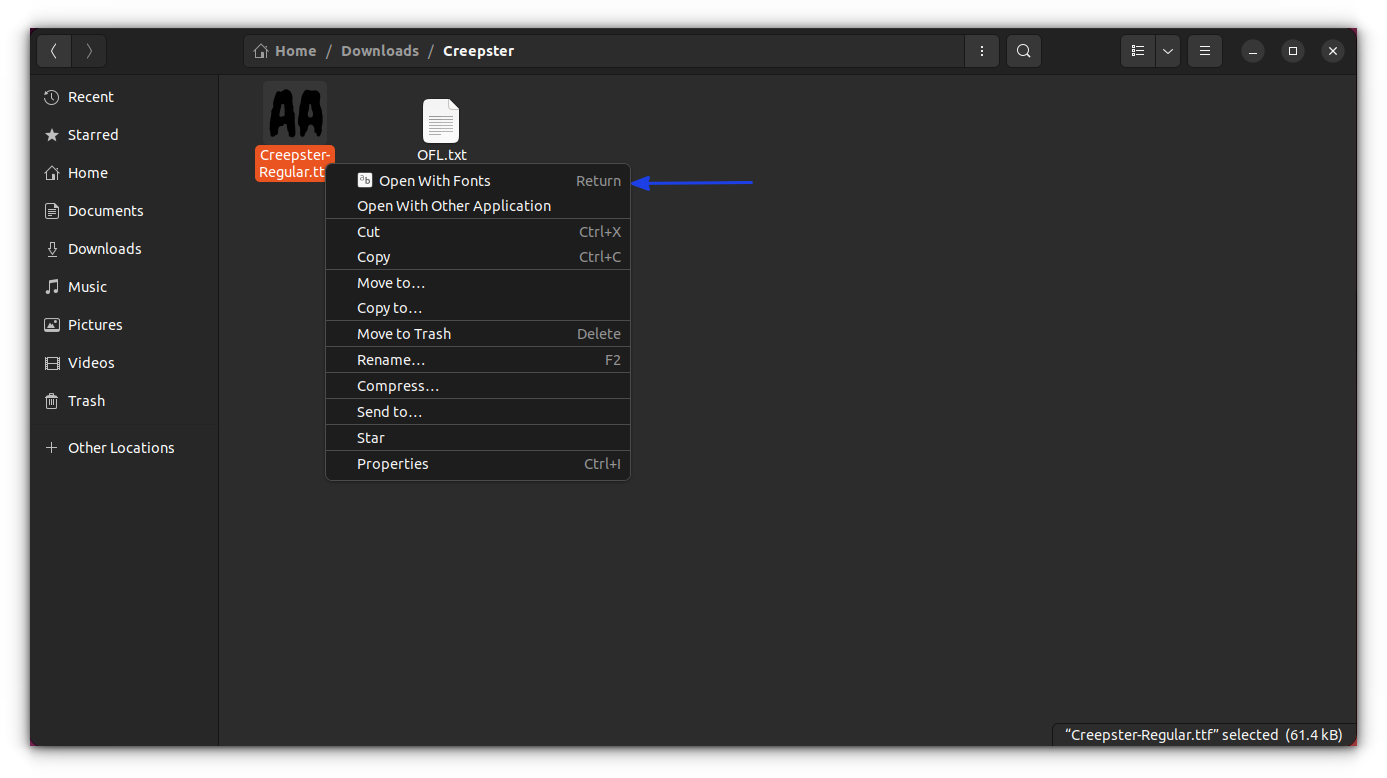
Here, press the install button.
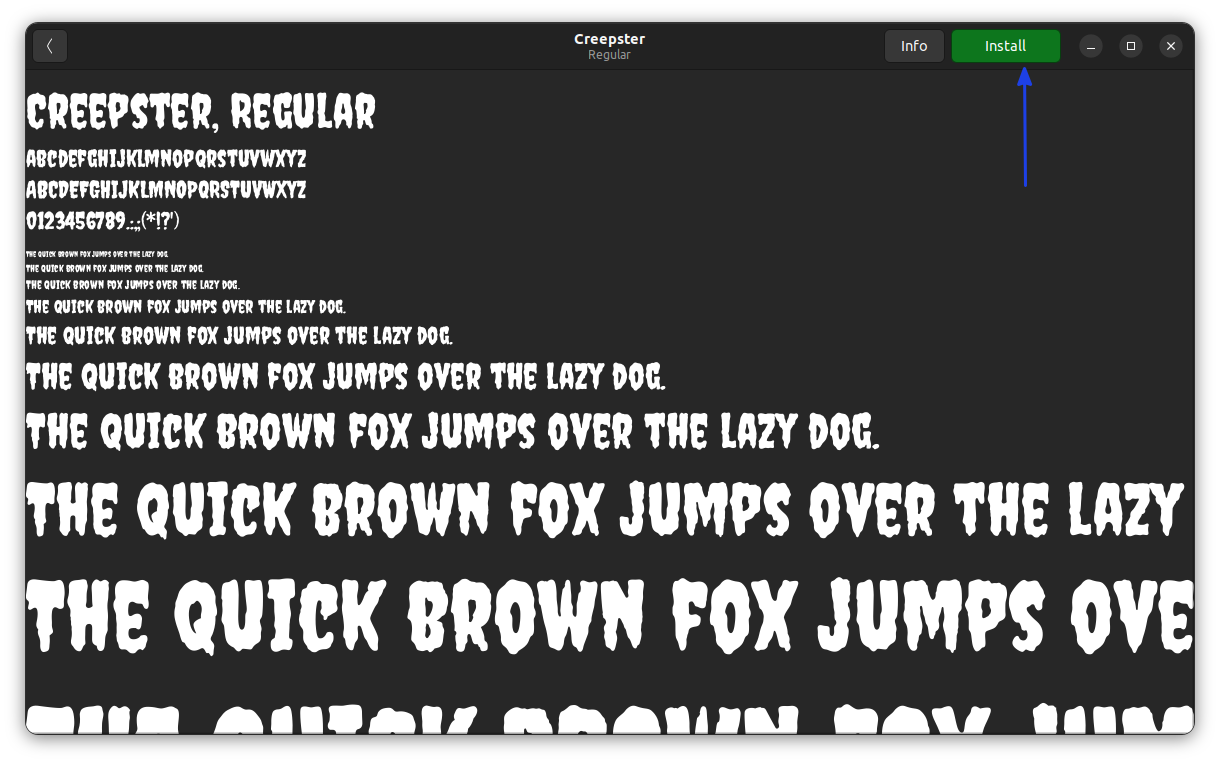
Note: In some systems, pressing the install button won’t show the “installed” prompt. In that case, you can just close the app because once you press the install button, it has been installed.
Now open the Tweaks app and move to the fonts section. Here, you can change the fonts of various sections as shown in the screenshot below.
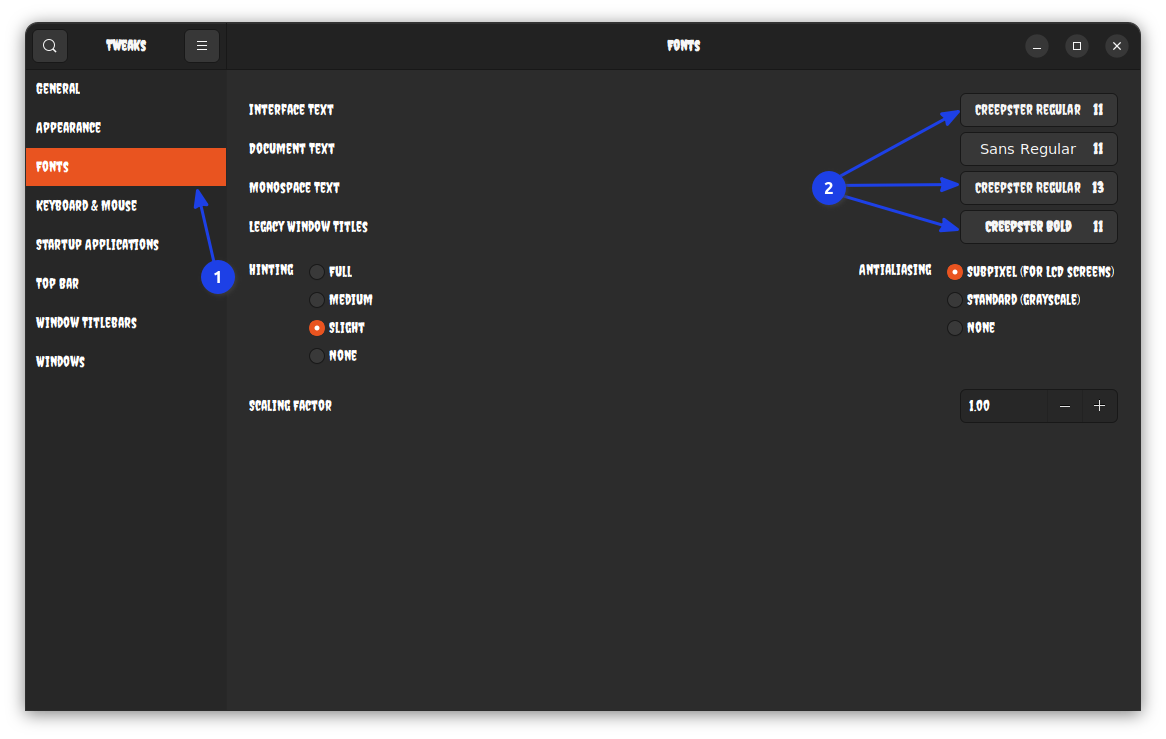
Note that, for terminals, a monospace font is required. Here, I am using a regular font and thus it may give you a slightly disoriented look sometimes.
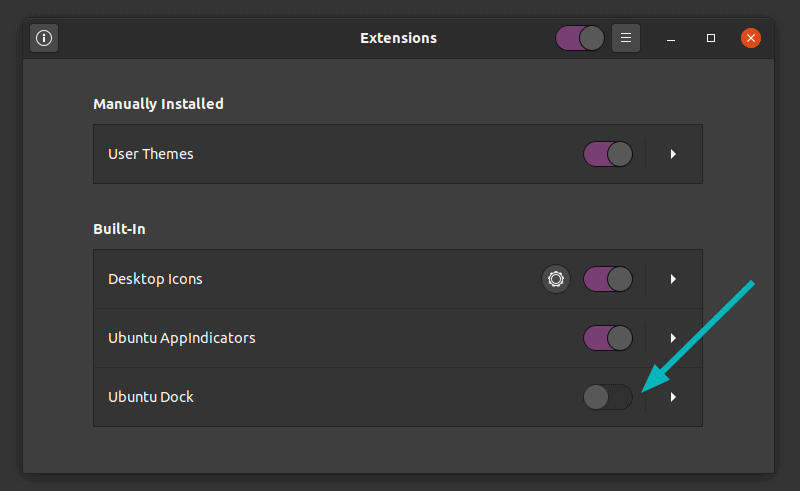
Apply Dash to Dock Extension settings
First, you need to turn off the Ubuntu Dock extension using the GNOME Extensions application.
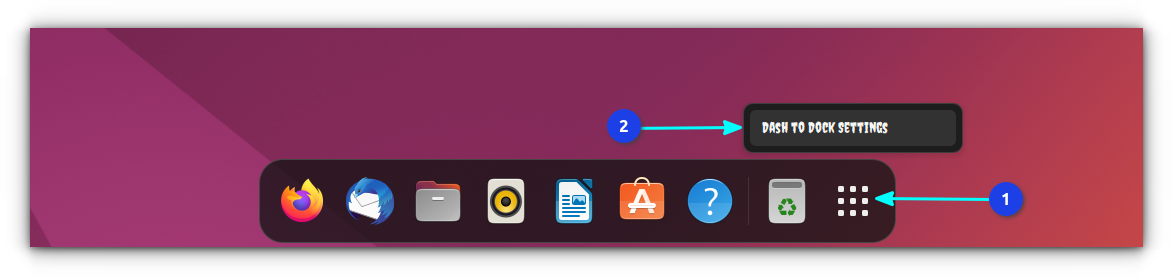
Run the Dash to Dock extension if it’s not running already.
Now, right-click on the dash to dock application button appearing on the bottom and select dash to dock settings.
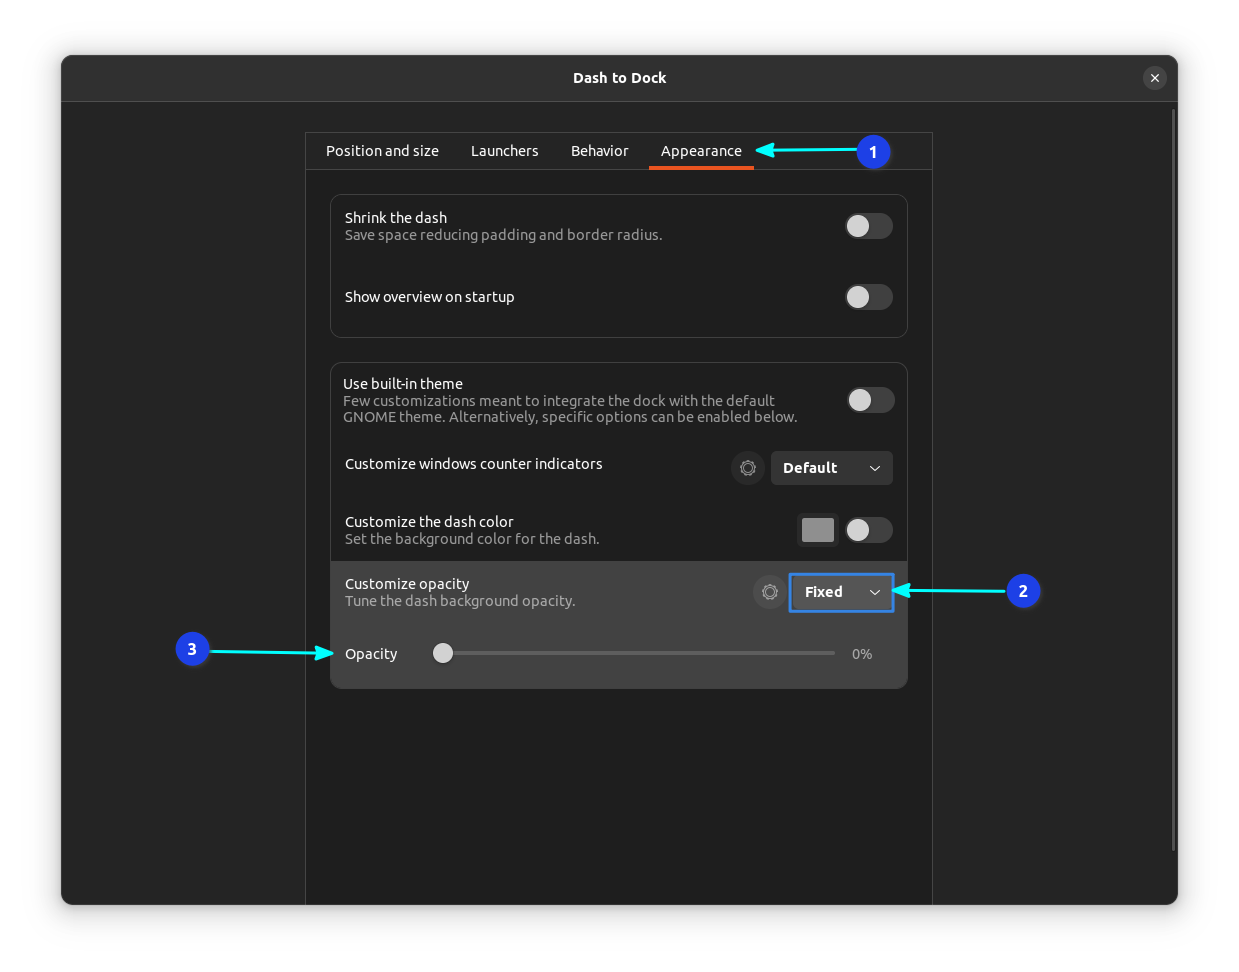
Here, you need to tweak some small things.
First, reduce the icon size using the respective slider.
After that, you need to reduce the opacity of the dock. I prefer a fully transparent dock.
For this, set the opacity to fixed and reduce it to zero with the slider, as shown in the screenshot below.
GNOME terminal setting
The main tweak you want to get is a custom neofetch look (or a shell color script) with some blurred transparency.
On applying monospace font in GNOME-tweaks earlier, the font in the GNOME terminal is also changed.
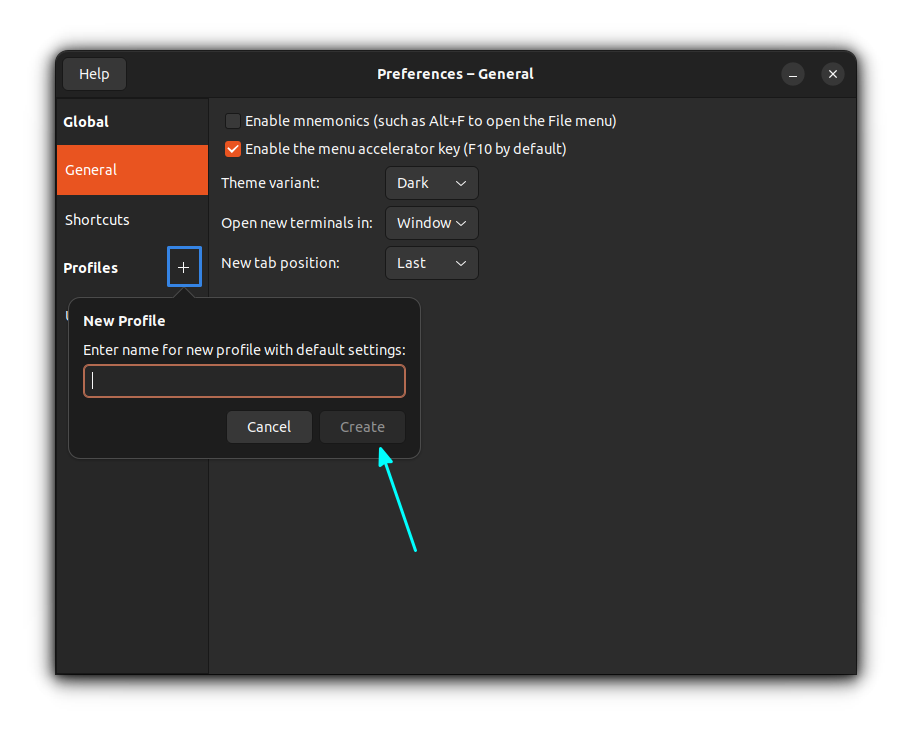
First, create a new profile from preferences.
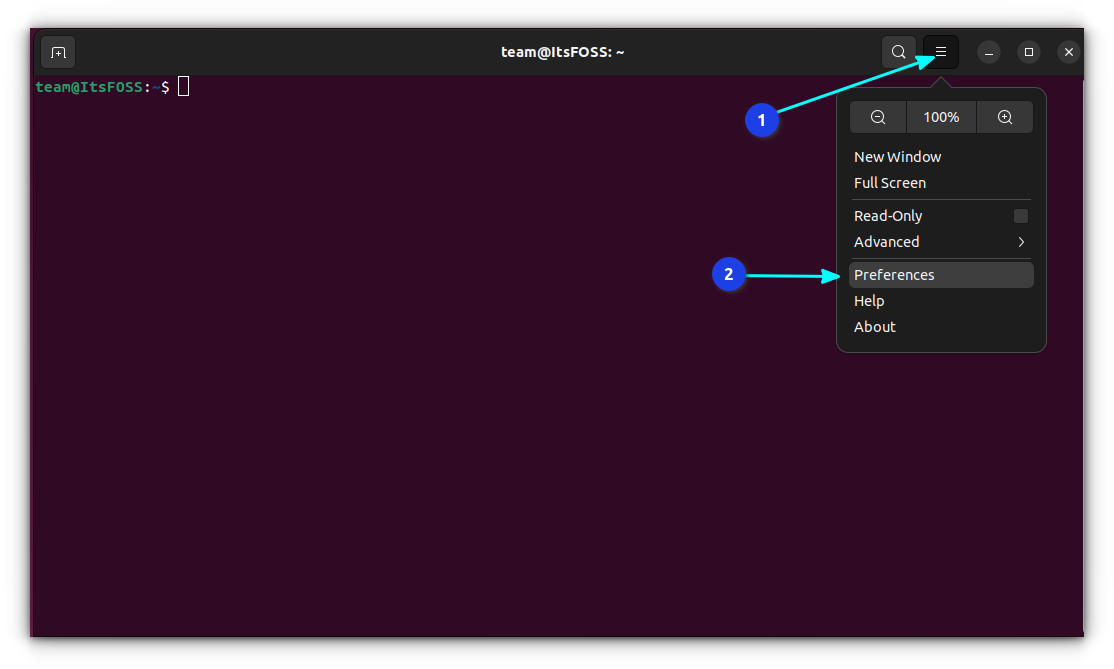
Here, Click + sign to create a new profile. Type in a name and press create as shown below:
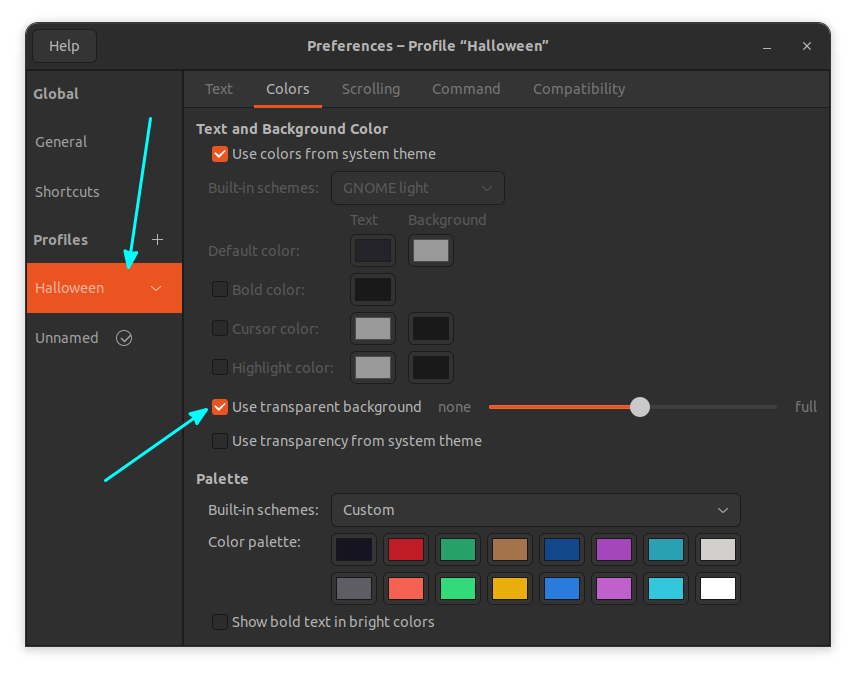
Inside the new profile, change the transparency setting and set it around the middle, as shown in the screenshot:
Once finished, set this profile as the default. To do this, click on the triangle button associated with the new profile and select Set as Default.

Setting blur effect
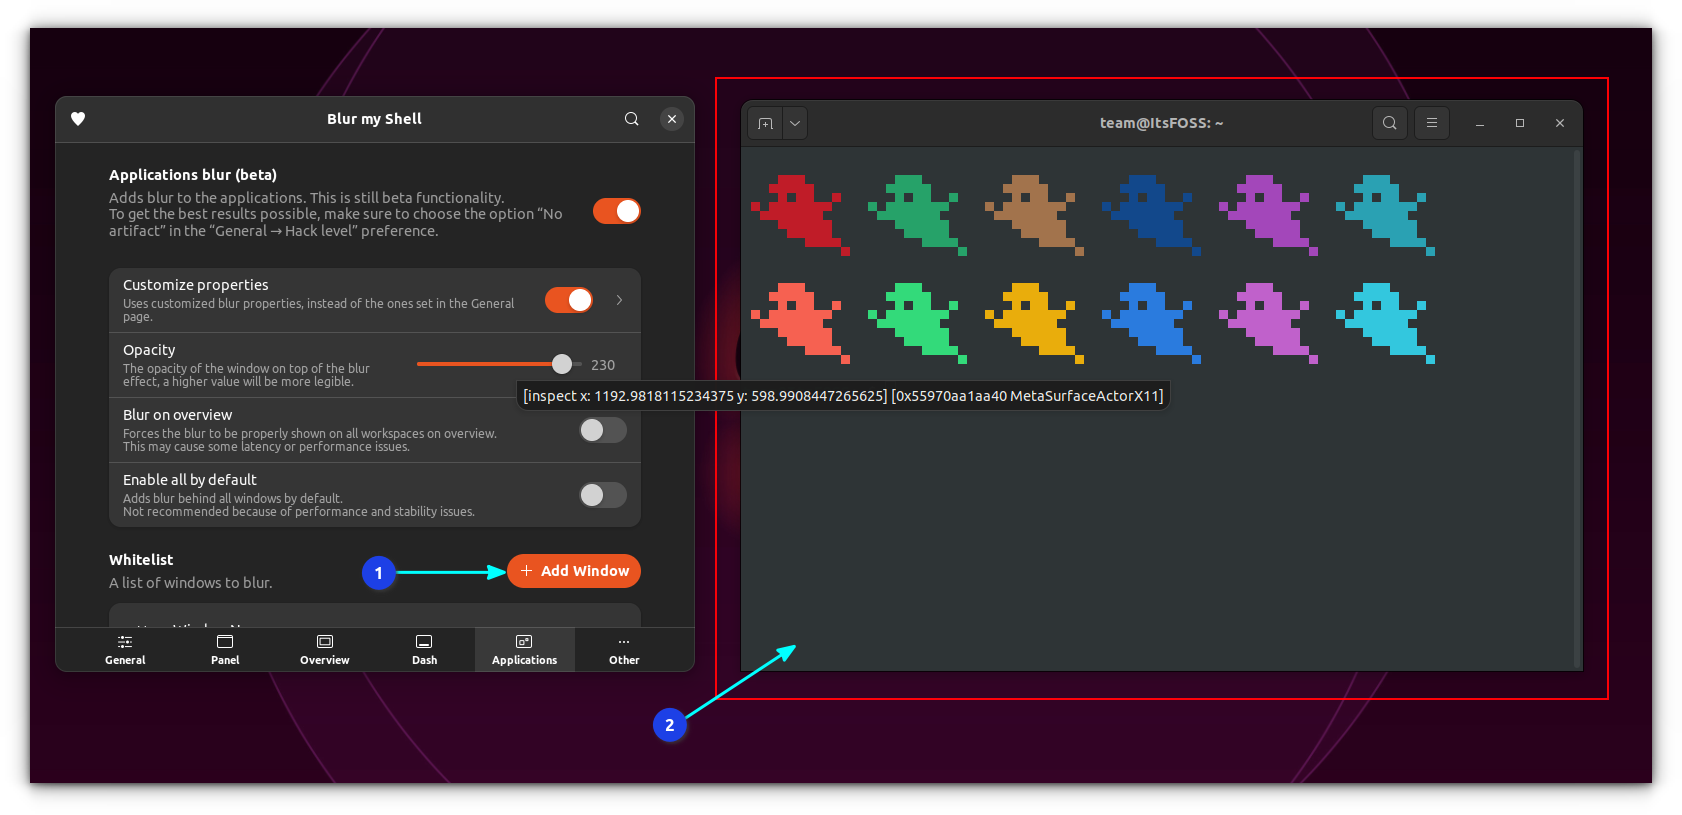
The above step will only create a transparent shell. But if you need a blur effect, which is good for better visibility, you need to go to the Blur my Shell extension settings.
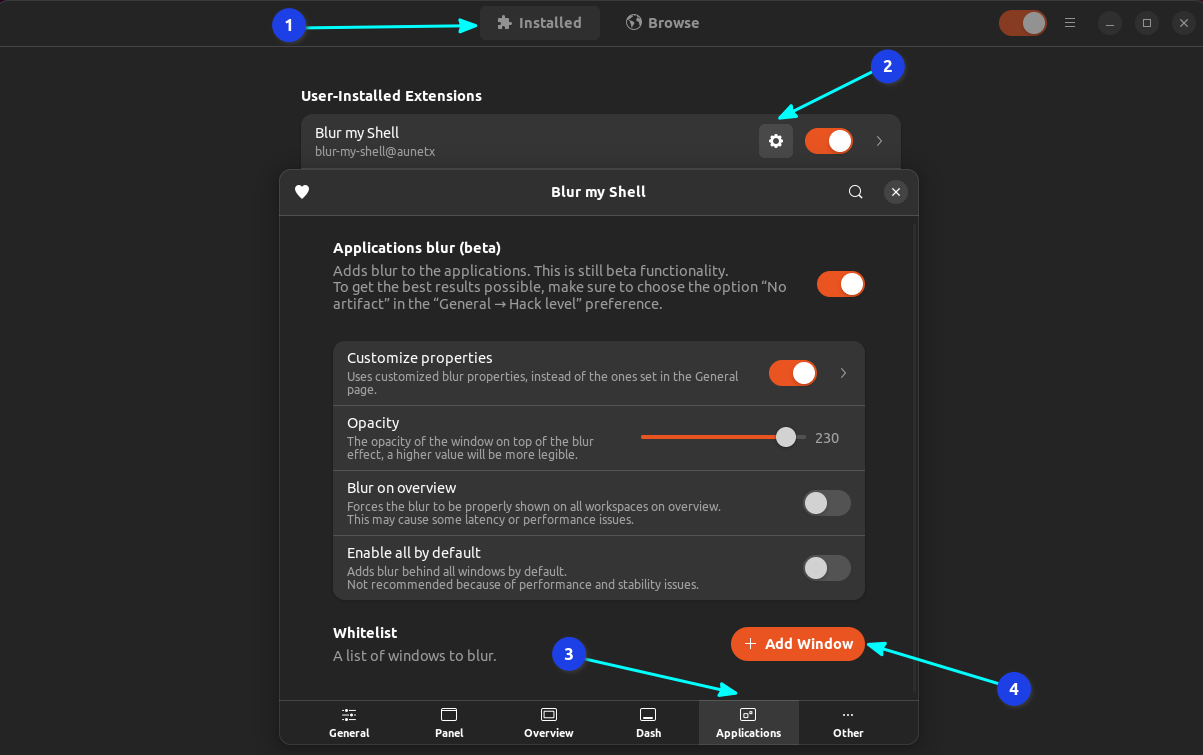
Here, go to the Application tab. Now, ensure that the terminal is opened and placed conveniently on the desktop. Click on Add Window button and select gnome-terminal window, to set the blur effect. Note: This feature is in beta so expect minor glitches.
This same procedure can be repeated for other apps also, like the Nautilus file manager.
Customizing Neofetch
One of the best features of neofetch is its customizability. You can tweak the look with a wide range of methods. For Halloween, I choose a pumpkin image to appear in place of the distro logo.
Neofetch supports adding custom images in a variety of formats. For that purpose, there are a variety of backends supported. Here, I use the jp2a backend, which will use an ASCII converted image.
neofetch --jp2a /path/to/your/image/file.png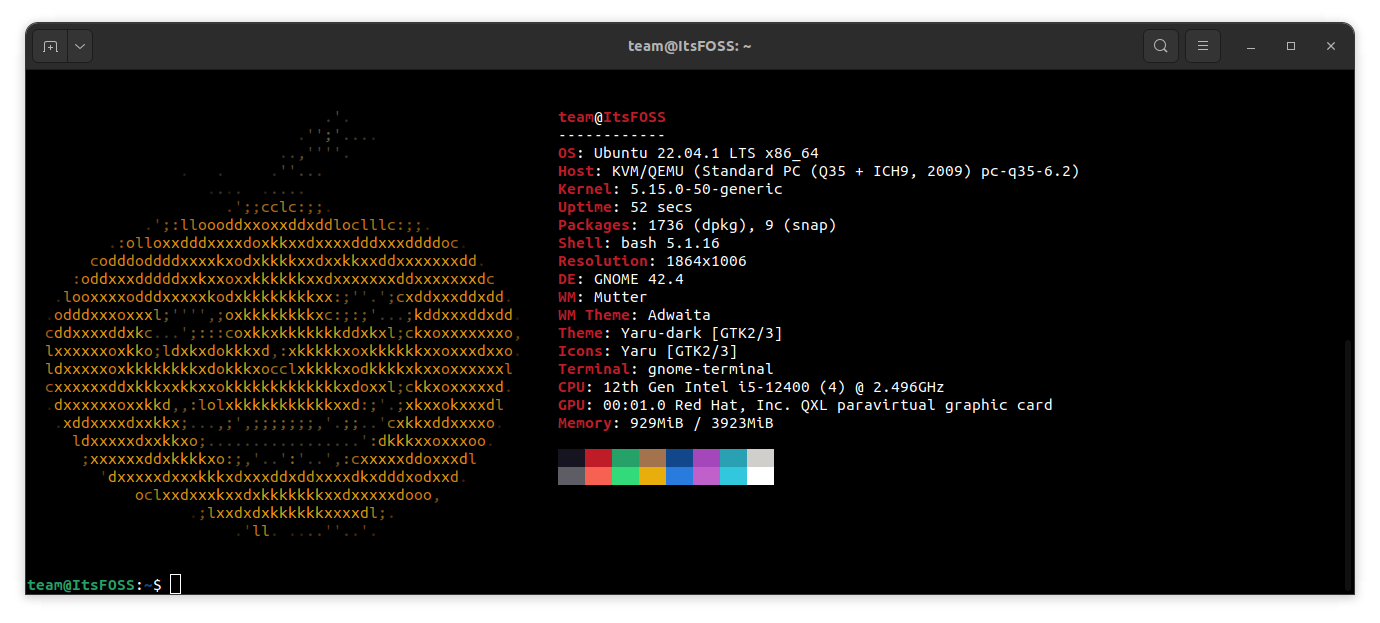
The above code will create a neofetch instance with the custom image. You can write this code to your .bashrc file, for permanent placement.
Unfortunately, this didn’t work on my Wayland instance.
Customizing Shell Color Scripts
If you installed shell color scripts, you have a variety of shell scripts. To list the available scripts, use:
colorscript -l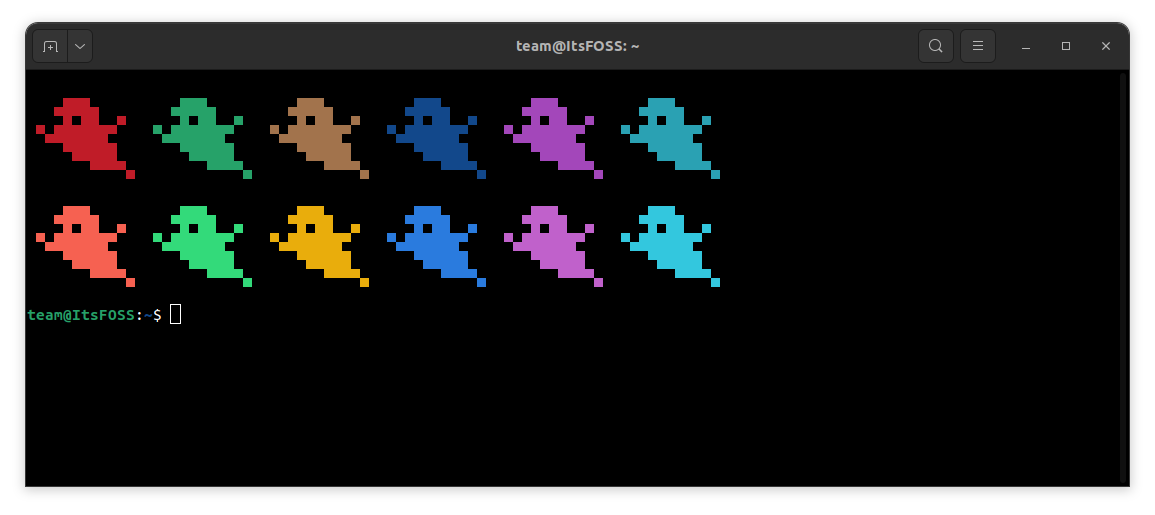
You can either get a random script each time by placing colorscript random in your .bashrc file. Or you can get any particular script by placing colorscript -e <name>
Setting up Conky
I am using the Grey-Minimalistic conky theme from Deviantart. Each type of conky theme has a different installation method. So if you are using another conky file, follow its setup method, described in its README files.
Extract the conky theme file. Inside, we have several folders. First, you need to install the associated icons and fonts. That is, install the given font using font-manager. Copy and paste the icon folder to your ~/.icons folder.
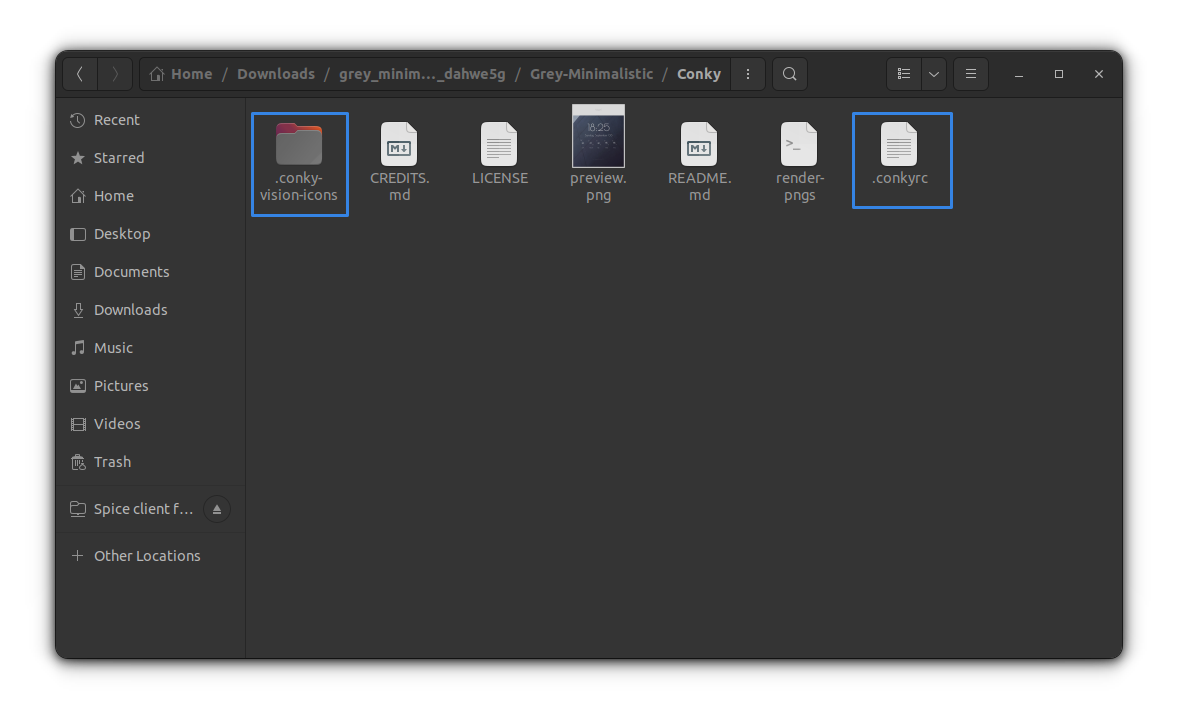
Now, go to the conky folder. Make sure that, you have enabled viewing hidden files. Now copy the .conkyrc file and .conky-vision-icons file to your Home directory, as shown above.
Now start conky to get a look like this.
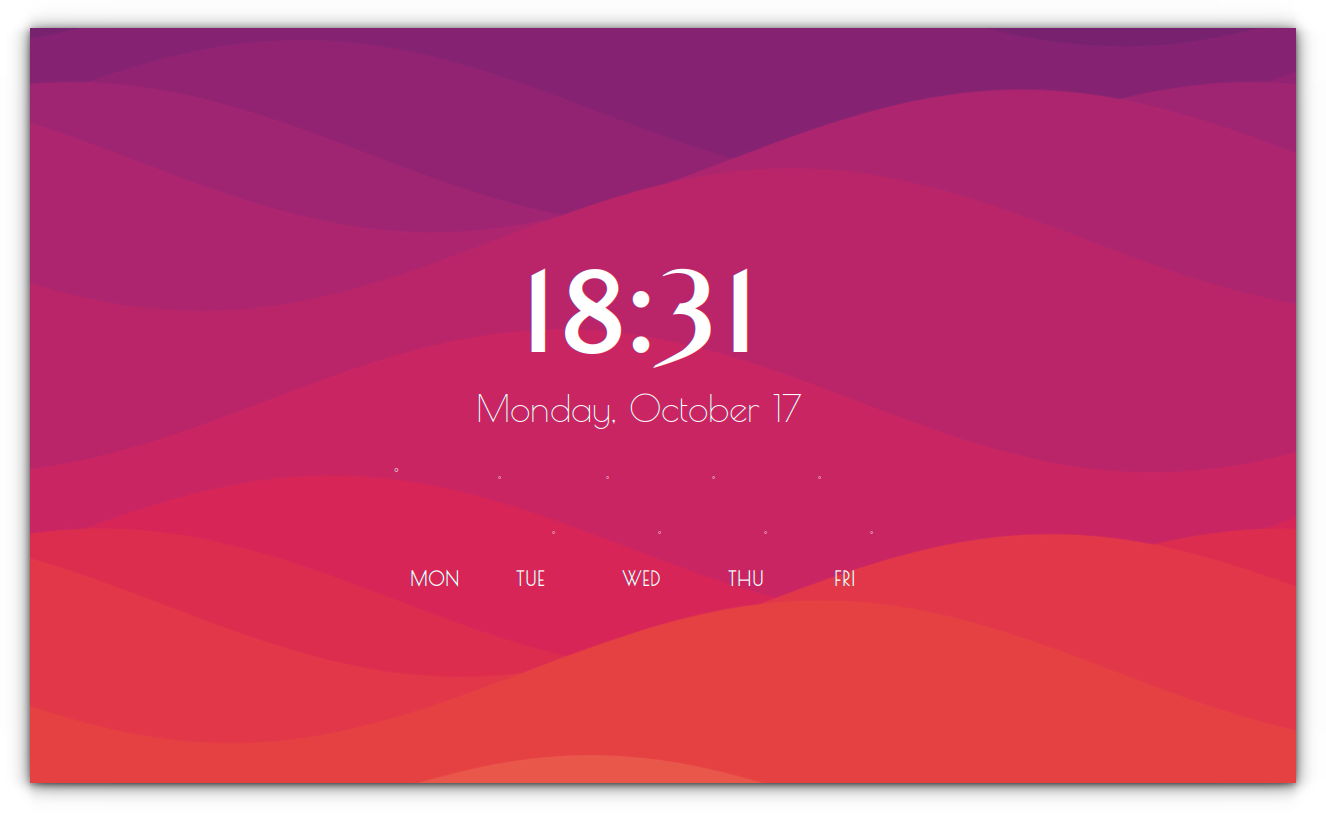
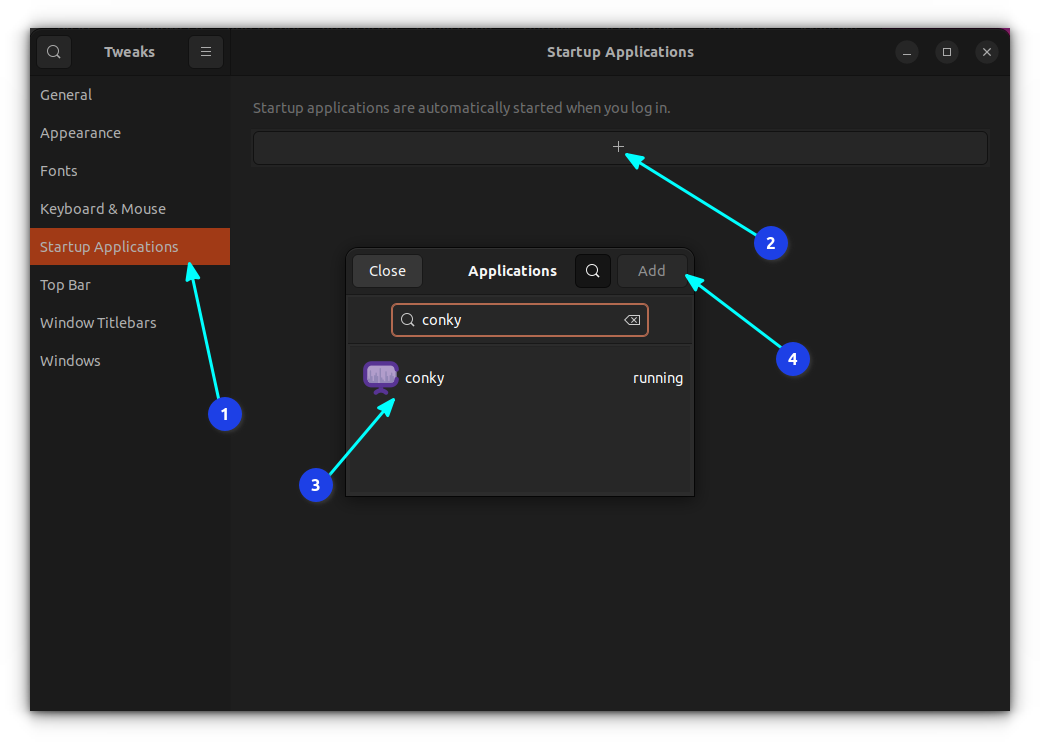
Add the conky to the list of startup applications so that it starts automatically at each boot.
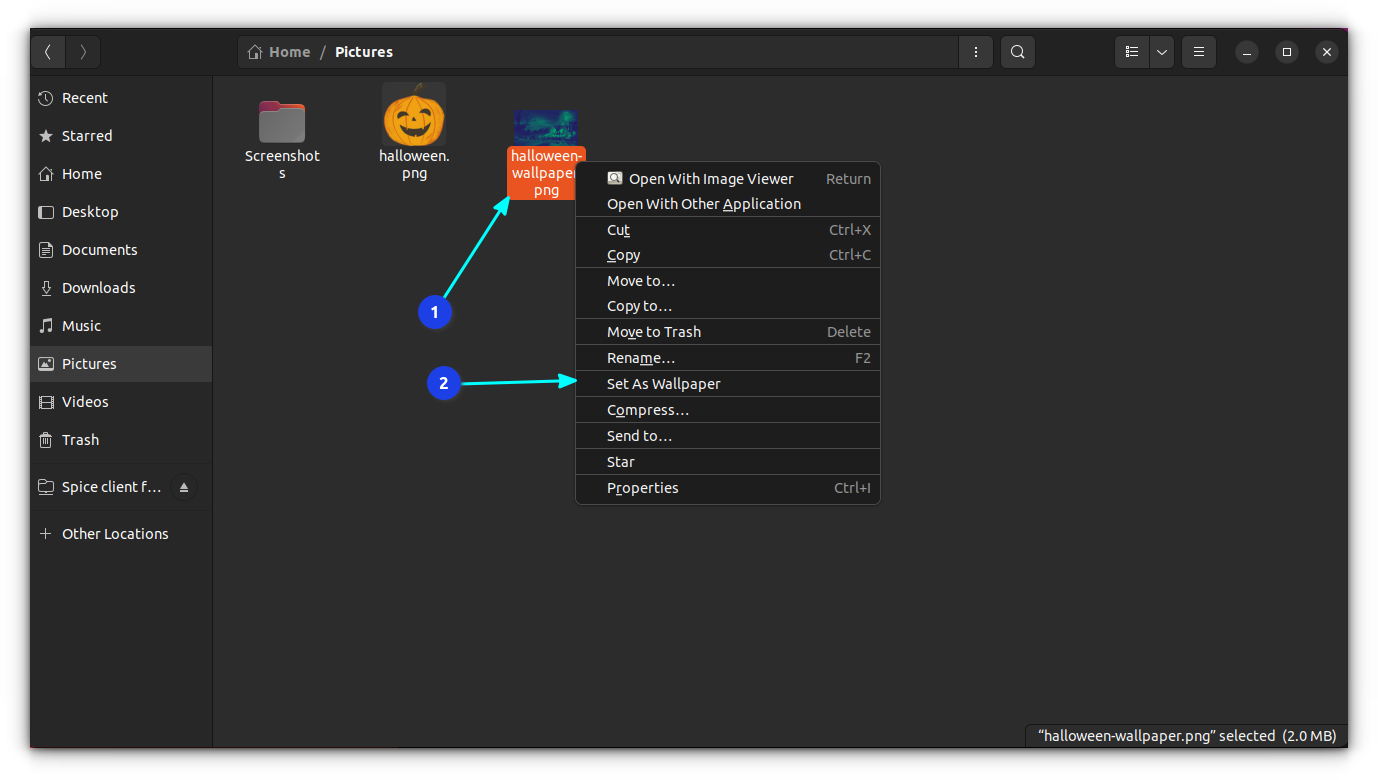
Change wallpaper
You are almost there. The only thing you need to do now is to change the background wallpaper. You have already downloaded the spooky wallpapers I believe.
Behold the final look!
If you followed most of the steps above, you should get a desktop that looks like the one in the below screenshots.
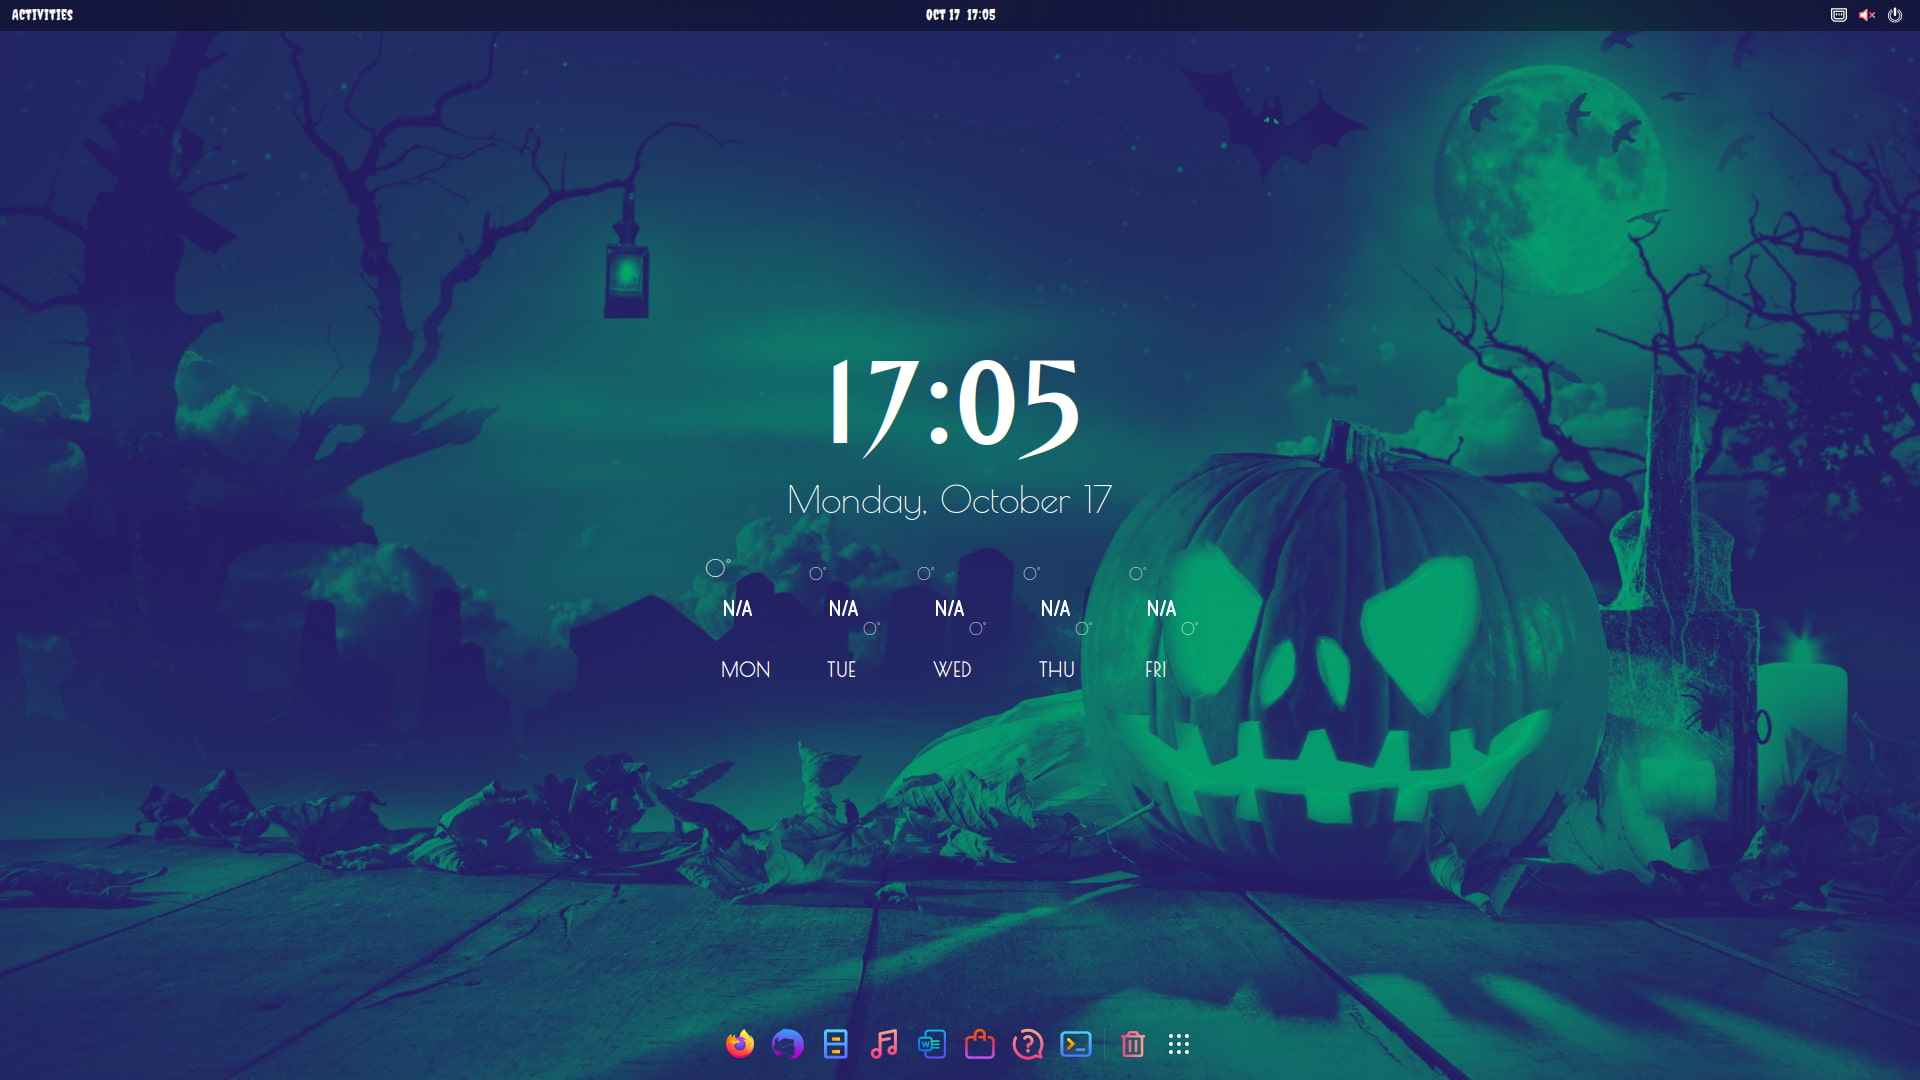
Is it scary enough for Halloween? What do you think? Let me know in the comments.
If this helped you, consider supporting It's FOSS
It's FOSS has been helping people use Linux for the past 14 years. Help us stay independent from big tech. Become a Plus member, enjoy ad-free reading and get 5 eBooks.

