

LibreOffice, the free and open-source office suite comes with a handy collaborative edit feature, which records changes to a document.
It lets you view the changes, comment on it, approve or reject changes etc. You can find this feature handy if multiple users (or a workgroup) utilize LibreOffice Writer or Spreadsheets.
So, how can you use this feature? What do you have to do to track changes and versions of a document meant for collaboration?
Considering you already have the latest LibreOffice installed, let me tell you about it here.
Enabling to Record Changes
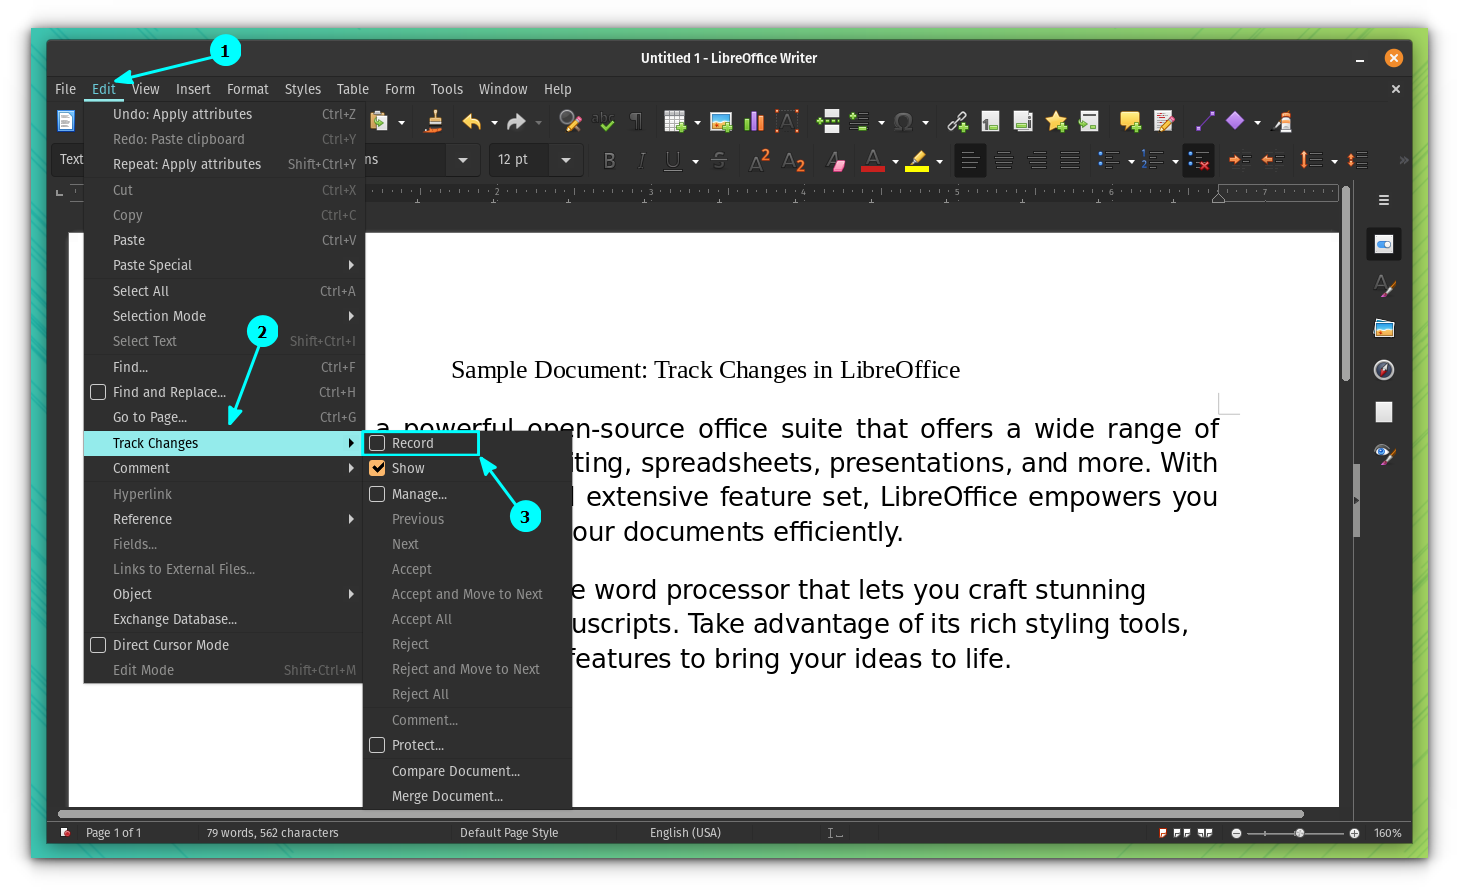
By default, the feature is not enabled. So, first, you need to enable it.
Open LibreOffice and go to Edit → Track Changes → Record.
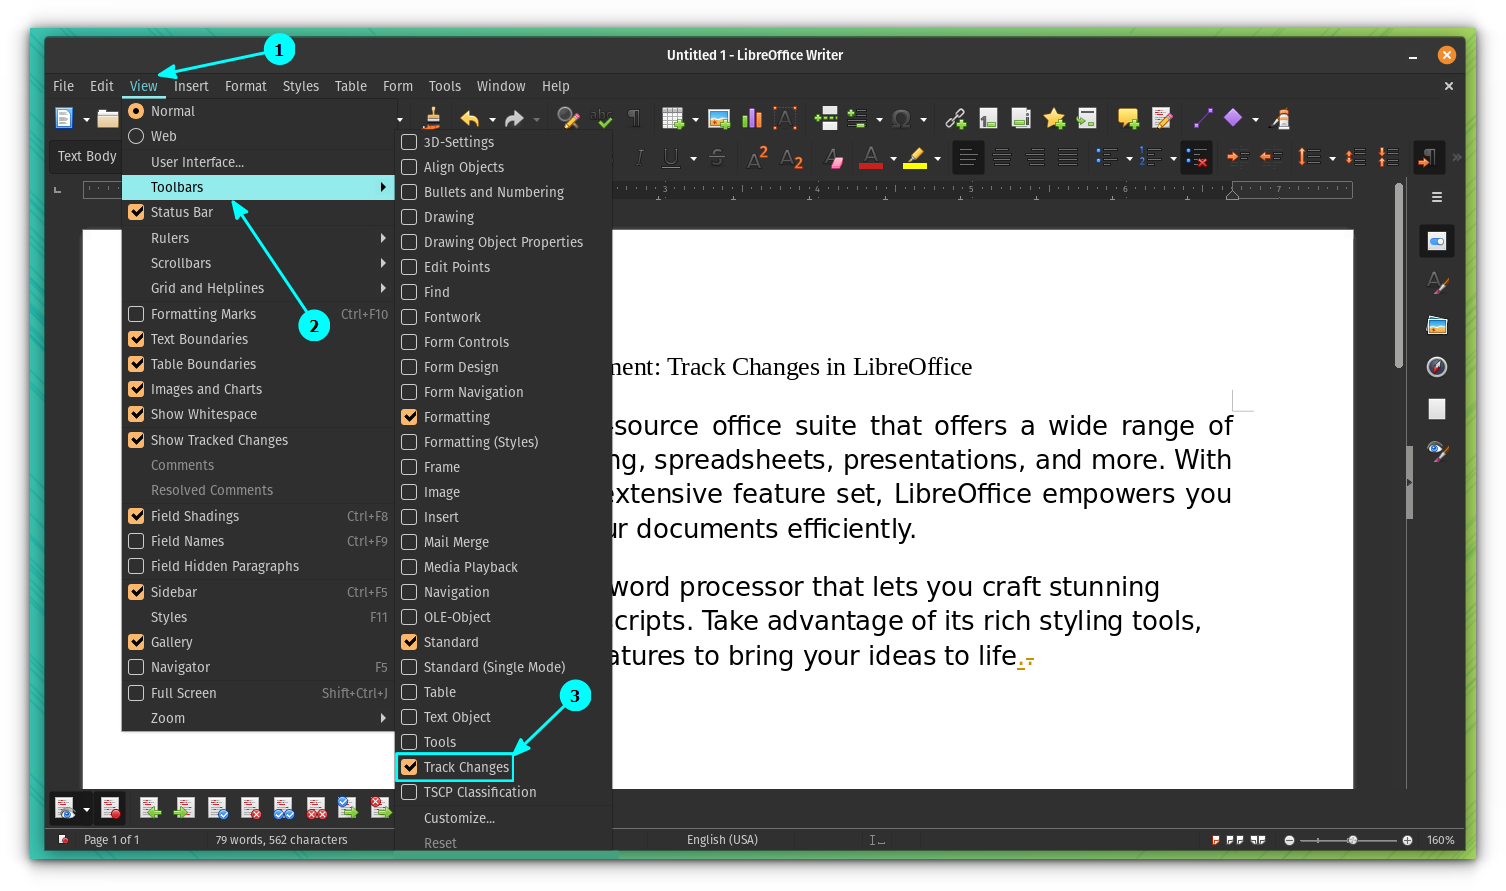
Now, you need to enable the Track changes toolbar, for convenience. For this, go to View → Toolbars → Track Changes.
You can see a small toolbar appeared on the bottom.
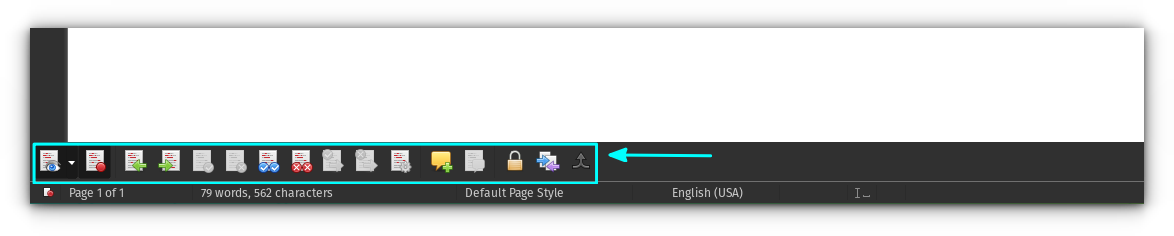
You can use these buttons to manage the changes. Options like accept/reject/ changes, adding comments, and comparing versions can be found here.
Add User Data
Before you start working with recording changes, you must add User Data, to identify changes. Without this, any change made will be marked as something done by “Unknown user”.
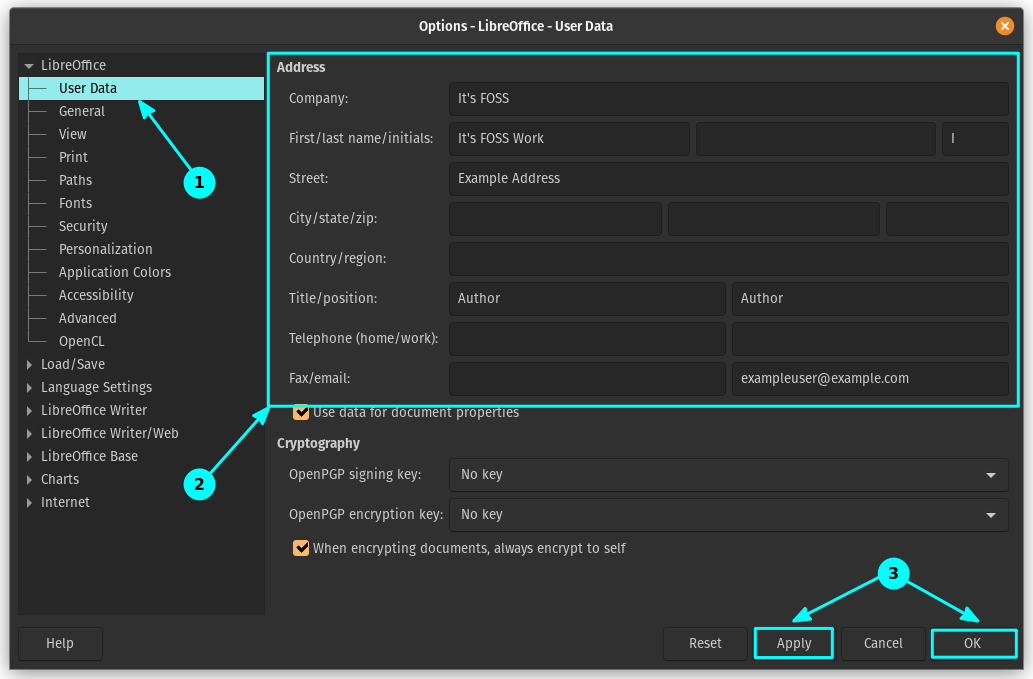
First, go to Tools → Options.
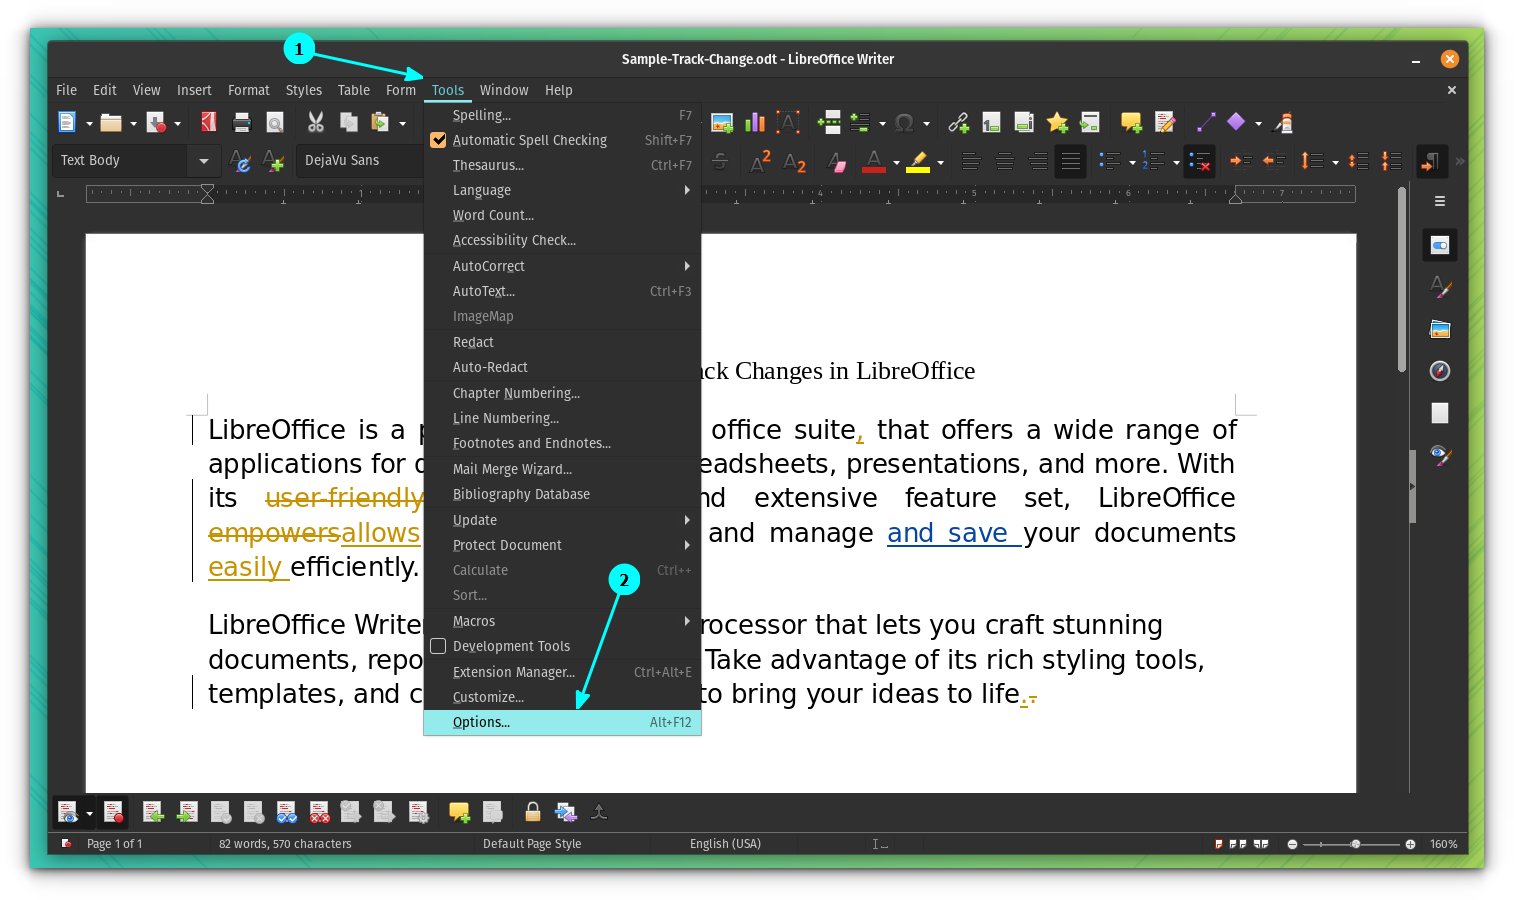
Here, inside the “User Data” section, add your name, address, email etc., if you prefer, but name is a must.
That's it. You are good to go.
Suggested Read 📖
 Ankush Das
Working with Recording Changes
Now, let us take a look at how all of this works:
Locating Changes
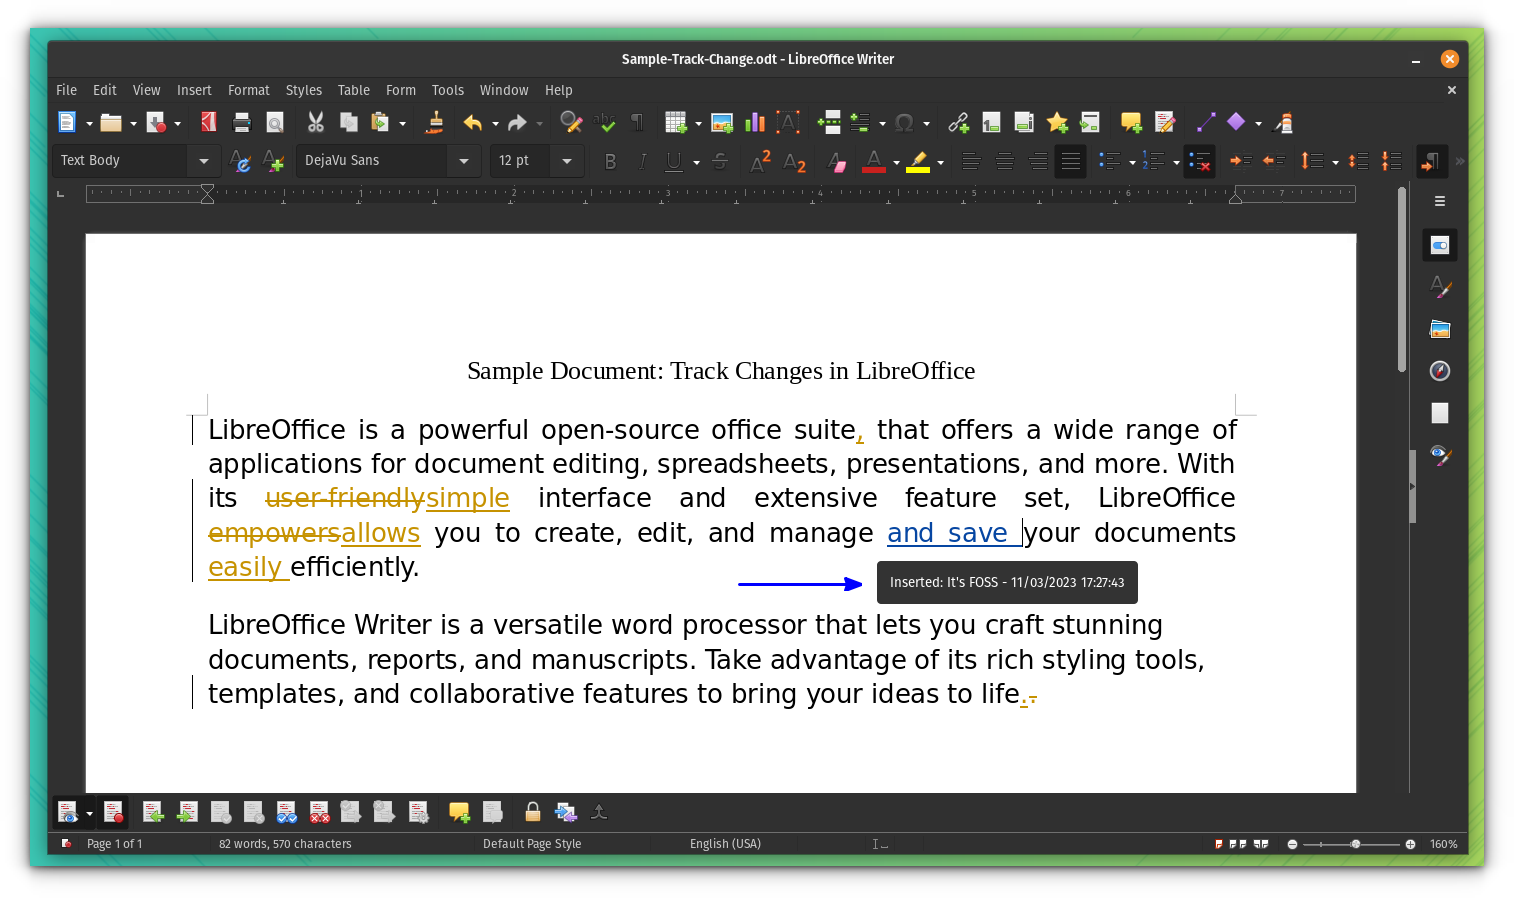
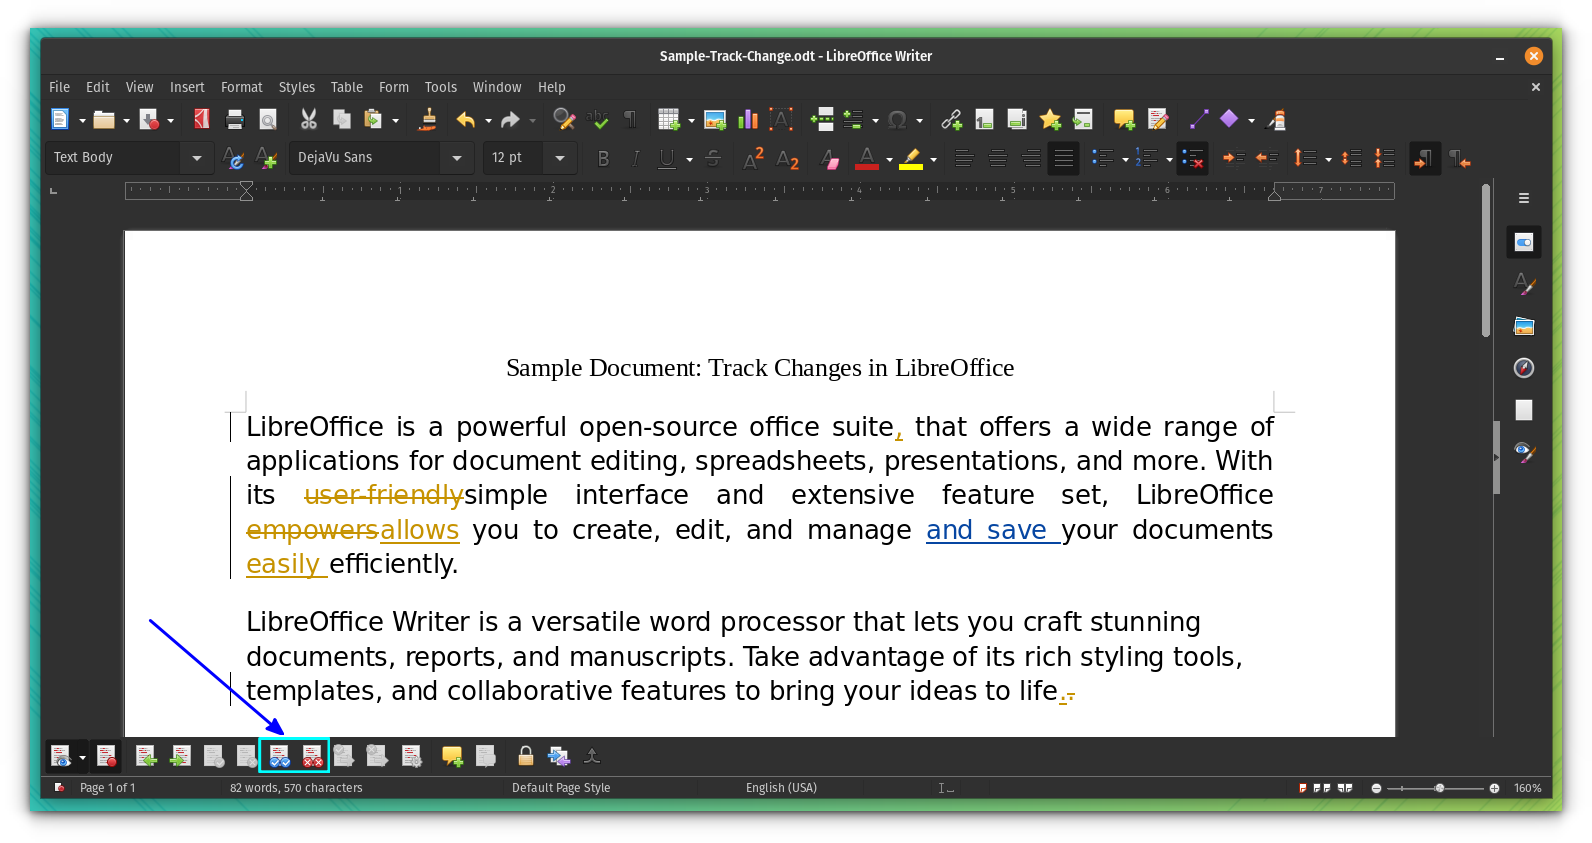
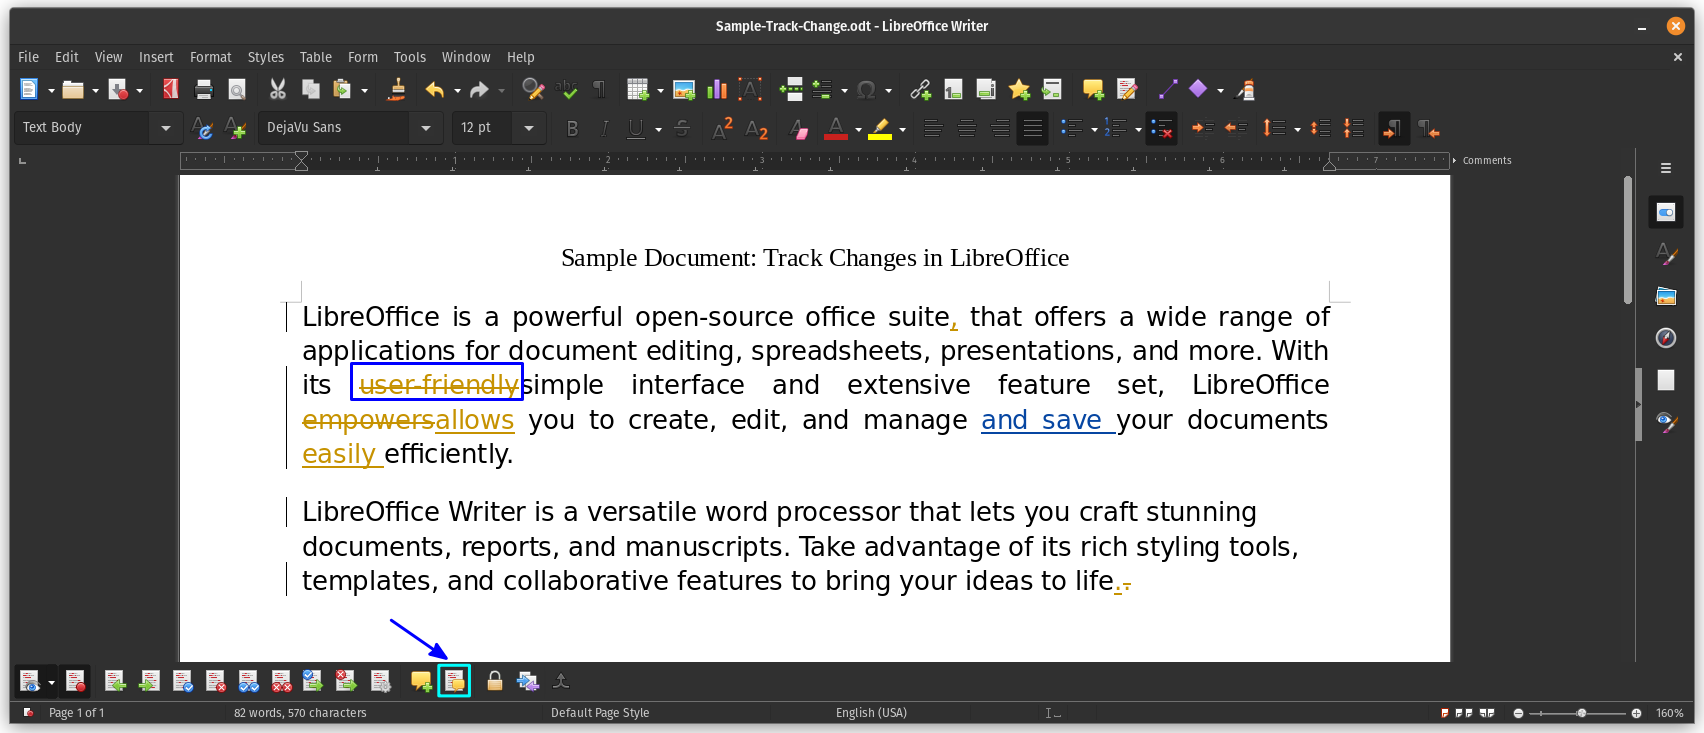
First, when you add a new word to the document, it appears in a yellow text.
As, you can see from the above screenshot, when a word is removed, it is not deleted from the document. Instead, it is marked with a strikeout annotation. When you add another word in its place, that also appears highlighted and underlined.
You can notice a small bar on the extreme left of the lines that include some kind of change, even if it is a small comma addition.
Knowing about the changes
Now that you have located the changes appearing to the document, what about the author who made the change?
LibreOffice also notes the author (user) who has made the change to a particular document. You can get this detail through several places.
Hover over the marked text, to know about that particular change. It will show the author, changed date and time.
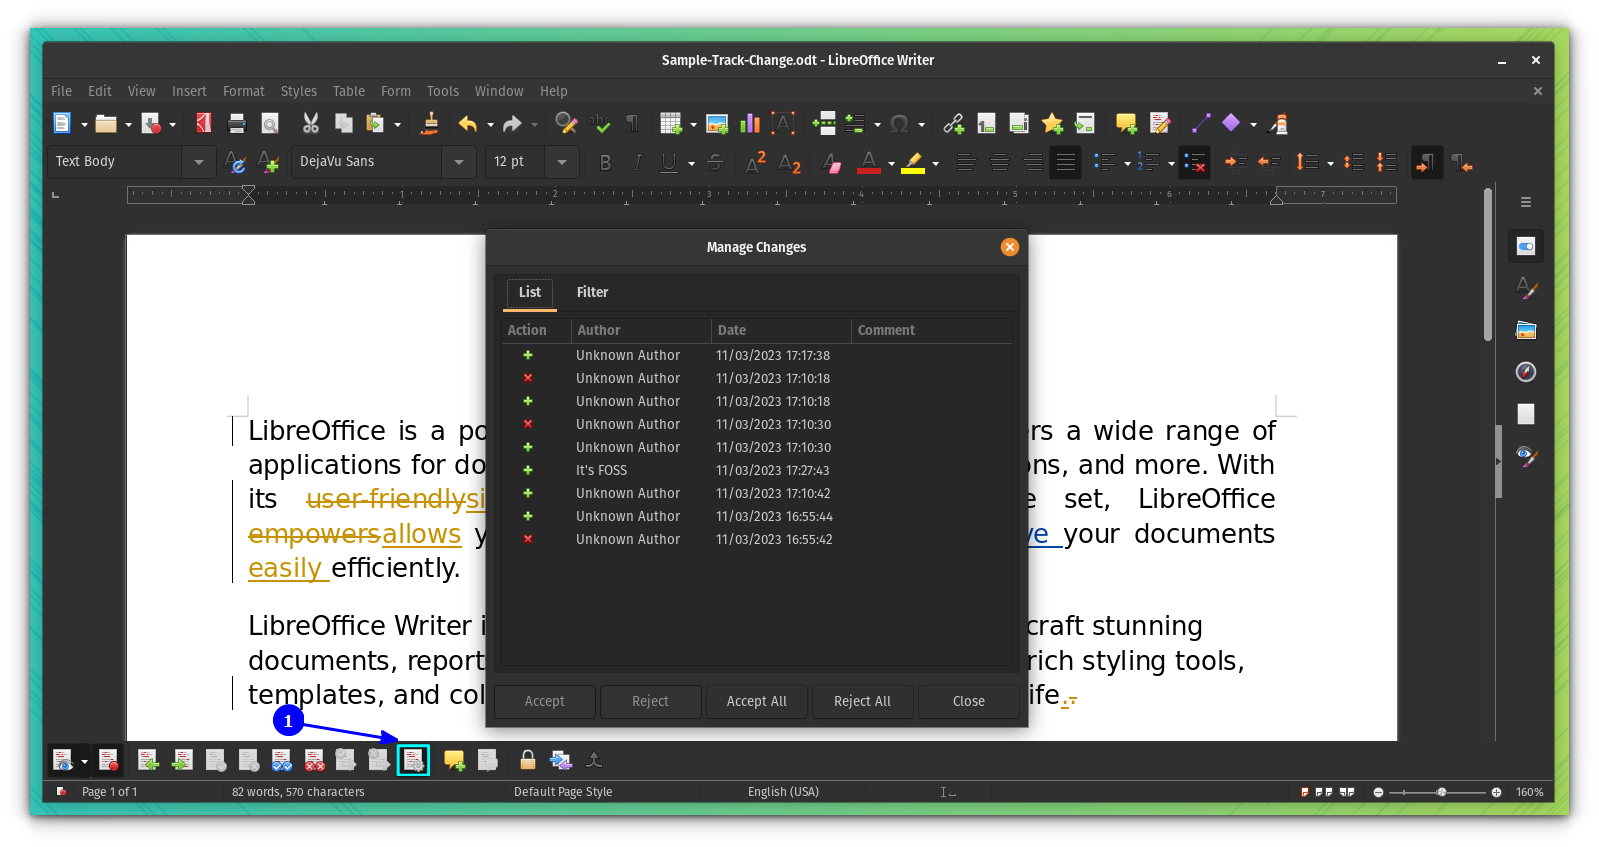
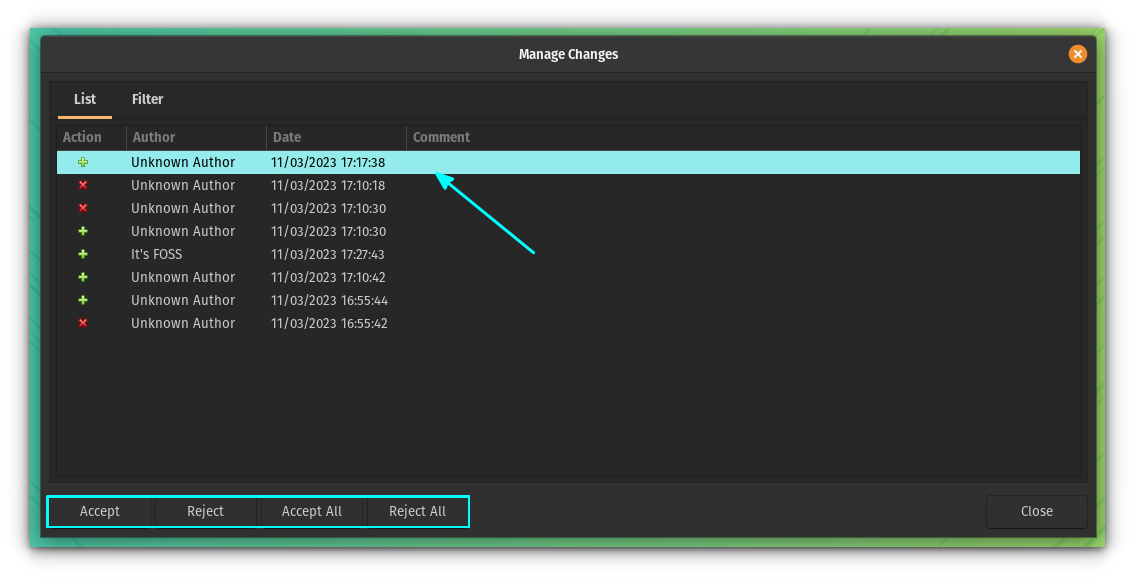
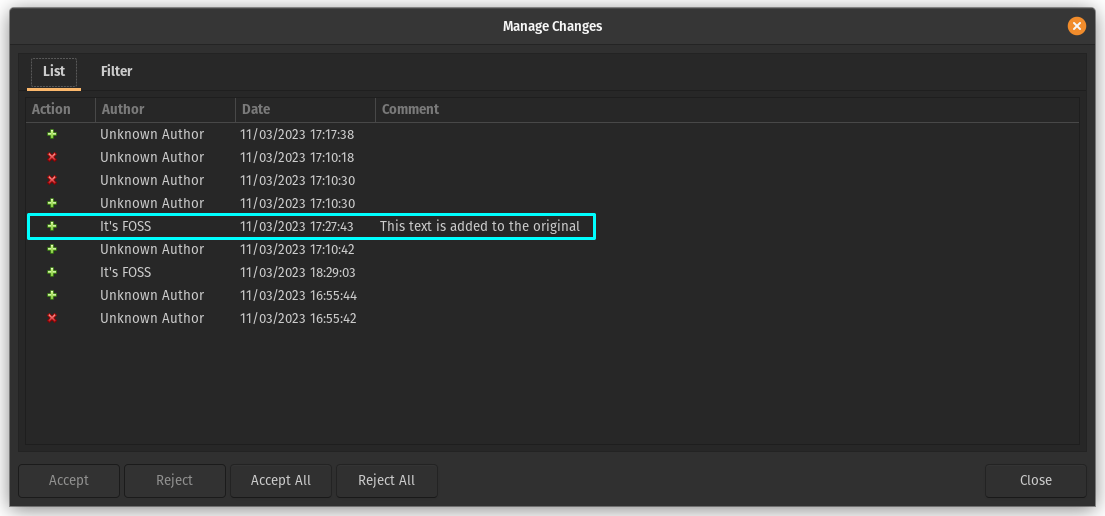
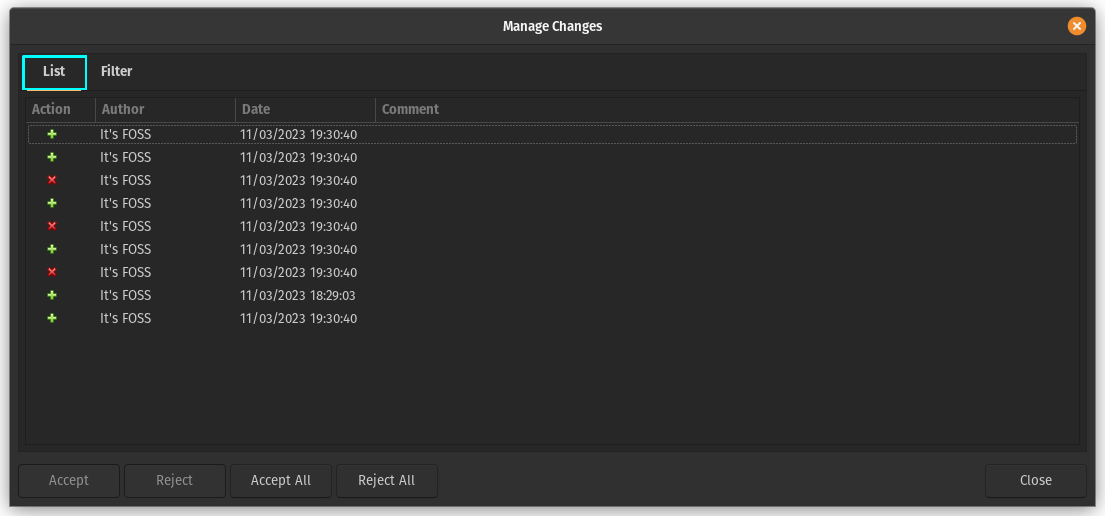
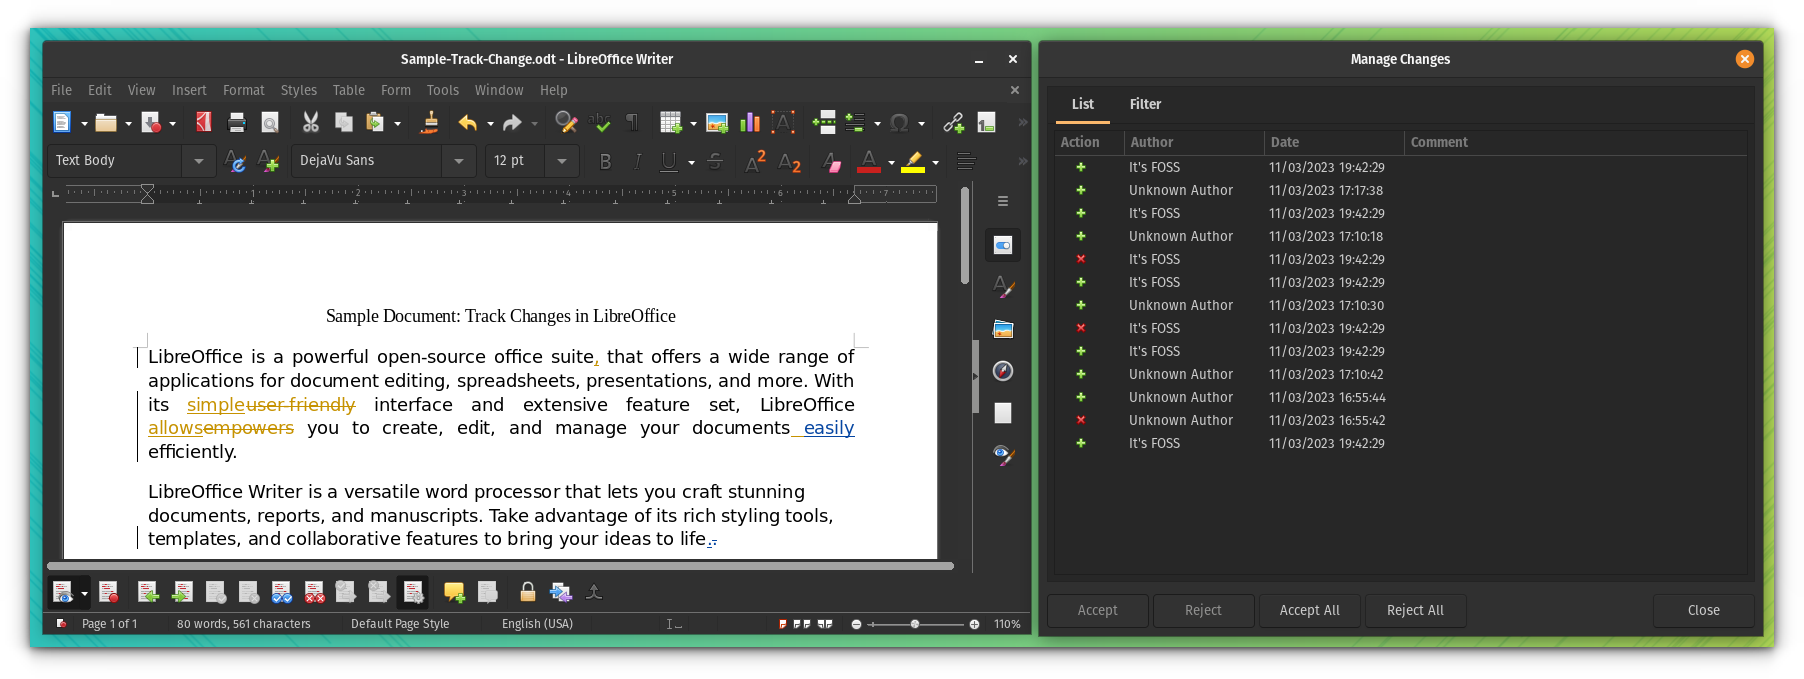
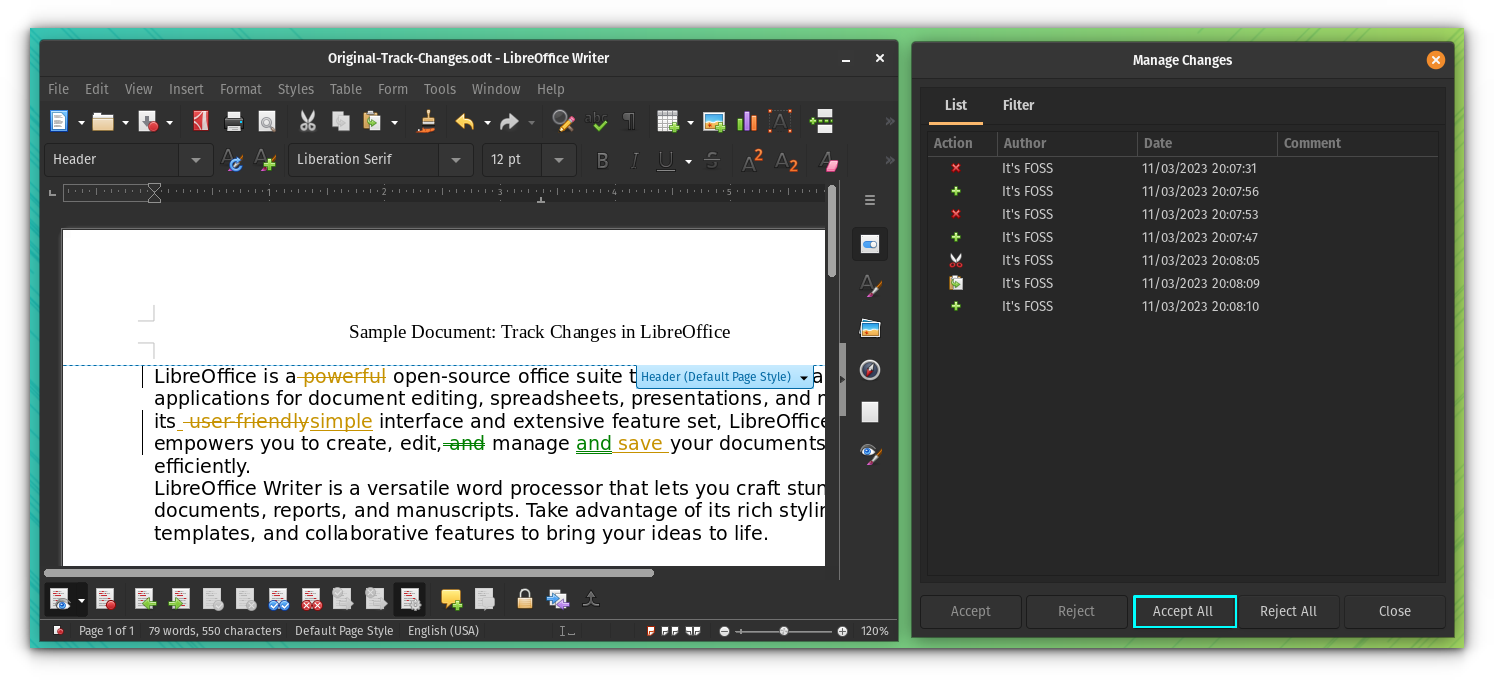
Or, you can click on the manage track changes button on the bottom toolbar, to get an overview of all changes as shown in the screenshot below:
Accepting/Rejecting Changes
To accept or reject a particular change, first, click on that particular change.
Next, click on the Accept change button (with a tick mark) to accept it. Or use the Reject button (with a cross mark) to reject the change.
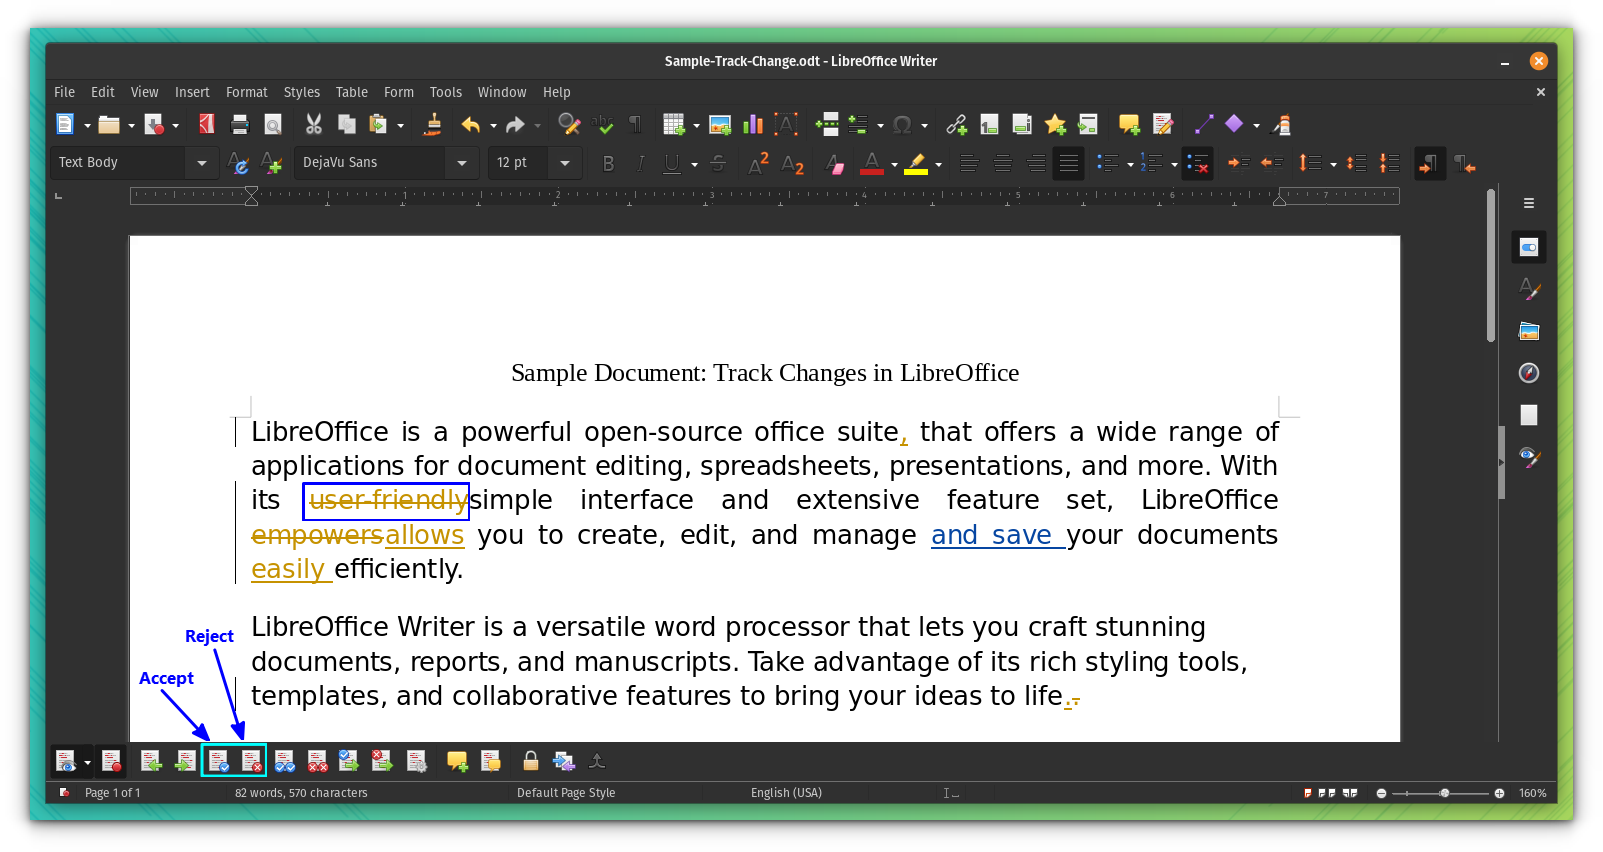
If you accept a change, the text will be fixed and will change to black color in case of addition. If you are removing something, the highlighted word will be removed.
On the other hand, if you reject a change, the addition/deletion will be cancelled.
Similarly, you can accept/reject all the changes at once, using the Accept All/ Reject All buttons. It is placed adjacent to the individual accept and reject buttons on the toolbar.
Another way to accept and reject changes is through the Manage Changes dialog box. Click on the Manage Changes button on the bottom toolbar, as described in the previous section.
Now, you can select a particular change and then use the bottom buttons for Accepting/Rejecting.
Inserting Comments
You can either insert a comment at a random position, or add a comment to a particular change.
To add a comment on a place, click on that particular position (to bring the cursor there). Next, click on the Add Comment button on the bottom toolbar.
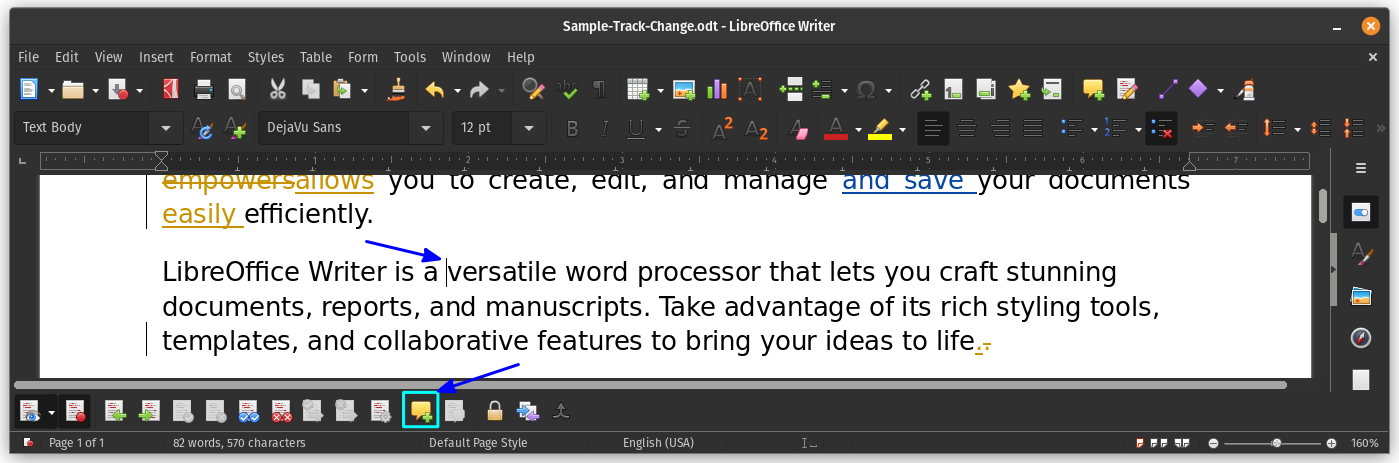
This will open up a right sidebar while pointing out the place you will be adding the comment. Type the message there as shown below:
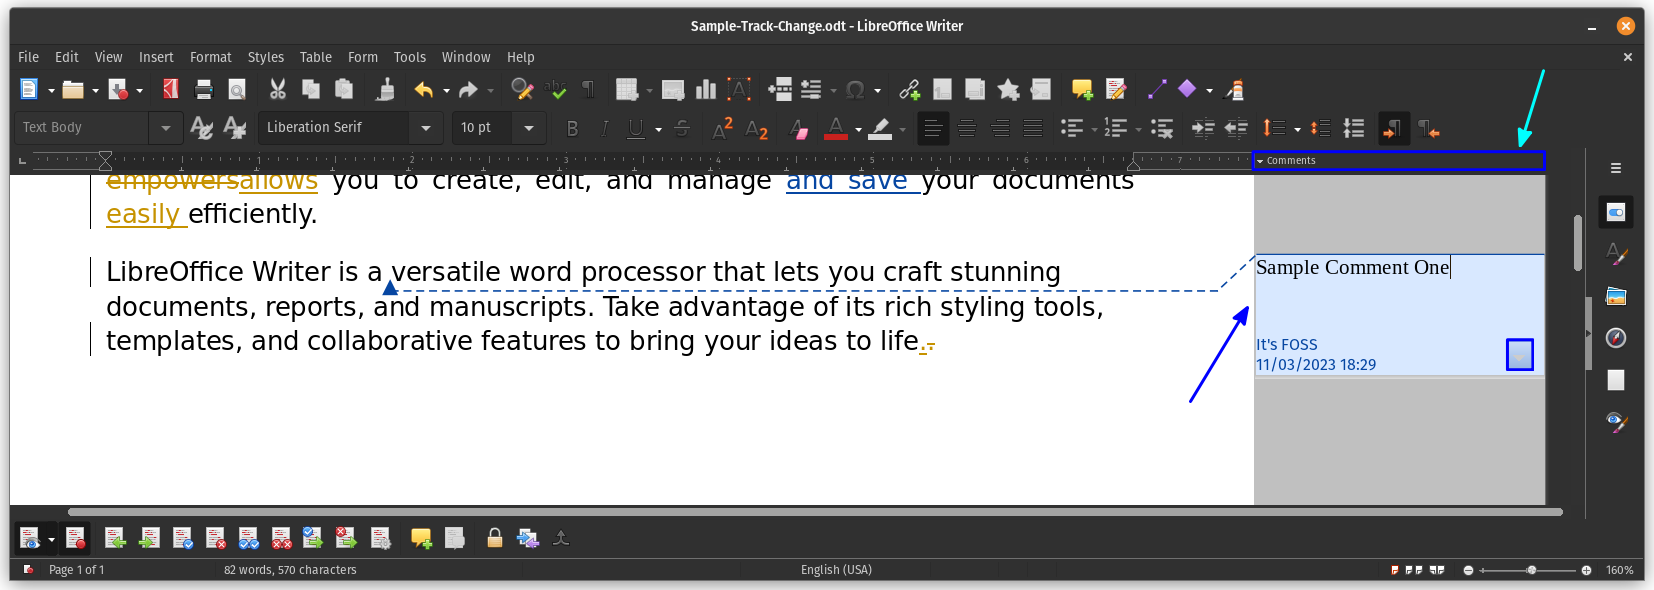
You can click on the adjacent rectangle button to get several actions on that comment. Use the top “Comment” button, to hide/unhide the comments.
Similarly, you can click on a particular change, and then click on the “Insert Track Change Comment” button.
It will look a bit different, but serves the same purpose. In the next dialog box, enter the comment. Now, click OK to save the comment.
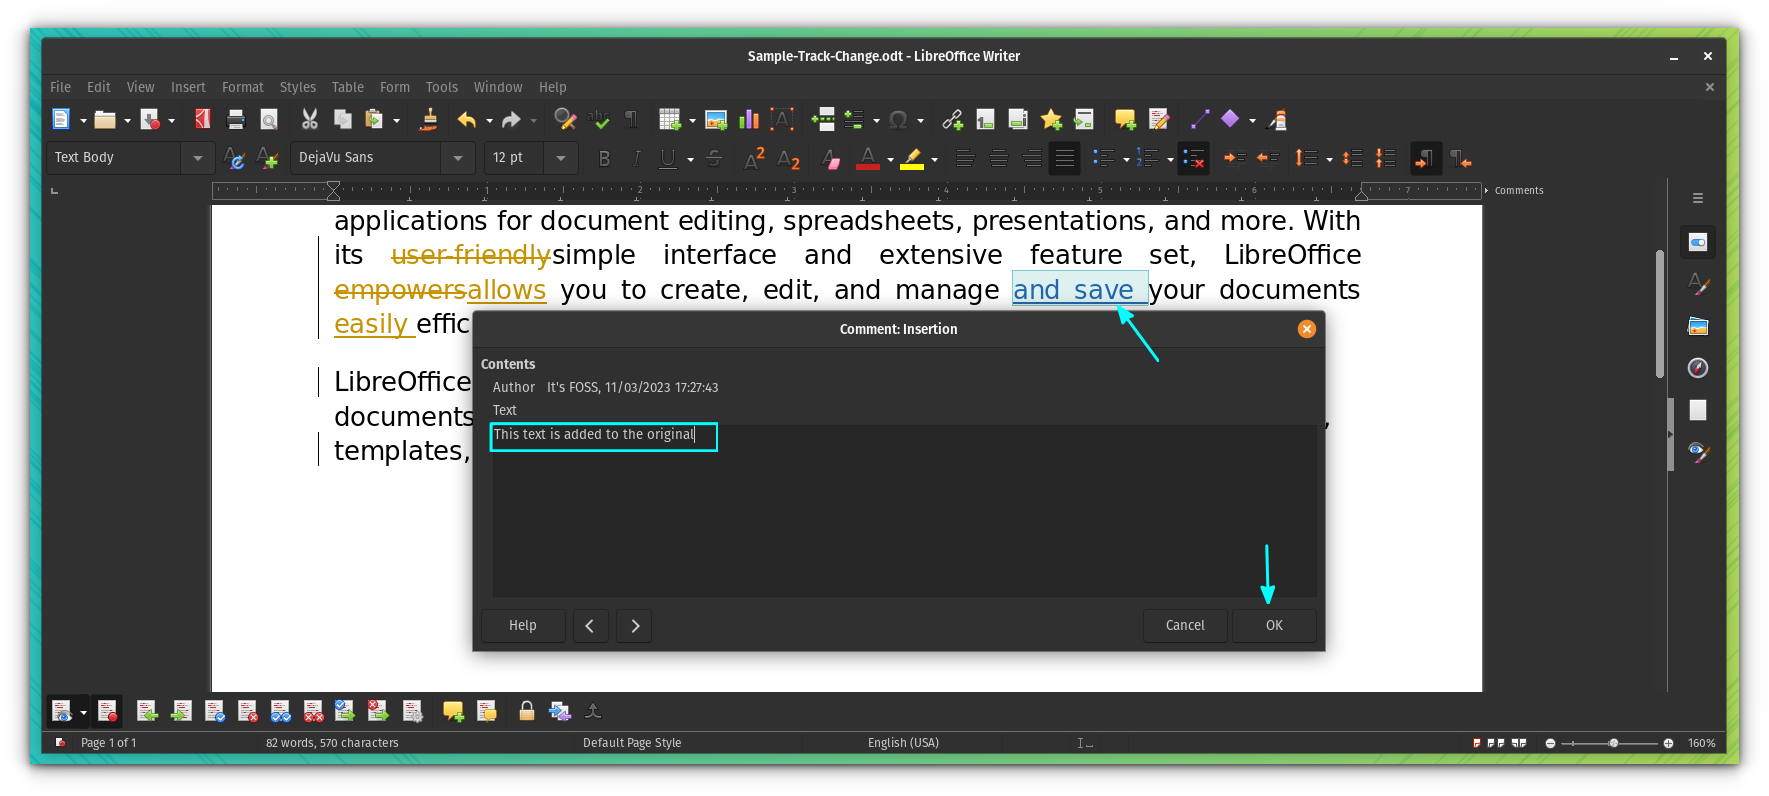
You have now added a comment to that change.
So, when you head to the Manage Changes dialog box, you can see the comment right to the mentioned change. Pretty handy, right? Of course, one of the best open-source alternatives to Microsoft Office. You should not expect any less 😉
Save a Version
While there is an auto-save feature to protect your document from a crash, there is no auto-versioning of documents.
So, once you have made some changes, you can save a version of it.
Go to File → Versions.
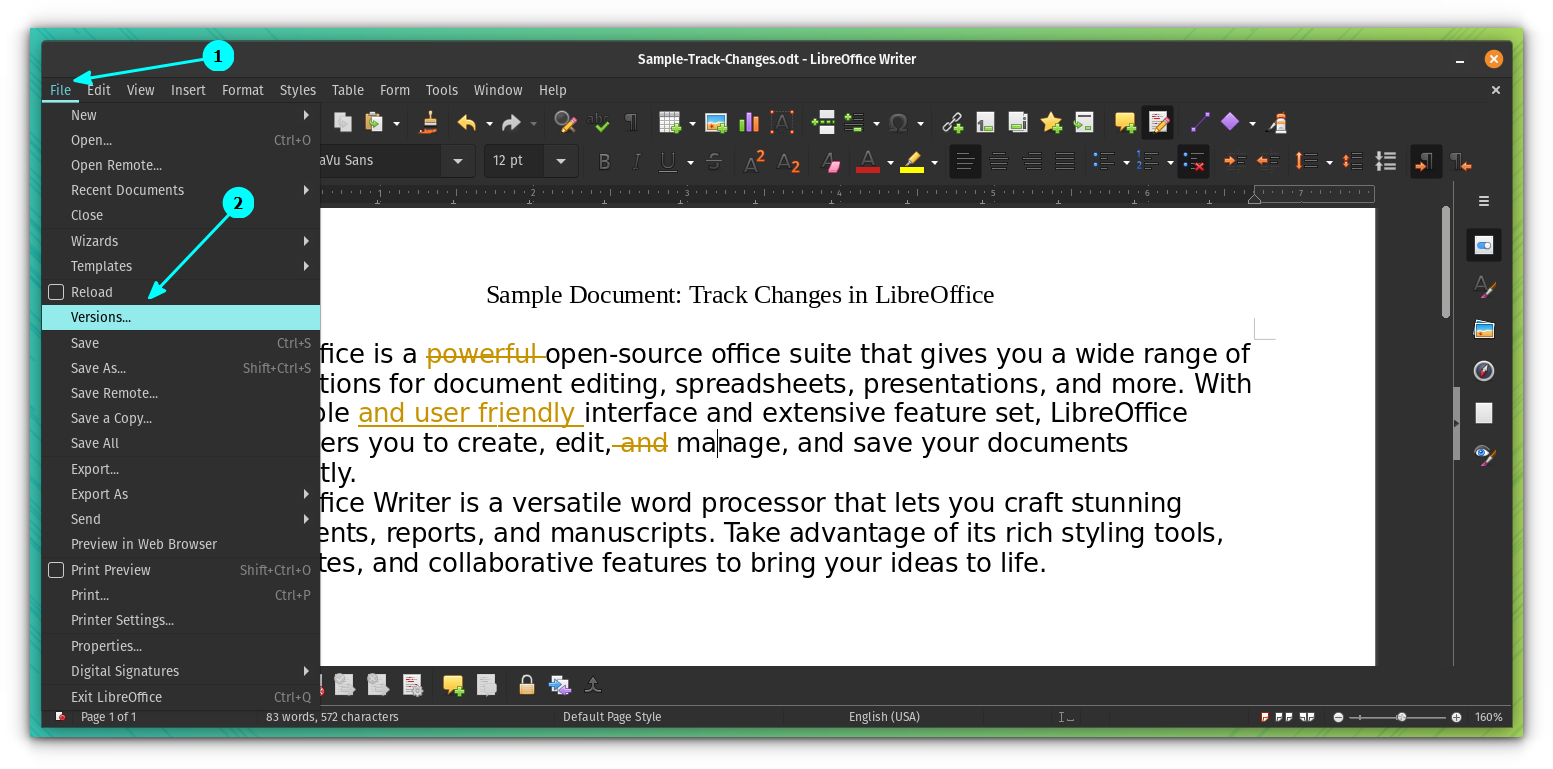
Here, you can save the current version of the document.
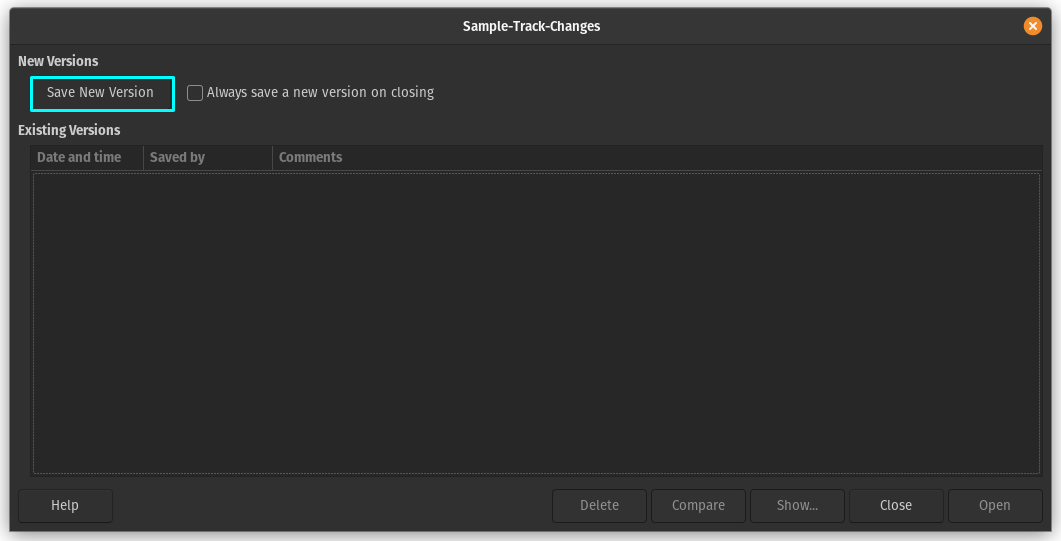
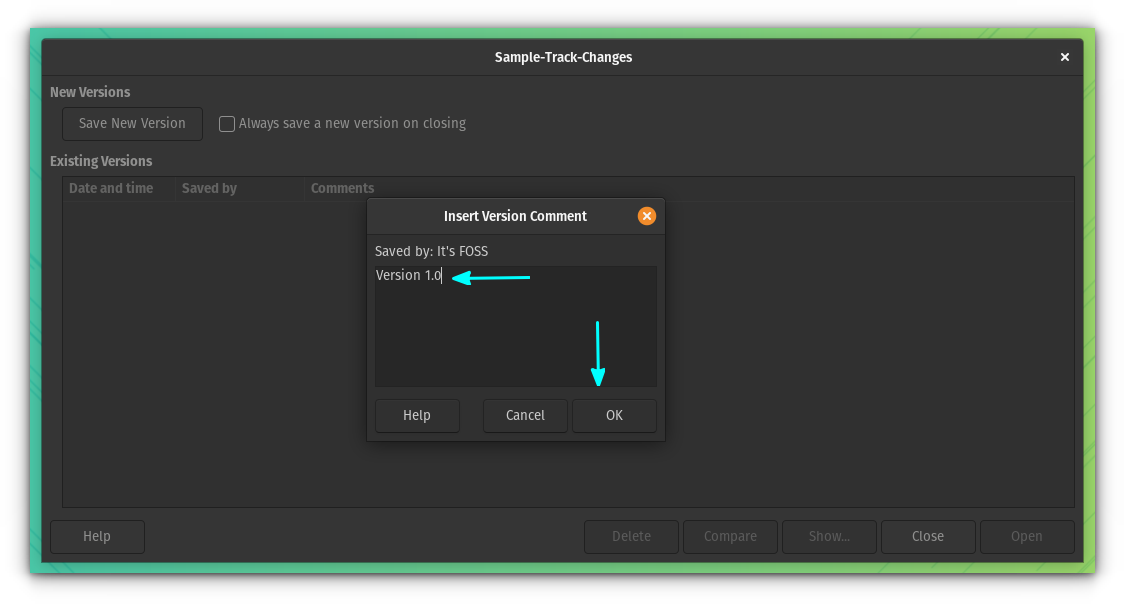
Insert a version comment to identify it easily, and then click OK.
You can now view multiple versions of the document by navigating to the same menu option. Instead of saving a new version, you can select the existing version and hit "Open" to access it.
Suggested Read 📖
Ankush Das
Filter Changes
LibreOffice provides a way to filter the changes based on author, time range, etc. This should help you find certain changes fast when there are lots of it.
First, hit the Manage Changes button to get to the dialog box where you see the changes. Here, go to the Filters Tab.
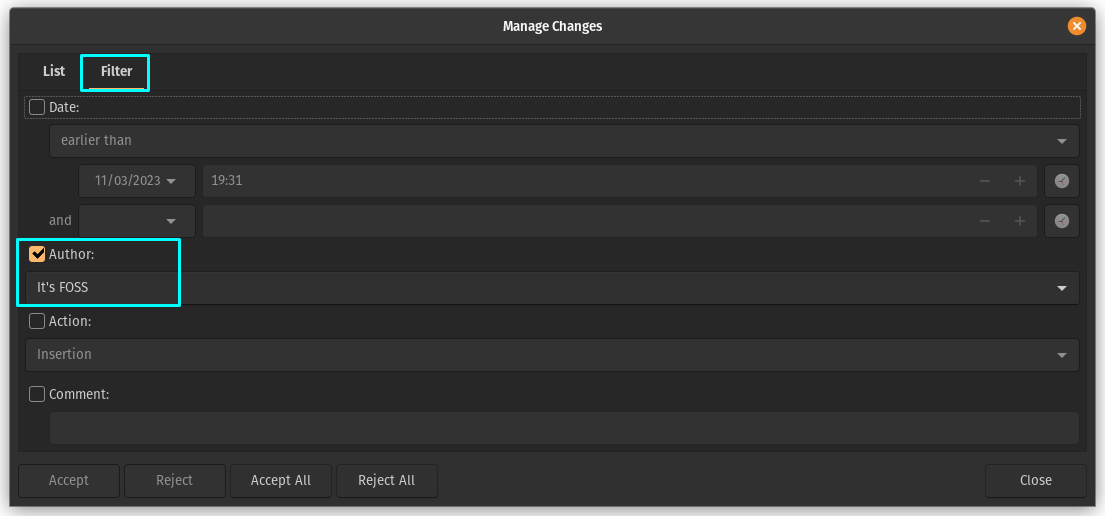
Next, you can set the criteria.
I have set to view the changes made by the author “It's FOSS”. So, when we go to the “List” tab, only changes made by author “It's FOSS” will be listed.
Compare with Original Document
Once you have completed collaborative editing, you can compare the changed document with the original one. This needs the original one to be saved separately.
So, click on the Compare button on the bottom toolbar.

Now, select the original file from the file chooser.
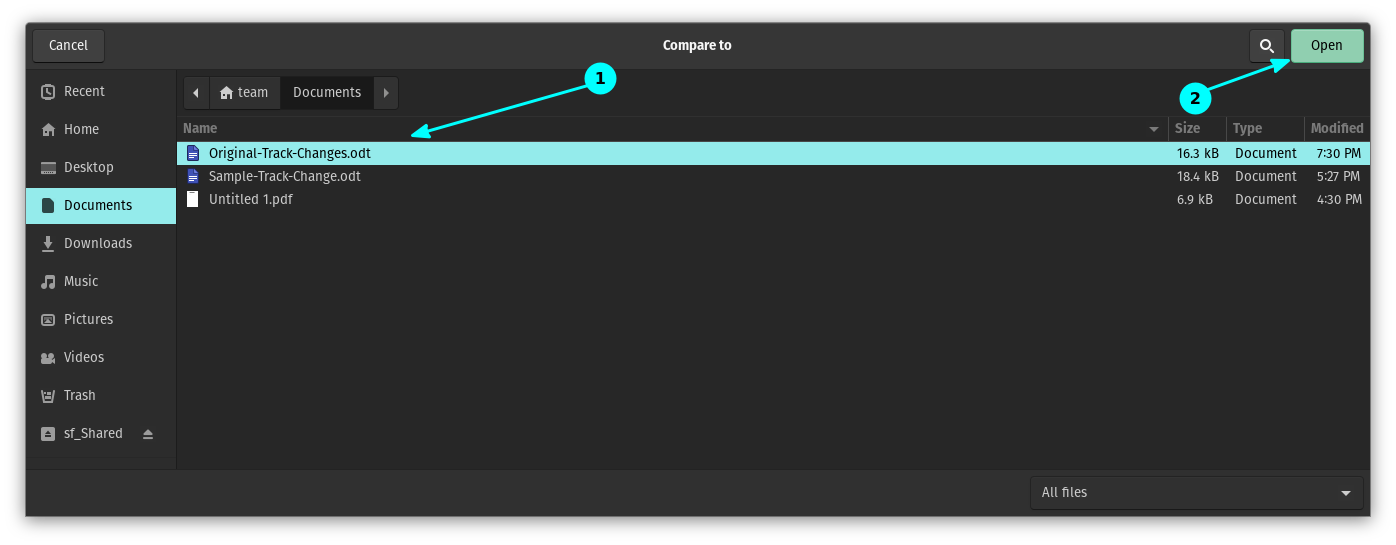
This will give you a highlighted document with changes from the original, along with the Manage Changes dialog box.
Merge with Original
Once you have completed the changes, save the document.
Once you have made all the changes, save it, without accepting the changes.
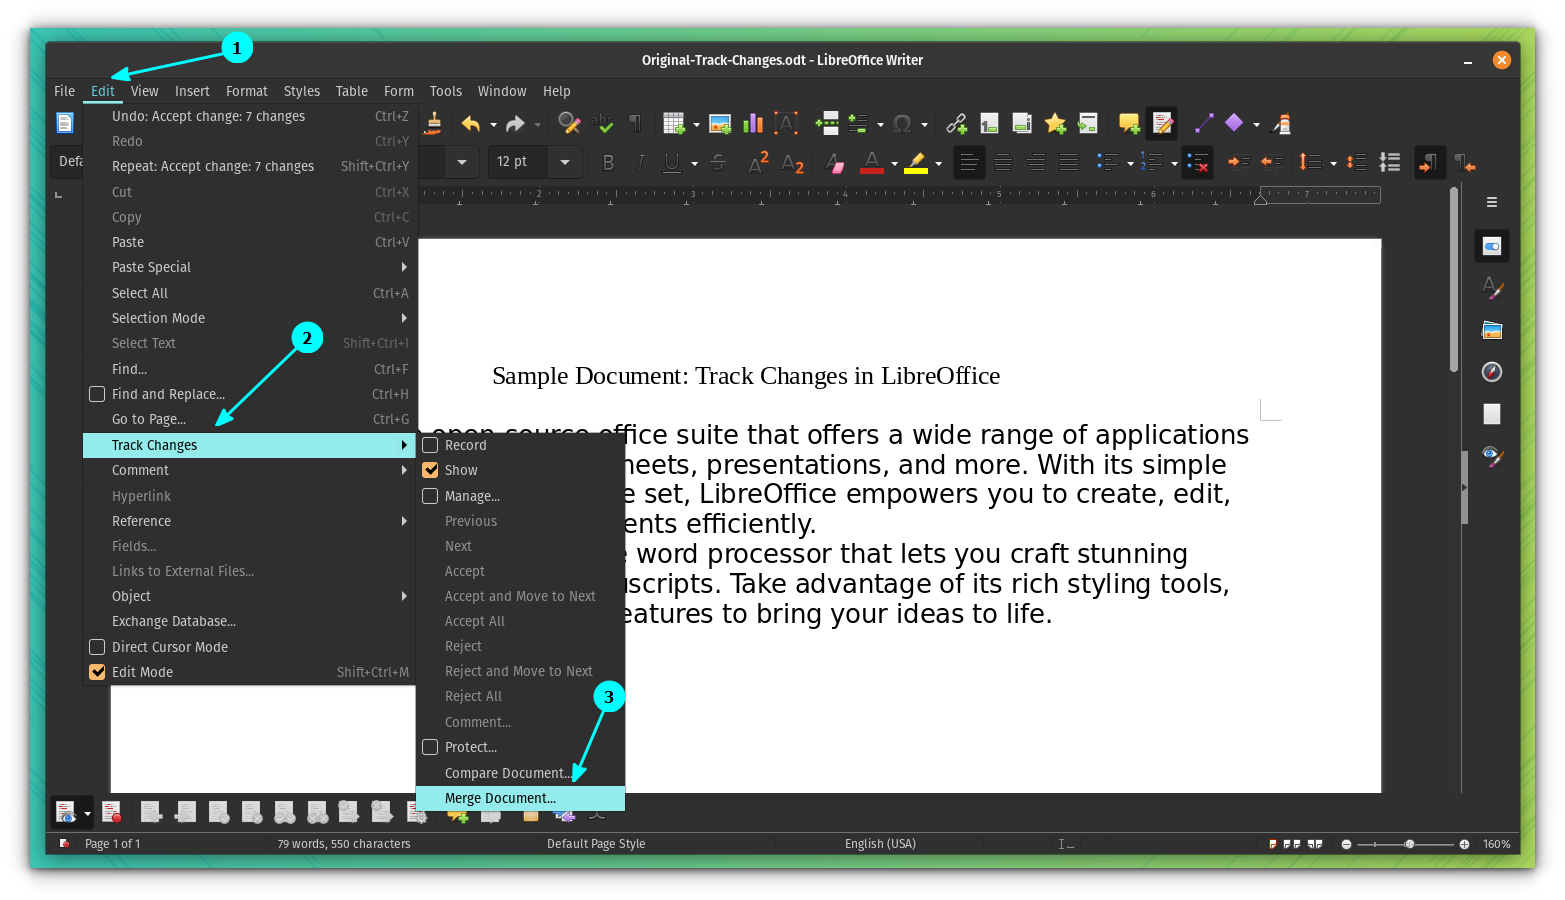
Now, open the original document in LibreOffice and go to Edit → Track Changes → Merge Document.
From the file chooser, select the edited document, and click Open.
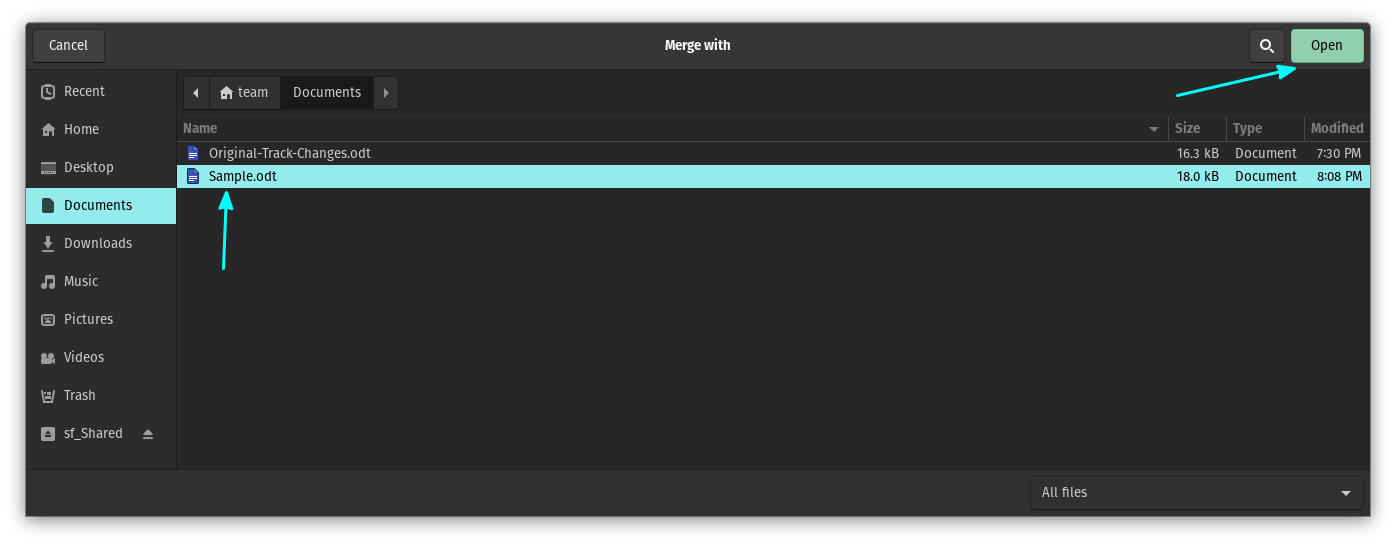
On the next screen, changes to the original document will be listed, along with a “Manage Changes” dialog box. Click on “Accept All” and the original document will be merged with the changes.
Suggested Read 📖
Abhishek PrakashWrapping Up
LibreOffice is a feature-packed document suite. You can do all sorts of things when compared to the proprietary alternatives.
You can also explore more LibreOffice tips to use it more effectively.
However, many users fail to find/know how to use a certain feature. With this article, I hope, you can now quickly track changes and versions of your document for a good collaborative editing experience.
💬 What is your favorite part of the LibreOffice Writer editing experience? Any other feature that you want to highlight? Share all about it in the comments below.
If this helped you, consider supporting It's FOSS
It's FOSS has been helping people use Linux for the past 14 years. Help us stay independent from big tech. Become a Plus member, enjoy ad-free reading and get 5 eBooks.

