
If you are creating a book, thesis or any such official or academic work, you must add a table of contents to your document.
You may also need to add a table of figures and an index of tables used in the documentation.
In this tutorial, I'll show you how to:
- Create the table of contents and figures automatically
- Update the tables when needed
- Insert the index of tables
Adding a table of contents in LibreOffice
The table of contents will be generated based on the headings you have. That means a level one heading will be on top; level two and three follows as subsections of the Level one heading and so on.
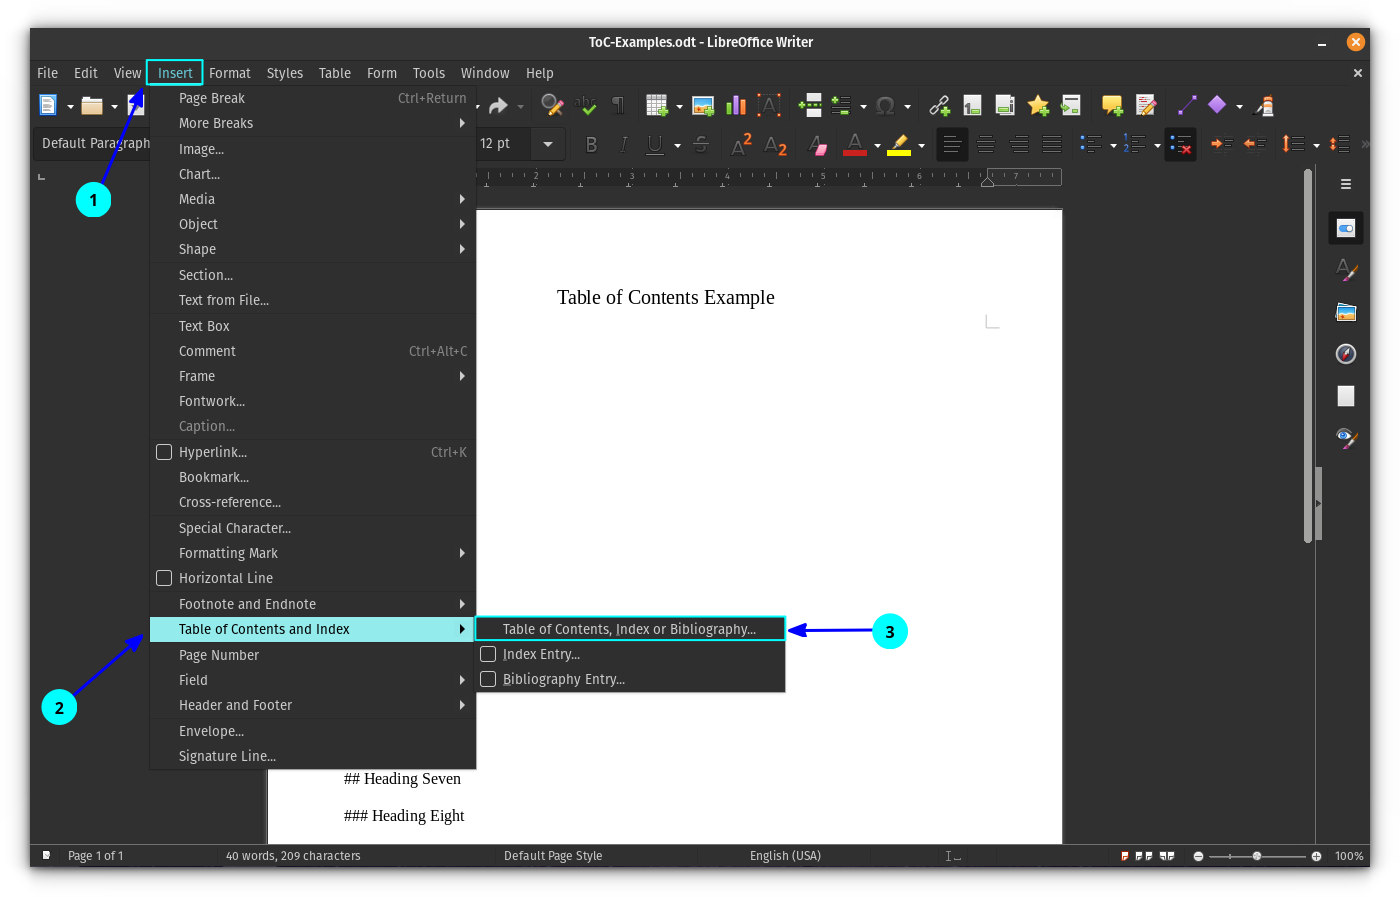
First, you need to place the cursor on the position where you want to add the Table of Contents because the ToC (table of contents) will be added depending on where your cursor is.
Once you are at the right place, click on the Insert button and select Table of Contents and Index:
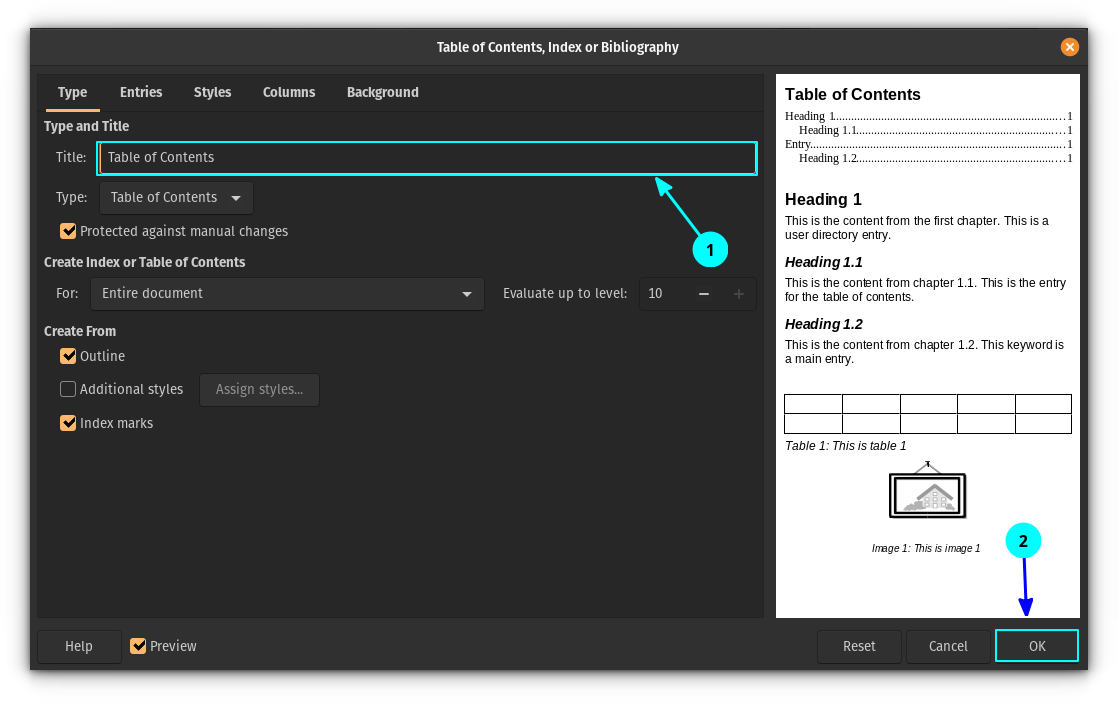
This will open a dialog box for tweaking the table of contents. For the default ToC, select a name you want for the heading and then press OK.
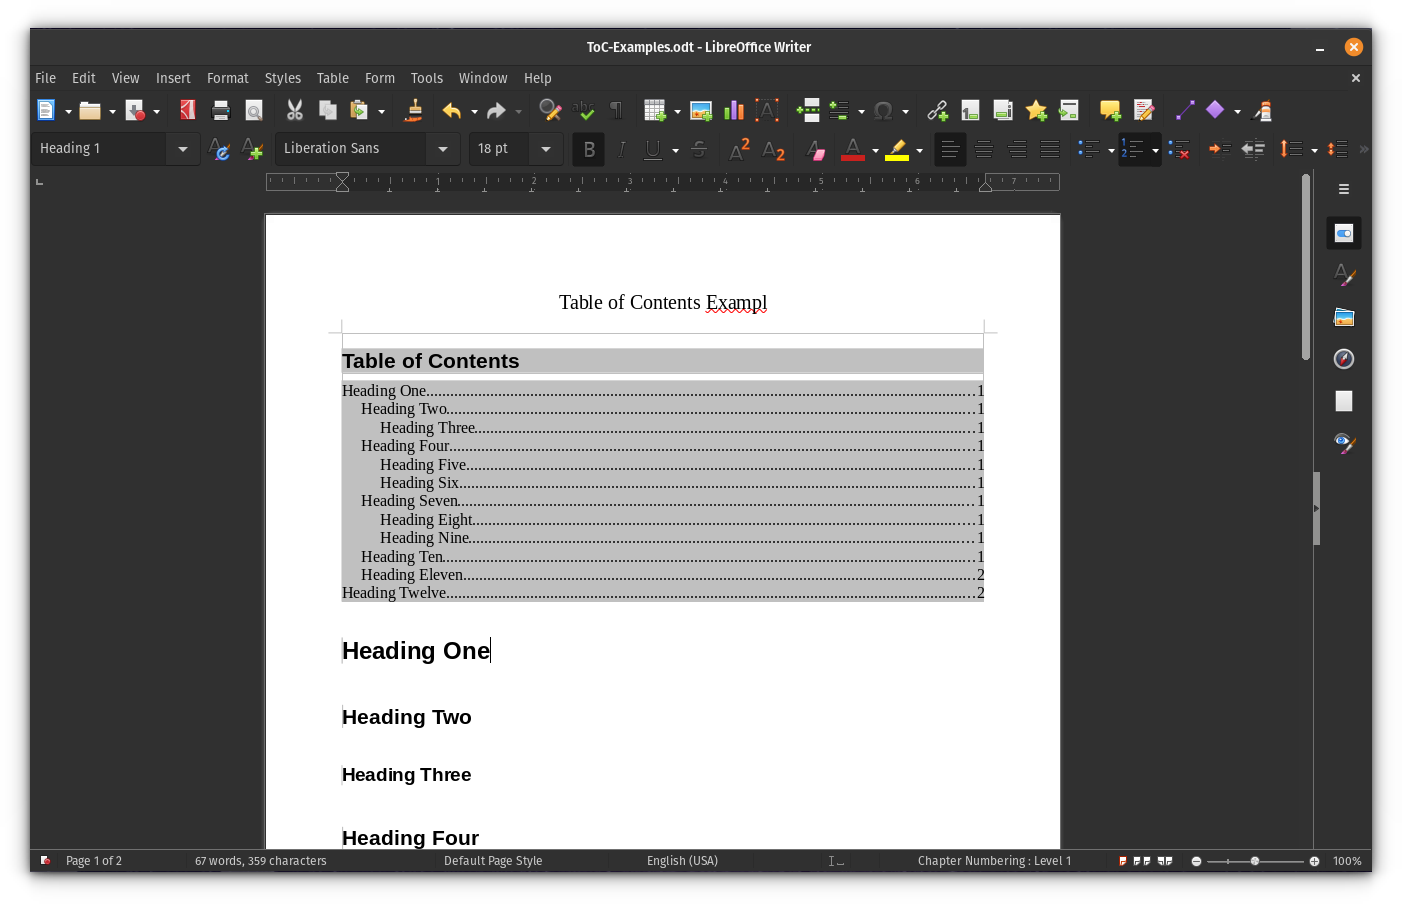
This will add a simple table of contents for your entire document based on the headings.
Edit an existing table of contents
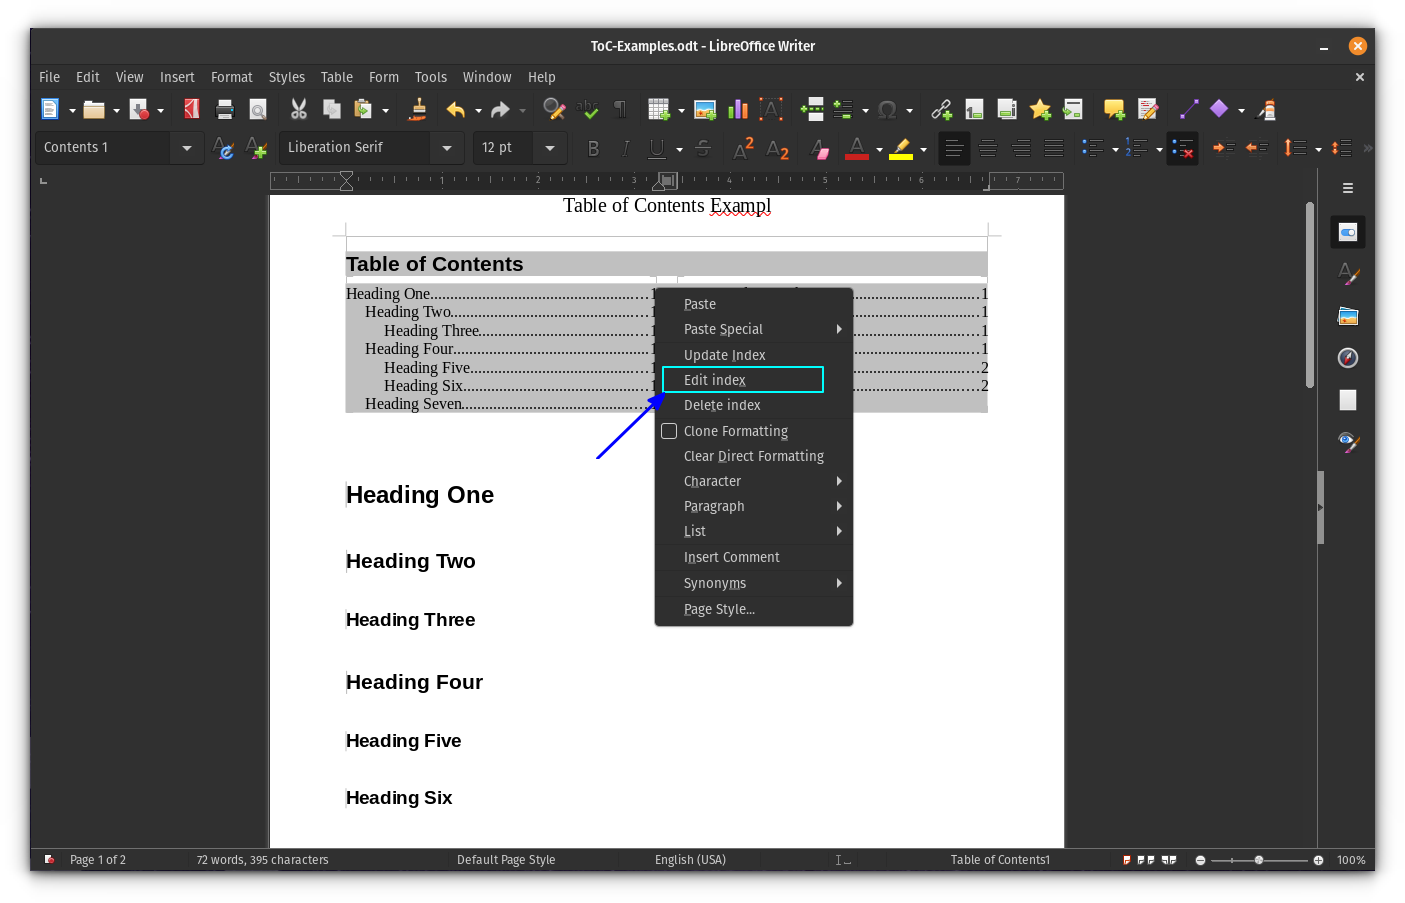
To tweak the properties of an existing table of contents, right-click on it and select "Edit Index":
This will open the Table of Contents dialog box, where you can make the changes like the color of the table of contents, etc.
Update the table of contents
If you add a table of contents, it is write-protected by default. This means it won't change automatically as the user updates the document.
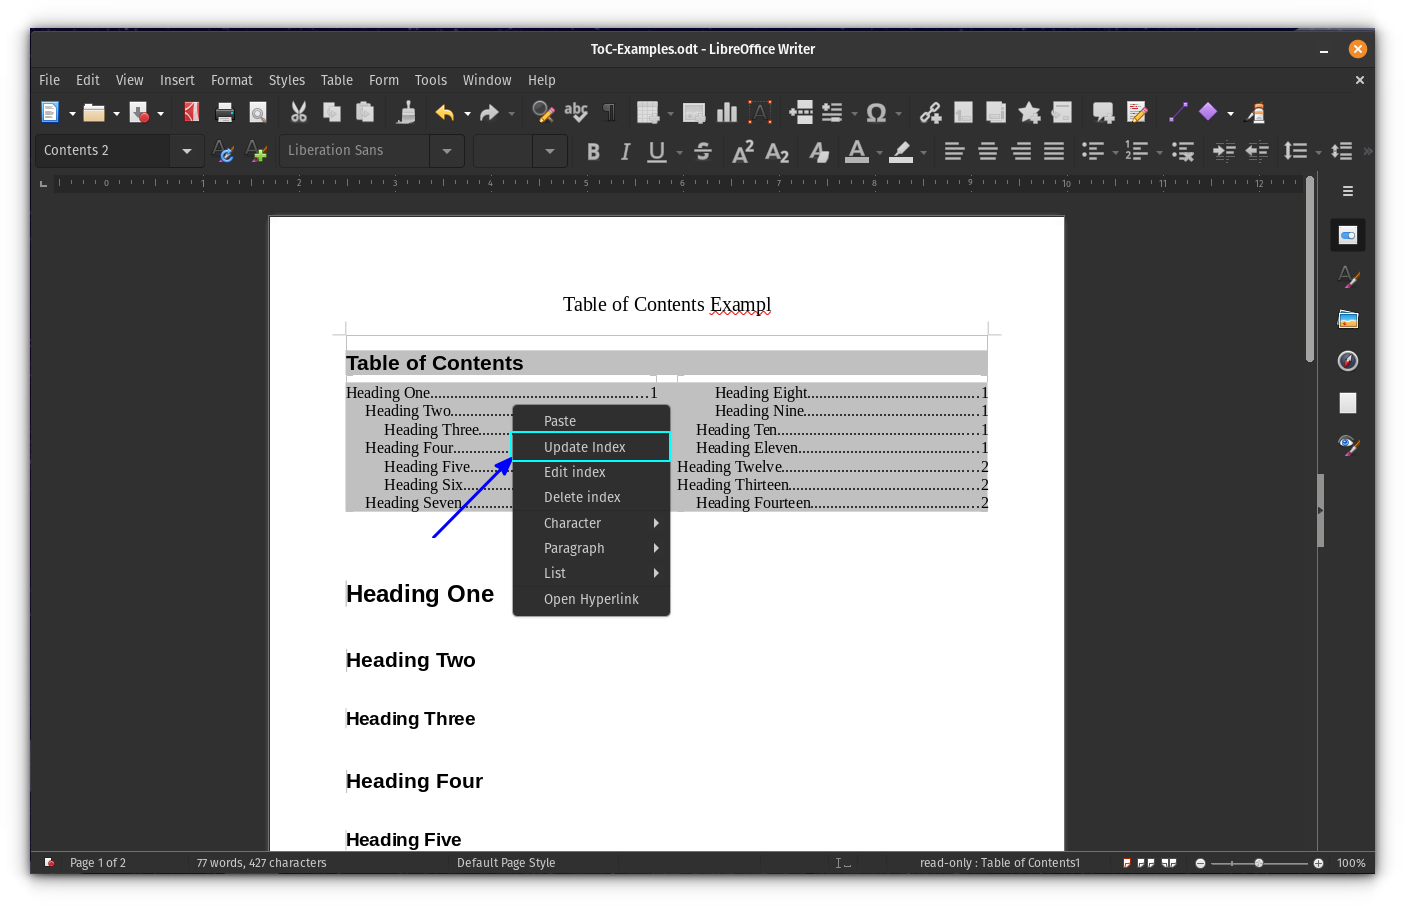
If you want to make the changes reflect on the Table of Contents, right-click on the ToC and select “Update Index”.
Automatically update the ToC as you add subheadings
But sometimes, for convenience, you may want to update your ToC automatically as you add additional headings.
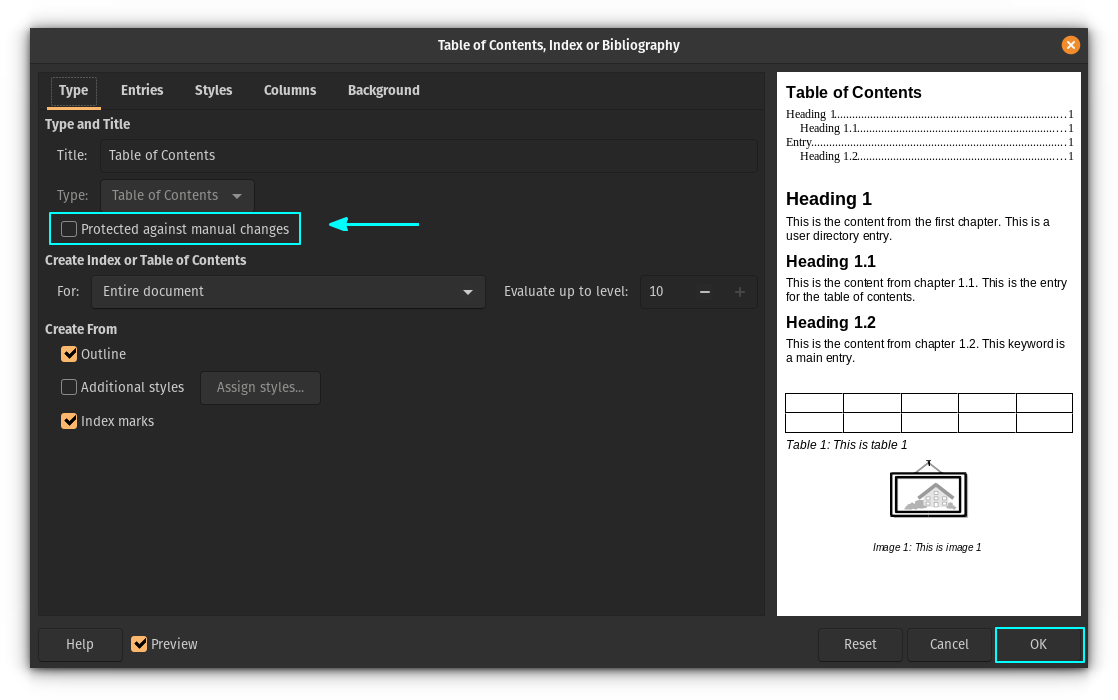
For this, uncheck the Protect against manual changes box on the Table of Contents dialog box. This will give the required permissions to modify the ToC automatically.
Multiple-columned table of contents
LibreOffice Writer allows you to add the table of contents in multiple columns.
Go to the Table of Contents dialog box by choosing the 'Edit index' option from the right click context menu.
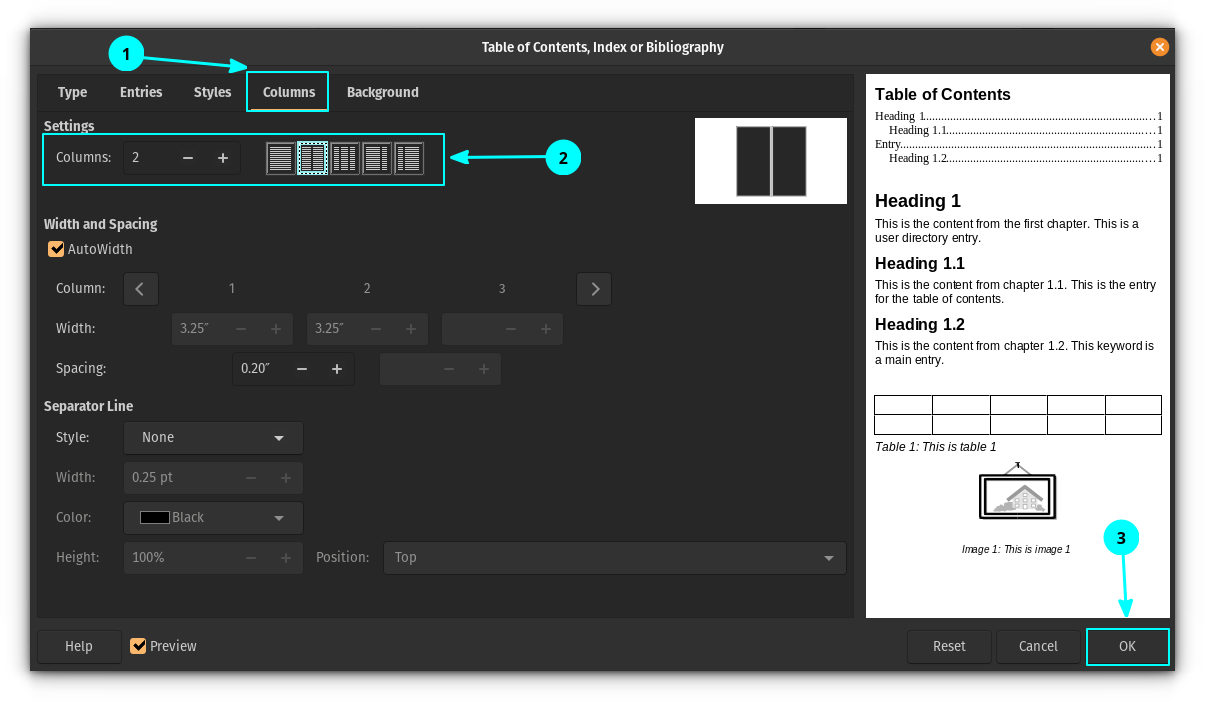
Now, go to the Columns tab. From there, you can change the appearance, like how many columns you want for the ToC.
Once you press the OK button, you can see the table of content changed into more than one column.
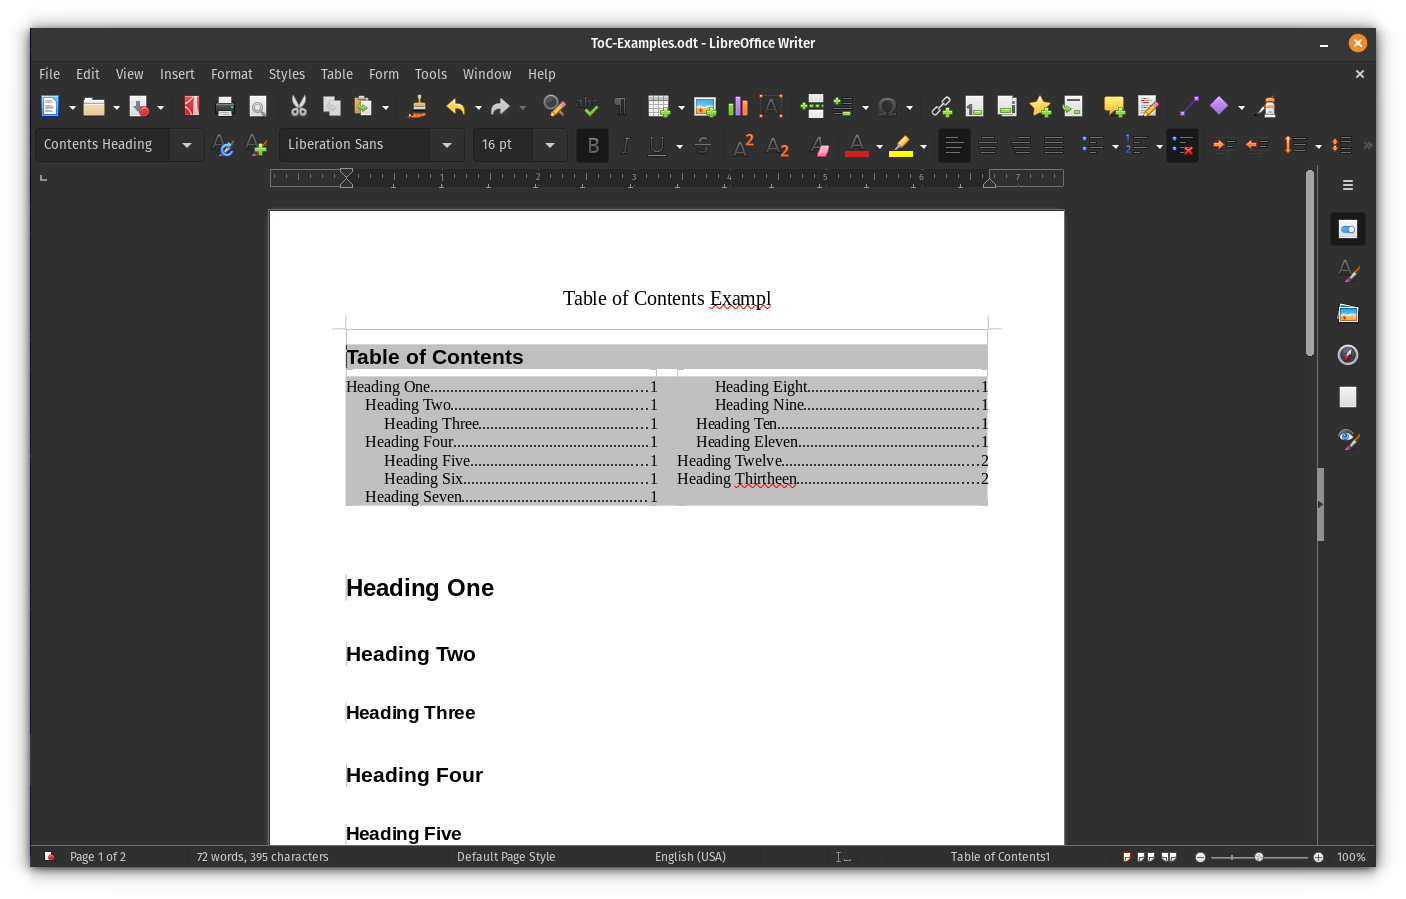
Table of contents for chapters
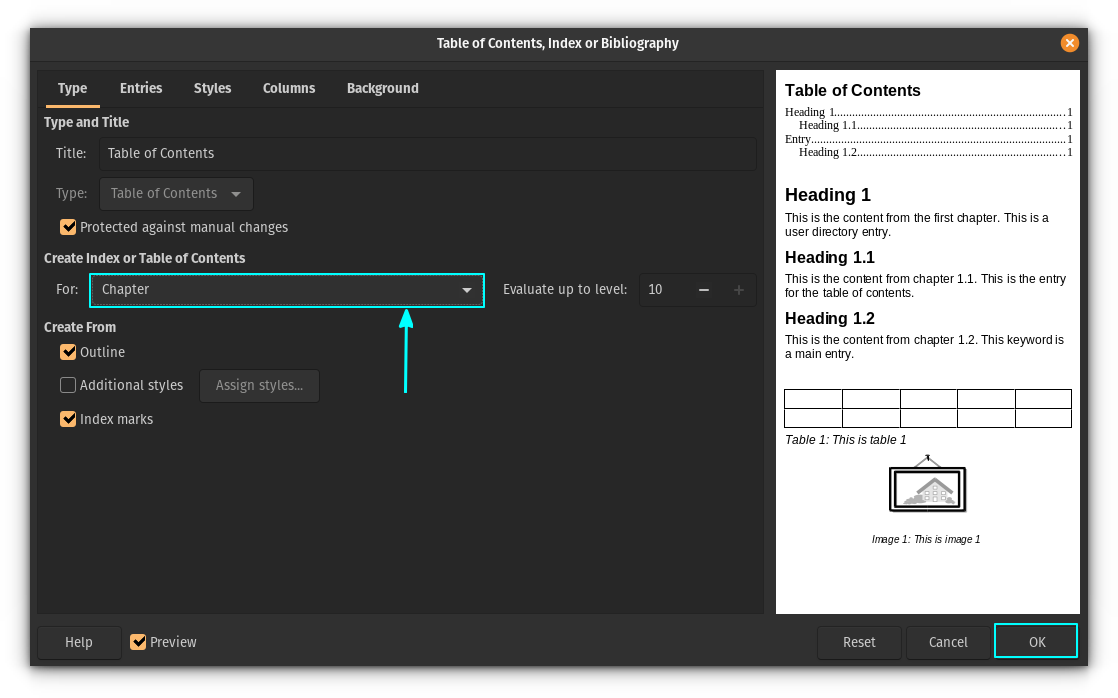
Don't want to apply ToC for the entire document? You can add ToC for chapters, too.
To do this, on the ToC dialog box, select "Chapters" instead of "Entire Document":
Create table of figures
Some academic documents require a table for all the figures and diagrams used.
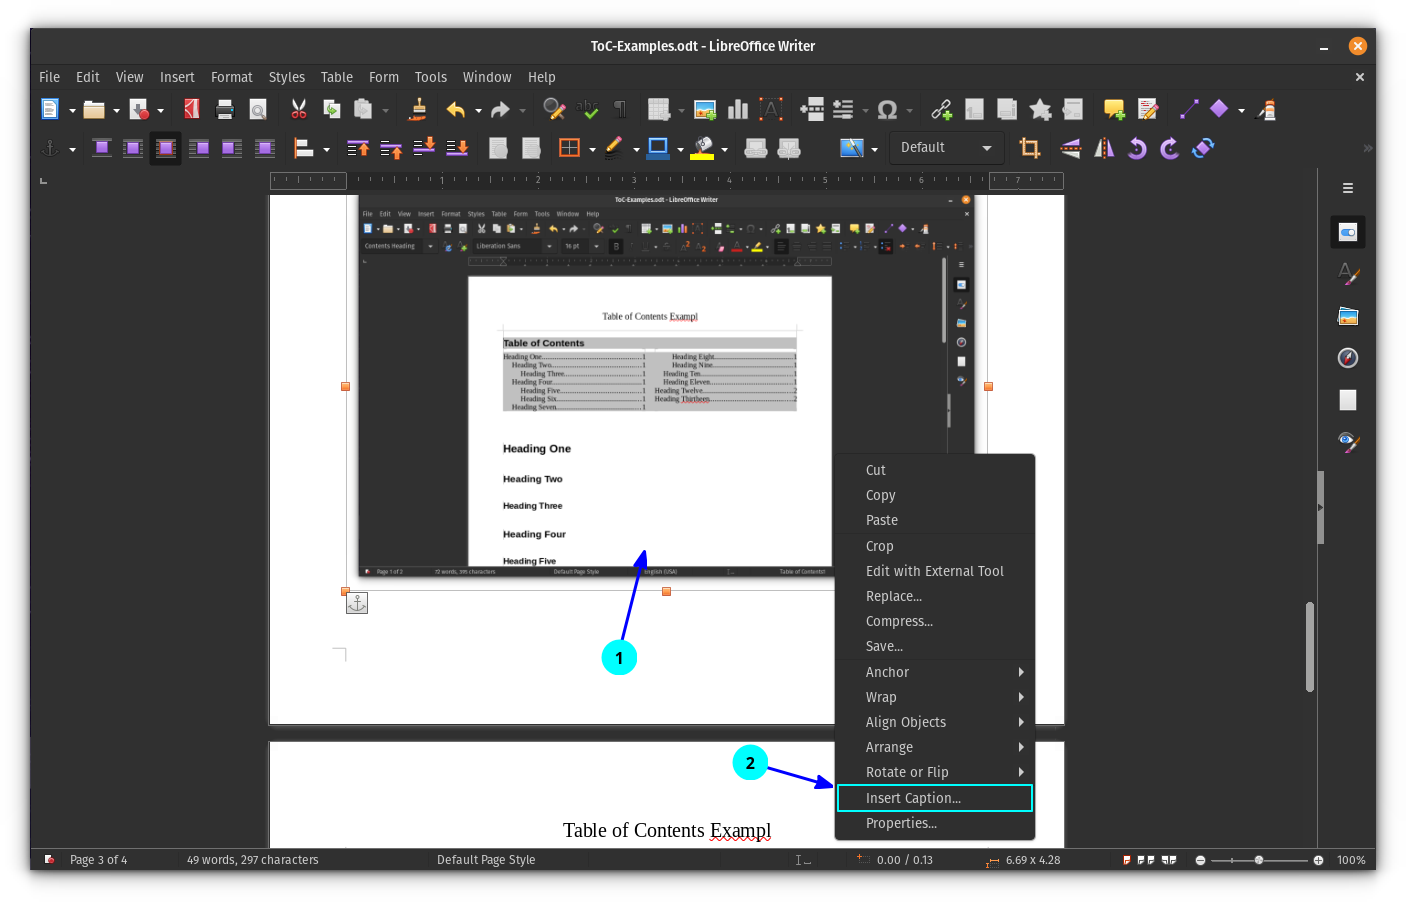
To create the table of figures, you need to add captions to your image. To do that, right-click on an image you inserted and select "Insert Caption":
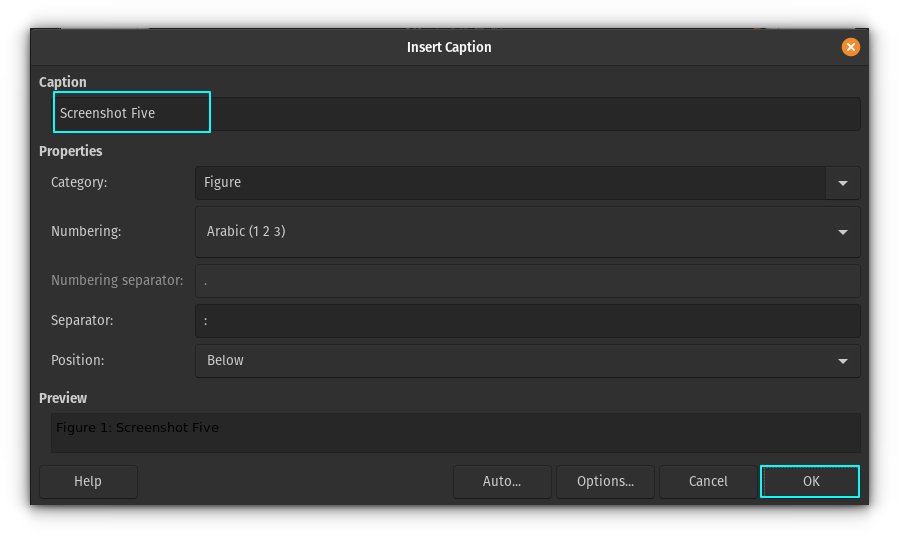
On the next screen, enter the caption for that image and click OK.
Once you have the captions for all the figures, position the cursor on a place where you want to add the table of figures. Now, select Insert > Table of Contents and Index.
From there, select “Table of Figures” from the dropdown menu on the Table of Contents dialog box.
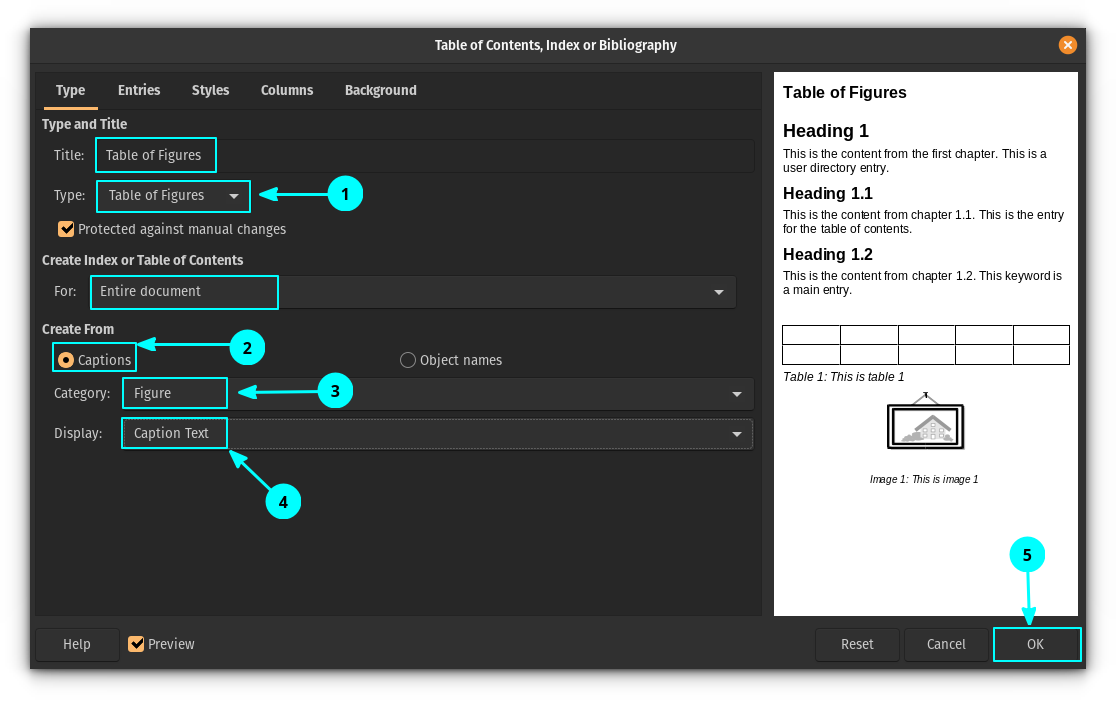
Here, you can see that I have selected the Captions option and selected "Figure" as Category and "Caption Text" as Display.
This way, it will create a Table of Figures with the caption text as entries.
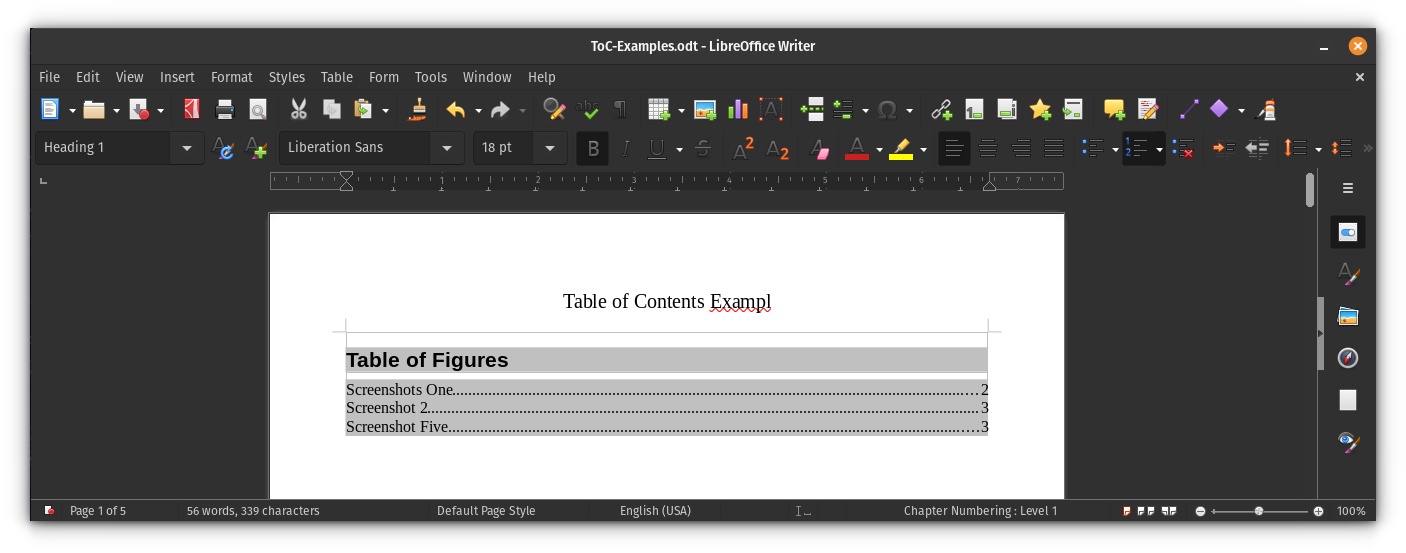
You can CTRL + click on the entry to navigate between them.
Create an index of tables
An index of tables comes in handy when your document has many tables. In fact, some academic documents require an index of tables.
First, as in the case of the table of figures, adding a caption to your tables will be very helpful in retrieving information. So, right-click on the tables you have added and select “Insert Caption”. Now, provide a caption text and click OK.
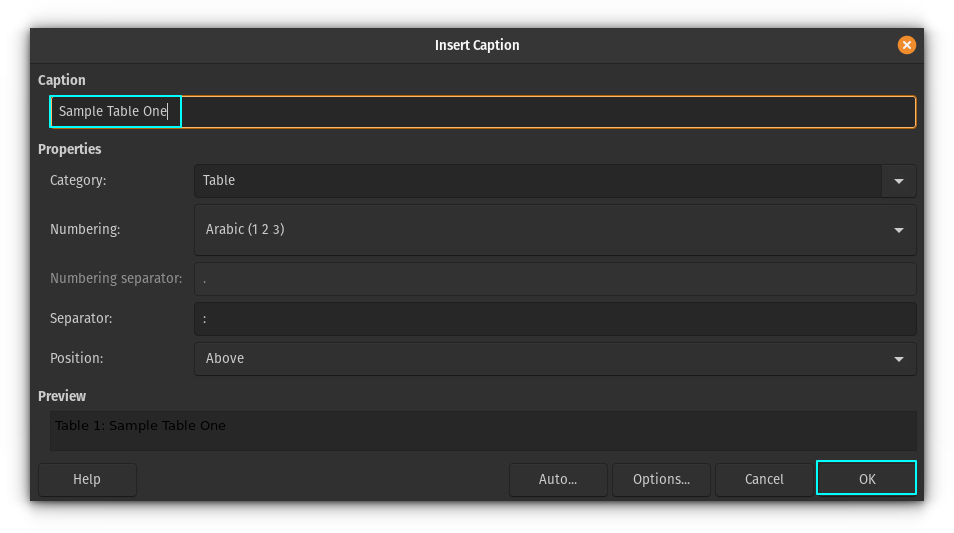
Once the tables are ready with the caption, position your cursor on the document where you want the Index of Tables to appear. Now, click on Insert > Table of Contents and Index. Select Index of Tables from the drop-down in the Table of Contents dialog box.
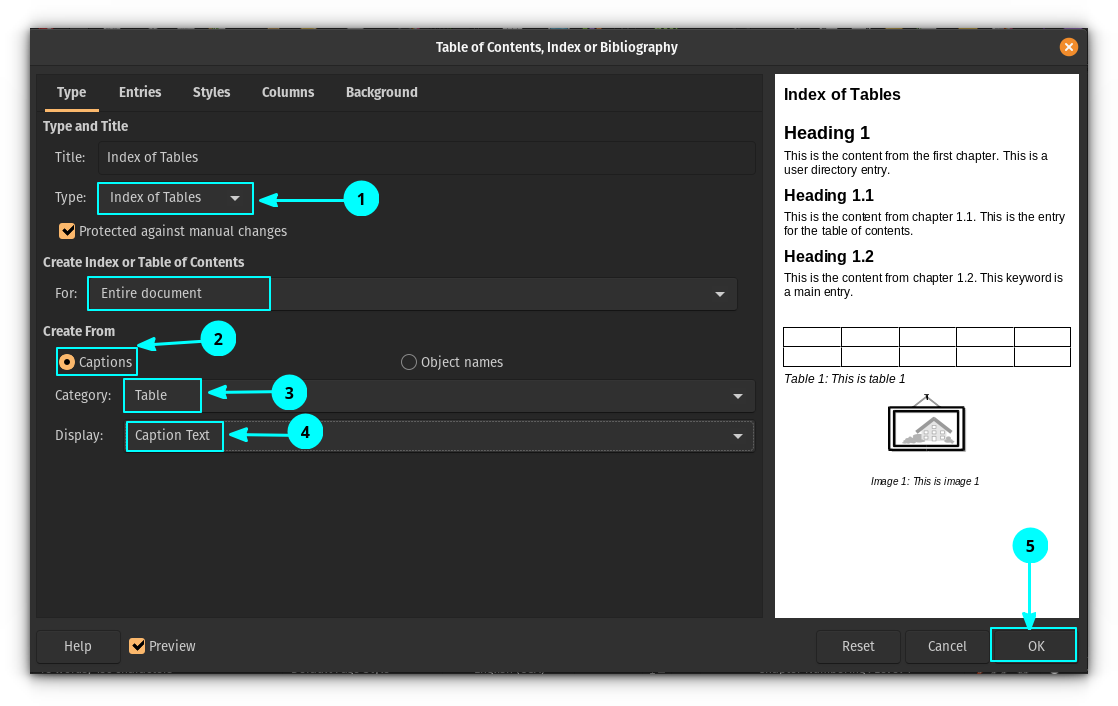
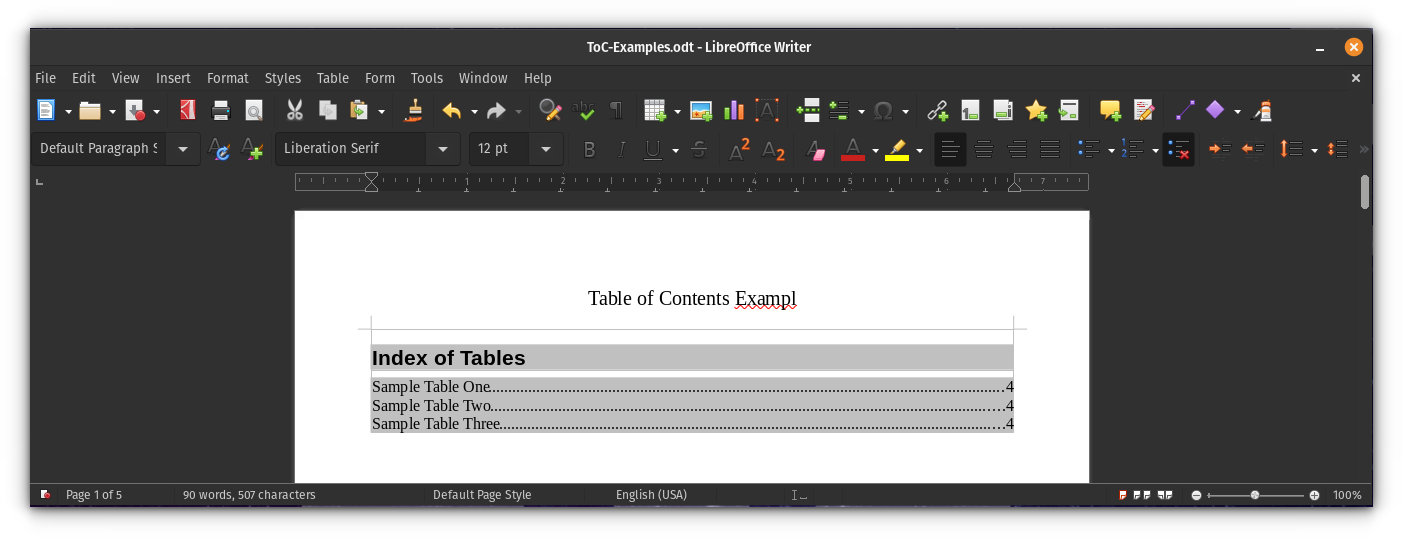
Upon clicking OK, you can see that an Index of Tables has been added.
Bonus: Make table of content attractive
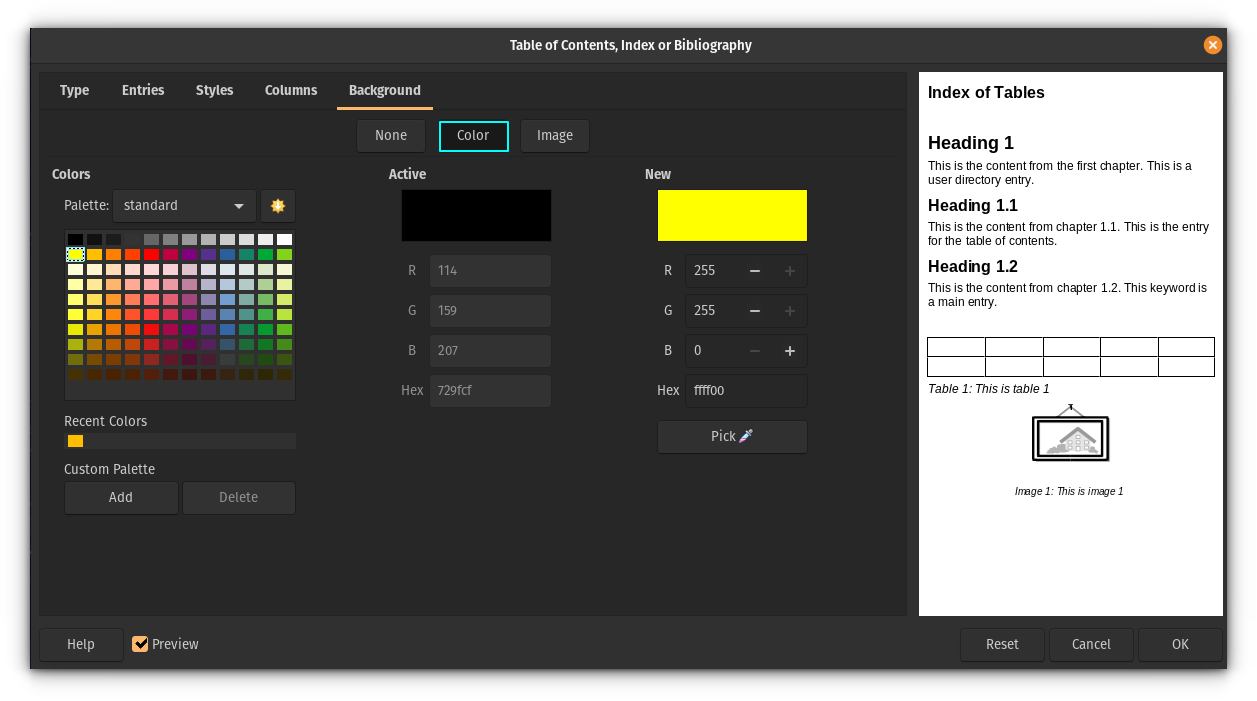
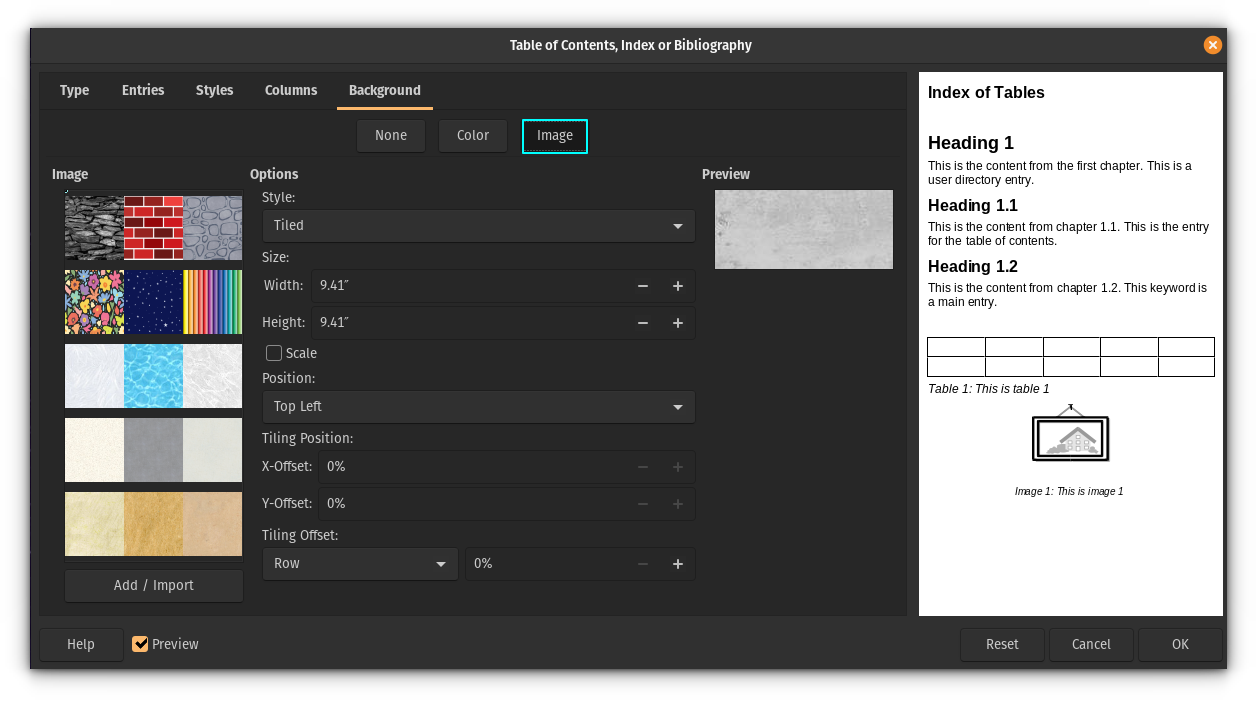
It is possible to make the ToC more attractive by changing the color, adding background image, etc. You can do this on the Table of Contents Dialog box.
For this, go to the "Background" tab. From there, select the color button to apply different background colors to your Table of Contents blocks.
Or, select the “Image” button to add images, textures, etc. as background for your Table of Content.
More on LibreOffice
There are many more advanced Table of Contents settings in LibreOffice. You can try them all in a sample document.
You may also check out this article on LibreOffice tips.
Did you find any other productivity tips and suggestions on this? Comment them below.
It's FOSS turns 13! 13 years of helping people use Linux ❤️
And we need your help to go on for 13 more years. Support us with a Plus membership and enjoy an ad-free reading experience and get a Linux eBook for free.
To celebrate 13 years of It's FOSS, we have a lifetime membership option with reduced pricing of just $76. This is valid until 25th June only.
If you ever wanted to appreciate our work with Plus membership but didn't like the recurring subscription, this is your chance 😃


