

Got a large digital media library thanks to your old DVD and Blue Ray collection? A media server will enhance your movie watching experience.
sFirst, your media library gets displayed like Netflix and other streaming services. You get to resume your playback or add titles to your watchlist.
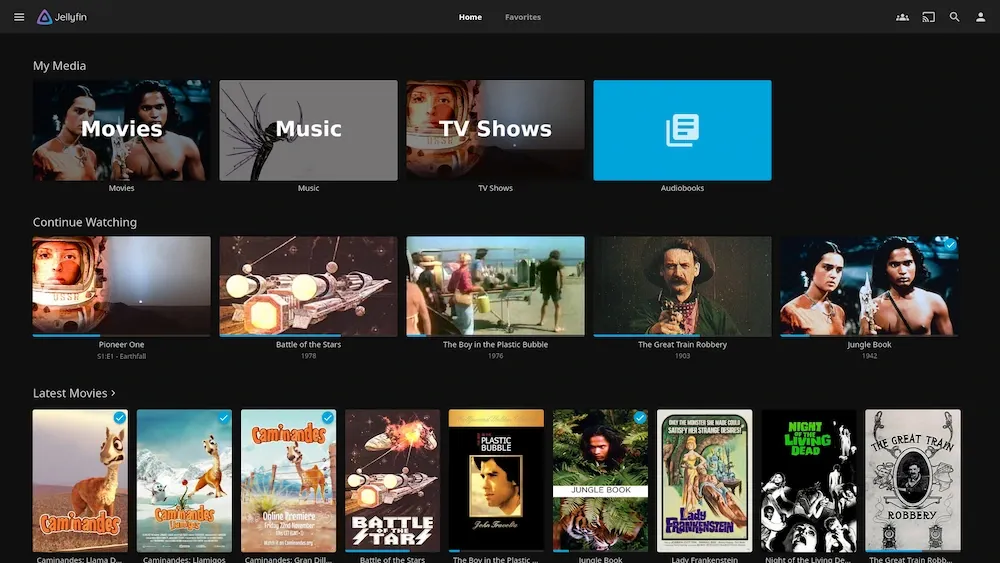
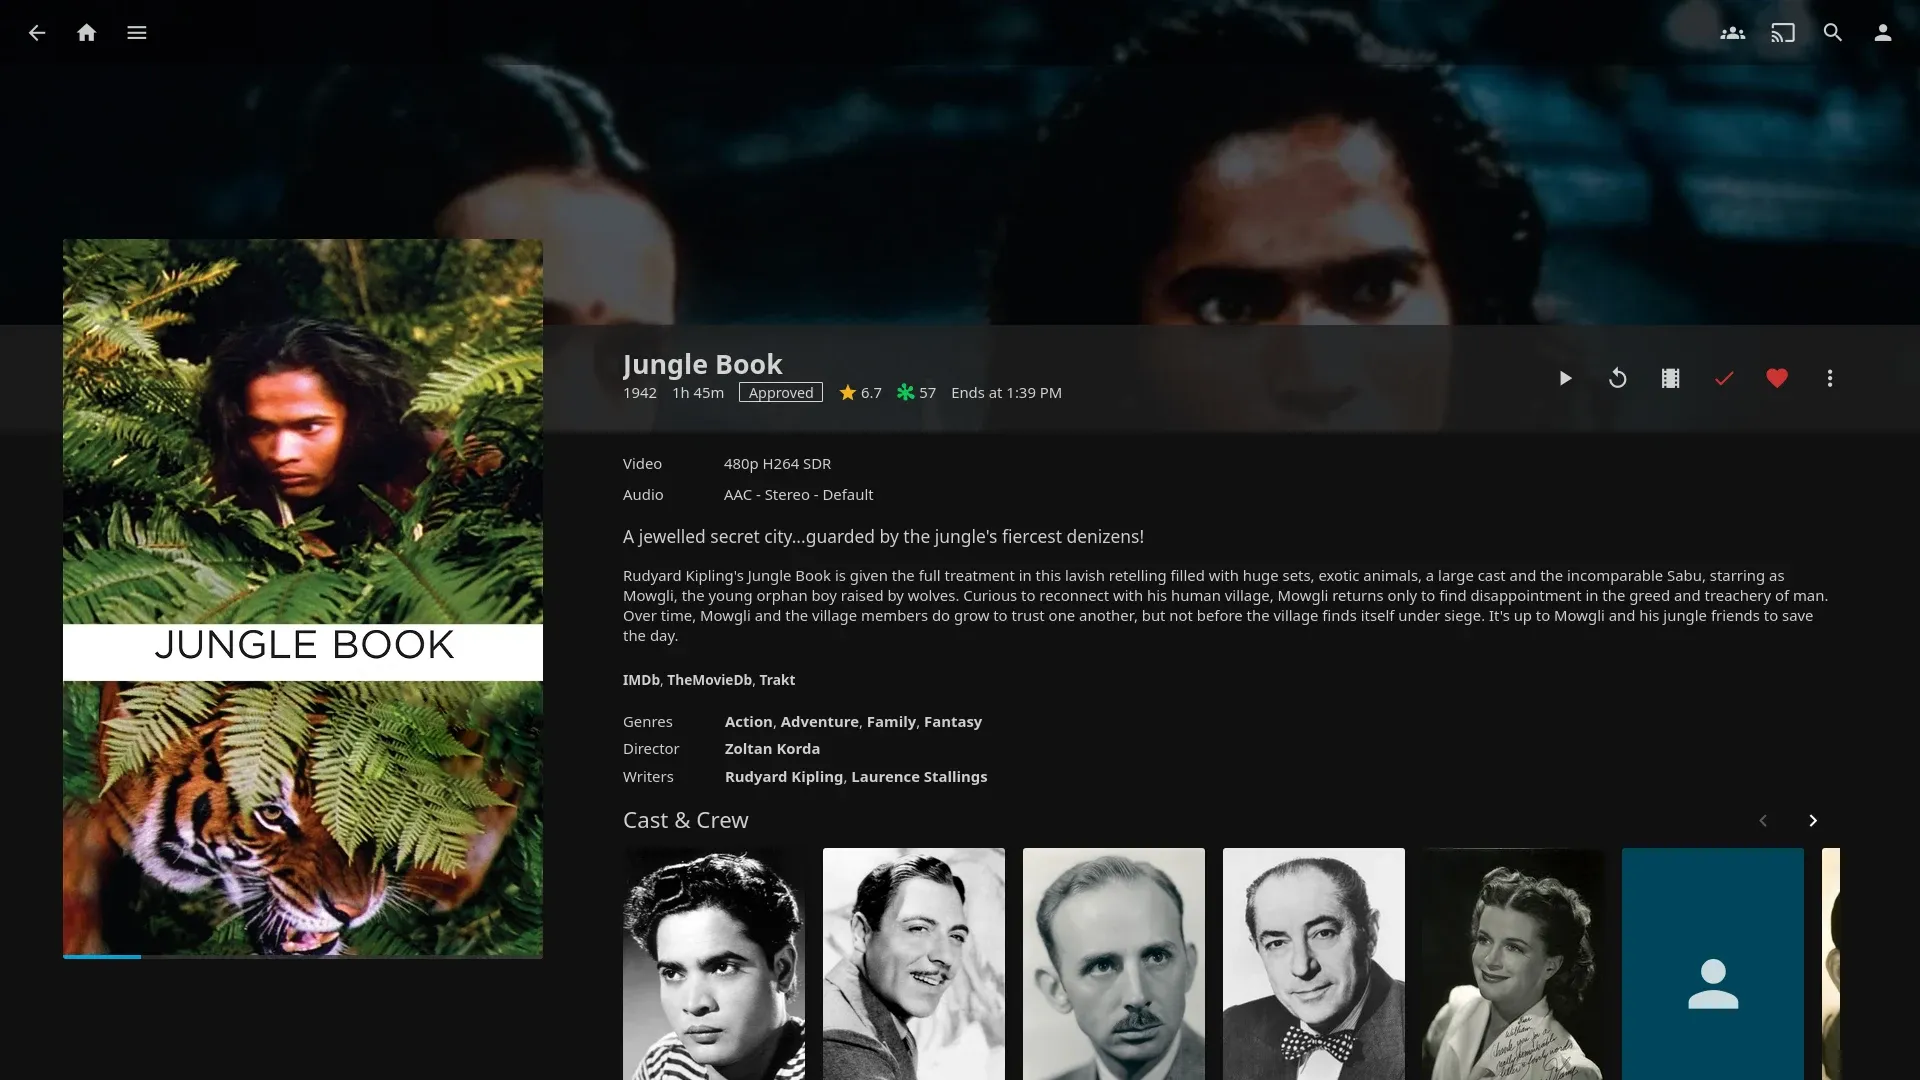
Other than that, you also get a dedicated page for each title that shows movie synopsis, cast, ratings and more.
That's not it. You can also 'stream' the movies and TV shows to your TV or other computers easily if they are connected to the same network.
There are several media servers available for Linux, but Jellyfin is my favorite open source tool for self-hosting media. Apart from being the media server, it also has the functionality of DVR and live TV (may require some additional configuration).
Hosting a media server is also one of the easiest projects you can build with Raspberry Pi.
In this tutorial, I'll show you how I set up Jellyfin media server on my Raspberry Pi to stream content to other devices connected to my home network. You should be able to achieve the same following the steps mentioned here.
Requirements
I am using a Raspberry Pi 4 for this project. It has 4 GB of RAM but you can use any Raspberry Pi model, although the performance might vary.
During my testing, there was not much difference between Pi 3 and 4 performance while playing a file locally on the network without any hardware transcoding. However, if you do want to transcode, then I think a Pi 4 will be a good fit for this.
- Raspberry Pi with Raspbian OS (or other Debian/Ubuntu based distro)
- Ethernet cable (optional but provides faster speed)
- Keyboard & mouse (it's optional as you can SSH into your Raspberry Pi and set up from your regular computer)
- External HDD/SSD (this is where you'll have your media files stored)
Installing Jellyfin on Raspbian OS
Before you begin adding the Jellyfin repository, make sure your Raspbian OS is updated
sudo apt update && sudo apt full-upgrade -yFirst you need to install a package called apt-transport-https as the apt package manager does not come default with the support of repositories running behind HTTPS.
sudo apt install apt-transport-https lsb-releaseNext, you need to import the GPG signing key of the repo:
curl https://repo.jellyfin.org/debian/jellyfin_team.gpg.key | gpg --dearmor | sudo tee /usr/share/keyrings/jellyfin-archive-keyring.gpg >/dev/nullNow you can add the Jellyfin repository to your system using this command:
echo "deb [signed-by=/usr/share/keyrings/jellyfin-archive-keyring.gpg arch=$( dpkg --print-architecture )] https://repo.jellyfin.org/debian $( lsb_release -c -s ) main" | sudo tee /etc/apt/sources.list.d/jellyfin.listSince a new repository has been added, you need to run the update command once more to ensure that your system knows about the packages available from this new repo:
sudo apt updateNow it is the time to install Jellyfin.
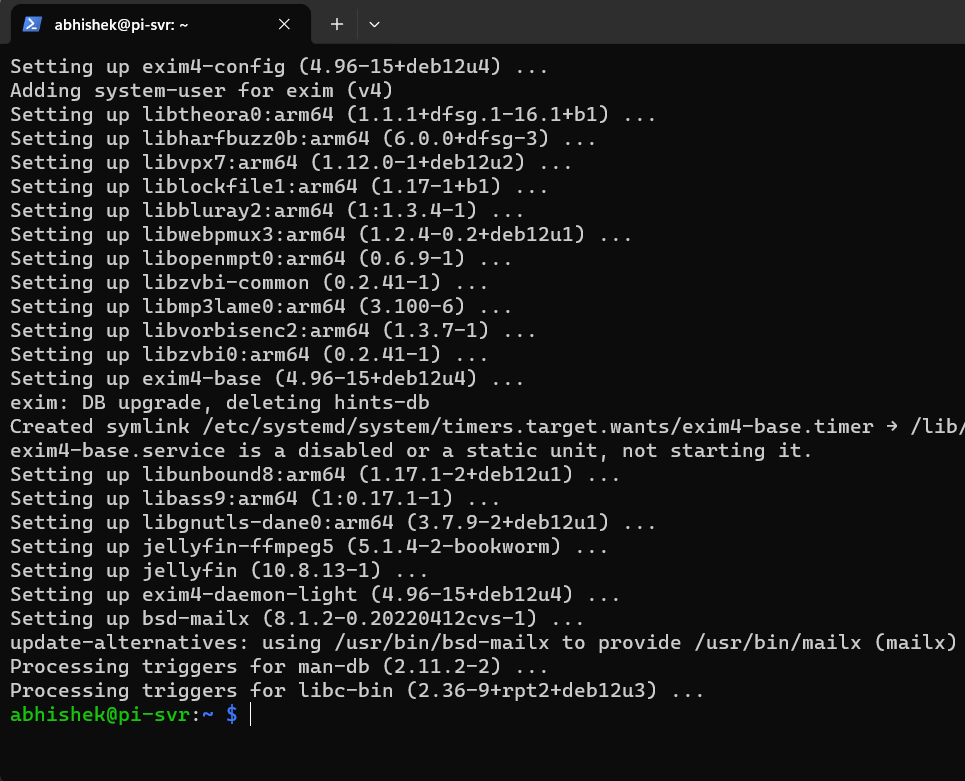
sudo apt install jellyfinIt will take some time to finish installation as Jellyfin will set up a few things in the background, such as a new user called jellyfin and this user can execute and need access to read your files.
If everything was set up correctly, you will see something like this:
Nice. Let's set up Jellyfin and make it streaming ready.
Setting up Jellyfin media server
Once Jellyfin has been installed, it will run automatically and to interact with it, you need to access its web UI.
Step 1: Access Jellyfin via web interface
If you are using it locally on the Raspberry Pi itself, then you can simply type localhost:8096 and it will work.
But the whole purpose of setting up a server is to access it from other devices. For that, you need to know the IP address of your Pi.
The easiest way to know the IP Address of your Pi is to just type hostname -I in the terminal and once you know the IP, just type it in the browser:
http://[YOUR IP ADDRESS]:8096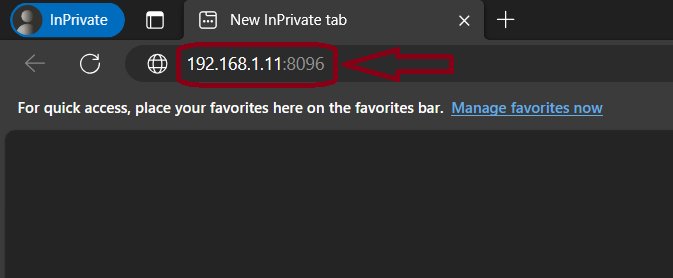
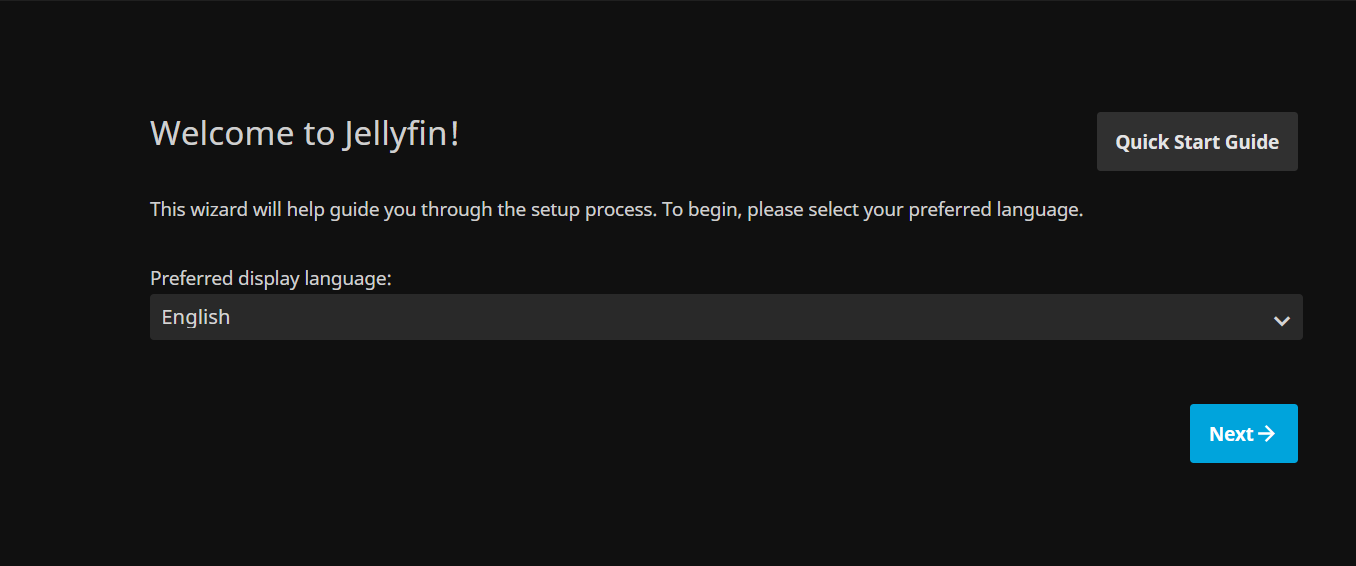
Step 2: Start Jellyfin configuration
You must set up Jellyfin before you start using it. When you first access Jellyfin, it will ask you to configure it.
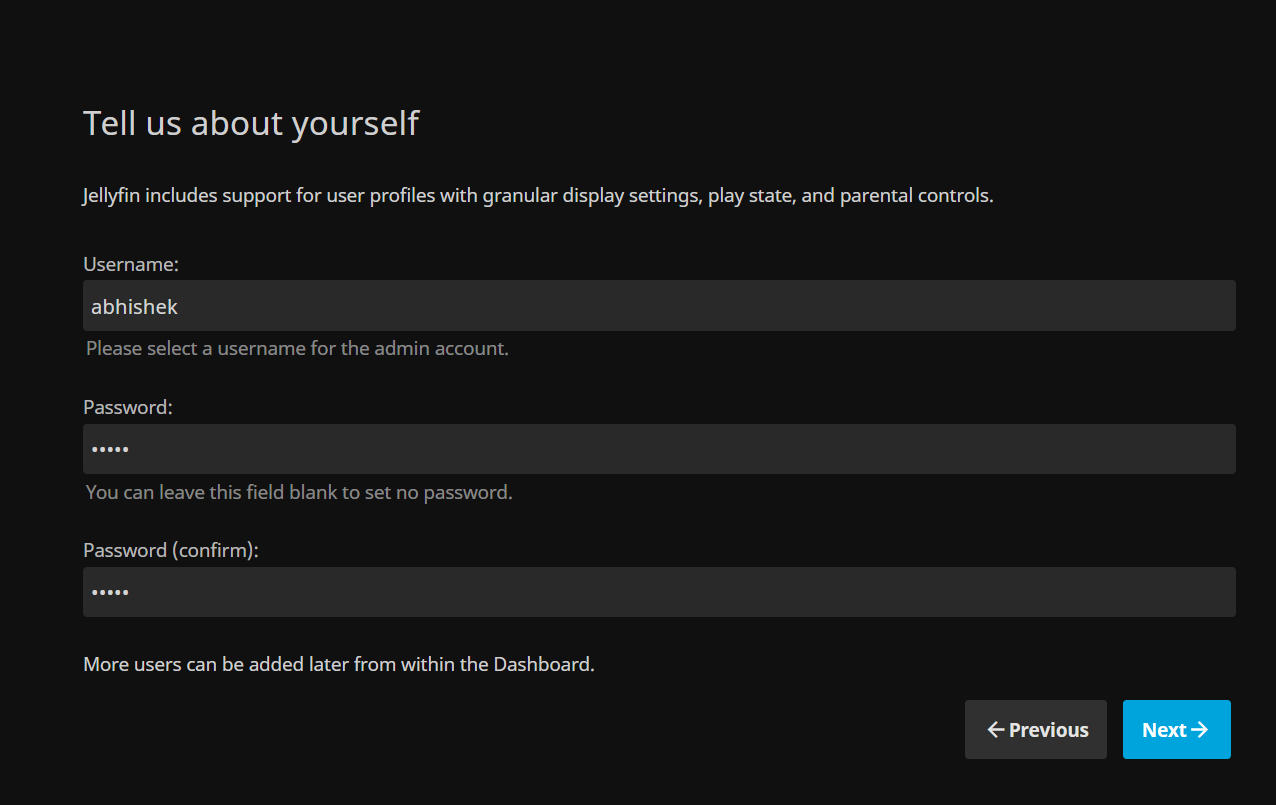
Step 3: Create user account
Then you have to set up user and password to protect your server from unauthorized access.
Step 4: Add your media library
Next, tt will ask you to select the media library i.e. the folder where you have stored your movies, shows and media files. You can mount your external drive as well. I suggest enabling auto-mount for external USB.
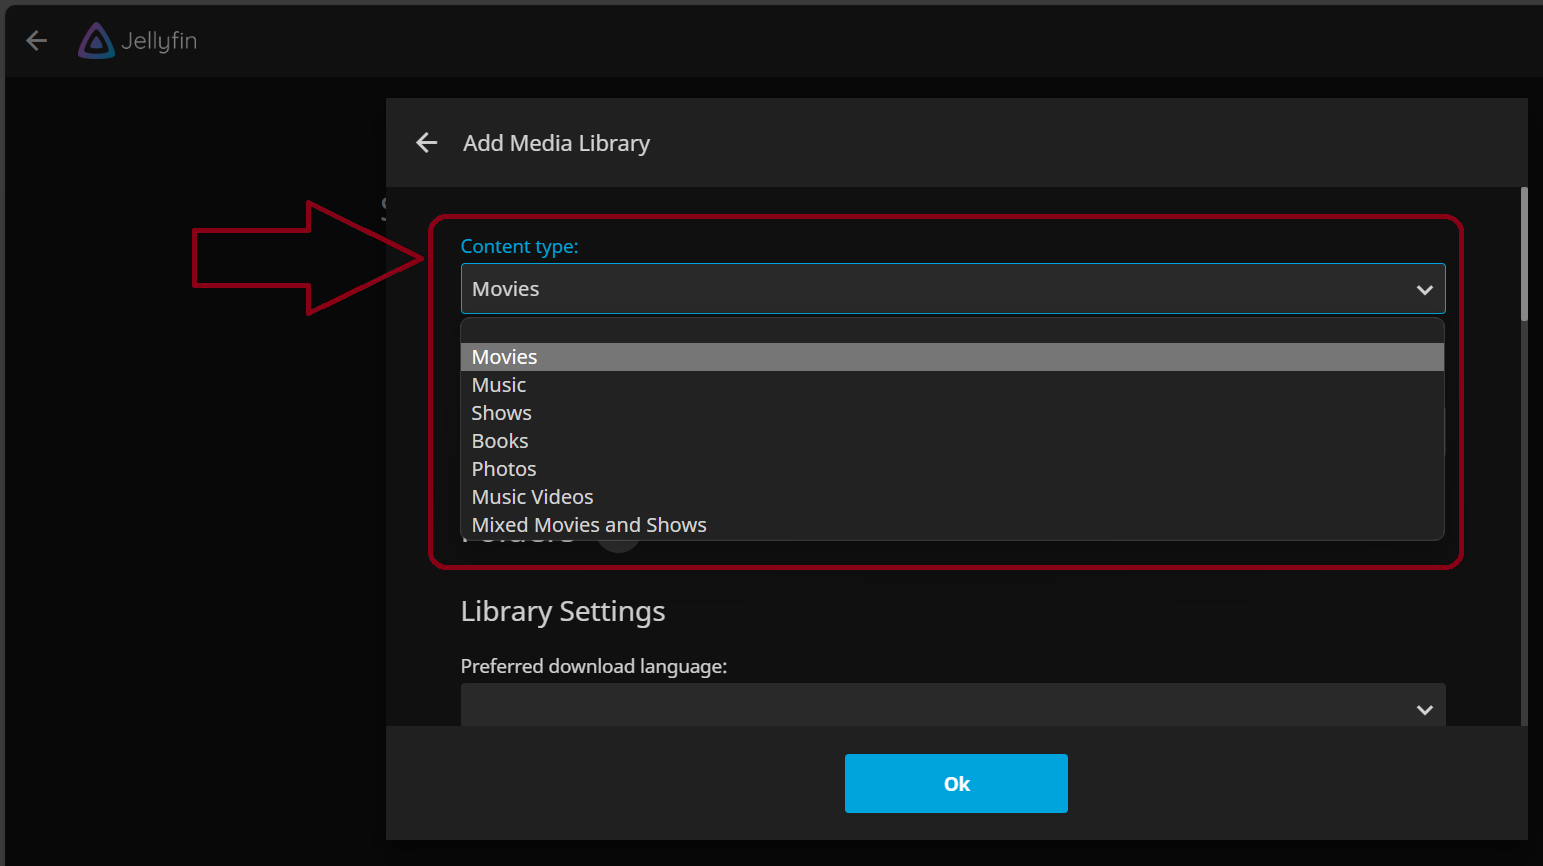
As you can see in the above screenshot, you have to first select the "Content type" which could be "Movies, TV Shows, Videos" etc.
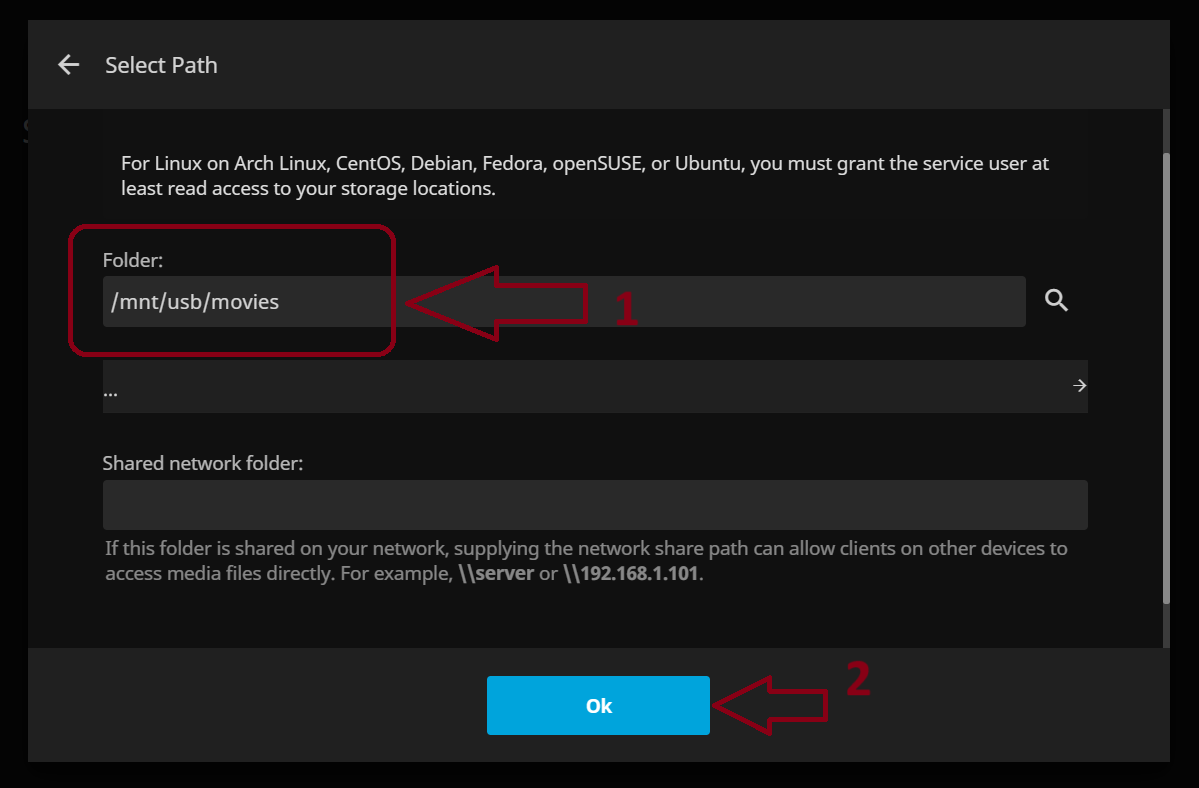
Then you need to add folders where your media files are located, to do that just press the + icon. (my media is located in /mnt/usb/movies folder). There are other settings that you can fiddle with below but I prefer to let them as default.
When you are done with it just press Next.
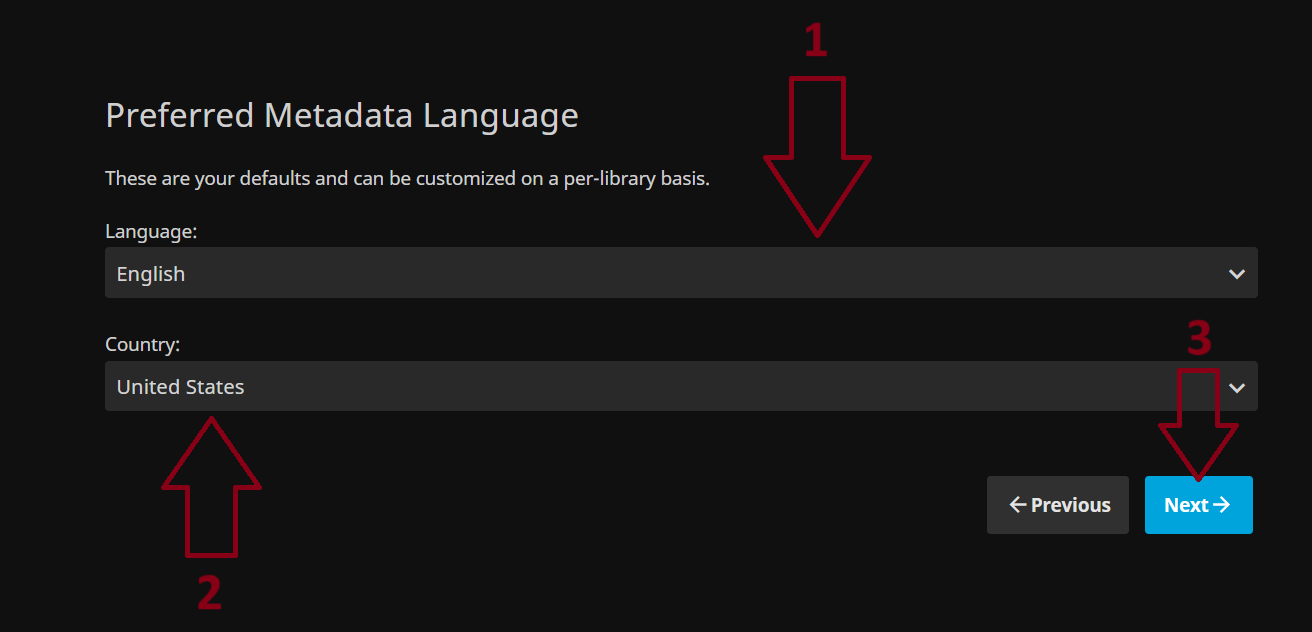
Step 5: Set up metadata language
On the next page, Jellyfin will prompt you again to select your preferred language for the metadata, as it maintains the metadata of the media you own locally. Press Next when done.
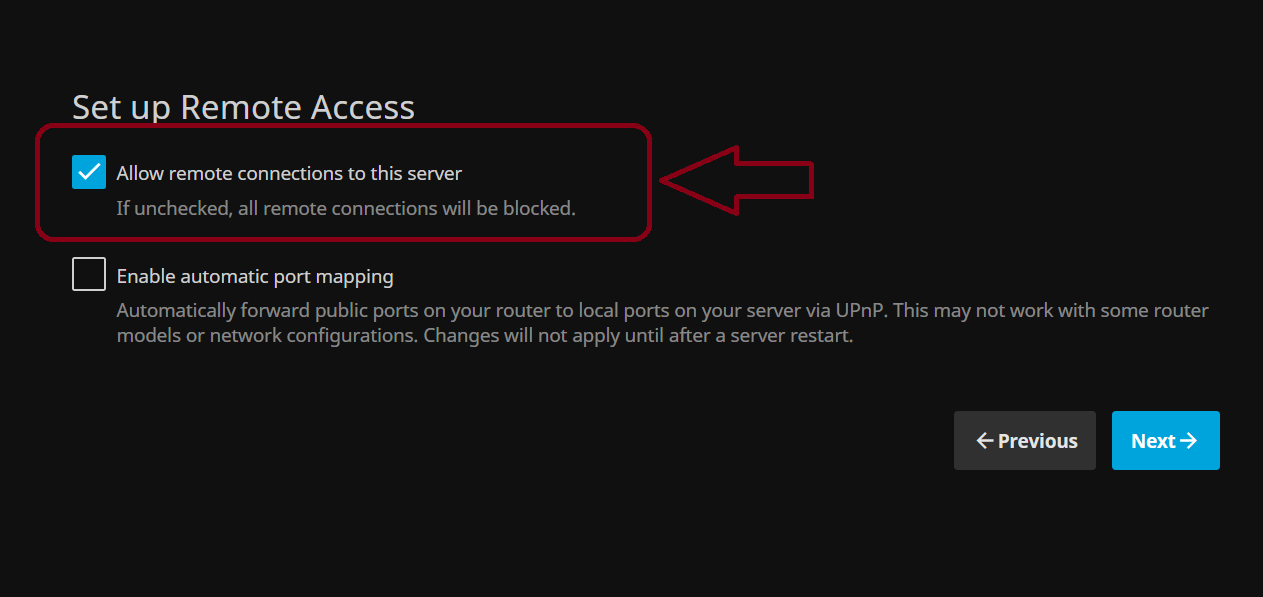
Step 6: Allow remote connection for streaming to other devices
This step is is important as here you have to select whether you want to Allow remote connections to this server i.e. accessing jellyfin from other devices and Enable automatic port mapping.
It already comes selected by default in my case and then press Next.
Step 7: Verify your Jellyfin set up
You are done setting up our Jellyfin and now just press Finish on the next page.

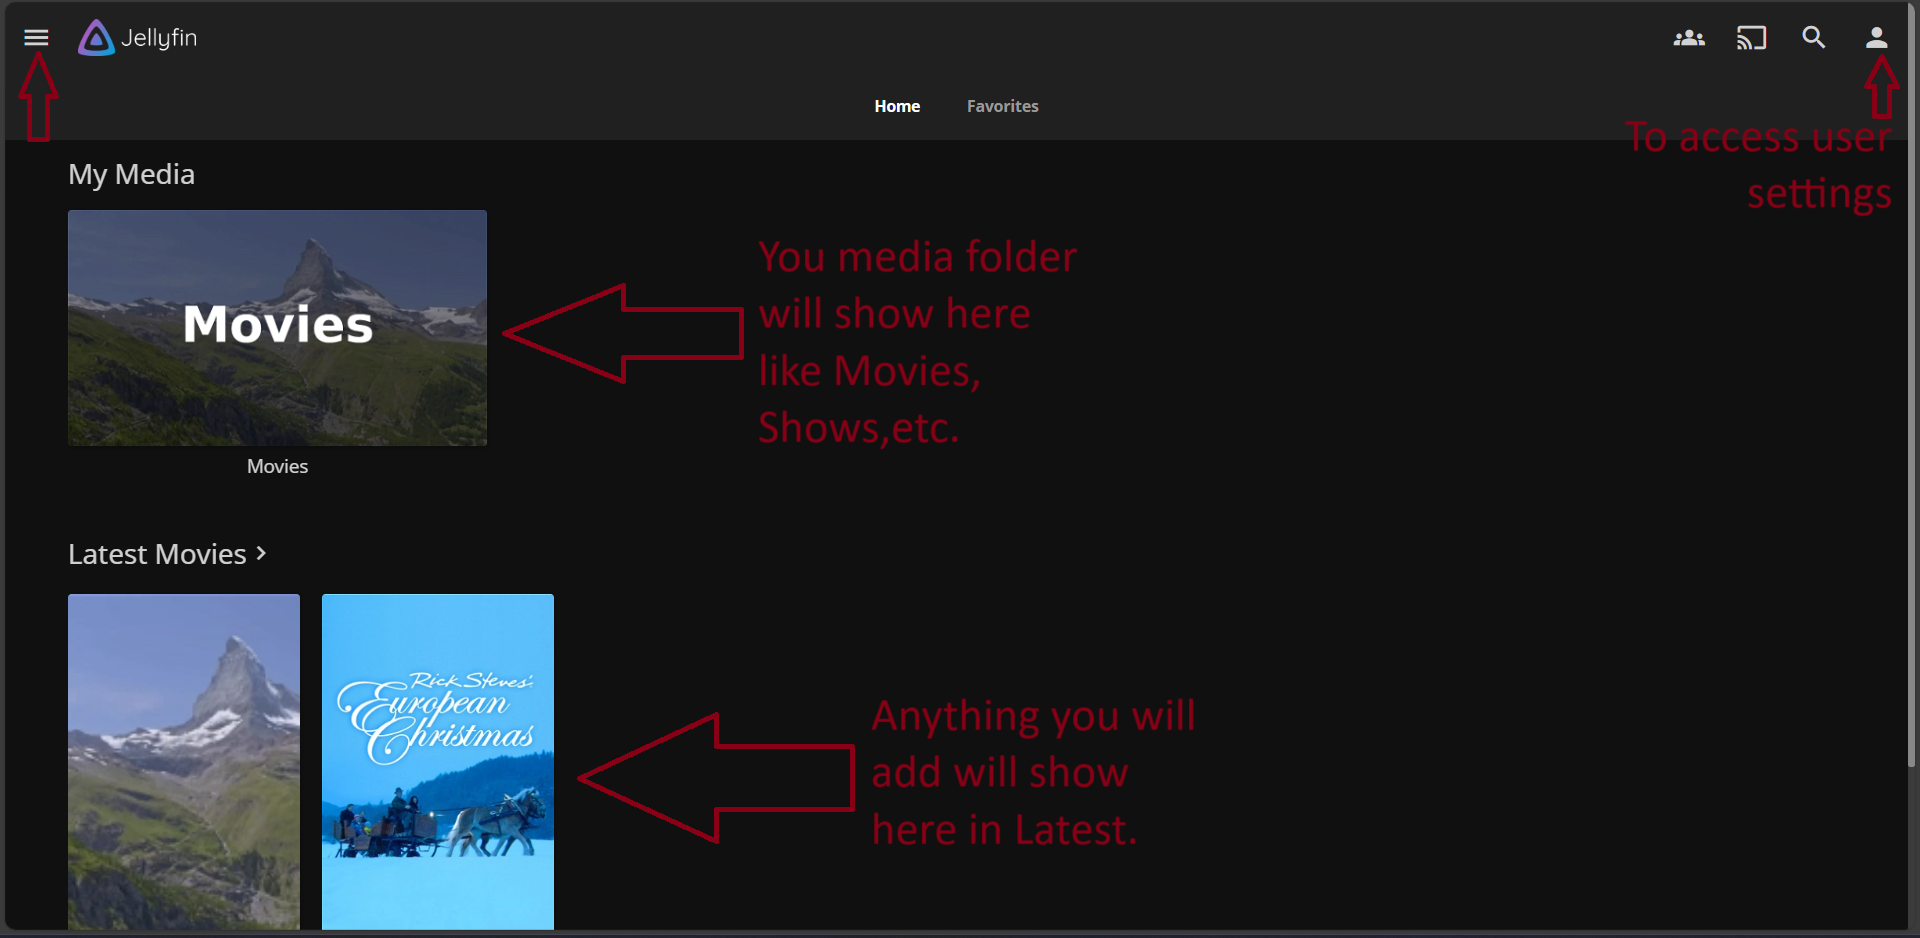
On the home screen, you are welcomed with all the movie/ TV collections you have added.You can play them either from the browser or from the official app Jellyfin app for your smart TV (needs to download app and use the same URL and port you used to access it via wbe browser).
Although this should be enough for you to enjoy movies and TV series but I think you can still improve a lot here by enabling hardware acceleration.
Optional: Using hardware acceleration for streaming on Jellyfin
If you want to stream your content on multiple devices, you don't always have to stress out your CPU, which might throttle if not cooled properly. It would be a good idea to let Jellyfin uses Pi's in-built GPU.
Step 1: Set up Raspberry Pi for hardware acceleration
On your Raspberry Pi, first add Jellyfin to video user group.
sudo usermod -aG video jellyfinThen you need to increase our Video memory as transcoding can be a pretty hefty task. You have to edit a config.txt file:
sudo nano /boot/config.txtGo to the end of the file and add the following code:
gpu_mem=320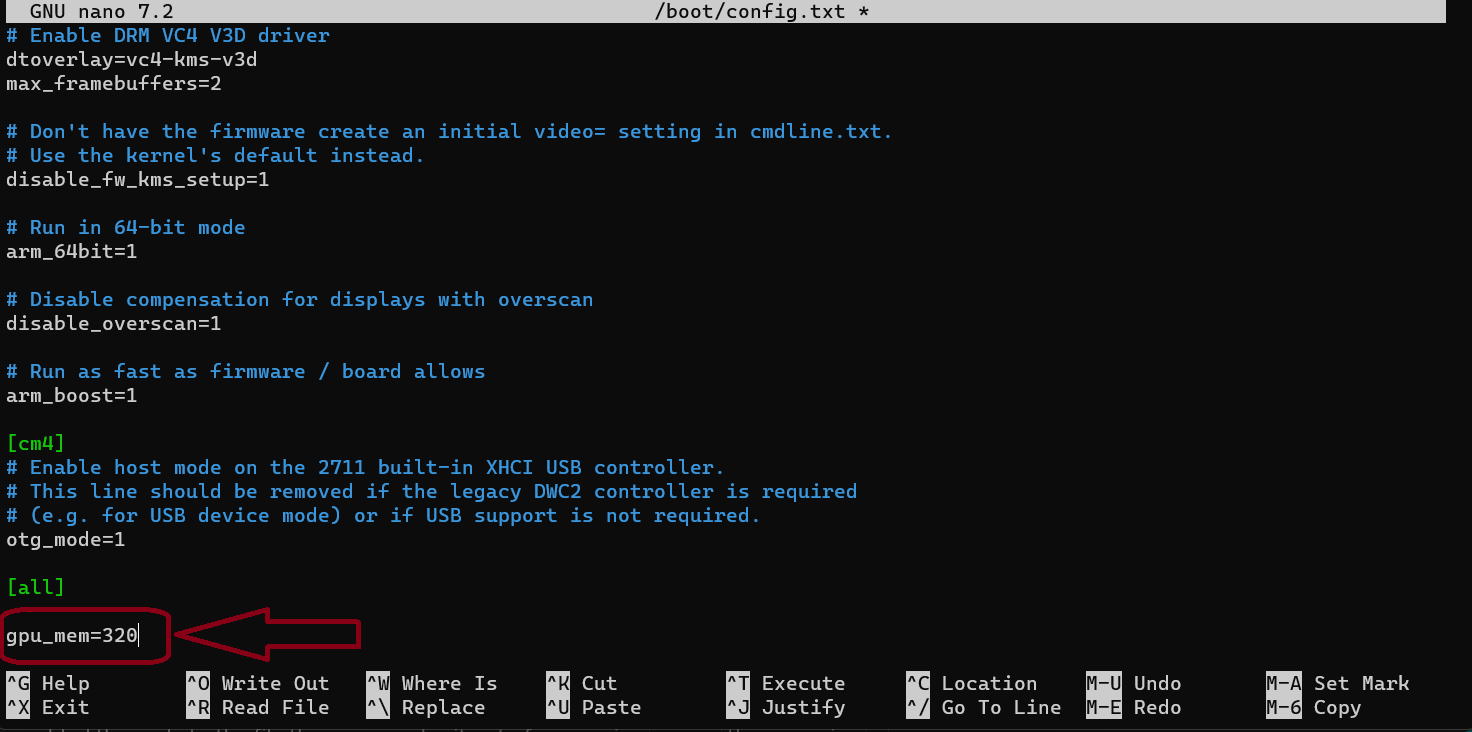
In the above picture, I am increasing Pi's default GPU memory, which is generally set around 76 MB to 320 MB
Save and exit Nano editor by using CTRL+X then pressing Y.
You also need to restart the Pi for the changes to take effect:
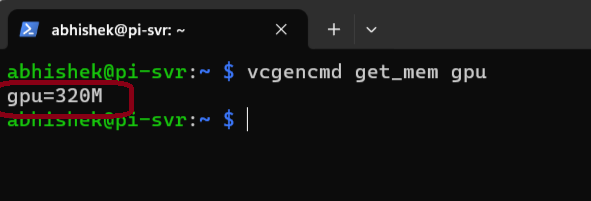
sudo reboot nowTo verify the changes to the allocated GPU memory, run:
vcgencmd get_mem gpuand the output should look like this:
Step 2: Enabling hardware acceleration in Jellyfin
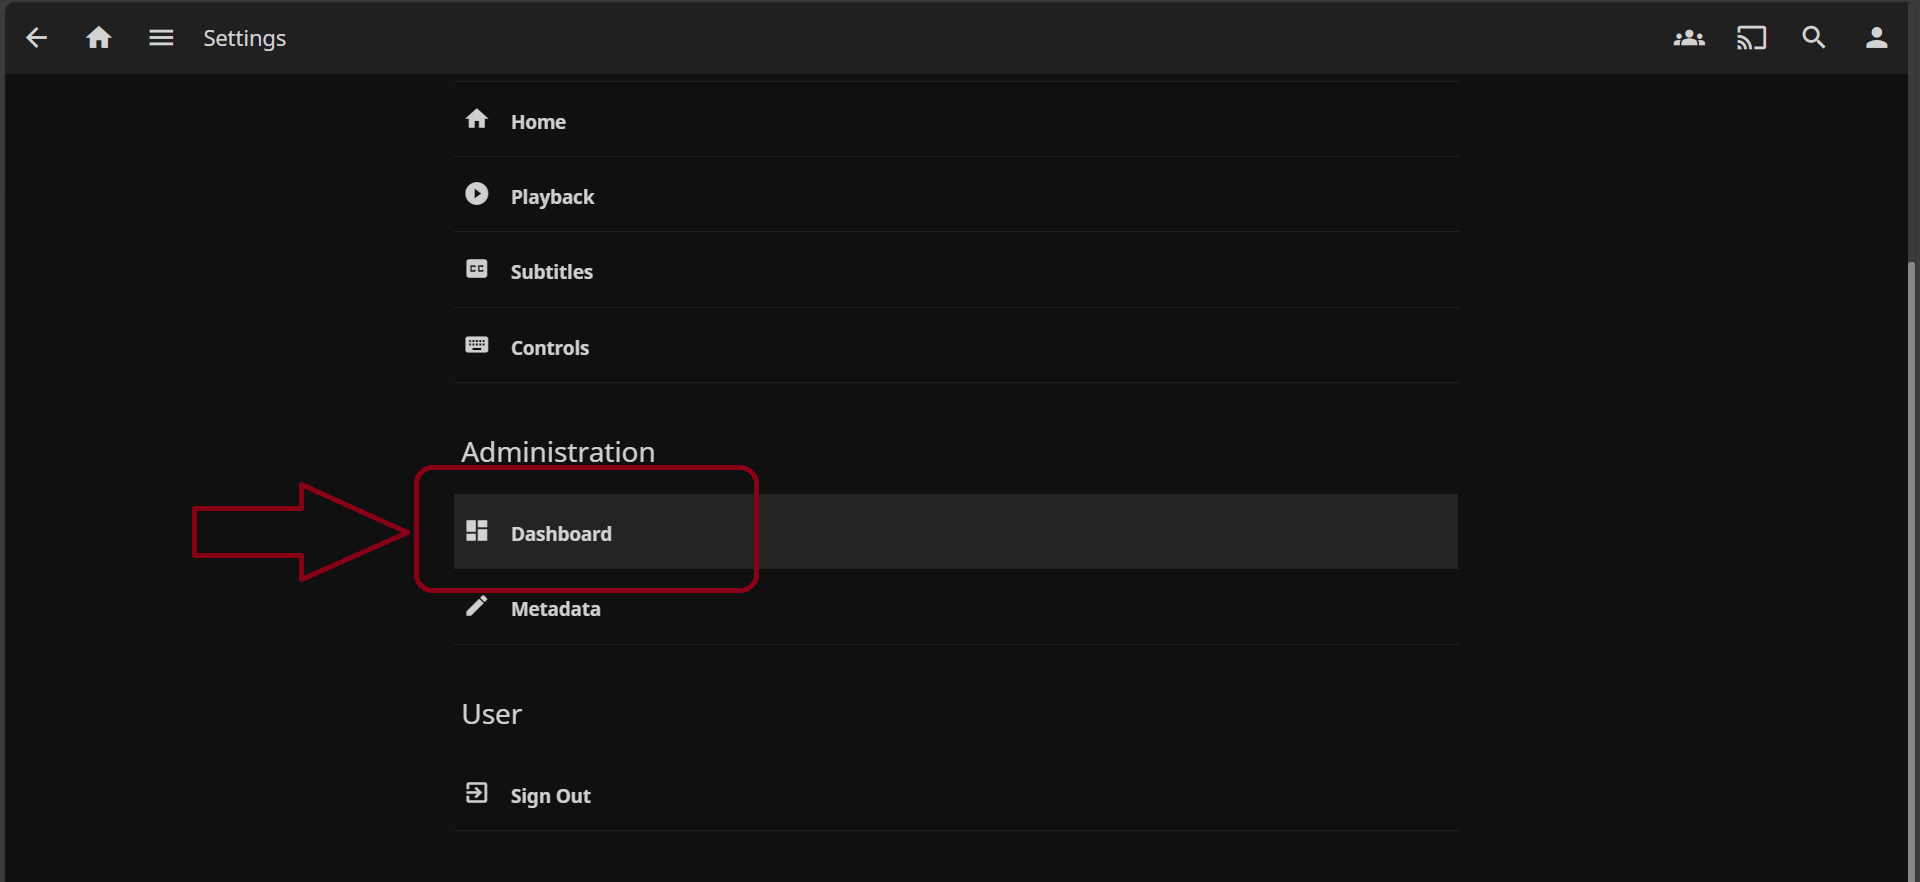
You have to go back to our Jellyfin's web interface and on the home page, at the top right click the User icon and it will take us to the user settings page.
Here, click on the Dashboard option:
Within the dashboard settings pane, on the left side, click on the Playback option.
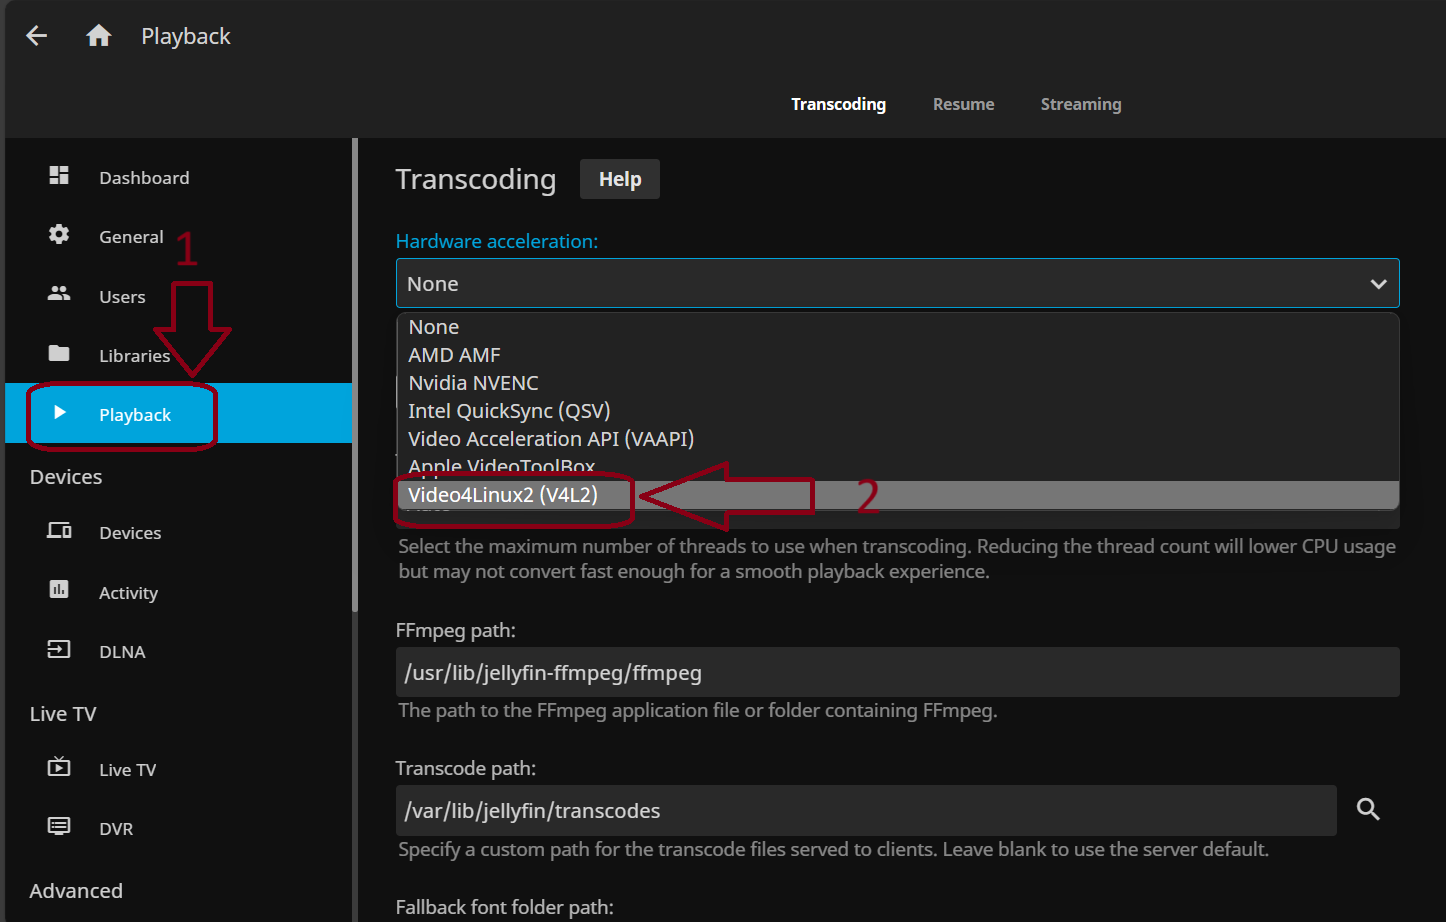
In the playback tab, you can find all the settings related to how media files are played on Raspberry Pi.
Under the Transcoding section, you should see a select box with the heading of Hardware Acceleration. Here you have to set the value to Video4Linux2 (V4L2).
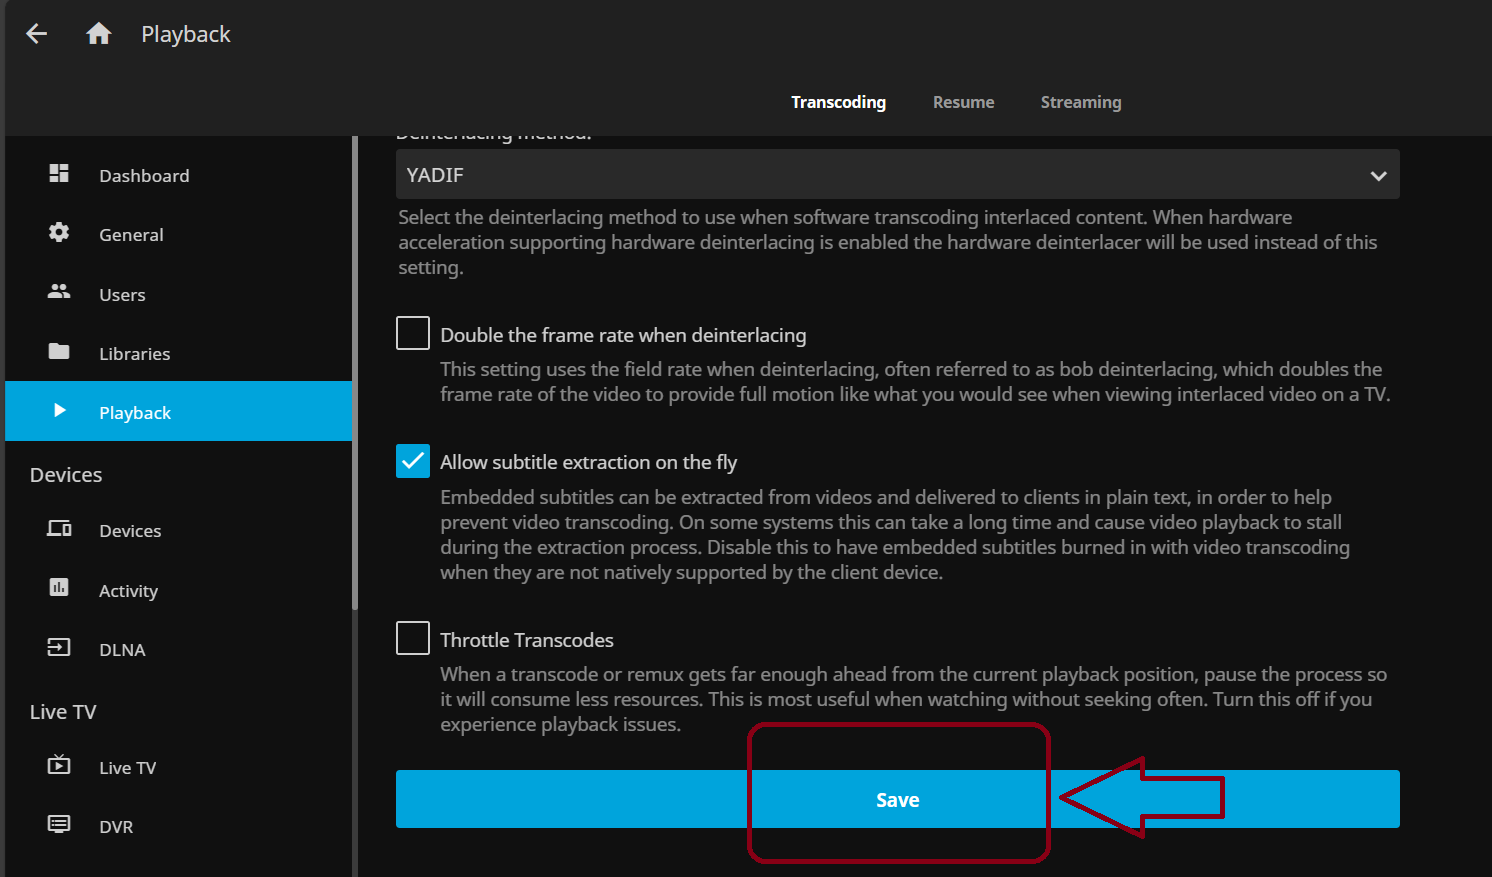
V4L2 is the only supported option for the Raspberry Pi hardware. Once done, just scroll to the bottom and hit Save.
Enjoy local media streaming
To sum it up, turning your Raspberry Pi into a media wizard with Jellyfin isn't just a tech upgrade – it's like giving your little single board computer a superhero cape!
Picture this: smoother streaming, snappy performance, and all the fun of hardware transcoding. It's not just a setup; it's a playful adventure into making your Raspberry Pi the coolest entertainment sidekick ever.
Get ready for a joyride into the world of media magic on your pint-sized powerhouse!
If this helped you, consider supporting It's FOSS
It's FOSS has been helping people use Linux for the past 14 years. Help us stay independent from big tech. Become a Plus member, enjoy ad-free reading and get 5 eBooks.

