
Raspberry Pi OS (formerly known as Raspbian) is the default and recommended operating system for Raspberry Pi.
It is based on Debian and features the PIXEL desktop environment , developed by the Raspberry Pi team.
As an open-source operating system, it comes pre-installed with various tools and applications designed for learning programming and supporting STEM education.
The Raspberry Pi OS is provides the best compatibility for your Pi, HATs and any other attachments you use.
In simple words, this is the best operating system for Raspberry Pi for general purpose usage.
If you have got a new Raspberry Pi, let's see how to install Raspberry Pi OS on a micro SD card and use it on your device.
Perquisites
Here is a list of all the things you need to get started with Raspberry Pi:
- A Raspberry Pi (older versions should work fine as well).
- A Class 10 Micro SD Card, at least 8 GB.
- HDMI compatible display and HDMI Cable
- Official power supply
- Keyboard and Mouse
- Internet Connectivity(WiFi or Ethernet).
- Micro SD Card Reader.
Installation
Let’s go through the step by step process to install and set up Raspberry Pi OS on your Raspberry Pi.
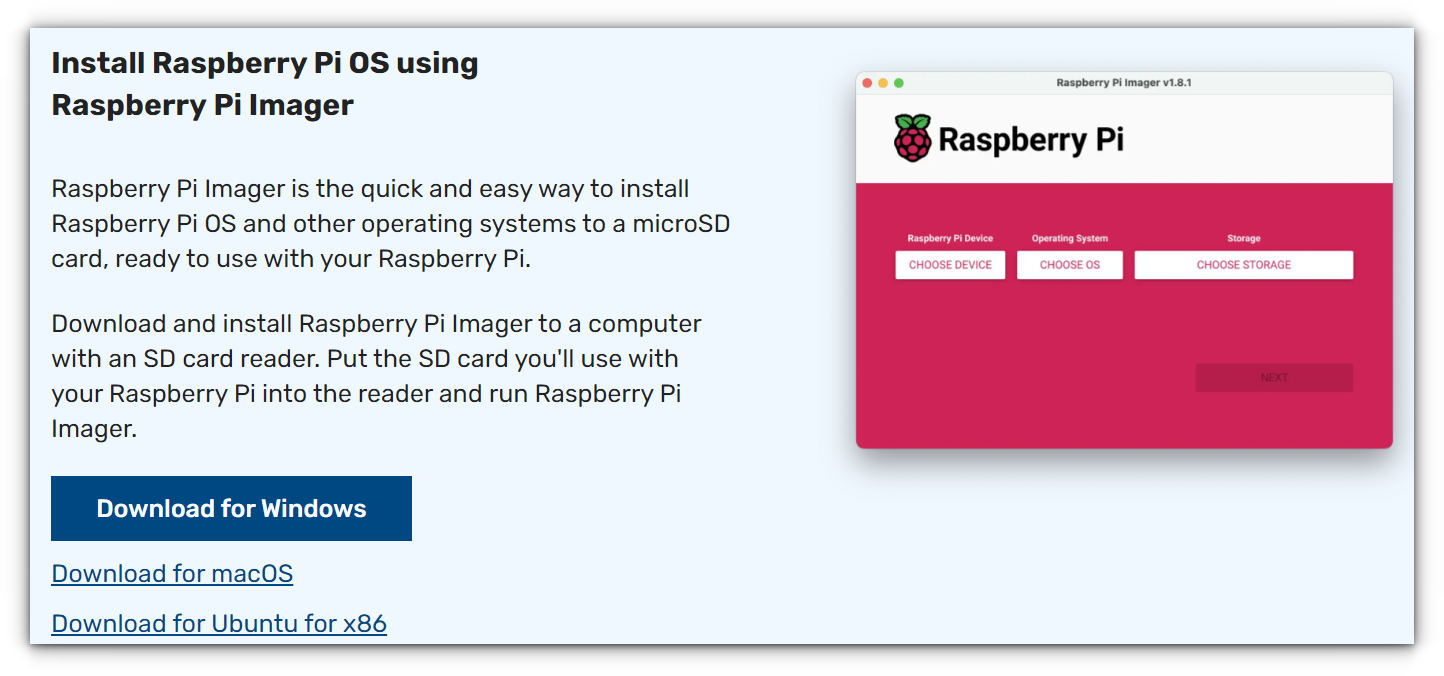
Step 1: Download Raspberry Pi Imager
Visit the official Raspberry Pi website and download the Raspberry Pi Imager for your operating system (Windows, macOS, or Linux).
Step 2: Insert a MicroSD Card
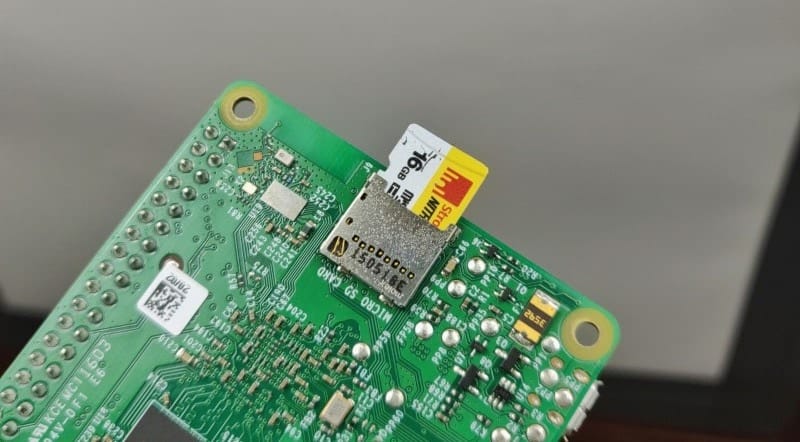
Use a microSD card (at least 8 GB recommended) and insert it into your computer's card reader. Ensure that any important data on the card is backed up, as the installation process will erase all existing data.
Step 3: Choose Device
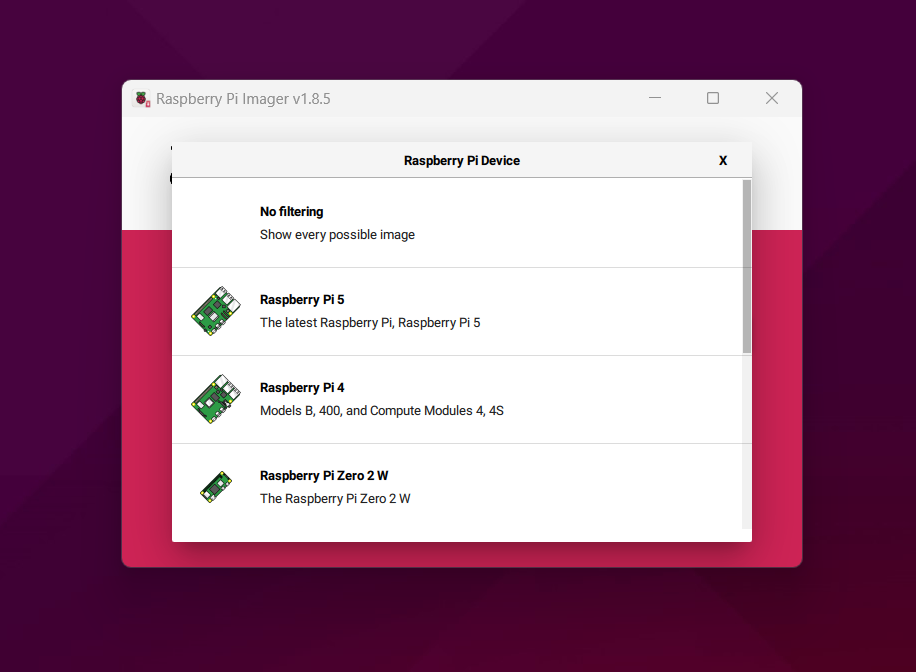
Click on "Choose Device" to select the model of your Raspberry Pi (e.g., Raspberry Pi 5, Raspberry Pi 4, etc.). This ensures that the correct OS version is installed for your specific model.
Step 4: Choose OS
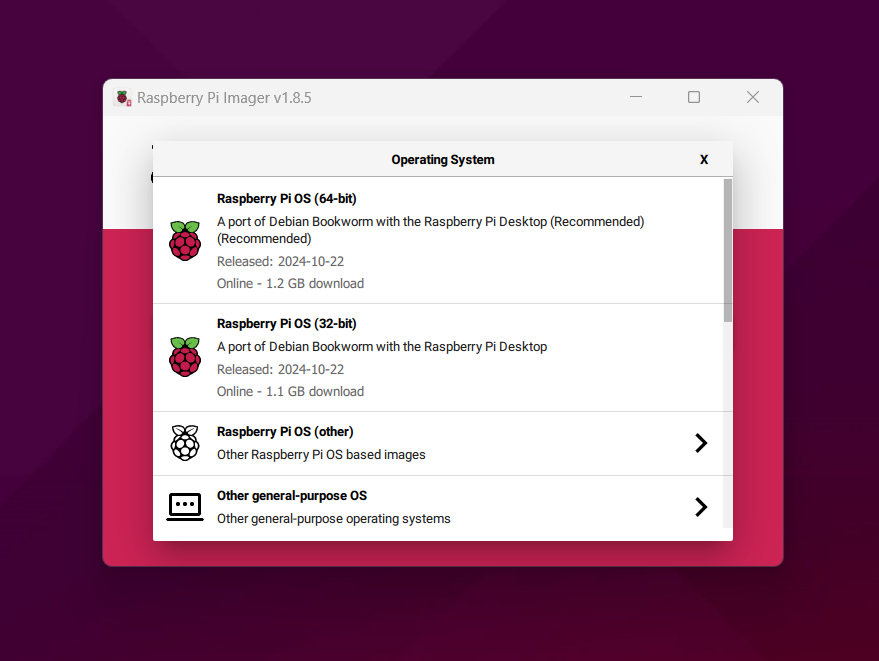
Click on "Choose OS" to select the operating system you want to install. Choose "Raspberry Pi OS" from the list.
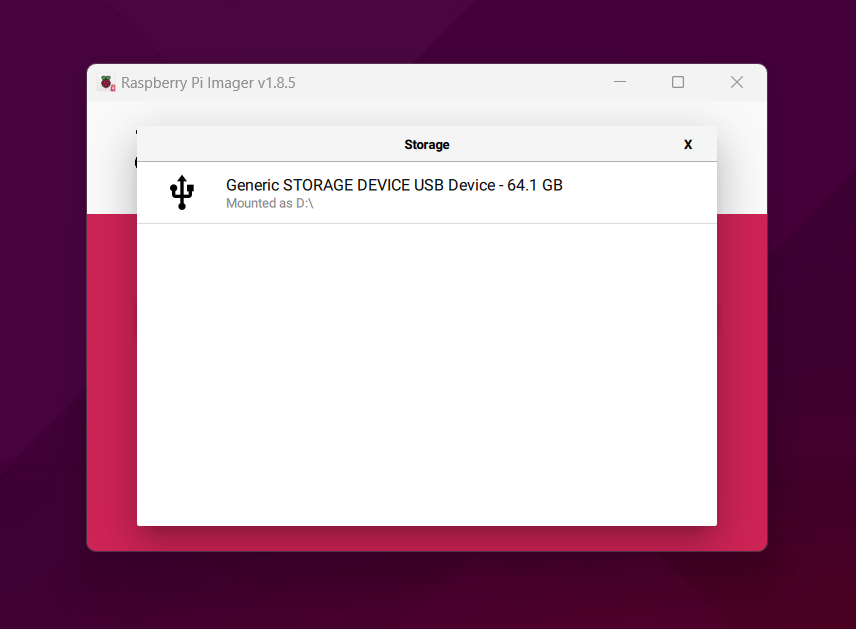
Step 5: Select Storage
Click on "Choose Storage" and select your microSD card from the list. Be cautious to choose the correct drive to avoid data loss.
(Optional Step) Configure Raspberry Pi Imager Options
Before proceeding to write the image, click on the settings icon (gear icon) in the Raspberry Pi Imager.
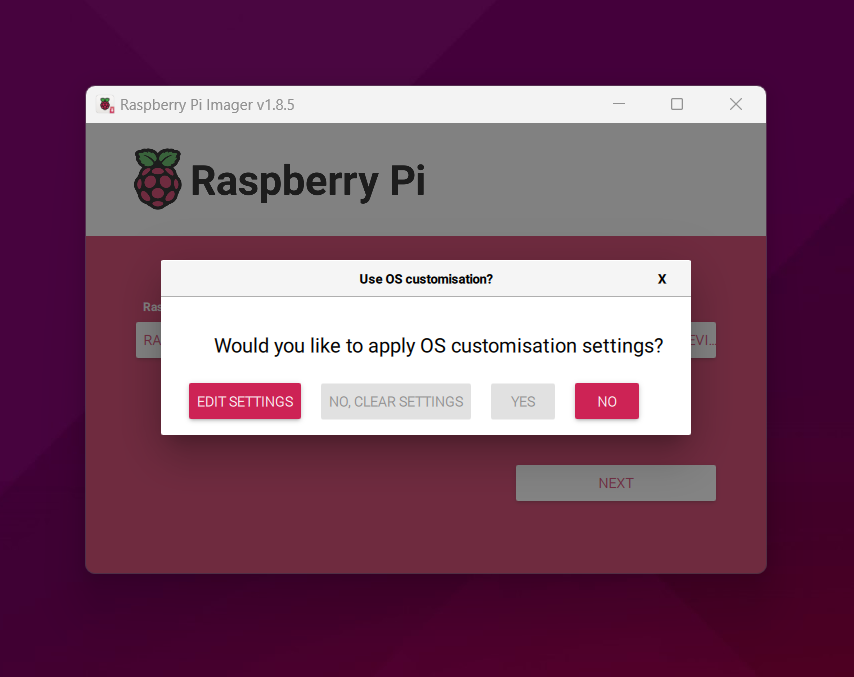
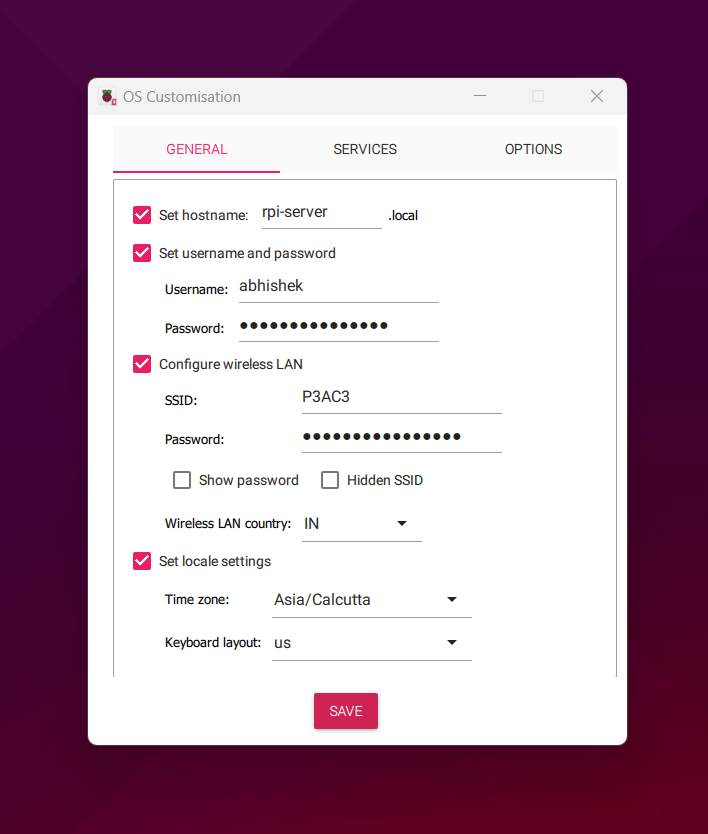
- Here, you can pre-customize your Raspberry Pi OS:
- Set Hostname: Give your Raspberry Pi a unique name.
- Username and Password: Create a user account with your desired username and password.
- Wi-Fi Credentials: Enter your Wi-Fi network name (SSID) and password to connect automatically.
- Enable SSH: Check the box to enable SSH, allowing you to access your Raspberry Pi remotely over the network.
- Configure Other Options: You can also configure other settings, such as localization and keyboard layout.
Step 6: Write the Image
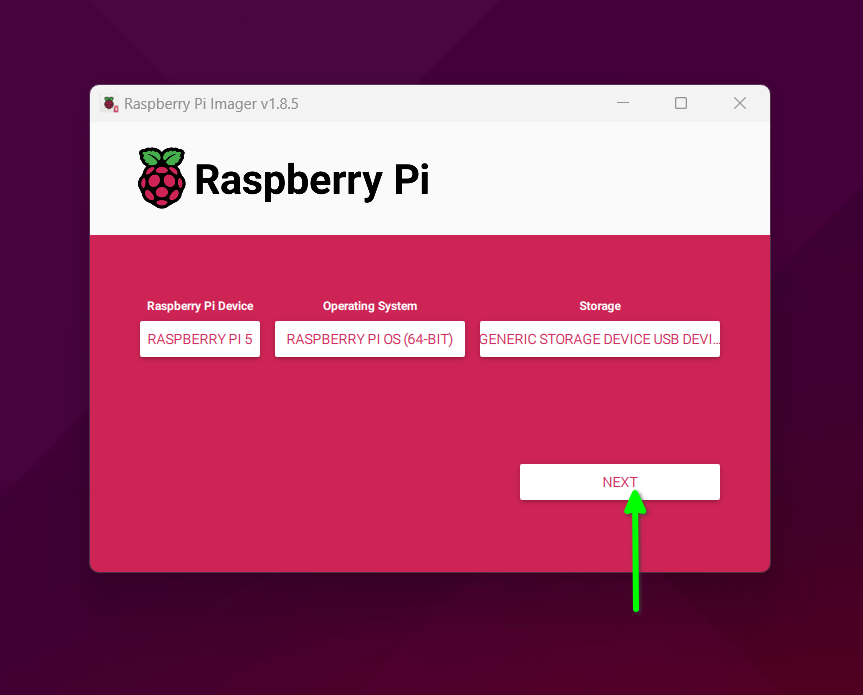
Click on the "Write" button to begin the installation process. The Imager will download and write the Raspberry Pi OS image to the microSD card. This may take a few minutes.
Step 7: Eject the MicroSD Card and Insert into Raspberry Pi
Once the process is complete, safely eject the microSD card from your computer and insert it into the microSD card slot on your Raspberry Pi.
Step 8: Connect Peripherals and Power On
Connect your Raspberry Pi to a monitor, keyboard, and mouse. If using Wi-Fi, ensure your credentials are configured.
Finally, connect the power supply to your Raspberry Pi. It will boot up, guiding you through the initial setup process.
First boot & initial configuration
First boot can take about a minute or two, once the Pi has booted up you are taken to the welcome screen for initial setup (if you have not done that in the Raspberry Pi Imager)
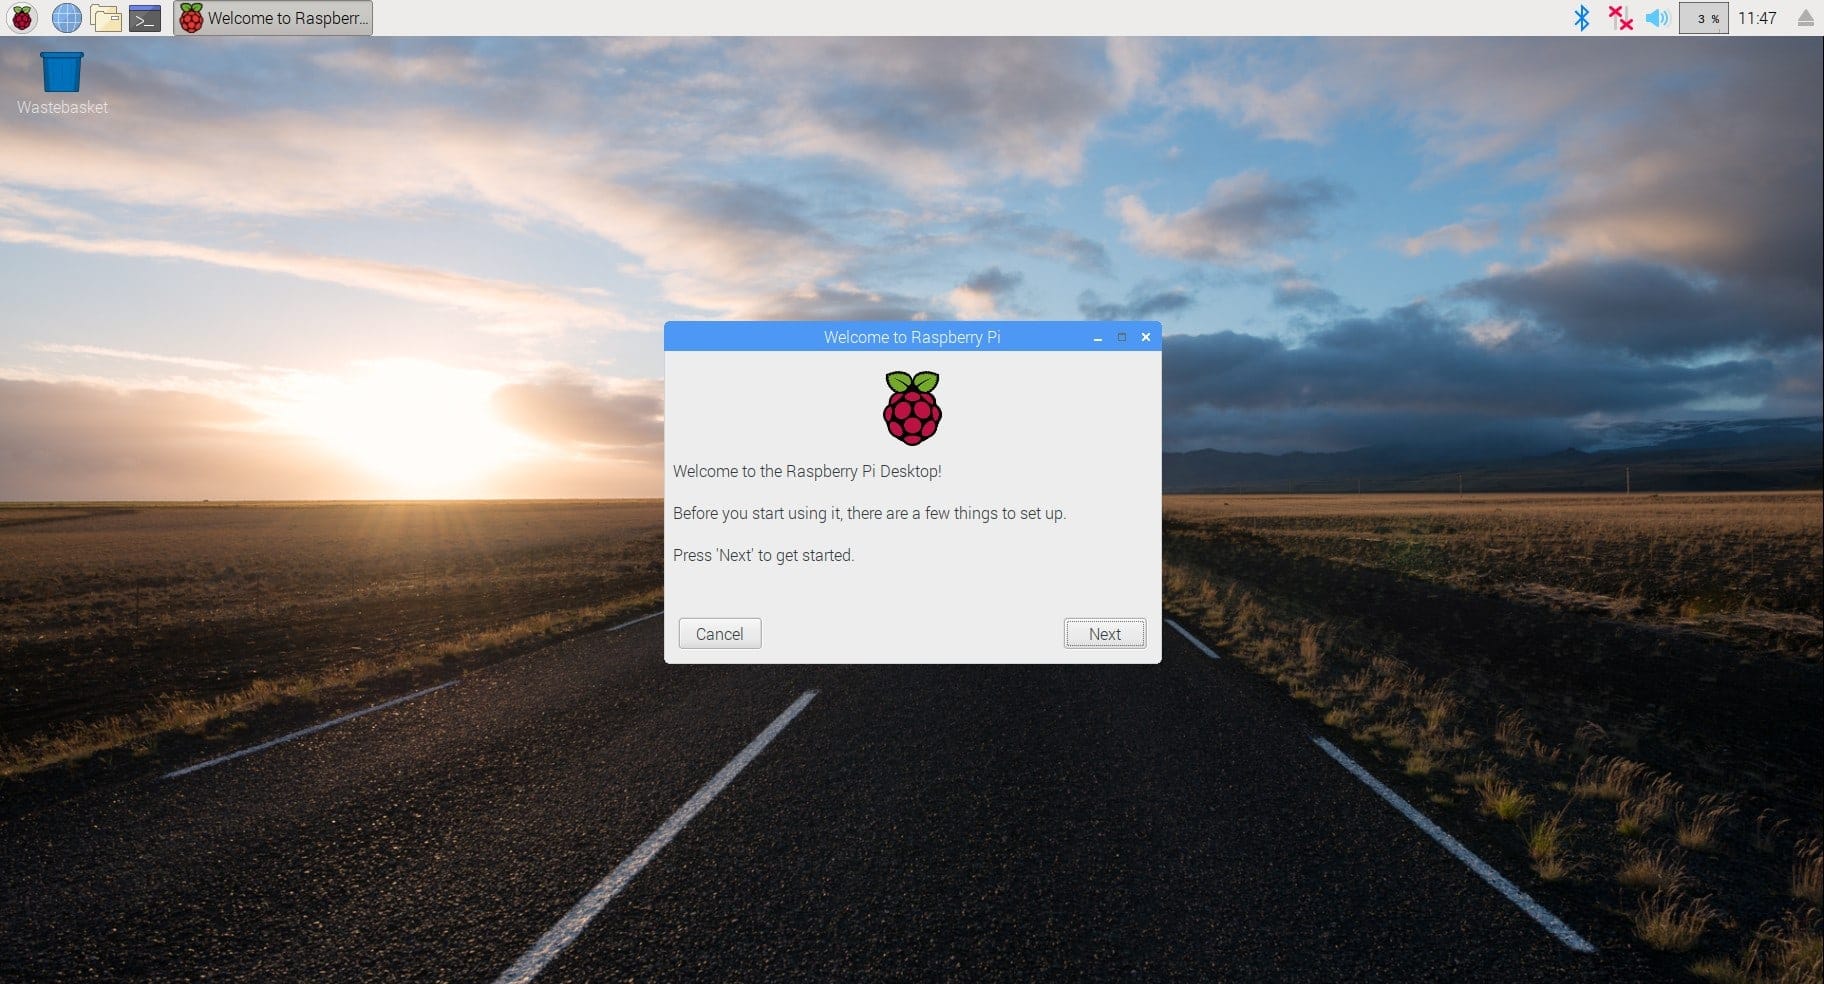
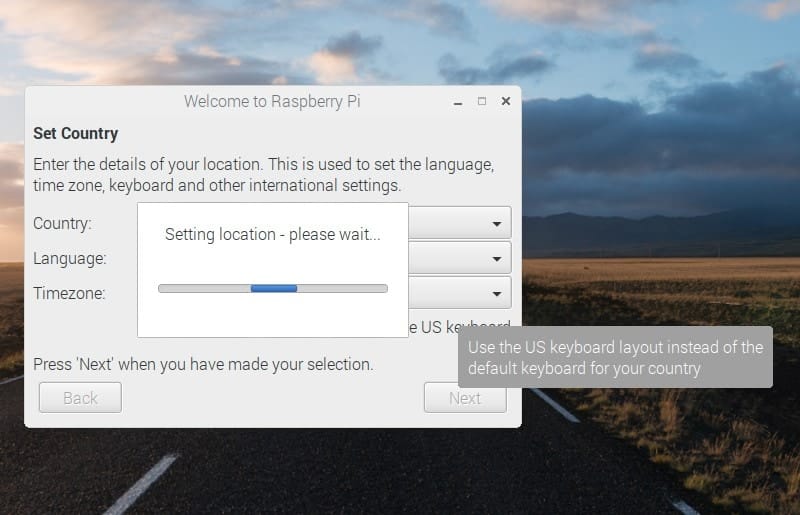
Click next, set your country, language and keyboard preferences. Usually the language and keyboard changes based on the country you select, so make sure you change them if you want the language to be English.
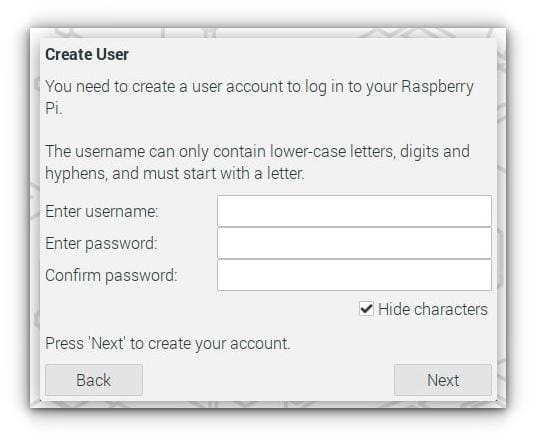
Create a new user and a password for it:
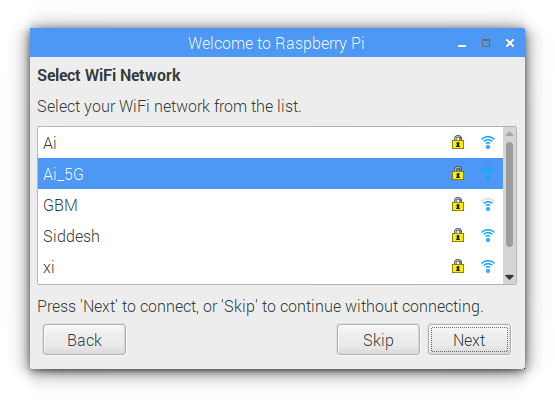
Next, connect to your WiFi network if you haven’t plugged in an Ethernet cable.
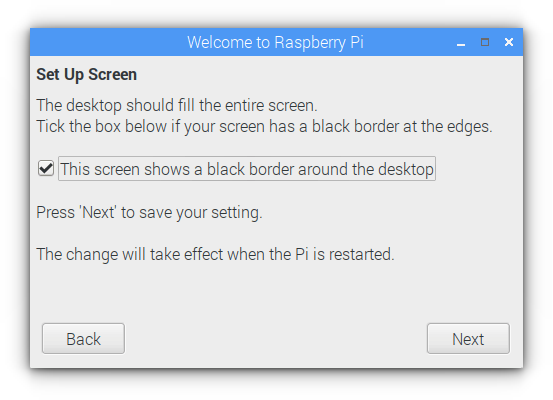
If the UI does not fill your display completely and has black border around it, tick the box in the following window. This happens due to improper display profile selection and gets corrected once the Pi restarts after the software update.
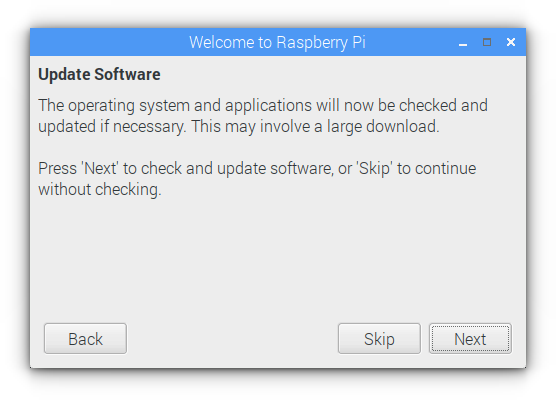
Update the Raspberry Pi OS, this step will take a while depending on network speeds.
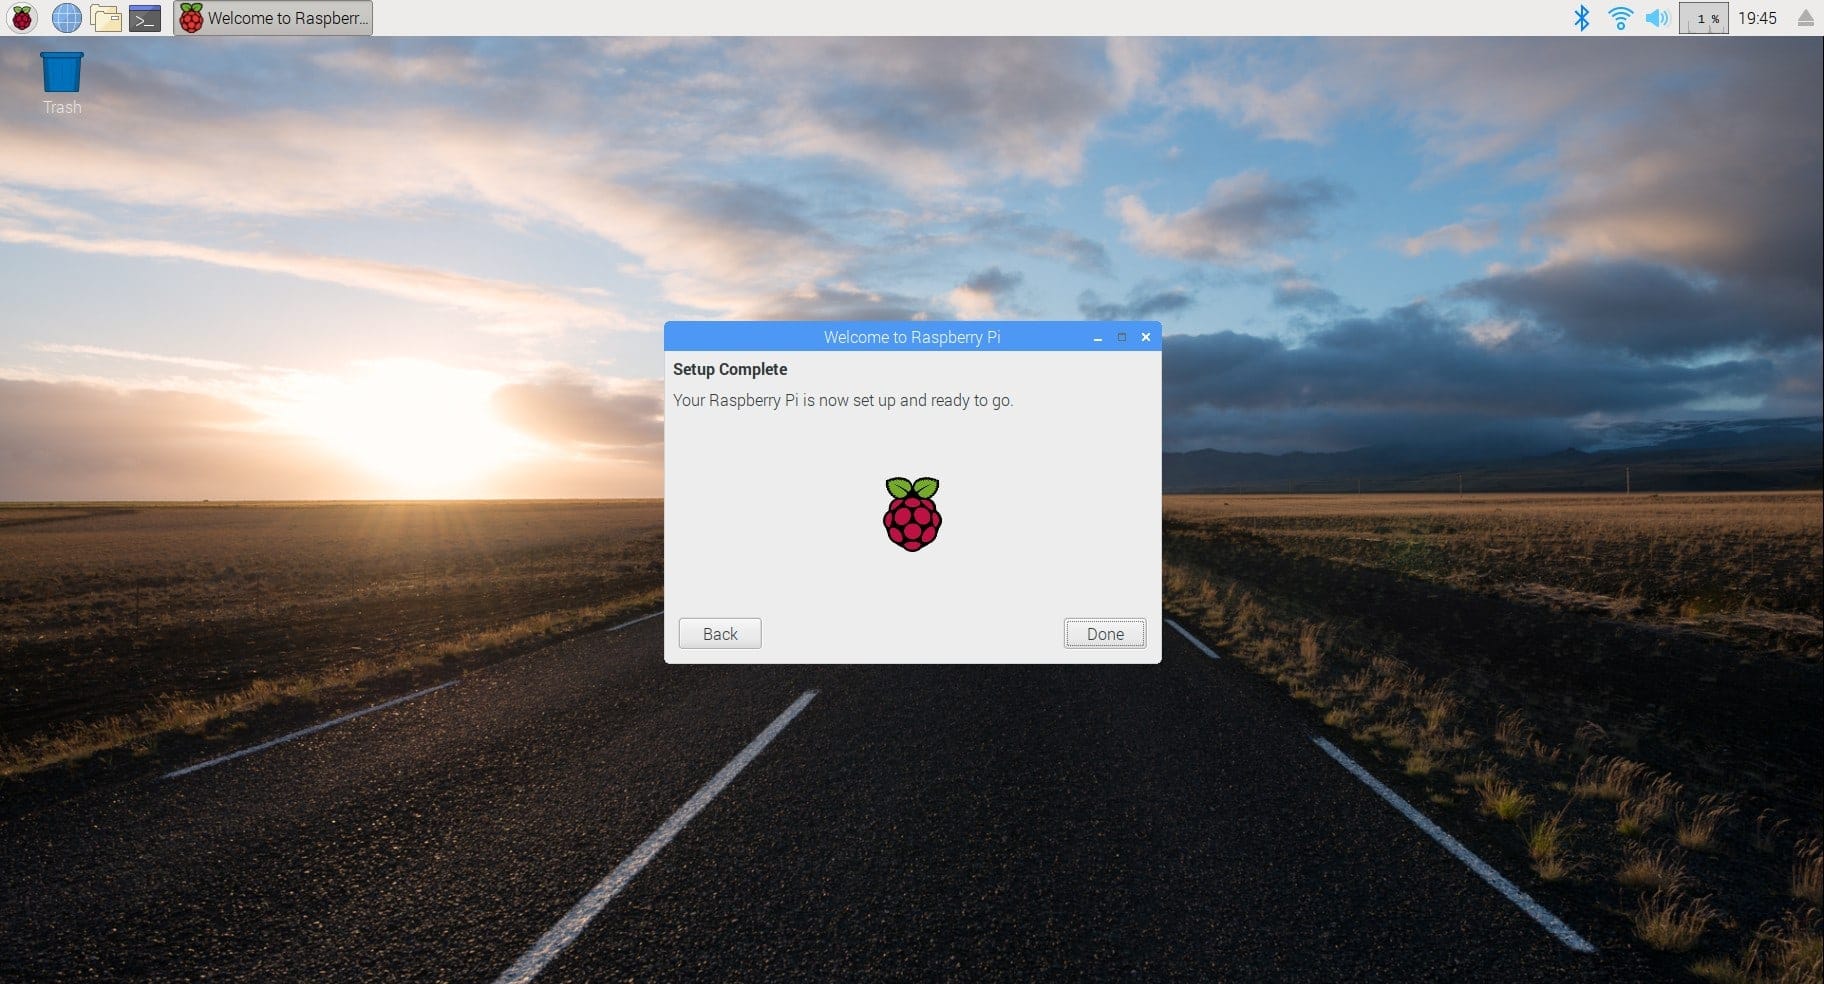
Once the Raspberry Pi has finished updating, the initial setup is done!.
Raspberry Pi Configuration Wizard
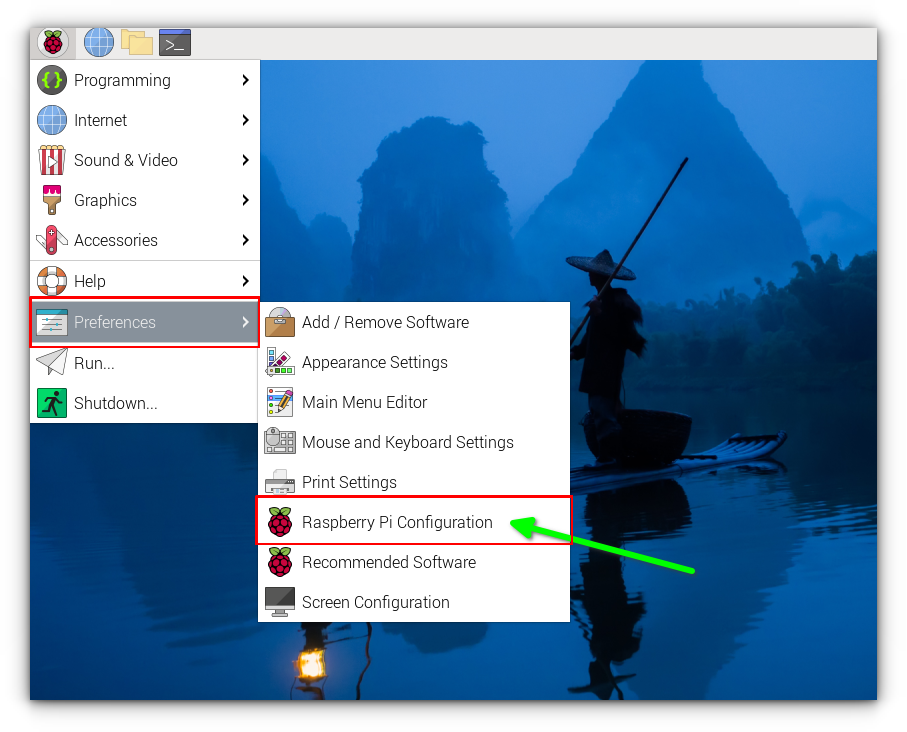
Before you go ahead and explore the OS, let me show the Raspberry Pi configuration wizard.
You can access the configuration wizard by navigating through the menu.
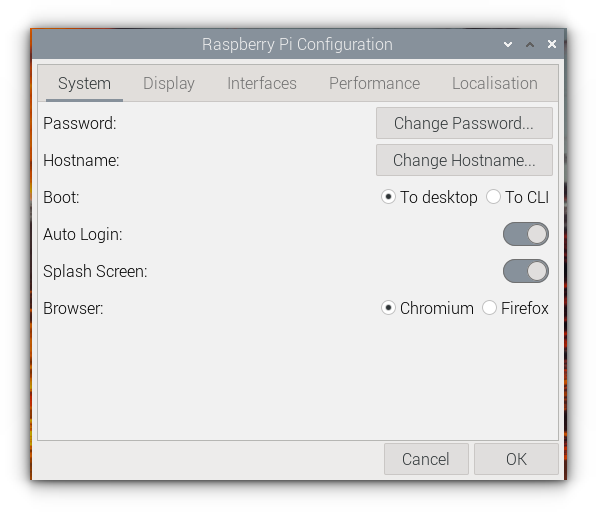
In the System tab, you can change the password, set a new hostname for your Pi, change the boot options and more. Booting to CLI(Command Line Interface) is preferable when you are running network or server applications.
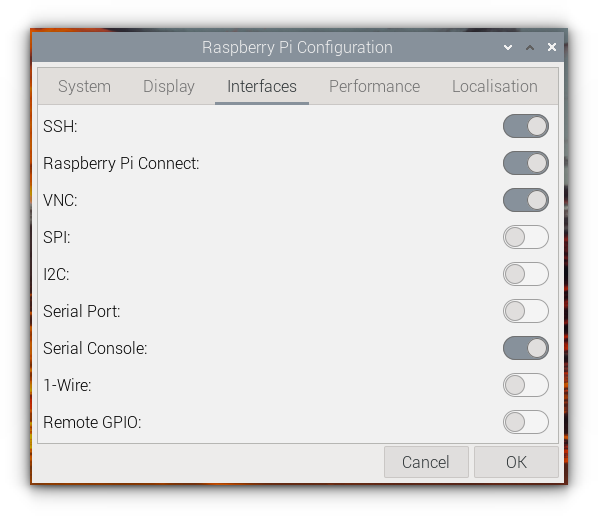
In the Interfaces tab, you can enable or disable all the different methods to interface with your Raspberry Pi.
SSH (Secure Shell) is disabled by default and needs to be enabled if you want to SSH into Raspberry Pi and access it via network.
Using VNC is another popular method to access a Raspberry Pi over the network. VNC streams the whole desktop GUI of the Pi to another device and you can interact with it like you would when directly using the Pi.
You can also enable or disable the GPIO bound interfaces in this tab.
Explore the Raspbian OS
Now you can go ahead and explore rest of the Raspberry Pi OS.
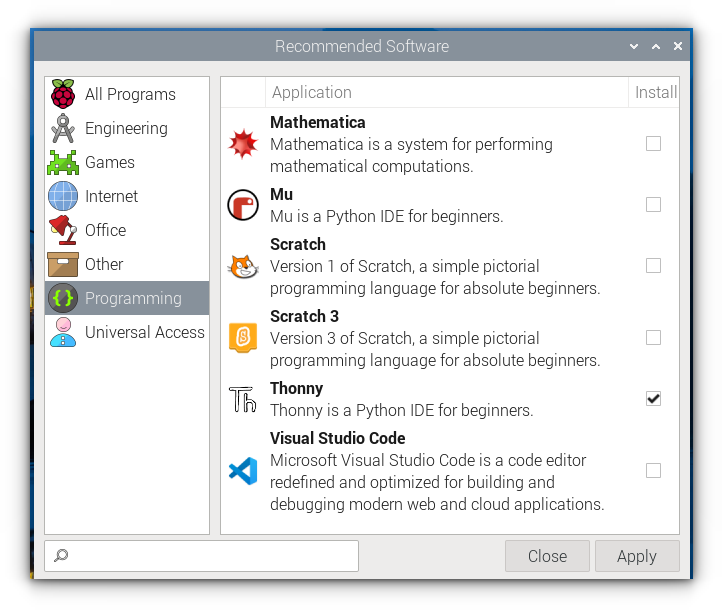
Under the programming subsection in Add-Remove Software you can find a bunch of tools ready to download to help you learn programming.
Mu is one of my favorite tools. You also get the Raspberry Pi version of Wolfram Mathematica for free!
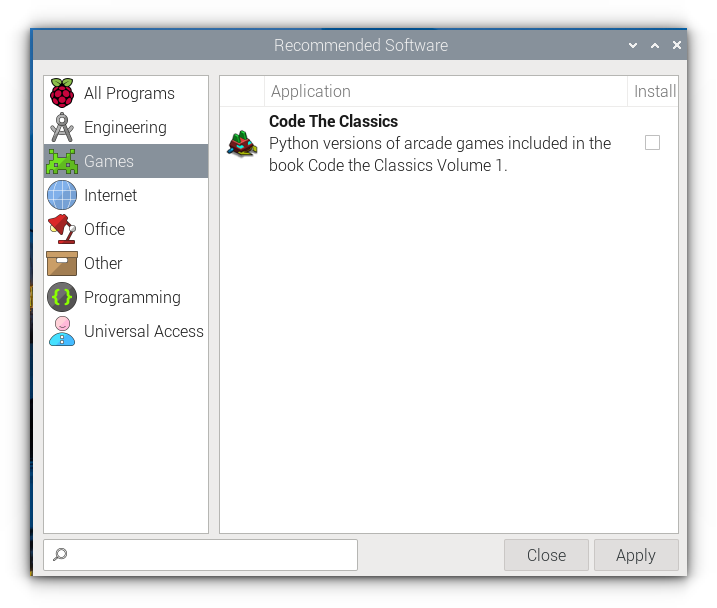
Under games you can also find Code The Classics:
At this point, you should be able to navigate around the Raspberry Pi OS on your own and also brings us to the end of the tutorial.
What made you curious about the Raspberry Pi? What do you think about the Raspberry Pi OS compared to your daily driver?
It's FOSS turns 13! 13 years of helping people use Linux ❤️
And we need your help to go on for 13 more years. Support us with a Plus membership and enjoy an ad-free reading experience and get a Linux eBook for free.
To celebrate 13 years of It's FOSS, we have a lifetime membership option with reduced pricing of just $76. This is valid until 25th June only.
If you ever wanted to appreciate our work with Plus membership but didn't like the recurring subscription, this is your chance 😃

