

Microsoft did the unexpected by releasing Visual Studio Code for all major desktop platforms, that includes Linux as well. Soon after its release, Microsoft Visual Code became one of the best open source code editors. The features it provides are useful not only to web developers, but for all kinds of programmers.
I am not going to list the features of Visual Studio Code here. I presume you already know them. So, here, I am going to show you how to install Visual Studio Code on Ubuntu and other Linux distributions.
- Snap version: Snap are the universal packaging format. You can find this version in the software center. Usually, Snap applications take longer to start but they get quicker updates automatically.
- Deb version: Traditional debian package (.deb file) that you have to download from VS Code's website and then install it on your system. Newer versions are provided with system updates.
Method 1: Install Visual Studio Code on Linux using Snap
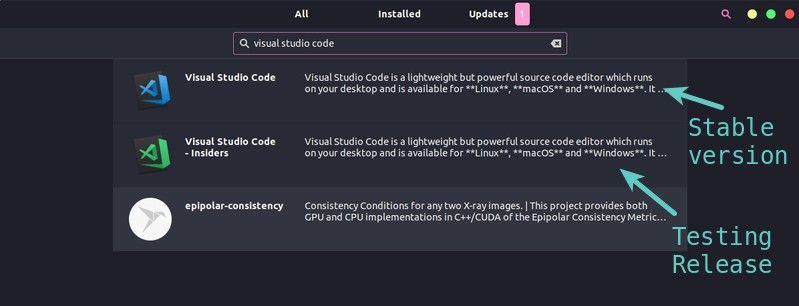
Visual Studio Code is available as a Snap package. Ubuntu users can find it in the Software Center itself and install it in a couple of clicks.
Snap packaging means you can install it in any Linux distribution that supports Snap packages. Make sure to enable Snap support on your Linux distribution if you haven’t done already.
sudo snap install code --classic
The installation will depend on your internet connection speed.
Remove VS Code Snap
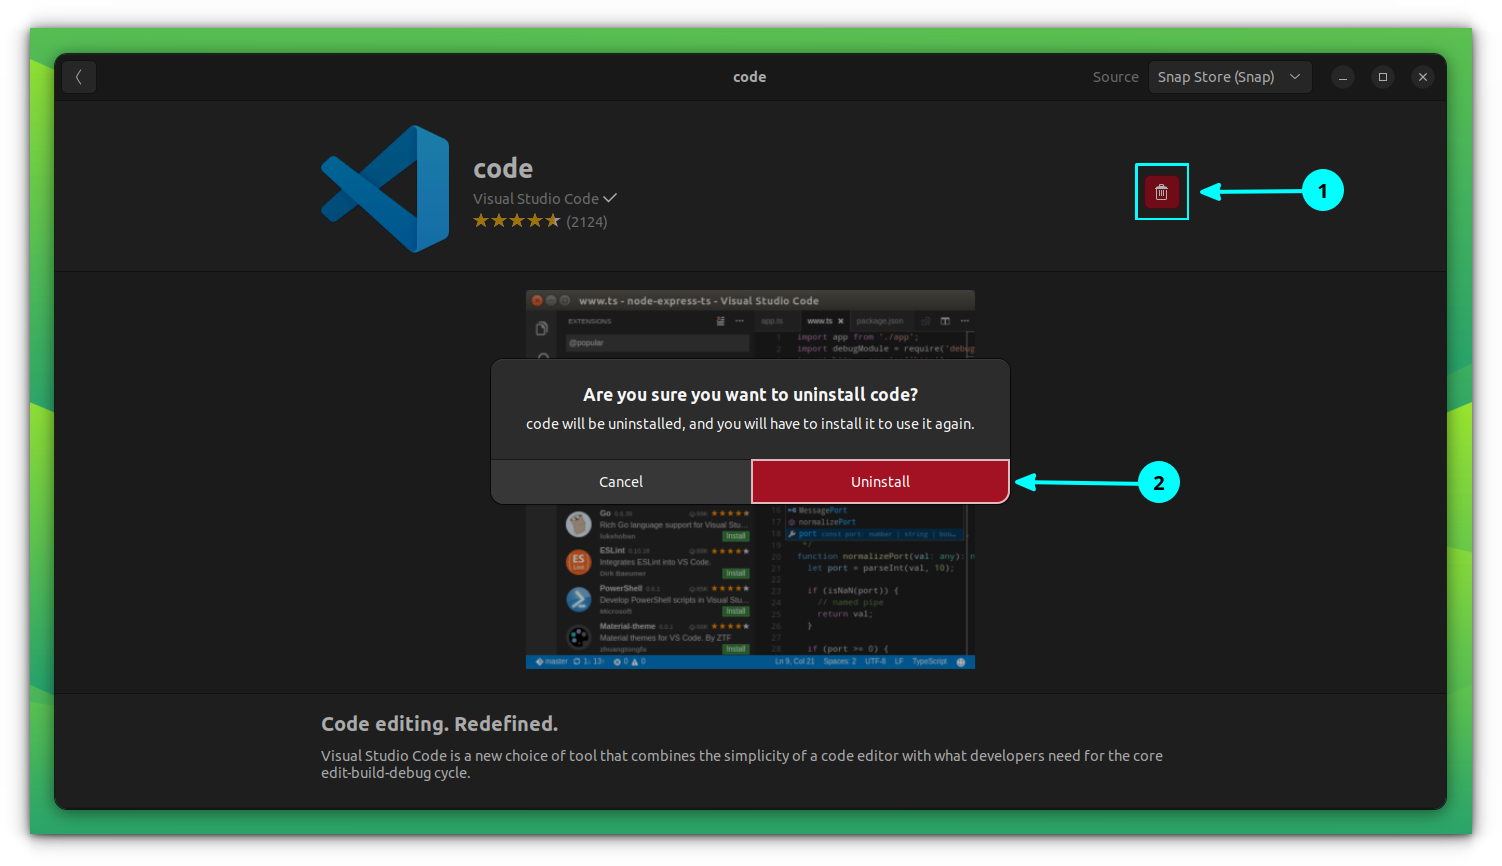
You can remove VS Code installed as a snap both through software center and terminal.
Open the Software Center and browse VS Code in the “installed” apps section. Click on remove to uninstall it.
Or, open a terminal and enter the following command, it is that easy:
sudo snap remove --purge codeMethod 2: Using the .deb/.rpm packages
Microsoft provides packages to install Visual Studio Code on Linux. Just head over to the download page of Visual Studio Code, and you’ll find the .deb and .rpm files options for the Linux platform.
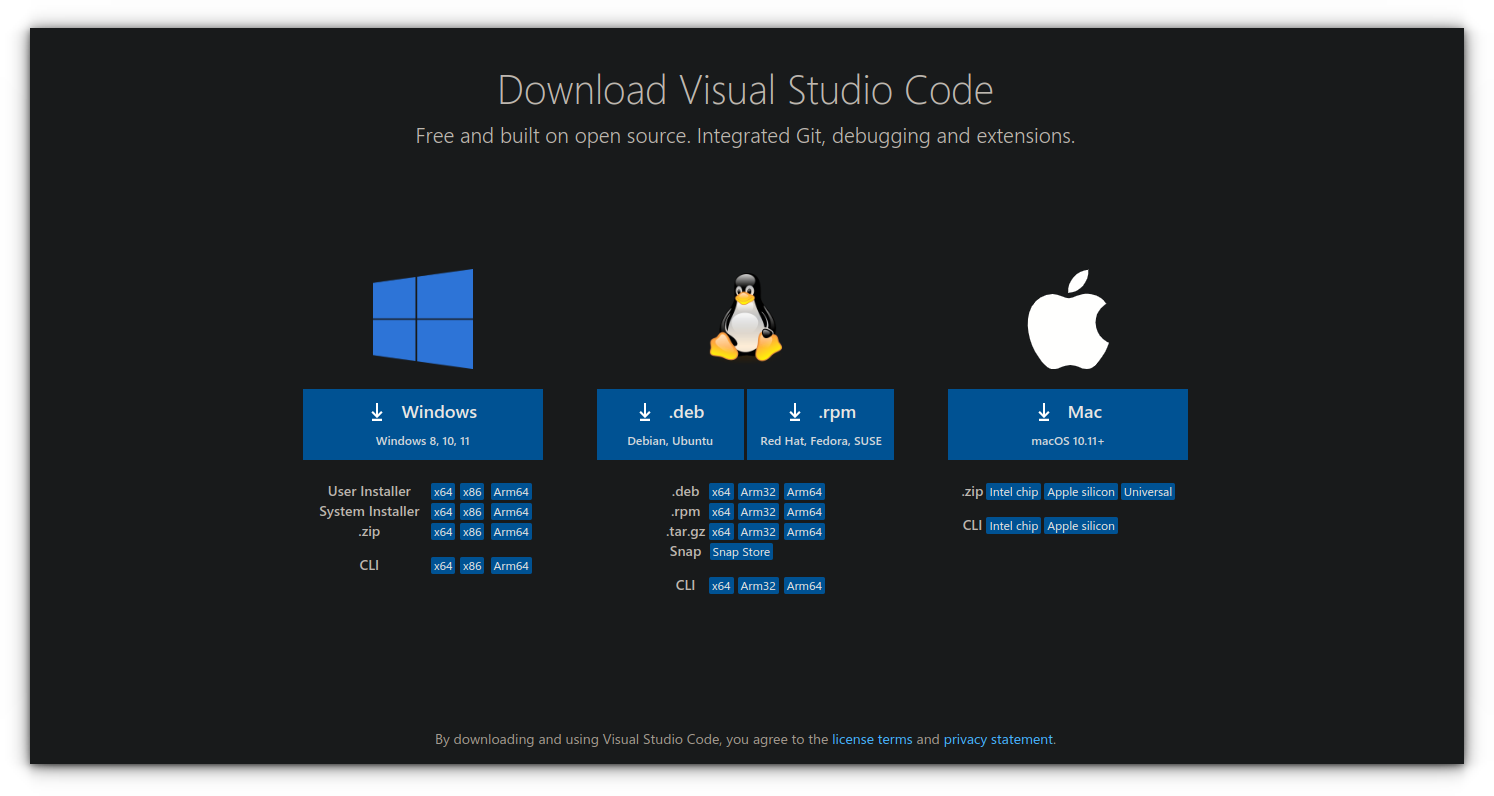
There are options for 32-bit systems as well. If you’re not sure about that, you can read our guide to find if your Ubuntu is 32 bit or 64 bit and then download the files accordingly.
Once downloaded, you can simply follow the method suitable to you to install a deb file on Ubuntu (or other Ubuntu-based distros).
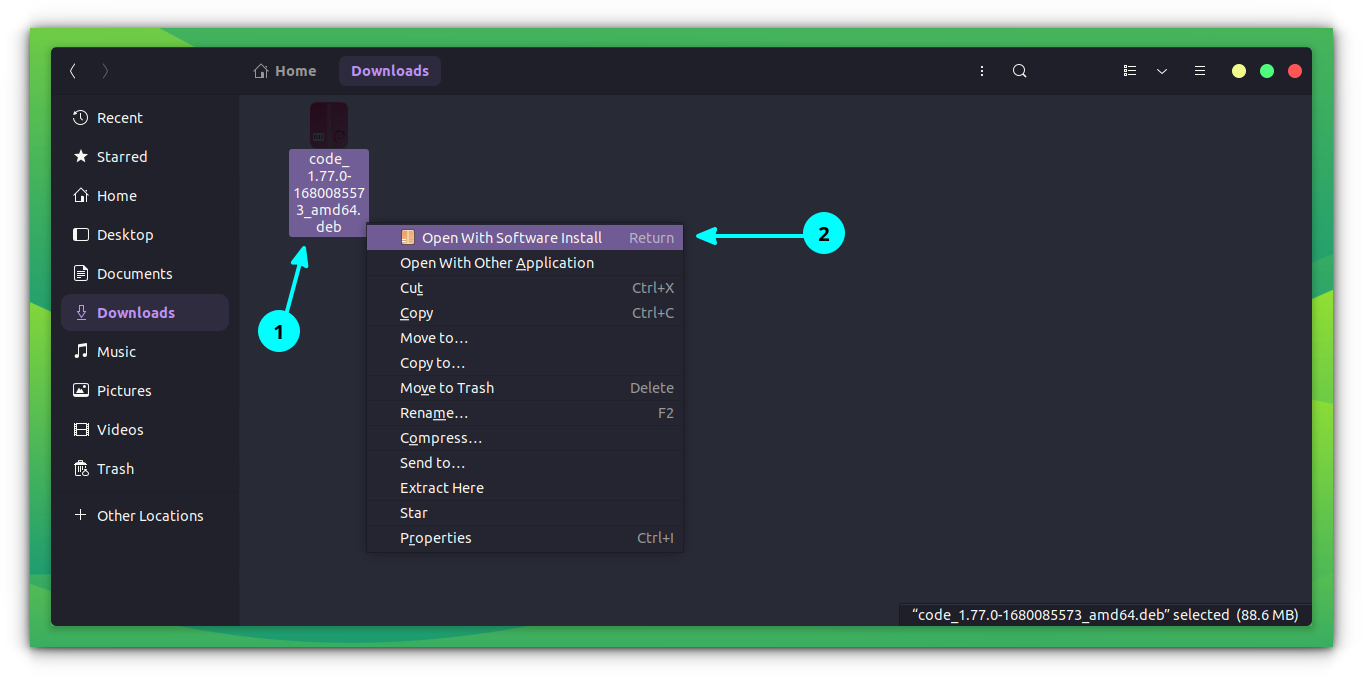
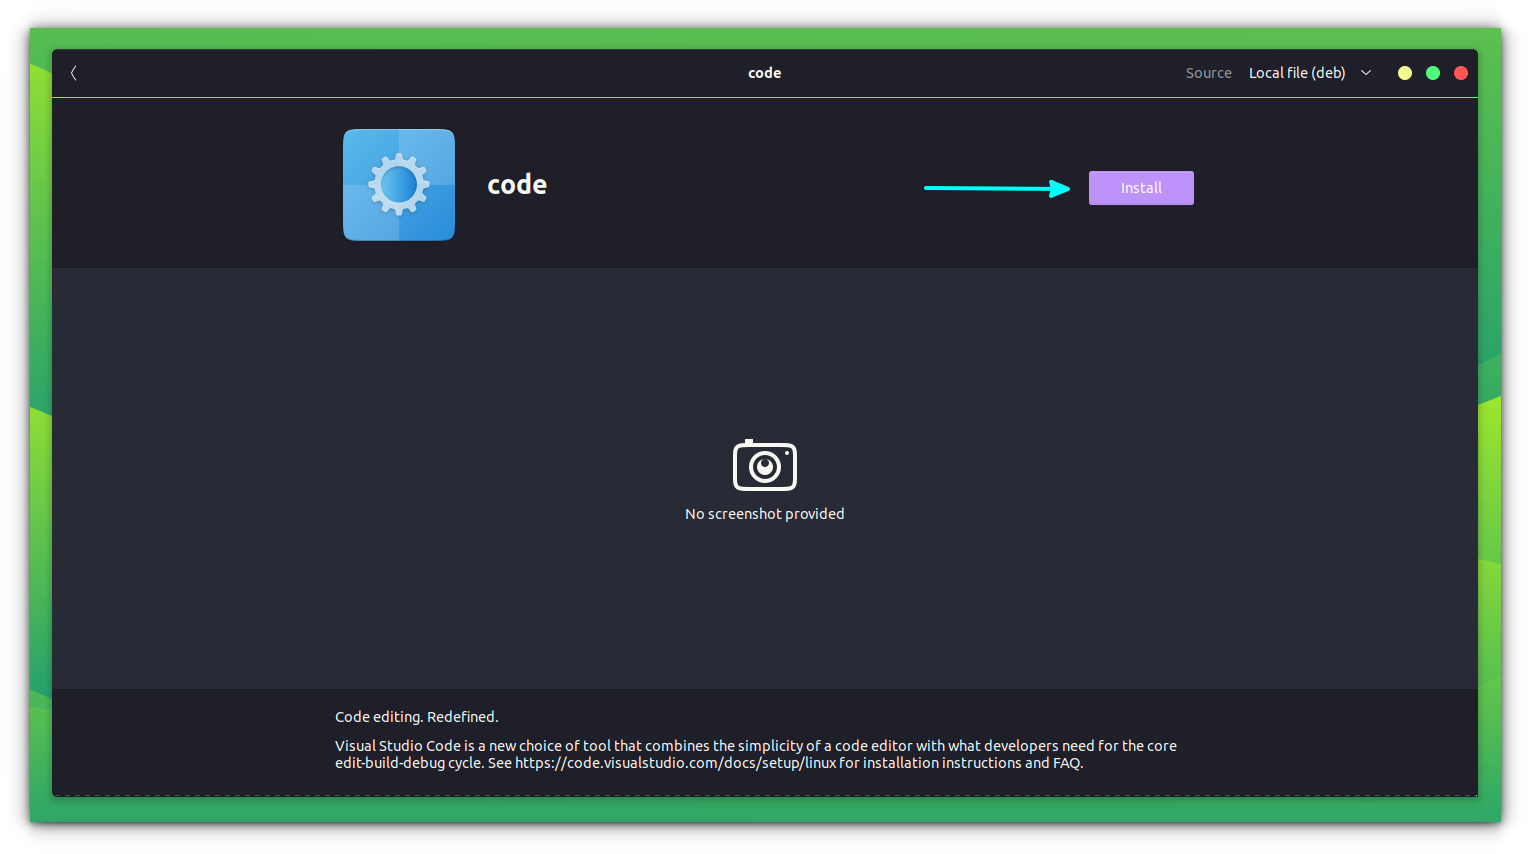
Or, you can explore the right-click menu on the downloaded deb file and select open with software center.
If you do not find the option there, select Open with other applications and from and next, Software Install.
Now, press the “Install” button in the Software Center to install it.
Suggested Read 📖
 Abhishek Prakash
Remove VS Code deb/rpm app
Removing software that was installed from a .deb file is the same as removing any app from the Software Center.
Just go to the Ubuntu Software Center, search for the application name and click on Uninstall to remove it.
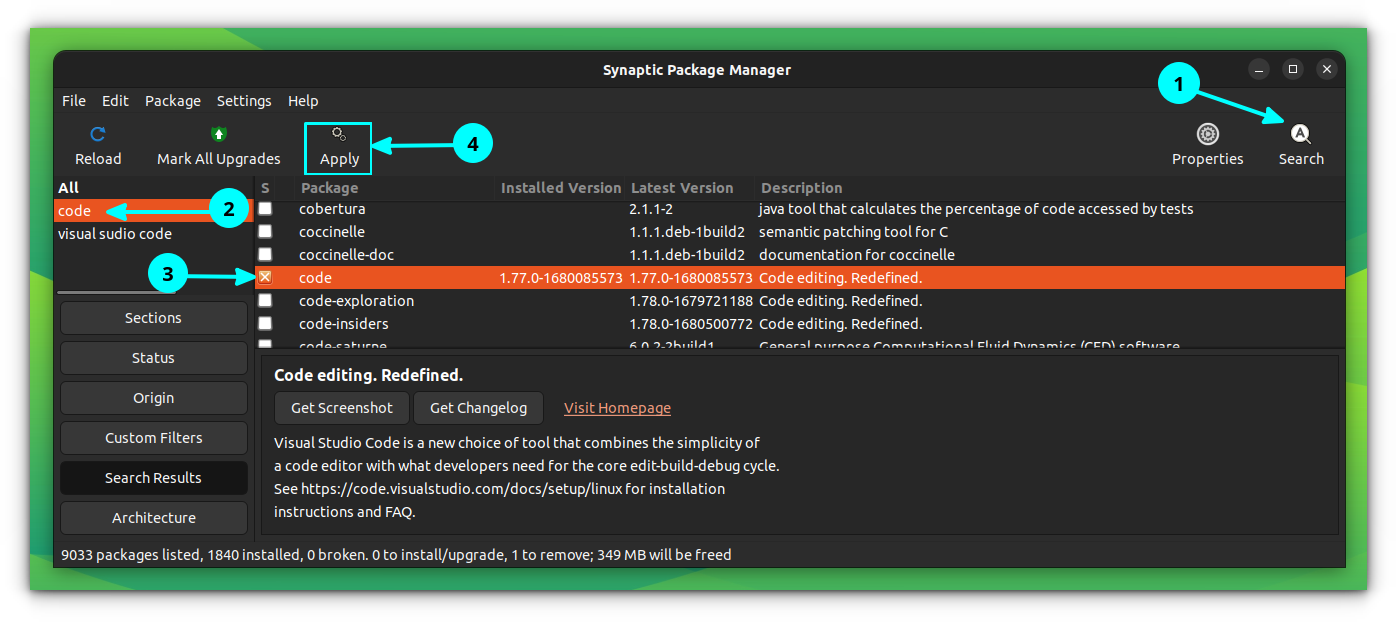
Alternatively, you can use Synaptic Package Manager if you do not find it listed on the Ubuntu Software Center for some reason.
Bonus Tip: Removing VS Code data
VS Code keeps some data on the disk. If you reinstall it, you'll find that your extensions and some other settings are still present.
If you want to remove all traces of VS Code from the system, you should also remove these application related files.
Usually, it creates .vscode folder in the home directory and a folder named Code in .config directory in your home directory.
You delete these folders and it should remove all presence of VS Code.
Conclusion
As a last resort, you can always build it from the source code. You can find the source code of VS Code on its GitHub page.
It’s pretty easy to install Visual Studio Code on Ubuntu, thanks to Snap, Flatpak, or deb/rpm packages available.
Now that you know — what method do you prefer to install Microsoft’s Visual Studio Code on Linux?
You are welcome to let me know your thoughts in the comments below!
If you are curious to explore alternatives and more options to code on Linux, here are some picks for you:
Abhishek Prakash
If this helped you, consider supporting It's FOSS
It's FOSS has been helping people use Linux for the past 14 years. Help us stay independent from big tech. Become a Plus member, enjoy ad-free reading and get 5 eBooks.
