
When it comes to choosing a Linux distribution for beginners, Ubuntu always comes on the top. While it already offers a simple installation experience, there are various ways to install Ubuntu (or other Linux):
- You can install Ubuntu inside a virtualbox in Windows
- You can use Bash on Windows feature to install it inside Windows
- You can dual boot Ubuntu with Windows (so that you can choose which OS to use at the time your system boots)
- You can replace Windows with Ubuntu by wiping it altogether from your system
The method I am going to show in this tutorial is the fourth one. You wipe out the entire system and let Ubuntu be your only operating system. In my experience, this is the easiest way to install Ubuntu without any hassle.
How is this the simplest way of installing Ubuntu?
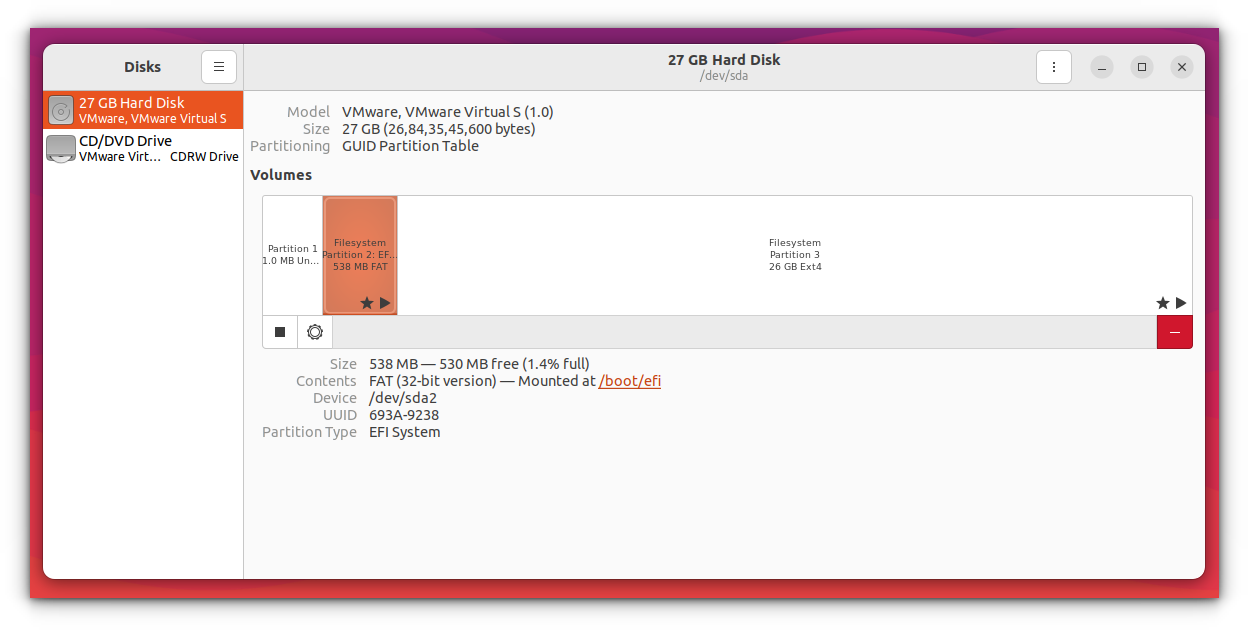
You don’t have to worry about creating partitions on your own. It automatically creates an ESP partition for UEFI.
It uses the rest of the disk space in creating a single root partition. The root partition (normally) has a 2 GB of swapfile. You don’t need to create a separate swap partition and if they need to be, you can increase the size of the swapfile.
The root partition also has the boot directory for grub related files. It also contains the home directory that is used for storing user related files like documents, pictures, music, videos, downloads etc.
It is a no-brainer. You let Ubuntu do the work for you instead of wondering about creating ESP, root, Swap and Home partitions.
Of course, this is the best way if you do not want any other operating system besides Ubuntu on your machine.
The procedure shown here works for Ubuntu and all other distributions based on it, such as Kubuntu, Xubuntu, Lubuntu, Ubuntu Budgie, Linux Mint, Linux Lite etc. The screenshot might look a bit different, but the steps are basically the same.
Suggested Read 📖
Install Ubuntu by replacing Windows and other operating systems
What do you need to install Ubuntu:
- A USB of at least 8 GB in size, preferred.
- Internet connection (for downloading Ubuntu and live-USB making tool, not required for installing Ubuntu)
- Optionally, you may need an external USB disk for making a backup of your important data (if any) present on the current system
If you are going to install the default Ubuntu GNOME, the system requirements are:
- A system with a 2 GHz dual-core processor or better
- 4 GB of RAM or more
- At least 25 GB of hard disk space
You may save your personal files, documents, pictures etc on an external USB disk or cloud storage if you want to use it later.
Step 1: Download Ubuntu
Before you do anything, you have to download Ubuntu. It is available as a single ISO file of around 3-4 GB in size. An ISO file is basically an image of a disc, and you need to extract this ISO on a USB disk or DVD.
You can download the Ubuntu ISO from its website.
If you have slow or inconsistent internet, you can use torrent to download Ubuntu. The torrent files are located on the alternate download page (scroll down a bit).
Step 2: Create a live USB
Once you have downloaded Ubuntu’s ISO file, the next step is to create a live USB of Ubuntu.
A live USB basically allows you to boot into Ubuntu from a USB drive. You can test Ubuntu without even installing it on your system. The same live USB also allows you to install Ubuntu.
There are various free tools available for making a live USB of Ubuntu such as Etcher, Rufus, Unetbootin, Universal USB installer.
You can follow this tutorial to learn to make live USB of Ubuntu with Universal USB Installer on Windows.
You may also watch this video to learn how to make a bootable USB of Ubuntu on Windows.
If you are already using some Linux distribution, you can use Etcher.
Step 3: Boot from the live USB
Plug in your live Ubuntu USB disk to the system.
Now, you need to make sure that your system boots from the USB disk instead of the hard disk. You can do that by moving the USB up in the boot order.
Restart your system. When you see a logo of your computer manufacturer (Dell, Acer, Lenovo etc), press F2 or F10 or F12 to access the BIOS settings.
Now, the BIOS screen could look different for your computer.
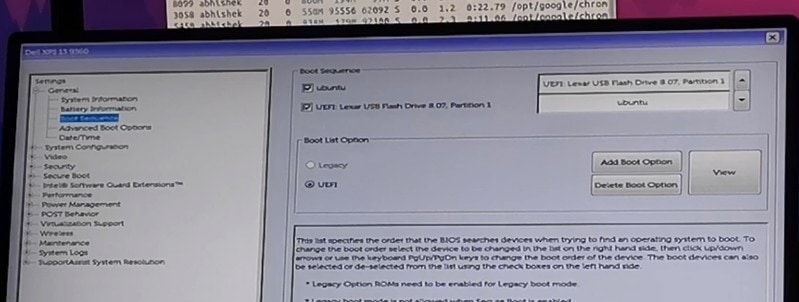
The entire idea is that you put USB (or removable media) on the top of the boot order. Save the changes and exit.
Step 4: Install Ubuntu
Now you should boot into the live Ubuntu environment. You'll have the grub screen that gives you the option to either try Ubuntu without installing or install it right away.
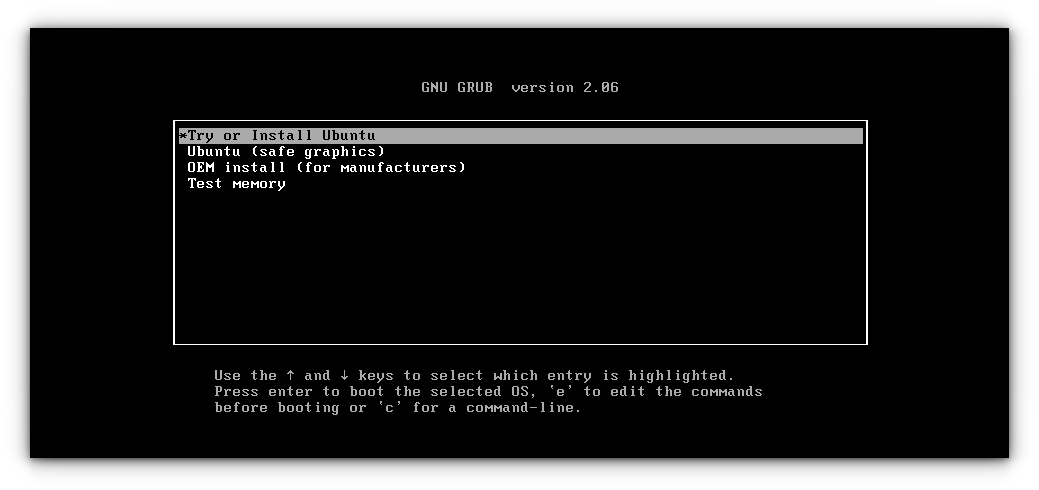
Once you select it, you will be prompted to proceed with “Try Ubuntu” or install it.
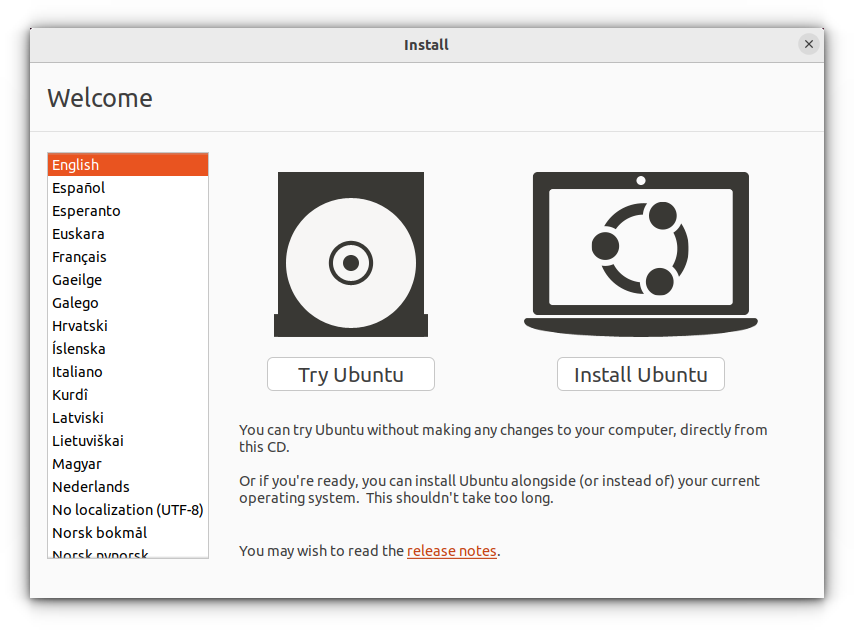
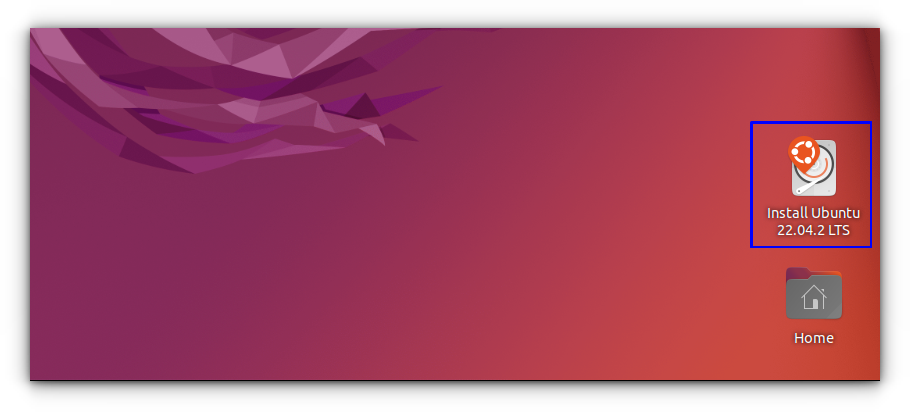
Alternatively, you can click the installation icon on the desktop to initiate the installation if you dismiss the above window.
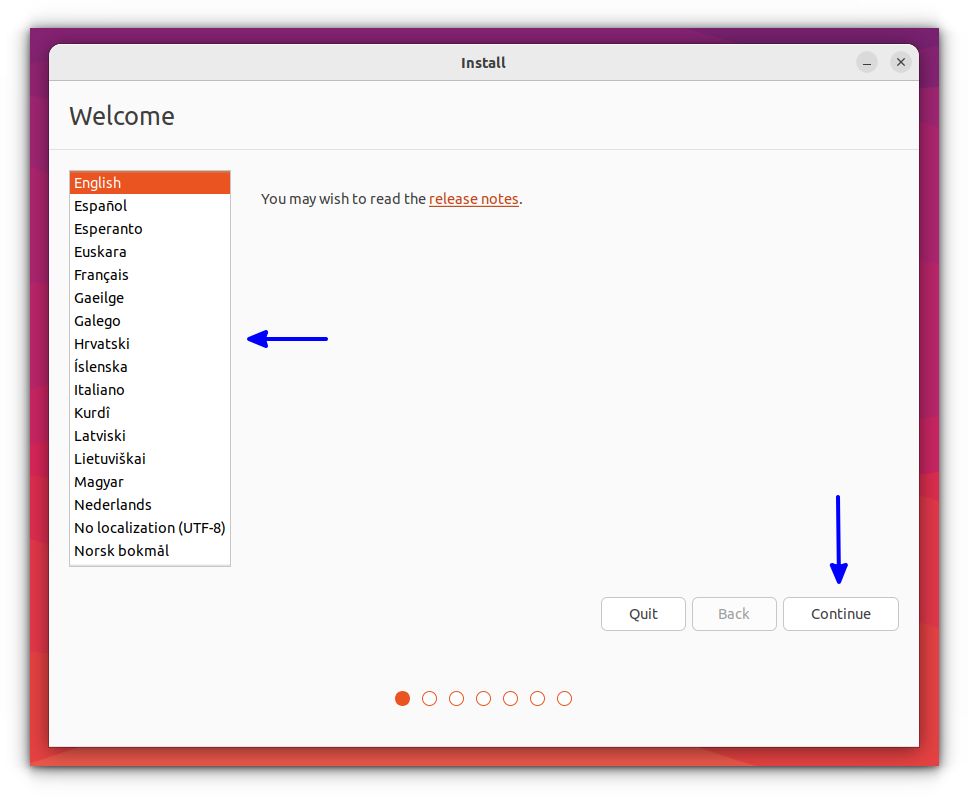
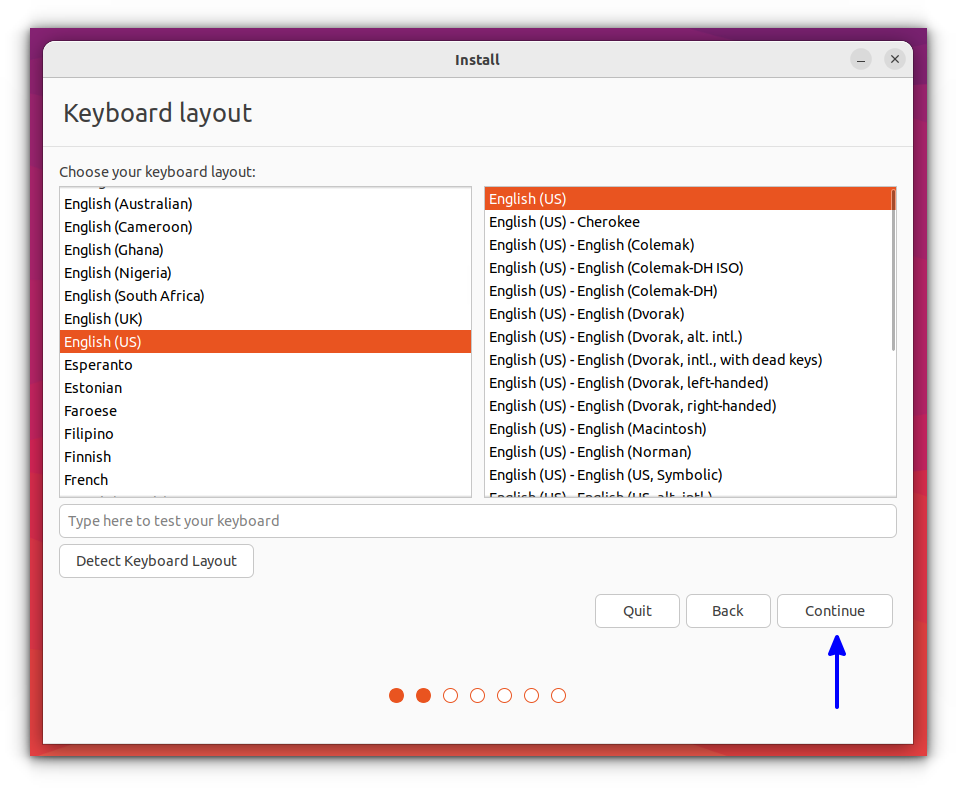
It will ask you to choose some basic configurations like language and keyboard layout. Select the most appropriate ones for your system.
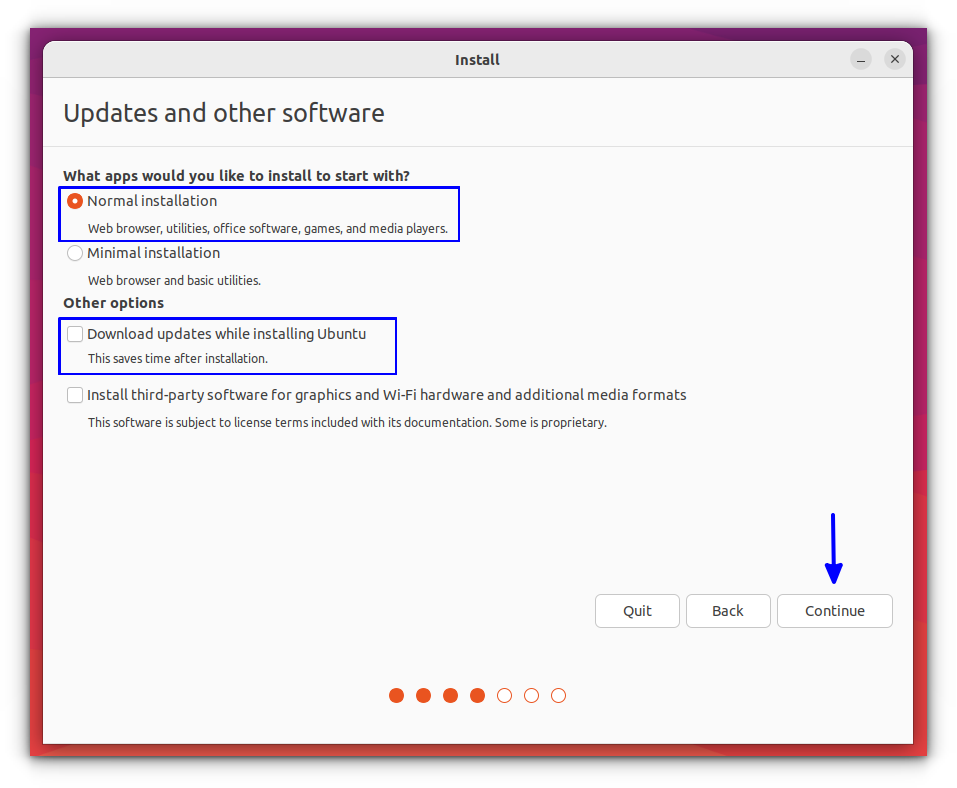
You should go for the normal installation here because it will install some software like a music player, video players and a few games.
If you are connected to the internet, you’ll get the option to download updates while installing Ubuntu. You may uncheck it because it may increase the installation time if you have a slow internet. You can update Ubuntu later as well without any issues.
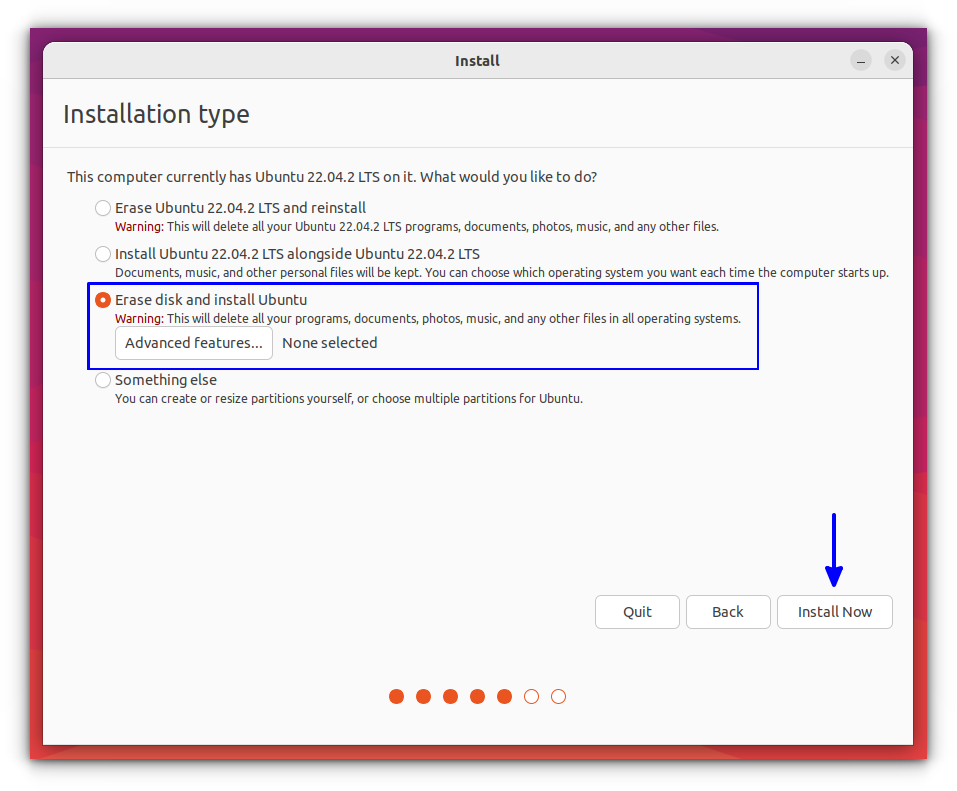
The most important screen comes at this time. If there are other operating systems installed, you may get the option to install Ubuntu along with them in dual boot.
But since your goal is to only have Ubuntu Linux on your entire system, you should go for the Erase disk and install Ubuntu option.
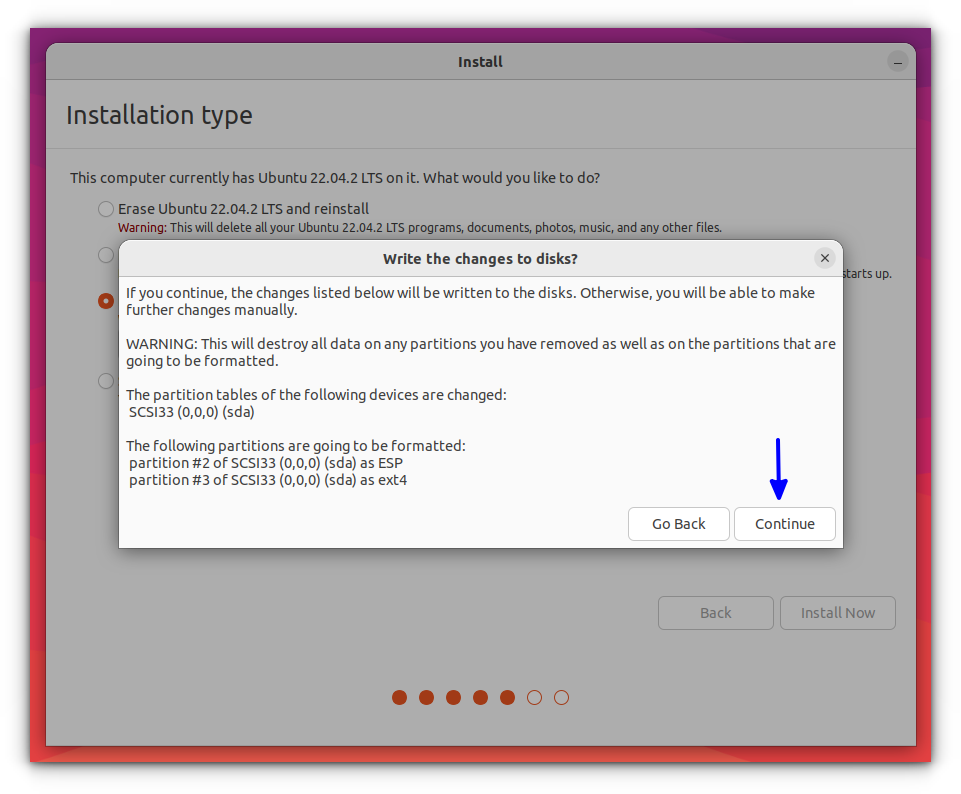
When you hit the “Install Now” button, you’ll see a warning that you are about to delete the data. You already know it, don’t you?
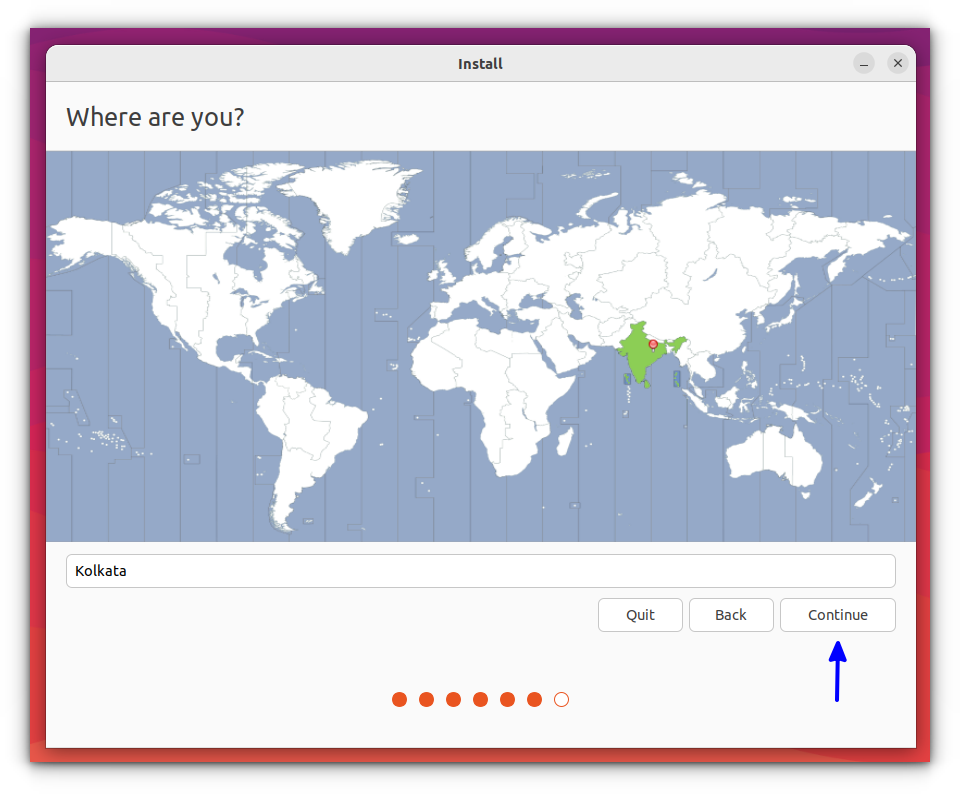
Things are straightforward from here. You’ll be asked to choose a timezone.
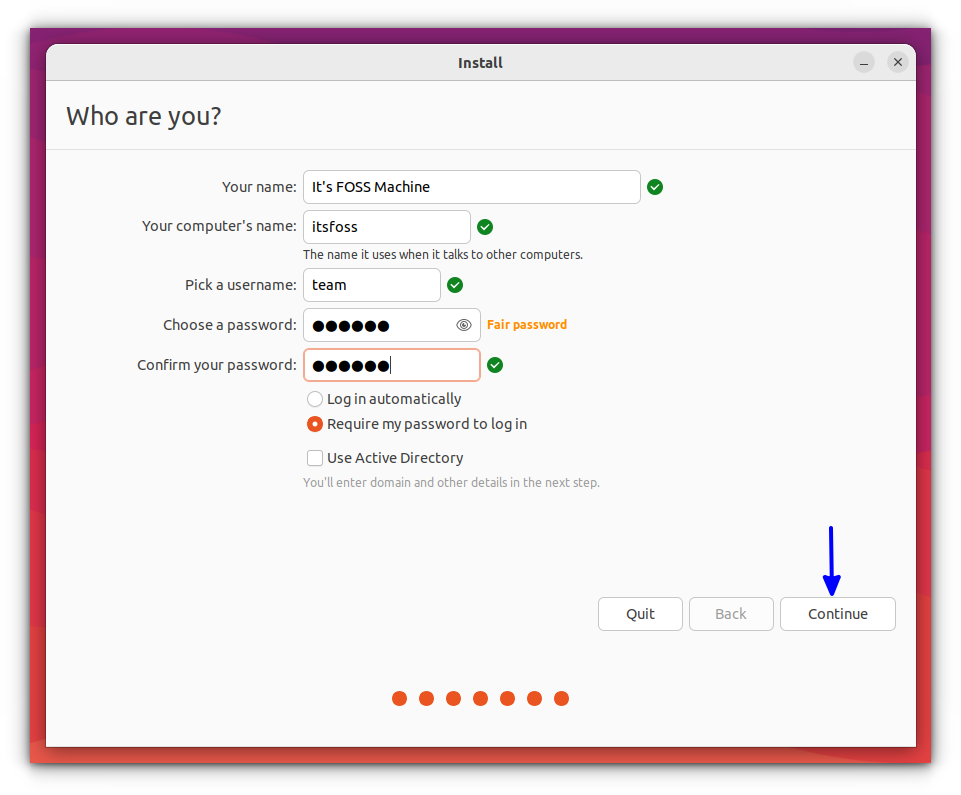
And then you’ll be asked to create a username, computer’s name (also known as hostname) and set a password.
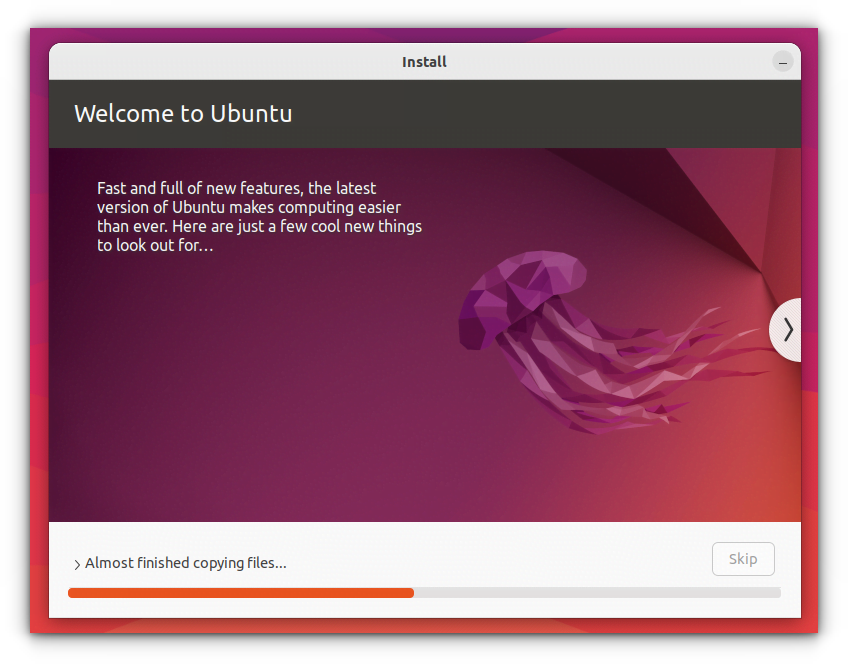
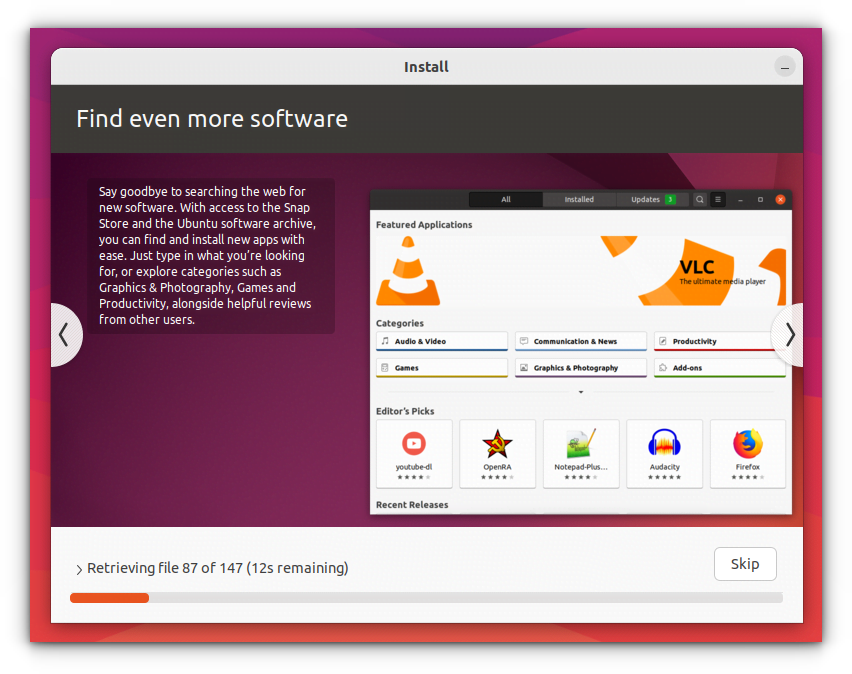
Once you do that, you just have to wait and watch for like 5–10 minutes. You’ll see a slideshow of Ubuntu features in this time.
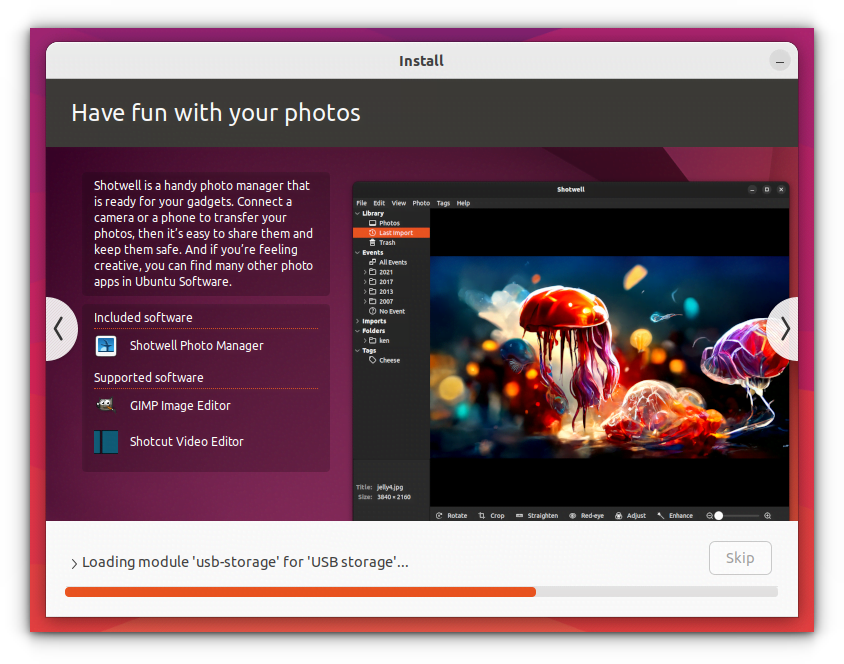
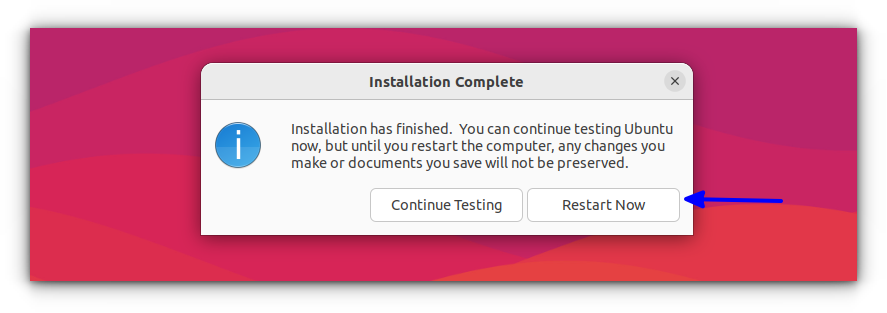
Once the process finishes, you will be asked to restart the system.
When you restart the system, you might encounter a shutdown screen that asks you to remove the installation media and press enter.
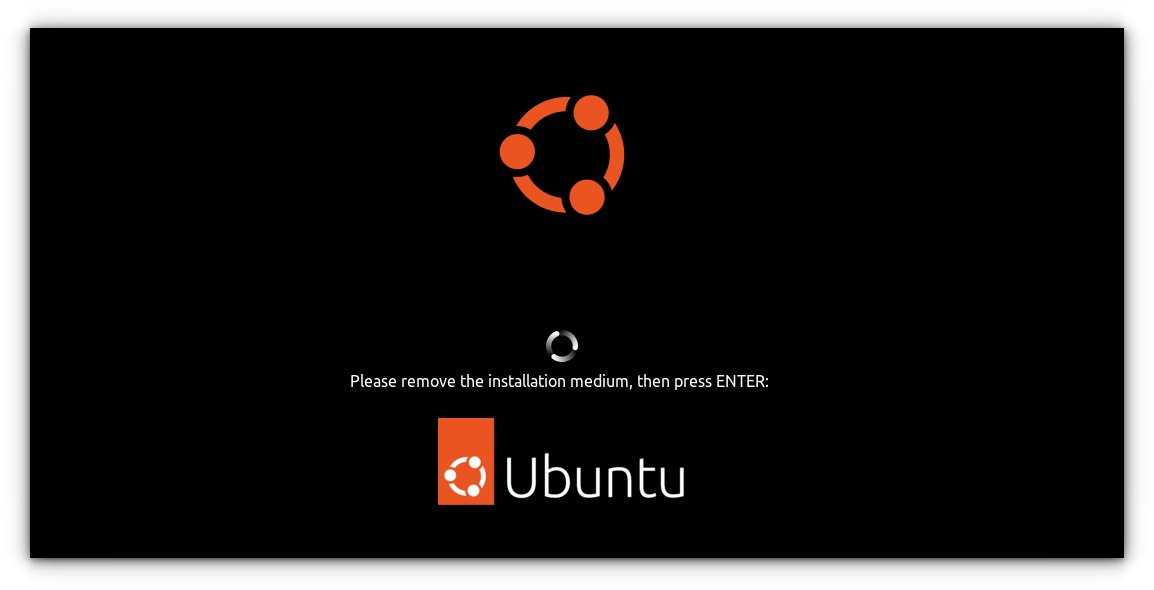
Remove the USB disk and press enter. Your system will reboot and this time, you’ll boot into Ubuntu.
That’s it. See, how easy it is to install Ubuntu. You can use this method to replace Windows with Ubuntu.
What next?
Now that you have successfully installed it, I strongly suggest reading this guide on things to do after installing Ubuntu to make your Ubuntu experience smoother.
I also recommend going through this list of Ubuntu tutorials and learning to do various common things with Ubuntu.
I hope you find this tutorial helpful in installing Ubuntu. If you have questions or suggestions, please feel free to ask it in the comment section.


