
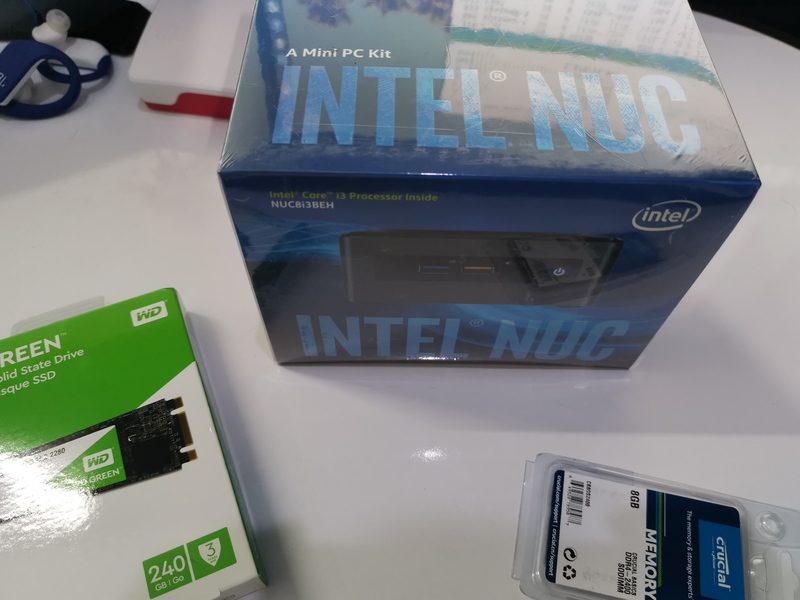
The previous week, I got myself an [lasso link=”B07GX4X4PW” title=”Intel NUC” link_id=”15034″ ref=”intel-nuc-8-mainstream-kit-nuc8i3beh-core-i3-tall-addt-components-needed” id=”101747″]. Though it is a tiny device, it is equivalent to a full-fledged desktop CPU. Most of the Linux-based mini PCs are actually built on top of the Intel NUC devices.
I got the ‘barebone’ NUC with 8th generation Core i3 processor. Barebone means that the device has no RAM, no hard disk and obviously, no operating system. I added an [lasso link=”B01BIWKP58″ title=”8GB RAM from Crucial” link_id=”15035″ ref=”crucial-8gb-single-ddr4-2400-mt-s-pc4-19200-sr-x8-sodimm-260-pin-memory-ct8g4sfs824a” id=”101724″] (around $33) and a [lasso link=”B01M9B2VB7″ title=”240 GB Western Digital SSD” link_id=”15036″ ref=”western-digital-240gb-green-m-2-2280-internal-solid-state-drive-model-wds240g1g0b” id=”101812″] (around $45).
Altogether, I had a desktop PC ready in under $400. I already have a screen and keyboard-mouse pair so I am not counting them in the expense.
The main reason why I got Intel NUC is that I want to test and review various Linux distributions on real hardware. I have a Raspberry Pi 4 which works as an entry-level desktop but it’s an ARM device and thus there are only a handful of Linux distributions available for Raspberry Pi.
The Amazon links in the article are affiliate links. Please read our affiliate policy.
Installing Linux on Intel NUC
I started with Ubuntu 18.04 LTS version because that’s what I had available at the moment. You can follow this tutorial for other distributions as well. The steps should remain the same at least till the partition step which is the most important one in the entire procedure.
Step 1: Create a live Linux USB
Download Ubuntu 18.04 from its website. Use another computer to create a live Ubuntu USB. You can use a tool like Rufus or Etcher. On Ubuntu, you can use the default Startup Disk Creator tool.
Step 2: Make sure the boot order is correct
Insert your USB and power on the NUC. As soon as you see the Intel NUC written on the screen, press F2 to go to BIOS settings.
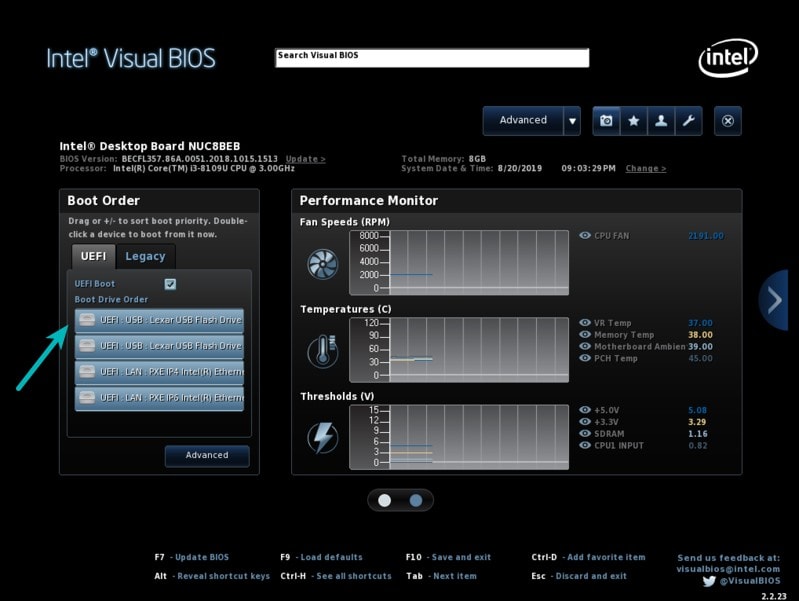
In here, just make sure that boot order is set to boot from USB first. If not, change the boot order.
If you had to make any changes, press F10 to save and exit. Else, use Esc to exit the BIOS.
Step 3: Making the correct partition to install Linux
Now when it boots again, you’ll see the familiar Grub screen that allows you to try Ubuntu live or install it. Choose to install it.
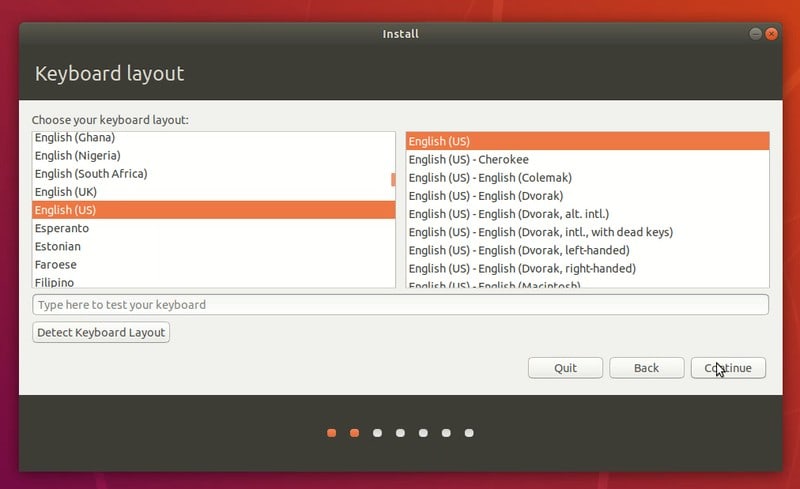
First few installation steps are simple. You choose the keyboard layout, and the network connection (if any) and other simple steps.
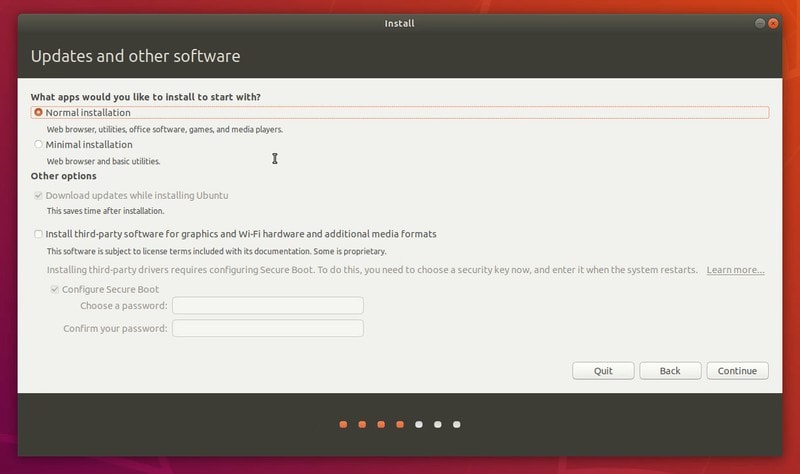
You may go with the normal installation that has a handful of useful applications installed by default.
The interesting screen comes next. You have two options:
- Erase disk and install Ubuntu: Simplest option that will install Ubuntu on the entire disk. If you want to use only one operating system on the Intel NUC, choose this option and Ubuntu will take care of the rest.
- Something Else: This is the advanced option if you want to take control of things. In my case, I want to install multiple Linux distribution on the same SSD. So I am opting for this advanced option.
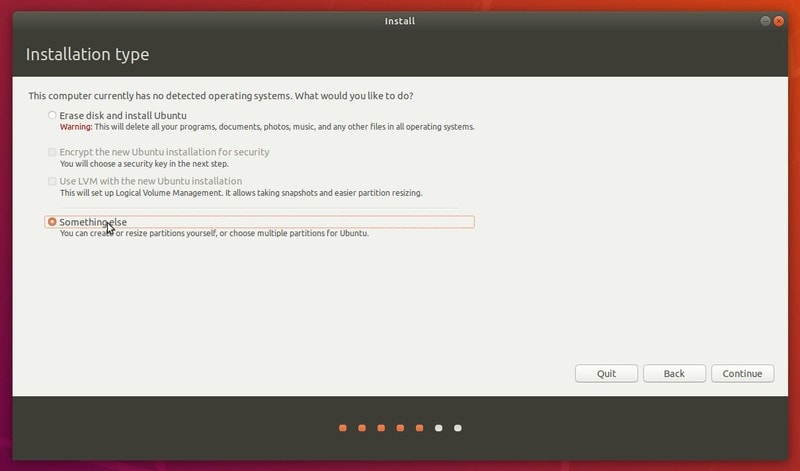
If you opt for “Erase disk and install Ubuntu”, click continue and go to the step 4.
If you are going with the advanced option, follow the rest of the step 3.
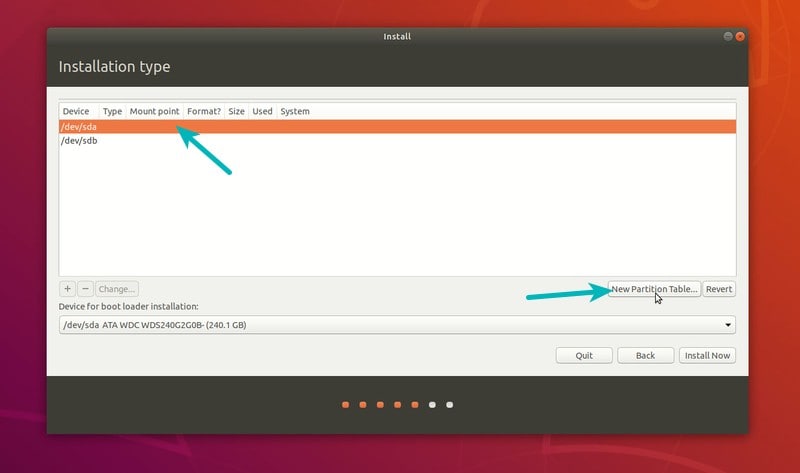
Select the SSD disk and click on New Partition Table.
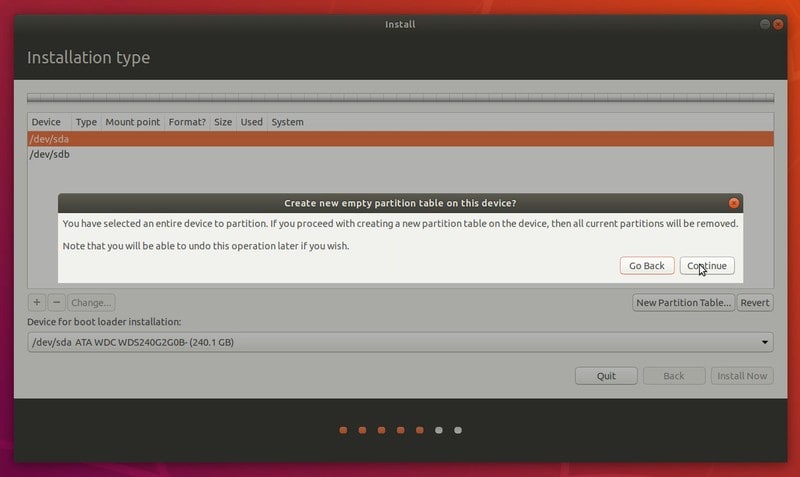
It will show you a warning. Just hit Continue.
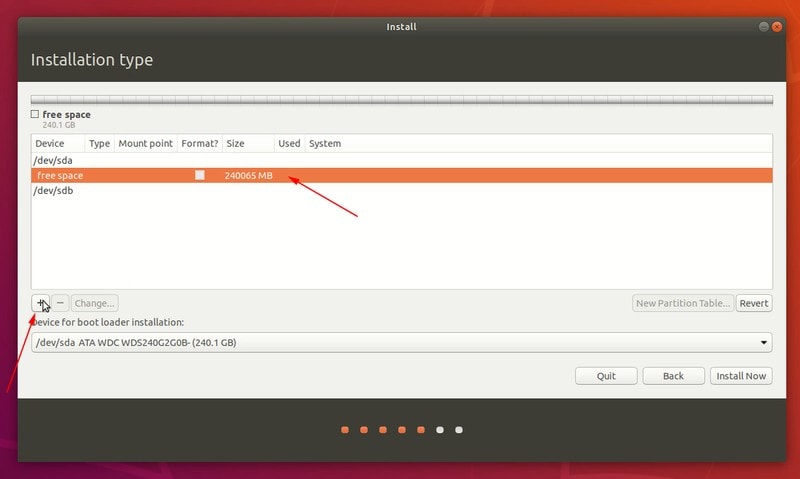
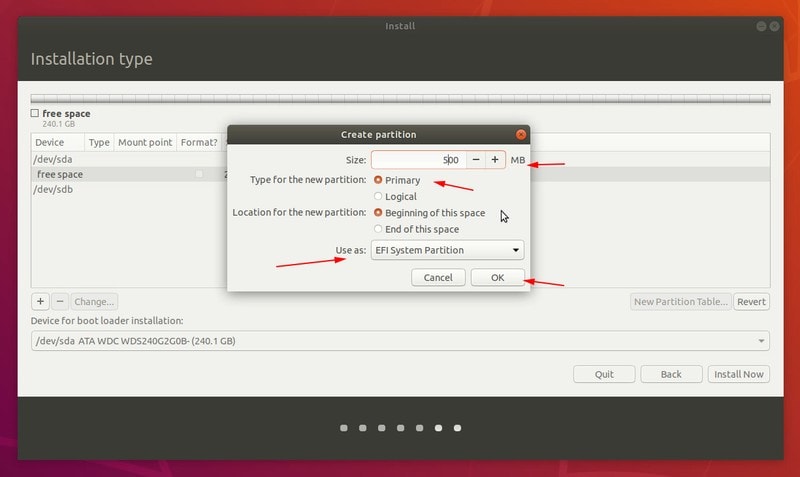
Now you’ll see a free space of the size of your SSD disk. My idea is to create an EFI System Partition for the EFI boot loader, a root partition and a home partition. I am not creating a swap partition. Ubuntu creates a swap file on its own and if the need be, you can easily create swap files in Linux to extend the swap size.
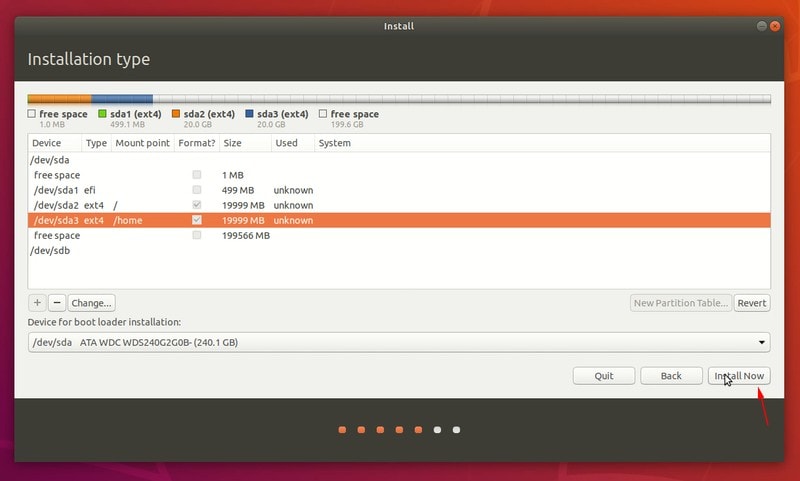
I’ll leave almost 200 GB of free space on the disk so that I could install other Linux distributions here. You can utilize all of it for your home partitions. Keeping separate root and home partitions help you when you want to save reinstall the system
Select the free space and click on the plus sign to add a partition.
Usually 100 MB is sufficient for the EFI but some distributions may need more space so I am going with 500 MB of EFI partition.
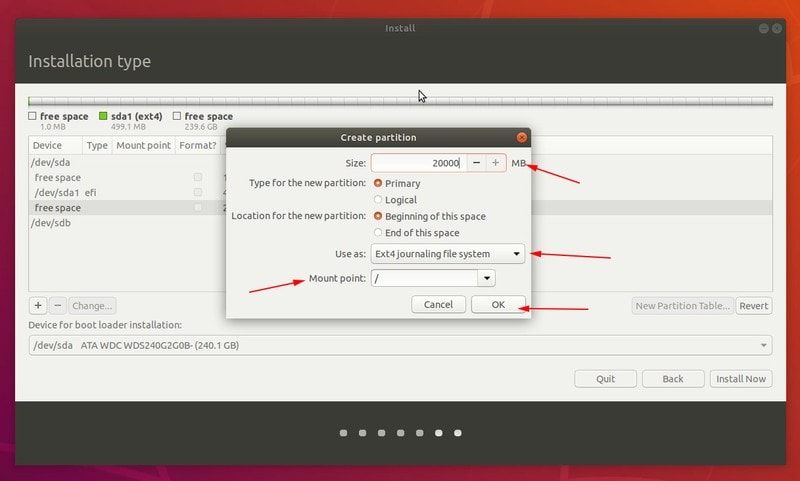
Next, I am using 20 GB of root space. If you are going to use only one distributions, you can increase it to 40 GB easily.
Root is where the system files are kept. Your program cache and installed applications keep some files under the root directory. I recommend reading about the Linux filesystem hierarchy to get more knowledge on this topic.
Provide the size, choose Ext4 file system and use / as the mount point.
The next is to create a home partition. Again, if you want to use only one Linux distribution, go for the remaining free space. Else, choose a suitable disk space for the Home partition.
Home is where your personal documents, pictures, music, download and other files are stored.

Now that you have created EFI, root and home partitions, you are ready to install Ubuntu Linux. Hit the Install Now button.
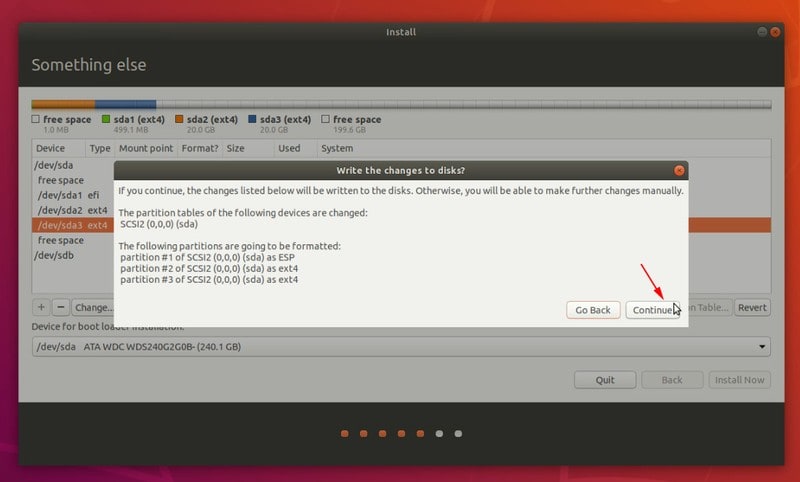
It will give you a warning about the new changes being written to the disk. Hit continue.
Step 4: Installing Ubuntu Linux
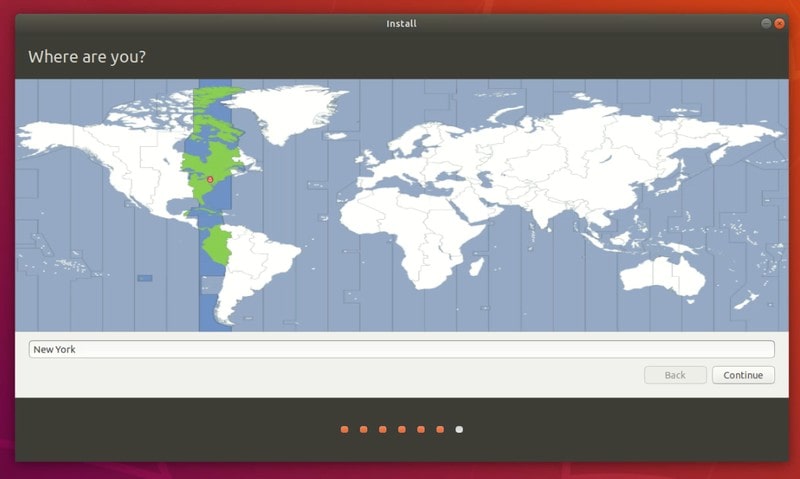
Things are pretty straightforward from here onward. Choose your time zone right now or change it later.
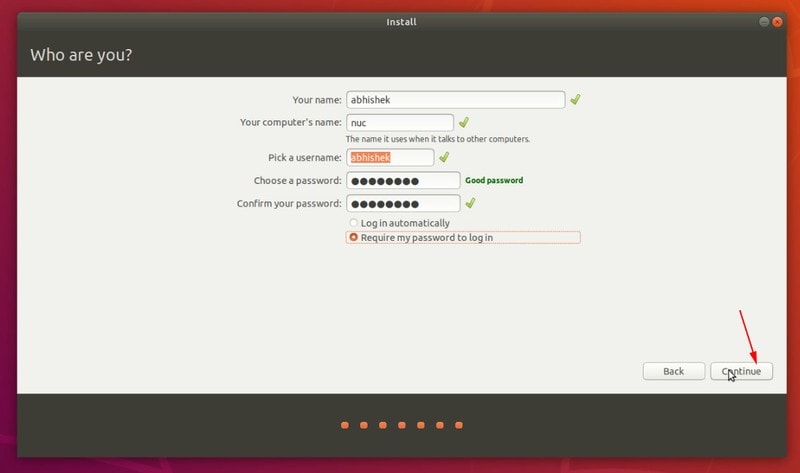
On the next screen, choose a username, hostname and the password.
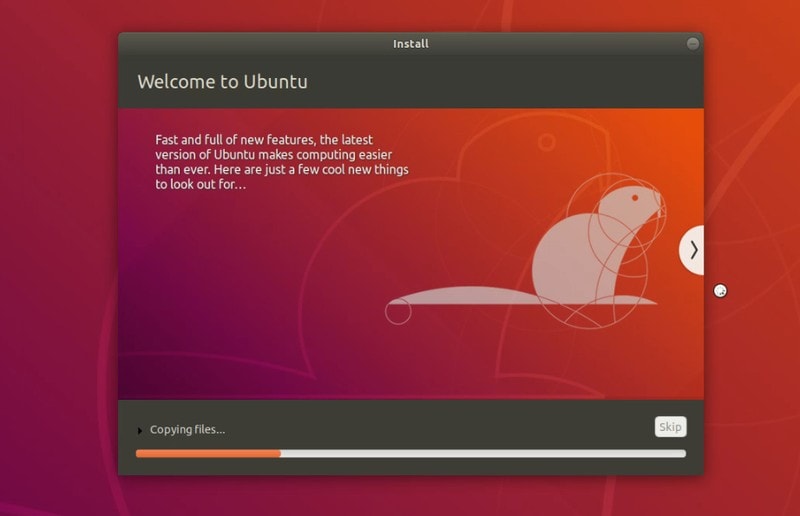
It’s a wait an watch game for next 7-8 minutes.
Once the installation is over, you’ll be prompted for a restart.
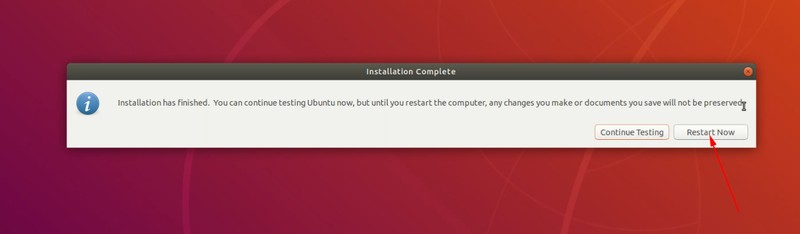
When you restart, you should remove the live USB otherwise you’ll boot into the installation media again.
That’s all you need to do to install Linux on an Intel NUC device. Quite frankly, you can use the same procedure on any other system.
Intel NUC and Linux: how do you use it?
I am loving the Intel NUC. It doesn’t take space on the desk and yet it is powerful enough to replace the regular bulky desktop CPU. You can easily upgrade it to 32GB of RAM. You can install two SSD on it. Altogether, it provides some scope of configuration and upgrade.
If you are looking to buy a desktop computer, I highly recommend [lasso link=”B07GX4X4PW” title=”Intel NUC” link_id=”15037″ ref=”intel-nuc-8-mainstream-kit-nuc8i3beh-core-i3-tall-addt-components-needed” id=”101747″] mini PC. If you are not comfortable installing the OS on your own, you can buy one of the Linux-based mini PCs.
Do you own an Intel NUC? How’s your experience with it? Do you have any tips to share it with us? Do leave a comment below.
