
Homebrew, also known as Brew, is a command line package manager primarily created for macOS.
Homebrew grew quite popular among macOS users as more developers created command line tools that could be easily installed with Homebrew.
This popularity resulted in the creation of Linuxbrew, a Linux port for Homebrew. Since it is primarily Git and Ruby, and Linux and macOS are both Unix-like systems, Brew works good on both kind of operating systems.
Linuxbrew project eventually merged with Homebrew project and now you just have one Brew project called Homebrew.
Why am I calling it brew, instead of Homebrew? Because the command starts with brew. You’ll see it in detail in a later section.
Why use Homebrew package manager on Linux when you have got apt, dnf, snap etc?
I know the feeling. You already have a good package manager provided by your distribution. In addition to that, you have Snap, Flatpak and other universal package system.
Do you really need Homebrew package manager on your Linux system? The answer depends on your requirement, really.
See, apart from the distribution’s package manager and universal packages, you’ll come across situations where you need other package managers like Pip (for Python applications) and Cargo (for Rust packages).
Imagine you came across a good command line utility and want to try it. It’s repository mentions that it can be installed using brew or source code only. In such a case, having brew on your system could be helpful. After all, installing from source code in the 2020s is not fashionable (and comfortable).
In other words, you’ll have an additional option in case you come across some interesting CLI tool that provides only brew installation option.
Install Homebrew on Ubuntu and other Linux distributions
The installation is quite easy. You just have to make sure that you have got all the dependencies.
Step 1: Install dependencies
You need to have relatively newer version of gcc and glibc. You can install build-essential package on Ubuntu to get them. Apart from that, you also need to install Git, Curl and procps (used for monitoring system process).
You can install all of them together like this in Ubuntu and Debian based systems:
sudo apt-get install build-essential procps curl file git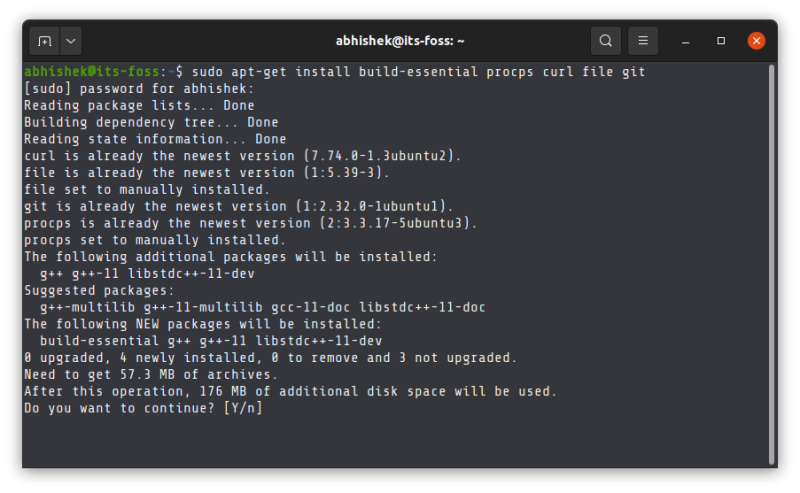
For other distributions, please use your package manager and install these dependencies.
Step 2: Install Homebrew
You can see why you needed to install Curl. It allows you to download the installation script file in the terminal.
Just enter this command:
/bin/bash -c "$(curl -fsSL https://raw.githubusercontent.com/Homebrew/install/HEAD/install.sh)"When asked for RETURN key, press enter:
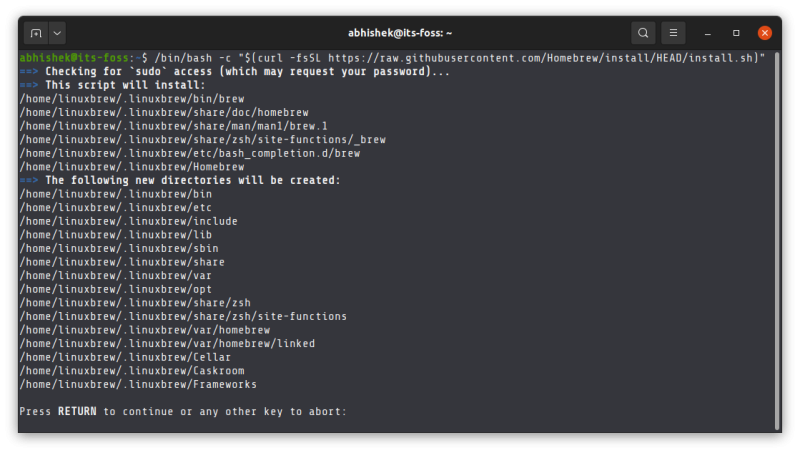
At the end of the script competition, it recommends to run a few commands to add it to the PATH variable. Homebrew is actually installed in your home directory and then soft linked to the /usr/local directory.
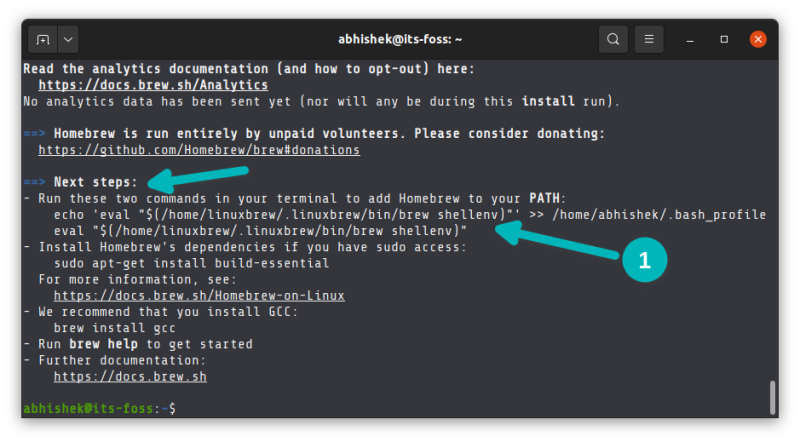
You can copy and paste in terminal easily. Just select the command it suggests and press Ctrl+Shift+C to copy and Ctrl+Shift+V to paste.
Alternatively, you can just copy paste this command:
echo 'eval "$(/home/linuxbrew/.linuxbrew/bin/brew shellenv)"' >> $HOME/.bash_profileAnd then this:
eval "$(/home/linuxbrew/.linuxbrew/bin/brew shellenv)"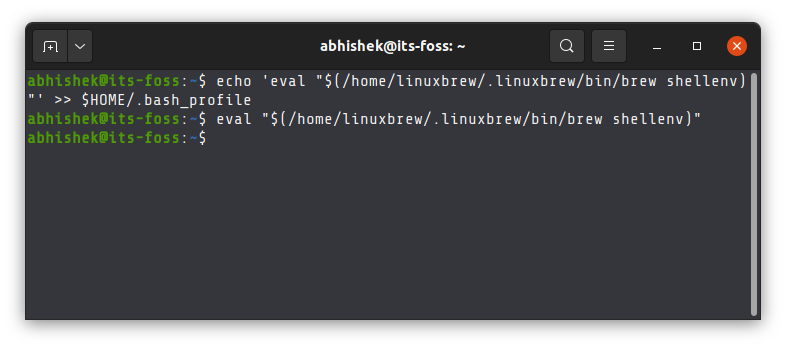
Step 3: Verify brew installation
You are almost done. Just verify that brew command is ready to run by using the brew doctor command:
brew doctorThe brew doctor command will tell you if there is any issue.
You may double verify by installing the sample hello project:
brew install helloIf you see no errors, you can enjoy the Homebrew package manager on Linux.
Using brew command for installing, removing and managing packages
Let me quickly tell you a few brew commands you can use for installing, removing and managing packages.
Since Homebrew is installed in your home directory, you do not need sudo to run it (just like Pip and Cargo).
To install a package with brew, use the install option:
brew install package_nameThere is no autocompletion for the package name here. You need to know the exact package name.
To remove a brew package, you can use either remove or uninstall option. Both works the same.
brew remove package_nameYou can also list the installed brew packages with this command:
brew listYou can also remove the unneeded dependencies with the autoremove option:
brew autoremoveIn the next screenshot, I had only two packages installed with brew but it also shows the dependencies installed for those packages. Even after removing the package, dependencies remained. The autoremove finally removed them.
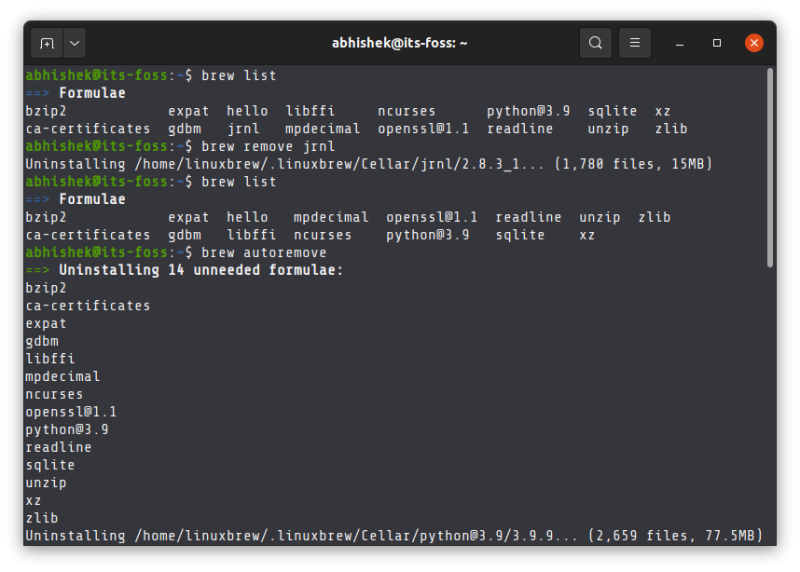
There are a lot more brew command options but that is out of scope for this tutorial. You can always go through their documentation and explore it further.
Removing Homebrew from Linux
This tutorial won’t complete without adding the steps for removing Homebrew from your Linux system.
As per the steps mentioned on its GitHub repository, you have to download and run the uninstall script using this command:
/bin/bash -c "$(curl -fsSL https://raw.githubusercontent.com/Homebrew/install/HEAD/uninstall.sh)"You’ll be asked to confirm the removal by entering the Y key.
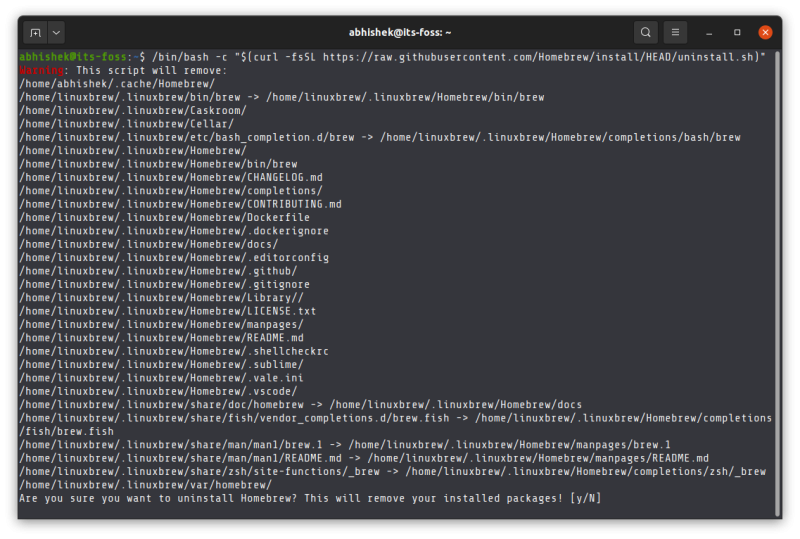
When the uninstallation of Homebrew completes, it lists the files and directories it has leftover:
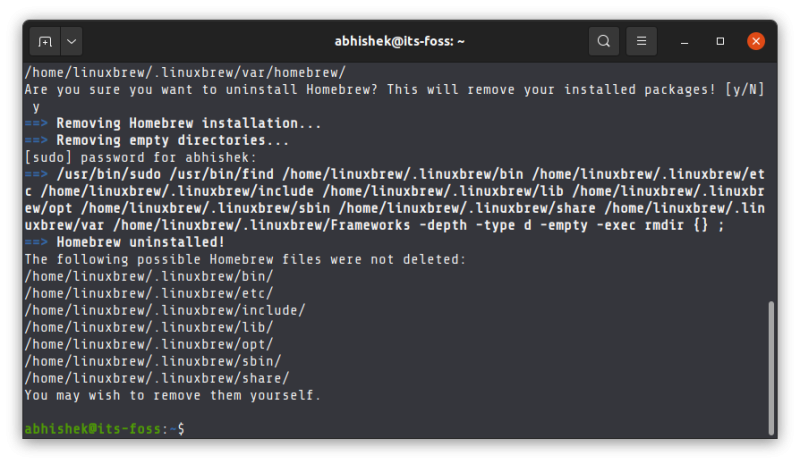
I let you remove the files and directories on your own.
Conclusion
As I explained earlier, Homebrew provides an extension to what you have already got. If you stumble upon an application that has only brew as installation method, having Homebrew installed on your Linux system will come handy.
Anything you want to add to this topic or share your question or opinion? Please use the comment section.

