
As a developer, you've likely seen many IDEs offering AI capabilities - from standalone editors like Cursor, Void editor, and Zed, to extensions like GitHub Copilot, Continue.dev, and Qodo.
If you enjoy tinkering with open source tools and experimenting with different approaches, Flexpilot IDE might be just what you're looking for. 🔍
Why Flexpilot IDE? ✨
Here are my reasons for creating and using Flexpilot:
Bring your own AI Model 🤖: Most developers already have API keys for various LLM services. Today's LLM providers offer generous free tiers - take Google Gemini or Azure OpenAI for instance. Instead of being locked into a specific subscription, Flexpilot lets you use these existing credentials and experiment with different models as you see fit.
Use locally hosted models 🏠: Privacy concerns in AI development are real. With advances in small language models and quantization techniques, running AI locally for simple coding tasks has become increasingly practical. Flexpilot embraces this by supporting locally hosted models, giving you complete control over your code's privacy.
GitHub Copilot Extension marketplace 🔌: The GitHub copilot extension marketplace is one of the largest growing Agentic Marketplace as of today. Flexpilot stands alongside VSCode (i.e., with GitHub copilot) as one of only two platforms that can tap into these extensions, opening up a world of specialized AI capabilities.
Use it inside a browser instantly 🌐: For those of us who spend time exploring GitHub codebases, the default GitHub interface can feel limiting. While vscode.dev and github.dev offer better browsing experiences, they lack AI capabilities. Flexpilot fills this gap through ide.flexpilot.ai, providing a familiar IDE experience enhanced with AI features right in your browser.
Uses native API interfaces ⚡: Most VS Code extensions rely on webviews for their chat interfaces, which can create unnecessary overhead. Flexpilot takes a different approach by using native APIs. Think of it like using a native app versus a web app - the difference might seem subtle at first, but the improved performance and additional capabilities become apparent as you use it.
Forked from VS Code 🔱: If you're comfortable with VS Code, you'll feel right at home with Flexpilot. It maintains all the familiar VS Code features while adding seamless AI integration. This means you get the best of both worlds - a trusted development environment with enhanced AI capabilities.
Use Flexpilot IDE in web browser 🌐
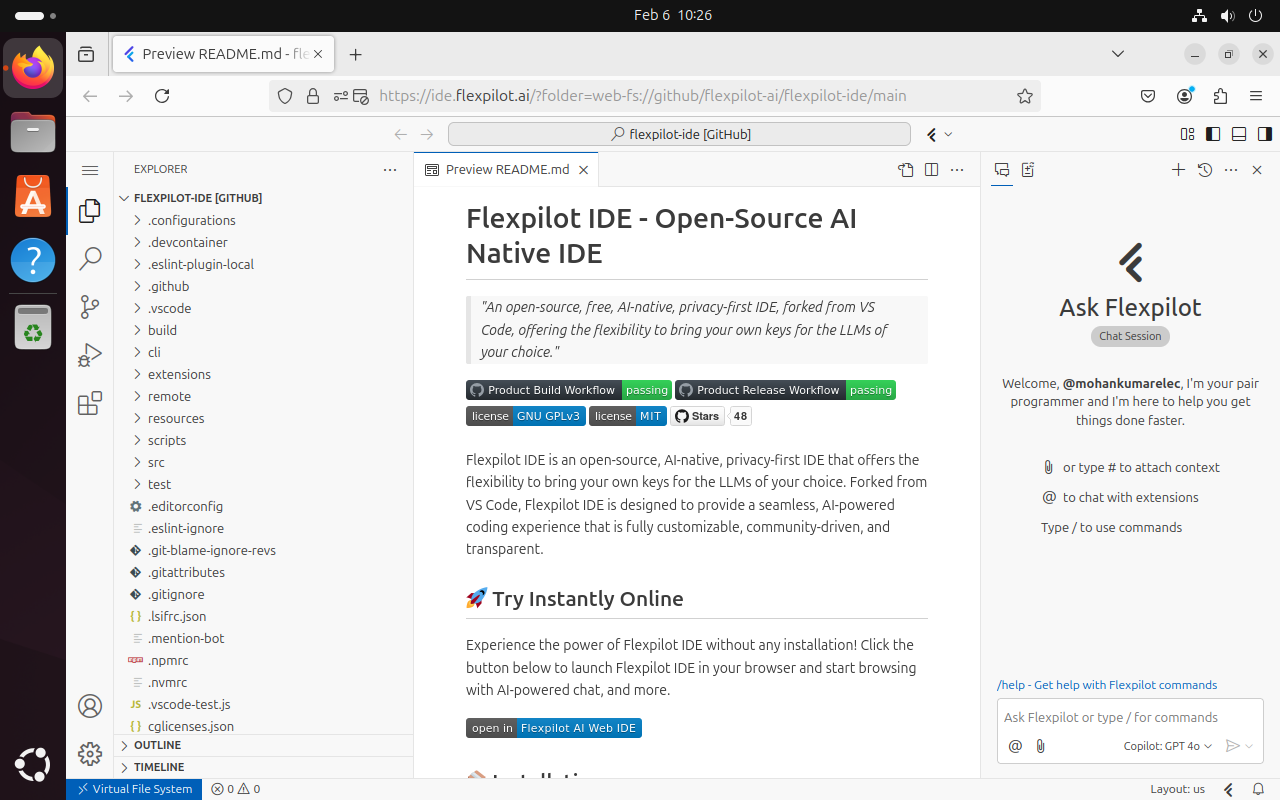
One of Flexpilot's standout features is its browser accessibility. Similar to vscode.dev or github.dev, but with integrated AI capabilities, you can start using it immediately without installation. Try it by clicking here to browser Flexpilot IDE's source code.
To browse any GitHub repository, simply modify the URL with your desired repo details:
https://ide.flexpilot.ai/?folder=web-fs://github/<repo-user>/<repo-name>/<branch>
For example, to explore the flexpilot-ide repo's main branch, use:
https://ide.flexpilot.ai/?folder=web-fs://github/flexpilot-ai/flexpilot-ide/main
Use Flexpilot IDE on Linux desktop 🐧 💻
It would be better to use Flexpilot on the desktop to use its full functionality.
Step 1: Download and install
Head over to flexpilot.ai to download the latest Desktop version. You'll find builds for Windows, Mac, and Linux, with options for both x64 and ARM architectures.
For Ubuntu users, the installation process is straightforward. Once you download the appropriate .deb package, Open terminal in your download directory and run:
For x64 systems:
sudo dpkg -i linux-x64.deb
For ARM systems:
sudo dpkg -i linux-arm64.deb
Then install dependencies:
sudo apt-get install -f
Now you can launch Flexpilot through your Applications menu or by just typing flexpilot in the terminal.
Step 2: Connect to GitHub
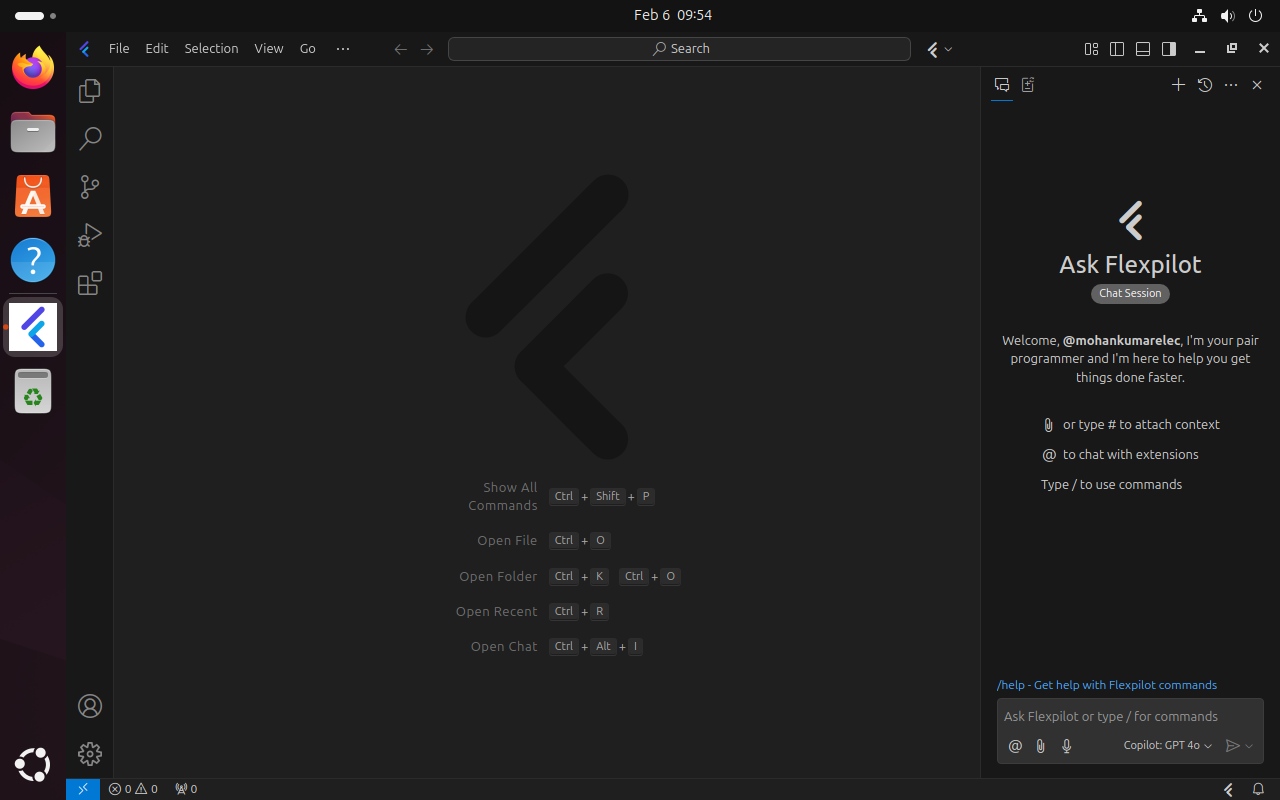
When you first launch Flexpilot, you'll notice a chat panel on the right side of the screen with a GitHub sign-in option. This connection does more than just authentication - it personalizes your experience with your GitHub profile and automatically configures GitHub Models API access, giving you immediate access to AI features.
Step 3: Configure AI Model (Optional during initial setup) ⚡
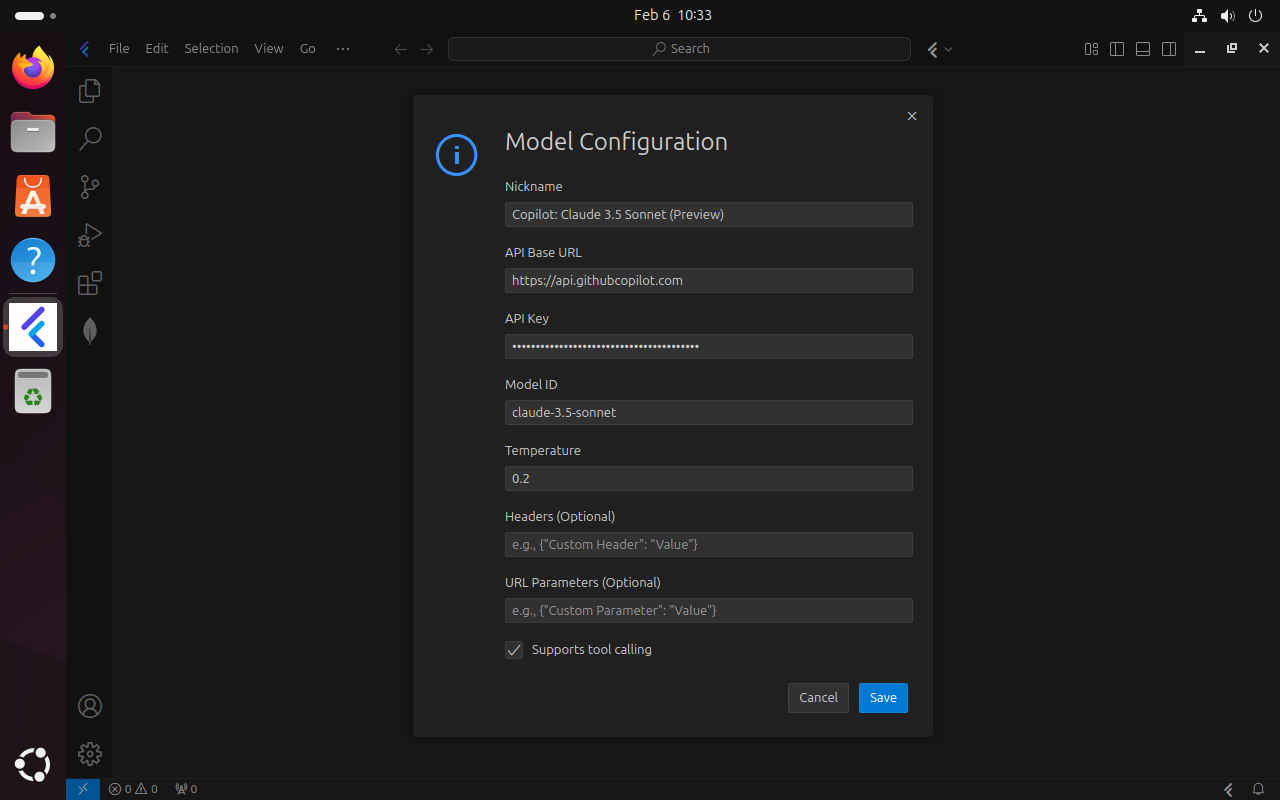
While GitHub Models API is pre-configured after sign-in, you might want to set up additional AI providers. Access the command palette with Ctrl+Shift+P, type Flexpilot: Configure the Language Model Provider, and customize your model settings according to your needs.
Step 4: Start chatting with your codebase using AI 💬
Flexpilot offers several ways to interact with AI throughout your development workflow:
Panel Chat
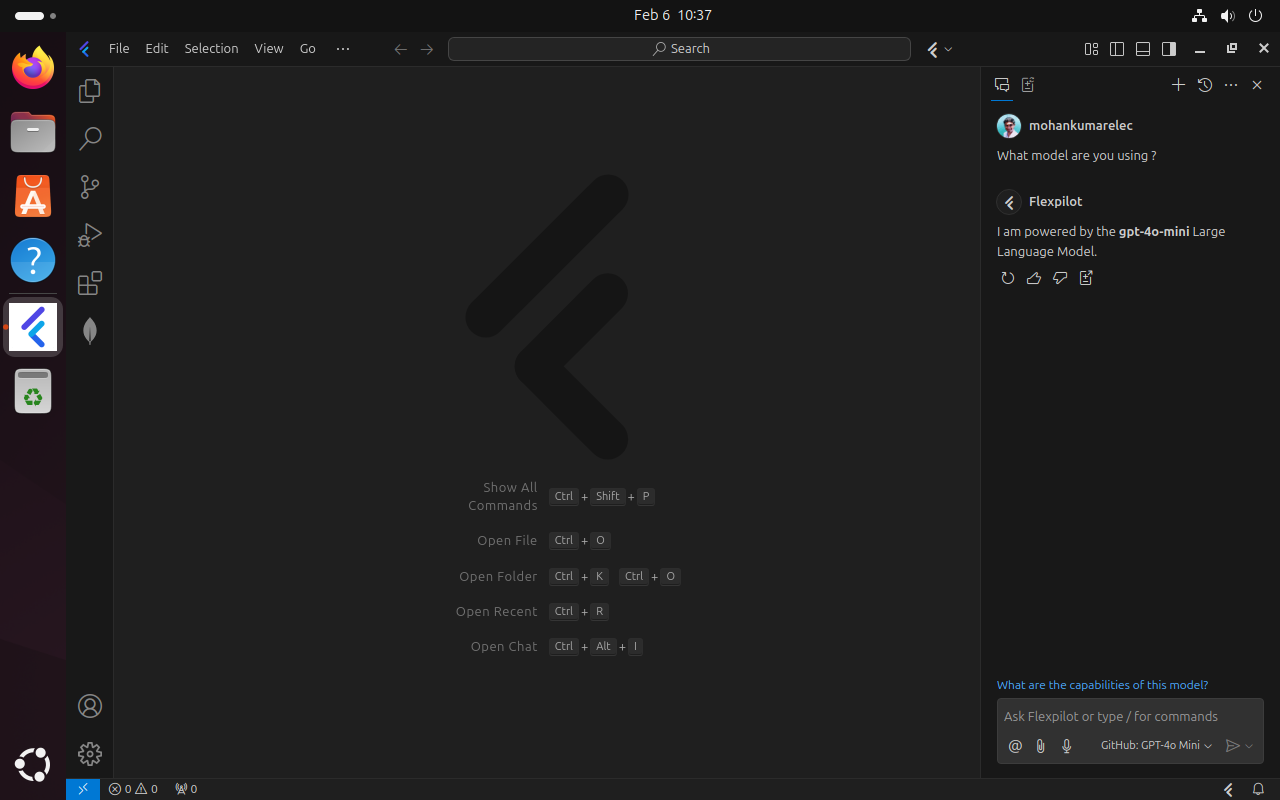
The panel chat sits conveniently on the right side of your screen. Select your preferred model, add context by referencing files or symbols, and start your AI-assisted coding journey.
Inline Chat
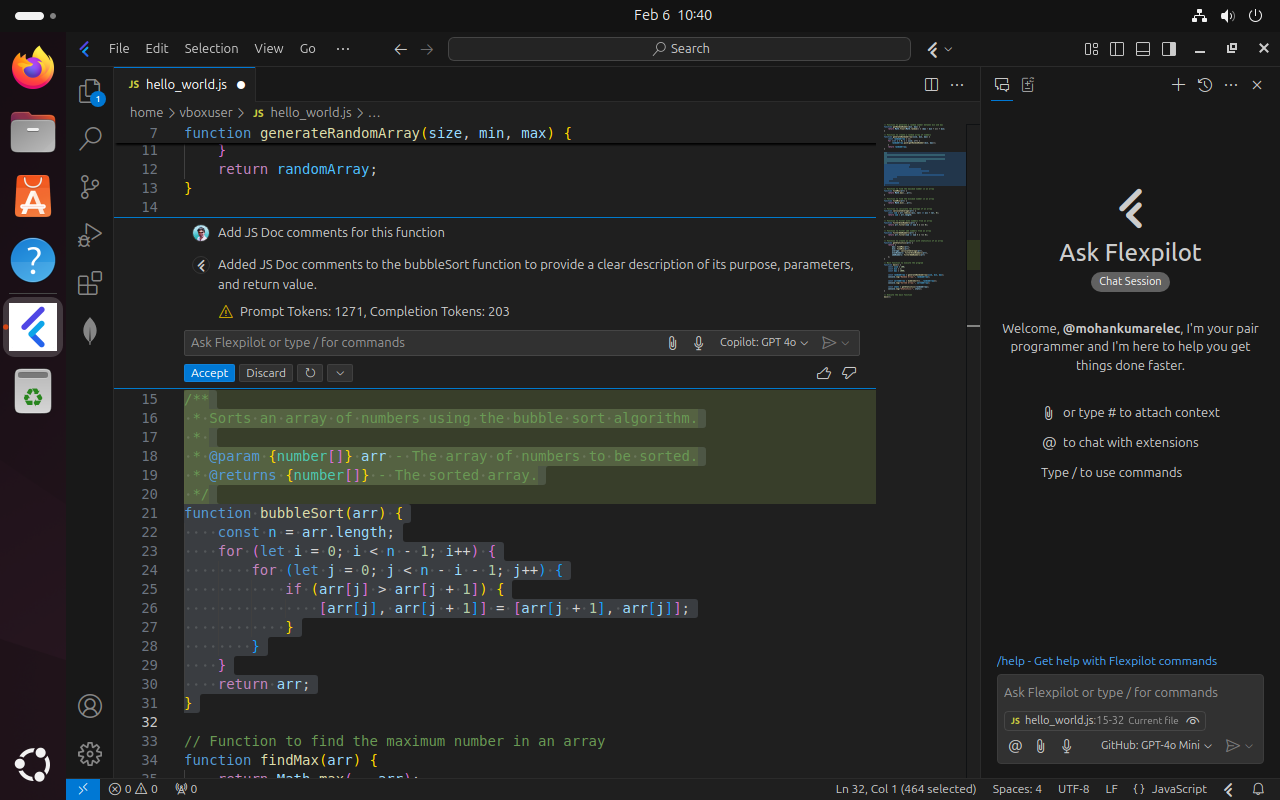
Need to modify specific code sections? Select the code, press Ctrl+I, and describe your desired changes. The AI will suggest improvements while maintaining context.
Terminal Chat
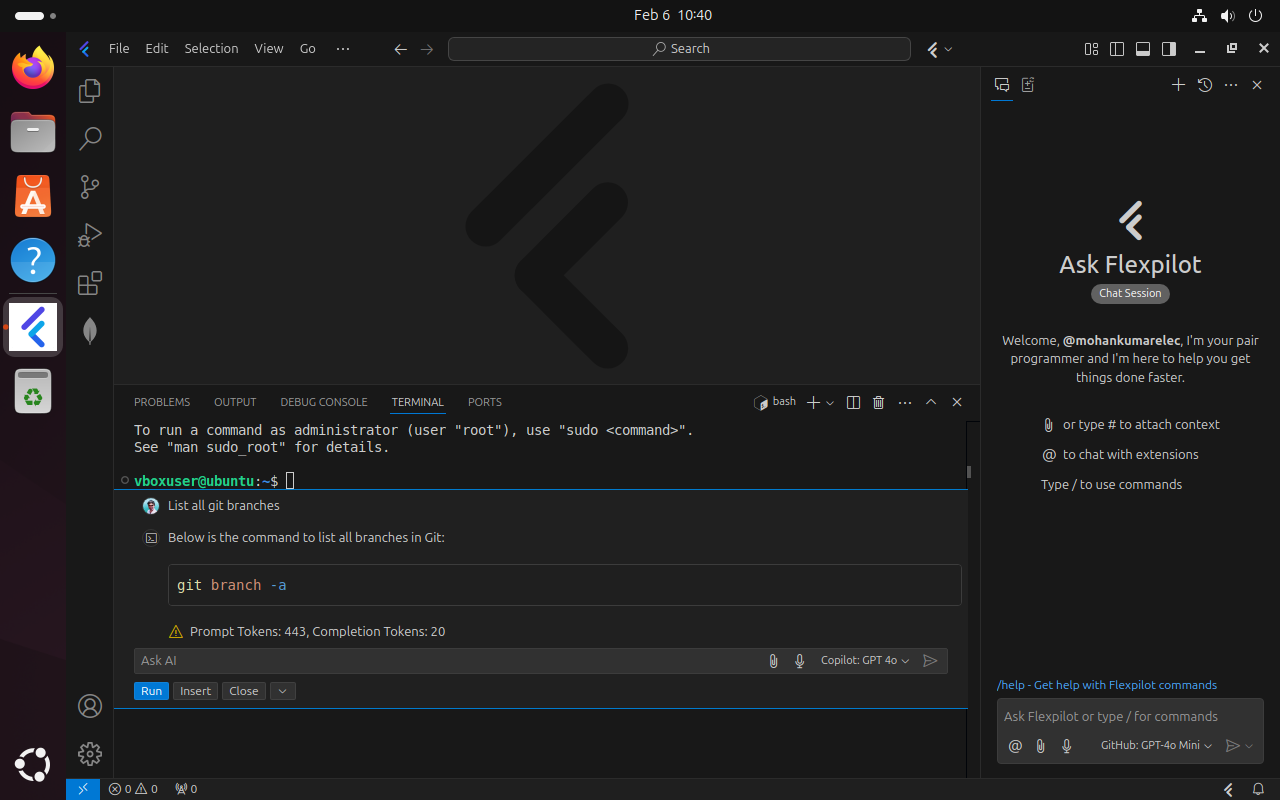
Working in the terminal? Press Ctrl+I while in the integrated terminal to get AI-powered command suggestions and explanations.
Additional Features
Flexpilot's AI integration extends beyond chat interfaces. You'll find AI assistance in code completions, multi-file edits, quick chat, symbol renaming, commit message generation, and more. Check out the official documentation for a complete feature list.
Step 5: Configure completions
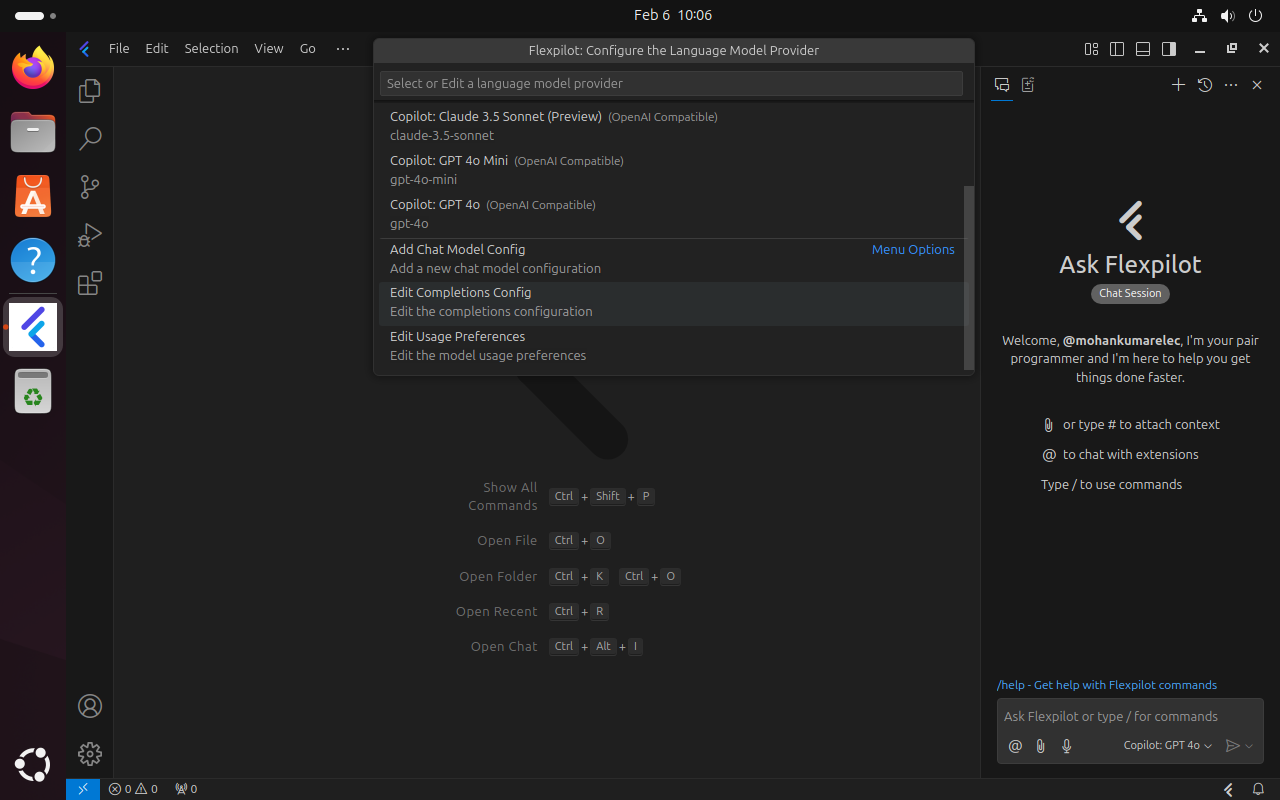
For those who enjoy predictive code completions, configure any OpenAI API compatible completion model providers through the command palette. Select Flexpilot: Configure the Language Model Provider and choose Edit Completions Config.
Extend AI capabilities with Copilot Extensions 🔌
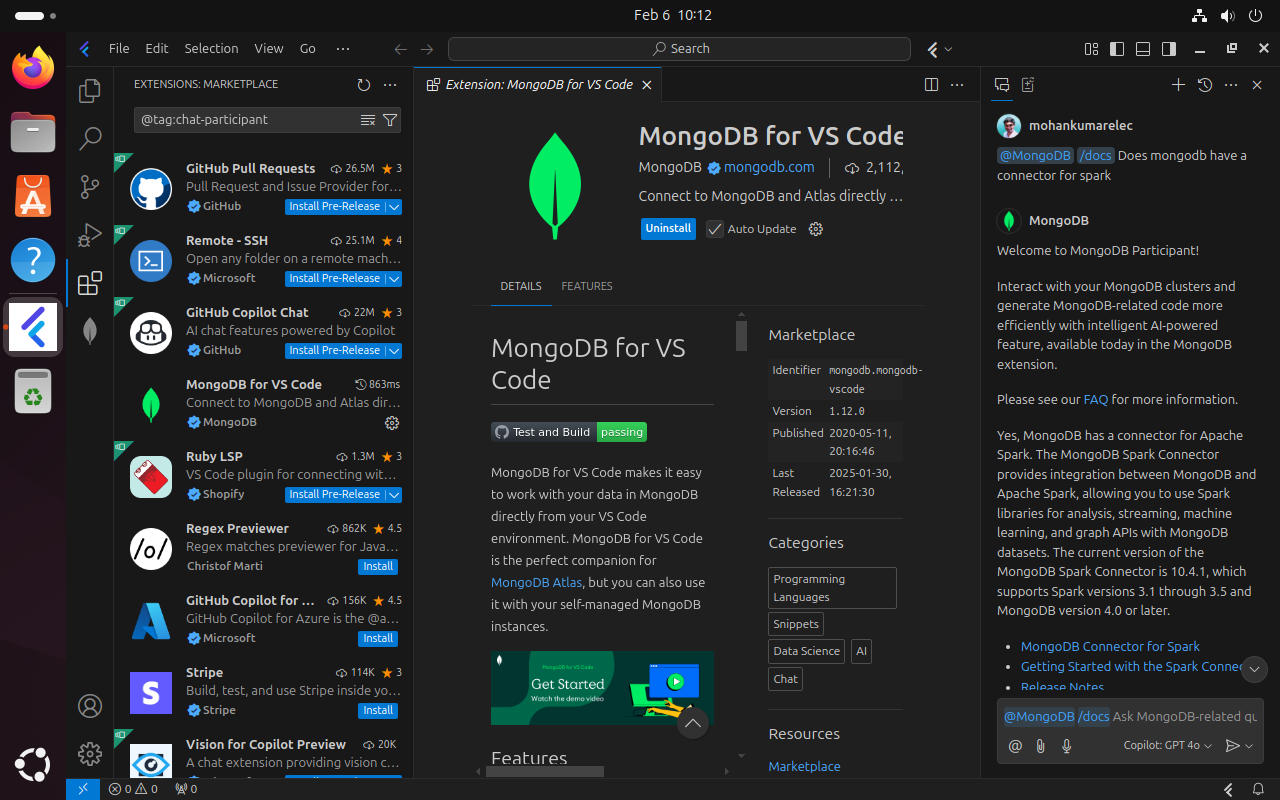
Flexpilot's extension system represents a significant step toward the future of AI development. Type @ in your chat to see installed agents and discover new ones through the marketplace. For instance, try the MongoDB extension - just start your questions with @mongodb for database-specific assistance.
This extension ecosystem embodies the vision of collaborative AI agents working together to solve complex development challenges.
Conclusion
Flexpilot IDE brings a fresh perspective to vibe coding editors. While it's still evolving, its unique features and open approach make it a valuable tool for developers who want more control over their AI assistance.
Looking to contribute? Visit GitHub repository and join the community in shaping the future of AI-native development.
Happy coding! 🚀

Author Info
Mohankumar Ramachandran is a Gen AI enthusiast, turning caffeine into code. Creator of Flexpilot.ai and open source advocate who believes AI is not just hype - it’s the future.


