
Managing partitions is serious business, especially when you have to remove them. I find myself doing this frequently, especially after using thumb drives as live disks and Linux installers because they create several partitions that I won’t need afterwards.
In this tutorial, I will show you how to remove partitions in Linux using both command line and GUI tools.
Warning!
You delete the partition, you lose your data. Whenever you are playing with partitions, make sure backup your data. A slight typo or slip of finger could prove costly. Don’t say we didn’t warn you!
Remove disk partition using GParted [GUI Method]
As a desktop Linux user, you probably will be more comfortable and perhaps safer with a GUI-based tool.
There are several tools that let you manage partitions on Linux. Depending on your distribution you will have one or even more such tool already installed on your system.
For this tutorial, I am going to use GParted. It is a popular open source tool and it’s very easy and intuitive to use.
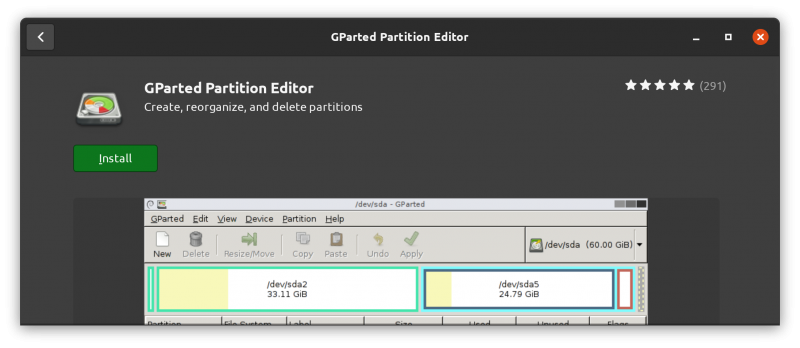
The first step is installing GParted if it isn’t already in your system. You should be able to find it in the software center of your distribution.
Alternatively, you can use your distribution’s package manager for installing it. In Debian and Ubuntu-based Linux distributions, you can use the apt install command:
sudo apt install gpartedOnce installed, let’s open GParted. Since you are dealing with disk partitions, you’ll be required to have root access. It will ask for authentication and once it opens you should see a window like this one:
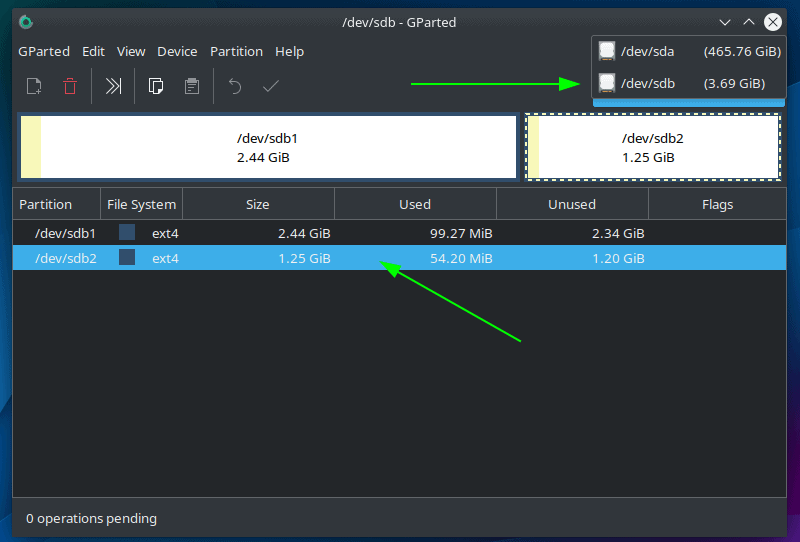
On the right-upper corner you can select the disk and in the lower screen the partition you want to remove.
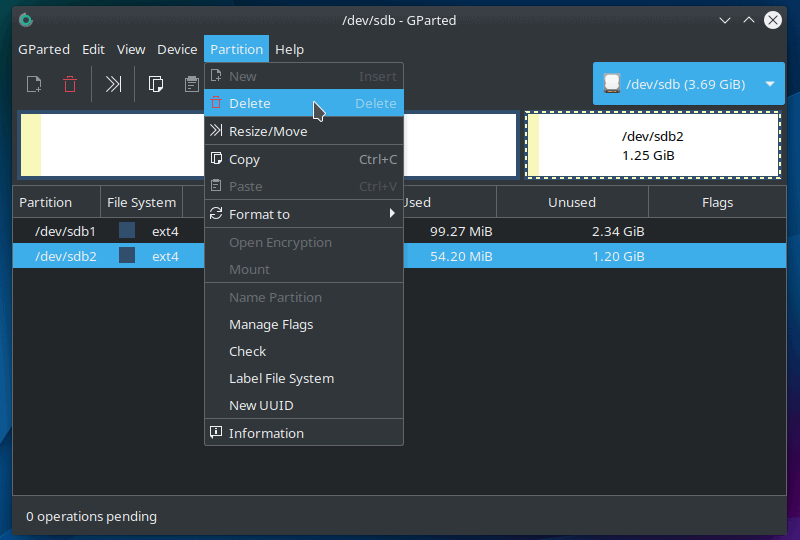
Next, select the option Delete from the Partition menu:
The process is incomplete until you rewrite the partition table. This is a safety measure and it gives you the option to review the changes before confirming it.
To do this just click on the Apply All Operations button located in the toolbar and then Apply when asked for confirmation.

After hitting Apply, you will see a progress bar and a results message saying that all the operations were successful. You can close the message and the main window and consider your partition completely deleted from our disk.
Now that you are aware of the GUI method, let’s move on to the command line.
Delete partitions using fdisk command
Almost every Linux distribution comes with fdisk by default and we are going to use this tool today. The first thing you need to know is what device is assigned to the disk with the partitions you want to remove. To do that, type the following in the terminal:
sudo fdisk --listThis will print all the drives and partitions in our system as well as the assigned devices. You need to have root access in order for it work.
In this example, I will work with a USB drive that contains two partitions as shown below:
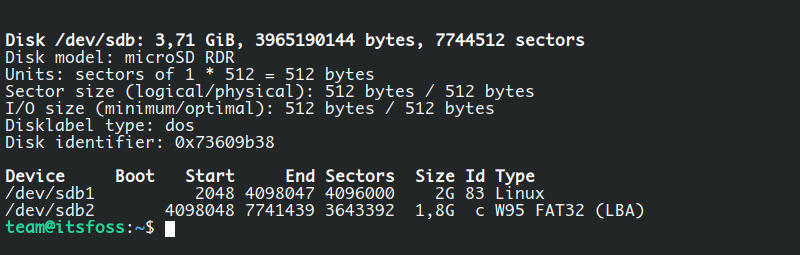
The device assigned in the system is /sdb and it has two partitions, sdb1 and sdb2. Now that you identified which device contains the partitions, you can start working on it by using fdisk and the path to the device:
sudo fdisk /dev/sdbThis will start fdisk in command mode. You can always press m to see a list of options.
Next, type p and press Enter to view the partition information and confirm that you are using the right device. If the wrong device is in use you can use the q command to exit fdisk and start the procedure again.
Now enter d to delete a partition and it will immediately ask for the partition number, that corresponds to the number listed in the Device column, which in this case are numbers 1 and 2 (as can be seen in the screen capture below) but can and will vary according to the current partition table.
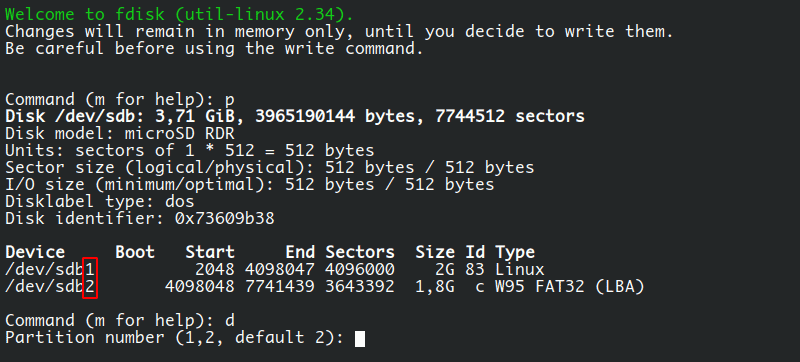
Let’s remove the second partition by typing 2 and pressing Enter. You should see a message saying “Partition 2 has been deleted“, but actually, it hasn’t been removed yet. fdisk needs one more step to rewrite the partition table and apply the changes. Safety net, you see.
You need to type w and press Enter to make the changes permanent. No confirmation is asked.
After this, you should receive some feedback like the one here:

Now, use sudo fdisk --list /dev/sdb to view the current partition table of the device and you can see that the second partition is completely gone. You are done removing your partition using the terminal and fdisk command. Success!
Wrapping up
And so I end this tutorial on how to remove partitions in Linux using both the terminal and GUI tools. Remember, stay always on the safe side, backup your files before manipulating your partitions and double check that you are using the right device. Deleting a partition will delete everything in it with little to no chance of recovering it.
