

Be extra careful when you delete things. Recovery is not always easy.
There are a few open source tools that an end user can use to attempt data recovery.
Attempt? Yes because there is no guarantee that data can be recovered fully and completely.
In this tutorial, you'll learn to use two popular open source data recovery tools:
- TestDisk: Can restore lost partitions, recover boot sector and undelete files
- PhotoRec: Primarily for recovering photos, videos and documents (not dealing with entire partitions)
Recover deleted files from an external drive in Linux using TestDisk
Let me present a simplified example: I took a clean thumb drive added some files, and then deleted one. Now, my system has a feature that will directly delete files from removable media, by-passing the “trash” altogether; that is, if I choose to “right” click on a file and then choose “delete”. It still presents a warning, but one click on the “yes” button and the file is gone forever. Or appears to be.
But this time I didn’t get that horrible feeling. And no, not because this is a cooked-up scenario. I knew that all I had to do was open the terminal, type testdisk and hit “enter”. When I did this for the first time, I had one of my “Linux moments”. Because if you don’t have it—and I didn’t—it tells you how to get it!
If you prefer videos, you can watch this video of the same tutorial on It’s FOSS YouTube channel:
Recover Deleted Files from External storage devices in Linux.
Step 1
You need to install the TestDisk tool first. Most Linux distributions already have this tool in their official repository. In Ubuntu and other Ubuntu-based Linux distributions such as Linux Mint, elementary OS etc., you can use the command below to install TestDisk:
sudo apt install testdiskIn Arch Linux, it is available in the official Extra repository. You can download it for other Linux distributions from the link below:
Step 2
Run TestDisk in the terminal using the command below:
testdisk
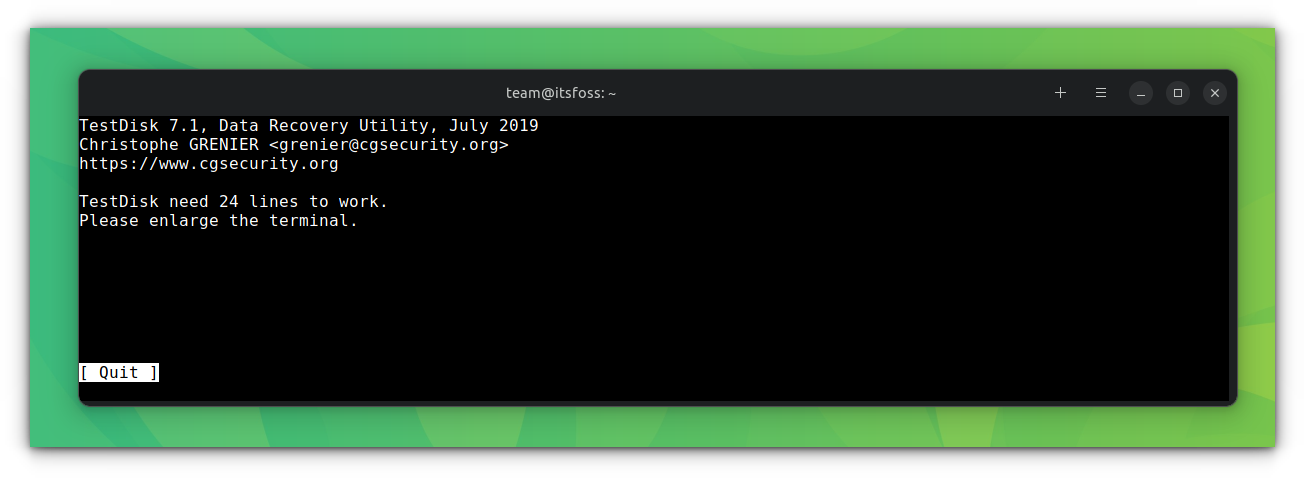
It needs a minimum 24-line terminal height to display things properly.
Step 3
When you open it, you’ll see something that looks like this. Be patient! The interface is actually straightforward, but you do have to carefully read the text. Use the arrow keys to navigate and “enter” to select.
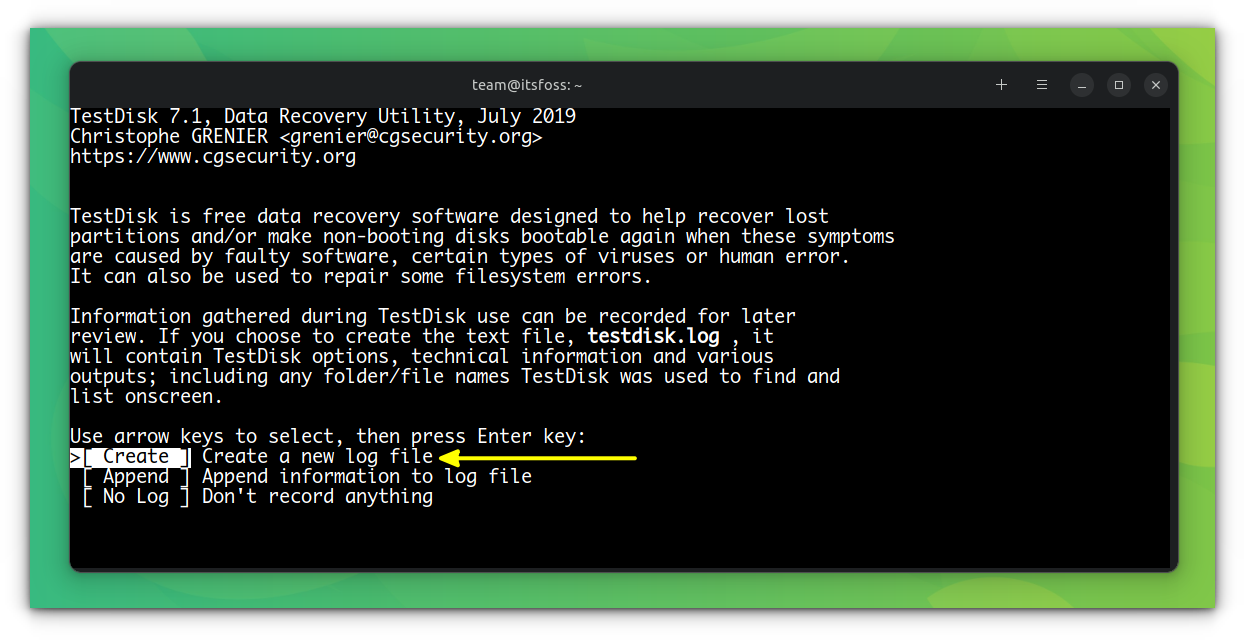
Screens that have extra commands will tell you so. Also, note that TestDisk 7.0 tends to highlight the next reasonable step. It’s almost always right, but do read the screen, since it can’t read your mind. In any case, when it wants you to let it create a log file, indulge it. It’s about to pull you out of a hole.
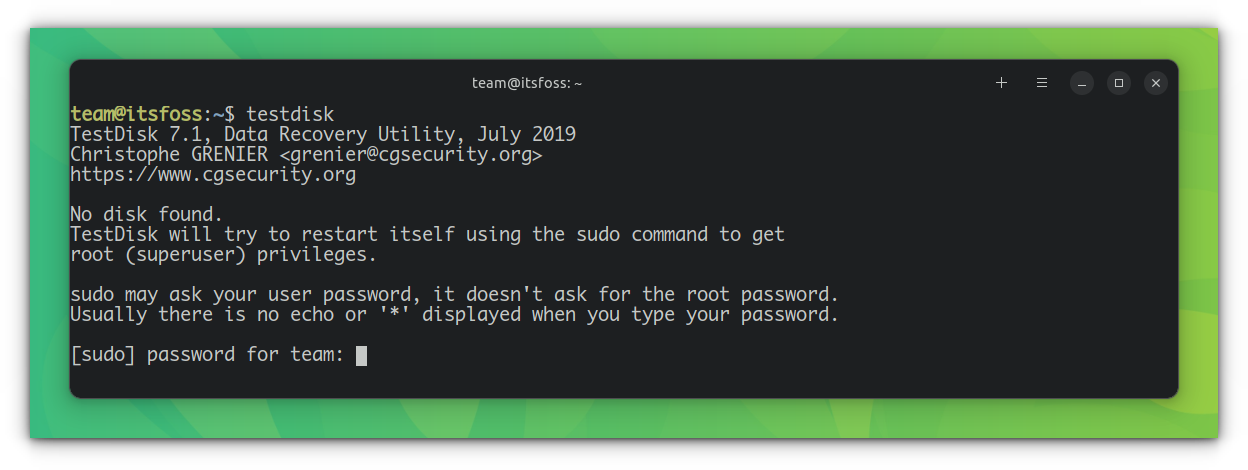
Now, if you are running TestDisk in a new terminal, that does not have sudo permission, it will ask you to enter the password.
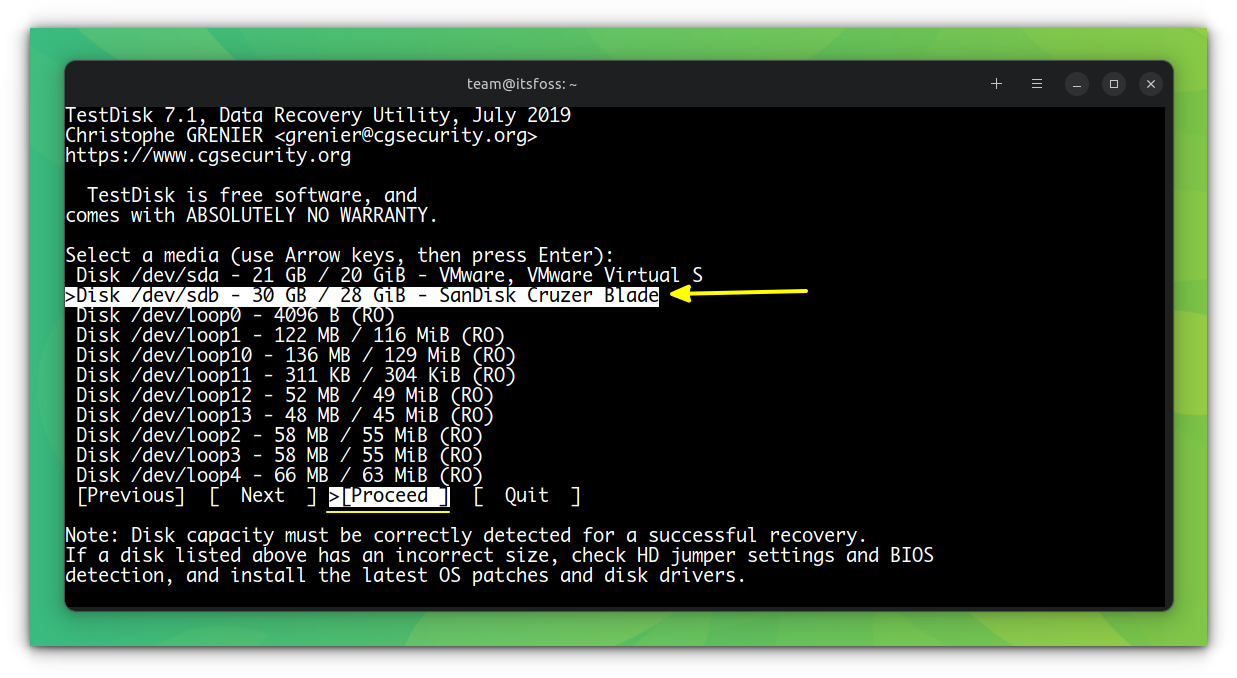
Step 4
This time, Testdisk displays all your drives. Use the up/down arrow key to highlight the drive in question, highlight the Proceed option, and hit enter.
Step 5
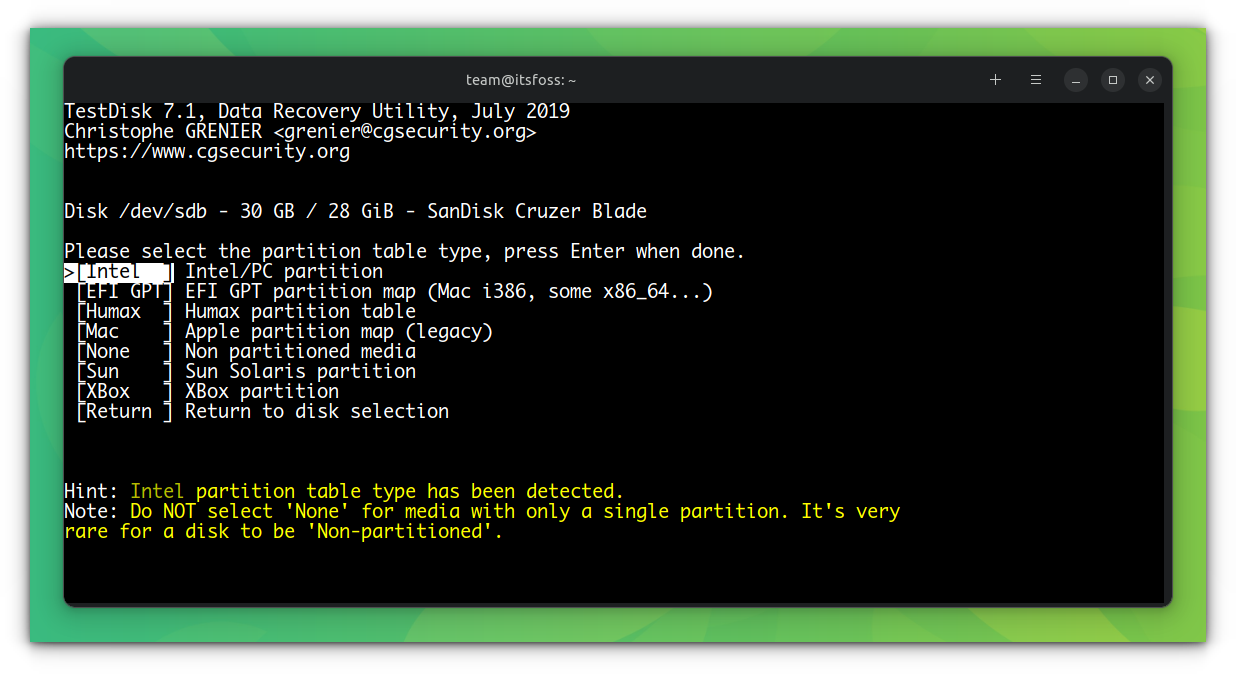
Testdisk has again selected the correct setting regarding the partition. Again hit enter:
Step 6
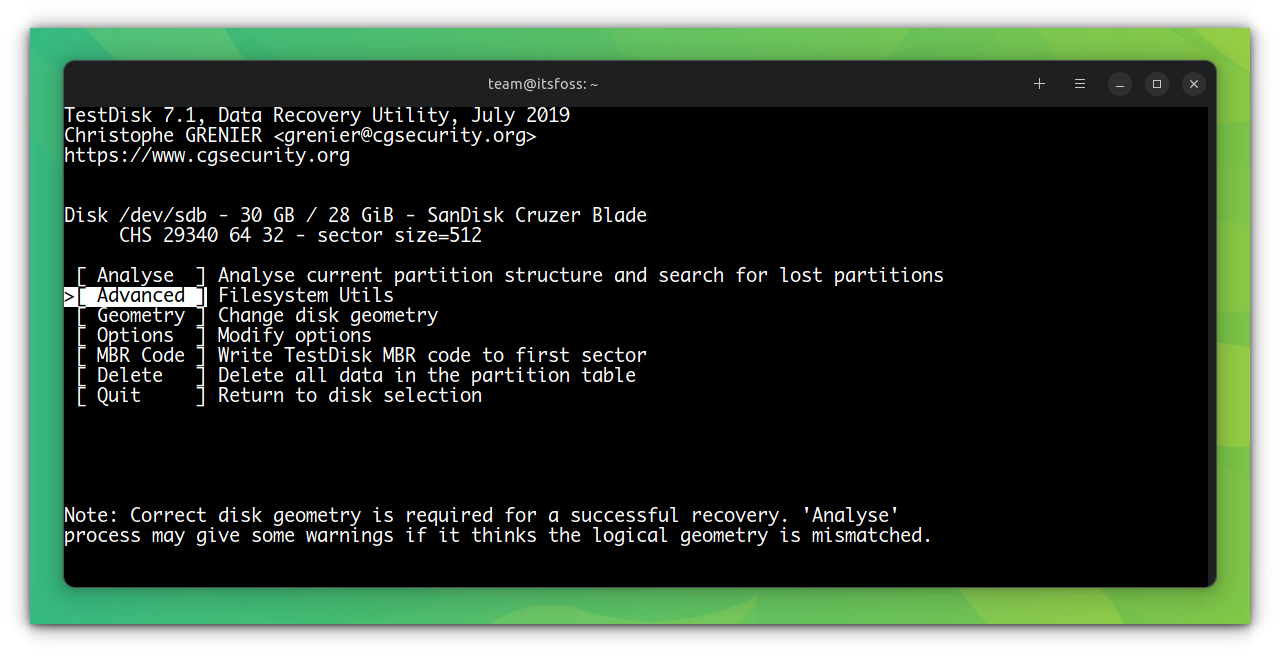
And finally, we have a little thinking to do. If you read the first screen—and I’ll bet you didn’t — this program isn’t just for recovering deleted files. It’s a powerful disk utility. But if we remember what we’re trying to do, the choice is fairly obvious: we’re not trying to fix a disk; we’re trying to recover a file. Select “Advanced” and hit “enter”.
Step 7
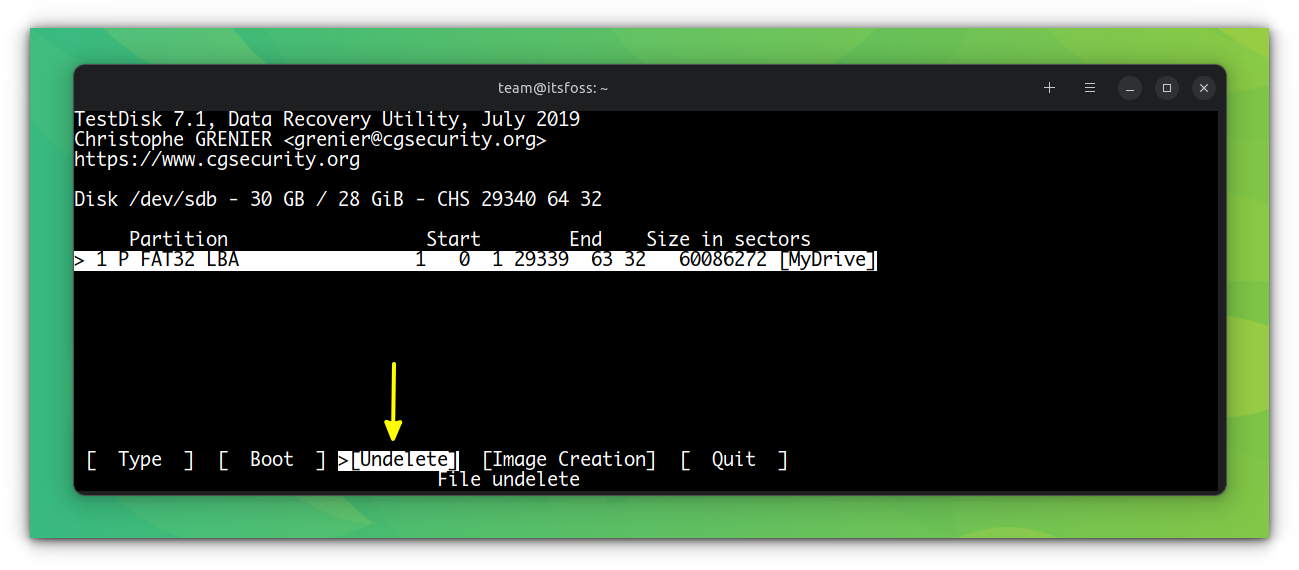
At the bottom of the page, choose “Undelete” and get ready to see a ghost!
Step 8
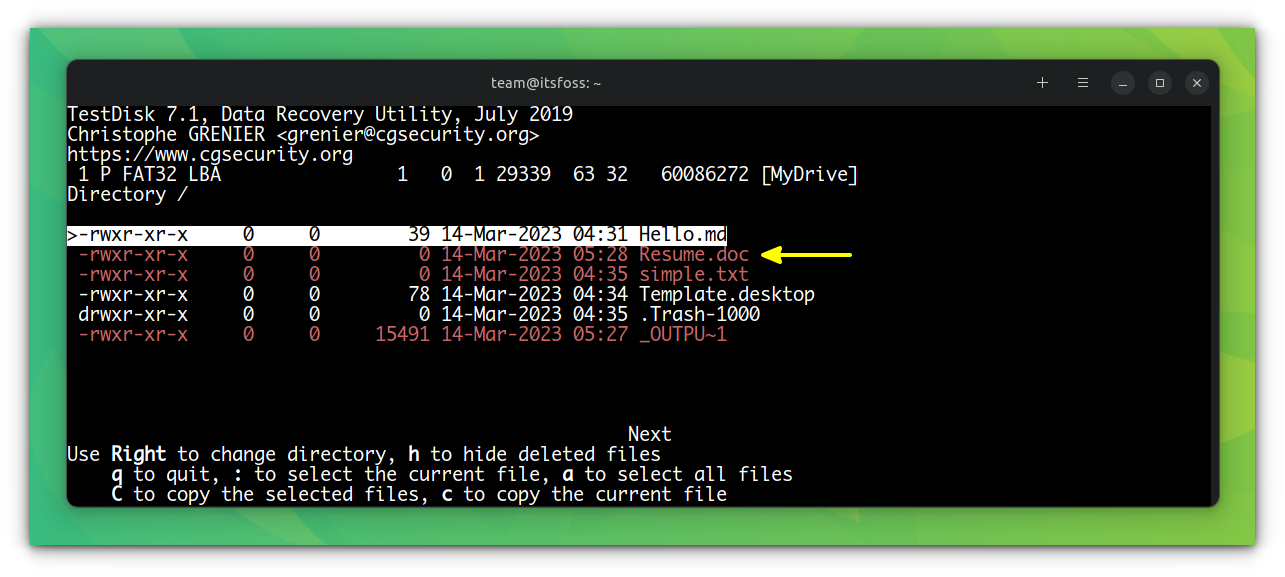
Testdisk will scan for files and produce a list of deleted files highlighted in red. Arrow down to it and carefully read the choices at the bottom.
Step 9
Again, bear in mind that Testdisk is a multi-function tool. Most of these options deal with groups of files; we only want our damn resume back! So, highlight the file we want to restore (Here, the Resume.doc, as shown in the above screenshot) and then hit “c”.
Now, select a destination for the file.
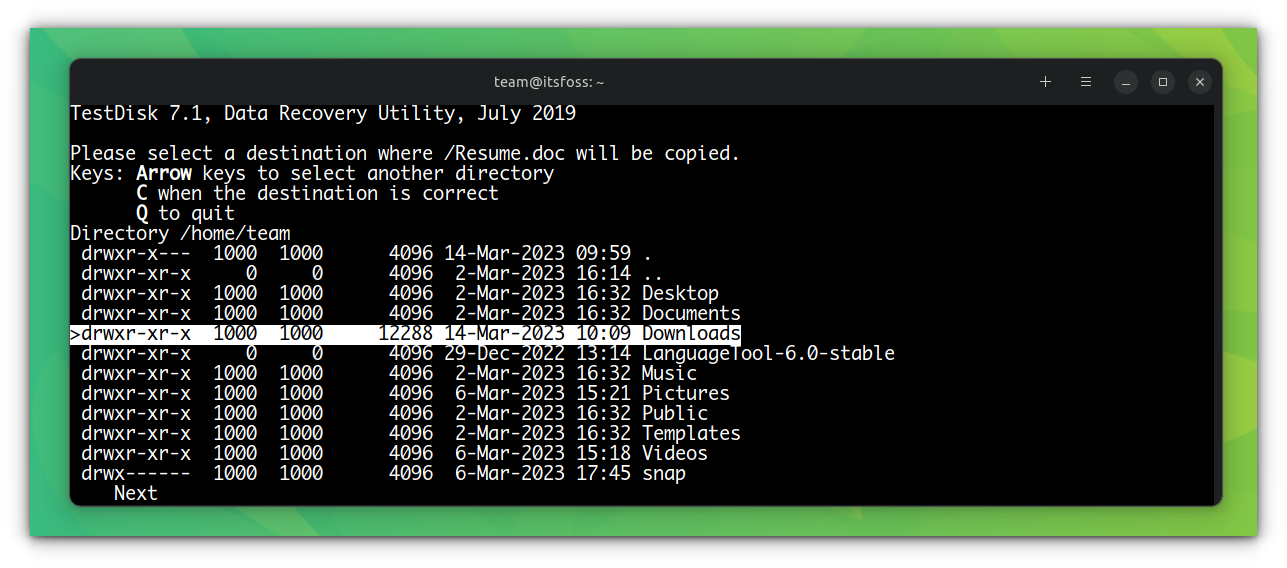
Once you reach the destination you want, press C to confirm. It will copy that file to the location.

You can now select other deleted files like this and press C to copy. It won't ask for location in the ongoing session.
Take a look at the complete process with this SVG:

A few tips on recovering deleted files in Linux using TestDisk
First, if you find yourself somewhere you don’t want to be, hit “q” for quit. This won’t close the program, instead, it will act like the “back” button on a program with a full-blown GUI, and put you back a page. And just like a “back” button, repeating will eventually lead you back to the beginning.
Second, as with anything, the fewer distractions, the easier it is to find what you’re looking for. In other words, physically detach all other storage drives. In graphically simple environments simplicity is your friend.
Finally, Testdisk can also help you retrieve files that have become inaccessible for other reasons. In fact, this is why I started using the program in the first place. I was trying to save files from a corrupted drive that could not be made to boot. Normally it’s simply a matter of removing the said drive and hooking it up to a USB adapter. You can then mount it on another PC and copy the files where ever you want.
But what if the drive is formatted to LVM? This was my problem because a mounted LVM drive looks nothing like a normal Linux OS. None of the usual files appears, and hunting around simply doesn’t help. This, among other reasons, is because most Linux file managers can no longer read ext.2 file systems.
Nevertheless, after a few false starts, I was able to find and save the missing files. Note, however, that the sequence of steps here will be a little different, you may need to use the “analyze” option for Testdisk to make sense of the drive, and you may have to poke around a little to find the “home” folder once you do. Furthermore, the files you’re looking for will not appear in red, since they were never deleted in the first place. But once you do find them, the copying procedure is basically the same.
How to recover deleted files in Linux using Photorec
PhotoRec is a companion program to TestDisk, and is designed to recover lost files including video, documents, and archives from hard disks, CD-ROMs, and lost pictures.
Photorec ignores the file system and only looks for the data. This helps the user to recover data, even if the file system has been severely damaged or reformatted.
If you install TestDisk, this package is also installed. So, to run PhotoRec, use:
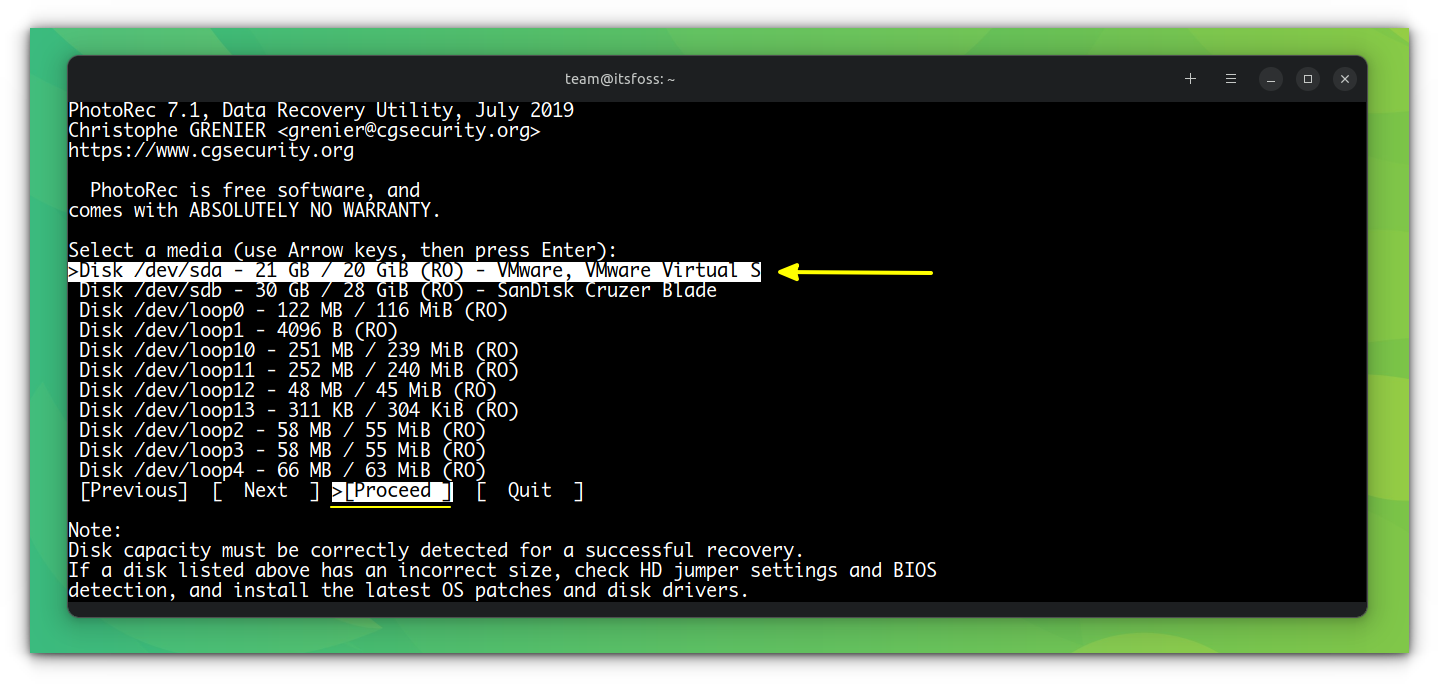
photorecNow, this also requires the sudo password. Once given, it will list all the file systems available on the device. Select the required one and hit proceed.
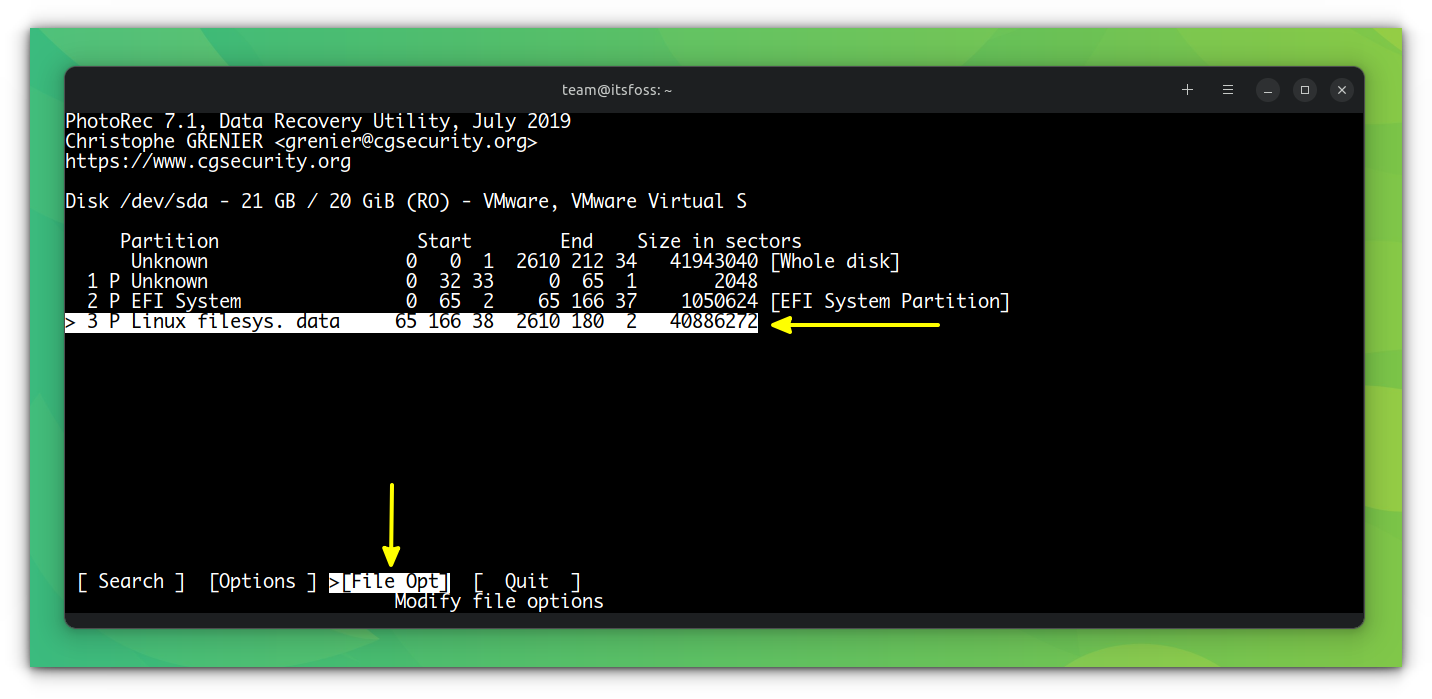
On the next screen, use the Up/down arrow to select the required section of your disk and then use the Right/left arrow key to highlight the File Opt and hit enter.
Here, you will get a list of supported file extensions. By default, all options are selected (x mark). You can press s to unselect all. Now, scroll through the list using the Up/down arrow key. You can select individual file types by pressing the Space key during highlighting a particular option.
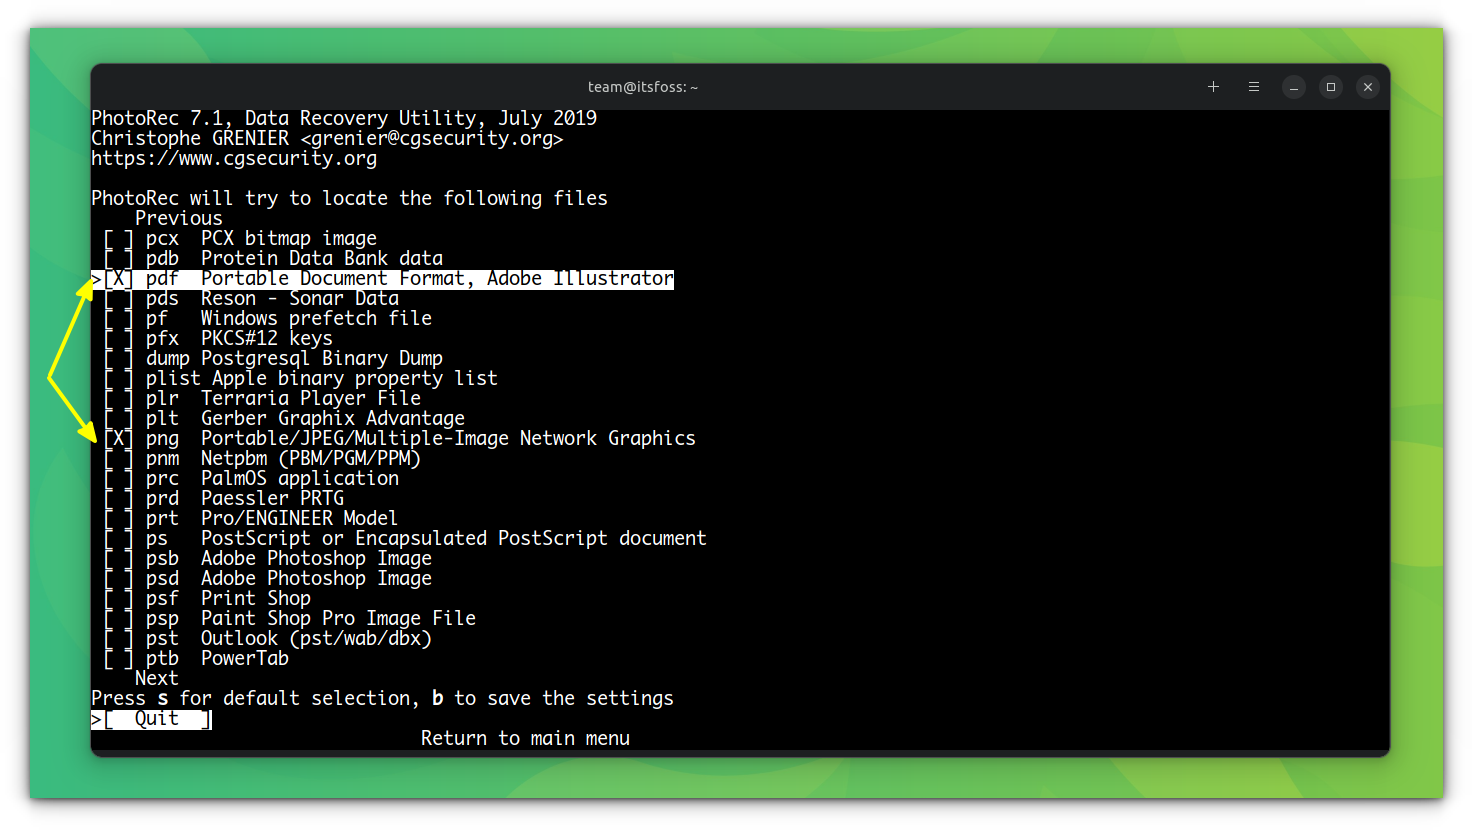
Here, you can see that I have unselected all and selected only PNG and PDF. Now press enter to quit this screen.
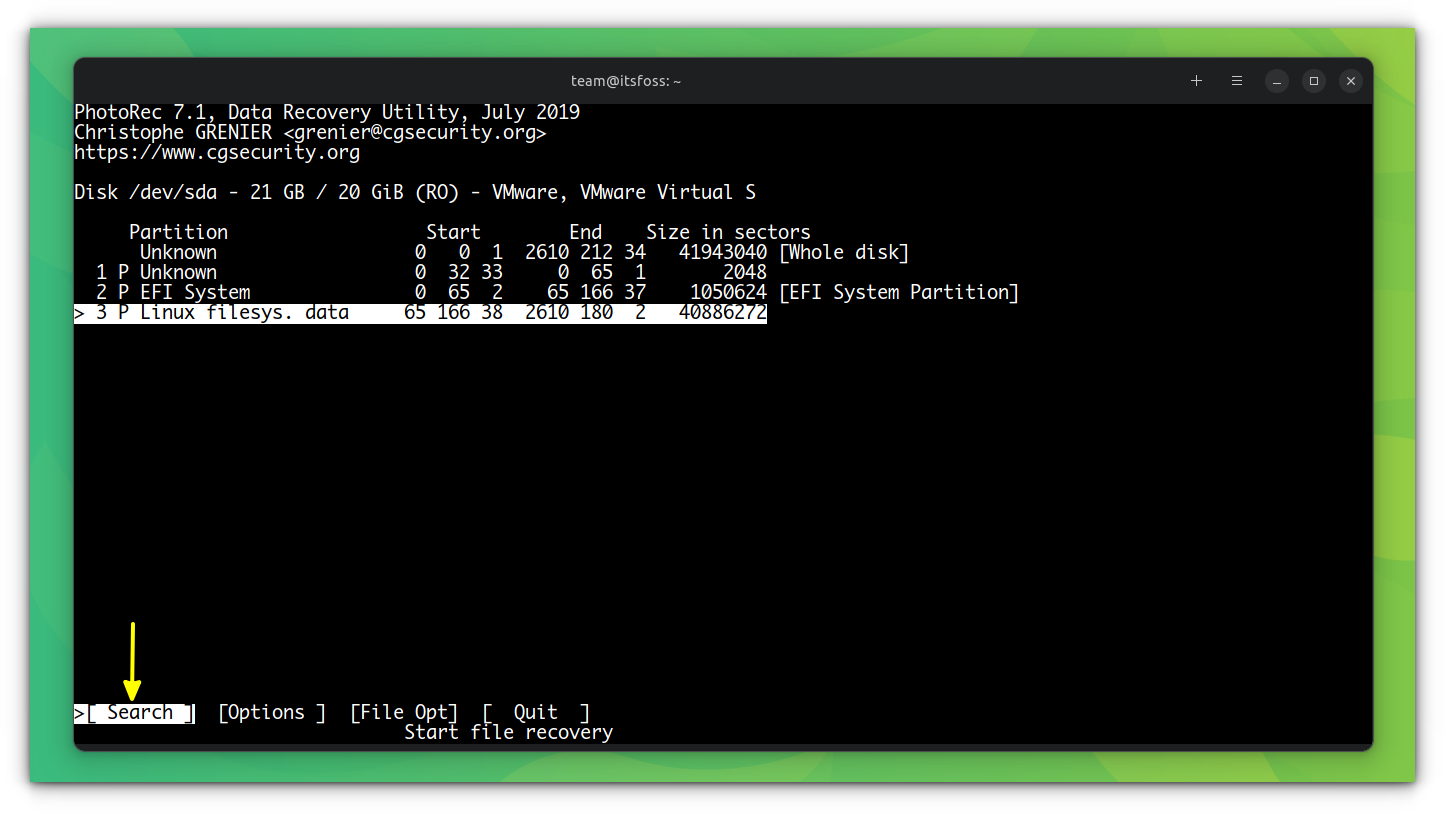
You can now highlight the Search tab and press enter.
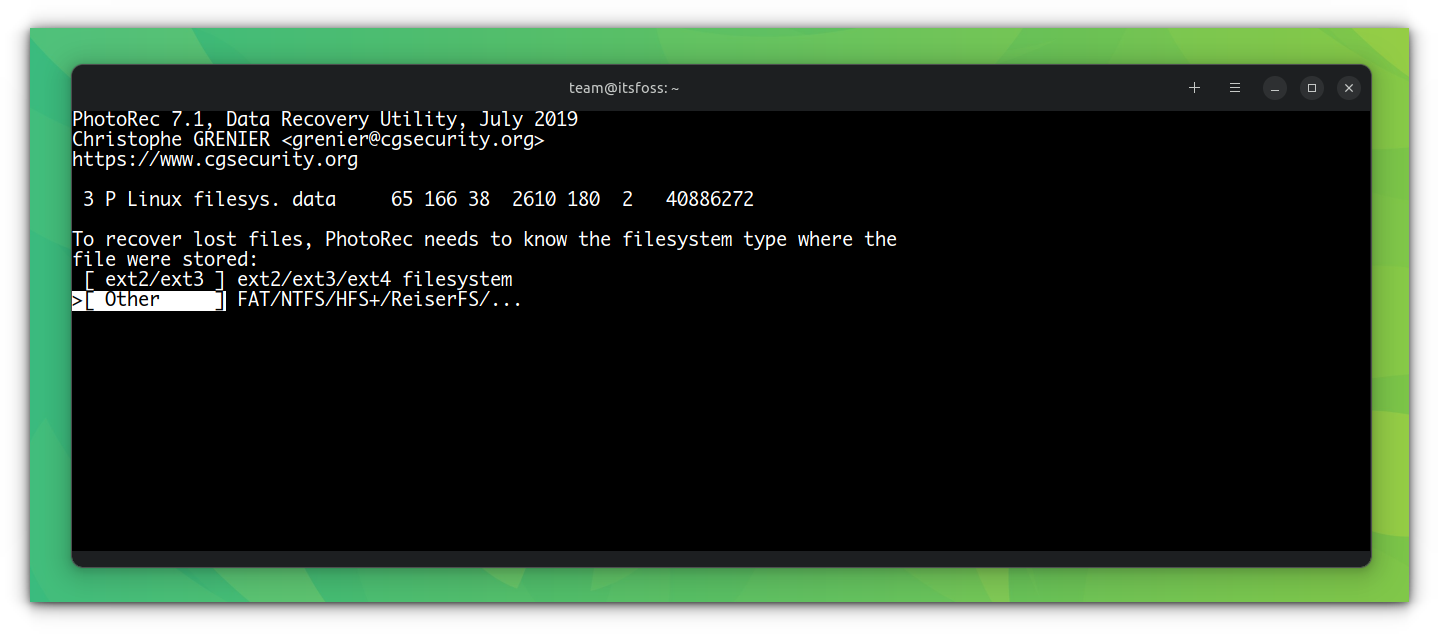
On the next screen, you need to select the partition type of your file system. It is self-explanatory. Unless it is an ext2/ext3/ext4 filesystem, choose Other.
On the next screen, you should select the destination for the recovered items. Better to keep this in an external medium.
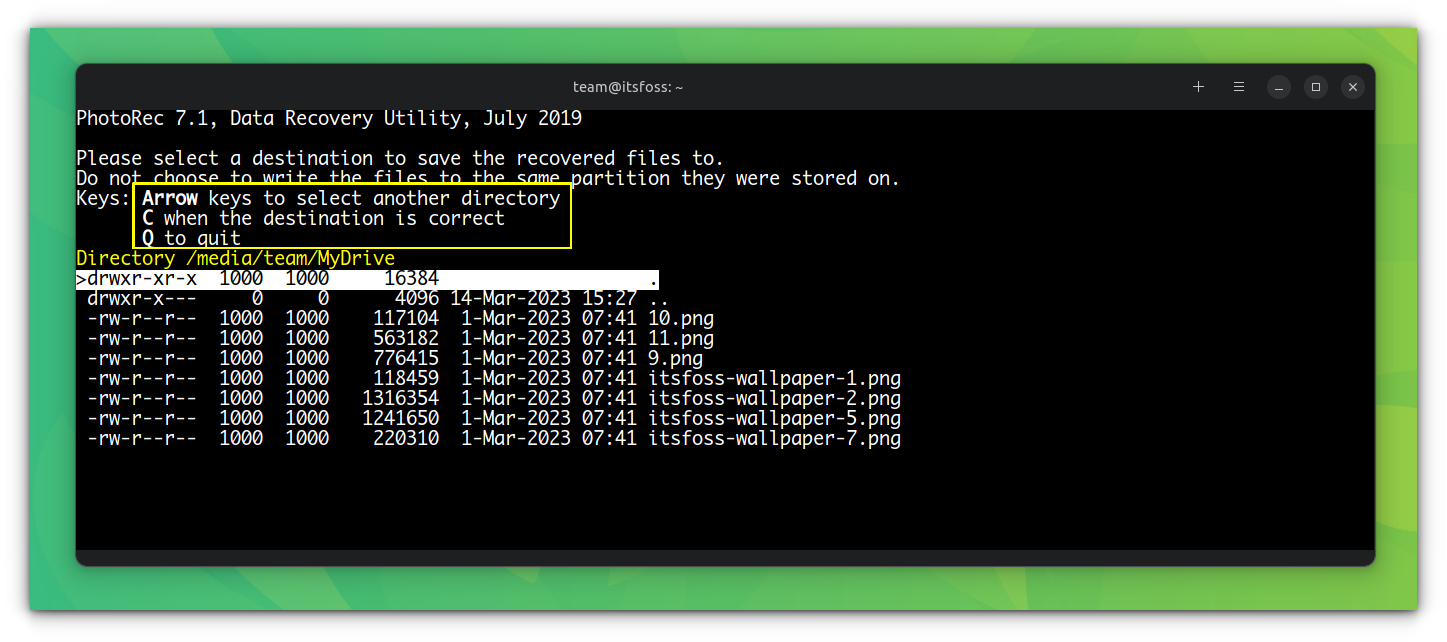
You can find your external drives in the /media/USERNAME/ directory.
Now, press C to confirm the directory. In the case of my native file system, the recovery process started at this point.
In the case of a thumb drive, where I had a FAT32 file system, I select the “Other” option in the partition type selection. This will bring another screen, where you have to select whether you want to recover data from the whole drive or from unallocated space only.
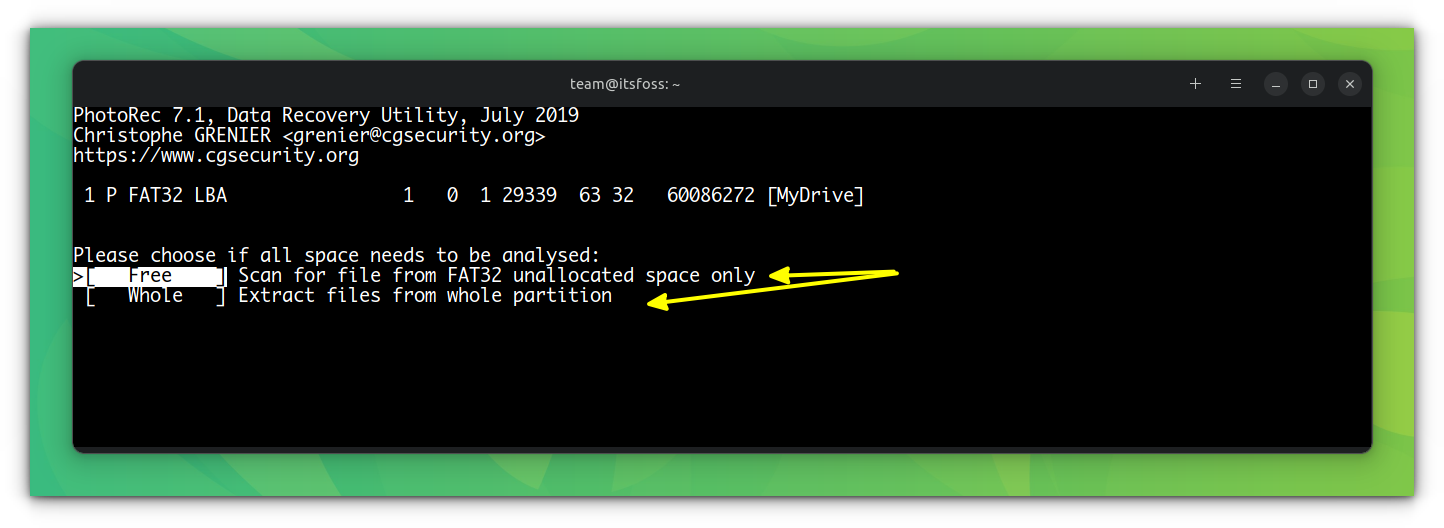
You can select according to your need and press enter after highlighting the particular option.
Now you can select the destination, and it will start the recovery.
You may need to wait for some time. It may take several hours. Once completed, it will prompt the details of the recovery.
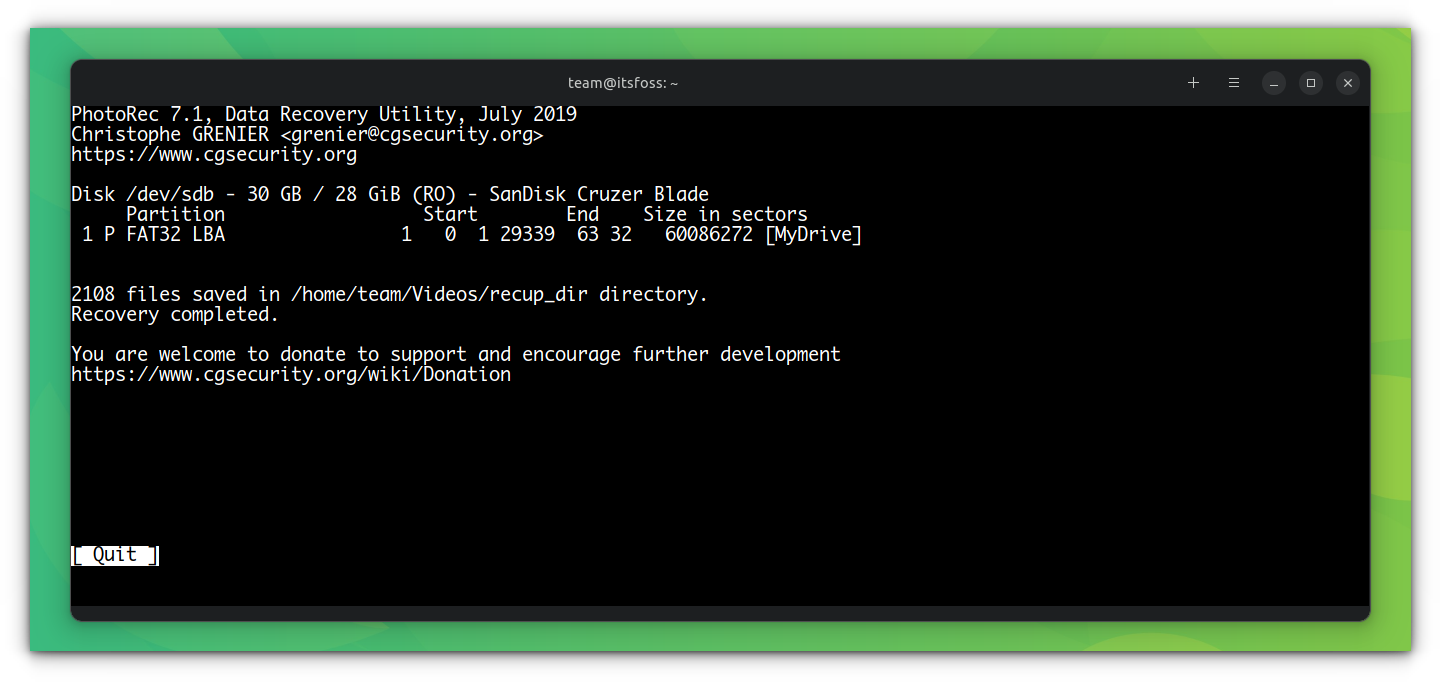
You can get the recovered files from the destination that you choose earlier.
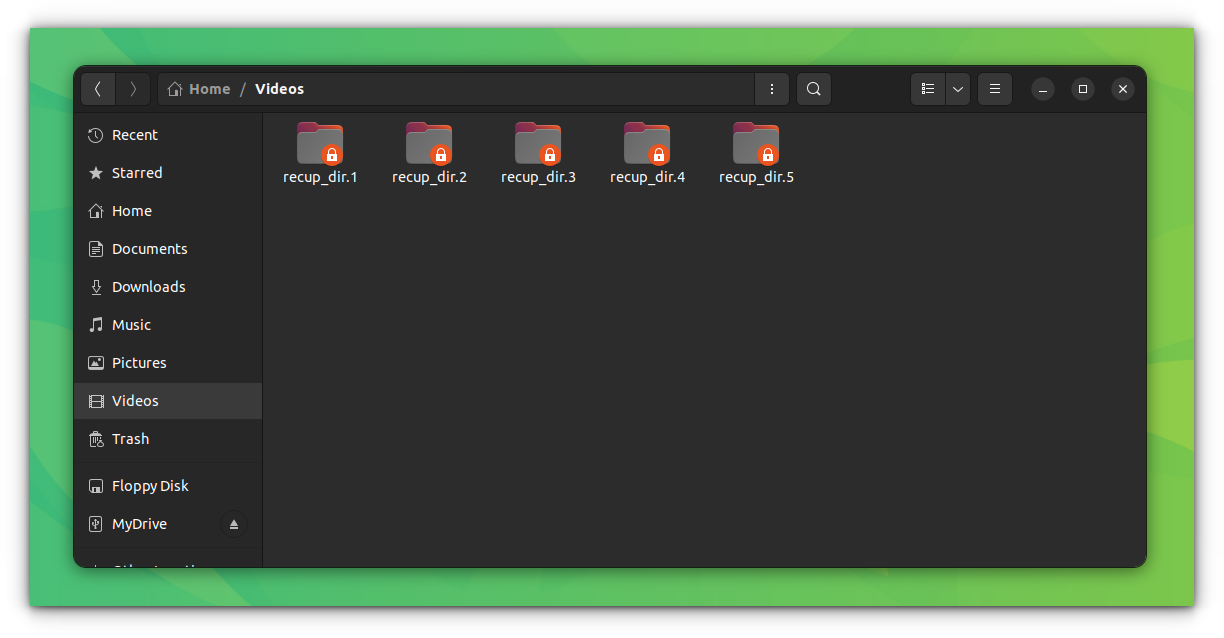
Recovered files will be in folders called recup_dir.1, recup_dir.2 etc.
This is a comprehensive tool. It recovered many images from a thumb drive that had been formatted, as you can see in the above images.
Conclusion
If you mess up a hard disk, SSD or USB/SD Card, you can use Testdisk or Photorec and attempt data recovery. Photorec is more suitable if your digital camera card gets corrupted or you accidentally delete the photos.
I haven't found a reliable tool that lets you easily undelete files from the current system in use. Let me know if you know such a tool and I'll experiment with it to recover deleted files on Linux.
If this helped you, consider supporting It's FOSS
It's FOSS has been helping people use Linux for the past 14 years. Help us stay independent from big tech. Become a Plus member, enjoy ad-free reading and get 5 eBooks.
