
Brief: Learn to use basic SQL commands in the open source database management system MySQL.
MySQL is the most commonly used relational database manager. Its ease of use and open source license have greatly contributed to this popularity.
Last week, I covered installing and configuring MySQL in Ubuntu. In this article I’ll be presenting to you multiple MySQL features, mostly sticking to the basics.
Note: MySQL queries (commands) are case-insensitive; however, it is common practice to use ALL CAPS for the actual command keywords and lowercase for the rest.
Connecting to & Disconnecting from the MySQL Server
To be able to enter queries, you’ll first have to connect to the server using MySQL and use the MySQL prompt. The command for doing this is:
mysql -h host_name -u user -p-h is used to specify a host name (if the server is located on another machine; if it isn’t, just omit it), -u mentions the user and -p specifies that you want to input a password.
Although not recommended (for safety reasons), you can enter the password directly in the command by typing it in right after -p. For example, if the password for test_user is 1234 and you are trying to connect on the machine you are using, you could use:
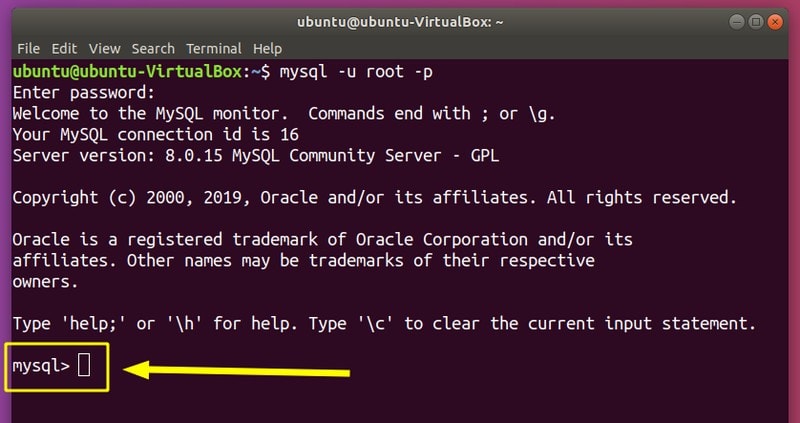
mysql -u test_user -p1234If you successfully inputted the required parameters, you’ll be greeted by the MySQL shell prompt (mysql>):
To disconnect from the server and leave the mysql prompt, type:
QUITTyping quit (MySQL is case insensitive) or \q will also work. Press Enter to exit.
You can also output info about the versionwith a simple command:
sudo mysqladmin -u root version -pNote: Make sure you are connected to the server before inputting any of the queries I’ll be covering.
If you want to see a list of options, use:
mysql --helpUsing Queries in MySQL
MySQL stores data in tables and uses commands called queries (SQL = structured query language). Before delving into storing, accessing and modifying data, I’ll go cover basic queries so you get the hang of it.
Since MySQL uses tables, the output of queries will also be displayed in tables. All SQL statements should be followed by a semicolon (;), although there are exceptions (most notably: QUIT). You can separate columns with comma (,). Here are some basic examples:
mysql> SELECT VERSION();
mysql> SELECT CURRENT_DATE;
mysql> SELECT VERSION(), CURRENT_DATE;
As an example, the third query would print out something similar to this:
+-----------+--------------+
| VERSION() | CURRENT_DATE |
+-----------+--------------+
| 8.0.15    | 2019-04-13   |
+-----------+--------------+
1 row in set (0,41 sec)
Since semicolon (;) marks the end of a statement, you could also write multiple statements on a single line.
For example, instead of:
mysql> SELECT VERSION();
mysql> SELECT CURRENT_DATE;
You could also write:
mysql> SELECT VERSION(); SELECT CURRENT_DATE;You can also enter multi-line queries (if you don’t include a semicolon at the end of the line before pressing Enter). In that case, MySQL will simply enter a different prompt to let you continue your command. For example:
mysql> SELECT
    -> VERSION()
    -> ,
    -> CURRENT_DATE;
Multi-line queries will also occur if you didn’t end a string on a line (a word surrounded by ‘ or “).
If you want to cancel a query, type in \c and press Enter.
There are prompts with different meanings:
- mysql> = ready for new query
- -> = waiting for next line of multiple-line query
- ‘> = waiting for next line, waiting for completion of a string that began with a single quote (
') - “> = waiting for next line, waiting for completion of a string that began with a double quote (“)
- `> = waiting for next line, waiting for completion of an identifier that began with a backtick (
`) - /*> = waiting for next line, waiting for completion of a comment that began with
/*
You can also print the current time (hh:mm:ss) alongside the current date with NOW(), as well as the user you are connected as using USER():
mysql> SELECT NOW();
mysql> SELECT USER();
This will output something similar to this:
+---------------------+
| NOW()               |
+---------------------+
| 2019-04-13 23:53:48 |
+---------------------+
1 row in set (0,00 sec)

+----------------+
| USER()         |
+----------------+
| root@localhost |
+----------------+
1 row in set (0,00 sec)
MySQL allows you to calculate mathematical computations as well:
mysql> SELECT COS(PI()/3), (10-2+4)/3;Outputting:
+--------------------+------------+
| COS(PI()/3)        | (10-2+4)/3 |
+--------------------+------------+
| 0.5000000000000001 |     4.0000 |
+--------------------+------------+
Using Databases in MySQL
1. Getting Information About Databases
First of all, you can list available databases with:
mysql> SHOW DATABASES;You can also see the selected database with:
mysql> SELECT DATABASE();This will output NULL if no database is selected. Here is an example output for the two mentioned statements:
+--------------------+
| Database           |
+--------------------+
| information_schema |
| mysql              |
| performance_schema |
| sys                |
+--------------------+

+------------+
| DATABASE() |
+------------+
| NULL       |
+------------+
2. Creating Databases
This is done by simply entering a command:
mysql> CREATE DATABASE example_db;Note: In Ubuntu 18.04 (or any other Unix-based system) database and table names are case-sensitive.
3. Selecting Databases
To select a database, you have to mention that you want to use it:
mysql> USE example_db;If successful, you’ll get the message:
Database changedIf not successful, you’ll get back an error telling you that MySQL can’t find the specified database.
You can also select a database when connecting to the server by mentioning the name of an existing database at the end of the connect command:
mysql -h host_name -u user_name -p example_tableFor example:
mysql -u root -p example_tableUsing Tables in SQL
1. Getting Information About Tables
To list the tables in the current database, use:
mysql> SHOW TABLES;Note: Make sure you have selected a database.
If the database is empty (e.g. a newly created), the output will be:
Empty set (0,00 sec)After creating tables, the output will be along the line of:
+----------------------+
| Tables_in_example_db |
+----------------------+
| table_1              |
| table_2              |
+----------------------+
1 row in set (0,00 sec)
2. Creating Tables
To create tables, you have to specify the layout – the columns and what type of data they should store.
In my example, I’ll store information about a group of people: name, birth date, sex, country. Here is how I can create that table:
mysql> CREATE TABLE table_1 (name VARCHAR(30), birth_date DATE, sex CHAR(1), country VARCHAR(40));Note: You can also write the command on multiple lines.
You can see that I mentioned the table name (table_1) and the name of the columns (name, birth_date, sex, country). After the column names, I specified the data type they store. VARCHAR(n) are strings of a maximum of n characters in length, DATE is self-explanatory (CCYY-MM-DD format) and CHAR(1) means a single character (specifically, I intend to use ‘m’ and ‘f’ for male and female). Other common types include INT (integers), BOOL (booleans), TIME (hh:mm:ss), There are many data types available to use in MySQL (numeric, string, date and time). You can also use more complex data types, such as AUTO_INCREMENT.
The table will now appear if you SHOW TABLES.
If you wish, you can modify the layout of a table using ALTER TABLE:
mysql> ALTER TABLE table_1 ADD email VARCHAR(50);
mysql> ALTER TABLE table_1 DROP birth_date;
These examples added a column (first example) and deleted a column (second example). You can check out more information about ALTER TABLE here, since it has more advanced uses too.
3. Describing Tables
You can see the structure of a table at anytime with:
mysql> DESCRIBLE table_name;For example:
mysql> DESCRIBE table_1;is going to output:
+------------+-------------+------+-----+---------+-------+
| Field      | Type        | Null | Key | Default | Extra |
+------------+-------------+------+-----+---------+-------+
| name       | varchar(30) | YES  |     | NULL    |       |
| birth_date | date        | YES  |     | NULL    |       |
| sex        | char(1)     | YES  |     | NULL    |       |
| country    | varchar(40) | YES  |     | NULL    |       |
+------------+-------------+------+-----+---------+-------+
4 rows in set (0,00 sec)
4. Deleting Tables
The statement for deleting tables is:
DROP TABLE table_name;5. Inserting Data Into Tables
To insert data, you have to specify the values to be introduced in every column (in the same order as in the table definition). For empty or unknown values you should use NULL. Make sure non-numerical values with quotes (‘) or double quotes (“). The values should be separated by commas(,).
Here are examples for Smith and Emily:
mysql> INSERT INTO table_1 VALUES ('Smith', '1980-04-24', 'm', 'Argentina');
mysql> INSERT INTO table_1 VALUES ('Emily', '1994-07-19', 'f', NULL);
6. Emptying Tables
If you want to empty a table (delete all entries), use:
DELETE FROM table_name;Using WHERE, you can delete specific rows:
DELETE FROM table_name WHERE col_name = valueI’ll go more in depth in the following sections.
7. Updating Table Entries
The syntax for updating an entry is:
UPDATE table_name SET col = 'value' WHERE conditionsFor example:
UPDATE table_1 SET country = 'France' WHERE name = 'Emily'If you don’t specify conditions, all entries will be changed.
8. Retrieving Data From Tables
The MySQL command used for extracting data out of tables is SELECT. The structure of such a statement is:
SELECT what
FROM where
WHERE conditions;
I’ll go over some common applications, so you can understand how to extract exactly what you want from the database.
a. Selecting all data
First of all, the simplest use is to display all data from a table. For example:
mysql> SELECT * FROM table_1;The wildcard (*) stands for everything, table_1 is the table I’m extracting from. You can see that I omitted the WHERE part; it’s optional to have conditions for the selected data.
b. Selecting particular data
First of all I’ll go over selecting rows.
To select particular rows, you have to specify conditions that narrow down the data:
mysql> SELECT * FROM table_1 WHERE name = 'Smith';
mysql> SELECT * FROM table_1 WHERE sex = 'm';
mysql> SELECT * FROM table_1 WHERE birth_date < '1990-1-1';
mysql> SELECT * FROM table_1 WHERE sex = 'f' AND birth_date > '1991-1-1';
mysql> SELECT * FROM table_1 WHERE sex = 'm' OR country = 'France';
mysql> SELECT * FROM table_1 WHERE country IS NOT NULL;
In the first two examples, I simply compare strings (case-insensitive). You can also compare values like dates and integers with comparison operators (>, <, >=, <=, =). <> is used for denoting ‘does not equal‘. You can specify multiple conditions using logical operators (AND, OR). AND has higher precedence than OR. It’s best to use parentheses when having more complex conditions.
IS NOT NULL is a way to display only rows that don’t have a value for the specified column. You can’t use arithmetic comparison operators with NULL, since it represents a missing value (the result will just be NULL too). You should use IS NULL and IS NOT NULL.
Both NULL and 0 are treated as FALSE, the rest as TRUE.
Now I’ll cover displaying specific columns.
To do so, you have to specify the columns you wish to display, separated by commas. For example:
mysql> SELECT name, birth_date FROM table_1;You can also get rid of repeating data. For example, if I want to get all birth dates (without getting the same value multiple times if multiple people have been born at that date), I’ll use:
mysql> SELECT DISTINCT birth_date FROM table_1;This will only display DISTINCT results.
To get even more specific, you can combine displaying particular columns with conditions (WHERE):
mysql> SELECT name, sex FROM table_1 WHERE country = 'France' AND birth_date < '1991-1-1';c. Sorting data
To sort data, you use ORDER_BY:
mysql> SELECT name FROM table_1 ORDER BY birth_date;You can see that I combined this with selecting specific data. The command above will display the names from all entries, ordered in ascending order by birth date.
You can also order in descending order:
mysql> SELECT name FROM table_1 ORDER BY birth_date DESC;Sorting can be applied on multiple columns. For example, to sort in descending order by birth date, and people born at the same date in ascending order by name, I would use:
mysql> SELECT name FROM table_1 ORDER BY birth_date DESC, name;d. Manipulating dates
You can get the current date using CURDATE(). Using this and another year, you could calculate a difference (e.g. to get the age of a person) with TIMESTAMPDIFF():
mysql> SELECT name, birth_date, CURDATE(),
    -> TIMESTAMPDIFF(YEAR, birth_date, CURDATE()) AS age
    -> FROM table_1 ORDER BY age;
Here is the output for an exampletable_1:
+--------+------------+------------+------+
| name   | birth_date | CURDATE()  | age  |
+--------+------------+------------+------+
| Emily  | 1994-07-19 | 2019-04-13 |   24 |
| Danny  | 1992-08-04 | 2019-04-13 |   26 |
| Joanna | 1992-08-04 | 2019-04-13 |   26 |
| Joe    | 1985-03-11 | 2019-04-13 |   34 |
| Smith  | 1980-04-24 | 2019-04-13 |   38 |
+--------+------------+------------+------+
TIMESTAMPDIFF() takes as arguments the unit to use for the result (YEAR) and two dates (birth_date, CURDATE()) for which to calculate a difference. The AS (alias) keyword names the resulting column and makes it easy to work with (in this example: sorting by age).
For referring to specific parts of dates, you can use YEAR(), MONTH() and DAYOFMONTH(), using the date as argument. For example:
mysql> SELECT name, birth_date, MONTH(birth_date) FROM table_1;You can compare results (months, years, days) just like normal numbers. However, to compare these with things such as the following month, you can’t simply add to CURDATE(), since this can cause you to check for month 13 or other such non-sense. The workaround for that is INTERVAL and DATE_ADD():
mysql> SELECT name, birth_date
       FROM table_1
       WHERE MONTH(birth_date) = MONTH(DATE_ADD(CURDATE(),INTERVAL 1 MONTH));
You could also use the modulo operator (MOD):
mysql> SELECT name, birth_date
       FROM pet
       WHERE MONTH(birth_date) = MOD(MONTH(CURDATE()), 12) + 1;
Using invalid dates will return NULL and produce WARNINGS, seen with:
mysql> SHOW WARNINGS;e. Using pattern matching
In MySQL, _ stands for any single character and % for 0+ characters and patterns are (by default) case-insensitive. Instead of = and <>, to use patterns you should use LIKE and NOT LIKE:
mysql> SELECT birth_date FROM table_1 WHERE name LIKE '%a%';
mysql> SELECT birth_date FROM table_1 WHERE name LIKE '%b';
mysql> SELECT birth_date FROM table_1 WHERE name LIKE 'c%';
mysql> SELECT * FROM table_1 WHERE name LIKE '___';
These examples select the birth dates of the entries where the name contains ‘a‘ (first example), ends with ‘b‘ (second example) or starts with ‘c‘ (third example). The last example selects rows where the name has exactly three characters (three instances of ‘_‘).
You can also use extended regular expressions, with REGEXP_LIKE() (also REGEXP and RLIKE operators). Regular expressions are beyond the scope of this guide, but you can check out more information here.
f. Counting results
Counting data is important and has many uses in the real-world. MySQL uses COUNT() for such tasks. The simplest example is counting the entries of a table:
mysql> SELECT COUNT(*) FROM table_1;You can also split the count among groups. For example, I could GROUP BY country and display how many entries are in each country:
mysql> SELECT country, COUNT(*) FROM table_1 GROUP BY country;You could mention even more specific groups by inputting more columns to group by. For example:
mysql> SELECT country, sex, COUNT(*) FROM table_1 GROUP BY country, sex;These results could also be used together with WHERE to narrow the output.
Be careful when counting. If you specify anything else to print besides COUNT() and don’t mention those columns after GROUP BY, you might either get an error or unexpected results(see ONLY_FULL_GROUP_BY).
g. Using multiple tables
This is something you might want to do in a slightly more complex context.
As an example, imagine there is another table (table_2) that stores the date (date) at witch people (name) attended meetings (meeting).
You can display how old the people in these tables were when they attended meetings:
mysql> SELECT table_1.name,
       TIMESTAMPDIFF(YEAR, birth_date, date) AS age,
       meeting
       FROM table_1 INNER JOIN table_2
         ON table_1.name = table_2.name;
This will output something like:
+-------+------+-----------------+
| name  | age  | meeting         |
+-------+------+-----------------+
| Emily |   21 | Dog Lovers Club |
| Emily |   22 | Dog Lovers Club |
| Emily |   23 | Hackathon       |
| Smith |   36 | TED Talk        |
| Smith |   38 | Footbal Match   |
+-------+------+-----------------+
I’ll try explaining the syntax. For name, we had to mention table_1.name and table_2.name, since the column is present in both tables (for birth_date, date and meeting we didn’t need to specify the table, since they are unique to one of them). This uses the statements that I already covered.
The interesting part is this:
       FROM table_1 INNER JOIN table_2
         ON table_1.name = table_2.name;
INNER JOIN puts the tables together and takes the row that have something in common, a condition specified by the keyword ON; in this case, where the names match.
Note: You can also put together the same table with itself, perhaps to compare two SELECT results.
Using Batch Mode in MySQL
Another neat feature is batch mode. Instead of the interactive shell, you can put the statements in a file and execute them:
mysql -h host_name -u user_name -p < batch_fileYou will then be prompted to enter a password (if required for the user). If you want to keep running instead of stopping at errors, use –force.
You can even redirect the output to another program or to a file:
mysql -h host_name -u user_name -p < batch_file | less
mysql -h host_name -u user_name -p < batch_file > output_file
You can also get interactive output with -t or echo output with -v parameters.
If you are in the interactive MySQL shell and want to run a script, use either of these two:
mysql> source batch_file;
mysql> \. batch_file;
Wrapping Up
In this article, I’ve covered different ways you can use MySQL to handle tabular databases, even delving into more advanced features.
I’d be glad if this guide helps struggling users and beginners. Even if you are not a beginner, I hope that you read something that you didn’t know about. If it did help you, let us know in the comments!
