
If you have started using Ubuntu or any Ubuntu-based Linux distribution, such as Linux Mint, elementary OS, etc., you must have come across the apt-get command by now.
In fact, first on the list of things to do after installing Ubuntu is to use apt-get update and apt-get upgrade.
Now, you might be aware of a few apt-get commands and their usage, but you might not know some others.
In this guide for beginners, I am going to explain various of apt-get commands with examples so that you can use them like an expert Linux user.
What is apt-get?
The apt-get is a set of command line tools that allow you to install, remove and update deb packages installed via the APT (Advanced Package Tool) in Debian and Ubuntu. This makes managing packages easier on Debian-based distros.
I guess you already know that Ubuntu is derived from Debian Linux. Debian uses the dpkg packaging system. A packaging system is a way to provide programs and applications for installation. This way, you don’t have to build a program from the source code.
APT (Advanced Package Tool) is the command-line tool to interact with this packaging system. There are already dpkg commands to manage it, but apt is a more user-friendly way to handle packages. You can use it to find and install new packages, upgrade packages, clean your packages, etc.
There are two main tools around APT: apt-get and apt-cache. apt-get is for installing, upgrading, and cleaning packages, while apt-cache command is used for finding new packages. You will see all of these commands with examples later in this guide.
There is also a newer apt command on the scene which is a simpler version of apt-get. Read this article to learn more details about apt and apt-get commands.
I am using Linux Mint in this tutorial, but you can use any other Ubuntu-based Linux distribution, such as elementary OS, Linux Lite, etc.
Using apt-get commands
Let’s start with apt-get commands. You just cannot escape this command. It’s better to have an understanding of it so that you can handle your Linux system in a slightly better way.
Update the package database with apt-get
apt-get basically works on a database of available packages. If you don’t update this database, the system won’t know if there are newer packages available or not. In fact, this is the first command you need to run on any Debian-based Linux system after a fresh install.
Updating the package database requires superuser privileges, so you’ll need to use sudo.
sudo apt-get updateWhen you run this command, you’ll see the information being retrieved from various servers.
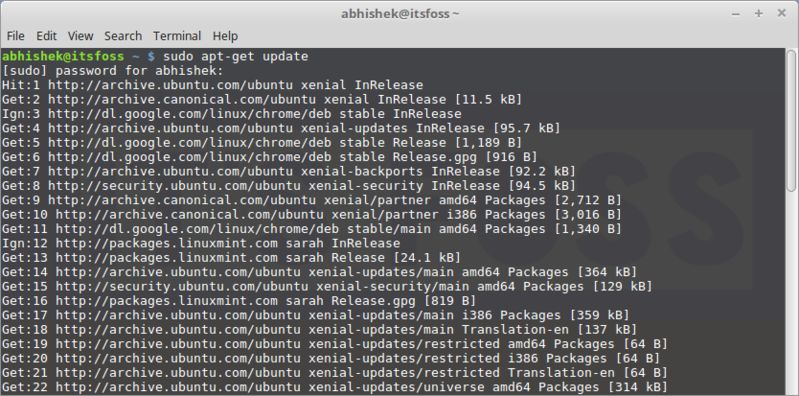
You’ll see three types of lines here: hit, get, and ign. Let me explain them to you:
- hit: there is no change in the package version
- ign: the package is being ignored. There could be various reasons for that. Either the package is so recent that it doesn’t even bother to check for a new version, or there was an error in retrieving the file but error was trivial and thus it is being ignored. This is not an error. There is no need to be worried.
- get: There is a new version of the package available. apt-get will download this information (not the package itself). You can see that there is downloaded information on the ‘get’ lines in the screenshot above.
Upgrade installed packages with apt-get
Once you have updated the package database, you can upgrade the installed packages. The most convenient way is to upgrade all the packages that have updates available. You can use the command below for this purpose:
sudo apt-get upgrade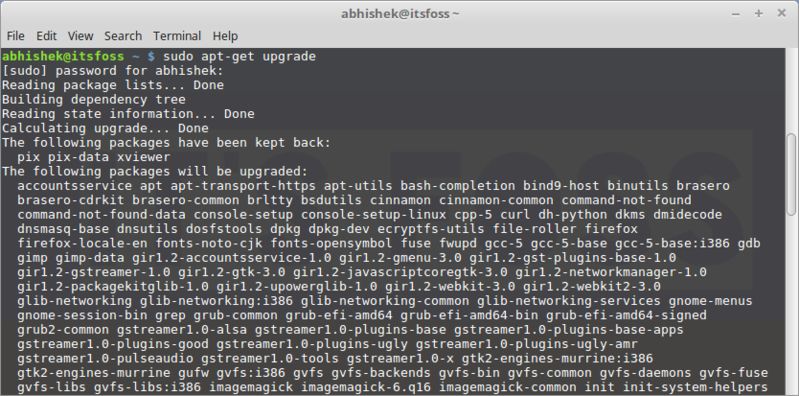
To upgrade only a specific program, use the command below:
sudo apt-get upgrade <package_name>There is another way to perform a complete upgrade by using the command below:
sudo apt-get dist-upgradeBut you should avoid using this command. I’ll explain why in the next section.
Difference between upgrade and dist-upgrade
The command apt-get upgrade is very obedient. It never tries to remove any packages or tries to install a new package on its own.
The command apt-get dist-upgrade, on the other hand, is proactive. It looks for dependencies with the newer version of the package being installed and it tries to install new packages or remove existing ones on its own.
It sounds like dist-upgrade is more powerful and intelligent, isn’t it? But there is a risk with it.
See, it has a “smart” conflict resolution system. It will attempt to upgrade the most important packages, at the expense of the less important ones. This may lead to the removal of some packages, which you might not want. This is the main reason why dist-upgrade should be avoided on production machines.
What is the difference between apt-get update and apt-get upgrade?
This is a very common confusion. You are not the only one to be confused by the terms update and upgrade.
Though it sounds like apt-get update should update the packages, that’s not true. apt-get update only updates the database of available packages. For example, if you have XYX package version 1.3 installed, after apt-get update, the database will be reflect that the newer version 1.4 is available.
When you do an apt-get upgrade after apt-get update, it upgrades the installed packages to the newer version.
This is the reason why the fastest and the most convenient way to update Ubuntu is to use this command:
sudo apt-get update && sudo apt-get upgrade -y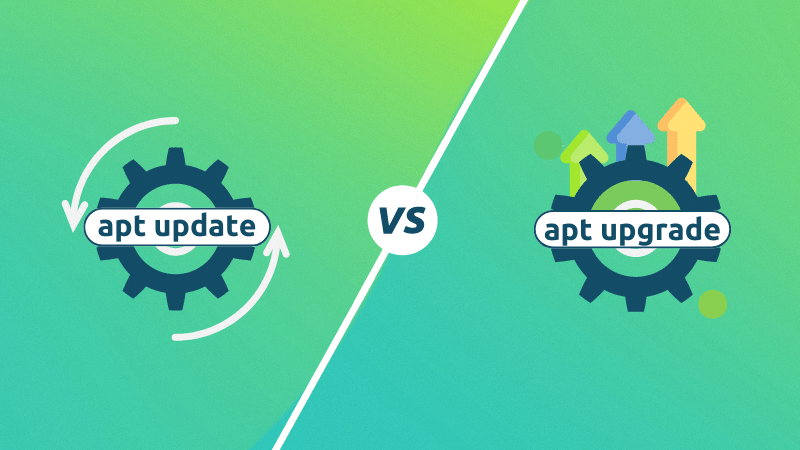
Using apt-cache commands to search for packages
I’ll be honest with you, this is not my preferred way of searching for packages. But this comes in pretty handy when you are looking for some specific library.
All you need to do is to use the following command (you don’t even need sudo here):
apt-cache search <search term>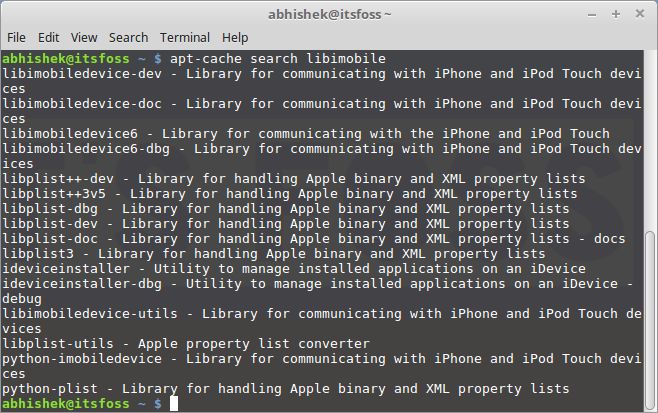
You don’t need to know the exact name of the package. It searches in package names and their short descriptions and shows results based on that.
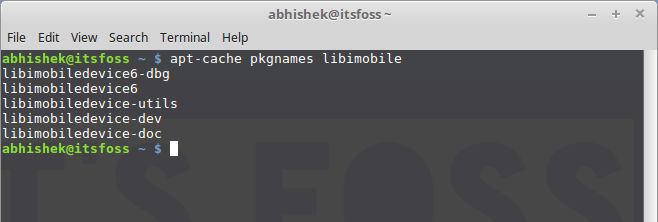
If you just want to search the apt packages with specific package names, you can use the command below:
apt-cache pkgnames <search_term>This gives you the list of all the packages starting with your search term.
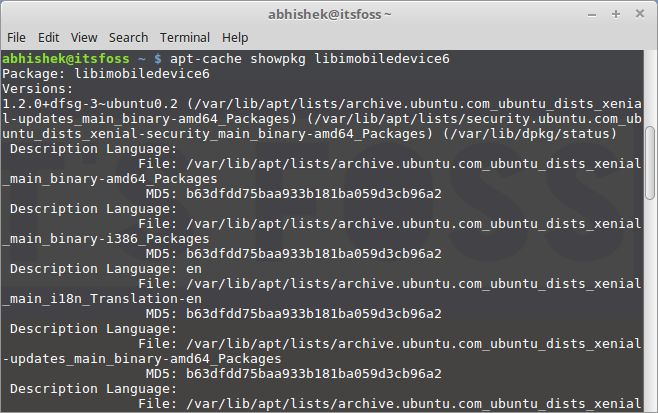
Once you know the exact package name, you can get more information about it, such as version, dependencies, etc., by using the command below:
apt-cache showpkg <package_name>
Install new packages with apt-get
If you know the name of the package, you can easily install it using the command below:
sudo apt-get install <package_name>Just replace the <package_name> with your desired package. Suppose I wanted to install the Pinta image editor. All I’d need to do is use the command below:
sudo apt-get install pintaThe good thing about this command is that it has auto-completion. So if you are not sure about the exact package name, you can type a few letters and press the tab, and it will suggest all the packages available with those letters. For example:

Install multiple packages
You are not restricted to installing just one package at a time. You can install several packages at a time by providing their names:
sudo apt-get install <package_1> <package_2> <package_3>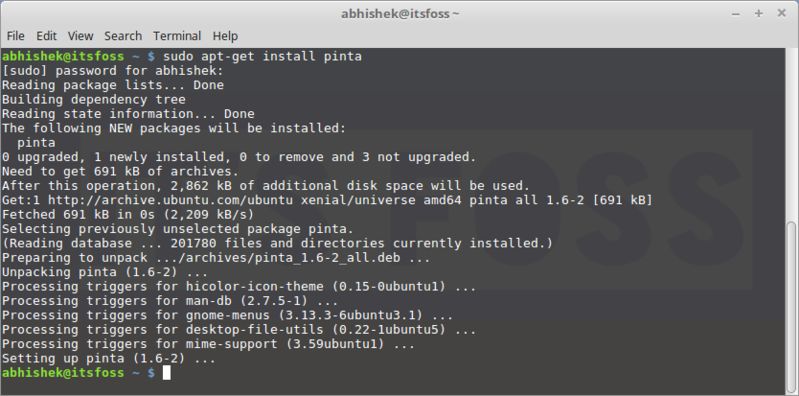
What if you run install on an already installed package?
Suppose you already have a package installed, but you used the install command for it anyway. apt-get will actually look into the database, and if a newer version is available, it will upgrade the installed package to the newer one.
So no harm is done by using this command — unless you don’t want the package to be upgraded.
Install packages without upgrading
Suppose for some reason you want to install a package but don’t want to upgrade it if it is already installed. It sounds weird, but you may have reasons to do that.
For that case, you can use the no-upgrade flag in the following manner:
sudo apt-get install <package_name> --no-upgrade
Only upgrade a package, not install it
In case you want to upgrade a package provided it’s already installed, but don’t want to install it if it’s not, you can do that with the following command:
sudo apt-get install <package_name> --only-upgrade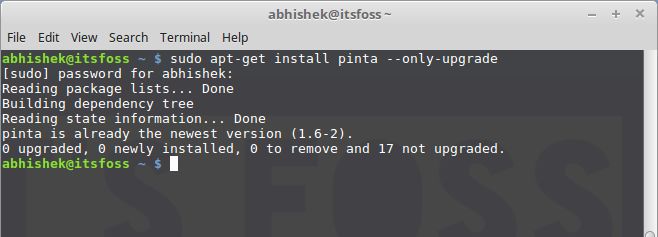
Install a specific version of an application
By default, the latest version available in the repository will be installed for any application. But if, for some reason, you don’t want to install the latest version, you can specify the package version number. (You would need to know the exact version number that you wanted to install).
All you need to do is to add the version number to the name of the package:
sudo apt-get install <package_name>=<version_number>
Remove installed packages with apt-get
Installing packages isn’t the only thing you can do with apt-get. You can also remove packages with it. All you need to do is to use the command in this manner:
sudo apt-get remove <package_name>Auto-completion works here as well. So just start typing package name and press tab, and it will suggest all the installed packages starting with those letters.
Another way of uninstalling packages is to use purge. The command is used in the following manner:
sudo apt-get purge <package_name>What is the difference between apt-get remove and apt-get purge?
- apt-get remove just removes the binaries of a package. It doesn’t touch the configuration files
- apt-get purge removes everything related to a package, including the configuration files
So if you have “removed” a particular piece of software and then install it again, your system will have the same configuration files. Of course, you will be asked to override the existing configuration files when you install it again.
Purge is particularly useful when you have messed up with the configuration of a program, when you want to completely erase its traces from the system and start afresh.
Most of the time, a simple remove is more than enough for uninstalling a package.
Clean your system with apt-get
Oh yes! You can also clean your system with apt-get and free up some disk space.
You can use the command below to clear apt cache (locally saved retrieved package files):
sudo apt-get cleanAnother way is to use autoclean. Unlike the above clean command, autoclean only removes those retrieved package files that have a newer version now, and so won’t be used anymore.
sudo apt-get autocleanAnother way to free up disk space is to use autoremove. It removes libraries and packages that were installed automatically to satisfy the dependencies of another installed package. If that package is removed, these automatically installed packages are useless in the system. This command removes such packages.
sudo apt-get autoremoveThis is a command-line way of cleaning a Linux system. If you prefer a GUI, here are some CCleaner alternatives for Linux which you can use on Ubuntu and Ubuntu-based Linux distributions.
Your input
There is more to apt-get, but this much should give you a pretty good start. You can always look up the man pages to get more information.

How do you like this guide to apt-get commands in Linux? Was it helpful to you and clear enough to understand? Your feedback will help in creating more such guides in the near future.


