
Every time you boot into an operating system, several programs start running automatically. These are called ‘startup applications’ or ‘start-up programs’.
I am not talking about essential programs like Network Manager here. I am talking about running Slack, Transmission torrent clients, Skype or other such regular programs.
Startup applications are a good way to save time and extend the usability of your Linux system. At the same time, you should not have too many startup applications. It may negatively impact the responsiveness of your system when you log in to it.
I’ll show you how to manage the startup applications in this Ubuntu beginner's guide. You’ll:
- Learn to add (almost) any program in the startup applications list to start them automatically at each boot.
- Learn to remove a program from the startup applications list so that you have a faster system when you boot into it.
- Learn to delay the running of a startup application so that it runs automatically but with a time delay. This way, not all startup applications consume the system resource simultaneously.
Managing startup applications in Ubuntu
By default, Ubuntu provides a Startup Applications utility that you could use. You may also use a third-party application like Stacer for managing the startup programs.
I’ll discuss the built-in utility first and then later in this tutorial, I’ll briefly touch on Stacer.
Go to the menu and look for startup applications, as shown below.

Once you click on it, it will show you all the startup applications on your system:
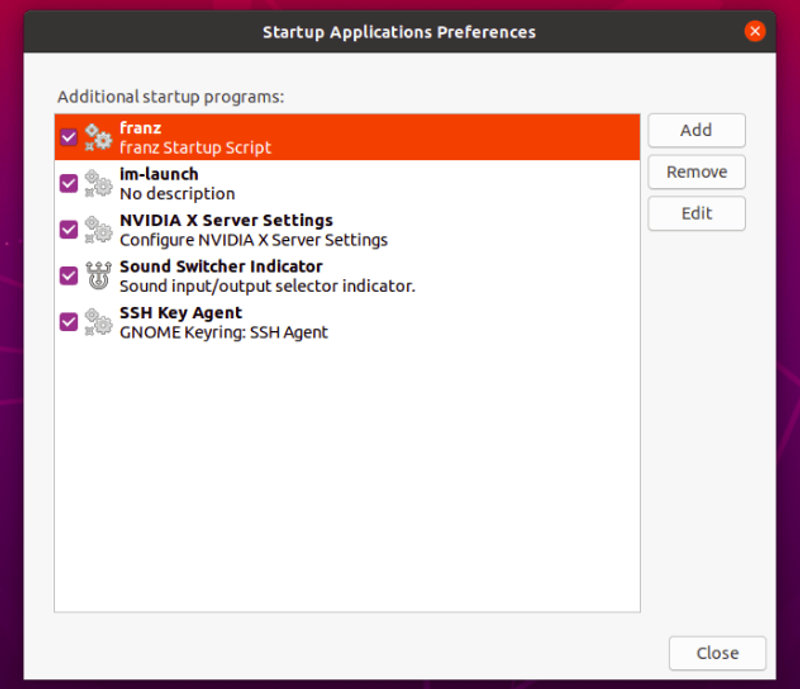
Remove startup applications in Ubuntu
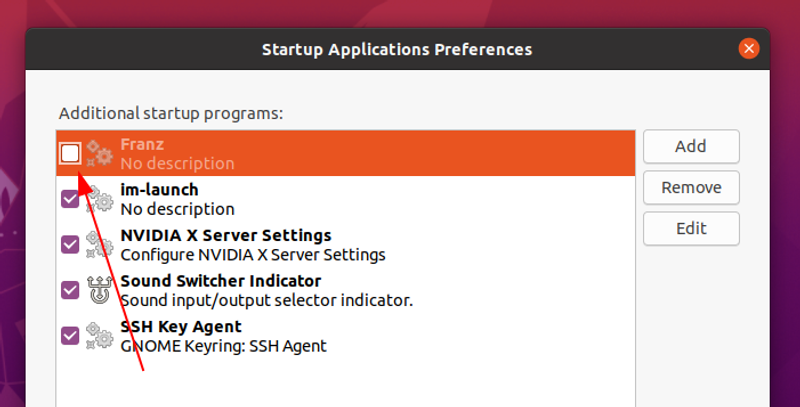
Now it is up to you to figure out what you need and what you don’t. In my case, Franz (an all-in-one messaging app) is no longer needed as a startup app. So, I’d like to disable it.
You can choose to either disable it or completely remove it from the list of startup apps.
To remove a program from startup applications list, select it and click on Remove from the right window pane.
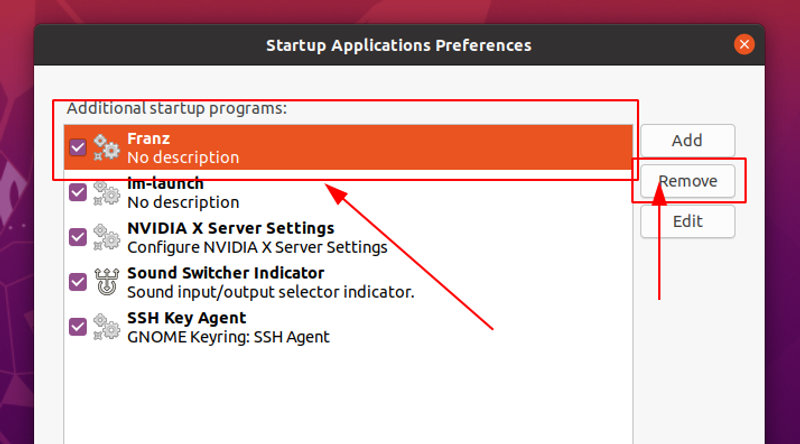
Removing unnecessary startup applications helps you speed up Ubuntu a little.
Delay the start up programs
What if you do not want to remove programs at the start up but want to optimize the system performance at the boot time?
In that case, you can add a delay in various programs so that not all the programs will be starting at the same time.
Select a program and click Edit.
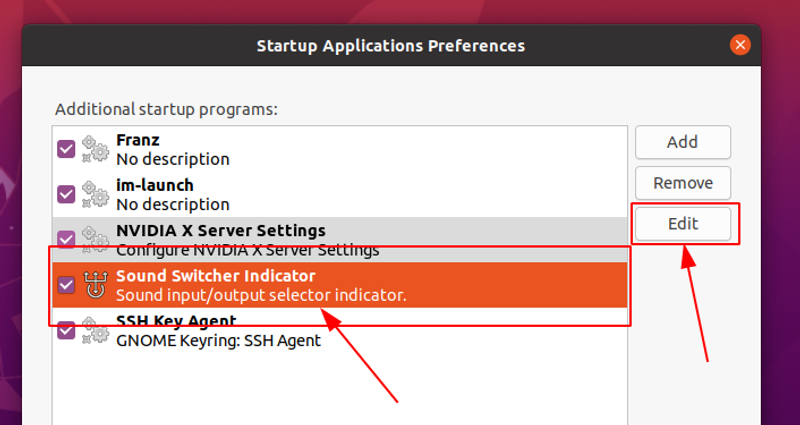
This will show the command that runs this particular program.
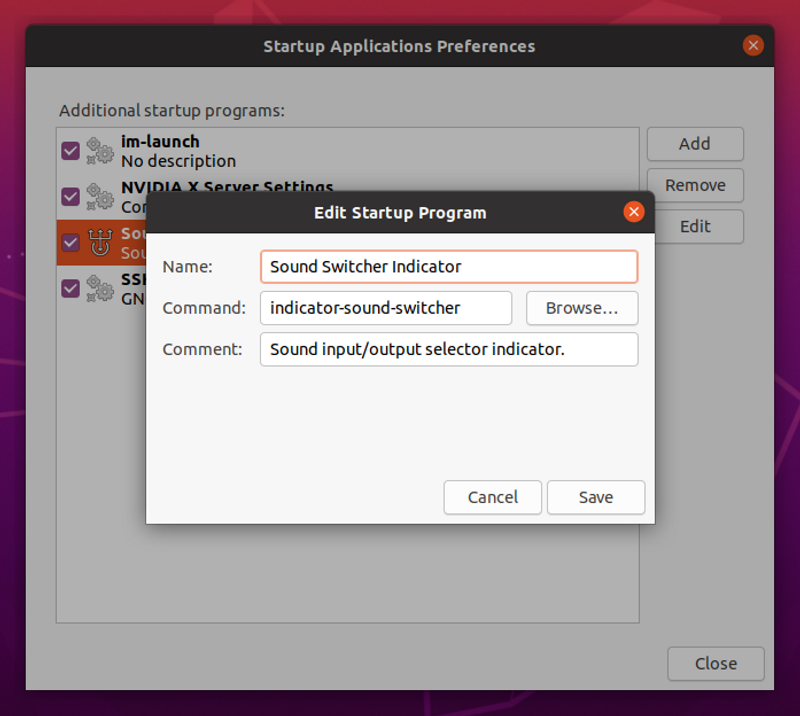
All you need to do is to add sleep XX; before the command.
It will add a delay of XX seconds before running the actual commands to run the applications.
For example if I want to delay Sound Switcher Indicator for 2 minutes, I’ll add sleep 120; before the command like this:
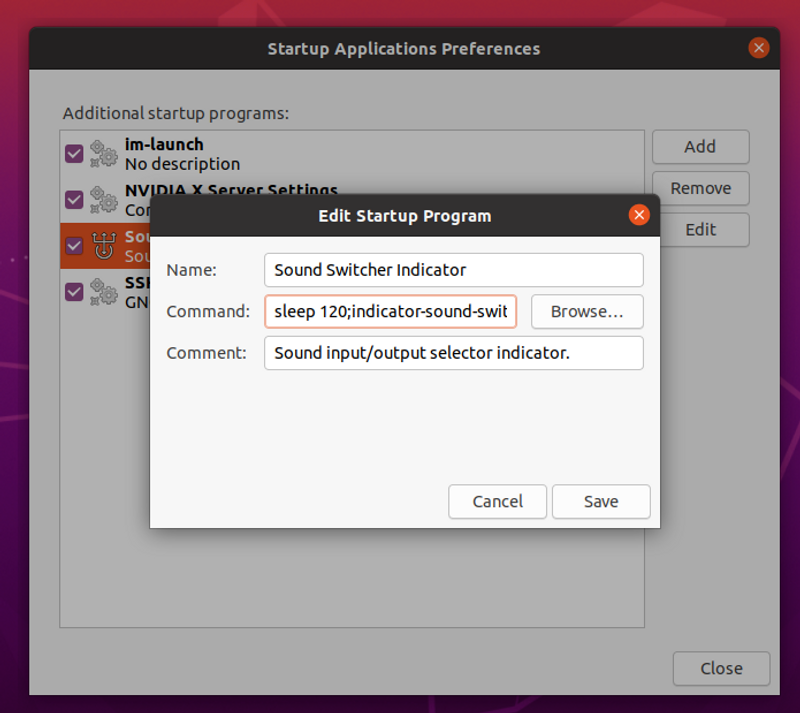
Save it and close it. Reboot the system to see how it works.
Add a program in the startup applications
Some applications provide the “autostart” option in their settings. This enables you to easily add them to the list of startup applications.

But not all applications do this. For applications like Transmission or qBitTorrent torrent clients, there is no built-in option to auto start.
Fret not. I’ll show you a neat trick that you can use to autostart almost any application.
This could be tricky for beginners but it’s not rocket science. I’ll try to make it as easy as possible for you to be able to add a new program to startup applications.
Step 1: find the command to run any application
If you are using GNOME desktop environment, you can use alacarte menu editor. Other desktop environments may or may not have such utilities.
You can look for alacrte in the software center by searching ‘Main Menu’.
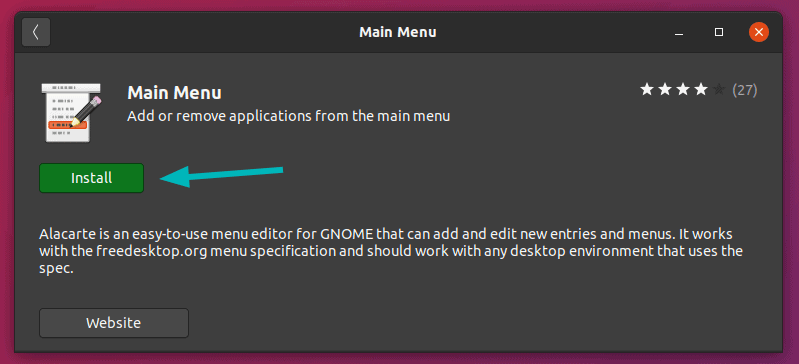
Alternatively, you can install it using this command:
sudo apt install alacarteOnce installed, go to the system menu and search for Main Menu. In case Main Menu is not installed by default, then you can install it from the Software Center.

This contains all the programs that you have installed on your system.
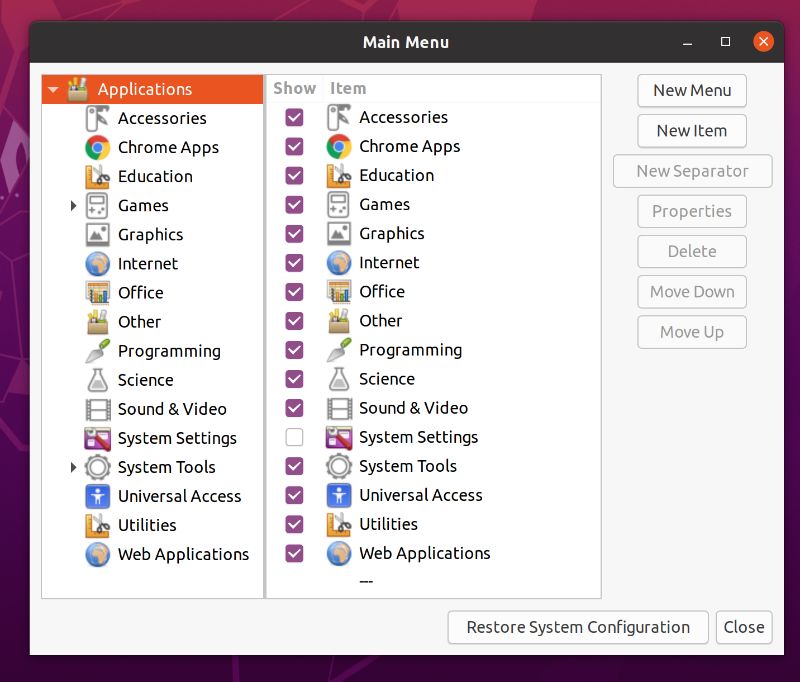
Just look for the application you want to add and click on the Properties option on the right-side of the screen to see the command that runs this application. For example, I want to run qBittorrent client on start up. Here’s what I have to do:

When I select the target application and click on propertives, this will give me the command that runs qBittorrent:
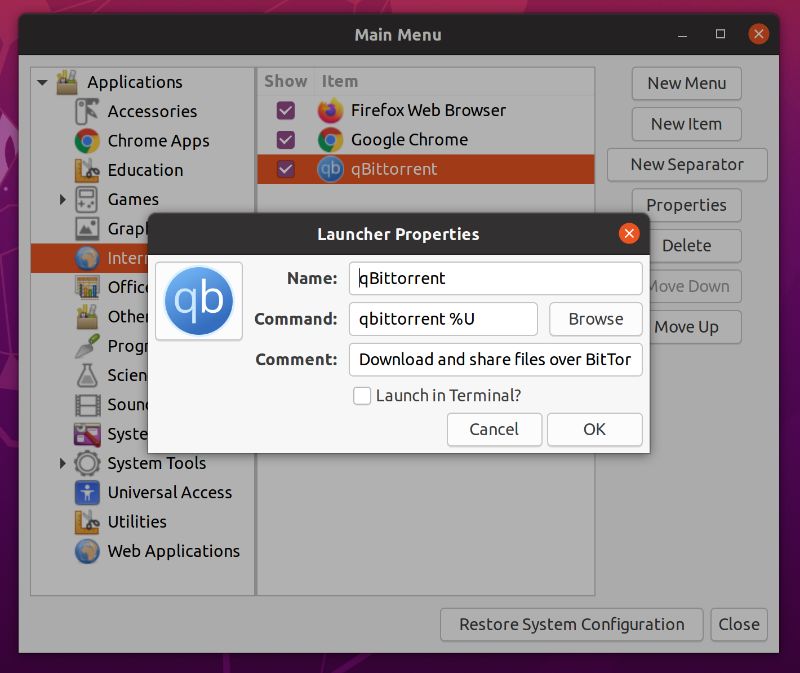
Now I’ll use the same information to add qBittorrent in startup applications.
Step 2: Adding programs in startup
Head back to Startup Applications and click on Add. This will ask you enter a name, a command and comment (optional).
The command is the most important of all. You can use whatever name and comment (which is the description of the app) you want.
Use the command you got from previous step and click on Add.
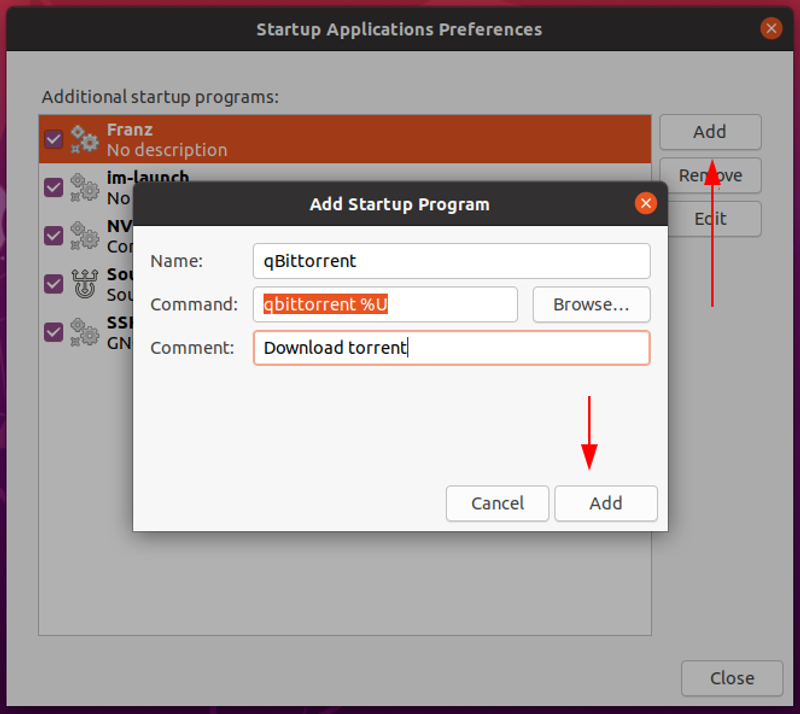
That’s it. You’ll see it in the next boot up, running automatically. This is all you can do with startup applications in Ubuntu.
Bonus Tip: See hidden startup programs in Ubuntu
So, far we have discussed applications that are visible in startup but there are many more services, daemons and programs that are not visible to Startup applications.
In this section, you’ll see how to see hidden startup programs in Ubuntu and manage those.
To see what are the services running at startup, open a terminal and use the following command:
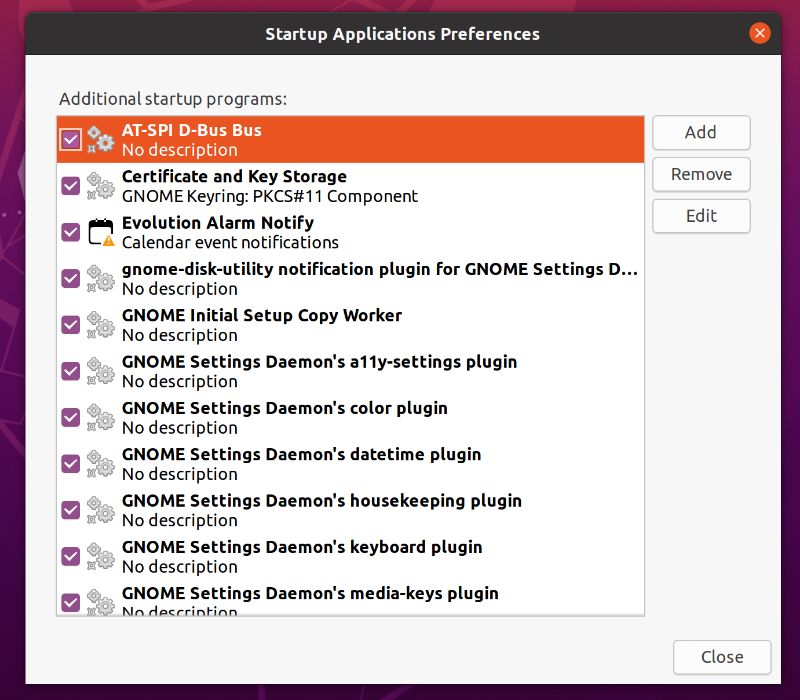
sudo sed -i 's/NoDisplay=true/NoDisplay=false/g' /etc/xdg/autostart/*.desktopThis is just a quick find and replace command that changes the NoDisplay=false with NoDisplay=true in all the programs that are in autostart. Once you do this, open Startup Applications again and now you shall see many more programs here:
Wrapping Up
I hope this Ubuntu tutorial helped you understand and manage startup applications. Feel free to let me know your thoughts in the comments below.

