
Brief: This tutorial goes over setting up XRDP on Ubuntu, which will allow for GUI connections to a remote computer.
Microsoft Remote Desktop Protocol (RDP) is a protocol that allows for graphical remote desktop connections from one computer to another. RDP works by having a main machine run software that allows several other computers to connect to it.
XRDP is an open-source implementation of RDP, removing the need to run any proprietary programs. XRDP not only tries to follow in the direction of RDP, but is also compatible with regular RDP clients such as Remmina and GNOME Boxes.
XRDP features a simple one-page interface, after which you’ll be right at your desktop:
Things to keep in mind about using XRDP
While XRDP works great for getting remote access to machine, it’s important to know what XRDP isn’t good at.
Do not use XRDP if you need a secure connection
Connections made over XRDP can be viewed and modified by attackers, and should thus be avoided for any sensitive information. This can be alleviated through the use of an SSH connection or with certificates, but both require a more complex setup and will not be covered here.
XRDP doesn’t work well with theming by default
In my testing, XRDP didn’t ever seem to apply the theming Ubuntu comes with by default. Instructions for fixing this are available at the end of the article.
Don’t use XRDP if you only want/need a CLI environment
XRDP is designed and made to use in a GUI environment. If you plan on using it for a CLI environment, such as on a server, you should look at other tools, such as SSH.
Installing and Setting Up XRDP on Ubuntu
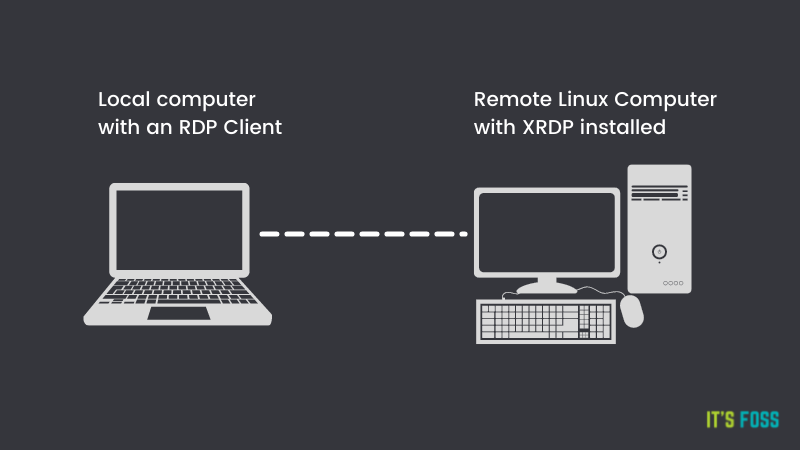
This tutorial assumes the following setup to get everything working properly.
- A Linux system with the XRDP server software installed on it. This is the system which will be accessed remotely.
- If the remove machine isn’t on your local network, the machine will need a public IP address with port forwarding enabled.
- The username and password of the remote system.
- Another system (be it Linux, Windows, or macOS) with an RDP client installed.
Step 1: Install XRDP on the remote machine
Installing XRDP is just a couple of steps, and is pretty straightforward to do.
Note
Before going anywhere, note that the “remote machine” will be the machine that all others connect to.
XRDP is included in most distributions’ repositories. On Ubuntu, it is available in the universe repository.
You can install it with the following command:
sudo apt install xrdpStep 2: Connecting to the remote machine
Good news is XRDP works right out of the box!
To connect to the machine you installed XRDP on, you’ll first need to install an RDP client on your local machine.
I’ll be using GNOME Boxes, which can be installed with the following:
sudo apt install gnome-boxesGNOME Boxes is known more for virtual machine use, but it also supports a variety of other protocols, including XRDP.
If for whatever reason you don’t want to use Boxes, you can also use a client called Remmina:
sudo apt install remminaAgain though, note that I’ll be using Boxes throughout the rest of the tutorial.z
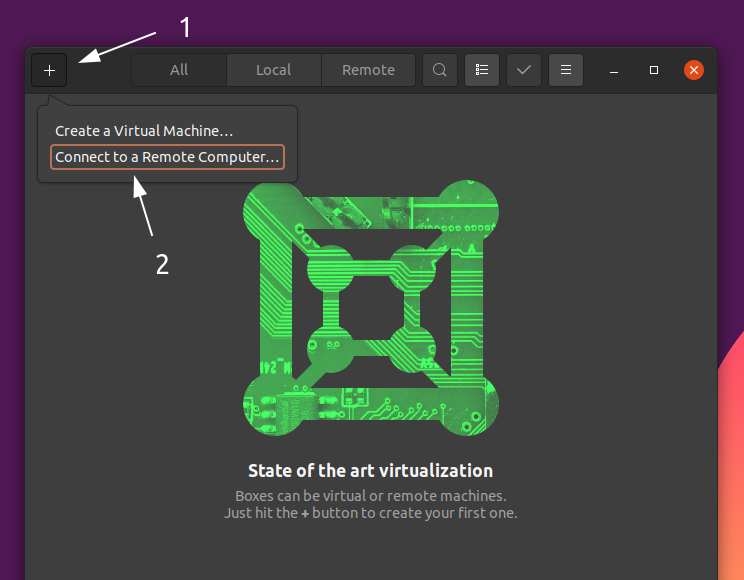
First off, Start GNOME Boxes, and click on the + sign and select “Connect to a Remote Computer…“.
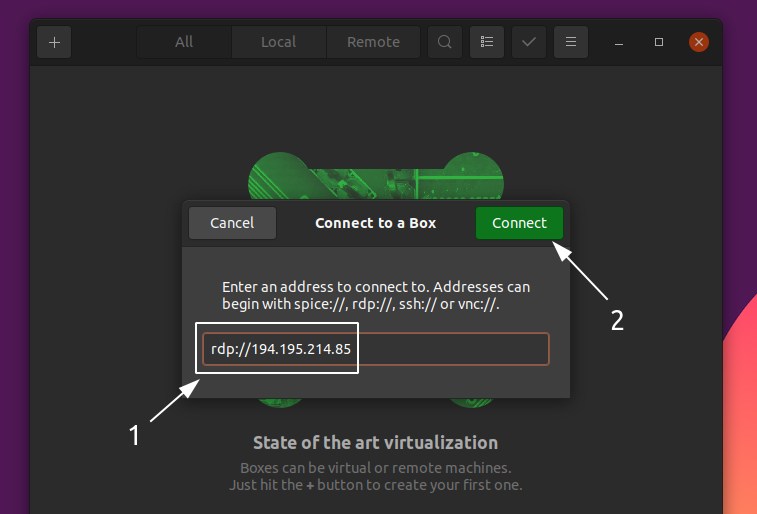
Next, enter the IP address of the machine you’re connecting to, prefixed with rdp://, and then connect as shown below:
Not sure what your IP address is?
You can find your IP address with the ip address command. You’ll need to look for something that looks like a number split into four groups:
abhishek@its-foss:~$ ip address
1: lo: mtu 65536 qdisc noqueue state UNKNOWN group default qlen 1000
link/loopback 00:00:00:00:00:00 brd 00:00:00:00:00:00
inet 127.0.0.1/8 scope host lo
valid_lft forever preferred_lft forever
2: wlp0s20f3: mtu 1500 qdisc noqueue state UP group default qlen 1000
link/ether dc:46:b9:fb:7a:c5 brd ff:ff:ff:ff:ff:ff
inet 192.168.0.107/24 brd 192.168.0.255 scope global dynamic noprefixroute wlp0s20f3
valid_lft 6183sec preferred_lft 6183sec
Avoid any IP addresses named 127.0.0.1, as that one points back to the machine you ran the command on. There should be more IP addresses in the output, as shown above.
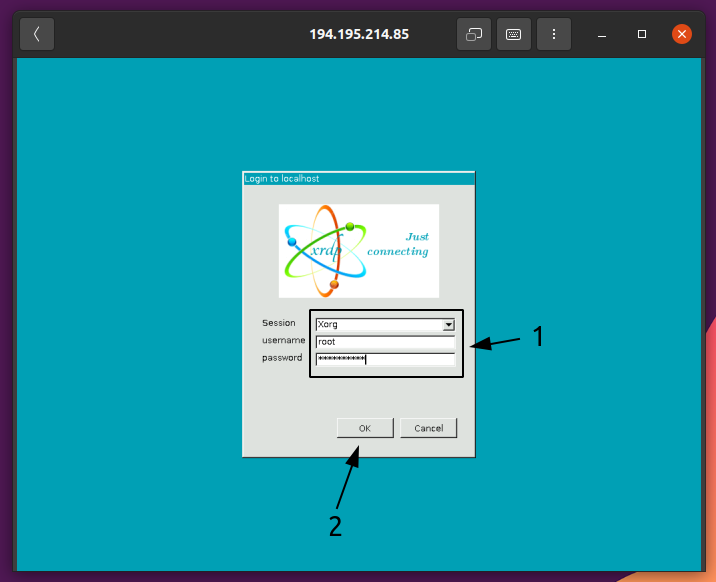
You should then be presented with a login screen. Keep “Session” set to “Xorg”, and just enter your username and password, then click “OK”:
After, you should be presented with the desktop of the remote machine:
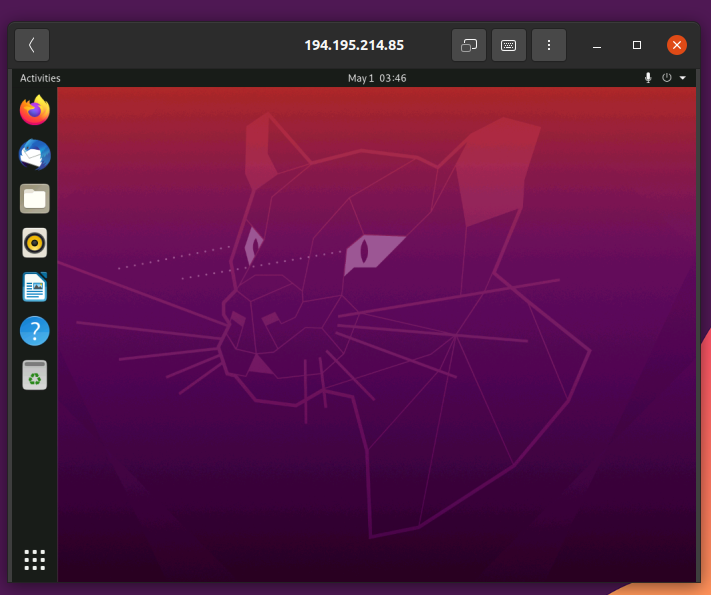
And now you’re good to go! Everything will behave just the same as if the machine was right in front of you.
Troubleshooting: Fixing theming issues
XRDP never seemed to get the theming correct for me. This can be fixed with a few steps.
First, on the remote computer, run the following command:
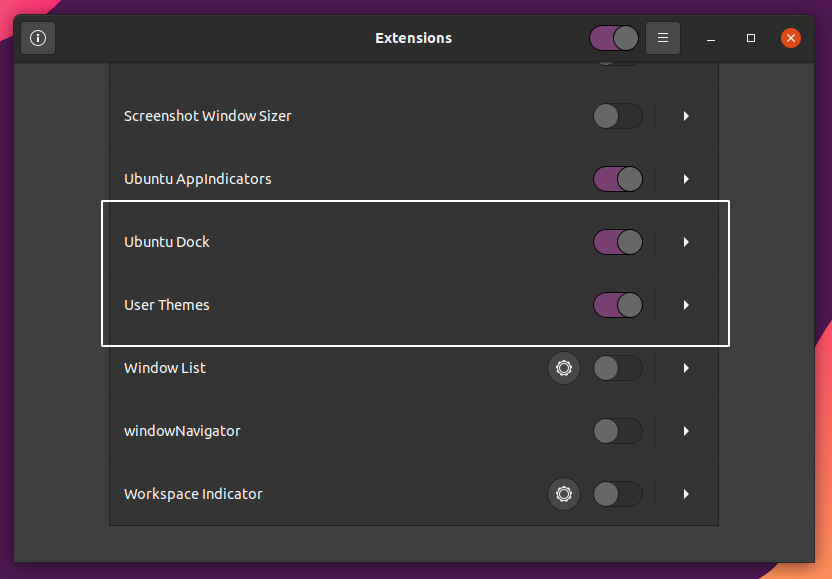
sudo apt install gnome-tweaks gnome-shell-extensions dconf-editor -yNext, open the Extensions app, and turn on the toggles shown below:
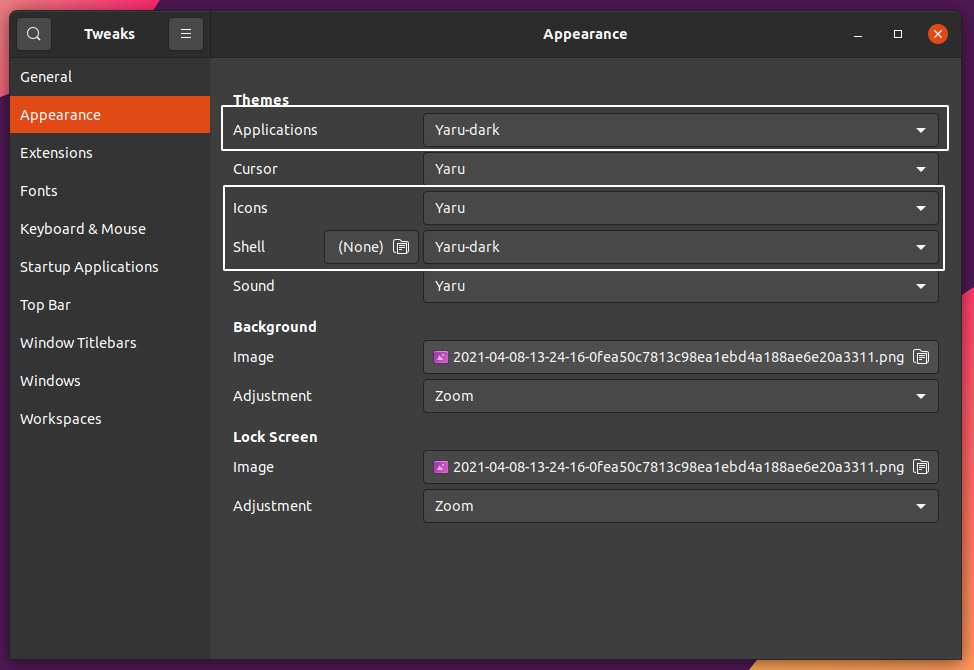
Now, close your remote desktop session and log back in. Next, open up Tweaks and configure everything per the screenshot below:
Lastly, open up dconf Editor, and navigate to /org/gnome/shell/extensions/dash-to-dock/, and set the values that are shown below:
custom-theme-shrink: Ondock-fixed: Ontransparency-mode: FIXED
Wrapping Up
And there you go! Everything is good to go, ready to do what you need to.
If something isn’t working quite right, or you have any questions or comments, feel free to leave them below.
