

VLC is more than just a video player. It's a versatile video tool with so many features that a normal user could never know them.
You can download YouTube videos with VLC or even trim videos with it.
Another such unusual use of VLC is for screen recording.
I still recommend using a proper screen recorder for this task, you are welcome to explore this VLC feature for fun.
Screen recording with VLC
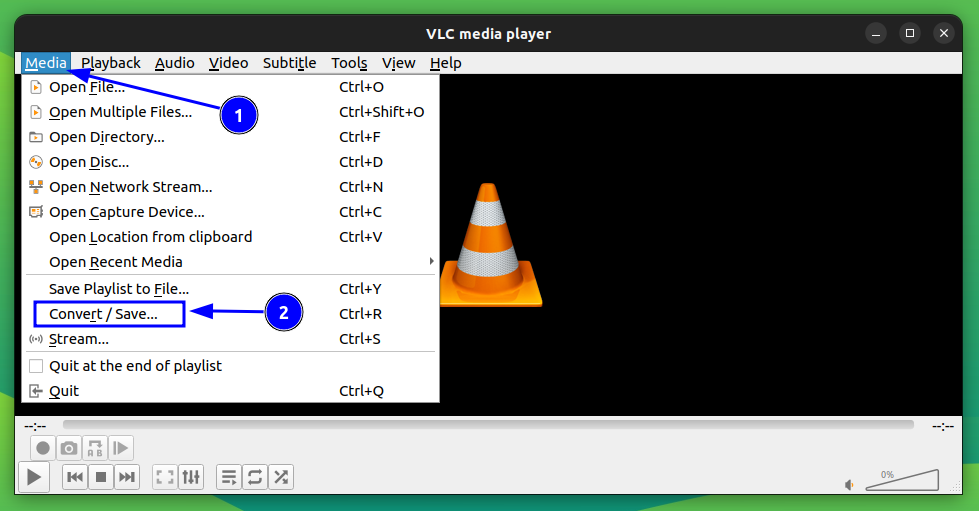
To record your screen using VLC, open it and click on Media and select Convert/Save. (Or directly click on Media → Open Capture Device)
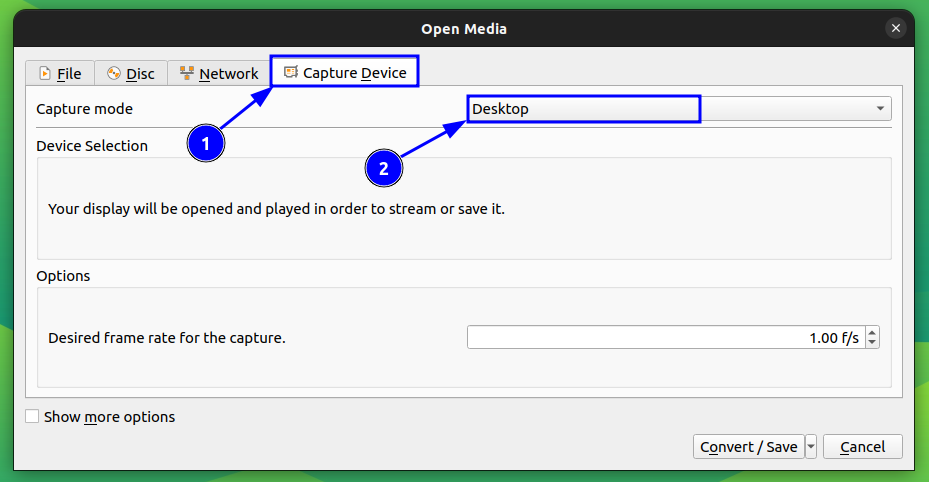
Go to the "Capture Device" Tab and select Desktop from the Capture Mode dropdown list.
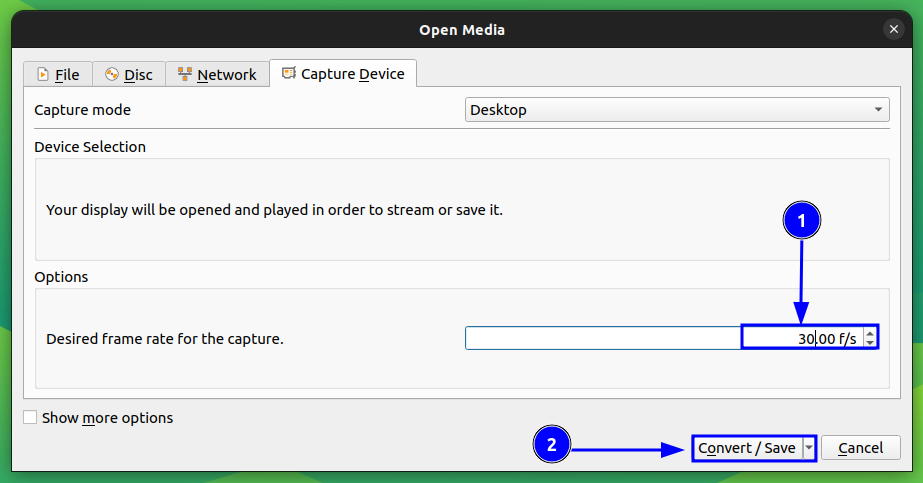
Now, provide some frame rate for your recording. 10, 24 fps etc will be good, and if you need more quality, go for higher. Note that this will increase the file size and system requirements. Then, press the Convert/Save button.
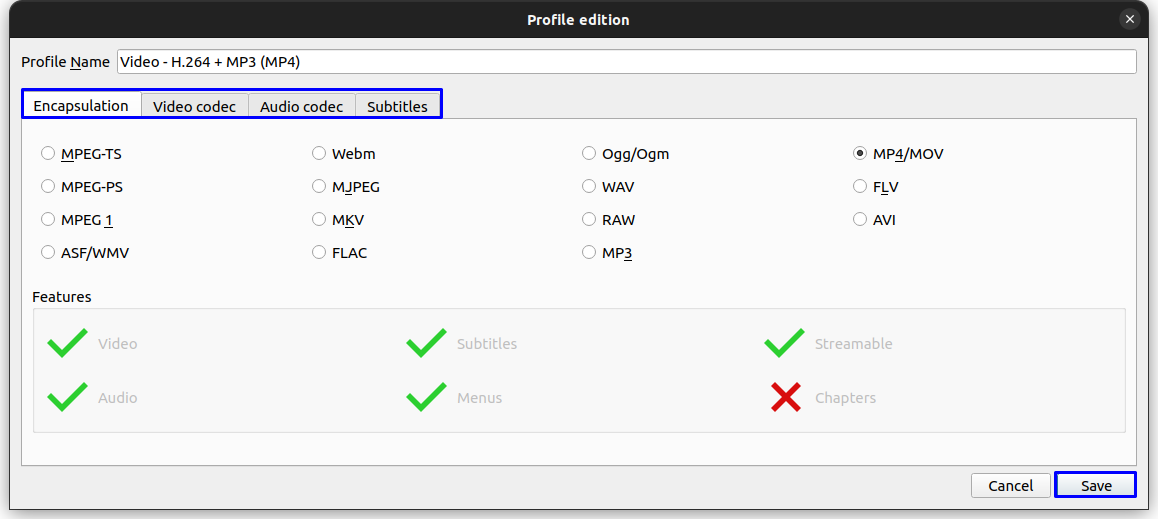
On the next page, select a profile from the drop-down and click on the adjacent button to edit the profile.
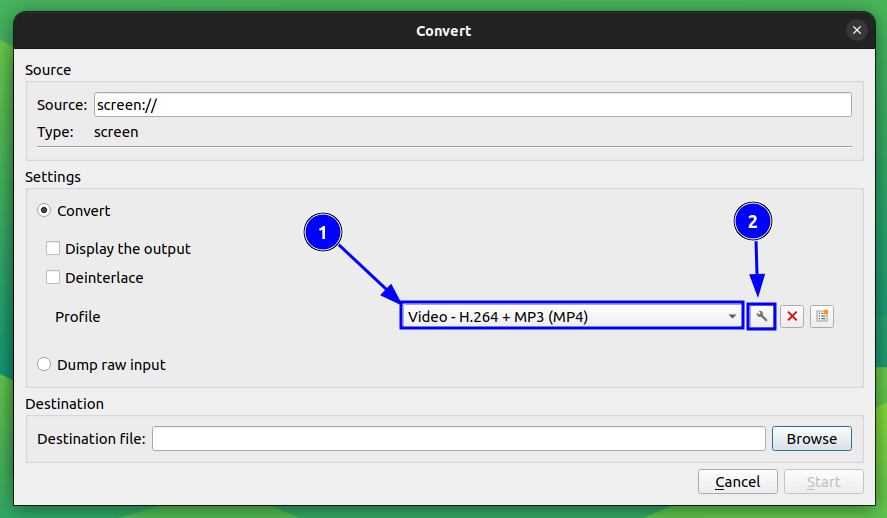
Set the Video format you need and press Save.
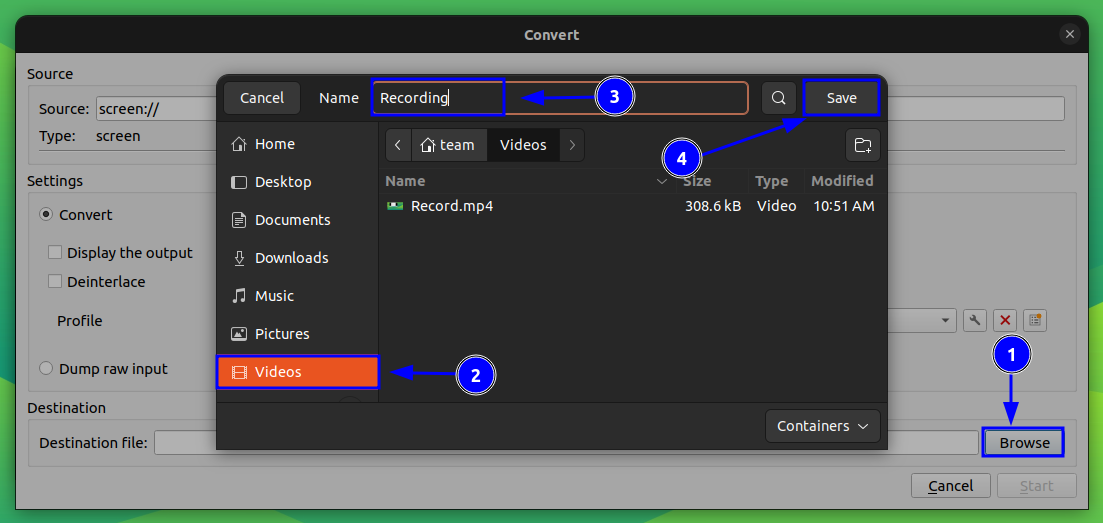
Now, you need to give a destination file name. Click on the Browse button, select a location, and enter the name of the output file. Click Save.
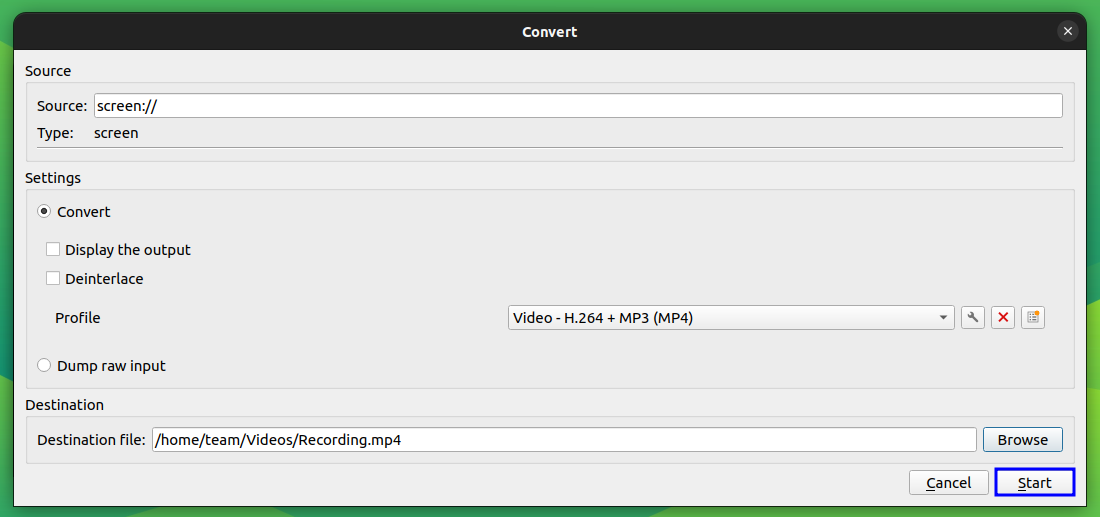
Press the Start button, to start recording your screen.
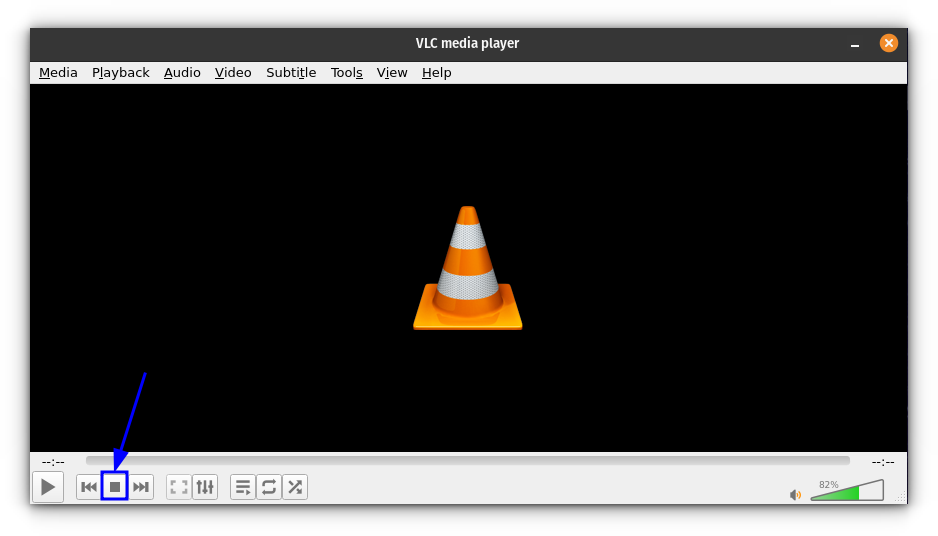
This will start recording. Once you finished your recording, use the panel button to stop.
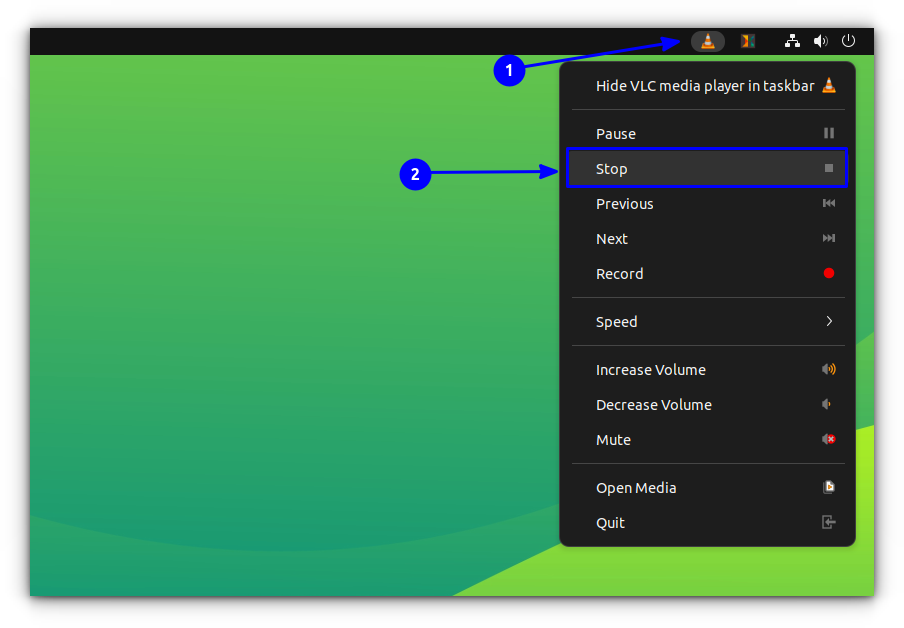
Or click on the stop button on VLC.
That's it. You can view the screen recording on the place where you saved it.

Conclusion
As you can see, while it is possible to record the desktop screen with VLC, it is not a replacement of a dedicated screen recording tool. Lack of audio recording is a major letdown.
 Munif Tanjim
Use VLC for screen recording only if you don't have any other options. What do you think?

