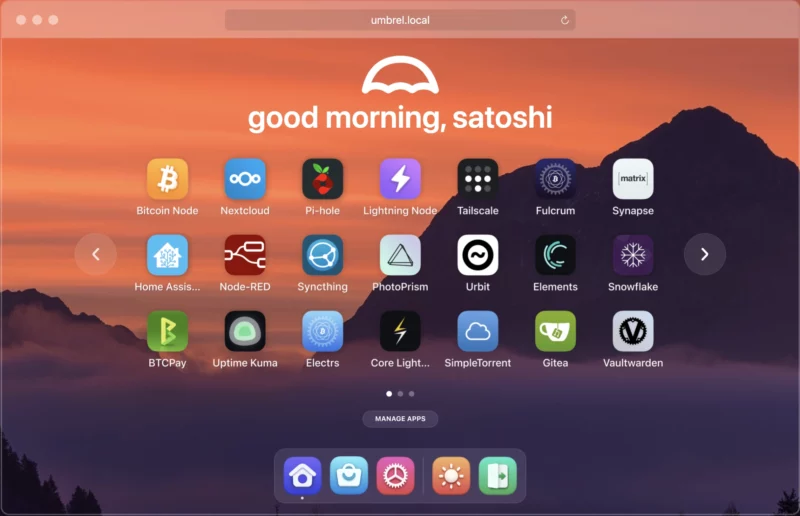
Umbrel is a beautiful operating system as well as a services dashboard that is a good start for someone interested in self-hosting. It has a nice web GUI and enables easy installation of containerized web services with a one-click install.
This is perfect if you want a homelab setup with open source software for personal usage but can’t (or don’t want to) do all the technical configuration manually.
Umbrel: Self-hoster’s paradise
Well, it depends on how you install Umbrel. On the website, there are two ways to “get” Umbrel. One is an image for the Raspberry Pi and another method is to install the Umbrel Docker image on an existing Linux installation as a Docker container.
So technically, it is a management tool for Docker containers.
I gave it a go with my Raspberry Pi 4 and here I share my experience and views on using Umbrel.
Hardware support
At the time of writing, there doesn’t seem to be an official guideline from Umbrel regarding this…
But fret not! I flashed Umbrel to my SD Card and looked under the ‘/boot’ partition. The only kernel to be found was named ‘kernel8.img’.
According to Raspberry Pi’s official documentation, ‘kernel8’ means a 64-bit kernel, whereas ‘kernel7’ and ‘kernel7l’ are 32-bit kernels.
As for non-Raspberry Pi hardware, below is a what I assume from my experience using Umbrel:
- Any 64-bit CPU (all modern CPUs are 64-bit)
- Any Linux-based OS, Ubuntu/Debian is preferred
- Minimum 4 to 8 Gigabytes of RAM
- An external SSD/HDD in at least 750 Gigabytes of capacity (ALL DATA WILL BE ERASED ON FIRST BOOT)
Installing Umbrel
If you like the idea of an operating system like Umbrel and you want to install it, you need to decide if you want to install it on a Raspberry Pi or on any other computer.
NOTICE
Raspberry Pi (64-bit)
If you want to install Umbrel on a Raspberry Pi, it is available on their Github at this link. There will be three files available for download, please download the ‘umbrel-os-VERSION.zip’ file.
While the Umbrel image gets downloaded, download an image-burning tool like BalenaEtcher.
Once Umbrel and BalenaEtcher are downloaded, insert the SD Card and use BalenaEtcher to flash Umbrel on the SD Card.
When the flashing finishes, insert the SD Card in the Raspberry Pi along with a 750+ Gigabyte HDD/SSD and boot your Raspberry Pi.
The web GUI will now be available at http://umbrel.local from your web browser.
Linux PC
If you do not have a Raspberry Pi but have a spare computer running Debian/Ubuntu, you can easily install Umbrel using a simple script that is provided.
The recommended way to do so is to run it with the curl command:
curl -L https://umbrel.sh | bashThe install script will install the necessary dependencies, Docker, Docker Compose and finally, the necessary containers.
Upon successful installation, you will see the methods of accessing the web GUI.

Installing Umbrel on my Ubuntu VM, I got the following methods of accessing the web GUI. One is a domain name, the second is an IP address and the third is a TOR address.
Using Umbrel: The good and bad
Like anything in this world, everything has its own positives and negatives. Umbrel is no exception.
It excels at ease of use but fails at basic customization.
The good parts
Let’s kick off this review piece by taking a look at the good parts of Umbrel. Things I enjoyed while using Umbrel, and my experience.
The web GUI is simply amazing and looks second to none.

App Store
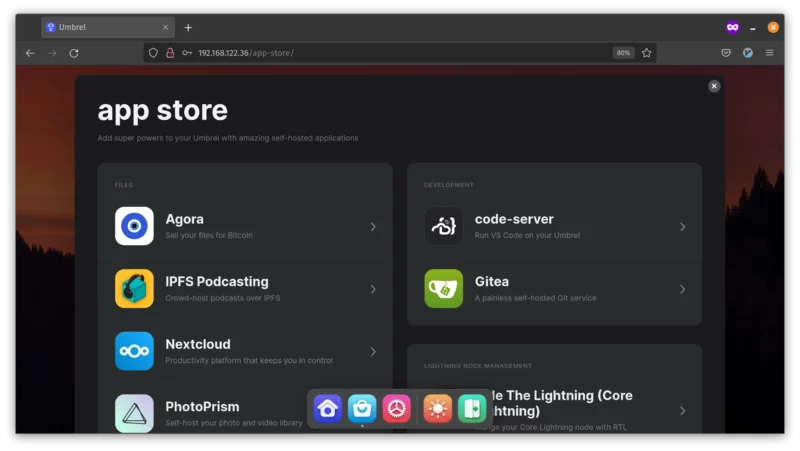
Umbrel, being advertised as an Operating System, comes with its own App Store. It has some of the most popular “self-hosting” software that you can imagine. Some of my favorite software available from the App Store are Gitea, Home Assistant, Nextcloud, Pi-hole, Synapse, Syncthing, Tailscale, Uptime Kuma, and much, much more.

The idea behind Umbrel’s App Store is very fascinating. Since Umbrel deals with Docker containers, the Apps are just docker-compose YAML files tailored to run on Umbrel. That is the most elegant solution I’ve ever seen yet! You can view those files here.

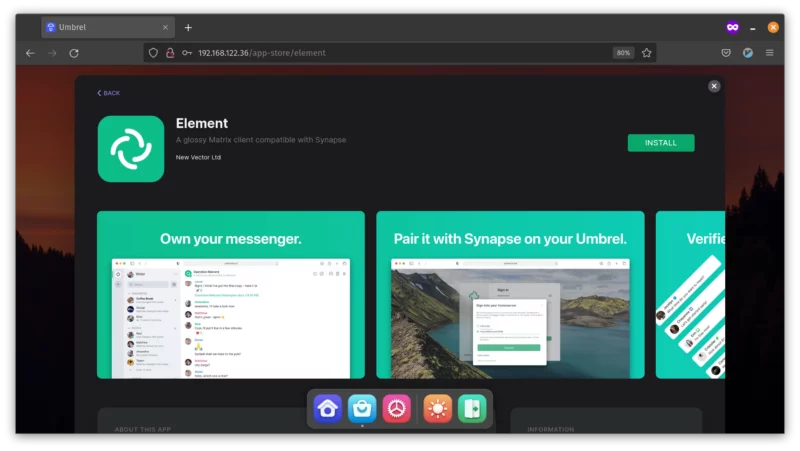
That means complex software like Nextcloud is now a ‘one-click install’.
Settings
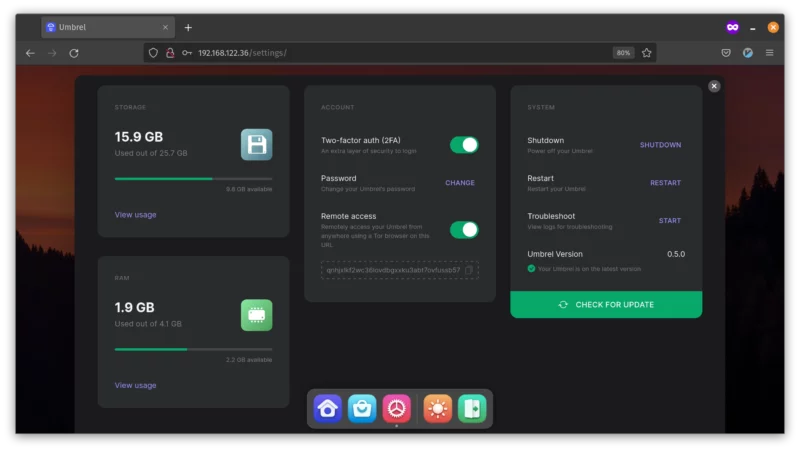
The Settings app in the web GUI shows useful metrics like storage and RAM usage. You can also shut down and restart your computer from the Umbrel web GUI itself. No longer need to SSH in a remote computer and run sudo shutdown +0 :)

The Settings app also lets you enable 2 Factor Authentication for the web GUI (not SSH connection). 2FA is always a good security feature.
TOR
Umbrel enables TOR by default. That allows you to access the Umbrel web GUI over a TOR network without any worries!
That means, even if you are behind a router, you can remotely access your services like Nextcloud over the TOR network without having to get a public IP address or enable port forwarding from your router. Now this is extra cool! I need to do this for my homelab :p
Bitcoin and Lightning
Umbrel actually started as a project that allowed easily setting up a Bitcoin node. And it got popular in crypto enthusiasts who wanted to run their own nodes.
The developers later realized that they don’t have to stick with a Bitcoin and other cryptocurrency software. They can extend this ‘one-click install’ feature to other popular open source software like Nextcloud, PhotoPrism.
If you are interested in crypto, you can still find those software and install them. I don’t have any interest in the cryptocurrency and hence I didn’t install those software to check their performance.
The bad parts
Since Umbrel is still in v0.5, I will try not to go too hard, as I understand it takes time to implement certain features. But I still need to let you — the potential user — know the current situation with Umbrel.
An empty external disk is a must
The first problem I faced on my Raspberry Pi was that the GUI would not start without an external HDD/SSD attached to it :(
Actually, it’s a requirement by design. Umbrel keeps the OS on one disk (the SD card of your Pi) and it needs a separate disk for the application data.
Do note that the external disk must not have any useful data because it will be erased the first time you install Umbrel.
No multiple disks
The second issue is that there are a few limitations with the Settings app on Umbrel’s web GUI. With a new drive attached, you can not add it to Umbrel to be used by apps like Nextcloud, Gitea, etc. Which essentially means, the inability to use separate drives. That further means no RAID, of any sort.
Storage configuration issues
The third “oversight” I encountered is that there seems no way to change the storage location for any app, before or after the installation. This is okay for devices with single physical storage, but not for a Raspberry Pi or an x86 computer where the host computer might have 2 or more drives attached to it.
The only thing that you can manage about the apps is, to either install them or remove them. The web GUI does not (yet) let you change things like the port number that a container uses.
Remember the previous notice that if you put in a HDD/SSD at first boot, all data on it gets erased? Well… What happens if you re-install Umbrel? Is your previous data, which was stored by Umbrel, now deleted by Umbrel itself? I don’t see if such checks like this are present or absent.
Conclusion
All in all, if you are just starting with your home lab, I do recommend you give Umbrel-a-try (I’ll show myself out)! It puts your Raspberry Pi to some good use.
It is a beautiful web GUI for simple management of containers, which can give you a good kickstart. If you want something that “just works” without getting fine-tuned control over knobs and switches, Umbrel is a good candidate for you.

