
When you install Ubuntu, you are provided with the option to choose whether or not you want to use a password to log in to the system. If you think you made the wrong choice at that time, you can change it at any time.
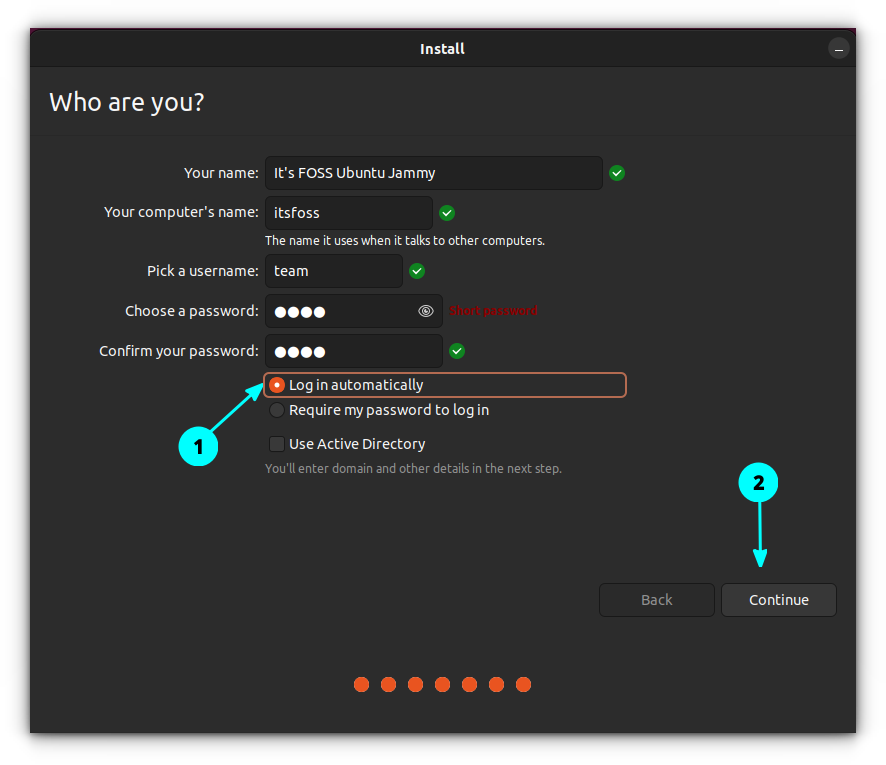
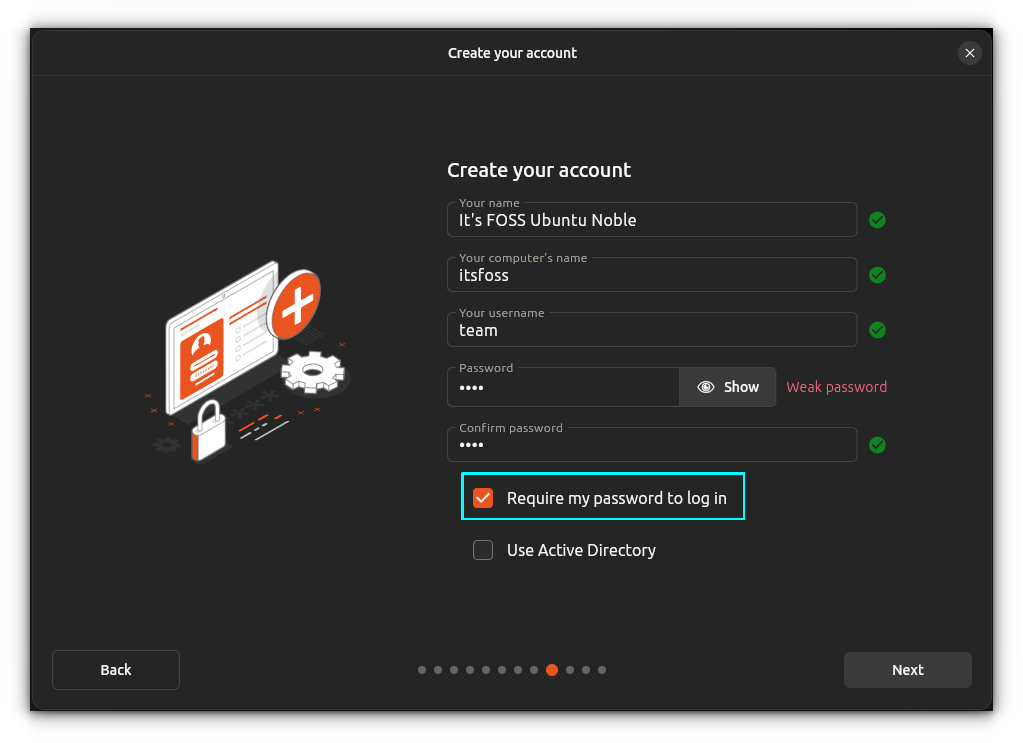
Old and new installer auto-login setting in Ubuntu. Disable the button for auto-login. (Click to enlarge)
In this quick beginner tip for Ubuntu users, I’ll explain the steps to enable or disable automatic login in Ubuntu 18.04 and higher versions that use GNOME desktop.
You may watch this video to see the steps in action, or simply follow the rest of the tutorial.
Enable automatic login in Ubuntu
First, press the super key (the Windows key) on your keyboard. This will bring the GNOME Activities area. Start typing settings and you’ll see the settings application. Click on it.

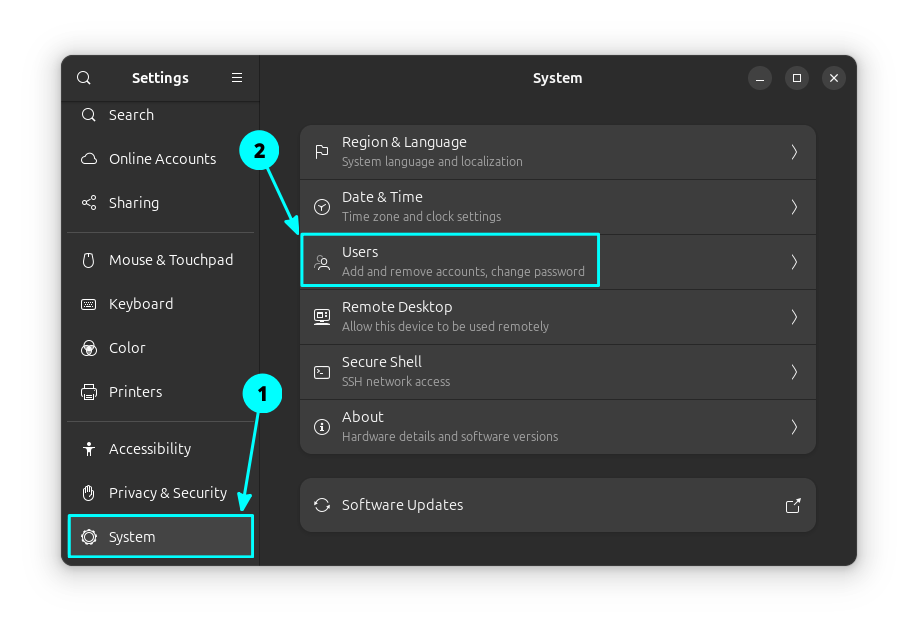
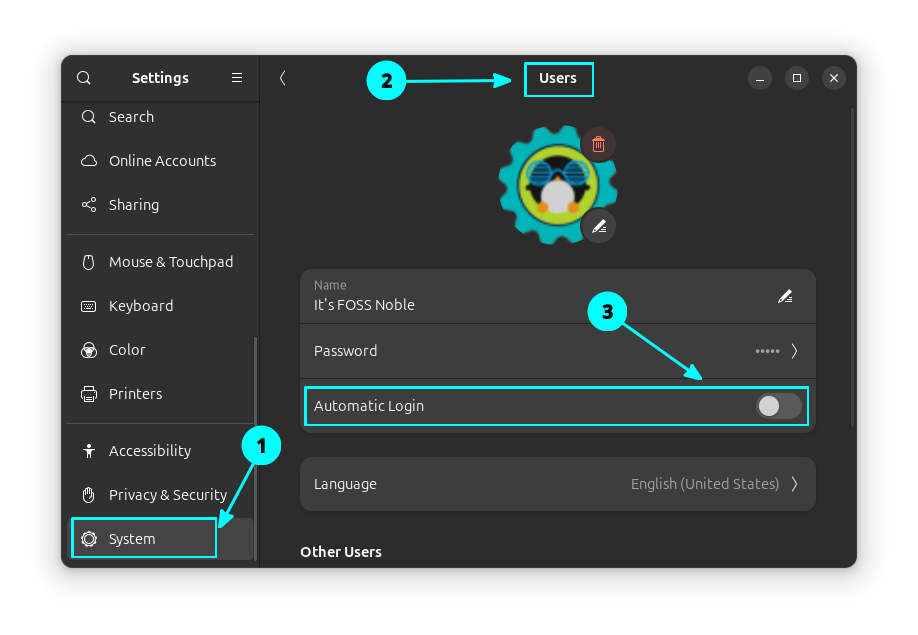
In the Settings, go to the bottom and look for System in the left sidebar and then select Users.
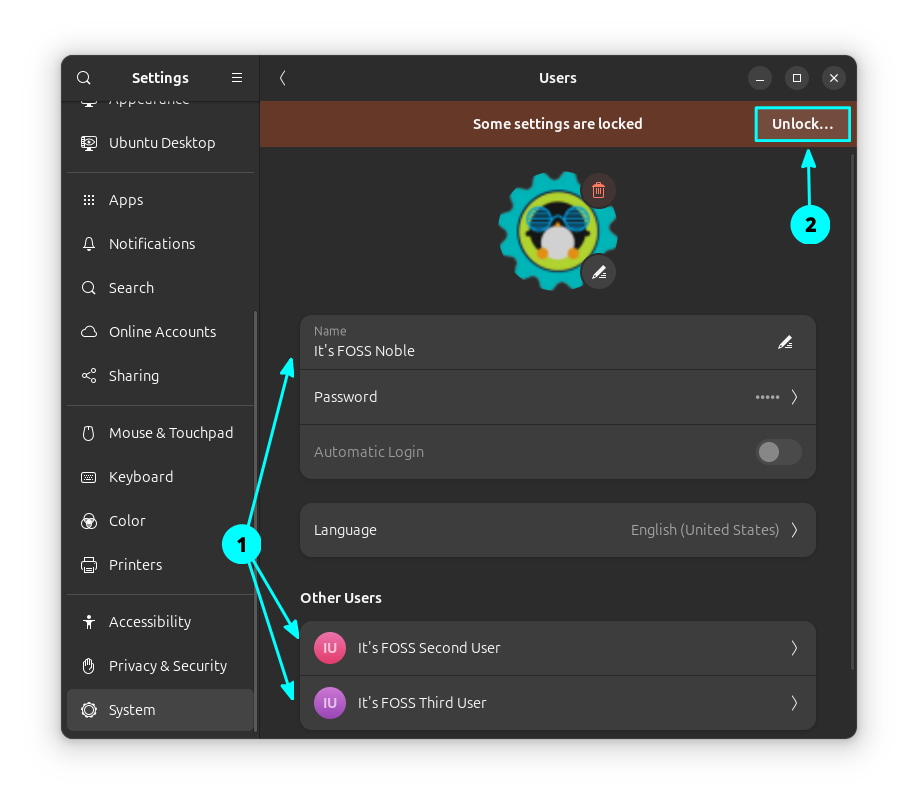
Here, you should see all the users available on your system. Click on the desired user and then click the unlock option.
You’ll have to enter your own account’s password:
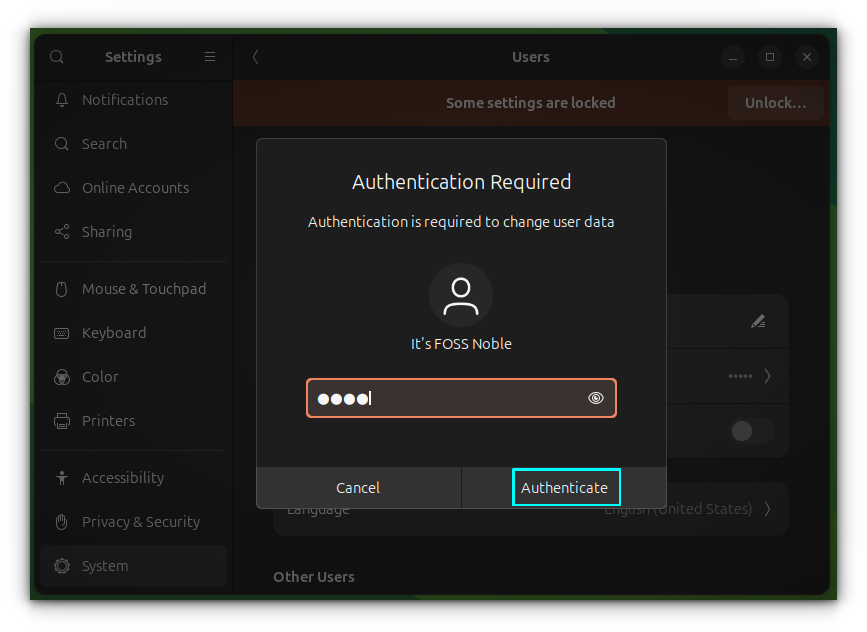
Now, you should be able to toggle the ‘Automatic Login’ button to enable automatic login in Ubuntu.
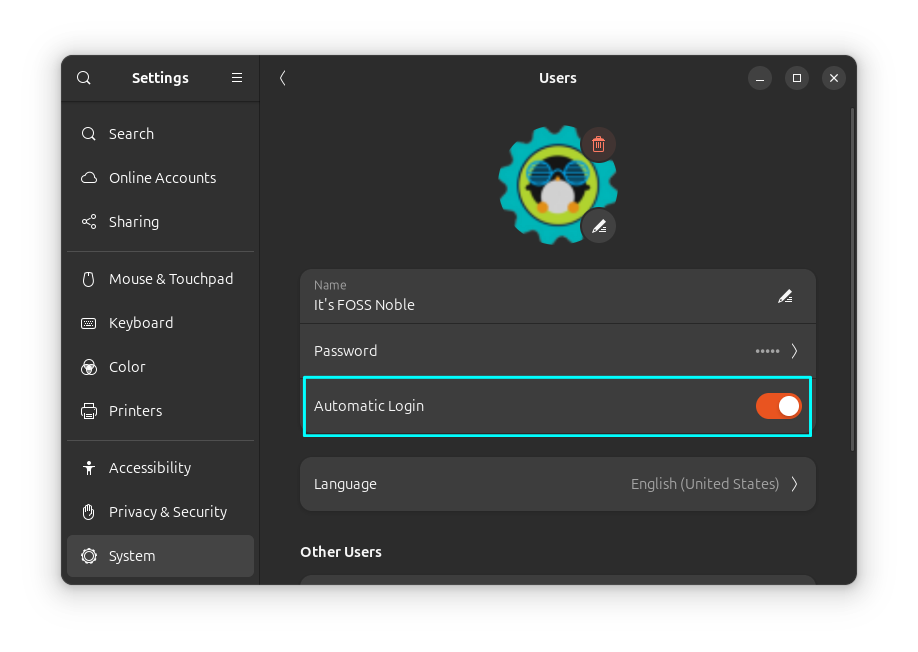
Disable automatic login in Ubuntu
You can disable automatic login the same way. You go to the Settings → System → Users and then unlock it with your password and toggle the Automatic Login button off. That’s it.
Why you should avoid using automatic login in Ubuntu?
If you take my suggestion, avoid using automatic login. There are several reasons for that. The first reason is that it makes your computer less secure. And if you use Ubuntu irregularly, you may forget your password. Now resetting Ubuntu password is not a complicated task, but it’s an additional pain nonetheless.
In addition to that, you’ll encounter the famous keyring issue in Ubuntu. You might be irked by an “unlock keyring” popup from time to time, and you’ll have to enter the password anyway.
Either way, it’s your choice if you want to use auto login in Ubuntu or not. I showed you both ways to deal with it.
What do you prefer? Do you use automatic login in Linux or not?

