
After installation, you will notice that NixOS is quite different from general-purpose Linux distributions.
Of course, as one of the advanced Linux distributions, it may not feel right at home to most new users.
If you do not know why you should use NixOS, and trying it out of curiosity, it is vital to know who it is for before proceeding.
While I assume you installed the distro already, if it is your first time, I suggest installing NixOS on a virtual machine.
1. Update packages
Updates would always be there even if you used the latest ISO for the installation. So why not start by updating the packages?
To upgrade packages, first, you will have to check for updates in added channels:
nix-channel --updateAnd then, use the following command to install those updates (if any):
sudo nixos-rebuild switch --upgradeThat's it! It will take care of the rest.
2. Change hostname in NixOS
If you try the traditional way of changing the hostname (using the hostnamectl command), it will throw the following error:
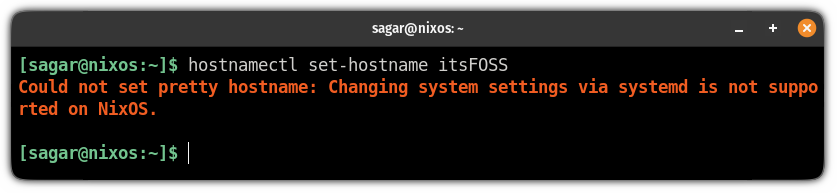
With NixOS, you can change the hostname easily using its main config file, which you can access using the following command:
sudo nano /etc/nixos/configuration.nixIn this config file, look for the following line:
networking.hostName = "nixos";And change it to:
networking.hostName = "Your_Hostname";For example, I changed my hostname to itsFOSS:
networking.hostName = "itsFOSS";
Now, save changes and exit from the nano text editor.
To take effect from the change you made to hostname, execute the following command:
sudo nixos-rebuild switchAnd finally, reopen the terminal, and the change in hostname should reflect. You may have to reboot in recent versions of NixOS.
Suggested Read 📖
 Pratham Patel
3. Setup Flatpak
I know what you might be thinking. The Nix package manager already offers a plethora of packages. So, why do you need Flatpak?
Installing what you need could be a bit time-consuming for first-time users. So, Flatpak should make things convenient for you.
Setting up Flatpak is not the same as you do on Ubuntu.
To setup Flatpak, you will have to make changes to the configuration.nix file, which can be accessed using the following:
sudo nano /etc/nixos/configuration.nixGo to the end of the line in nano and add the following line before the }:
services.flatpak.enable = true;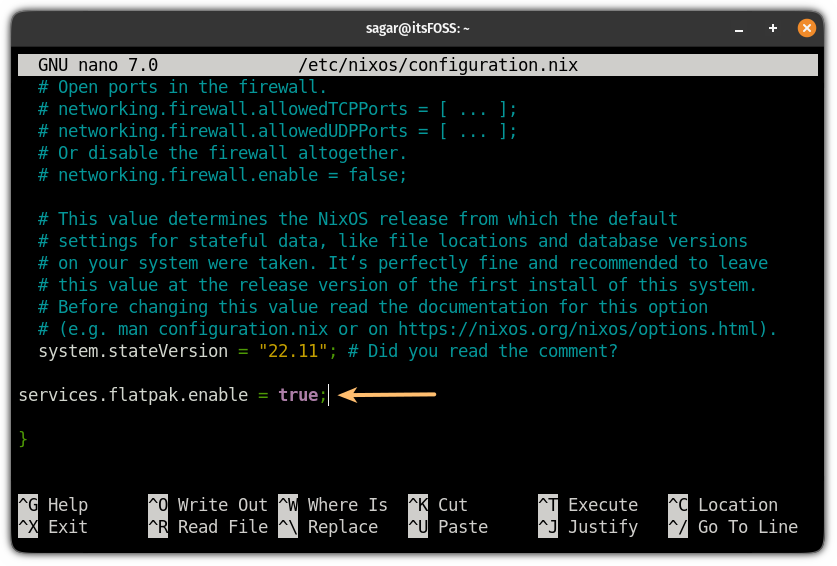
Save changes by pressing Ctrl + O, hit enter and exit by Ctrl + X.
Next, rebuild and switch to the new config file using the following command:
sudo nixos-rebuild switchAnd finally, add the Flathub repository to the system using the following command:
flatpak remote-add --if-not-exists flathub https://flathub.org/repo/flathub.flatpakrepoWant to know what exactly is a Flatpak package? You can refer to our article on it:
Ankush Das
4. Enable garbage collection
NixOS is known for being immutable, and there is a strong reason why.
Whenever you upgrade a package, the old package won't be removed. Just the symlinks of the old package will be given to the latest version.
And doing that, you will collect unnecessary trash from your system.
But removing every old generation will falsify the purpose of NixOS.
So, in that case, you can configure your system to remove garbage packages weekly.
To do that, first, open the nix configuration file:
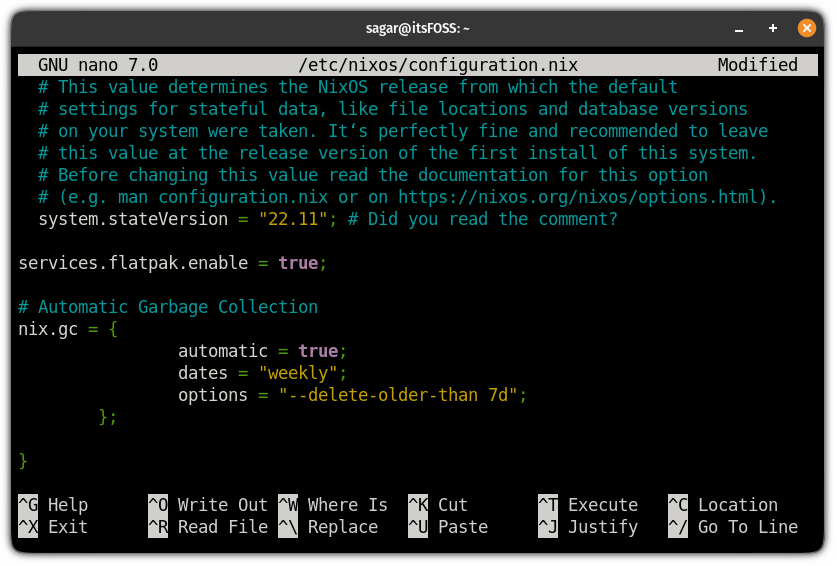
sudo nano /etc/nixos/configuration.nixAnd add the following line at the end of the config file before }:
# Automatic Garbage Collection
nix.gc = {
                automatic = true;
                dates = "weekly";
                options = "--delete-older-than 7d";
        };
Save changes and exit from the nano text editor.
To activate the garbage collection, rebuild and switch to the new config file:
sudo nixos-rebuild switchIf you are not sure whether the garbage collector is running fine in the background, you can list active timers using the following command:
systemctl list-timers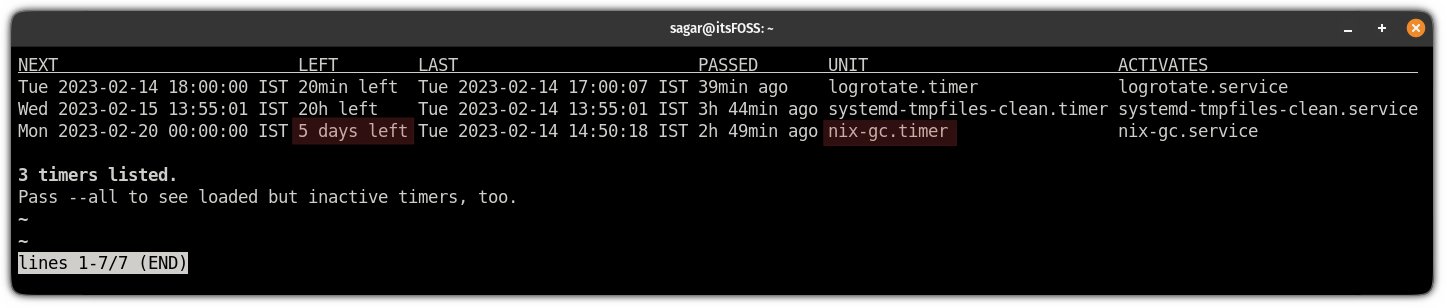
And as you can see, the Nix garbage collector is running as expected and shows 5 days left for the next cleanup.
5. Install your favorite software
I mean this is the only reason why we use computers. "To use our favorite software," and if there's none, we make it happen!
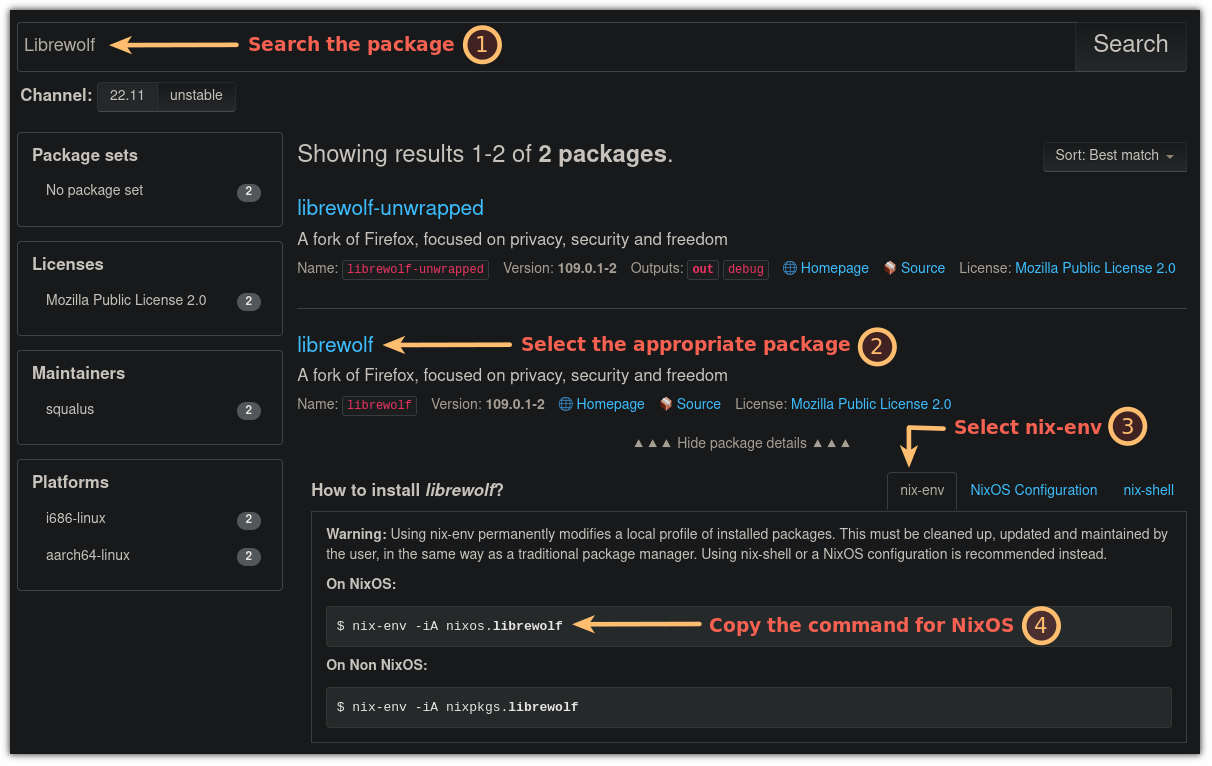
The best place to look for packages is the Nix package search which can be accessed using any of your preferred browsers.
- Search package
- Select the package
- Click on
nix-envand copy the given command forNixOS - Execute that command, and that's it
You can check our NixOS package management guide to get all the details.
Let me give you a quick recap here. For example, here, I want to install Librewolf, so I went with the following:
But if you want to install services like SSH or plex, the above method won't work.
For that, you will have to look into NixOS options situated at the top of the page.
So let's say I want to install OpenSSH, so I have to follow the given steps:
- Go to
NixOS options - Search the name of the service
- Get the name of the service and paste it to the
configuration.nixby changing its value totrue
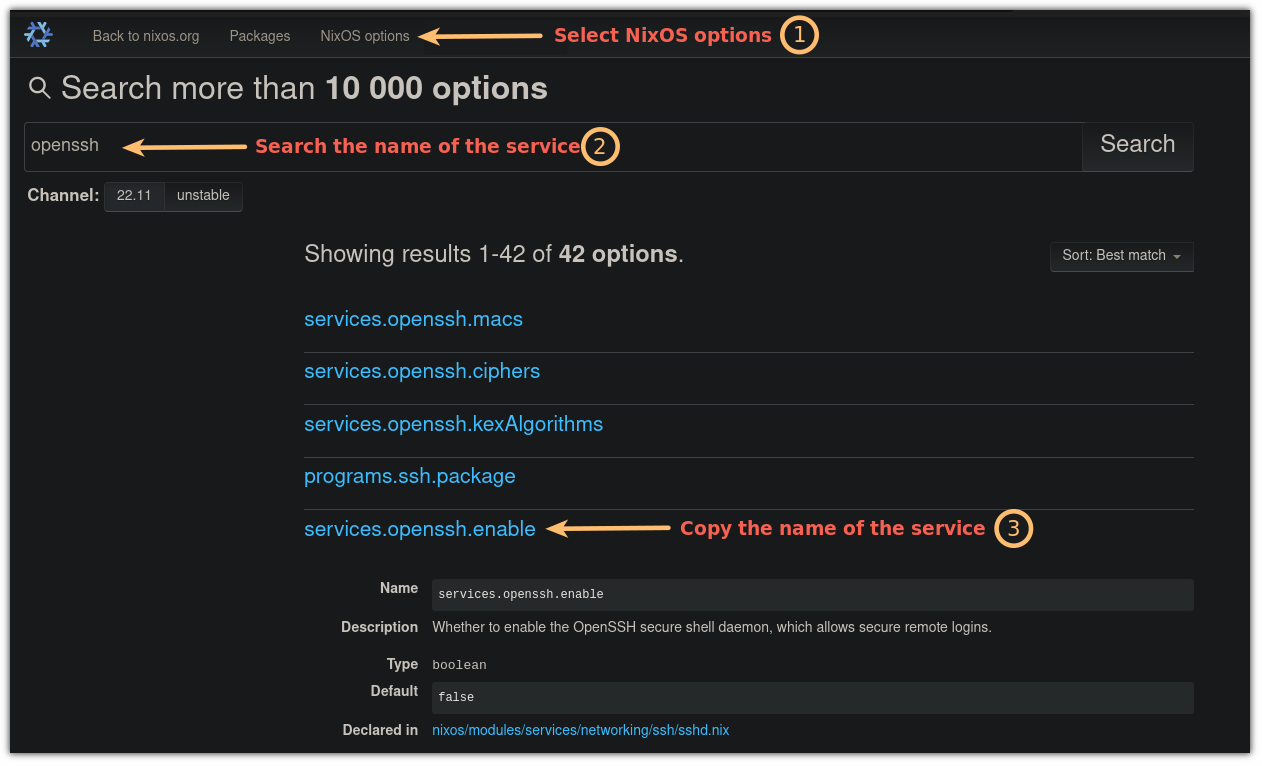
services.openssh.enable = true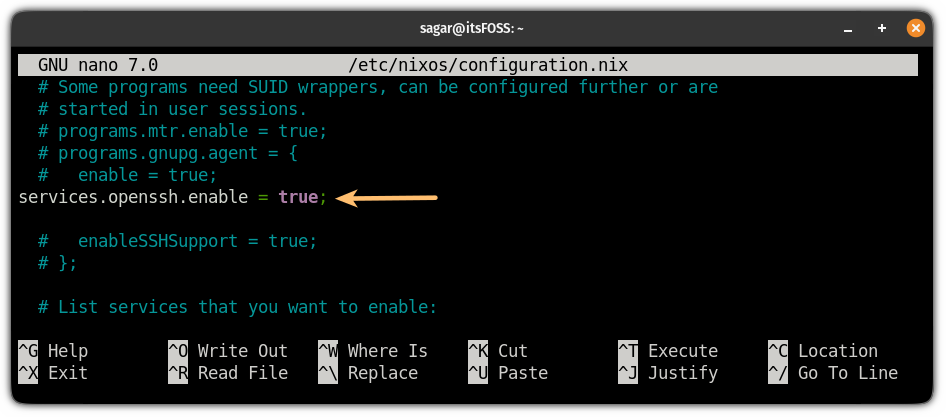
After adding the line to the config file, rebuild the service:
sudo nixos-rebuild switch6. Enable auto-update in NixOS (optional)
Some users prefer to have auto-updates enabled, whereas others can update packages at their convenience.
So it is all up to you.
To enable auto-update, first open the configuration.nix file:
sudo nano /etc/nixos/configuration.nixNext, add the following line at the end of the config file before }:
# Auto system update
system.autoUpgrade = {
      enable = true;
};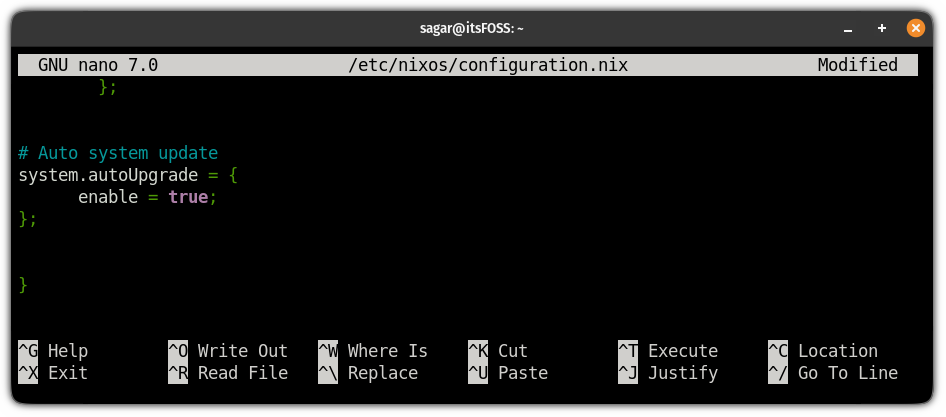
Save changes and exit from the nano.
To enable the auto-update, you will have to rebuild and switch to that file using the following:
sudo nixos-rebuild switchYou can also check the NixOS upgrade timer using the following command:
systemctl list-timers
And as you can see, the nixos-upgrade.service is running in the background as intended!
7. Reduce swapiness
If you are utilizing the swap partition, you may want to reduce the swapiness value.
Swapiness is nothing but the value of how aggressively you want to use the swap partition (or memory), which ranges from 0 to 100.
The lesser the swapiness, the more your system will use the physical memory (RAM), whereas a swap partition is nothing but a bit of part of your storage drive.
Also, storage drives are relatively slower than RAM, so you should reduce the swapiness if possible.
Suggested Read 📖
Abhishek Prakash
To check the default swapiness of your system, use the following:
cat /proc/sys/vm/swappiness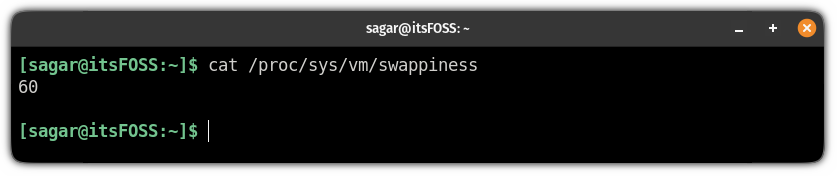
And for most Linux distributions, it is set to 60.
I would recommend you lower this value to 10.
To do that, first, open the configuration file using the following command:
sudo nano /etc/nixos/hardware-configuration.nixAnd add the following line at the end of the line before }:
boot.kernel.sysctl = { "vm.swappiness" = 10;};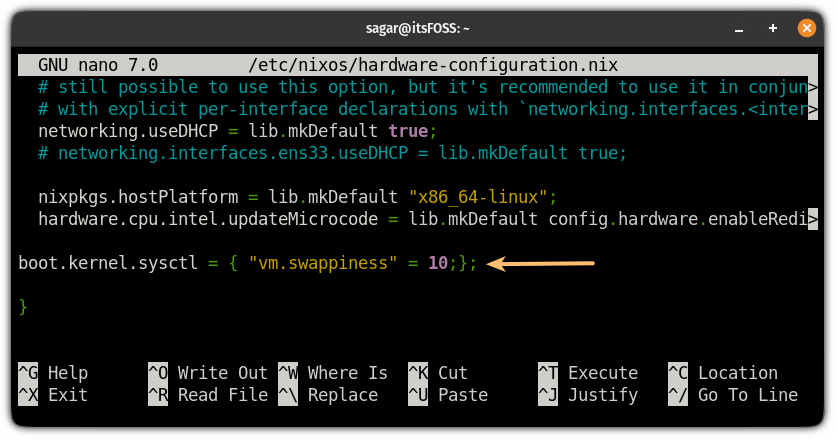
Save changes and exit from the text editor.
Now, rebuild the config and switch to it using the following:
sudo nixos-rebuild switchAnd now, you can check the swapiness again and it should reflect the change:
cat /proc/sys/vm/swappiness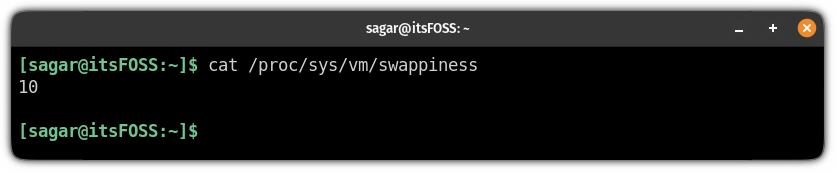
That's it!
Wrapping Up
If you follow these points right after installing NixOS for the first time, you should get a good user experience.
Sure, there can be a few other things depending on your requirements. But, I think the above-mentioned things are the most essential or common things to do.
For the next part of this series, I shall discuss setting up the home manager on NixOS, which should be helpful for a system with multiple users.
💬 What do you first do after installing NixOS? Let me know your thoughts.

