
This is a complete tutorial to show you how to share folders over the local network between Windows and Ubuntu.
Do you have multiple devices in your home? Do you have to use Flash Drive or SD card to transfer data from Ubuntu to another computer? Do you find it annoying? We know you do. Because we don’t want you to waste your precious time while you can transfer your files, documents, and other large stuff quickly and easily, over the local network. It’s one-time setup and then with some clicks you will be able to share files between Ubuntu and Windows or any other Linux system. And don’t worry it’s easy and takes only a little time.
One more thing to add, while we performed this tutorial on Ubuntu, this tutorial should be valid for any other Linux OS.
Share folder on local network in Ubuntu
If you are using Ubuntu, there are two ways you can share your local files over the local network to access it from Windows or other Linux computers.
- Share it for everyone’s access on local network, without password
- Password protect the folders for restricted access
We’ll see both methods in this post and will let you decide which one you would prefer to use.
Method 1. Share folders on local network without password
You’ll have to do some settings on both Windows and Ubuntu.
Enable sharing on Ubuntu
To share a folder on the local network in Ubuntu, right click on the desired folder and select Local Network Share:
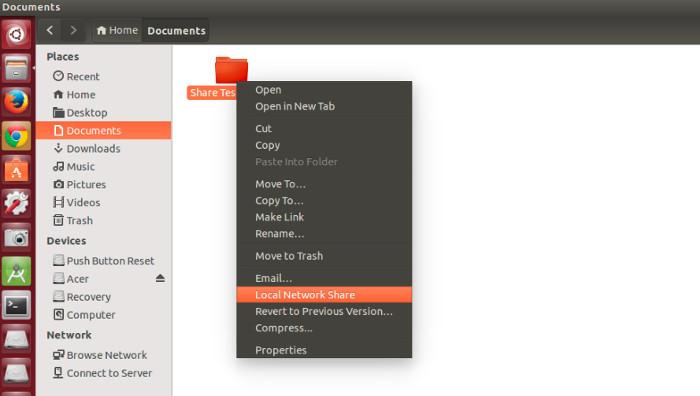
Don’t see Local Network Share option?
Possible troubleshoot: If you do not see the option of Local Network Share in right click menu, open a terminal and use the following command to install nautlius-share:
sudo apt-get install nautilus-shareYou’ll need to restart Nautilus. Either log out and log in back or use the command below:
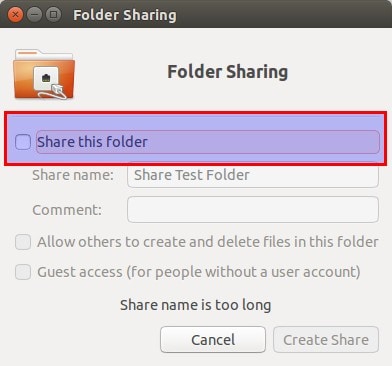
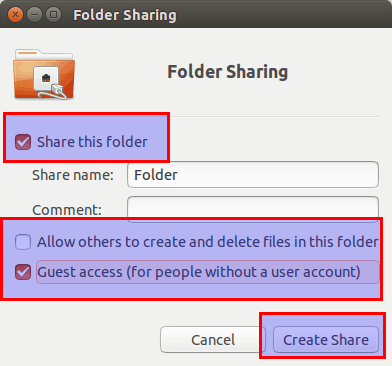
nautilus -qWhen you click on Local Network Share, you will see the option of sharing the folder. Just check the option of Share this folder:
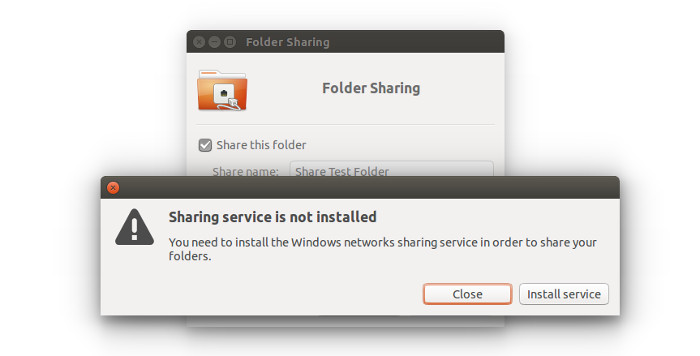
Possible troubleshoot: If you are prompted about Sharing service not being installed, like in the screenshot below, just click on Install service and follow the instructions.
When you check the option of Share this folder, you’ll see option of Create Share available for you. You can also allow other users to edit the files in the shared folder. Option for guest access can be checked as well.
You’ll see that the folder icon have been changed to show that it has been shared. To stop sharing a folder, just uncheck the Share this folder option.
Now access the shared folder on Windows machine.
Step 2: Enable sharing on Windows
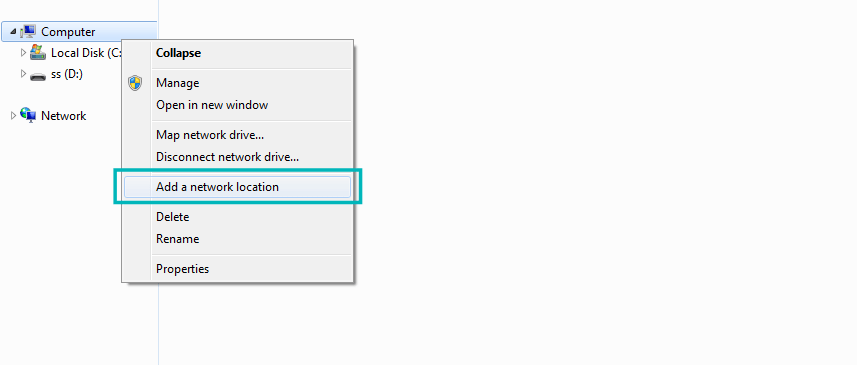
On Windows, right click on “This PC” or “My Computer”, and select “Add a new connection”.
Click on “next” button.
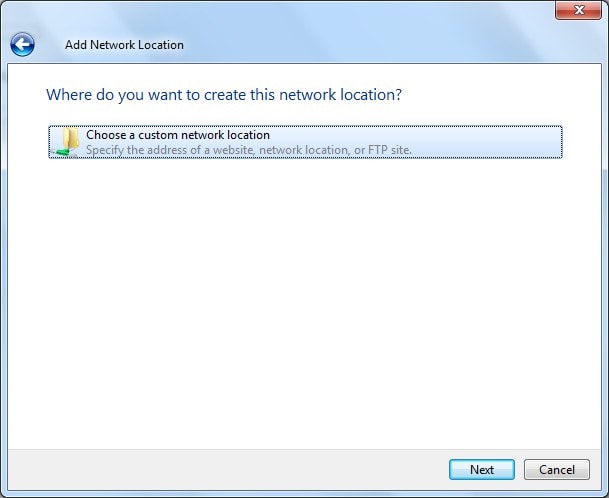
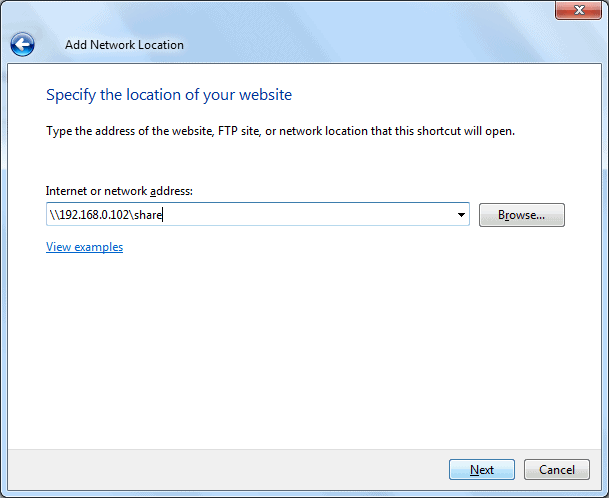
Now it’s time to enter server address and the name of folder which we’ve shared. Please enter in following format.
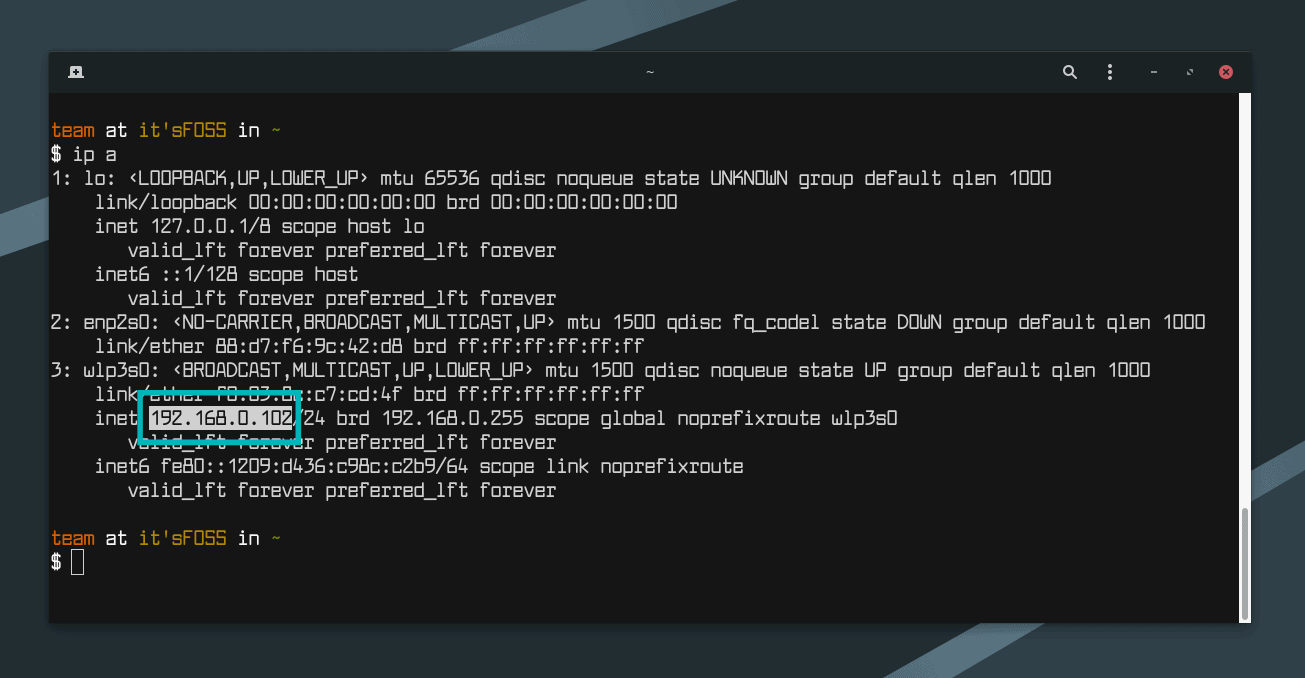
You can find your server’s address, i.e. IP address of Linux machine by entering ip a command.
In my case, IP address of Linux machine is 192.168.0.102 and folder I’ve shared is share.
Now add the location in the following manner:
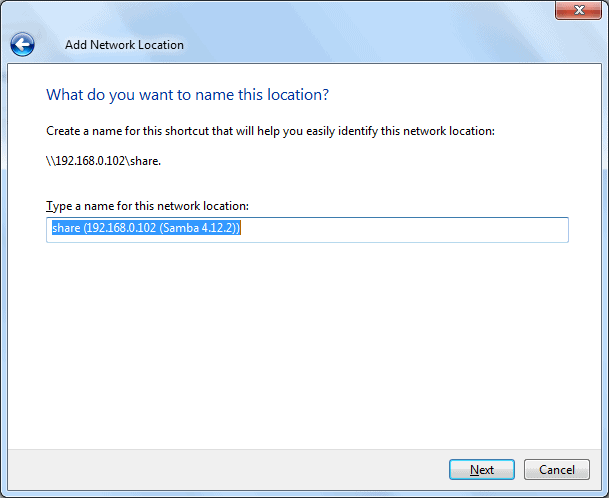
Now you will see this screen, just click next.
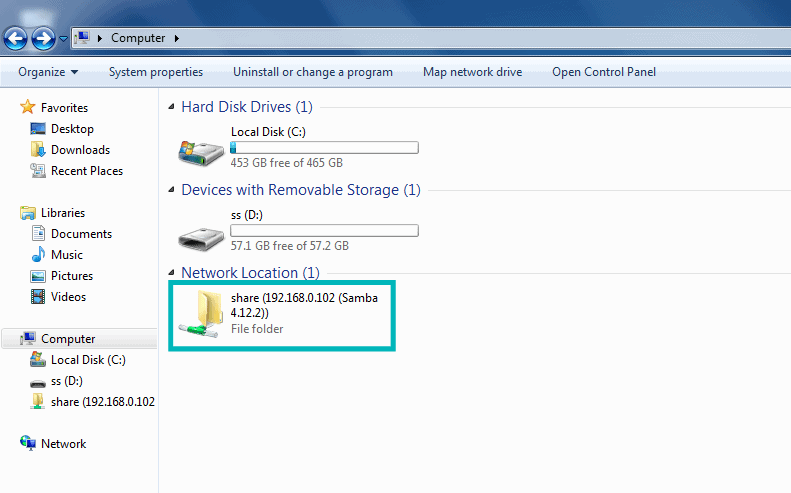
Now, you can access the shared folder in “This PC” or “My Computer” under “Network Location” section.
Now this was the easy way out. This provides access to anyone on your local network to access these files.
In normal condition, you should prefer this. I mean, devices on your home network should be generally known devices. But this could not be the case always. What if you want only certain people to access it?
This is where Samba server comes in picture. We’ll see that in the second part of the tutorial.
2. Share the folders on local network in Ubuntu with password protection
To do this, we need to configure Samba server. Actually, we did use Samba in the previous part of this tutorial. We just did not emphasize on it. Before we go on seeing how to set up Samba server for local network sharing in Ubuntu, let’s first have a quick look on what actually is Samba.
What is Samba?
Samba is the software package that allows you to share files, documents and printers across a network, irrespective of whether you are using Linux, Windows and Mac. It’s available for all major platforms and can work tremendously nice in all of them. Quoting from Wikipedia:
Samba a free software re-implementation of the SMB/CIFS networking protocol, and was originally developed by Andrew Tridgell. As of version 3, Samba provides file and print services for various Windows Clients and can integrate with a Windows Server domain, either as a Primary Domain Controller (PDC) or as a domain member. It can also be part an Active Directory domain.
Install Samba server on Ubuntu
You can easily install Samba on you Ubuntu box. Before installing update your system so that you can install any available updates.
sudo apt-get update && sudo apt-get upgradeNow install Samba serer and few other required stuffs with the following command:
sudo apt-get install samba samba-common system-config-samba python-glade2Once you’ve installed Samba server, it’s time to configure Samba from the graphical interface window to share files.
Configure Samba server on Ubuntu
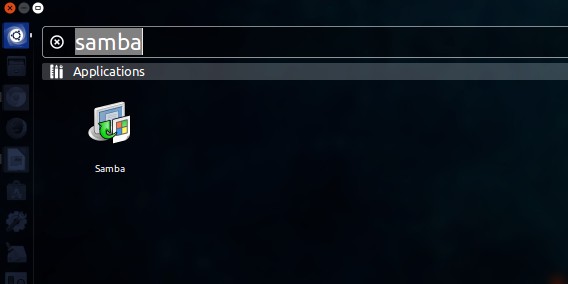
Open Samba Configuration tool from the dash:
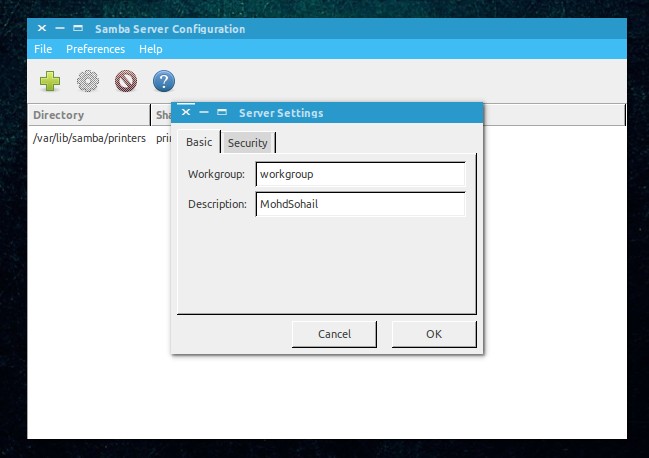
Go to Preference->Server Settings. Although the default settings are good and may be same you need. But you may need to make change to it in some cases.
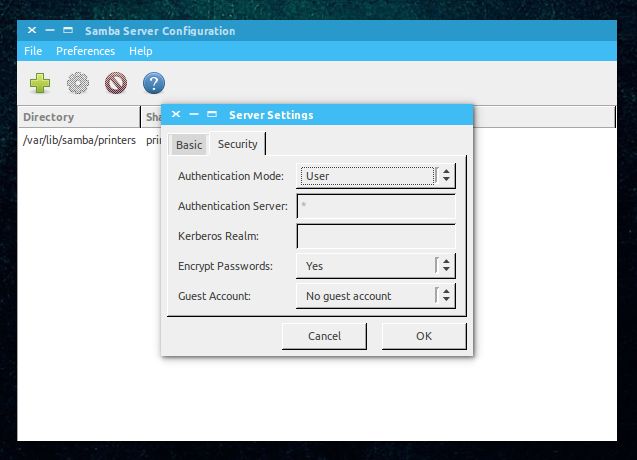
Now in Server Settings you’ve two tabs, ‘Basic’ and ‘Security’. Under Basic tab you’ve the following options that mean:
- Workgroup – This is the name of the Workgroup of the computer you want to connect to. For example, if you want to connect to a Windows computer so you will enter the workgroup name of Windows computer, and in Windows you already have the same workgroup name as is set by default in Samba Server Settings. But if you have a different workgroup name on Windows then you will enter that workgroup name in this field. (In Windows 7 to get the workgroup name, right-click Computer icon and go to Properties, there you’ll see Windows Workgroup name.)
- Description – This is the name of your computer as seen by others. Don’t use spaces or non-internet friendly characters.
Allowing ‘Guests’ is not advisable so there is no reason to change security settings. Keep as it is.
It is all done! You’ve setup Samba Server. We are not far from sharing our first folder on network.
Create a system user for network file sharing
We will now create a system user for sharing file on network. This is how simple it is.
- Go to System Settings.
- Under Systems Settings Click User Accounts.
- Click unlock to Enable + (plus) icon.
- Click + (plus) icon to create a new system user.
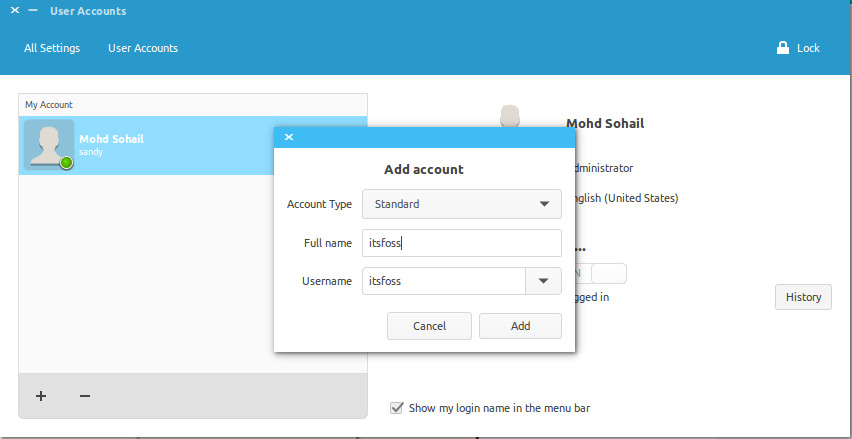
Now as you can see the above image, you can enter ‘Full name’. As you enter ‘Full name’ Username will be taken as Full name automatically. Because we are creating this user to share files so we will assign Account Type to ‘Standard‘.
Done above steps? Click add. You have created a system user. The user is not yet activated so we will activate it by setting up password for this account. Make sure Users accounts panel is unlocked. Click Account disabled and type a new password, then confirm password and click Change.

Yipee… Upto now we have installed and configured Samba and We have created a System user to share files on network from the account and we have activated our newly created account, too. Now We will move to Samba for the last step of configuring everything, then we will share a folder.
Add new Samba user
Open Samba and click Samba Users under Preference. Fill up the the simple dialogue. Here are couple of details about the fields:
Unix Username – In this case I am selecting the user that I just created.
Windows Username – You will enter this username when you are accessing from Windows Machine.
Samba Password – You will enter this password when you are accessing from Windows Machine.
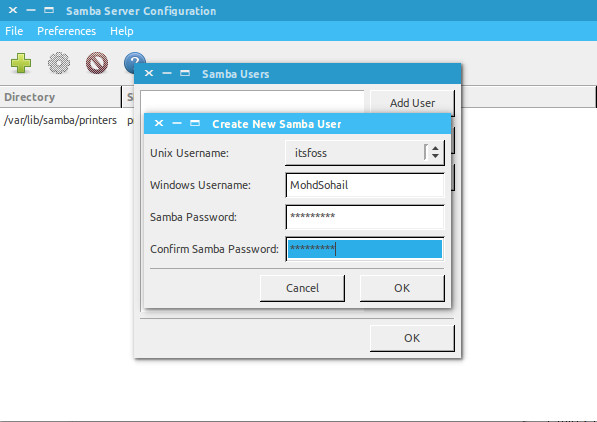
Once you’ve done click OK. Now take a deep breath. You have successfully created a network with the help of Samba. Now restart the network or Samba services and ready to share files with other machines.
sudo restart smbd && sudo restart nmbdShare folders or files over the network
To share files with Samba it’s simple with graphical user interface. Click the Plus icon in Samba and you will get dialogue like this:
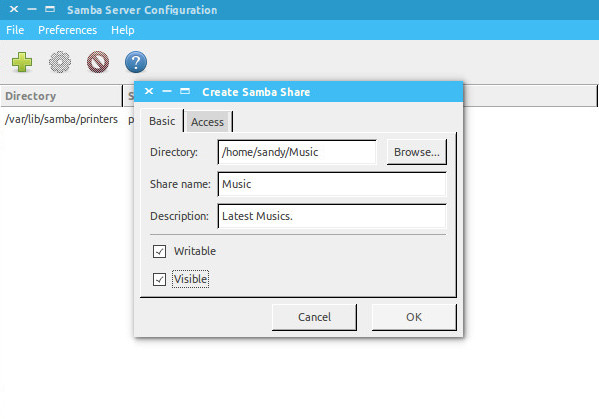
Complete the fields. In ‘Directory‘ browse the folder you want to share. Here are the details about the fields you will see here:
- Share name is the name of the folder that other would see.
- Description is simply about the content you are sharing on network.
- Writable You shared folders are ‘read only’ by default. You can set them to writable if you want others on network to change them.
- Visible As the name suggests when you click Visible, the shared folder will be visible to the people on network.
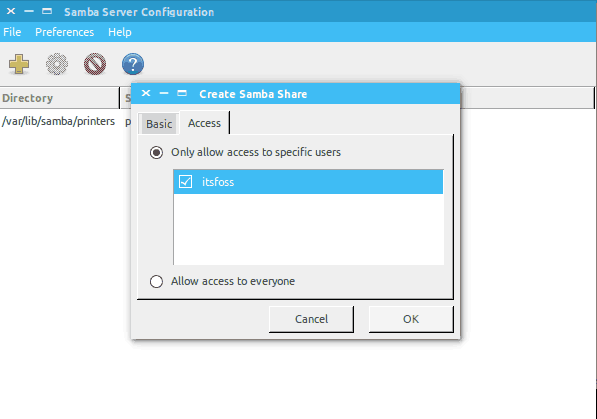
Now you can set permissions for the folder you are sharing. To do this click ‘Access’ tab and check the users you want to share the folder with. When you select Allow access to everyone, the folder will be accessible to everyone on the network.
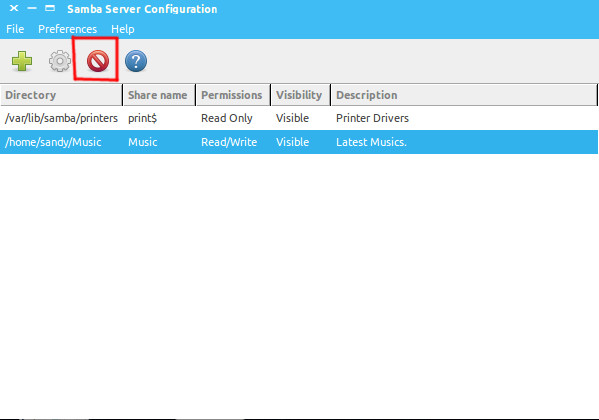
Finally click OK to complete the sharing. Now the folder is shared with the people you want. You have completed sharing file on network. Is there everything left? Yes! How to remove the folders from the network?
Remove shared folders
We will also need to remove some of the folders after sometime from network. It is very simple and here is how we can do that.
This is all done! We can also share files over network using terminal but that would not be as easy as this one. If you request for command line sharing then I will write a tutorial on how to share files over network with command line in Linux.
So, how do you find this tutorial to share files on local network in Ubuntu? I hope with this tutorial you can easily share files between Ubuntu and Windows. If you have questions or suggestions, feel free to ask it in the comment box below.
This tutorial was requested by Kalc. If you would like, you can request your own tutorial. We would be happy to help you out along with other readers facing the same issue.
With inputs from Abhishek Prakash.
