

The ping command is probably the first tool every user would use or get suggested if they are having an issue with the network.
In simple terms, it is a tool that everyone relies on to check network availability.
So in this tutorial, I will walk you through how the ping command works including multiple examples of how you can use the ping command.
How does ping command work?
Ever heard of SONAR? It is a tool that sends sound waves underwater which bounce off and return as echoes, which allows us to find the nearest objects and their distance.
Ping does a similar job but for computers, obviously.
When you execute the echo command, it sends a small data packet (32 bytes is the default value) to the specified target.
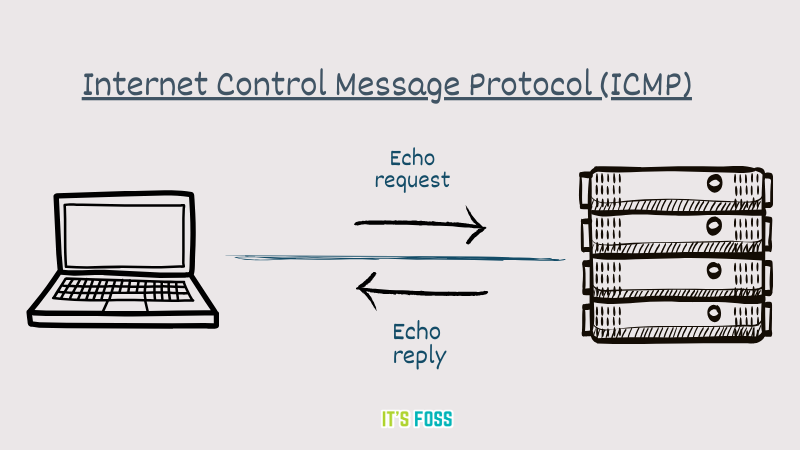
We are talking about the internet here, which is nothing but millions of computers interacting with each other over a network so in order to reach the target, it goes through several hops (routers or intermediate devices).
It also works for local networks.
Once it reaches the destination and if it is working, the target will send the response packet.
The total time it took from sending the packet to receiving a response packet is called round trip time (often measured in milliseconds).
Once you stop the ping command, it will list the sent and received packets which should be the same in ideal condition.
But if you see the difference in sent and received packets, it indicates a hardware problem, congested network traffic, filtering, and more.
Now, let's look at how you use the ping command.
How to use the ping command
To use the ping command, you need to follow the given command syntax:
ping [OPTIONS] HOSTNAME_OR_IP_ADDRESSHere,
[OPTIONS]: it is used to modify the default behavior of the ping command.HOSTNAME_OR_IP_ADDRESS: it is where you specify the IP address or domain name of the target.
0. Check if a remote system or website is available
You can use the ping command without any options and it will continue to ping to the specified address:
ping HOSTNAME_OR_IP_ADDRESS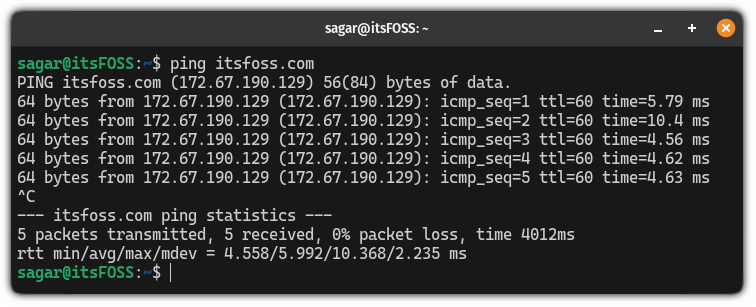
To stop the running command, use Ctrl + C.
As you can see, in the above screenshot, I've sent 5 packets and all were transmitted with 0% packet loss. This means the host is up without any issues.
Also, the time it shows for every packet is round trip time for every packet. The first packet took 5.79 milliseconds to get there and get back.
But there's a lot more you can do with the ping command. Let me show you how.
1. Get gateway IP
You can use the ping command to get the default gateway of your network:
ping _gateway
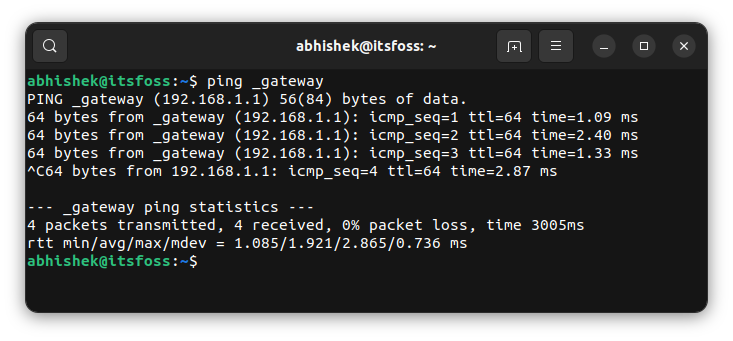
As you can see, it only pings the gateway, which is your router's IP address' usually. This is a handy way of knowing if your system is connected to the router or not.
2. Specify the number of ICMP echo requests
The ICMP (Internet Control Message Protocol) echo requests are nothing but the packets we send to the target to know if it is up or not.
By default, the ping command will send packets endlessly which is not ideal for most users. In that case, you can use the -c flag and specify the number of the echo requests as shown here:
ping -c no_of_packets Target For example, here, I sent 5 ICMP echo packets to itsFOSS.com:
ping -c 5 itsfoss.com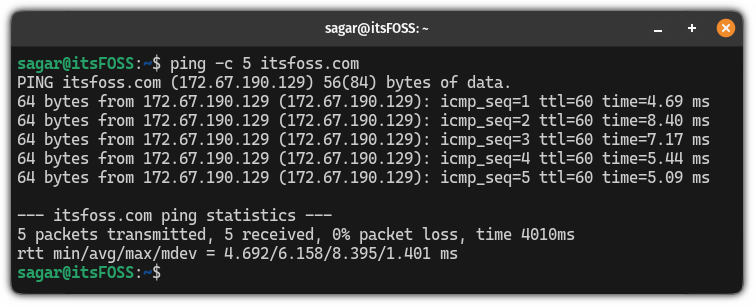
3. Set intervals between sending packets
The default interval between sending is one second which should be fine for most users but if you want to increase the time, you need to use the -i flag in the following manner:
ping -i seconds TargetFor example, here, I set the interval for 2 seconds:

4. Ping flooding using the ping command
This is more like a DOS attack, where you send the packets without waiting for the response of the target.
It can be used to test how your system behaves with intense load.
To use the ping command this way, it needs to be executed with the -f flag as shown:
sudo ping -f Target 
When executed, you will see constant blinking of . indicating ping flooding is active.
5. Change the TTL value
The TTL (Time To Live) defines the lifespan of a packet on how many hops it will go through before reaching the final destination.
You can choose a value of TTL between 1 to 255.
To change the TTL value, use the -t flag with the ping command in the following manner:
ping -t TTL_Value Target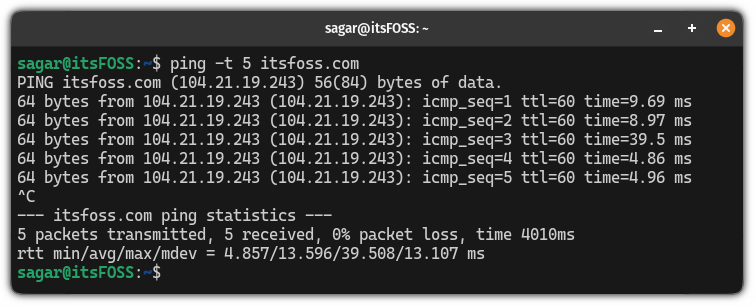
6. Change the size of ICMP packets
By default, the ping command will send packages of 32 or 64 bytes which is fine for the majority of users.
But there are times when you want to increase/decrease the size of the ICMP echo package which can be done using the -s flag:
ping -s package_size TargetFor example, here, I went for a packet size of 124 bytes:
ping -s 124 itsfoss.com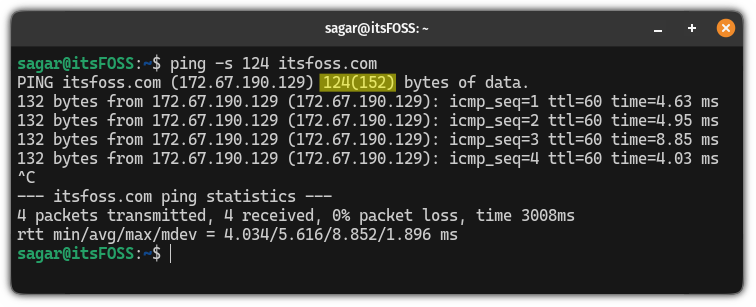
7. Preload packets to send
When preload is enabled, you can send the specified number of packages in a single attempt without waiting for the response of the target.
To preload packets, you'd need to use the -p flag in the following manner:
sudo ping -p PRELOAD_COUNT TargetFor example, here, I choose 100 packets to preload:
sudo ping -p 100 itsfoss.com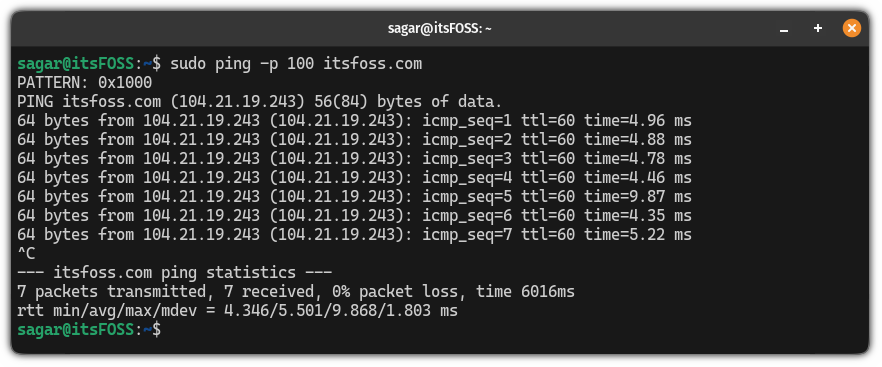
If you want, you can also combine the -p flag with the -f to have more intensive testing:
sudo ping -f -p PRELOAD_COUNT Target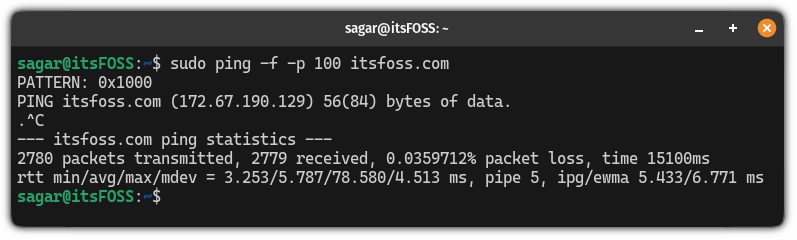
8. Specify the timeout to wait for response
With the ping command, you can also specify the time to wait for the response from the target. And for that, you have to use the W flag as shown here:
ping -W seconds_to_wait TargetFor example, here, I configured ping to wait for the 3 seconds:
ping -W 3 itsfoss.com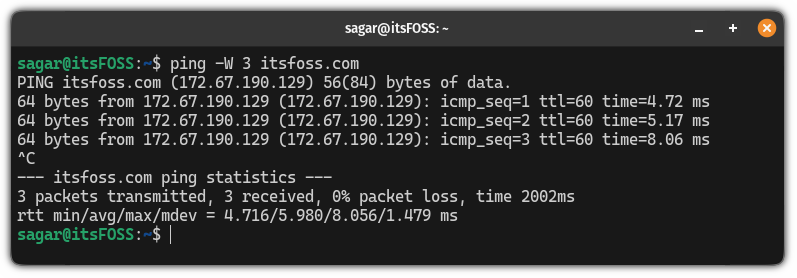
9. Set timeout for the ping command
The ping command allows you to set a timeout (in seconds) for a long the ping command will actively send and receive packets.
Don't get confused with the -c flag. It is used to specify the number of packages whereas the -w flag works as a timer.
To set the timeout for the ping command, use the -w flag in the following manner:
ping -w timeout_in_seconds TargetFor example, here, I wanted to set the timeout after the 3 seconds, so used the following:
ping -w 3 itsfoss.com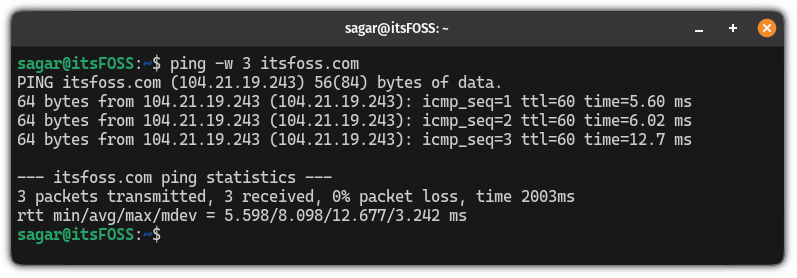
10. Suppress output with the quite mode
Most users are only interested in the final result of the ping showing how many packets were transferred and if there was a packet loss or not.
Or you just want to save the output of the ping command by redirecting the output.
To enable the quiet output with the ping command, use the -q flag as shown:
ping -q TargetFor example, here, I configured ping to send 5 packets with the -c flag and then used the -q flag to quite the output:
ping -q -c 5 itsfoss.com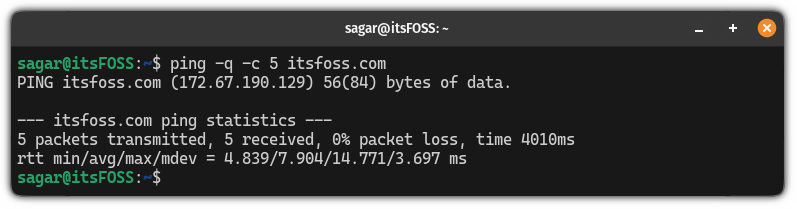
As you can see, it only gave me the final output-cutting those lines that you get by default!
This is what you've learned so far
Here's a summary of what I explained in this ping command tutorial with different flags:
| Option | Description |
|---|---|
-c COUNT | Specifies the number of packets to send. |
-i SECONDS | Sets the time interval between packet transmissions. |
-f | Flood mode: sends packets as quickly as possible. |
-t TTL | Sets the limit on the number of network hops. |
-s PACKET_SIZE | Adjusts the size of ping packets in bytes. |
-p PRELOAD_COUNT | Defines the number of packets sent in each burst. |
-W SECONDS_WAIT | Sets the maximum time to wait for a response. |
-w TIMEOUT | Specifies a total time limit for the ping operation. |
-q | Quiet mode: suppresses detailed output. |
More on commands
Ping is one of the essential Linux networking commands. A must have for troubleshooting network connections.
 Sagar Sharma
If you are just getting started with a Linux terminal, we made a series for users like you who are eager to learn but can't find a place to start:

I hope you will find this guide helpful.
If this helped you, consider supporting It's FOSS
It's FOSS has been helping people use Linux for the past 14 years. Help us stay independent from big tech. Become a Plus member, enjoy ad-free reading and get 5 eBooks.

