

It’s not every day at It’s FOSS that we talk about the “command line side” of Linux. But as some of you readers pointed out in the internal survey (exclusive for It’s FOSS newsletter subscribers), you would also like to learn some command line tricks.
So I compiled a list of essential Linux networking commands that helped me during my college days and gave me a firm overview of how you can use Linux on the networking side.
These commands will help you set-up as well as troubleshoot various networking issues you may encounter with your Linux system.
Essential networking commands in Linux
This compilation includes CLI utilities that will help you with troubleshooting network issues, monitoring packets, connected devices, and much more.
Before I show the commands with some details, let me share a brief overview of all the commands which I’m going to discuss today:
| Command | Description |
|---|---|
| ip | Manipulating routing to assigning and configuring network parameters |
| traceroute | Identify the route taken by packets to reach the host |
| tracepath | Gets maximum transmission unit while tracing the path to the network host |
| ping | Often used to check the connectivity between the host and the server |
| ss | Gets details about network sockets |
| dig | Gives all the necessary information about the DNS name server |
| host | Prints IP address of a specific domain and viscera |
| hostname | Mostly used to print and change the hostname |
| curl | Transfers data over the network by supporting various protocols |
| mtr | A combination of ping and traceroute is used to diagnose the network |
| whois | Gets info about registered domains, IP addresses, name servers, and more |
| ifplugstatus | Detects the link status of a local Ethernet device |
| iftop | Monitors stats related to bandwidth |
| tcpdump | Packet sniffing and analyzing utility used to capture, analyze and filter network traffic |
| ethtool | Allows users to configure Ethernet devices |
| nmcli | Troubleshooting utility for network connections |
| nmap | Primarily used to audit network security |
| bmon | An open-source utility to monitor real-time bandwidth |
| firewalld | CLI tool to configure rules of Firewall |
| iperf | Utility to measure network performance and tuning |
| speedtest-cli | CLI utility of speedtest.net to check internet speeds |
| vnstat | Mostly used to monitor network traffic and bandwidth consumption |
Now, let’s discuss them with examples and more depth.
Please note that not all the commands here will come preinstalled. I have added instructions for Debian/Ubuntu. For other distributions, please use your package manager.
1. IP command
IP (Internet Protocol) is one of the most basic yet essential enough that you’d often find it being used by sysadmins, and its use cases can be ranging from manipulating routing to assigning and configuring network parameters.
While the use cases may be endless, let me show you the most basic use case of Ip command (finding an IP address):
ip address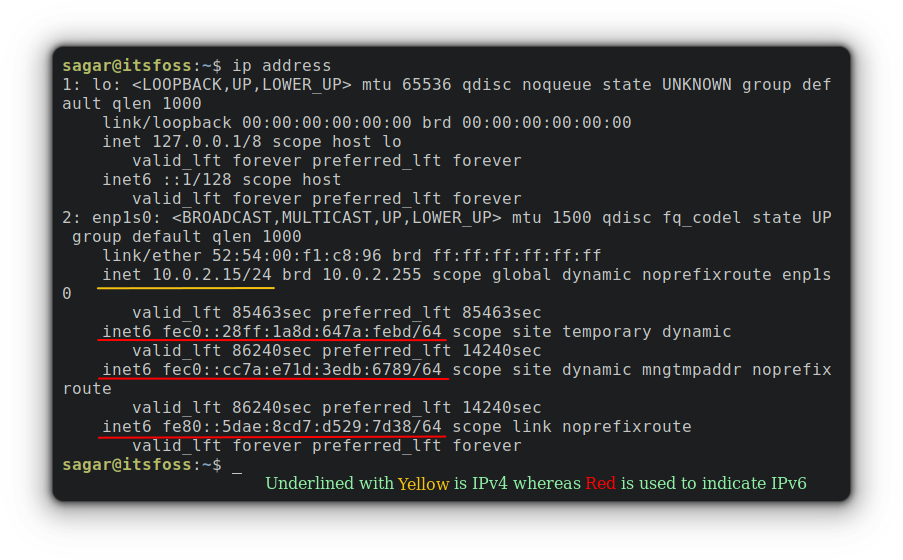
Similarly, you can also use the Ip command to continuously monitor the state of devices by using monitor option instead of address that we used to get IP addresses previously.
ip monitor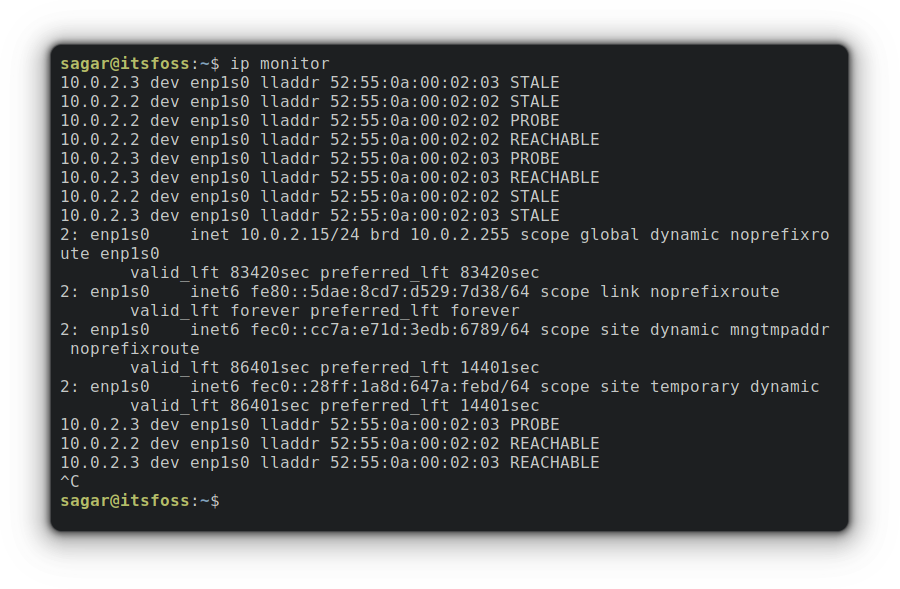
2. traceroute
Using the traceroute command, you can identify the route taken by packets to reach the host. And it can be quite useful when you want to interrogate the transmission of data packets and hops taken by packets.
By default, your system may not have traceroute installed and if you’re on Debian-derivative (including Ubuntu), installation is single command ahead:
sudo apt install tracerouteFor example, I’d be tracerouting packets to google.com
traceroute google.com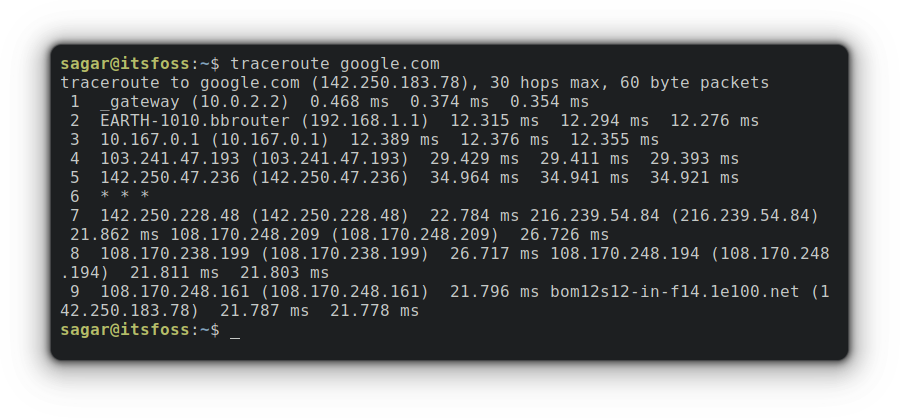
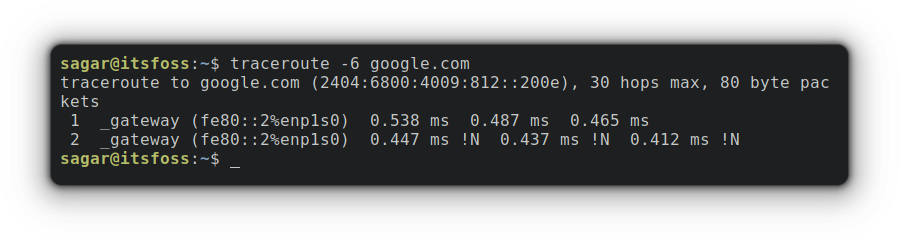
By default, traceroute will utilize IPv4 but you can change this behavior by using -6 option that will indicate traceroute to use IPv6. Let me show you how:
3. tracepath
The tracepath command is used to discover MTU (Maximum Transmission Unit) while tracing the path to the network host. It’s quite similar to what I discussed above but it does require sudo privileges and also has no fact functions like traceroute.
But what is MTU in the first place?
MTU is nothing but the largest frame or packet that can be transmitted or received over the network.
Now, let’s have a look at the basic example of tracepath with google.com
tracepath google.com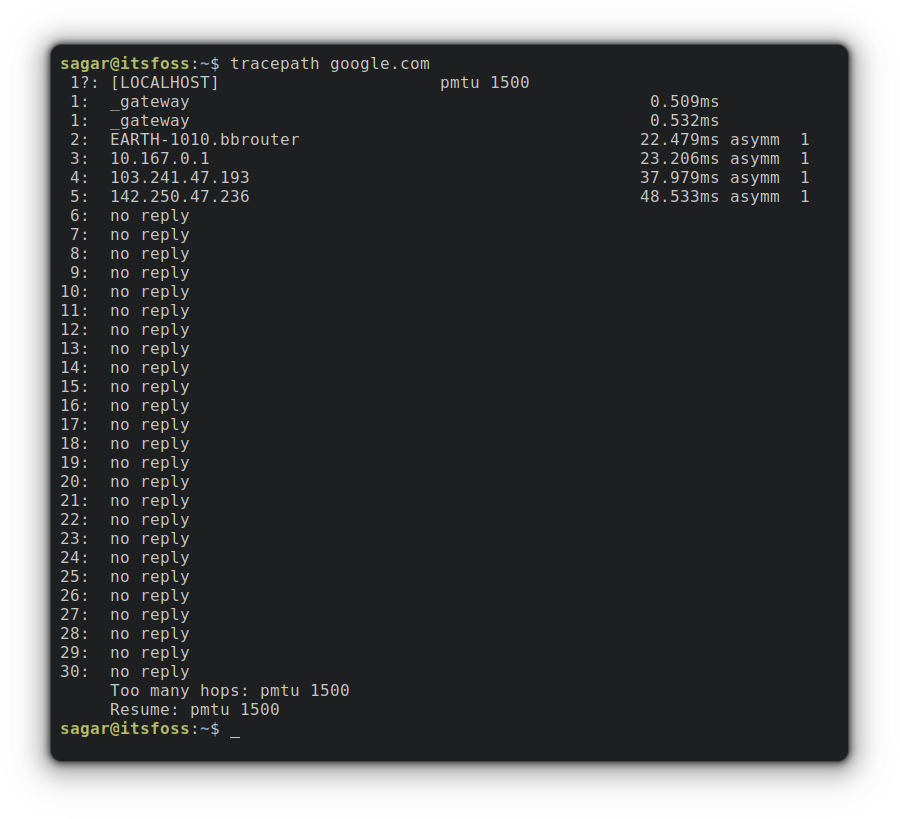
Similarly, you can print both IP address and hostname using -b option.
tracepath -b google.com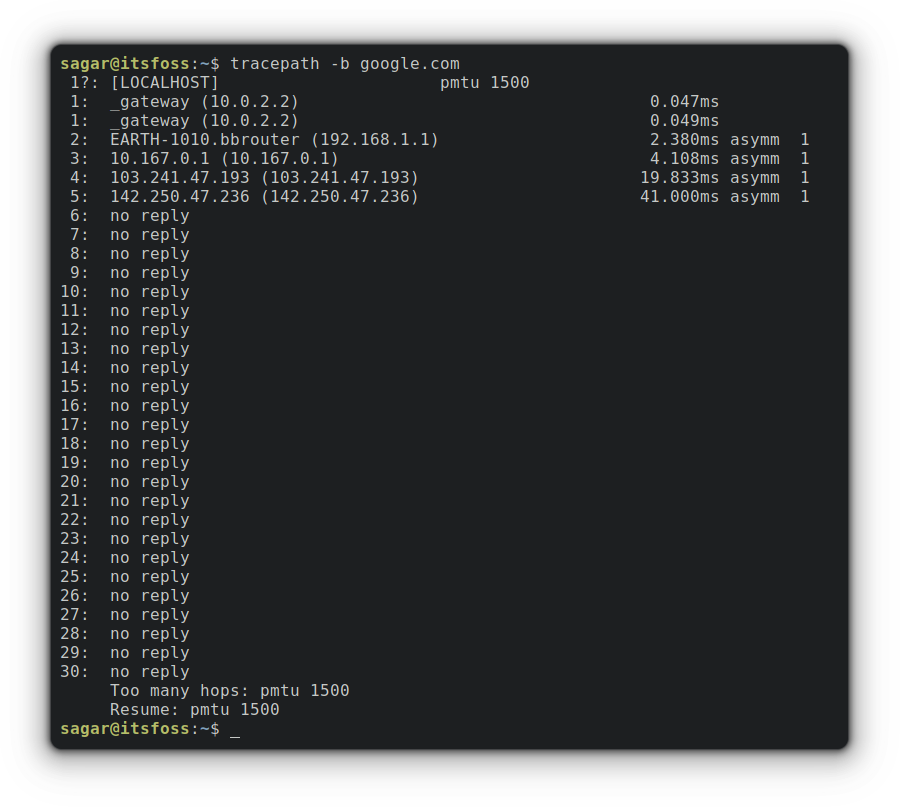
4. ping
The ping (Packet Internet Groper) command can be considered one of the most important commands while troubleshooting your network, as it is the most common way to check the connectivity between the host and the server.
For example, I’d be pinging google:
ping google.com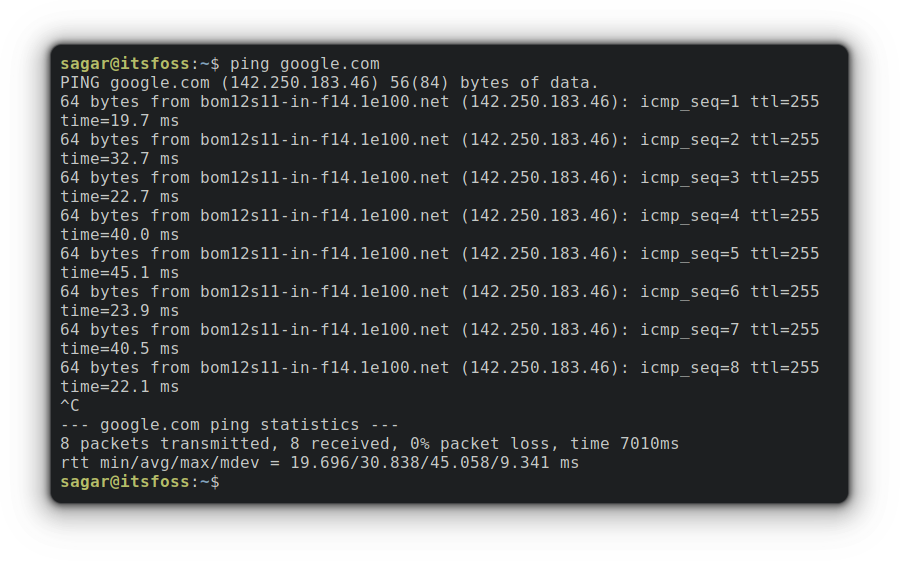
Here, the last line (min/avg/max) indicates the time to get a response from the specified server.
And if you’re getting an error saying “bash: ping: command not found”, you can check out our guide on how to install Ping on Ubuntu.

5. ss
The ss (socket statistics) command is used to detail about network socket (endpoint for sending and receiving data across the network).
To list all the listening and non-listening TCP connection, you have to use -at option as shown below:
ss -at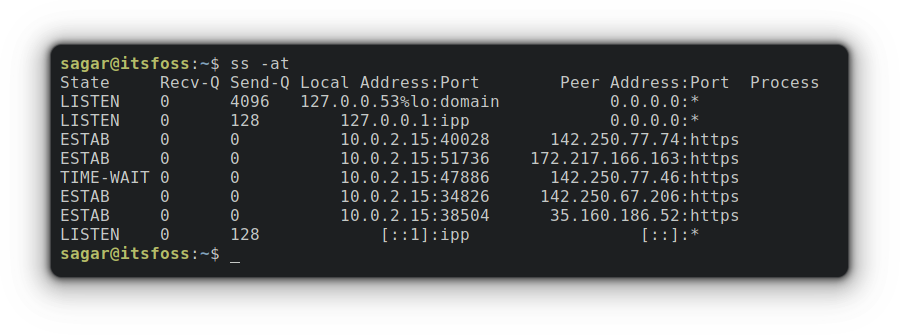
Similarly, you can do the same with UDP ports using -au option:
ss -au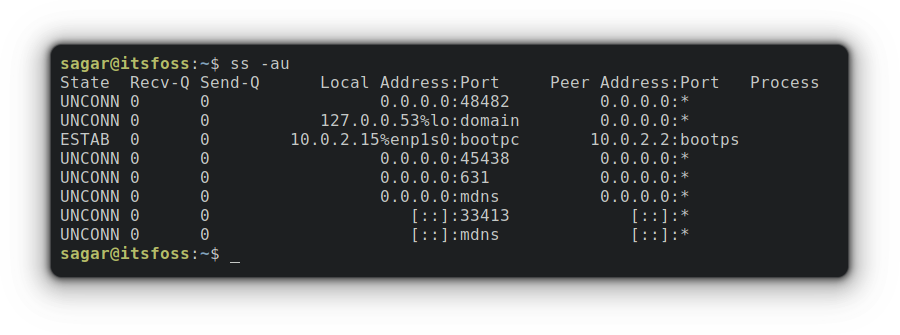
6. dig
The dig (Domain Information Groper) command is used to fetch all the necessary information about the DNS name server.
To install the dig utility on Ubuntu-based distros, follow the given command:
sudo apt install dnsutilsNow, let me show you how to get info from a specific DNS, and for this example, I’d be using itsfoss.com as DNS.
dig itsfoss.com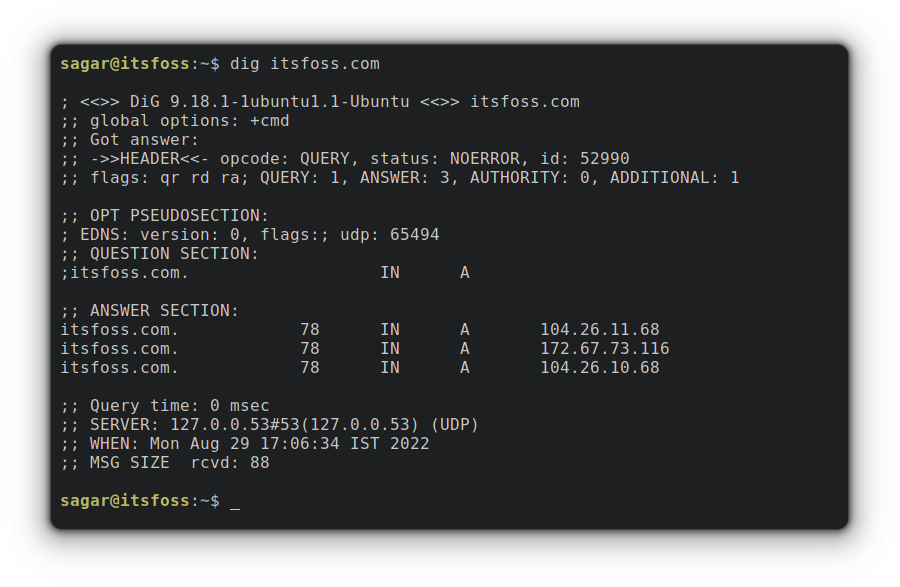
7. host
The host command is mainly used to get the IP address of a specific domain, or you can get the domain name from a specific IP address. In other words, it’s just a DNS lookup utility.
To find the IP of the domain, you just have to append the domain name with the host command. Let me show you how:
host itsfoss.com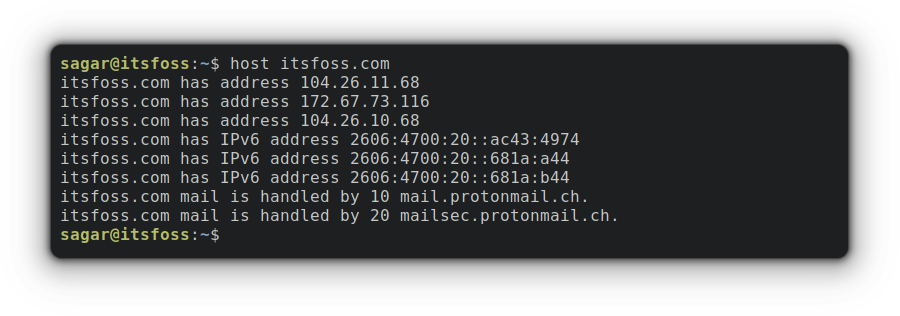
Similarly, you can use an IP address to fetch the domain name:
host 8.8.4.4
8. hostname
You must be familiar with this command if you’ve been using Linux for a while, as this is mostly used to change the hostname of your system and NIS (Network Information System) domain name.
When used without any options, it gets the current hostname of the system:
hostname
Changing the hostname from a file containing the desired hostname is yet another interesting feature of this utility.
sudo hostname -F <filename>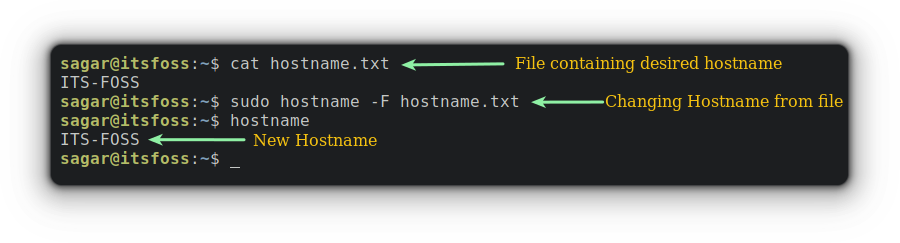
9. curl
The curl (Client URL) command is mostly used to transfer data over the network and supports various protocols including HTTP, FTP, IMAP, and many others.
This tool is preferred in automation as it is built to work without any human interaction and can also be used in endpoint testing, Debugging, and error logging.
The curl utility does not come pre-installed and if you’re on any Debian-derivative, you just have to use the following command for installation:
sudo apt install curlIt is quite easy to download files using the curl command, You just have to use -O option with the URL, and you’d be good to go!
curl -O [URL]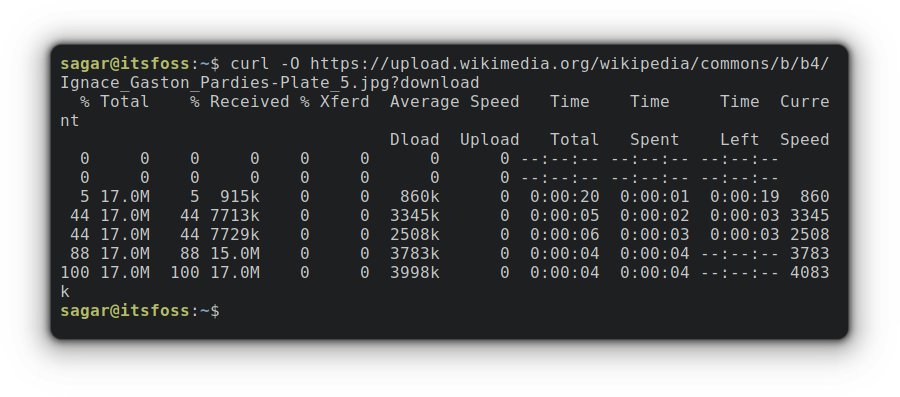
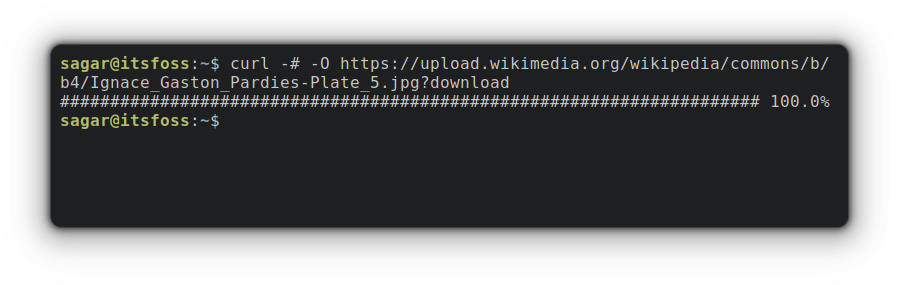
While downloading large files, the progress bar can be quite convenient, and you can do the same with curl using -# option.
10. mtr
It is a combination of ping and traceroute utilities and is mainly used for network diagnostics and gives live look at network response and connectivity.
The simplest way to use mtr is to append a domain name or IP address with it, and it will give a live traceroute report.
mtr [URL/IP]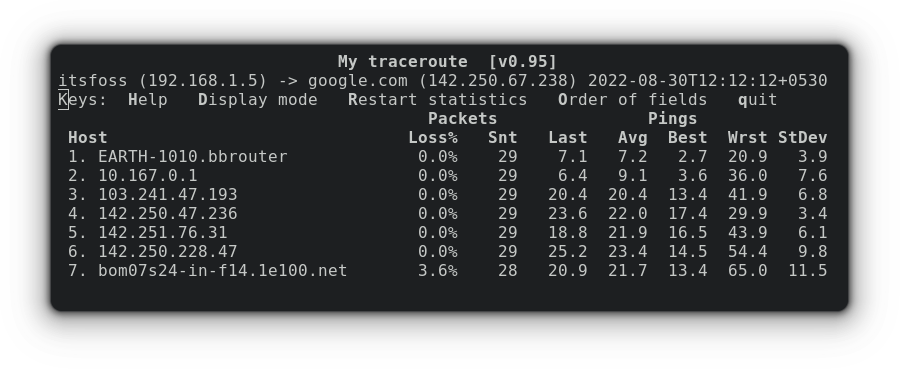
And if you want mtr to show both hostnames and IP addresses, you can pair it with -b option as shown below:
mtr -b [URL]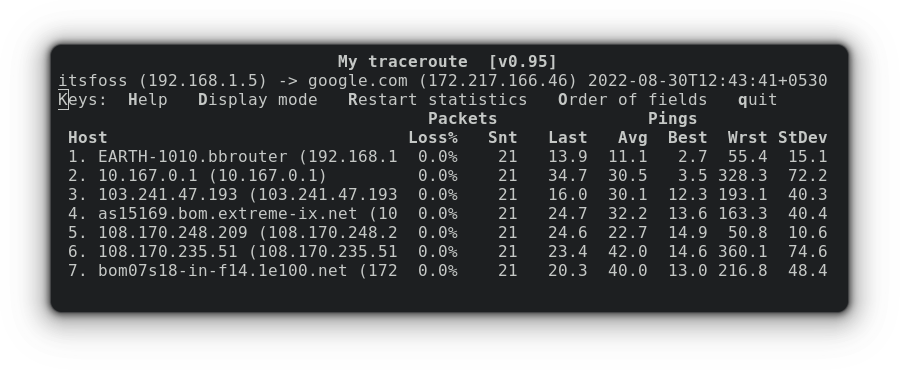
11. whois
The whois can help you find info about registered domains, IP addresses, name servers, and a lot more as it is the client for the whois directory service.
This utility may not be pre-installed on your device and for installation in Ubuntu-based distro, you can use the given command:
sudo apt install whoisGenerally, the whois command is paired with the domain name as given:
whois [DomainName]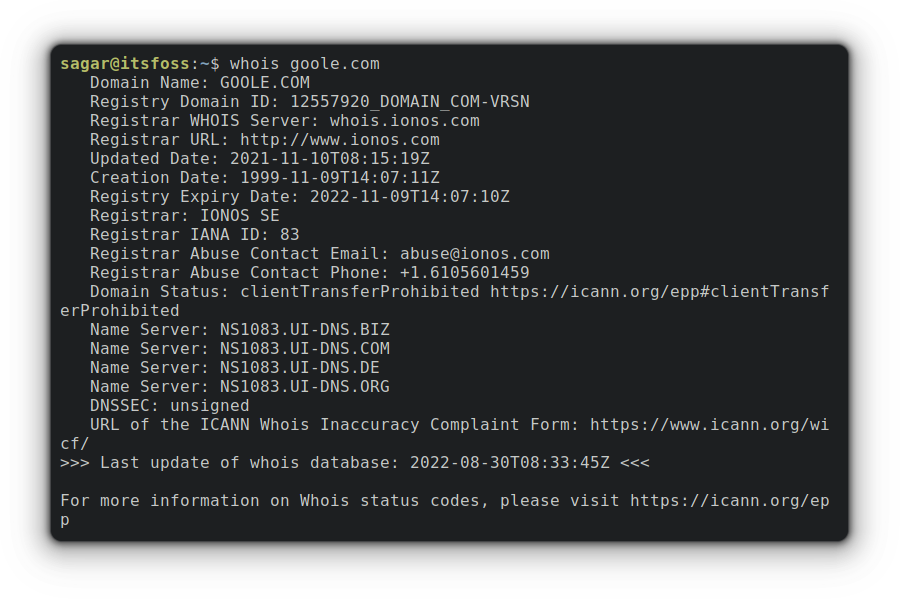
Alternatively, you can also use an IP address instead of a domain and you’d get the same details.
12. ifplugstatus
The ifplugstatus is one of the most basic yet useful enough to troubleshoot connectivity at the basic level. And is used to detect the link status of a local ethernet and works similarly to mii-diag, mii-tool, and ethtool by supporting APIs for all 3.
For installation on Ubuntu-based distros, you can follow the given command:
sudo apt install ifplugdThis utility does not have any fancy options and often used without being paired with any:
ifplugstatus
13. iftop
The iftop (Interface TOP) is often used by admins to monitor stats related to bandwidth and can also be used as a diagnostic tool when you’re having issues with the network.
This utility requires manual installation and can be easily installed on machines running Ubuntu by the given command:
sudo apt install iftopWhen iftop is used without any options, it shows bandwidth stats of the default interface:
sudo iftop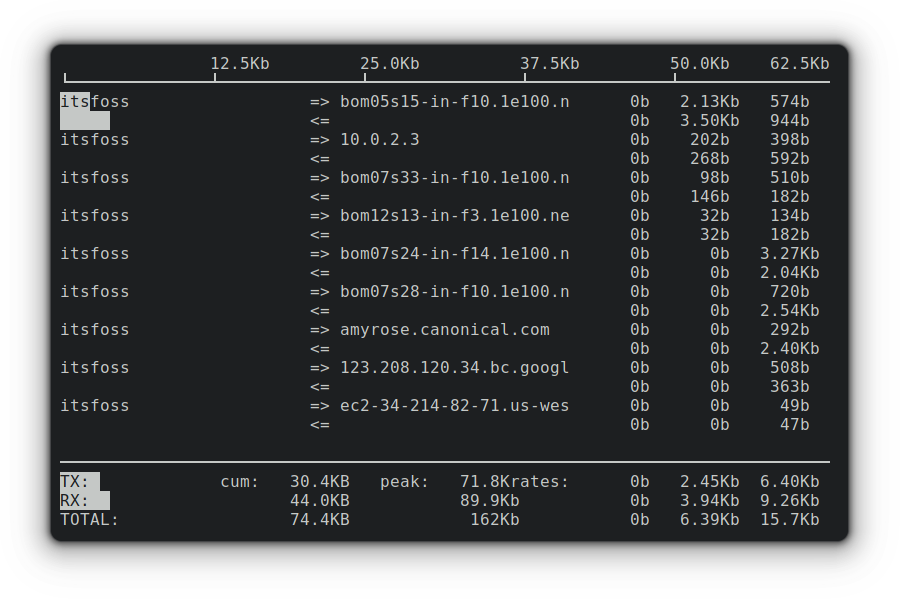
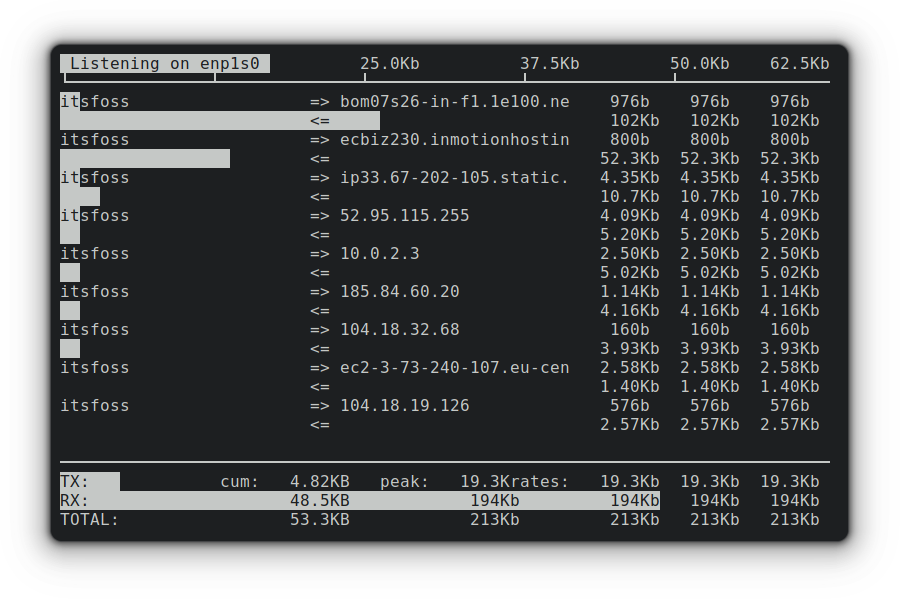
And you can also specify the network device by appending the device name with -i option.
sudo iftop -i <DeviceName>In my case its, enp1s0 so my output will be as follows:
14. tcpdump
The tcpdump is a packet sniffing and analyzing utility used to capture, analyze and filter network traffic. It can also be used as a security tool because it saves captured data in pcap file which can be accessed through Wireshark.
Like many other tools, tcpdump does not come pre-installed, and you can follow the given command for installation if you’re on Ubuntu base.
sudo apt install tcpdumpOnce you’re done with the installation, you can get capture packets for the current interface as given below:
sudo tcpdump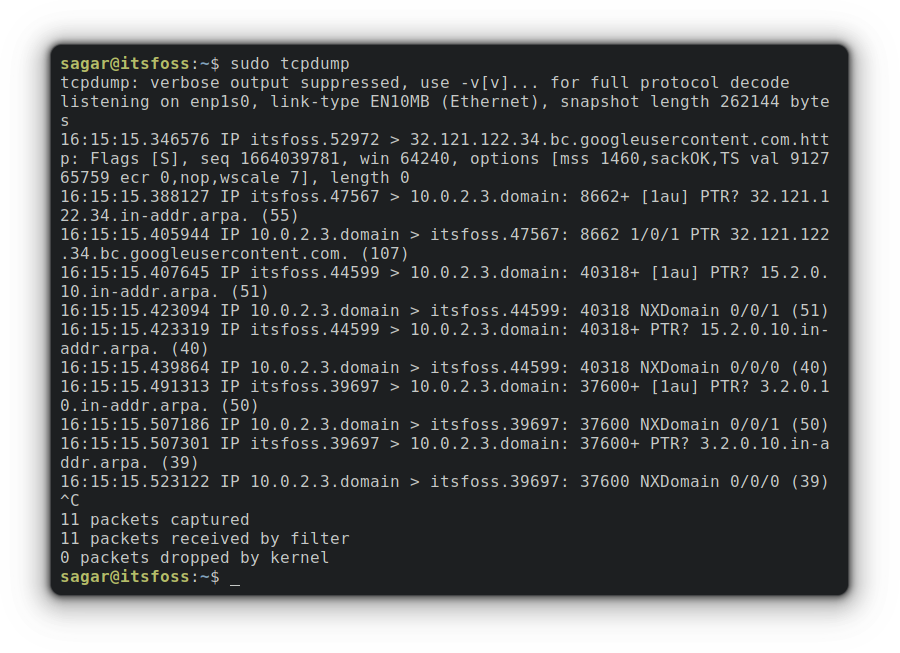
So how about saving captured packets in pcap file? Let me show you how:
sudo tcpdump -w Captured_Packets.pcap -i <networkdevice>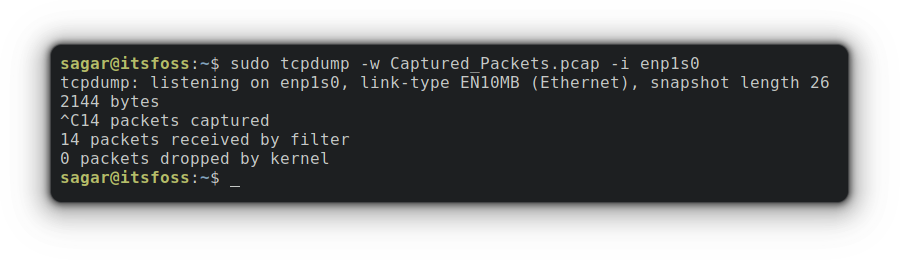
To access the saved file, you need to use -r option by appending file name:
sudo tcpdump -r Captured_Packets.pcap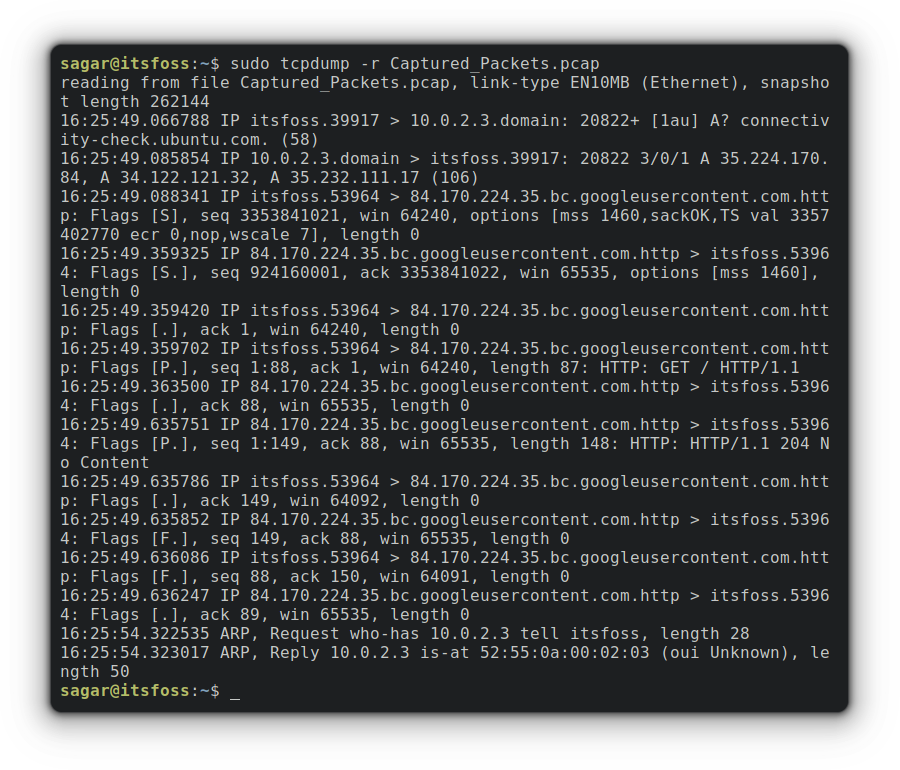
15. ethtool
As its name suggests, the ethtool utility is primarily concerned with managing ethernet devices. Using this utility allows you to tweak network card speed, auto-negotiation, and much more.
But it may not be pre-installed on your machine and can be installed on a Ubuntu-powered machine by utilizing the given command:
sudo apt install ethtoolTo fetch the interface details, you just have to append the device name with the command as shown below:
sudo ethtool <InterfaceName>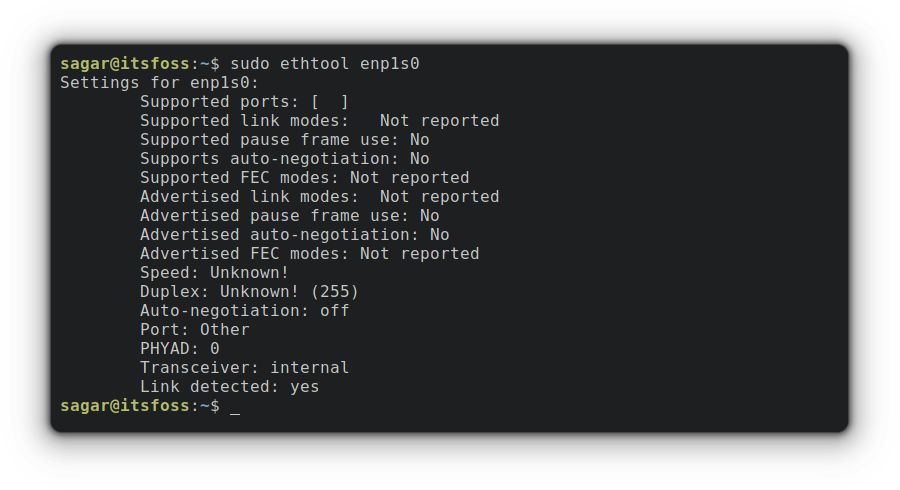
16. nmcli
Being a simple yet powerful network troubleshooting tool, it is one of the first utilities that any sysadmin would use for troubleshooting the network and can also be used in scripts.
There is one thing, though. nmcli is part of the Network Manager and it may not always be installed on all Linux systems. In some cases, you need to install it first.
You can use nmcli command as given to monitor the connectivity status of devices:
nmcli dev status
When used without any options, it will bring info about all the present devices in your system.
nmcli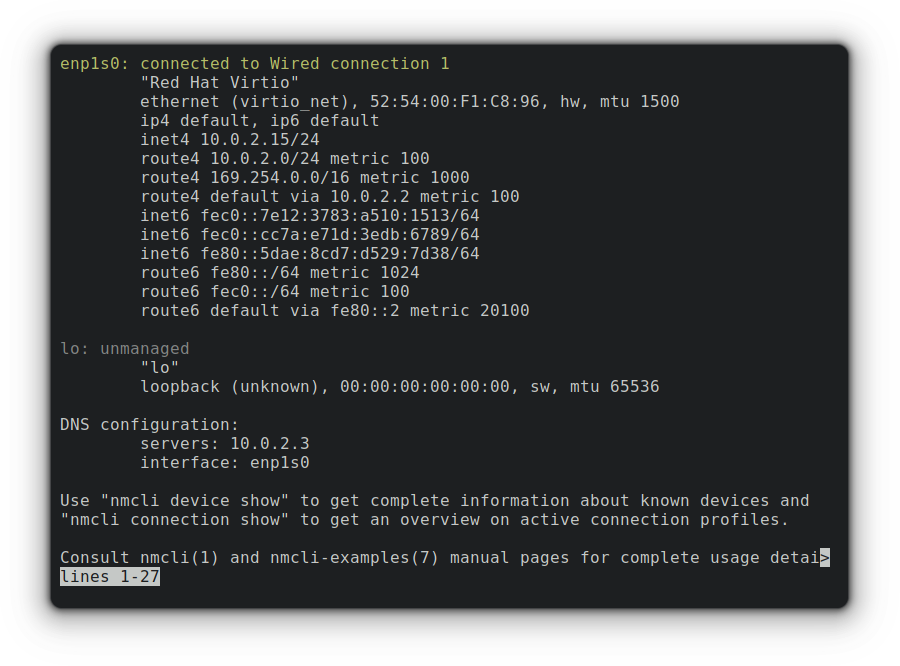
17. nmap
The nmap is a tool to explore and audit network security. It is often used by hackers and security enthusiasts as it allows you to get real-time info on the network, IPs connected to your network in a detailed manner, port scanning, and much more.
For installation of nmap utility on Ubuntu-based distros, utilize the given command:
sudo apt install nmapLet’s start scanning with hostname:
nmap itsfoss.com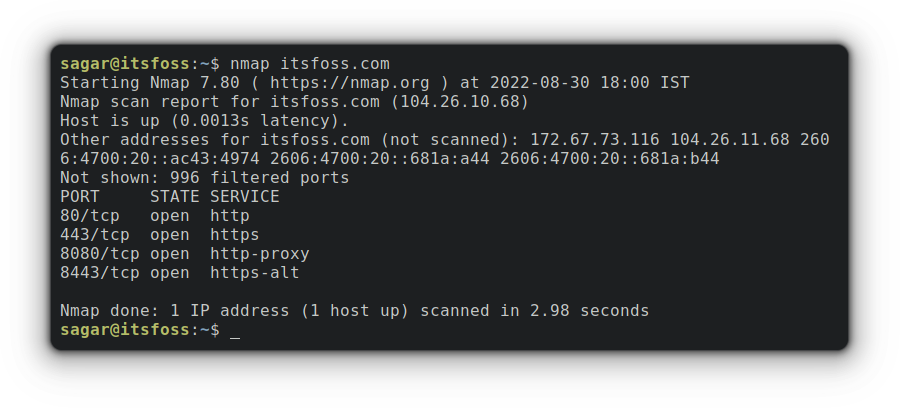
18. bmon
The bmon is an open-source utility to monitor real-time bandwidth and debug issues by presenting stats in a more human-friendly way. The best part of this tool is the graphical presentation and can even get your output in HTML!
Installation is quite simple as bmon is present in default repos of popular Linux distros and that also includes Ubuntu.
sudo apt install bmonNow, you just have to launch bmon and you’d be able to monitor bandwidth in eye pleasant way:
bmon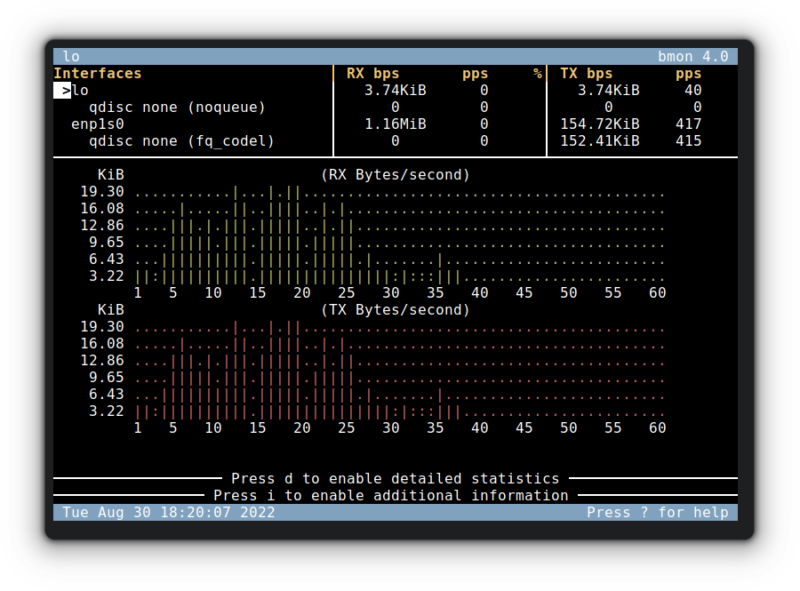
19. firewalld
Managing firewalls can be considered the core part of network security and this tool allows you to add, configure and remove rules on firewall.
But the firewalld requires manual installation, and you can utilize the given command for installation if you’re using an Ubuntu-based distro:
sudo apt install firewalldFor example, I’d show you, how you can open port 80 permanently for the public zone:
sudo firewall-cmd --permanent --zone=public --add-port=80/tcp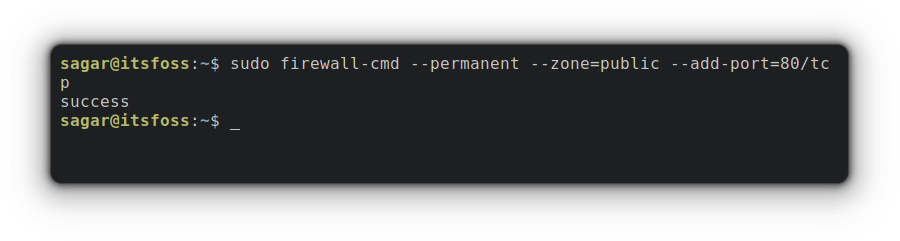
Similarly, to remove the recently added rule, you have to use -remove option as shown below:
sudo firewall-cmd --zone=public --remove-port=80/tcp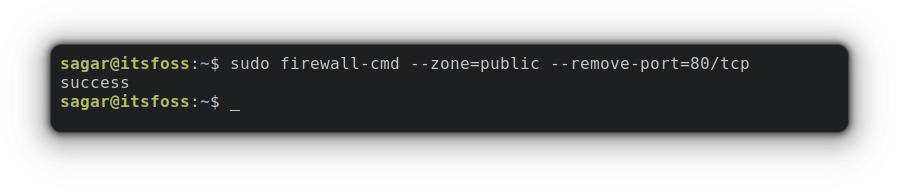
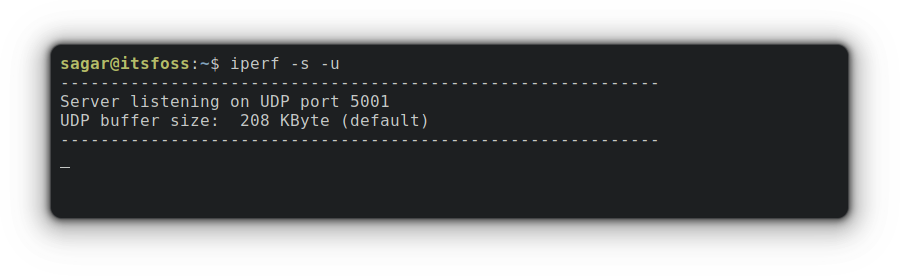
20. iperf
The iperf is an open-source utility written in C allowing users to perform network performance measurement and tuning.
This tool is present in the default repository of Ubuntu and can be installed from the given command:
sudo apt install iperfTo start monitoring the network, users must initiate this client on the server by given command:
iperf -s -uWhere, -s option indicates server and -u option is for UDP format.
Now, you can connect to your server (using -c option indicating client side) by providing an IP address payload for the preferred protocol. For this example, I went with UDP (using -u option) with a payload of 100.
iperf -c 10.0.2.15 -u 100
21. speedtest-cli
As the name suggests, this is the CLI utility for the speedtest.net website. This open-source utility released under Apache 2.0 license can be quite helpful when you want a reliable source for checking internet speeds from cli.
Installation is quite straightforward and can easily be installed utilizing the given command if you’re on an Ubuntu base:
sudo apt install speedtest-cliOnce you’re done with the installation part, you just have to use a single command to get your speeds tested:
speedtest-cli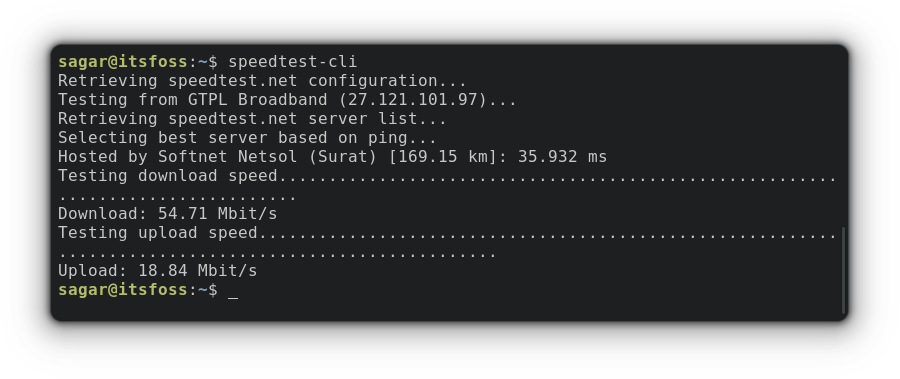
22. vnstat
The vnstat utility is mostly used by sysadmins to monitor network traffic and bandwidth consumption (for the most part) as this tool monitors traffic on network interfaces of your system.
As with any other networking tool, you can find vnstat in the default repositories, and if you’re on Ubuntu, the installation can be done through the given command:
sudo apt install vnstatYou can use vnstat command without any options, and it will bring basic stats of all available interfaces of your system:
vnstat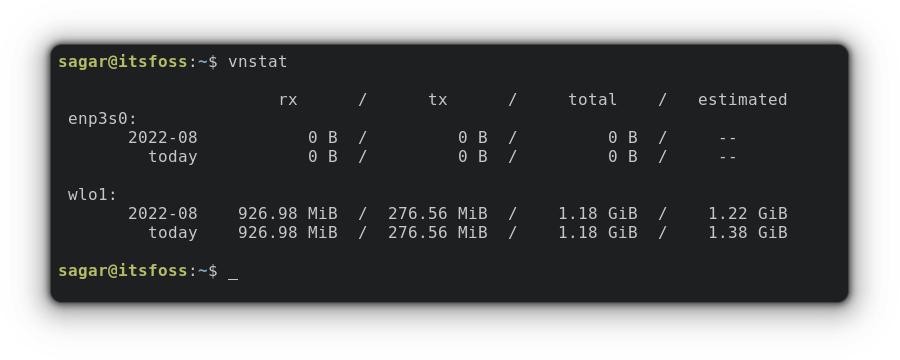
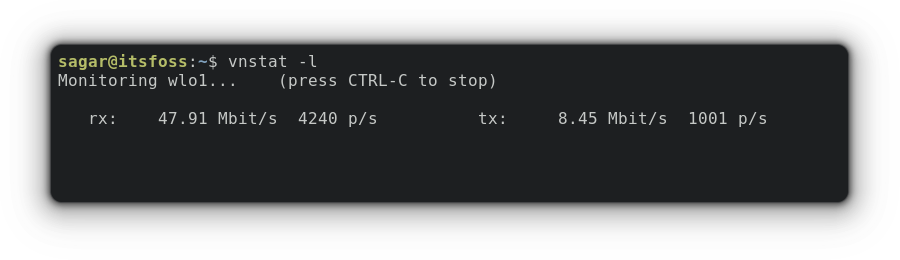
For live monitoring, you can pair vnstat command with -l option:
how to get the most out of man pages
Test your knowledge
If it interests you, play this crossword composed of popular networking commands and test your knowledge.

A long List, right?
This compilation is not even the tip of the iceberg and only shares the purpose and basic examples of each command because adding more would have made this even longer.
Popular but deprecated Linux commands like ipconfig have been deliberately left out of this list.
If you are new to Linux, this list of essential commands could help you.
 Abhishek Prakash
And if you’re curious, you can learn how to get the most out of man pages which will teach you how you can use any utility at its max potential.
And if I forgot to mention any of your favorites, please let me know in the comments.
If this helped you, consider supporting It's FOSS
It's FOSS has been helping people use Linux for the past 14 years. Help us stay independent from big tech. Become a Plus member, enjoy ad-free reading and get 5 eBooks.

