

In a situation where you often share your computer with others but have some private files that you don’t want others to see?
You can try hiding it in places where others cannot find it. Like in a deeply nested folder structure but that’s not entirely foolproof because the files could be shown in the desktop search results.
On Android, there are several applications to lock gallery photos or hide them. I haven’t used such folder-locking applications in Linux. My laptop is used only by me and I do not need to hide any files.
If so, then why are we talking about folder lock for Linux today? I got a request from an It’s FOSS reader for a tutorial on encrypted folders in Ubuntu. If this interests you, let’s see how to lock a folder in Linux.
Password protect folders in Linux
While there can be numerous ways, I am going to share two tools for creating password-protected folders:
- GNOME Encfs manager
- Veracrypt
I am using Ubuntu in this tutorial but you can use any other Linux distribution based on Ubuntu such as Linux Mint, elementary OS, etc. The steps should apply to other Linux distributions such as Fedora, Arch Linux, etc but the commands to install the tool won’t be the same.
Method 1: Lock folders with Gnome EncFS Manager
Let’s see how to install Gnome Encfs Manager.
If you are using Ubuntu or Linux Mint or other Linux distributions based on Ubuntu, you can use the official PPA using the commands below one by one:
sudo add-apt-repository ppa:gencfsm
sudo apt update
sudo apt install gnome-encfs-manager
Packages for Debian, Fedora, and OpenSUSE are available here.
If you are using GNOME on Wayland and don't have the system tray app indicator support, you should use this GNOME extension to add quick access to the top panel. Read this article to learn how to use GNOME extensions.
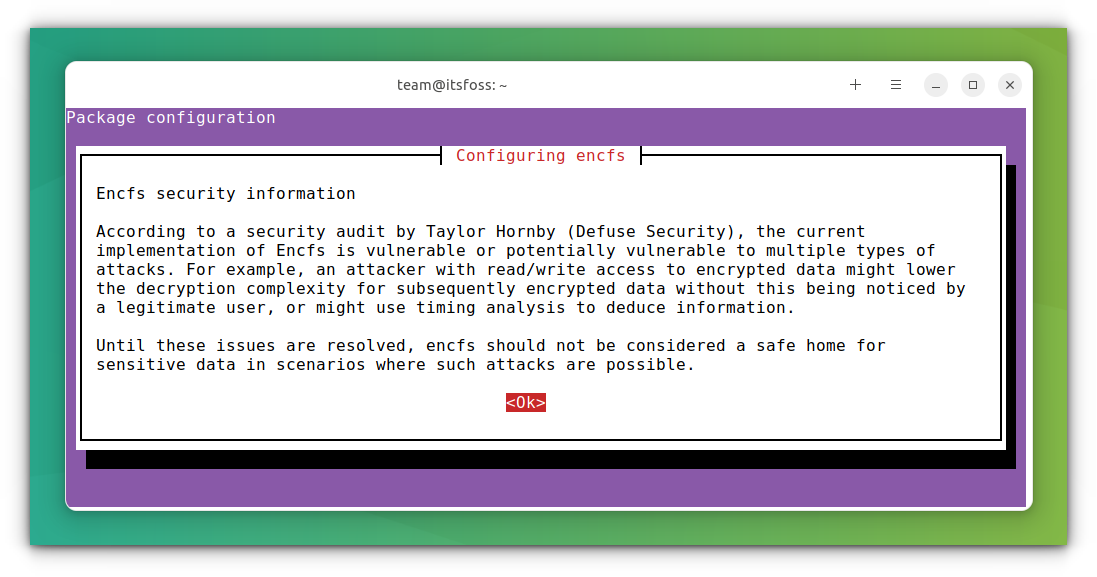
Once installed, you may have to log out to see the application working. Now, go to the application menu and start Gnome Encfs Manager. On the first opening, it will show you a warning message about the existing vulnerability. You need to press Enter on OK to continue.
Now, click on the + sign to add a new folder that you’ll be locking with a password. A password-protected folder is called stash in this application’s terminology.
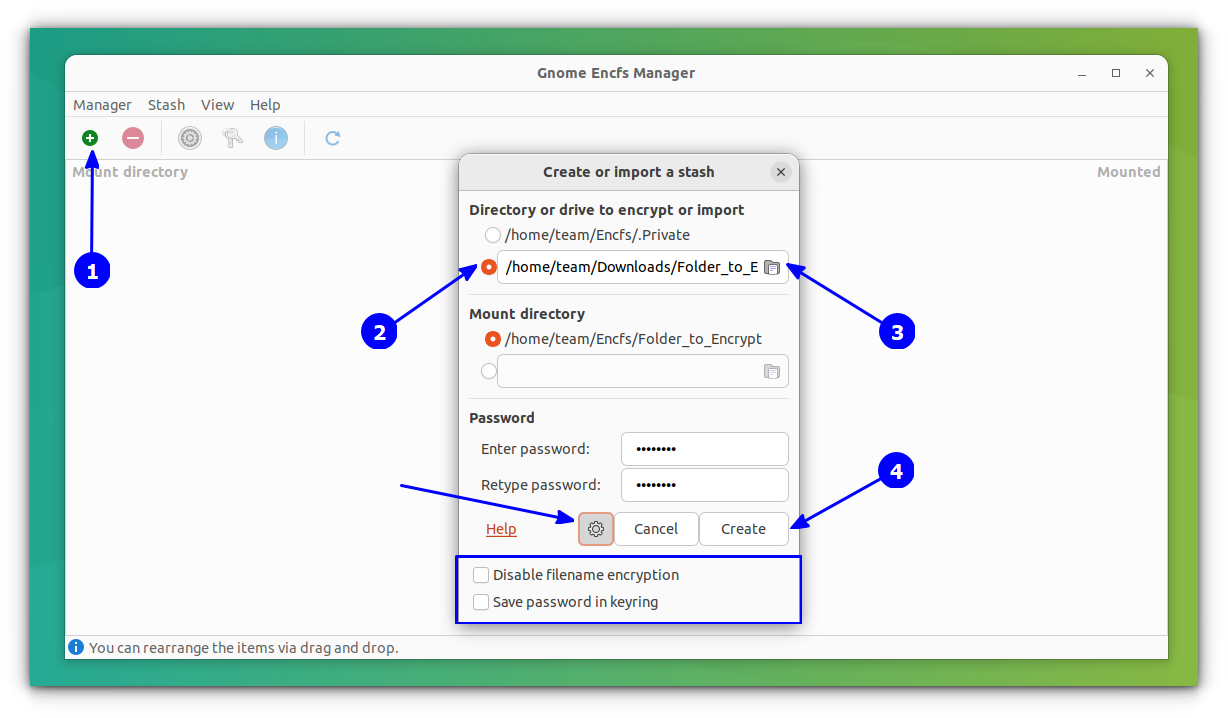
Here, you can create a new directory or browse an existing one. You can try password-protect an existing folder, but the files already in the folder won’t be locked. For this reason, I suggest creating a new folder and moving the files after you password-protect it.
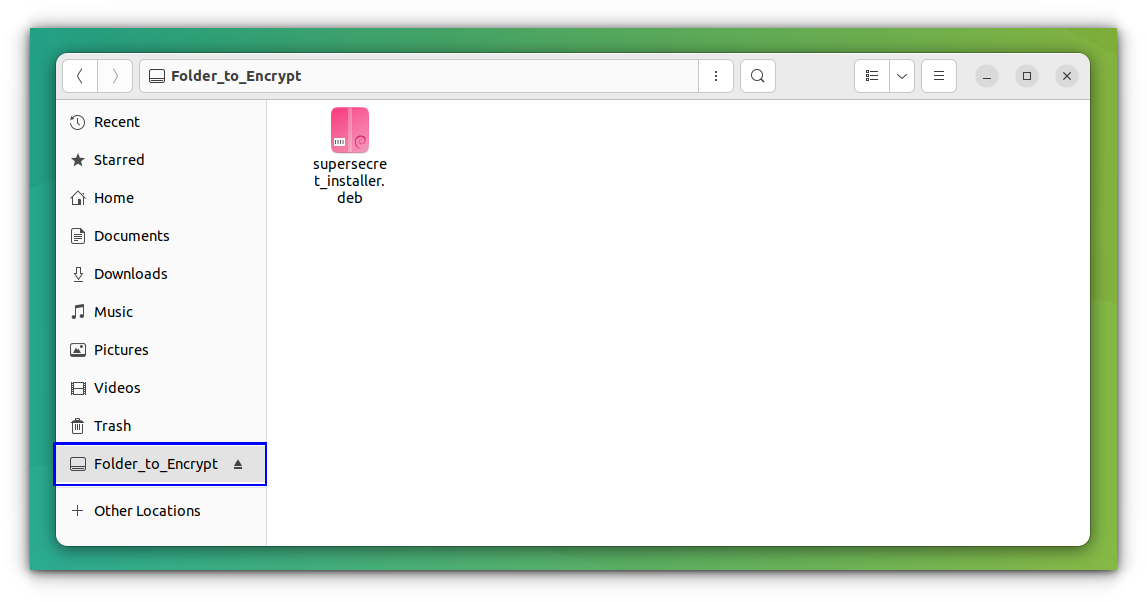
Once the folder is created, you can start copying the files into it. Your locked folder will be seen as a mounted drive when you have unlocked it.
You can get control of the locked folder from the GNOME extension. I am not sure if other desktop environments have anything similar. I leave that to your exploration.
Once you have copied the files into the secret folder, simply unmount it. You can do that by unchecking the mounted folder from the panel extension as shown above. When you want to access it, use the launcher in the top panel or start the program again.
You can also use advanced settings such as auto-start or auto-unmount after a certain idle time.
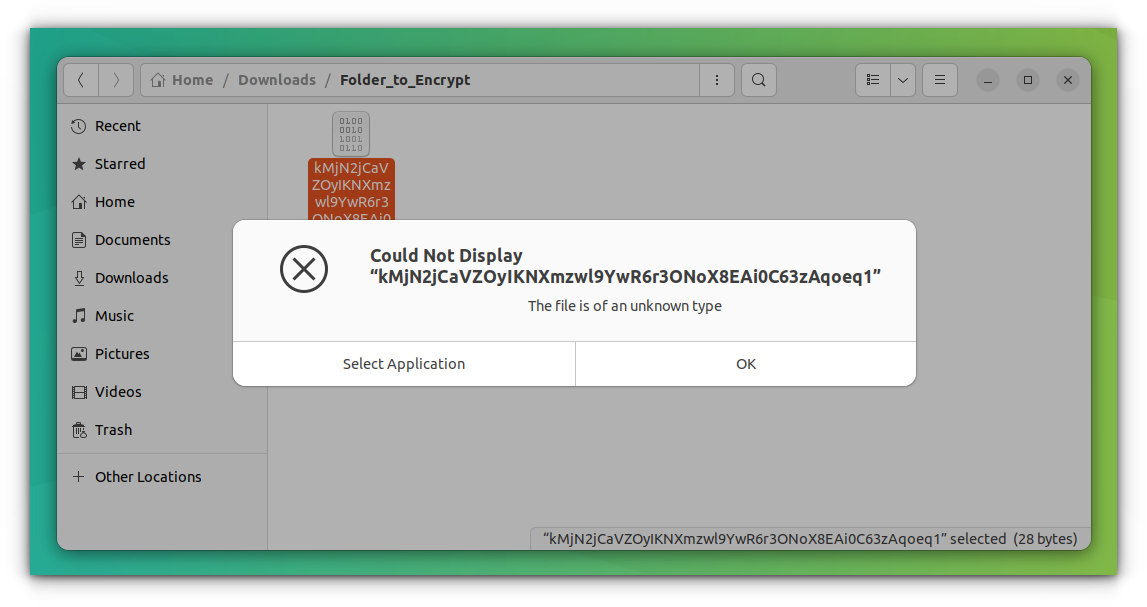
Note that the so-called secret directory will be visible and accessible to anyone in its usual location. However, its content won’t be in a readable format, not even the filenames.
When you mount the locked folder, it will become readable.
That’s all you need to know about password-protecting folders with Gnome Encfs Manager.
Method 2: Lock files with VeraCrypt
VeraCrypt is a free, open-source disk encryption software, available for all major platforms, and is based on TrueCrypt 7.1a.
It is available as a deb package for Ubuntu releases up to 22.04. It also offers several installation packages for various recent versions of Fedora, Debian, OpenSUSE, etc. You need to download the appropriate file from their official downloads page.
Once downloaded the file, install the deb file in Ubuntu using the terminal, software center, or GDebi package installer, according to your choice.
After installation, open VeraCrypt from the Ubuntu Activities overview.
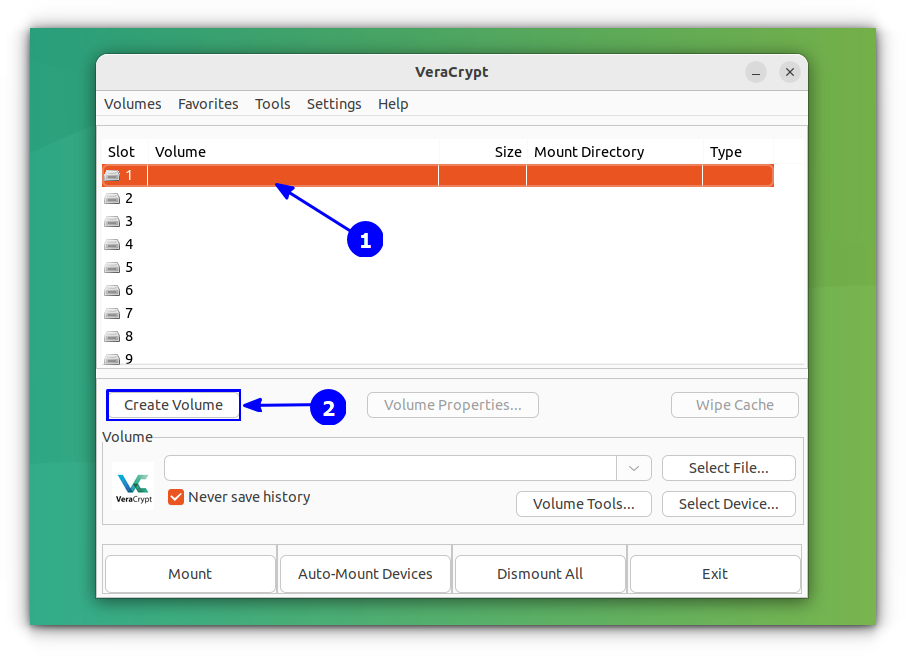
Now, select a slot (64 by default) and click on create volume button.
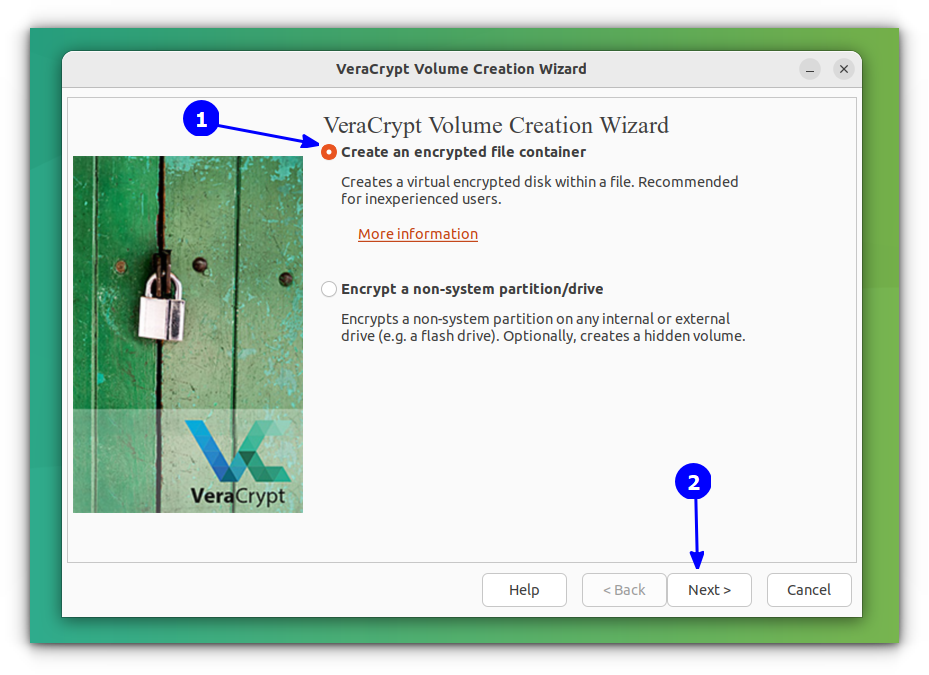
Select the Create an encrypted file container option on the next screen and click Next.
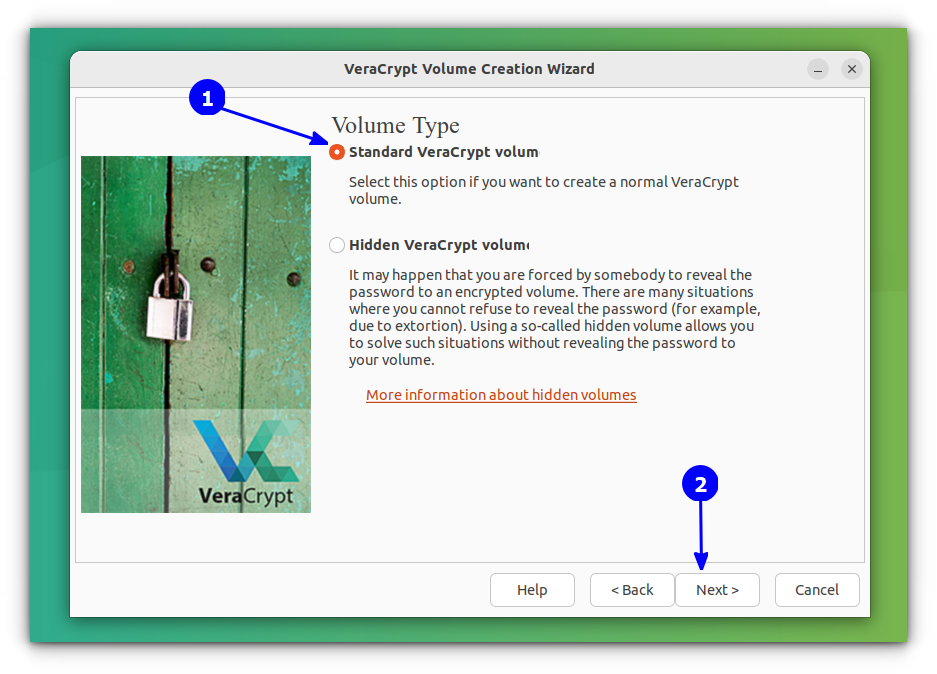
After that, select the Standard VeraCrypt volume as the Volume Type and press Next.
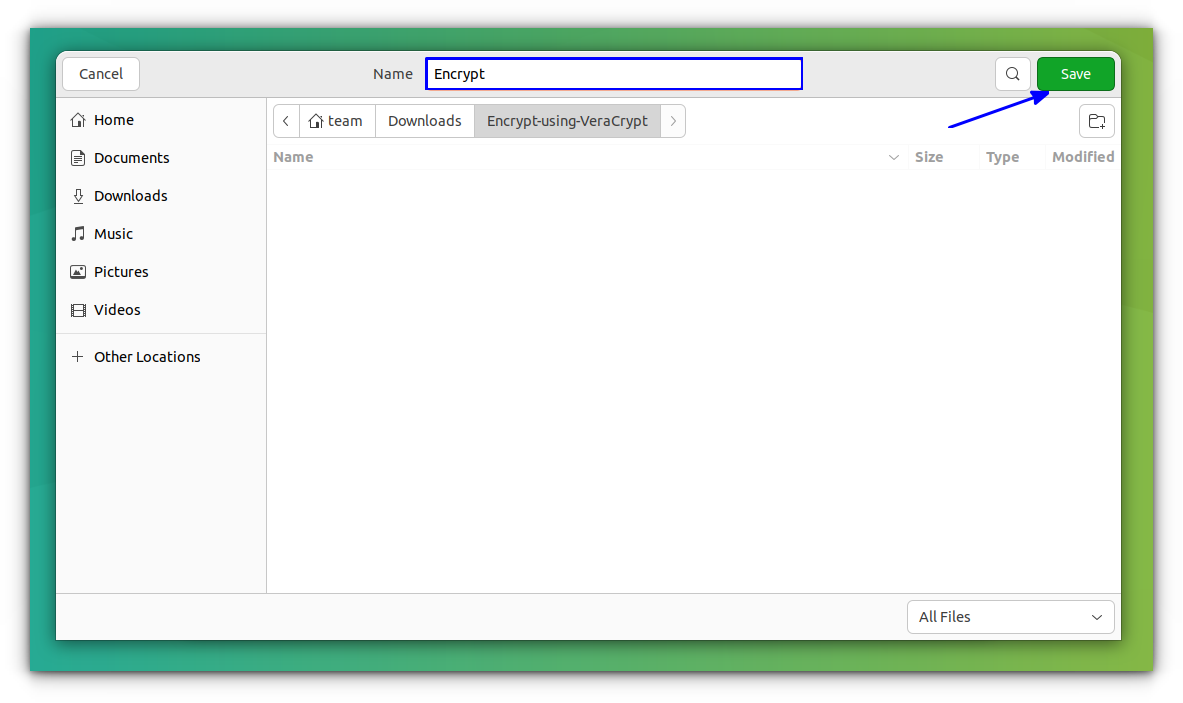
This will lead you to a window, where, you want to select a file to store the encrypted volume. You need to press the Select File option.

This will open the file explorer window and you can create a new file by typing a name on the top name bar as shown below and pressing Save.
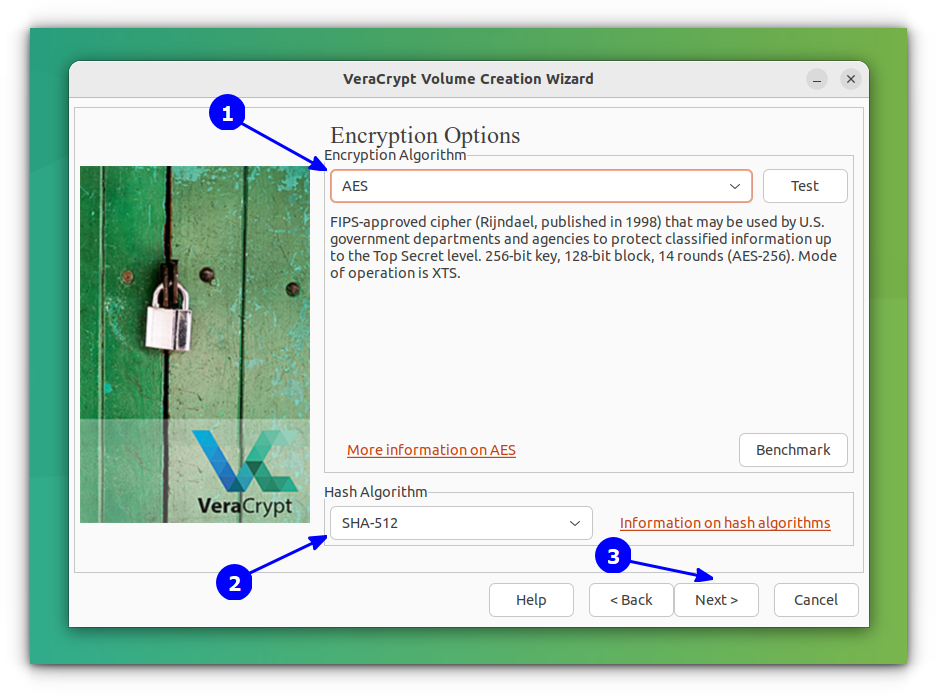
Once the file is selected, in the next step, you need to specify the Encryption type, that is the Encryption and Hash algorithm. The default is AES and SHA-512. Press Next.
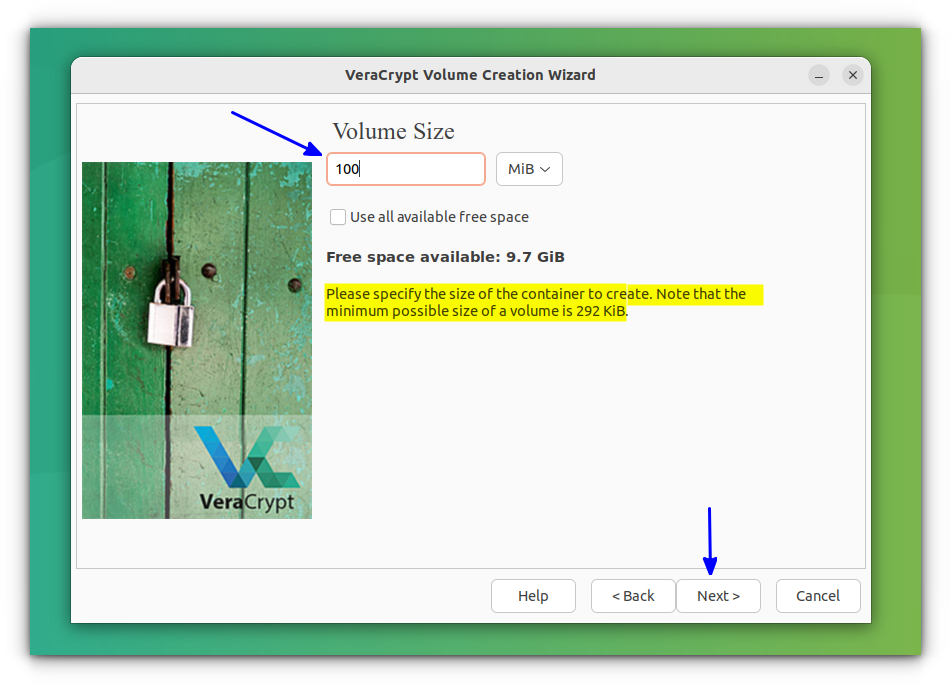
Now, give a size for the encrypted volume. Here, allocate a size that will satisfy your need.
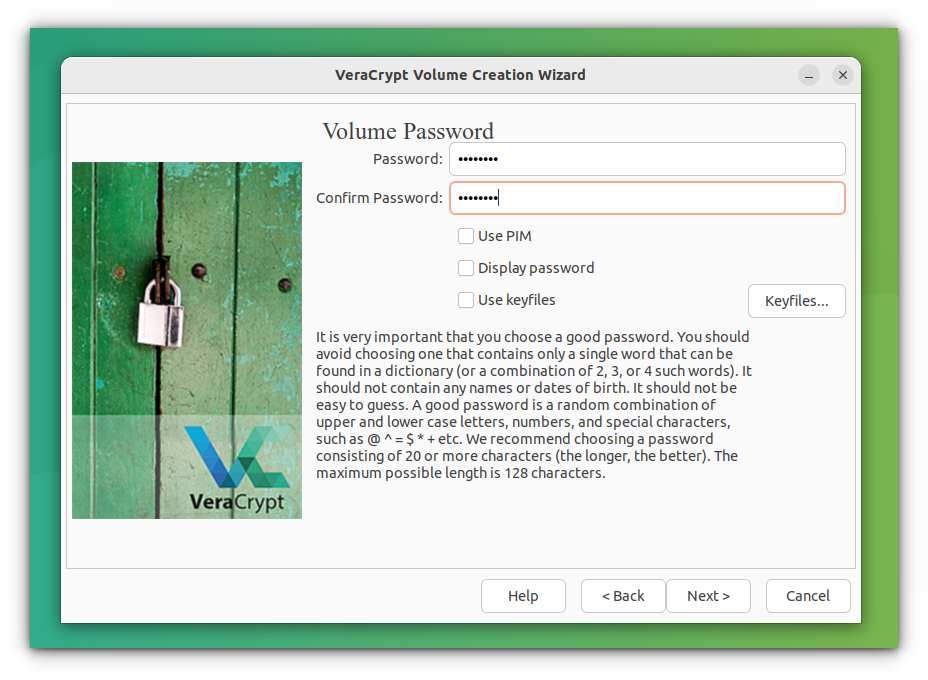
Following the above step, you must provide a password for the encryption. VeraCrypt suggests (not mandatory) a 20+ character password; they will prompt this if not satisfied.
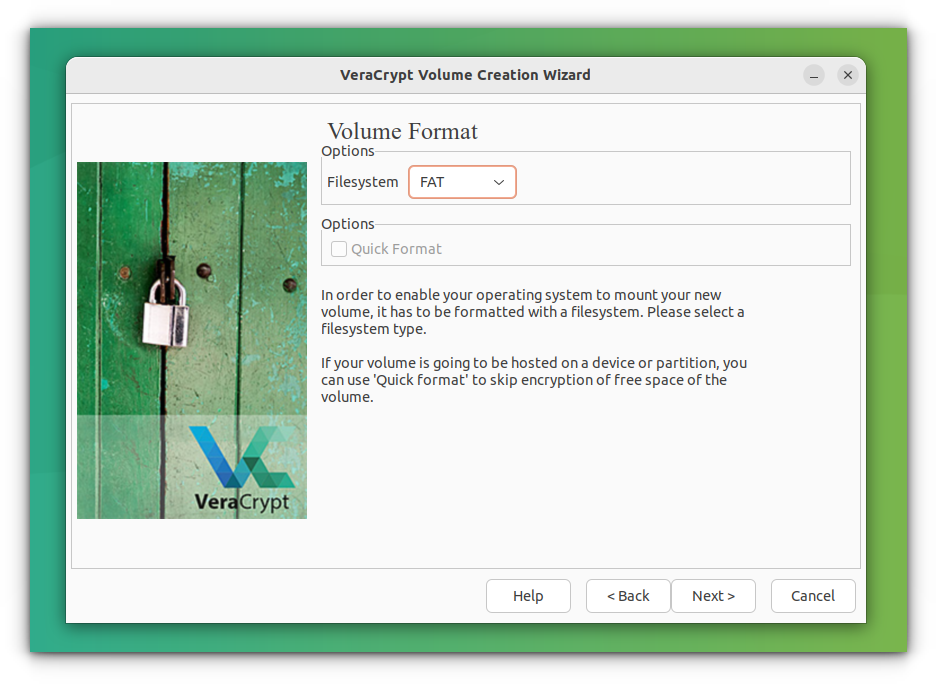
In the Next step, choose the filesystem for the volume. Several options are available including NTFS. After selecting, press Next.
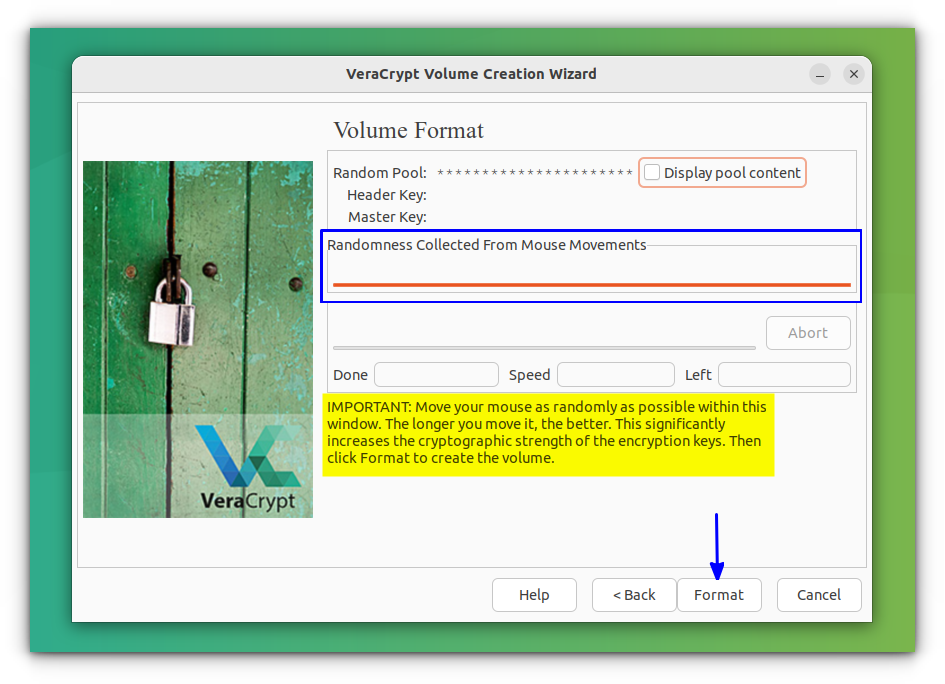
The last page will ask you to randomly move your mouse inside the window to increase encryption strength. Do it till the progress bar reaches the other end :). Now press Format.
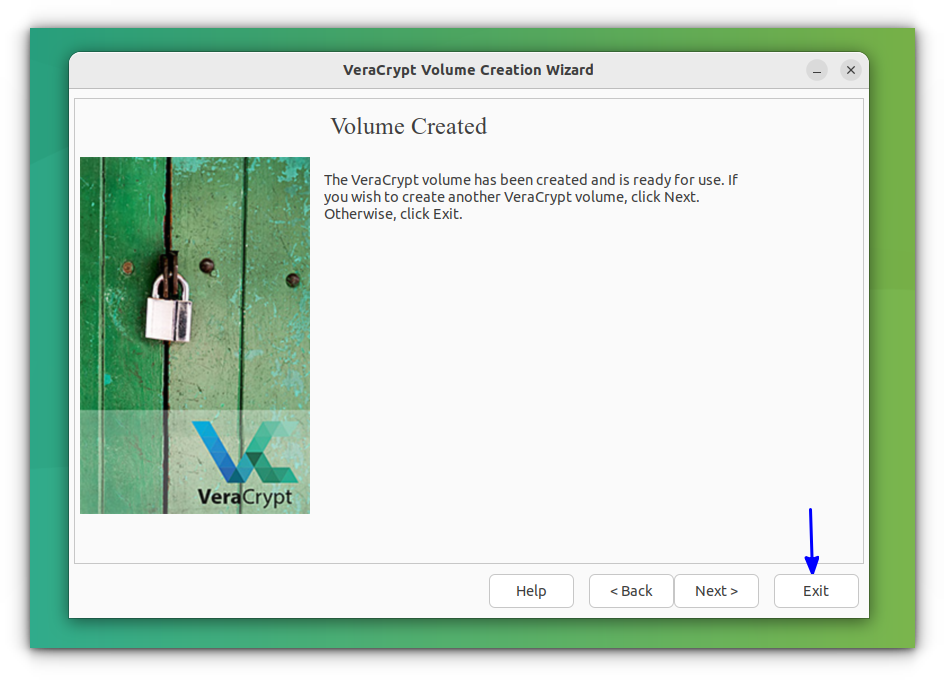
Now, you can press Exit to finish the process.
Once the volume is created, you need to mount this. To do that, open VeraCrypt and select Select File.
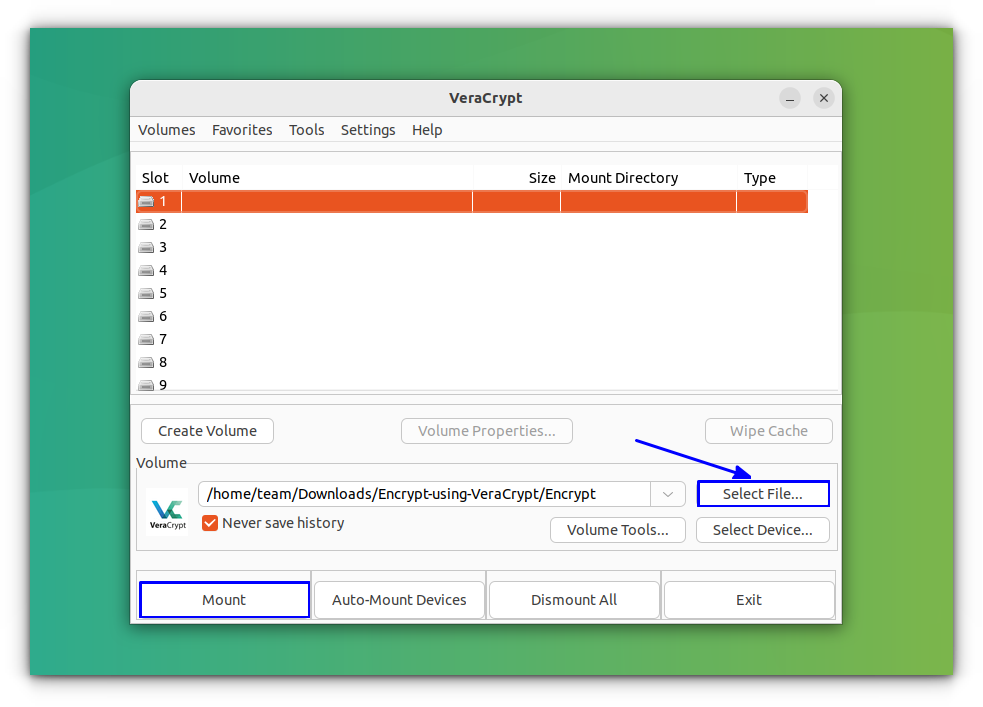
Choose the file you created initially and press Mount to mount the volume.
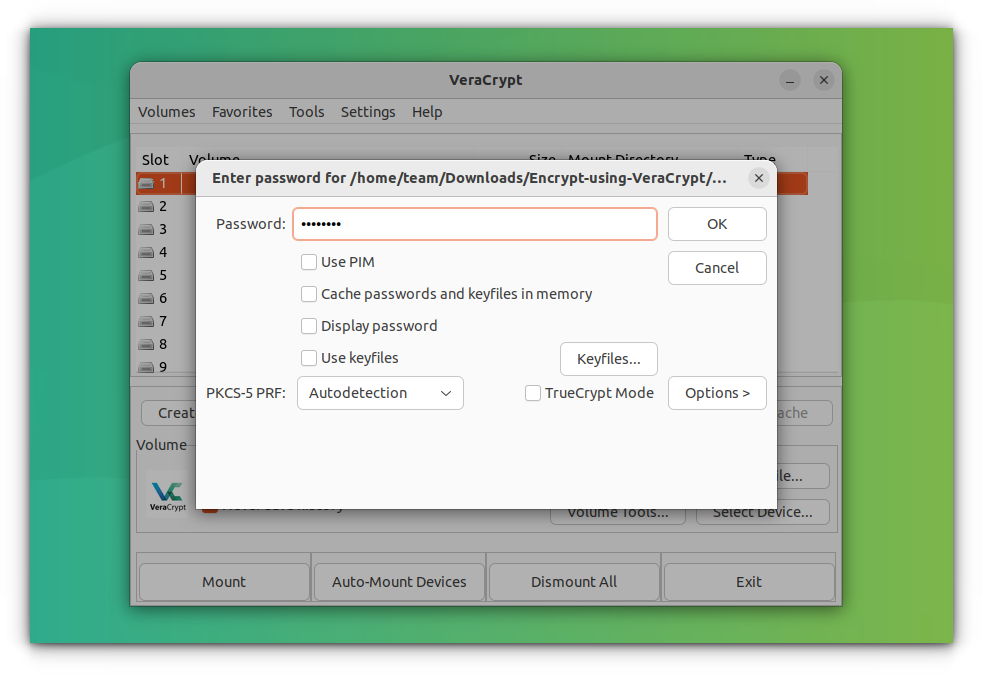
This will ask you for the encryption password. Also, you may be asked for your user password in this process. Give them.
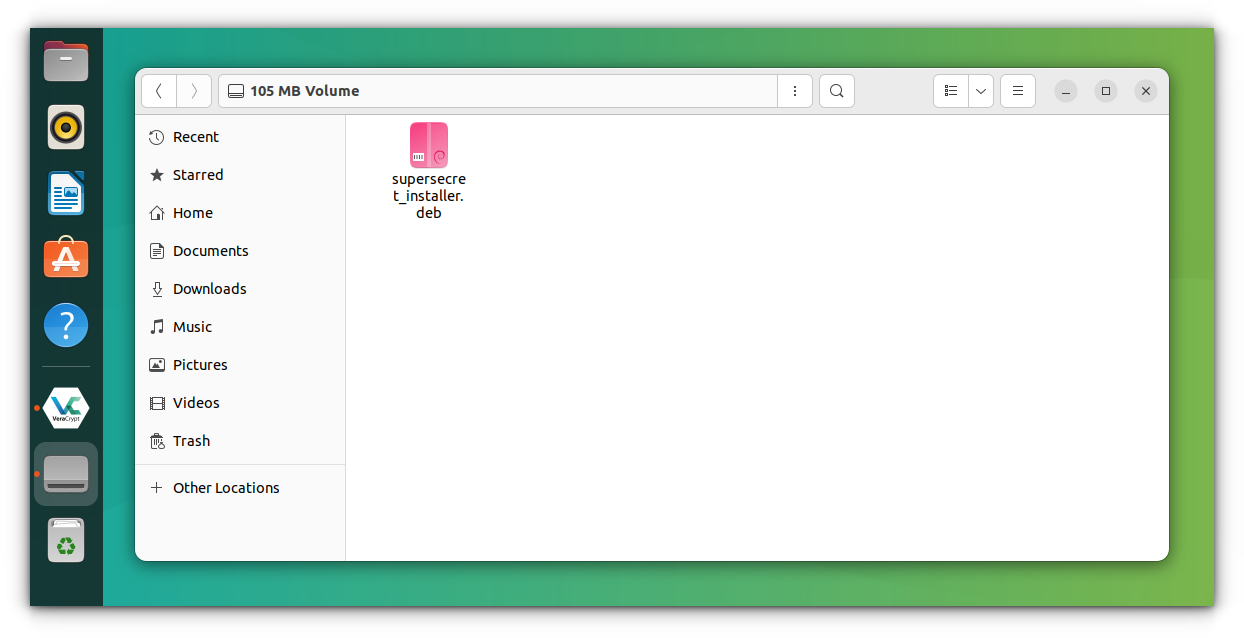
Now, you can paste the files you want to encrypt inside this volume. Upon unmounting, you need the password to reaccess it. Keep in mind the size of the volume you allotted to it at the beginning; this will be the copying limit.
Note that, VeraCrypt won’t be started automatically at each boot. If you want that, read this guide to manage start up applications in Ubuntu and see how can you start VeraCrypt at each boot.
Private or not?
Enjoy your private locked folder in Linux. As I mentioned earlier, it gives you some basic functionality where an average person cannot access the files you have kept in the locked folder.
For better security, you should encrypt the entire disk while installing the operating system. Most people don't need security at such a level.
Questions or suggestions are always welcome.
