


Lately, tiling window managers have been gaining popularity even among the regular desktop Linux users. Unfortunately, it can be difficult and time-consuming for a user to install and set up a tiling window manager.
This is why projects like Regolith and PaperWM has come up to provide tiling window experience with minimal efforts.
We have already discussed Regolith desktop in details. In this article, we’ll check out PaperWM.
What is PaperWM?
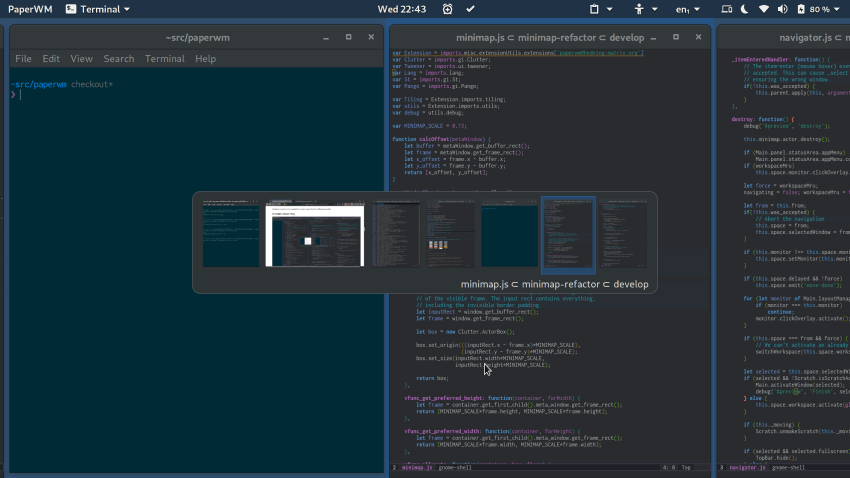
According to its GitHub repository, PaperWM is “a Gnome Shell extension providing scrollable tiling of windows and per monitor workspaces. It’s inspired by paper notebooks and tiling window managers.”
PaperWM puts all of your windows in a row. You can quickly switch between windows. It’s a little bit like having a long spool of paper in front of you that you can move back and forth.
This extension supports GNOME versions up to 50. It also supports both X11 and Wayland. It is written in JavaScript.
How to Install PaperWM?
PaperWM is available to install from the official GNOME Extensions web page. If you have the GNOME Shell Extension Manager app is installed, search for PaperWM in the app and install it using the Install button.
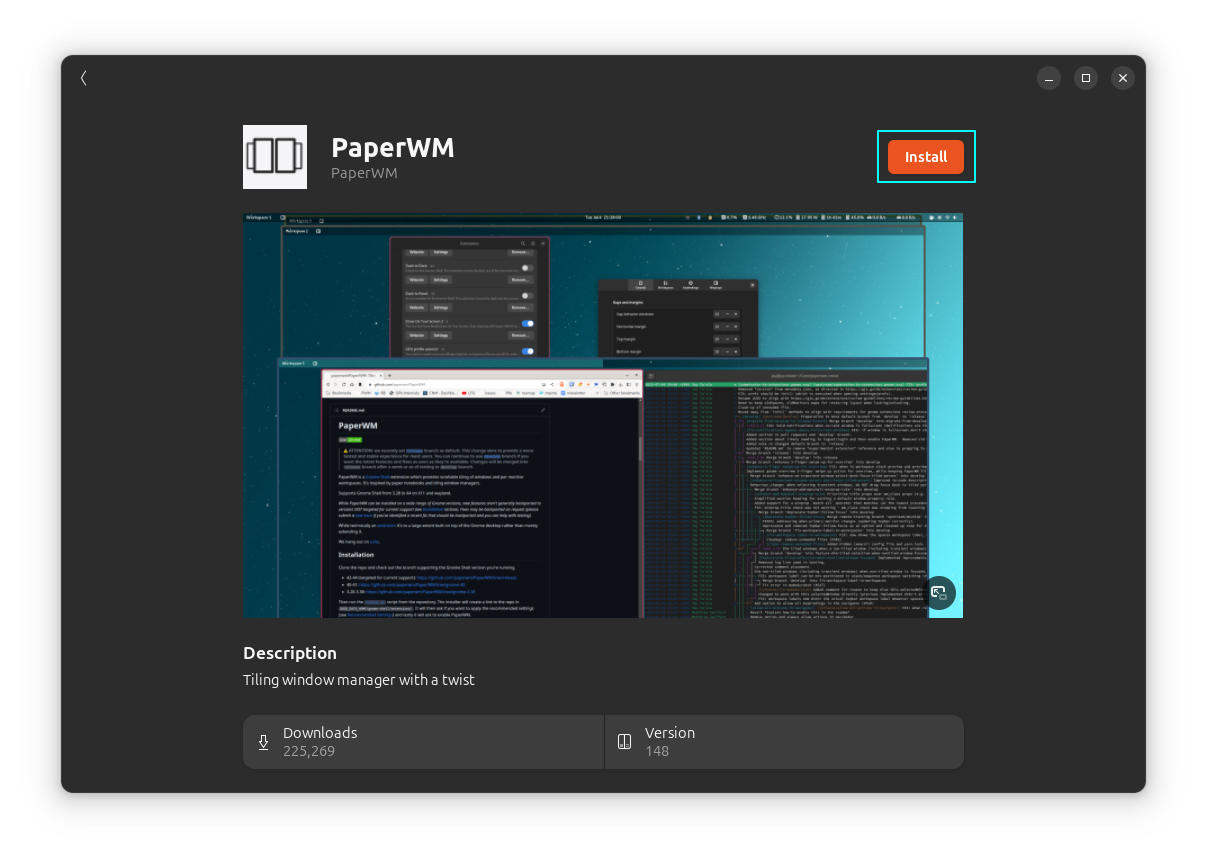
If you have no Extension Manager application, install it via the traditional method, using the GNOME Extensions website.
How to Use PaperWM?
Like most tiling window managers, PaperWM uses the keyboard to control and manage the windows. PaperWM also supports mouse and touchpad controls. For example, if you have Wayland installed, you can use a three-fingered swipe to navigate.
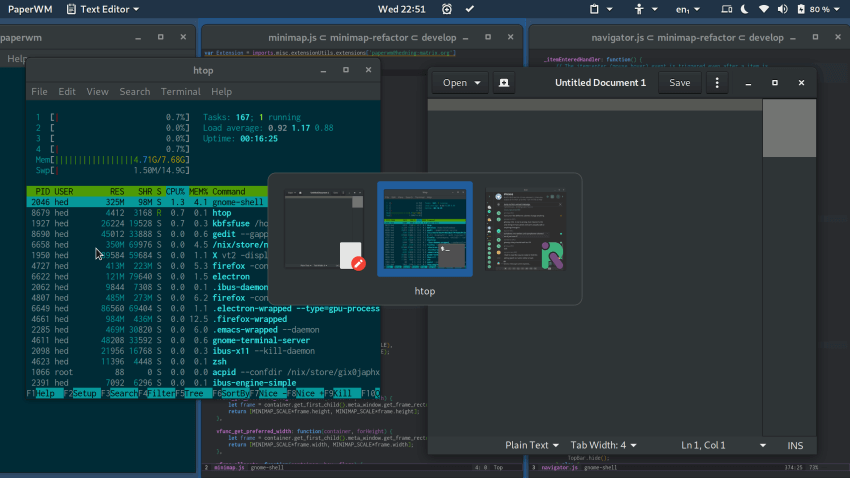
Here is a list of a few of the keybinding that preset in PaperWM:
| Key | Description |
|---|---|
Super + , or Super + . |
Activate the next or previous window |
Super + Left or Super + Right |
Activate the window to the left or right |
Super + Up or Super + Down |
Activate the window above or below |
Super + Tab or Alt + Tab |
Cycle through the most recently used windows |
Super + C |
Center the active window horizontally |
Super + R |
Resize the window (cycles through useful widths) |
Super + Shift + R |
Resize the window (cycles through useful heights) |
Super + Shift + F |
Toggle fullscreen |
Super + Return or Super + N |
Create a new window from the active application |
Super + Backspace |
Close the active window |
The Super key is the Windows key on your keyboard. You can find the full list of keybindings on the PaperWM GitHub page.
Access the settings
In the GNOME Shell extension manager application, click on the settings gear adjacent to the PaperWM extension.
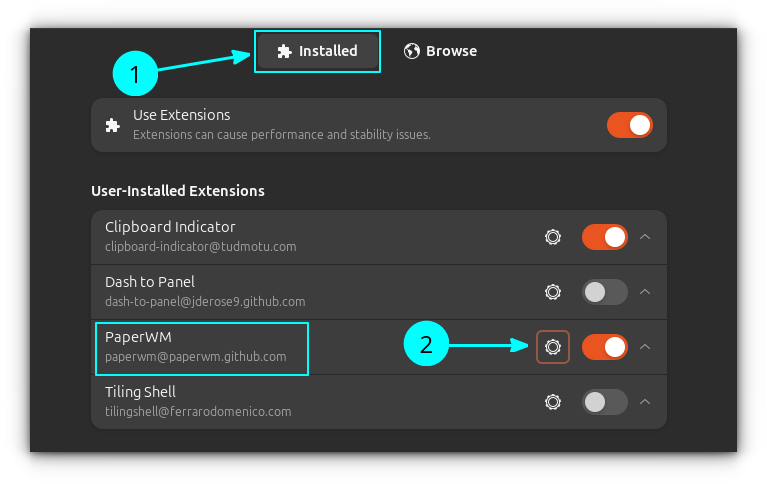
Here, you can tweak the behaviour of the PaperWM. Now, let's see some of the essential settings that you may need to give a look.
Focus Mode
By default, PaperWM use a right edge focus for new windows. This means, new windows opens to the right side. Other windows, as they loss focus move away from the edge.
Now, you can temporarily change this to a centre focus, using the top-left button on the GNOME panel.
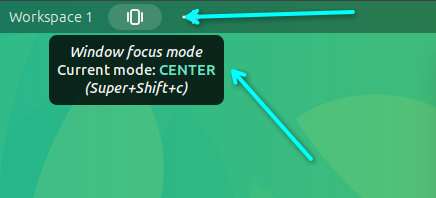
Now, to make it permanent, set the General -> Default window focus mode for workspaces option to Centre. I like to use a centre focus, instead of edge.
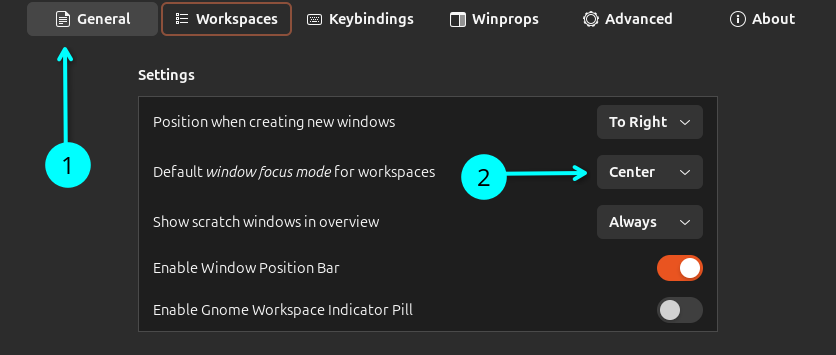
By centre focus, the newly opened windows will be opened in the centre.
Change the border size
The border size used out of the box feels a bit thick for me. So, to reduce the border size and margins, you can use the Border|Gaps|Margins settings under the general tab. Here is what it looks like on my machine.
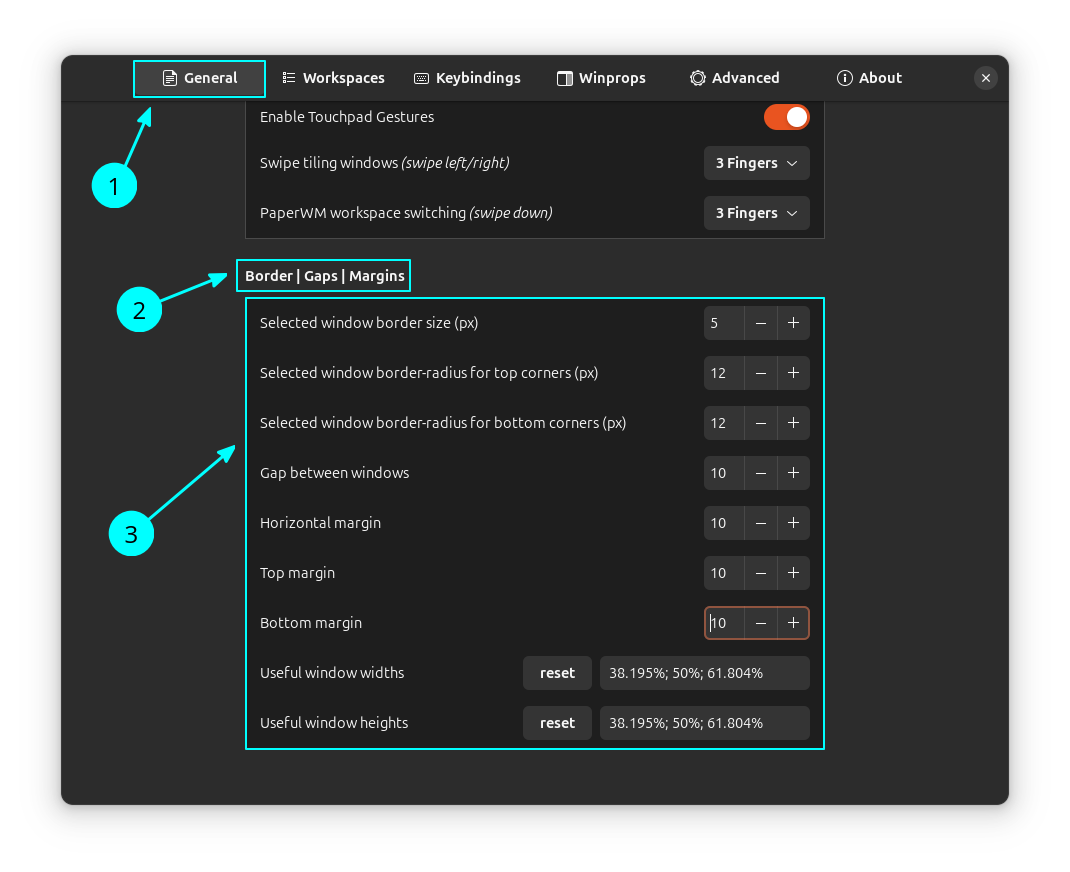
This is how it looks.
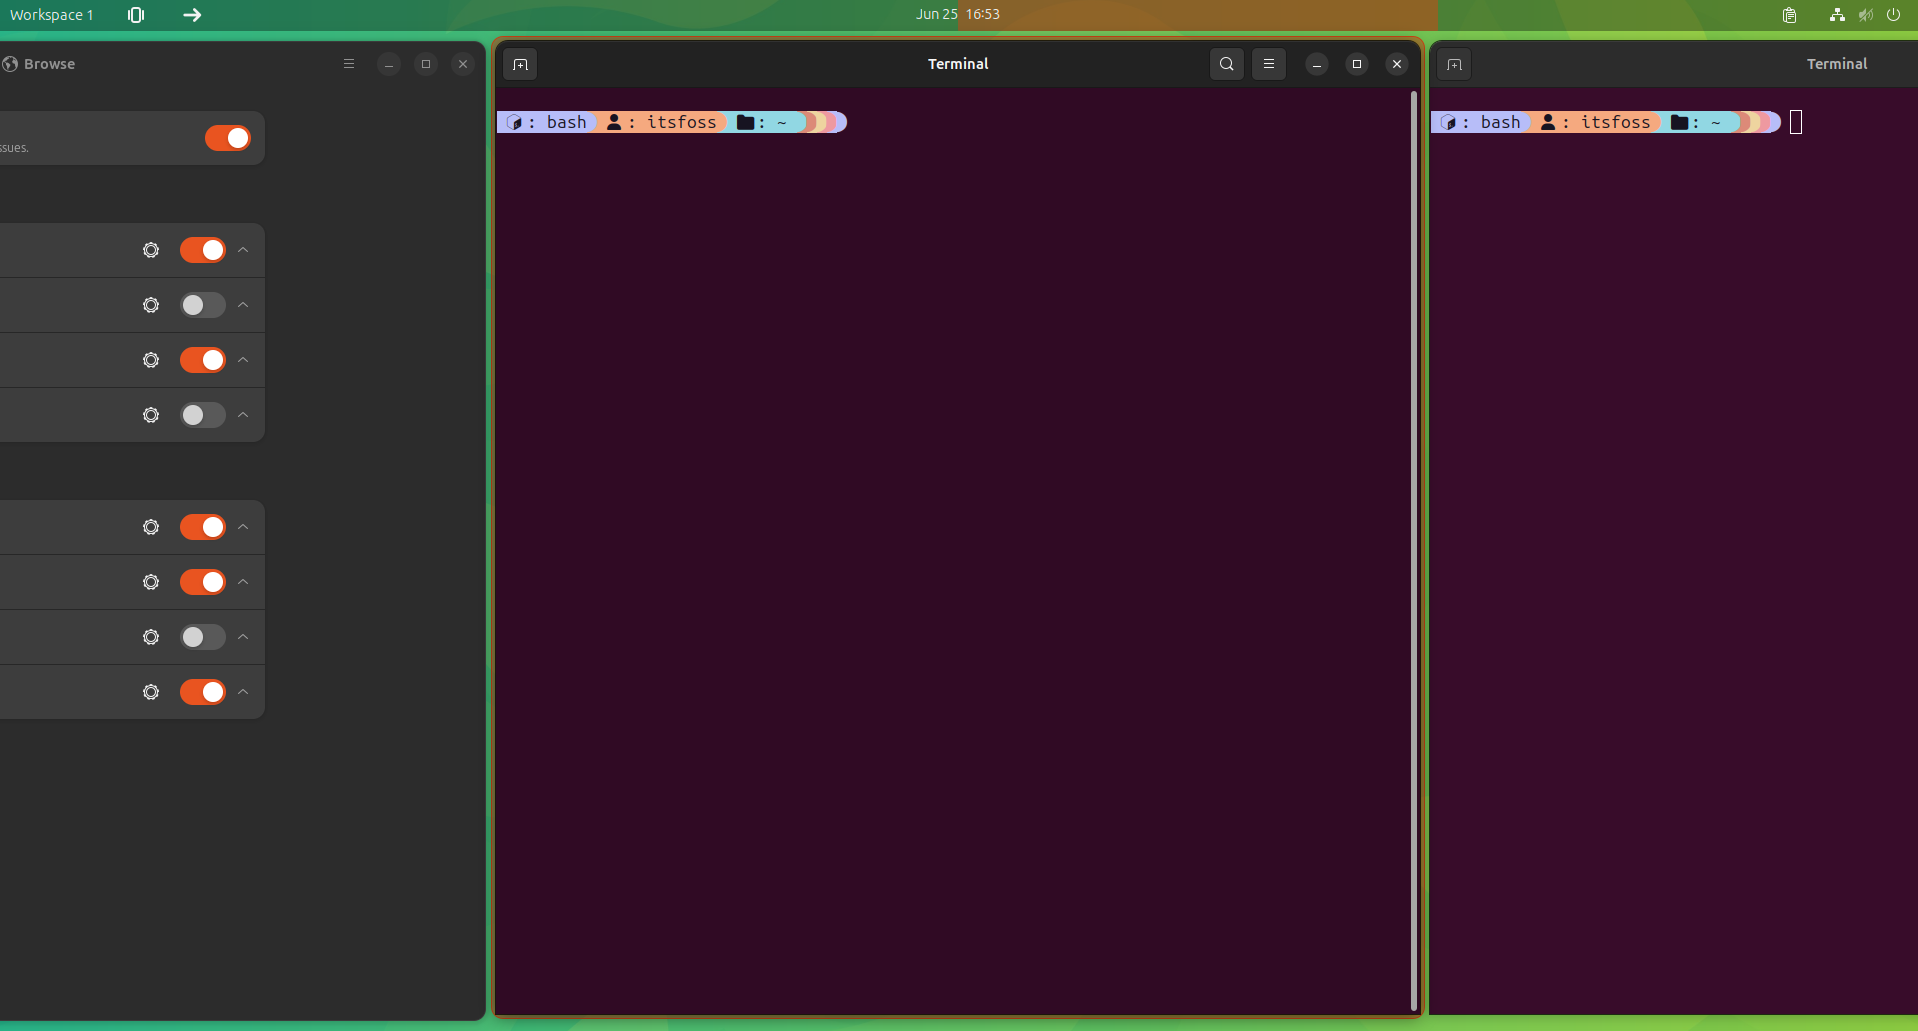
Swipe or Scroll
PaperWM allows you to scroll through the windows using mouse gestures. Use a three finger swipe left/right to switch between tiled windows. The same can be achieved using the mouse scroll. Use the mouse wheel on the top panel to scroll between tiled windows.
Scroll windows
You can also use three finger swipe down to switch between workspaces. But I find the traditional GNOME's Super + Swipe to switch workspace more convenient on my desktop PC.
Apply per-workspace wallpaper
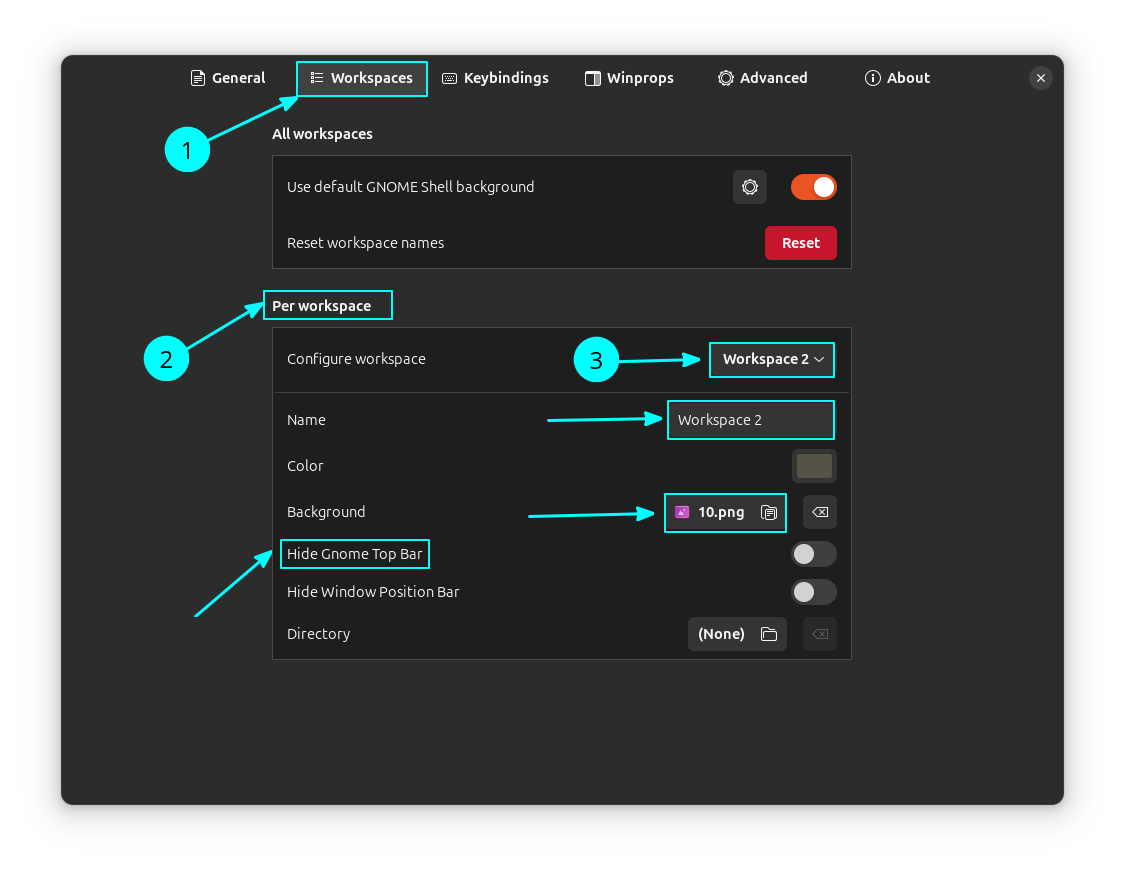
PaperWM allows you to set separate wallpaper and other settings for individual workspaces.
Per workspace wallpaper
In the extension settings, go to the Workspaces tab. Here, in the Per Workspace heading, select a workspace and then change the settings as needed.
- Name: Change the name of the workspace
- Background: Apply a new wallpaper to the workspace
- Hide GNOME Top bar: Hide the top bar for that workspace. Useful if you want a workspace to have some more space like a browser.
Adding Rules for Windows
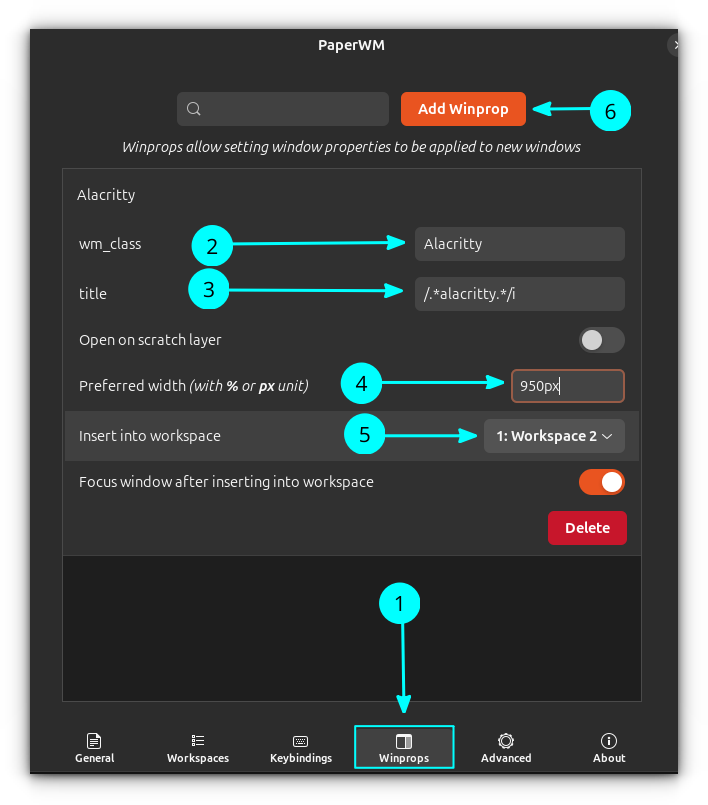
PaperWM allow you to set certain rules for windows. Go to the Winprops settings. Here, enter the wm_class and title for the window.
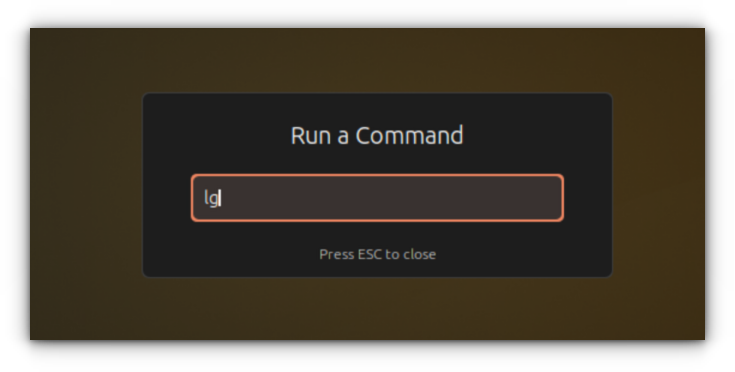
To get the wm_class in Ubuntu, press ALT+F2. In the command box, enter lg.
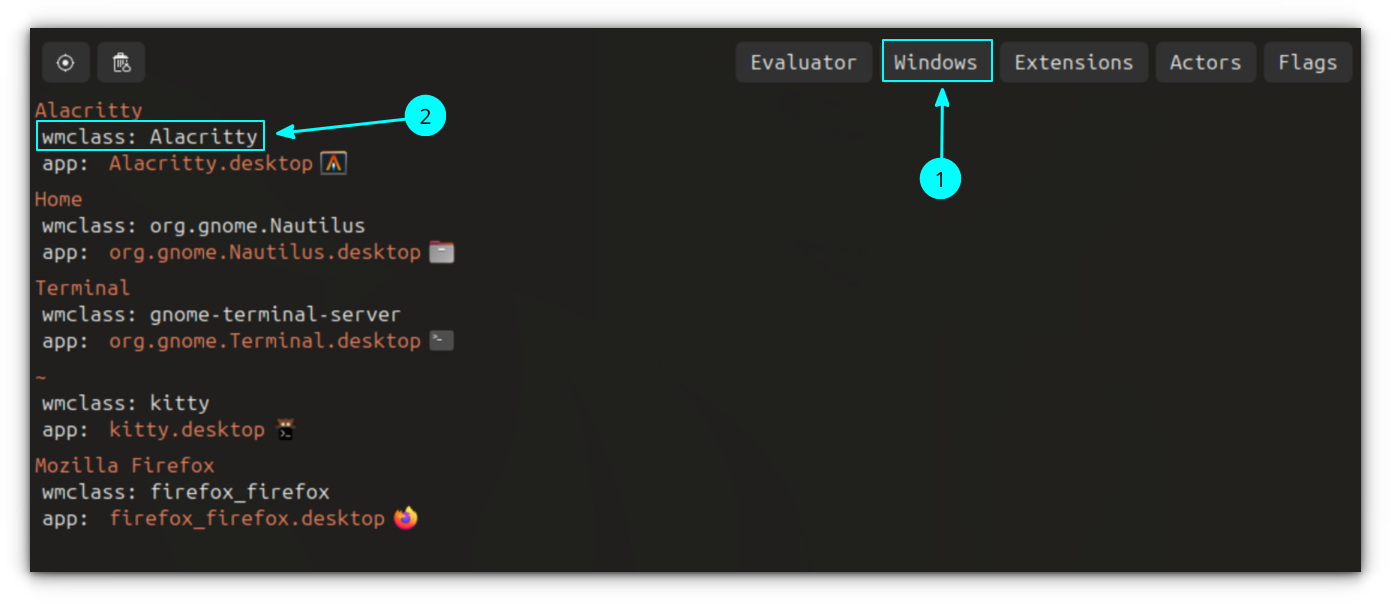
This will give you an overlay with some actions. Click on Windows. Here, you can get the class names of opened windows.
Once these details are entered, you can have more tweaks as shown in the screenshot above, like setting a custom width for this window, open this window in a custom workspace, etc.
Final Thoughts on PaperWM
As I have stated previously, I don’t use tiling managers. However, this one has me thinking. I like the fact that you don’t have to do a lot of configuring to get it working. Another big plus is that it is built on GNOME, which means that getting a tiling manager working on Ubuntu is fairly straight forward.
The only downside that I can see is that a system running a dedicated tiling window manager, like Sway, would use fewer system resources and be faster overall. If you are interested, you can check another similar project called Niri, which is clearly inspired by PaperWM.
What are your thoughts on the PaperWM GNOME extension? Please let us know in the comments below.
If you found this article interesting, please take a minute to share it on social media, Hacker News or Reddit.
If this helped you, consider supporting It's FOSS
It's FOSS has been helping people use Linux for the past 14 years. Help us stay independent from big tech. Become a Plus member, enjoy ad-free reading and get 5 eBooks.