

Let me recall a few things.
A live USB is used for testing the distribution. It is also used for installing Linux on computer's hard disks. Normally, any changes you made to your live distribution are lost and this limits the usage of the live USB.
Several of It’s FOSS readers requested a tutorial on installing Linux on a USB. Not the regular live USB with persistence but the actual Ubuntu installed on a USB disk.
This means having a portable Ubuntu Linux on a USB that you can plug it in to any computer, use it, and save your work on the USB like it was an actual hard disk.
The procedure does not seem very different from installing Ubuntu on an actual hard disk. And this is where people make mistakes.
The available tutorials on the internet miss the most crucial part: the bootloader.
Problem with bootloader on UEFI systems
The one major problem with this setup is bootloader installation on UEFI systems. A system can only have one active ESP partition at a time and this causes issues.
While installing Linux, even if you choose the USB as the destination for the bootloader, the existing ESP partition is still used for placing the EFI file for the new distribution.
This means that the Linux installed on the external USB will be the last to update and control the bootloader. This may create several problems:
- The system you used for installing Linux on USB may not boot and end up with a grub error if you don’t have the Linux USB plugged in.
- The Linux USB you created won’t boot on other systems because its EFI files are on the ESP partitions of the system which was used to install Linux on the USB.
This fails the entire idea of having a portable Linux USB, right?
Worry not. I’ll share a neat trick for installing Ubuntu or other Linux distributions on a USB without messing up with the bootloader of the host system and the system on the USB.
Things to know before installing Linux on a USB

The solution or workaround to the bootloader problem is that you do not let the installer know that there is already an ESP partition.
If you have a desktop PC, you may remove the hard disk and that could solve the problem but things will be difficult when it is a laptop. Removing the disk is out of the question here.
An easier way out is to remove the ESP flag from the ESP partition before installing Linux on the USB and put it back after installation. This way, you fool the Ubuntu installer into thinking that there is no existing ESP partition and it will create and use a new ESP partition on the USB. The original ESP partition on the hard disk is untouched.
Clever trick, I know. Let me clear a few more doubts and add some suggestions:
- You’ll need two USB keys. One for live USB and another one where Linux will be installed.
- Use a USB of 4 GB for the live system and at least a 32 GB USB for the Linux USB.
- I highly recommend using USB 3.0 for both live USB and the actual Linux USB. USB 2.0 will be painfully slow for both installing and using Linux.
- Even if you use USB 3, installing Linux will be multiple fold slower than normal Ubuntu installation. Have patience and time.
- Using a Linux system from USB will always be slower than actual hard disk and SSD.
- When you want to use the Linux USB on a system, you’ll have to go to the boot settings to boot from the USB (unless the system is set to boot from USB by default).
- The Linux USB may not work with systems with secure boot enabled.
About the slower experience with Linux on USB, if your system has a thunderbolt port, I advise getting a thunderbolt SSD. I have a SanDisk SSD and when I used installed Linux on it, the experience was very smooth, almost like the SSD on the system.
Installing complete Ubuntu on a flash drive
Now that you know what you need, let me lay out the parts of this tutorial:
- Create a live Ubuntu USB
- Use the live USB to install Ubuntu on another USB by removing ESP partition flags before and after the installation
- Using the Ubuntu USB on various systems
- Recovering the USBs
Part 1: Create a live Ubuntu USB
I am not going in details for this part. You are probably aware of the steps anyway. I am going to briefly mention the steps here. If needed, you can read this tutorial on creating live Ubuntu USB.
On your computer, go to Ubuntu’s website and download a current Ubuntu release of your choice.
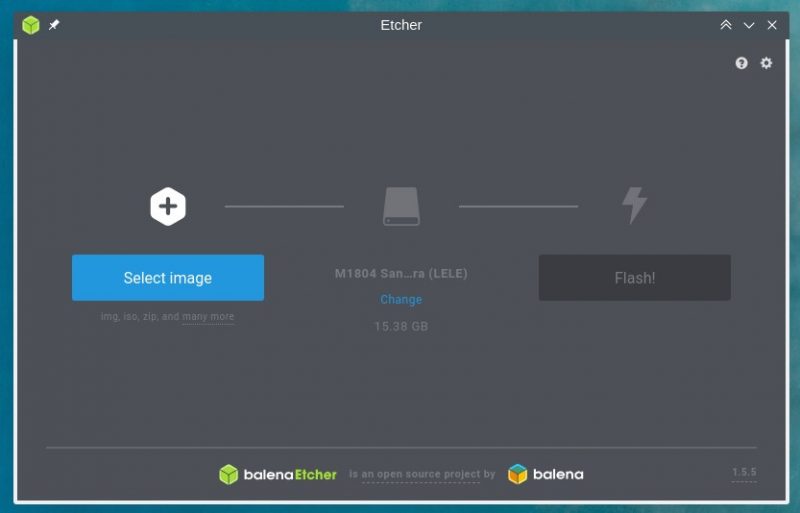
There are several tools available for writing the ISO image to the USB. You may use Etcher which is available for Linux, Windows and macOS.
Download Etcher. Plug in your smaller capacity USB. Run Etcher and browse to the downloaded ISO and USB and hit the flash button. It’s really simple.
When you have created the live USB, it’s time to use it to install Ubuntu on the other USB.
Part 2: Installing Ubuntu on the USB
Alright! So you have a live Ubuntu USB and an empty USB where you’ll be installing Ubuntu. Plug both of them to a computer. You have to boot from this live USB now and for that you’ll have to access the boot settings.
Step 1: Boot from live USB
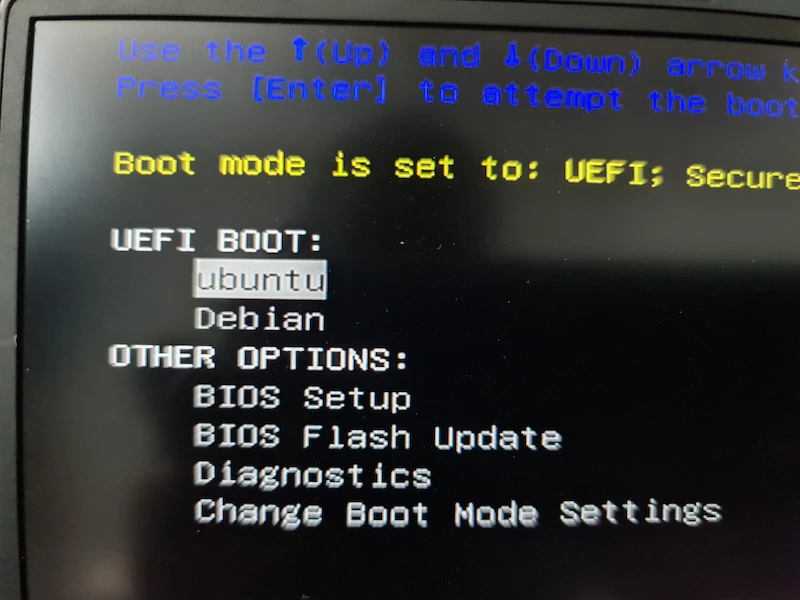
Plug in both USBs to your system and restart it. When the system is booting and it shows the manufacturer’s logo, press F10/F12 keys repeatedly. Different manufacturers set different keys for accessing the BIOS settings.
Note: Some systems won’t allow booting from live USB if secure boot is on. If that’s the case, disable secure boot first.
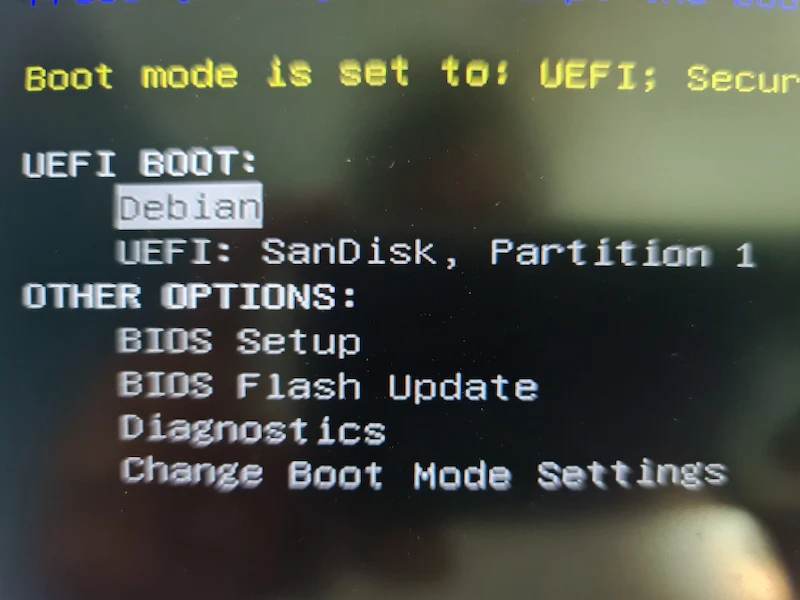
On my Dell system, the boot settings showed this screen. I have Debian installed on this system.
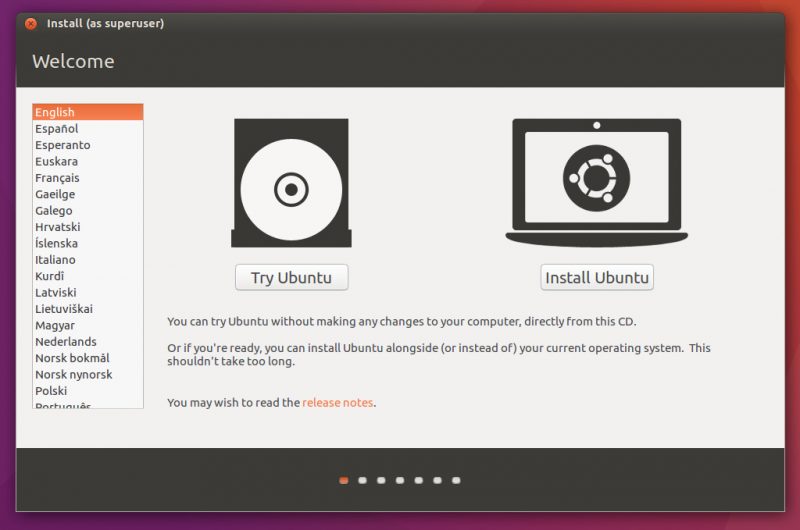
When you are in the live session, go with “Try Ubuntu” option:
Step 2: Disable ESP flags from the ESP partition
Press the Windows key and type Gparted. This will open the Gparted partition manager which is (usually) already present on the Ubuntu ISO.

If it is not found, connect to the internet, open a terminal, run sudo apt update and then install gparted on Ubuntu.
In Gparted, make sure that you have selected the system’s disk. Look for the partition of around 100-500 MB in size and flagged as ESP. Right click on this partition and select ‘Manage Flags’:
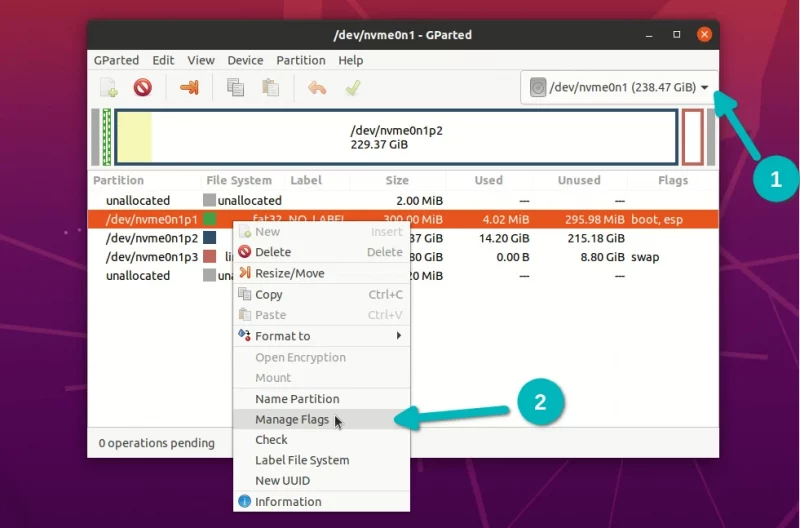
It should show esp and boot flags. If there are more flags set, take a screenshot to revert to the same set of flags after the installation is complete.
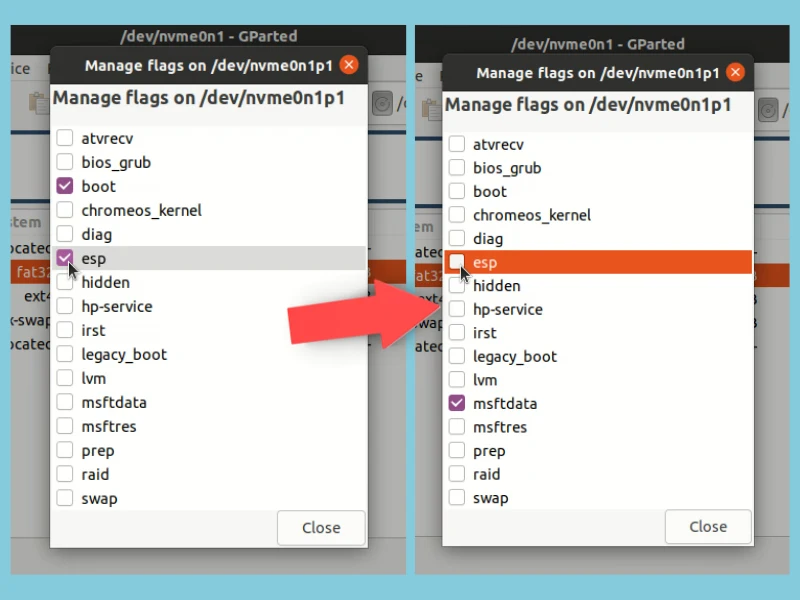
Deselecting the flags usually adds a msftdata flag and you can leave it like that. Changes take effect immediately.
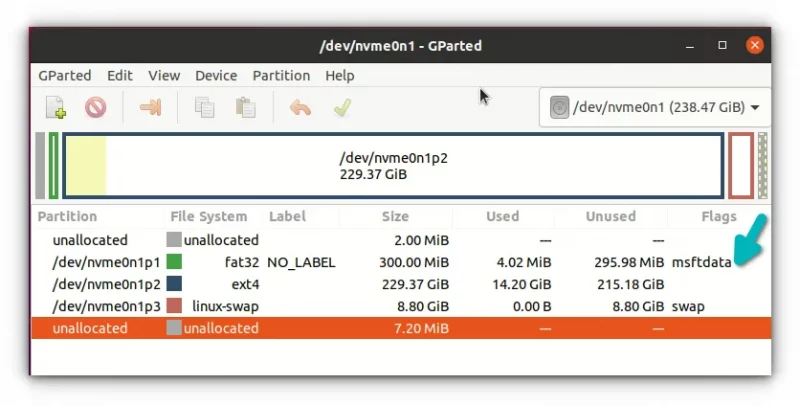
Great! Now your live system does not see the ESP partition and thus the existing boot settings of the computer. Now is the time to start installing Ubuntu on the other USB.
Step 3: Installing Ubuntu on the other USB
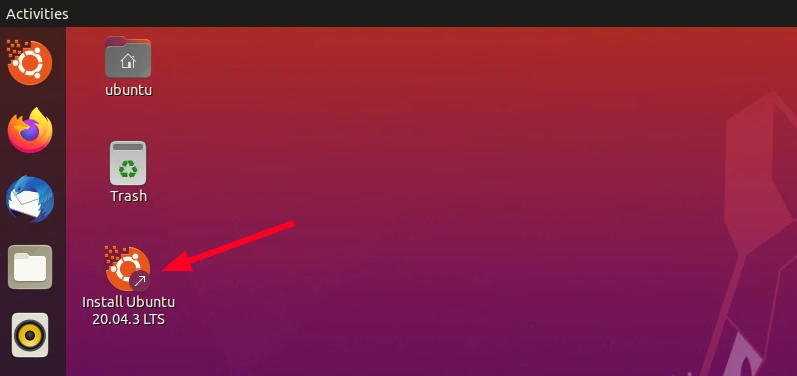
Make sure that you have plugged in the other, bigger-capacity USB as well. Double click on the install Ubuntu icon on the desktop.
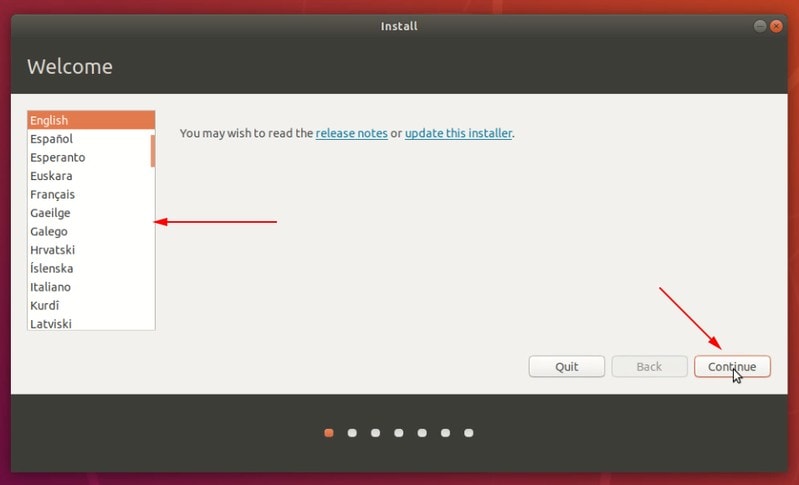
It will start the installation. You can go through the first few steps of choosing the keyboard layout and language.
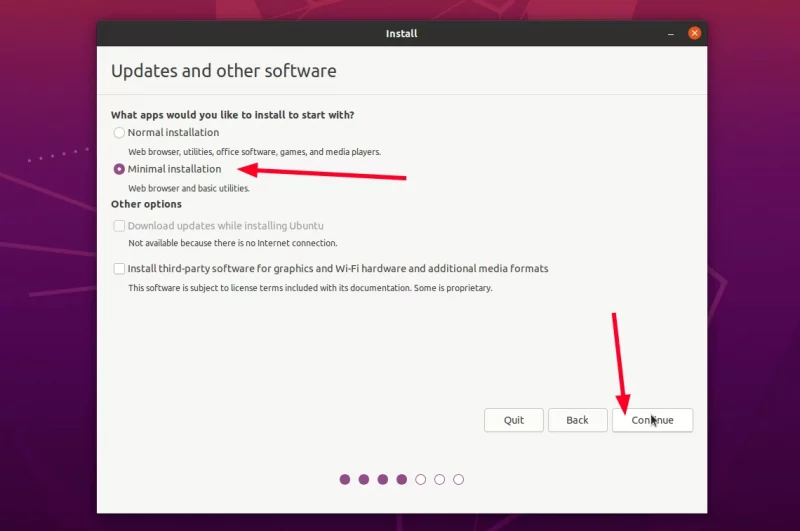
Remember, I told you in the beginning that it takes quite a long time in installing Ubuntu on a USB? For this reason, I suggest going for the minimal install here which comes with a browser and essential utilities but won’t include office software, media players etc. You can install them later.
Using Minimal Installation means copying less files on the USB and this will reduce the installation time.
On the next screen, select Something Else:
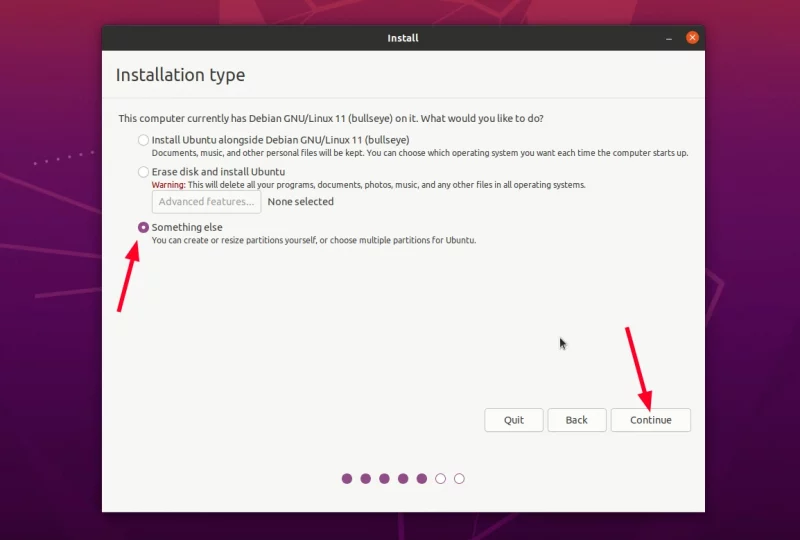
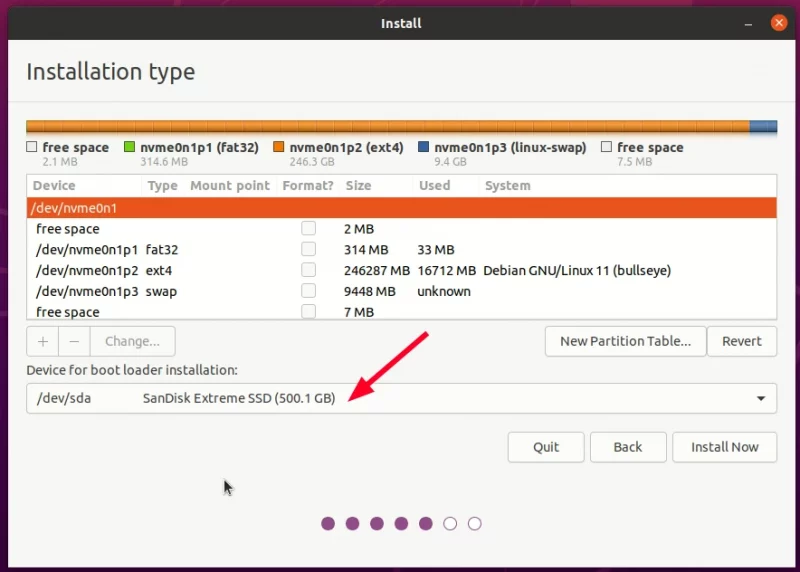
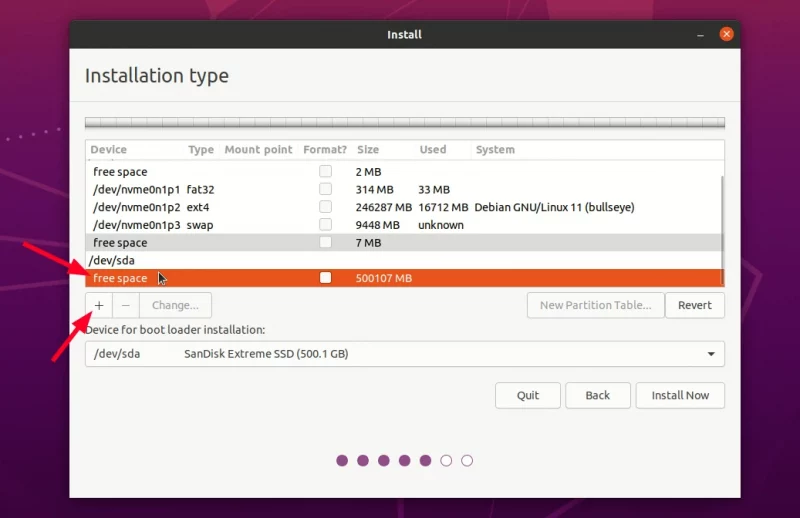
On the ‘Installation type’ screen, you can see all the hard disk and the USB disks listed on the main interface. You can see that the hard disk doesn’t show an ESP partition because the flags have been removed.
What you should make sure here is that you have selected the correct USB (the bigger one) for “Device for bootloader installation”. I am using my external thunderbolt SSD here which is of 500 GB capacity (bigger than the hard disk of the laptop):

Now, select the bigger USB and delete any existing partition to make free space by clicking the – button.
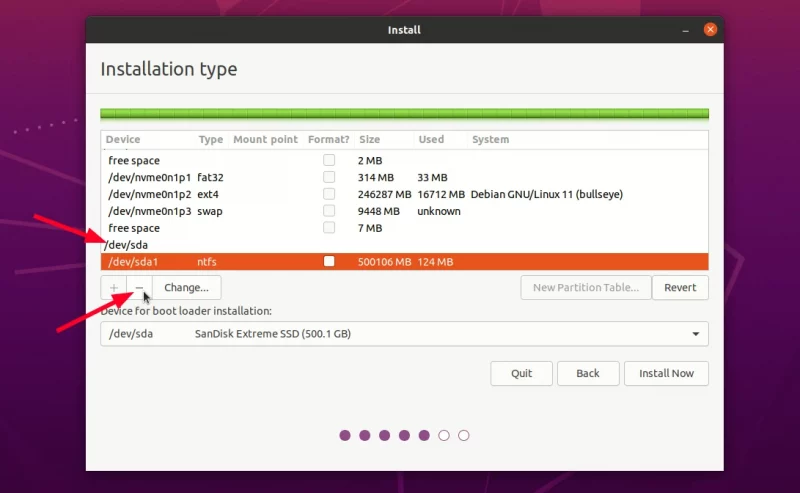
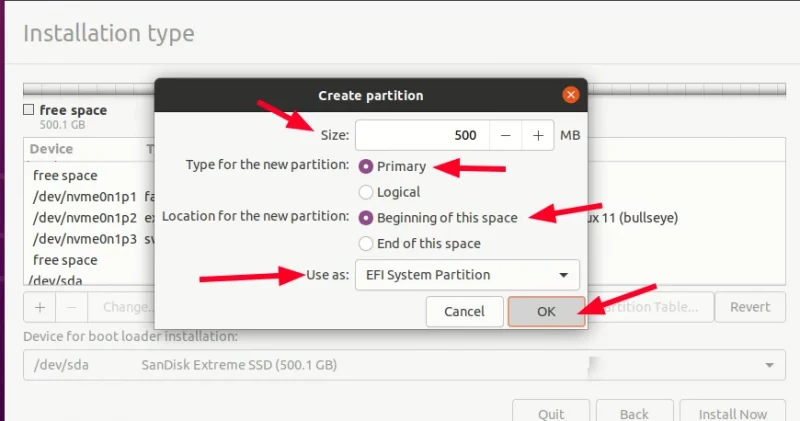
Next, select the free space you just created and click the + sign to make partition on it.
Make the first partition as ESP for the bootloader.
Select the remaining free space and create root with Ext4 filesystem. You may also create root, swap and home but I suggest keeping everything under root including swap (thanks to swapfile).
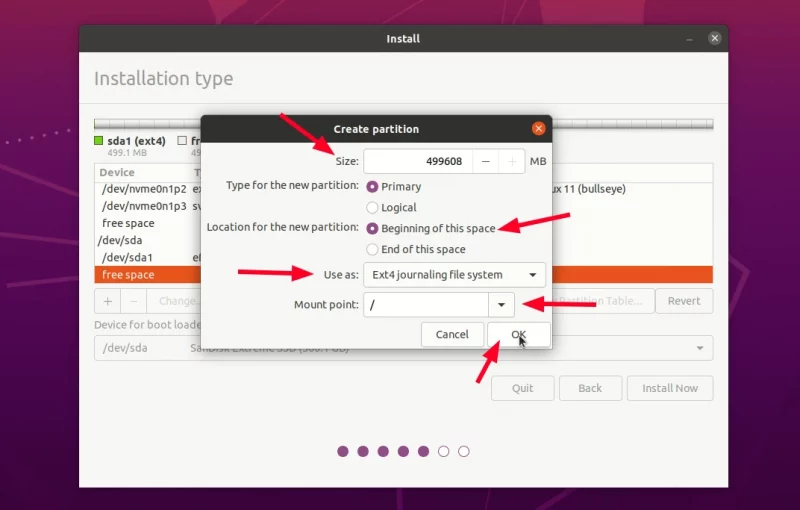
When you have the partitions ready, double check that external USB is chosen for the bootloader install.

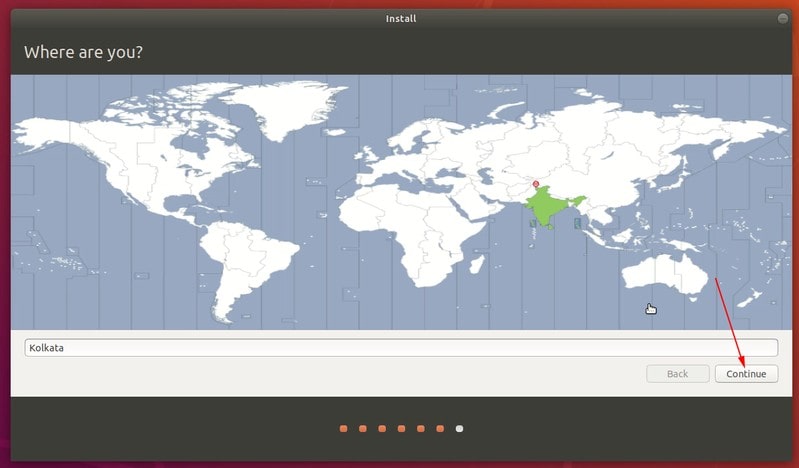
Things are looking good. Hit the install button and go through the usual timezone settings.
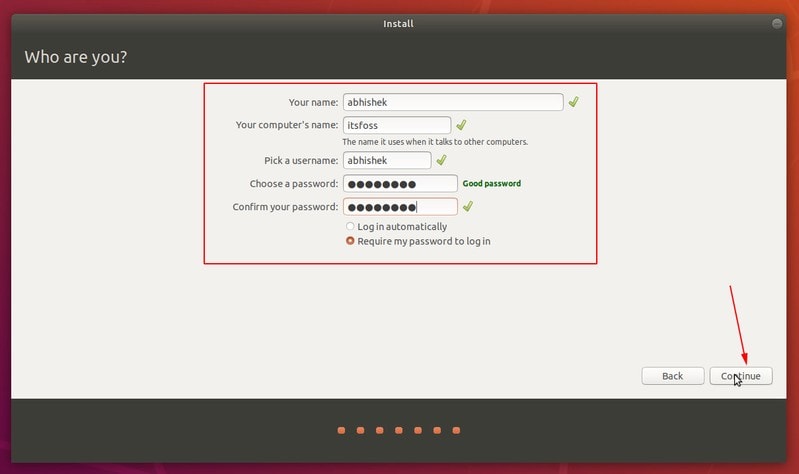
You’ll be asked to create user and password.
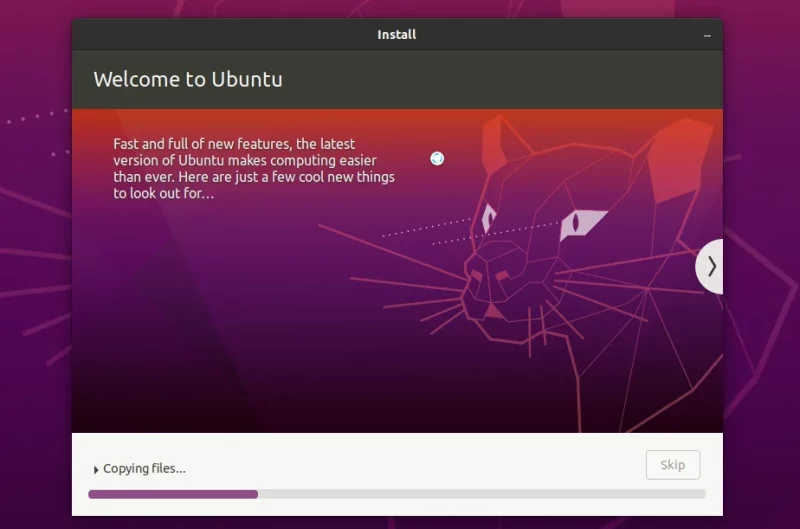
After this, it is all a matter of waiting. If you have ever installed Ubuntu, you’ll surely feel that this installation is slower than usual.
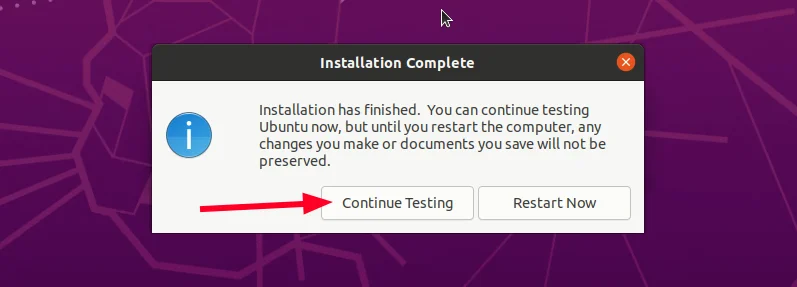
When the installation finishes, DO NOT RESTART right away. You have to reset ESP partition back in its original state.
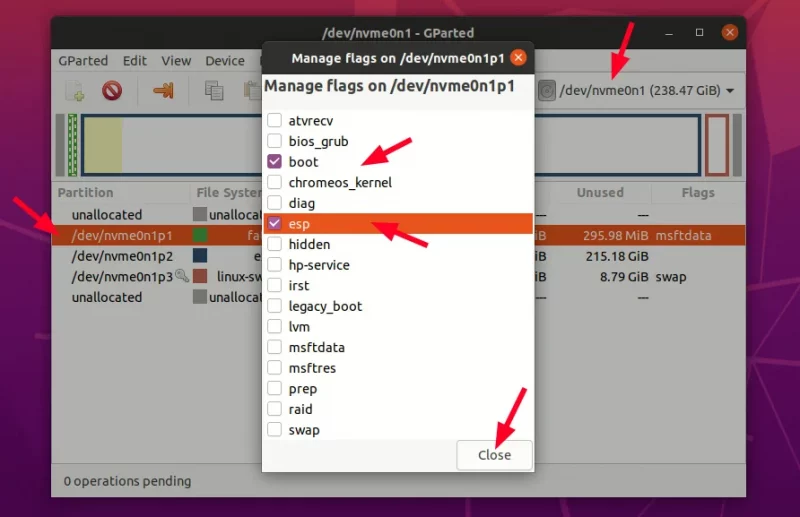
Step 4: Re-enable ESP flags on the ESP partition
Start Gparted once again. Select the hard disk of your system and right click on its ESP partition which is now labelled as msftdata. Select esp flag and it should also select boot flag automatically.
Congratulations! You have successfully installed actual Ubuntu on a flash drive. You can now turn off the live Ubuntu system.
Part 3: Using the Ubuntu USB on any system
The USB you just created can be used on any computer as long as it allows to boot from the USB. In other words, the secure boot should be disabled.
I verified my Ubuntu USB of two systems, one on which I created it and another one which was not used in this process. It worked on both.
The process is similar to how you booted from the live USB. You turn on the system; when the system manufacturer’s logo is visible, press F2/F10/F12 keys to access the boot settings and select Ubuntu or USB to boot from. It may be displayed with either of the two names (or more perhaps).
When you boot from the Ubuntu USB, you’ll see the familiar Grub screen and you can select Ubuntu to use it:
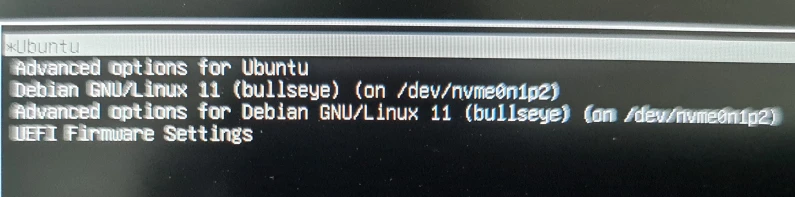
Did you notice something in the above Grub screen? I used a system which had Debian installed for creating this Ubuntu USB. While installing, the new ESP partition on the USB also takes note of the Debian system as you can see in the Grub screen.
If I use this USB on a different system and try to boot into Debian, it will throw an error. Obviously, because there is no Debian system on the new system. If I use the USB on the same Debian system which was used for the Ubuntu installation on the USB, it will work.
The extra entry in the Grub should not bother you unless you have obsessive compulsive disorder. If that’s the case, boot into this USB, install Grub Customizer and delete these additional entries. That’s up to you.
Another thing to note is that when you boot from the Ubuntu USB on a different systems It shows a blue screen with a few options. Just go with boot anyway.
There is one last thing remaining, and that is to claim your USB drives back.
Part 4: Getting your USBs back in normal condition
Here’s the thing you have used two USBs: one for live Ubuntu and one for actual Ubuntu install.
If you want to use either of the USBs later for normal data transfer, you’ll have a difficult time formatting them. When you create a live USB, it leaves the USB in a weird state and often operating systems cannot format it directly.
Gparted comes to the rescue once again. It is available for Linux, Windows and macOS. Download and install it and use it to format the USB by deleting all the partitions on it and creating a new partition in NTFS or FAT32 format.
Conclusion
The neat trick of hiding the actual ESP partition from the Ubuntu installer is the key idea here. This is a better solution than removing the hard disk or having a messed up boot.
I hope you like this trick and find this detailed tutorial helpful.
If you still have questions about installing Linux on USB, please ask them in the comment section and I’ll try to answer them.
