VMware Tools enhances your VM experience by allowing you to share clipboard and folder among other things. Learn how to install VMware tools on Ubuntu and other Linux distributions.
In an earlier tutorial, you learned to install VMware Workstation on Ubuntu. You can further enhance the functionality of your virtual machines by installing VMware Tools.
If you have already installed a guest OS on VMware, you must have noticed the requirement for VMware tools – even though not completely aware of what it is needed for.
In this article, we will highlight the importance of VMware tools, the features it offers, and the method to install VMware tools on Ubuntu or any other Linux distribution.
VMware Tools: Overview & Features
For obvious reasons, the virtual machine (your Guest OS) will not behave exactly like the host. There will be certain limitations in terms of its performance and operationg. And, that is why a set of utilities (VMware Tools) was introduced.
VMware tools help in managing the guest OS in an efficient manner while also improving its performance.
What exactly is VMware tool responsible for?
You have got a vague idea of what it does – but let us talk about the details:
- Synchronize the time between the guest OS and the host to make things easier.
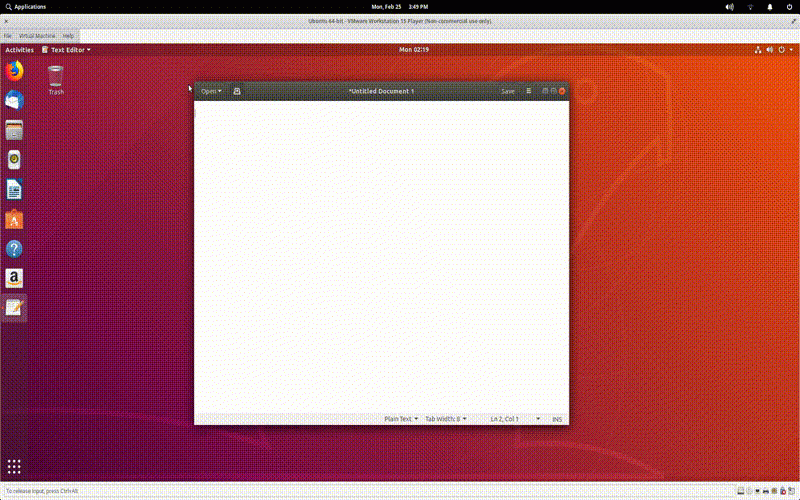
- Unlocks the ability to pass messages from host OS to guest OS. For example, you copy a text on the host to your clipboard and you can easily paste it to your guest OS.
- Enables sound in guest OS.
- Improves video resolution.
- Improves the cursor movement.
- Fixes incorrect network speed data.
- Eliminates inadequate color depth.
These are the major changes that happen when you install VMware tools on Guest OS. But, what exactly does it contain / feature in order to unlock/enhance these functionalities? Let’s see..
VMware tools: Core Feature Details
If you do not want to know what it includes to enable the functionalities, you can skip this part. But, for the curious readers, let us briefly discuss about it:
VMware device drivers: It really depends on the OS. Most of the major operating systems do include device drivers by default. So, you do not have to install it separately. This generally involves – memory control driver, mouse driver, audio driver, NIC driver, VGA driver and so on.
VMware user process: This is where things get really interesting. With this, you get the ability to copy-paste and drag-drop between the host and the guest OS. You can basically copy and paste the text from the host to the virtual machine or vice versa.
You get to drag and drop files as well. In addition, it enables the pointer release/lock when you do not have an SVGA driver installed.
VMware tools lifecycle management: Well, we will take a look at how to install VMware tools below – but this feature helps you easily install/upgrade VMware tools in the virtual machine.
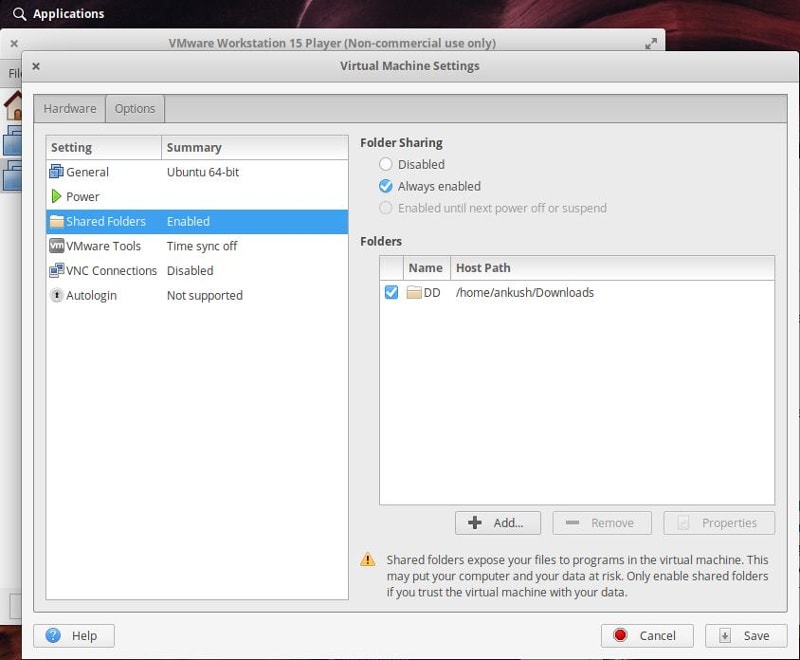
Shared Folders: In addition to these, VMware tools also allow you to have shared folders between the guest OS and the host.
Of course, what it does and facilitates also depends on the host OS. For example, on Windows, you get a Unity mode on VMware to run programs on virtual machine and operate it from the host OS.
How to install VMware Tools on Ubuntu & other Linux distributions
Note: For Linux guest operating systems, you should already have “Open VM Tools” suite installed, eliminating the need of installing VMware tools separately, most of the time.
Most of the time, when you install a guest OS, you will get a prompt as a software update or a popup telling you to install VMware tools if the operating system supports Easy Install.
Windows and Ubuntu does support Easy Install. So, even if you are using Windows as your host OS or trying to install VMware tools on Ubuntu, you should first get an option to install the VMware tools easily as popup message. Here’s how it should look like:
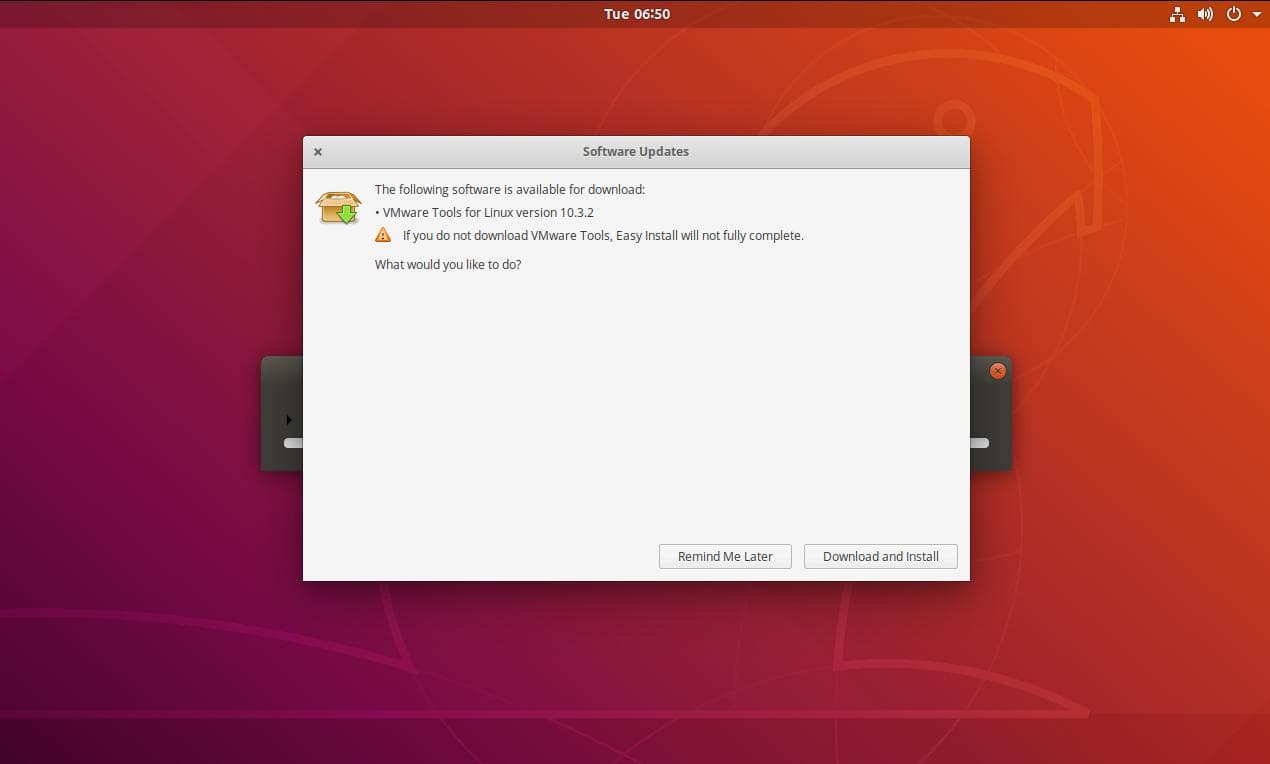
This is the easiest way to get it done. So, make sure you have an active network connection when you setup the virtual machine.
If you do not get any of these pop ups – or options to easily install VMware tools. You have to manually install it. Here’s how to do that:
1. Launch VMware Workstation Player.
2. From the menu, navigate through Virtual Machine -> Install VMware tools. If you already have it installed, and want to repair the installation, you will observe the same option to appear as “Re-install VMware tools“.
3. Once you click on that, you will observe a virtual CD/DVD mounted in the guest OS.
4. Open that and copy/paste the tar.gz file to any location of your choice and extract it, here we choose the Desktop.
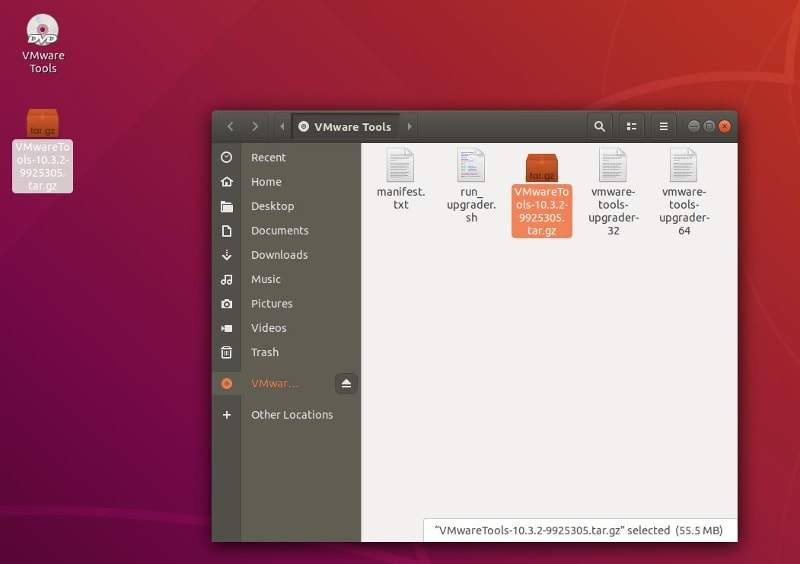
5. After extraction, launch the terminal and navigate to the folder inside by typing in the following command:
cd Desktop/VMwareTools-10.3.2-9925305/vmware-tools-distrib
You need to check the name of the folder and path in your case – depending on the version and where you extracted – it might vary.
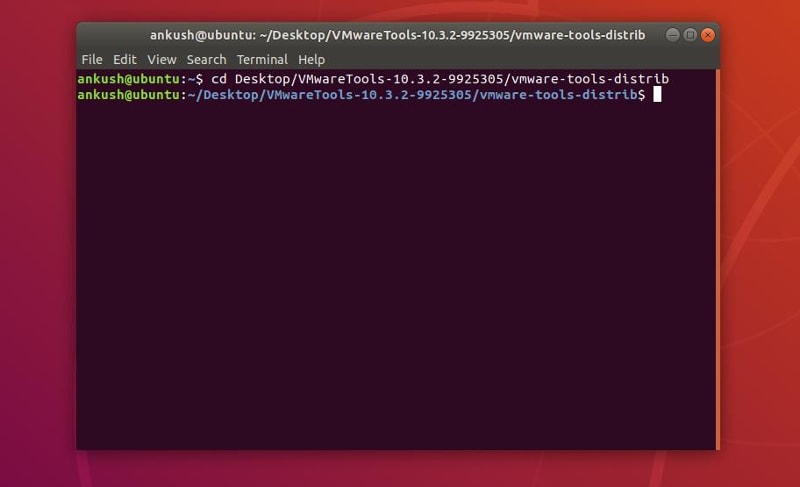
Replace Desktop with your storage location (such as cd Downloads) and the rest should remain the same if you are installing 10.3.2 version.
6. Now, simply type in the following command to start the installation:
sudo ./vmware-install.pl -d
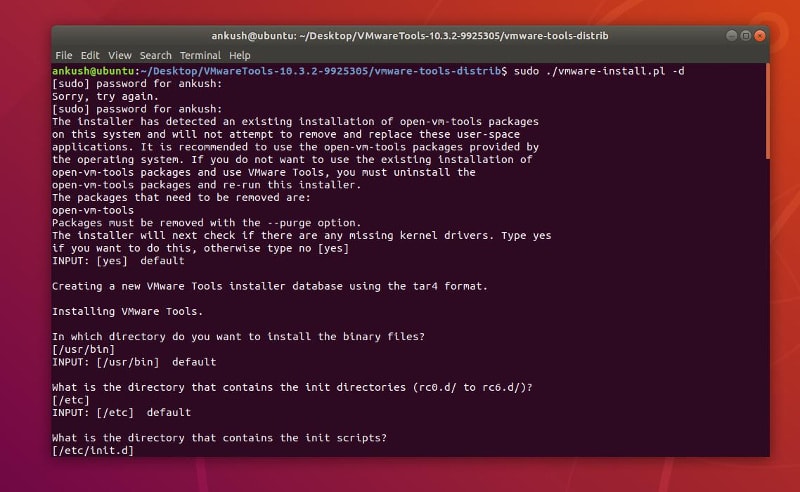
You will be asked the password for permission to install, type it in and you should be good to go.
That’s it. You are done. These set of steps should be applicable to almost any Ubuntu-based guest operating system. If you want to install VMware tools on Ubuntu Server, or any other OS.
Wrapping Up
Installing VMware tools on Ubuntu Linux is pretty easy. In addition to the easy method, we have also explained the manual method to do it. If you still need help, or have a suggestion regarding the installation, let us know in the comments down below.

