

Installing themes and icons on Xubuntu is similar to Ubuntu or any other Linux distribution. You put the theme files in the ~/.themes folder and icons in ~/.icons folder and then use a tool to change it.
However, some options or the user interface will look different considering Xubuntu uses the Xfce desktop environment. This is why I created this specific tutorial to show the steps with proper screenshots.
Installing new themes in Xubuntu (Xfce)
To get started, you need to create a .themes folder in the home directory. Mind the dot (.) before the folder name. It’s important and hides the folder from normal view.
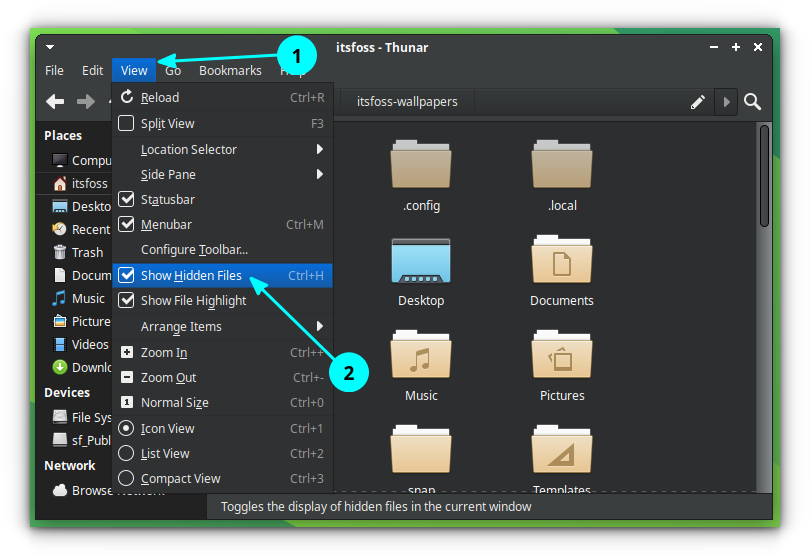
To check if you already have it, you can enable viewing hidden files and then create it if it isn’t present.
Once done, you need to download a theme.
You can browse for XFCE themes on the Xfce-look portal. All you have to do is download the archive (compressed) file.
On the website, there is a section called GTK3/4. You can download a popular GTK theme file from here. Chances are there that it supports Xfce as well. You can look into the theme description or check the file to find a folder xfwm.
For this section, I am using the Layan theme, which is a popular theme for the GNOME and KDE desktop and it also has an option for Xfce.
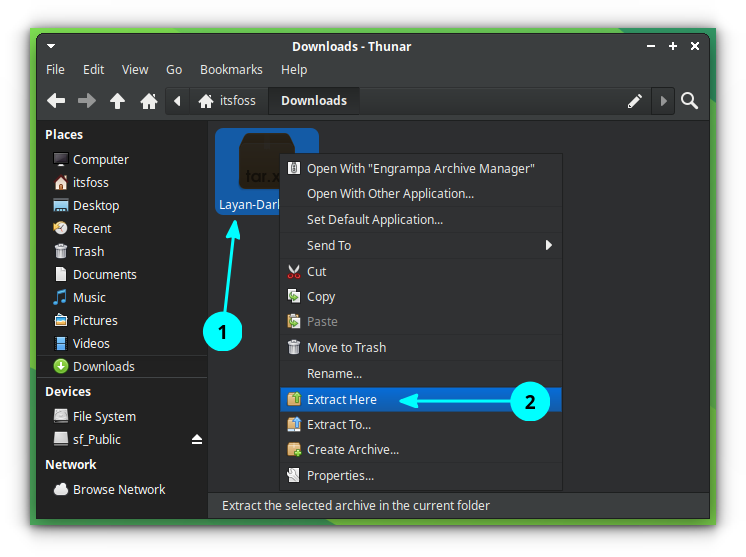
When the theme file is downloaded, you need to extract the archive file, as shown in the screenshot below.
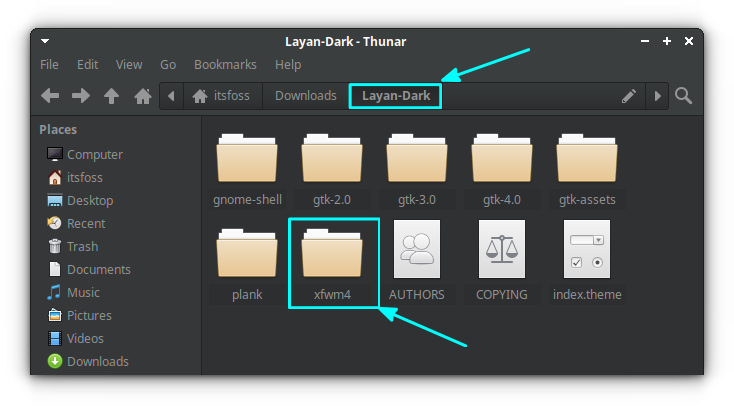
Once you extract it, you will notice a folder appear.
Go inside that folder and see whether you can spot an index.theme file. If yes, copy the whole folder.
Sometimes, there will be multiple theme variants inside the extracted folder. You should be copying the sub-folder which has an index.theme file.
Now paste this folder into the .themes directory that you created initially.

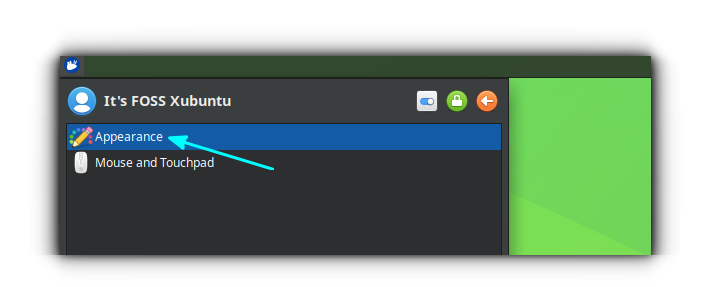
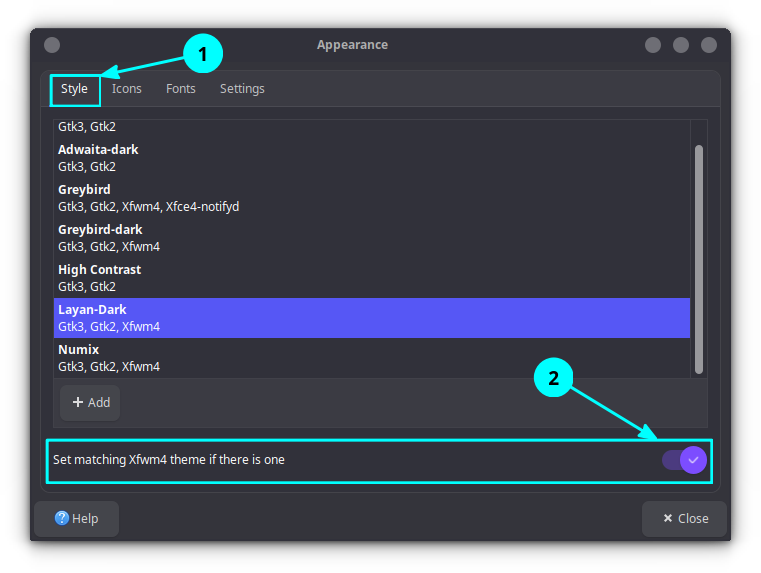
Finally, open Appearance app from the start menu.
In the Appearance window, under the Style tab, select the newly added theme, in this case, Layan-Dark.
This way, if the theme provides a Xfce window manager theme, it will be applied.
If not, you can theme the window manager separately by going to the Window Manager settings.
Search for Window Manager from the Xfce menu.
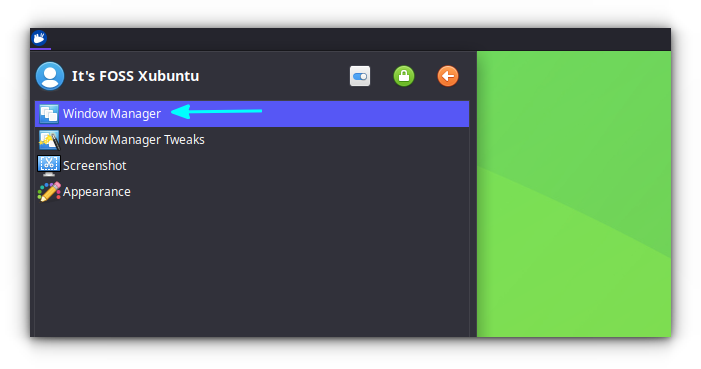
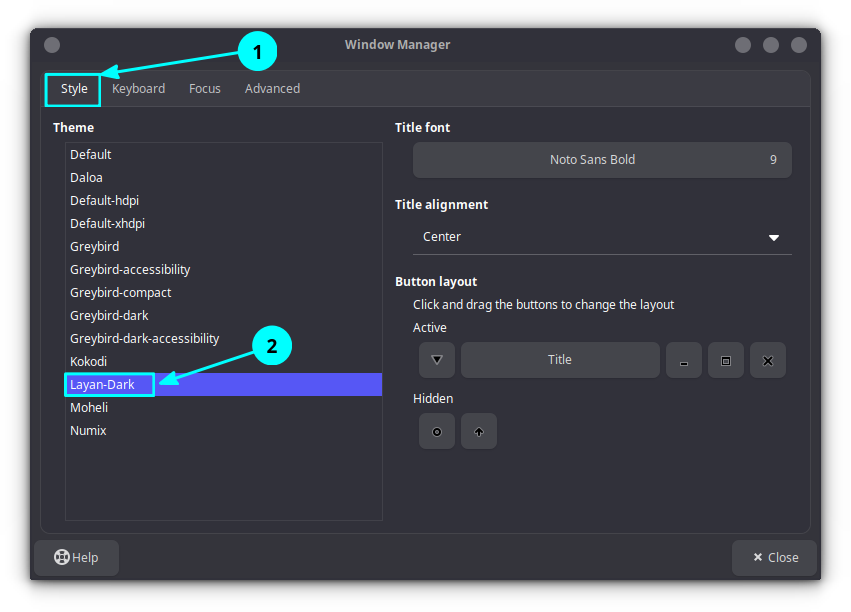
Here, under Style, apply Window Manager theme separately.
Alternate but easier way of installing GTK themes on Xfce
If you have downloaded a GTK theme archive file, you don't have to extract and paste it in the .themes folder. Instead, you can use the Appearance settings to do this for you.
Open Appearance from the start menu and from the Style tab, select the + Add button at the bottom-left.
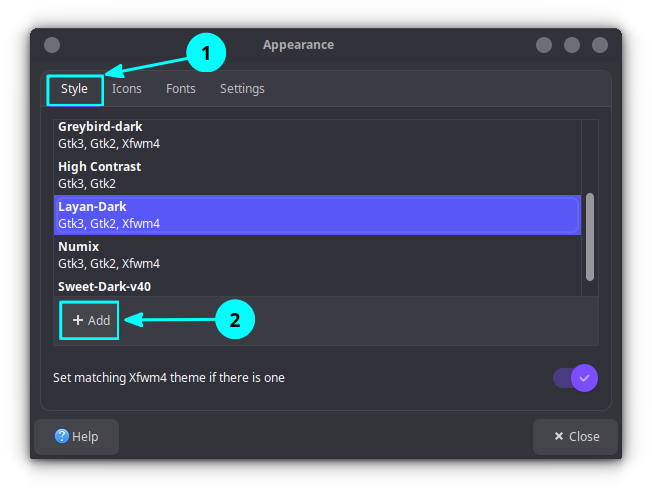
Now, from the file chooser, select the theme archive file (not the extracted folder).
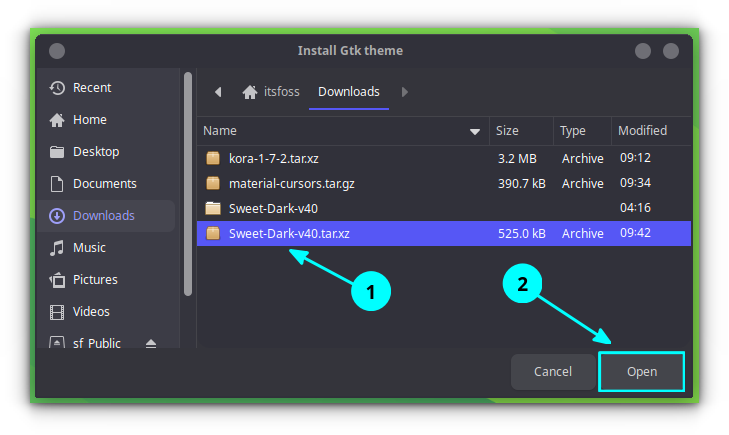
That's it. It will extract the folder and place the theme in the ~/.themes folder. You can select the theme without even closing the Appearance window.
Adding icon themes in Xubuntu (Xfce)
Let's customize Xfce further by installing icons in Xfce. Basically, the GTK theme changes the appearance of the application windows, file manager, window border etc. Icons will change the logo/icons of the applications you have installed.
You can browse through the same xfce-look portal to look for complete icon themes.
Or, you can explore some of the best icon themes available for Ubuntu that should work for Xubuntu as well. Icons are independent of the desktop environment.
Once you find the one you like, download it.
Now, open the Appearance settings and go to the Icons section. Click on the Add button.
From the file chooser, select the Icon archive file (not the extracted folder).
Unlike in the GTK theme described above, even if there are multiple icon variants inside a single archive, this will extract them all and paste it on the ~/.icons folder.
You can select the icons without closing the Appearance settings.
Alternative traditional icon install method
If you want to install the icons manually, extract the downloaded icon archive file.
Now, paste it in the ~/.icons folder. Create it, if it's not there already.
Now, you can head back to the Appearance settings and find the icon listed under the “Icons” available.
Troubleshoot: Icon cache issue
Sometimes, you will see a notification symbol in the Icons settings in Appearance settings window. If you hover over it, it will display:
Warning: this icon theme has no cache file....
This tooltip itself gives you the solution. You can run the command as shown in the settings. For me, it will be:
gtk-update-icon-cache /home/itsfoss/.icons/kora/Bonus: Adding a cursor theme in Xubuntu (Xfce)
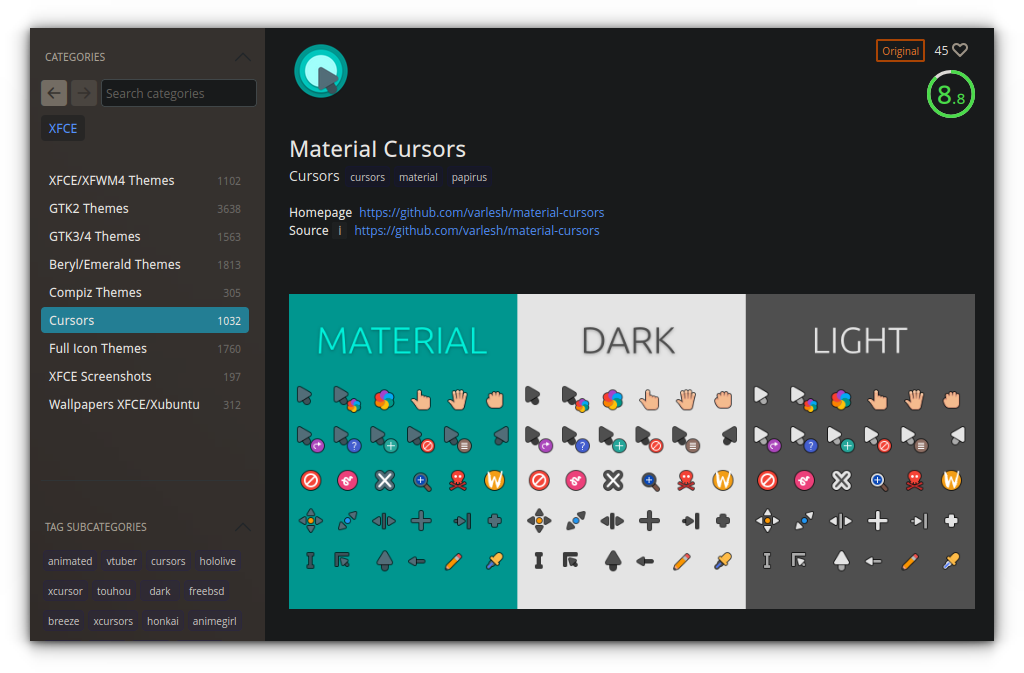
Adding a cursor theme is similar to icons. You can download any good cursor theme from the Cursors section on the Xfce-look website.
Once downloaded, extract the file and place it in the ~/.icons folder. Yes, Icons and Cursors are placed in the same folder.
Once downloaded, the archive, extract it and place it in the ~/.icons folder.
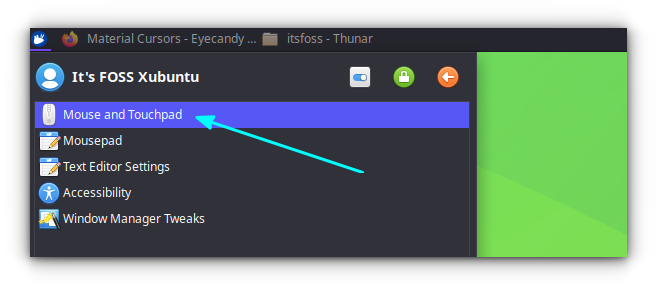
~/.icons locationNow, search and open Mouse and Touchpad from the start menu.
Here, go to the Theme tab and change the cursor theme to your favorite from the list.
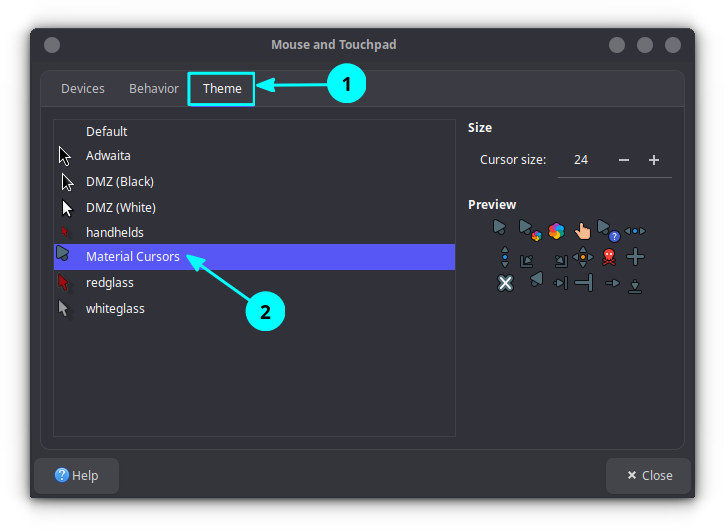
You can change the cursor size also from these settings.
Keep on customizing
Themes, icons and cursor, that's just the beginning. You can explore more ways to customize Xfce in this video where I share a particular minimalist setup.
Happy tweaking Xfce!
